Loading ...
Loading ...
Loading ...
6
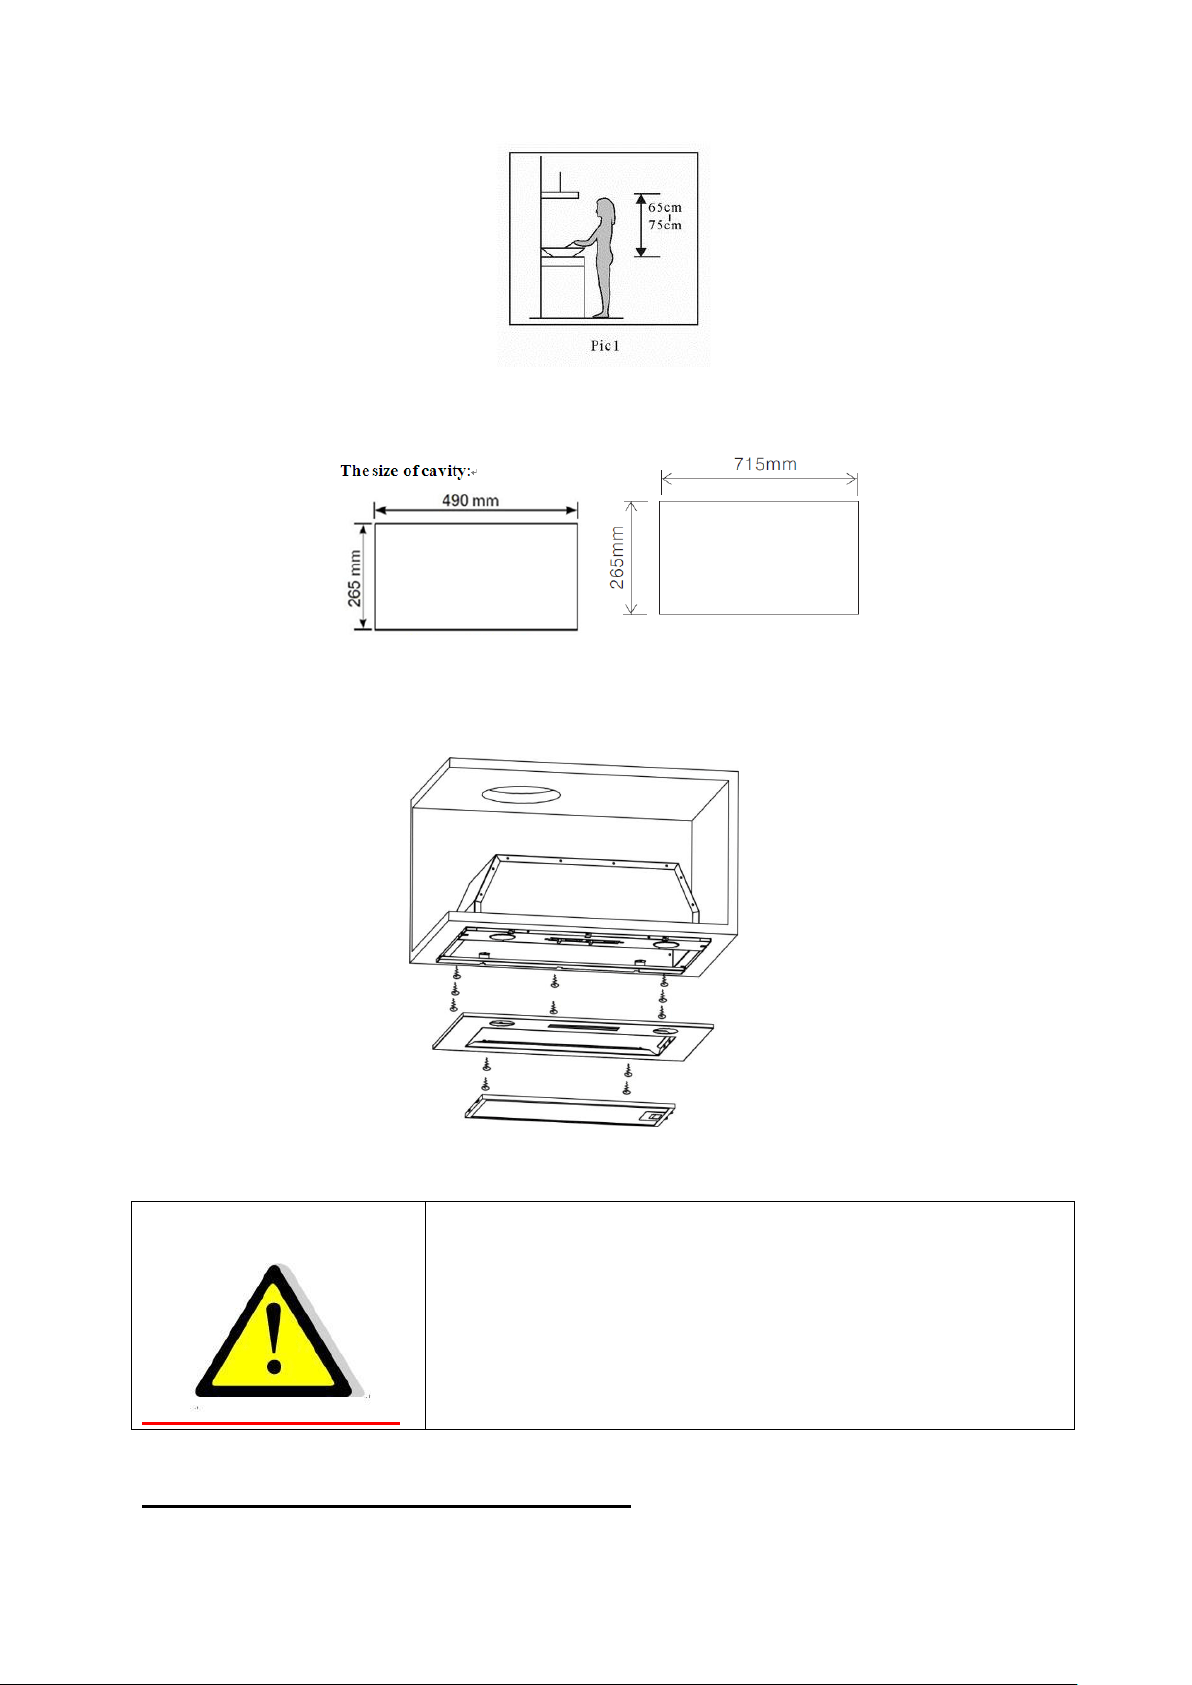
3. Drill a hole in the cupboard, with hole wide 490*265(mm) for 52CM and
715*265(mm) for 75CM.Refer to pic below.Make sure the distance between the
edge of the hole and the edge of the cupboard edge is at least 35mm.
4. Remove the aluminum filter and remove the two front panel screws.
5. Use a screwdriver to secure the 8pcs ST4*18 screws and fix the hood body to the
cupboard.
6. Replace the front panel with the two screws and replace the filter.
Note:The expansion pipe is not included in the product.
WARNING:
For safety reason, please use only the same
size of fixing or mounting screw which are
recommended in this instruction manual.
Failure to install the screws or fixing device in
accordance with these instructions may result
in electrical hazards.
Start Using Your Cooker Hood
Loading ...
Loading ...
Loading ...