HOW TO CLEAN THE DIRTY
WATER TANK (CONT’D)
Remove Insert and rinse under faucet.
Access the hose for cleaning by remov-
ing the three screws on the bottom of
the carpet cleaner. Once removed, slide
the piece away and rinse.
2
3
4
Rinse hand tool under faucet. Remove
nozzle cover by pressing release button
on top.
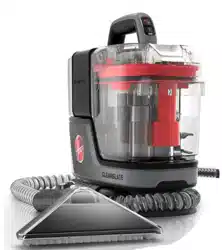
PORTABLE CARPET &
UPHOLSTERY CLEANER
Please visit Hoover.com for video
instructions and FAQ’s for this
Carpet Cleaner.
IMPORTANT: READ ALL INSTRUCTIONS
CAREFULLY BEFORE ASSEMBLY AND USE.
This product is intended for Household use only.
If used Commercially warranty is VOID.
Questions or concerns?
For assistance, please call Customer Service at 1-800-944-9200 Mon-Fri 9am-6pm EST
PLEASE DO NOT RETURN THIS PRODUCT TO THE STORE.
USER MANUAL
POWERDASH
TM
GO
©2020 Techtronic Floor Care Technology Limited. All Rights Reserved. Distributed by, Royal Appliance Mfg. Co. Charlotte, NC 28262. 964A00242-R0
Please visit Hoover.com
for video instructions
and FAQ’s for this Carpet Cleaner.
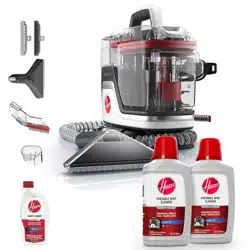
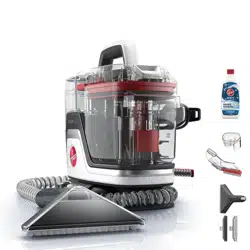
Replacement parts and
accessories such as solutions
aavailable at Hoover.com.
Puede encontrar la versión en español
de este manual en Hoover.com en
esta página de productos.
Versión en
español:
For assistance, please call
Customer Service: 1-800-944-9200
Mon-Fri 9am-6pm EST
PROBLEM POSSIBLE CAUSE POSSIBLE SOLUTION
Cleaner won’t run 1. Power cord not firmly plugged into outlet. 1. Plug unit in firmly.
2. Blown fuse or tripped breaker. 2. Check fuse or breaker in home. Replace fuse⁄reset
breaker in home.
3. Needs service. 3. Visit our website at www.hoover.com or call
1-800-944-9200.
Cleaner won’t pick-up or
low suction
1. Dirty Water Tank is not installed correctly. 1. Check placement of Dirty Water Tank in base of cleaner.
2. Dirty Water Tank is full. 2. Empty Dirty Water Tank.
3. Dirty Water Tank is clogged. 3. Clean Dirty Water Tank.
4. Air path is clogged. 4. Remove Hose and Flush out with Clean Water.
Water escaping from
Cleaner
1. Dirty Water Tank is full. 1. Empty Dirty Water Tank.
2. Dirty Water tank is not installed correctly. 2. Check placement of Dirty Water Tank in base of cleaner.
3. Solution Tank not installed properly. 3. Review “Getting Started” for Solution Tank Installation.
Cleaner won’t dispense
1. Solution Tank is empty. 1. Fill Solution Tank.
2. Solution Tank not installed properly. 2. Review “Getting Started” Solution Tank Installation.
3. Needs service. 3. Visit our website at www.hoover.com or call
1-800-944-9200.
Hose nozzle will not
spray after filling the
Clean Water Tank or
Solution Tank Container.
1. Air is trapped in the pump and hose. 1. Turn on the cleaner. If hose dœs not spray, prime the
pump by lowering the hose down to the floor and hold
the trigger for up to 1 minute.
Motor noise becomes
high-pitched
1. Dirty Water Tank is full. 1. Empty Dirty Water Tank.
2. Dirty Water Tank is clogged. 2. Clean the Dirty Water Tank.
3. Air path is clogged. 3. Unclog air path.
4. The float in the Dirty Water Tank has been
activated.
4. Review Cleaning the Dirty Water Tank.
TROUBLESHOOTING
REPLACEMENT PARTS AND ACCESSORIES SUCH AS SOLUTIONS AVAILABLE AT HOOVER.COM.
IF APPLIANCE IS NOT WORKING AS IT SHOULD, HAS BEEN DROPPED, DAMAGED, LEFT OUTDOORS, OR DROPPED INTO WATER, CALL
CUSTOMER SERVICE AT 1-800-944-9200 PRIOR TO CONTINUING USE.
ALWAYS IDENTIFY YOUR CLEANER BY THE COMPLETE MODEL NUMBER. (THE MODEL NUMBER APPEARS ON THE BOTTOM OF THE CLEANER.)
WARNING:
To reduce the risk of personal
injury - Unplug before cleaning or servicing.
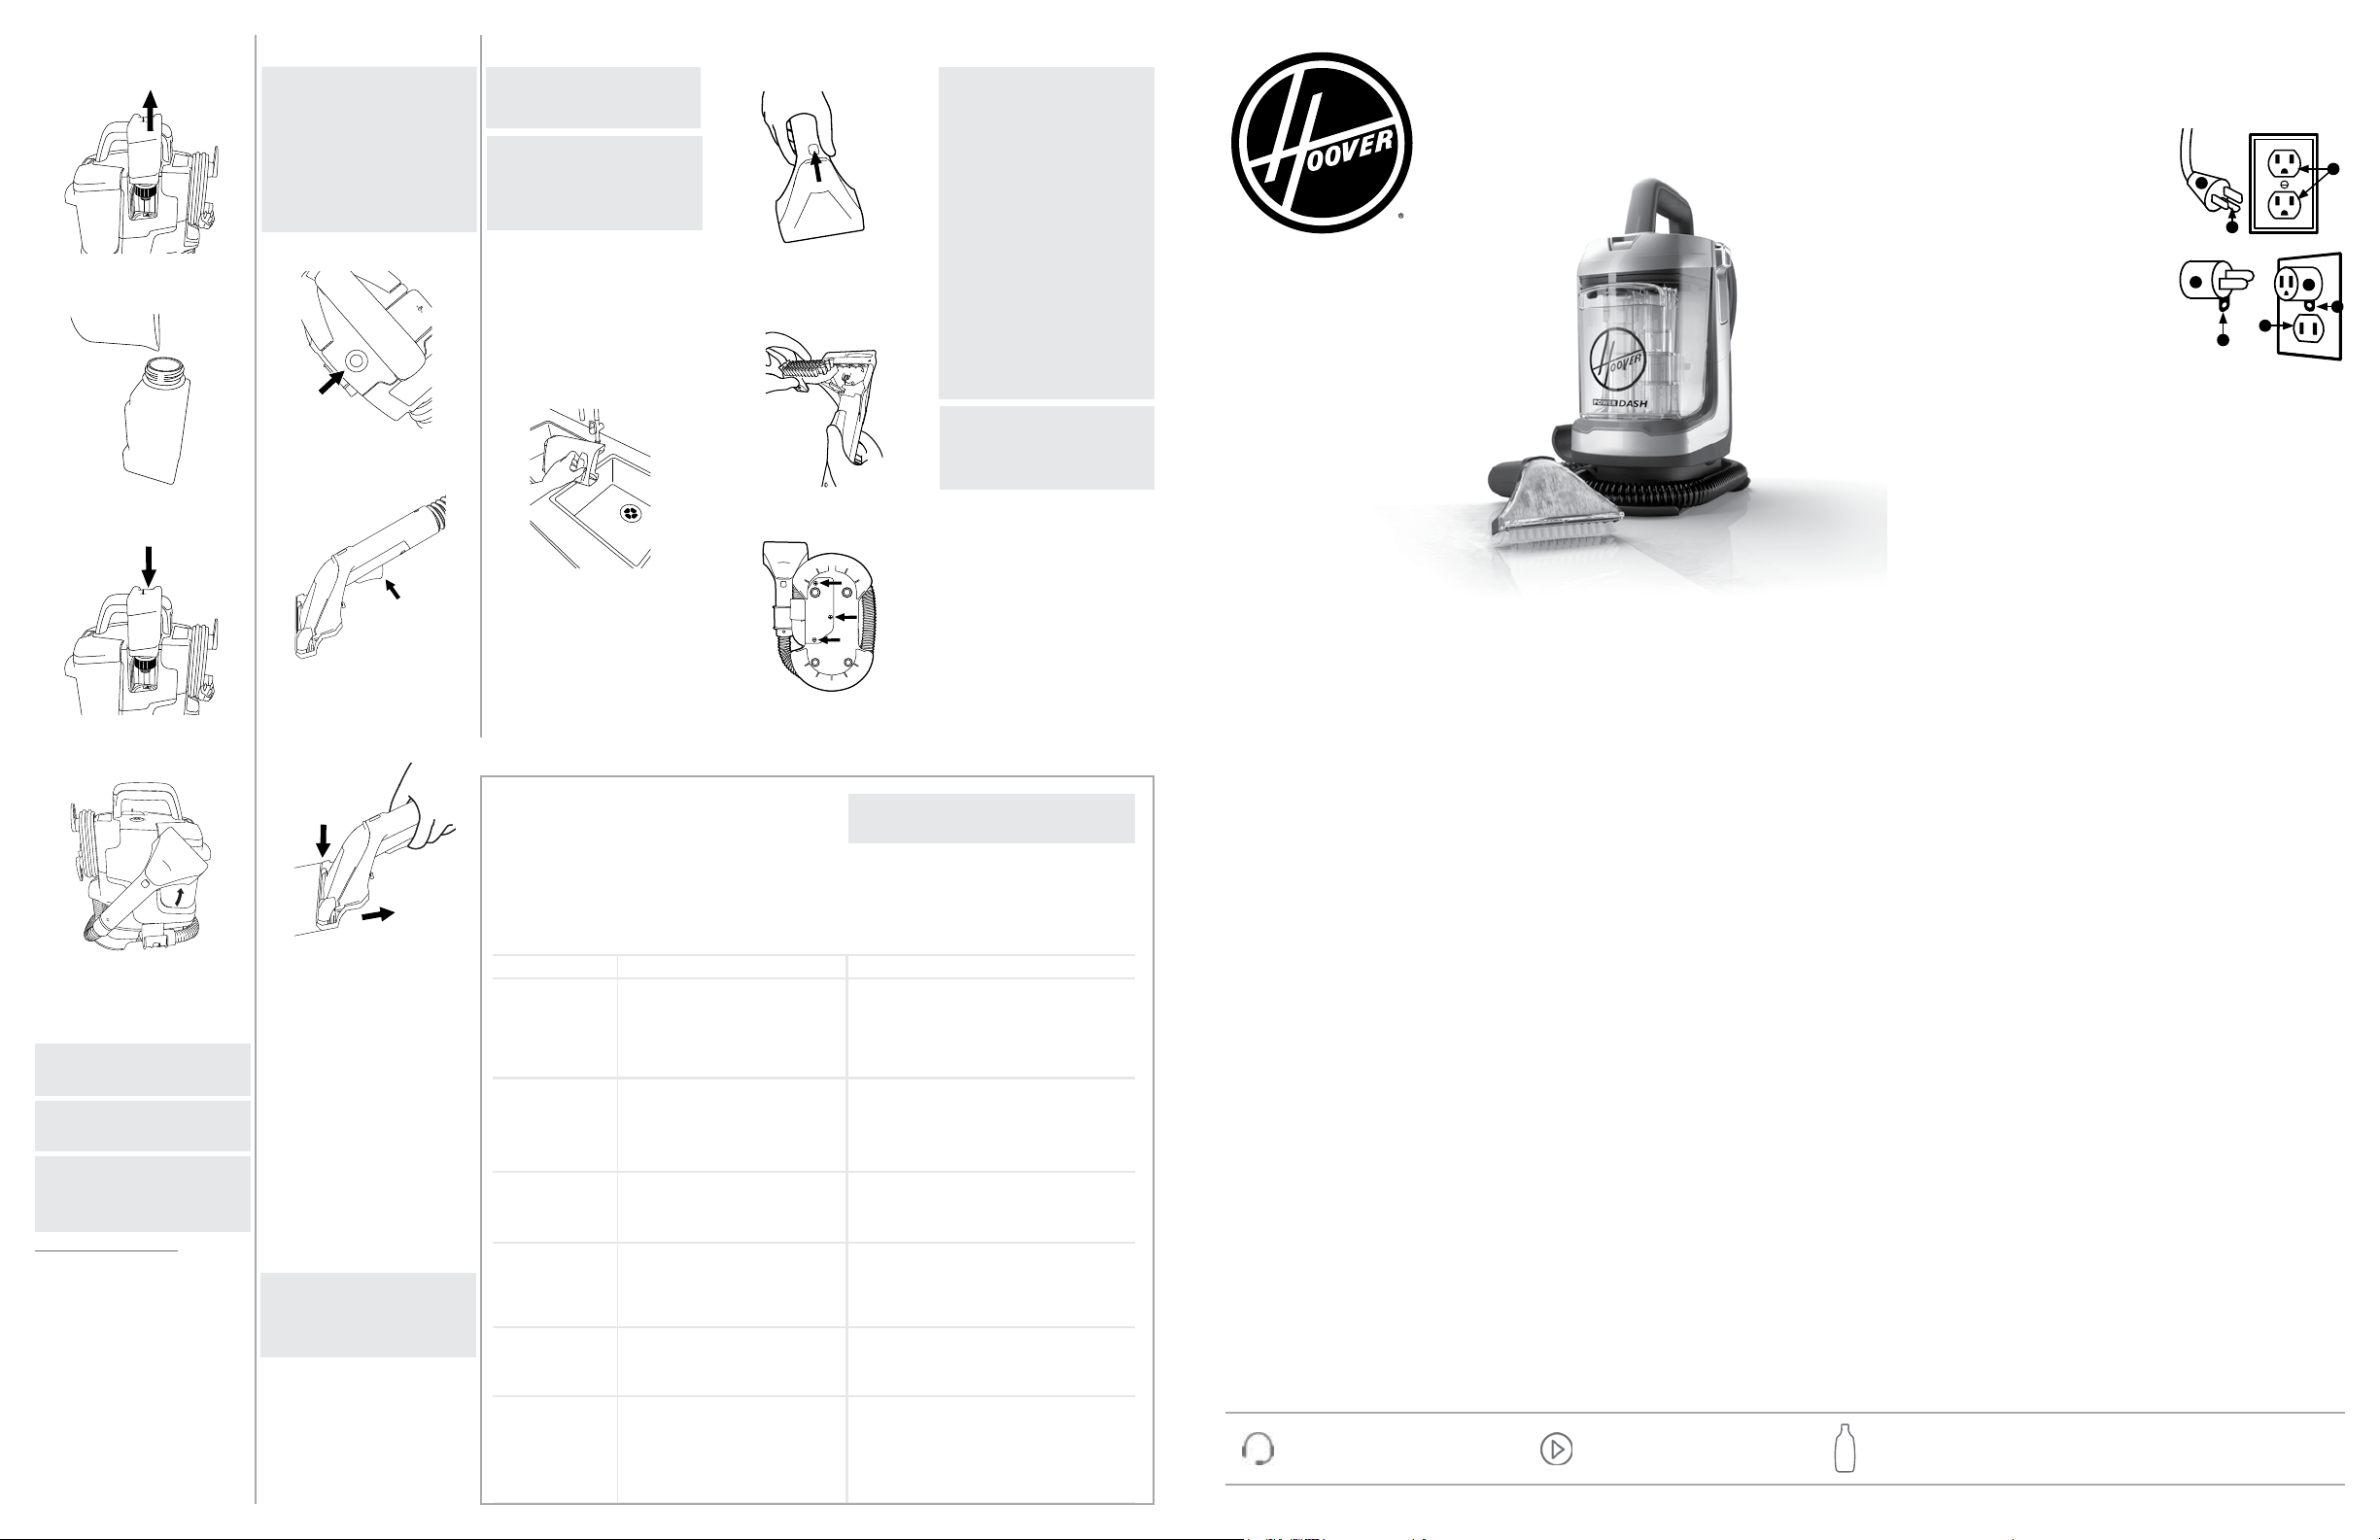
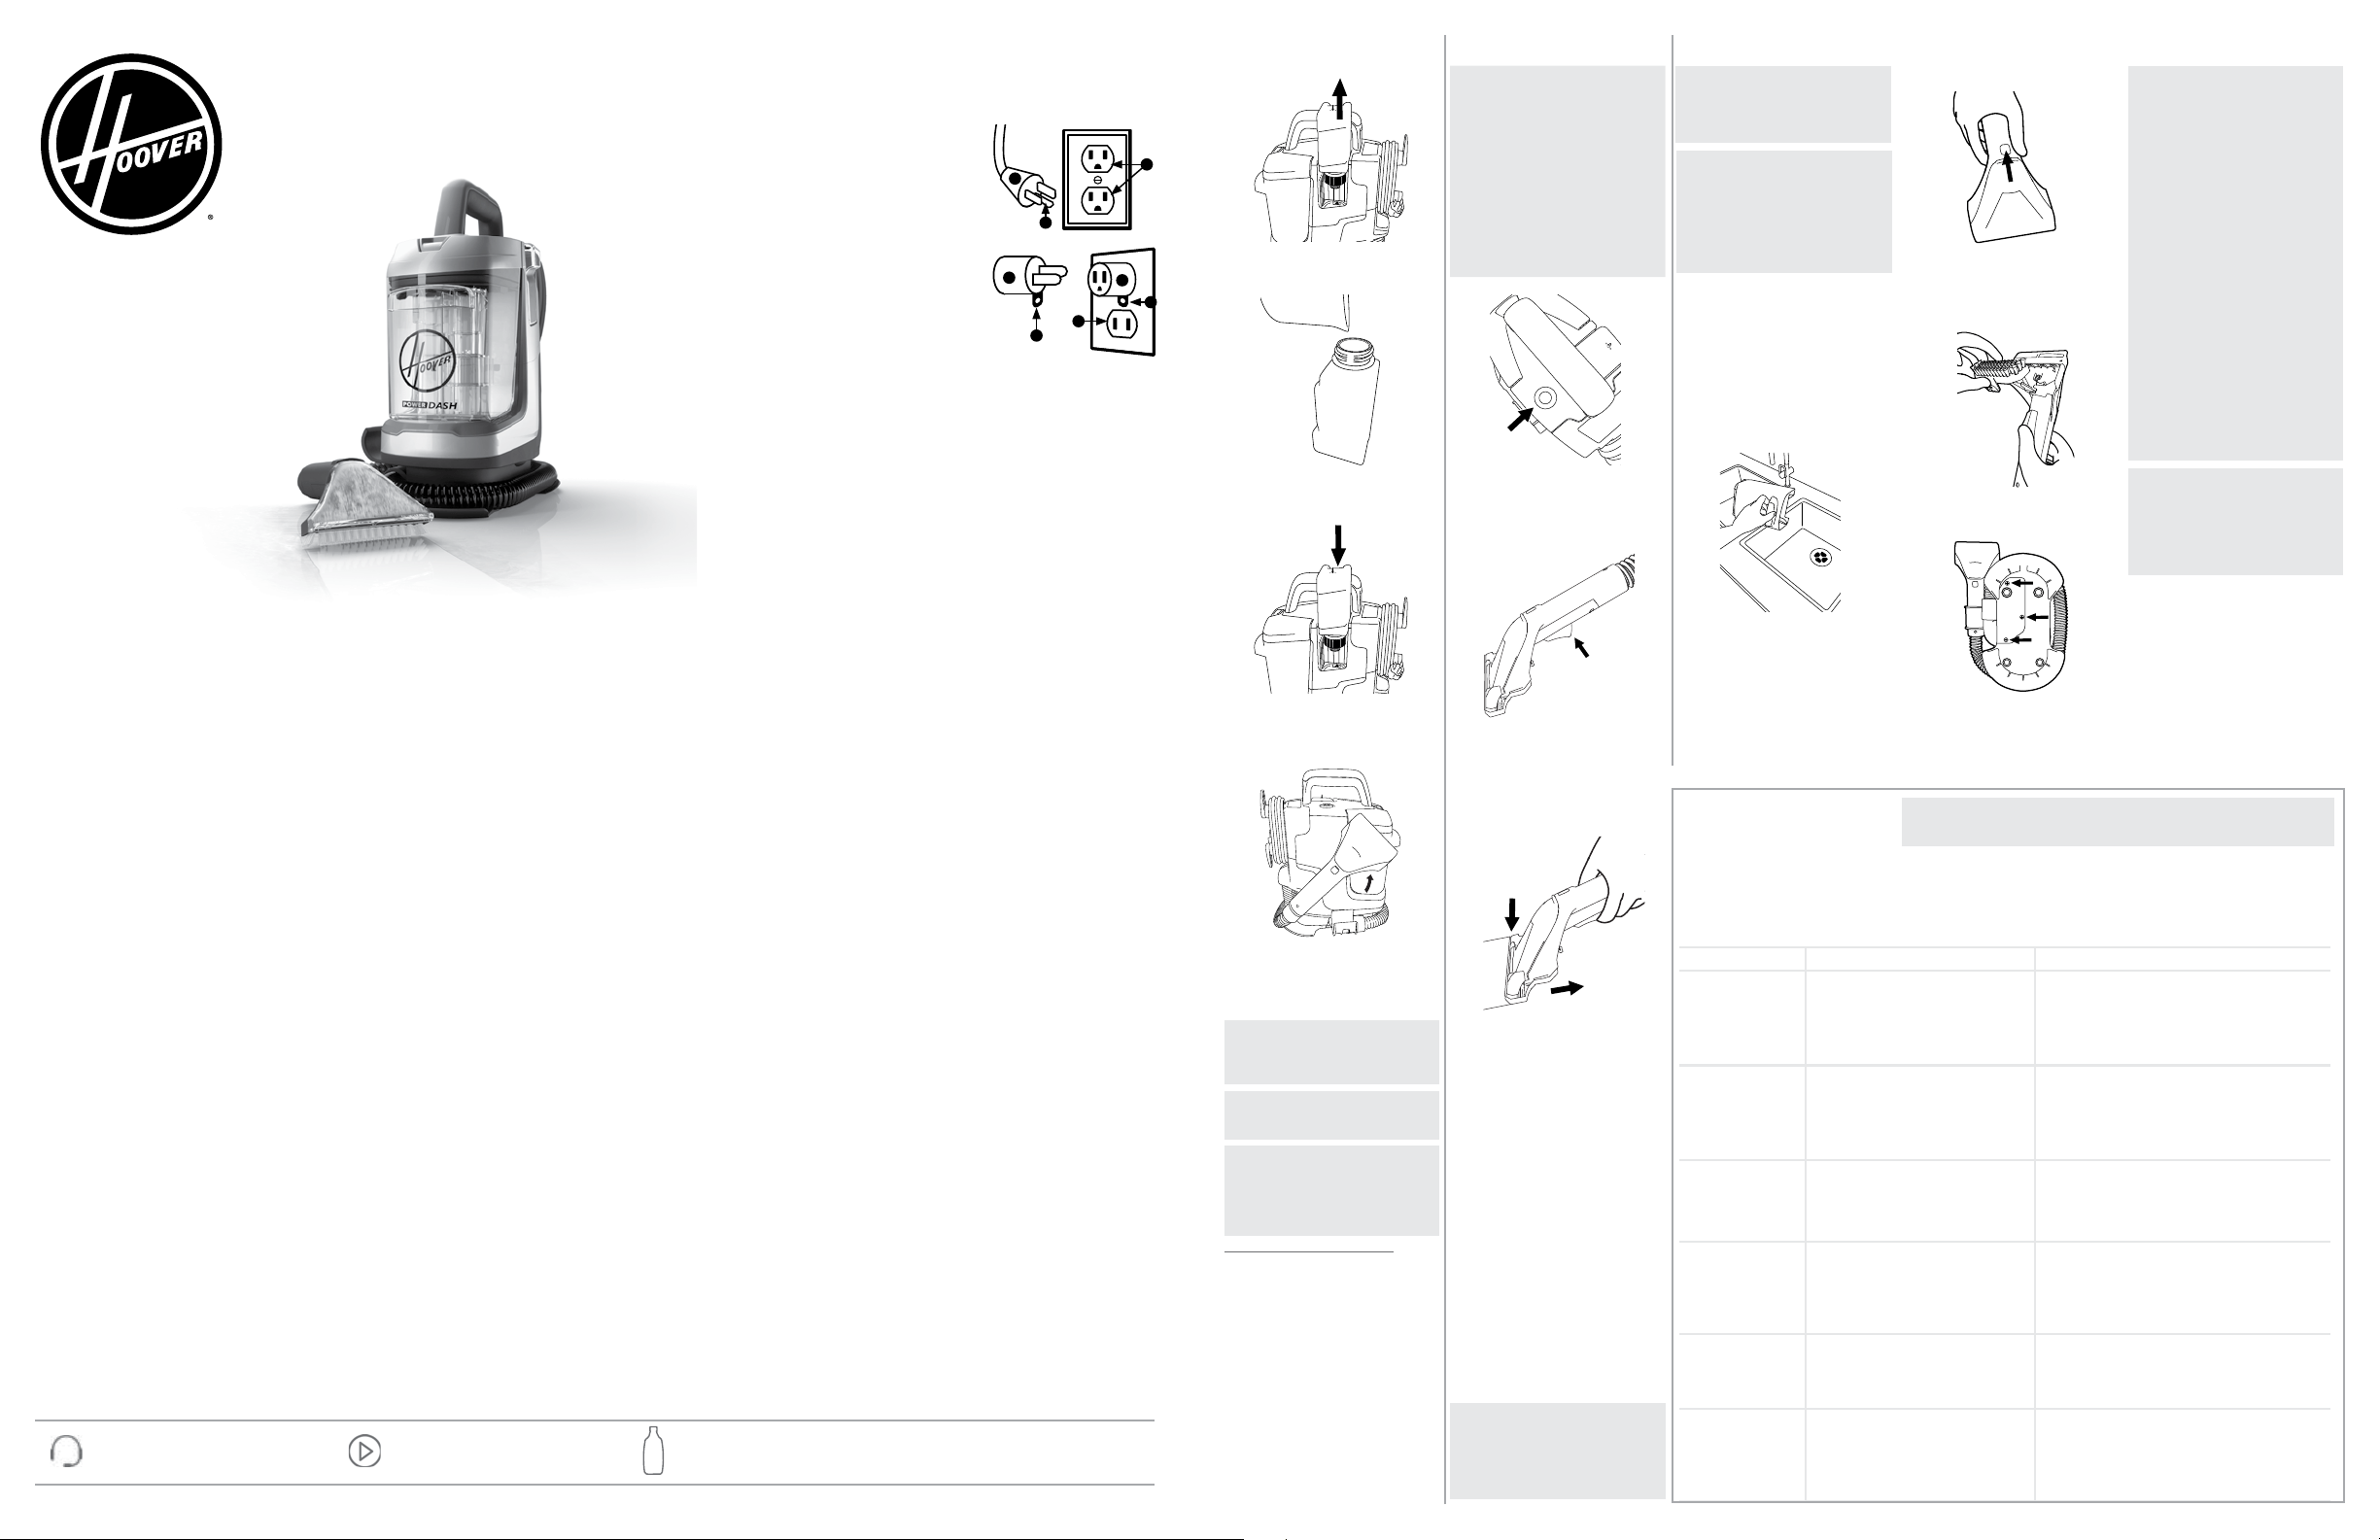
1
Remove Solution Tank from the side of
the unit, then remove the cap.
GETTING STARTED
CLEANING FLUID: SEE THE HOOVER
SOLUTION GUIDE insert or visit Hoover.
com/cleaning-solutions.
2
3
4
Add HOOVER® cleaning solution to the
Solution fill line.
Replace and tighten cap. Slide the Tank
back into the unit to secure the tank.
Unwrap hose from unit. Select preferred
tool and make sure it is attached securely.
NOTE: Read the directions on the HOOVER®
Carpet Cleaning fluid prior to use.
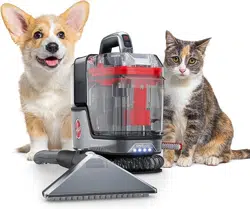
CAUTION:
Not to be used for
grooming a pet.
CAUTION:
DO NOT USE THIS
EXTRACTOR ON HARD FLOORS. USING
THIS PRODUCT ON HARD FLOORS MAY
SCRATCH OR DAMAGE YOUR FLOOR.
Before You Begin Cleaning
Use your Hoover upholstery and spot cleaner
only if upholstery fabric is marked with a “W”
(for “wet” clean) or “S/W” (for “solvent/dry”
or “wet” clean). Don’t clean fabric marked “S”
(“solvent/ dry” clean only).
Test for colorfastness in a small, hidden area.
Gently rub surface with a dampened white
cloth. Wait ten minutes and check for color
removal or bleed with a white paper towel.
NOTE: To prevent staining, use plastic or
aluminum foil to protect wood or metal
surfaces from possible water spray.
NOTE: To avoid damage to wood floors
underneath area rugs or carpet, place
waterproof material (e.g. plastic) underneath
them before cleaning.
an equipment-grounding conductor (C) and grounding plug (A). The plug must be inserted into an appropriate
outlet (B) that is properly installed and grounded in accordance with all local codes and ordinances.
WARNING:
Improper connection of the equipment-grounding conductor can result in the risk of electric shock. Check with
a qualified electrician or service person if you are in doubt as to whether
the outlet is properly grounded. Do not modify the plug provided with the
appliance - if it will not fit the outlet, have a proper outlet installed by a
qualified electrician.
This appliance is for use on a nominal 120-volt circuit and has a ground-
ing plug that looks like the plug (A) illustrated in Fig. 1.
A temporary adapter (D) may be used to connect this plug to a 2-pole
receptacle (E) if a properly grounded outlet is not available (Fig. 2).
The temporary adapter should be used only until a properly grounded
outlet (B) can be installed by a qualified electrician (Fig. 1). The green
colored rigid ear, lug, or the like (F) extending from the adapter must be
connected to a permanent ground (G) such as a properly grounded outlet
box cover (Fig. 2). Whenever the adapter is used, it must be held in place
by a metal screw. NOTE: In Canada, the use of a temporary adapter is not
permitted by the Canadian Electrical Code.
IMPORTANT SAFETY INSTRUCTIONS
SAVE THESE INSTRUCTIONS
READ ALL SAFETY WARNINGS AND INSTRUCTIONS BEFORE USING THIS PRODUCT.
WARNING:
When using an electrical product, basic precautions should always be
followed to avoid electric shock, fire, and/or serious injury, including the following:
• Fully assemble product prior to use. • Operate cleaner only at voltage specified on data plate on bottom of
cleaner. • Do not leave appliance when plugged in. Unplug from outlet when not in use and before cleaning or
servicing. • Do not expose to rain, store indoors. • Do not immerse. Use only on surfaces moistened by
cleaning process. • To Reduce the Risk of Fire and Electric Shock due to internal component damage, use only
HOOVER® Cleaning Fluids intended for use with this appliance. See the Cleaning Fluid section of this manual.
• Do not allow to be used as a toy. Not intended for use by children age 12 and under. Close supervision is
necessary when used by or near children. To avoid injury or damage, keep children away from product, and do
not allow children to place fingers or other objects into any openings. • Use only as described in this manual.
Use only manufacturer’s recommended attachments and products. • Do not use product with damaged cord or
plug. If product is not working as it should, has been dropped, damaged, left outdoors, or dropped into water,
call customer service at 1-800-944-9200 prior to continuing use. • Do not pull or carry by cord, use cord as a
handle, close a door on cord, or pull cord around sharp edges or corners. Do not place product on cord. Do not
run appliance over cord. Keep cord away from heated surfaces. • Do not unplug by pulling on cord. To unplug,
grasp the plug, not the cord. • Do not handle plug or appliance with wet hands. • Do not put any object into
openings. Do not use with any opening blocked; keep free of dust, lint, hair, and anything that may reduce air
flow. • Keep hair, loose clothing, fingers, and all parts of body away from openings and moving parts. • Turn o
all controls before unplugging. • Do not use to pick up flammable or combustible liquids, such as gasoline, or
fine wood sandings, or use in areas where they may be present. • Connect to a properly grounded outlet only.
See Grounding Instructions. • Do not pick up anything that is burning or smoking, such as cigarettes, matches,
or hot ashes. • Do not use without filters and tanks in place. • Do not clean over floor electrical outlets. • Put
product away after use to prevent tripping accidents.
CAUTION:
TO REDUCE THE RISK OF DAMAGE:
• Avoid picking up hard, sharp objects with this product, as they may cause damage. • Store appropriately
indoors in a dry place. Do not expose machine to freezing temperatures. • Do not use sharp objects to clean
out hose as they can cause damage. • To assist in reducing drying time, be certain the area is well ventilated
when using detergents and other cleaners with this machine. • To help prevent matting and resoiling, avoid
contact with carpets until they are dry. Keep children and pets away from carpets until they are completely
dry. • Do not store extractor with solution in tanks. • DO NOT USE THIS EXTRACTOR ON HARD FLOORS UNLESS
YOU HAVE THE PROPER HARD FLOOR ATTACHMENT. USING THIS PRODUCT ON HARD FLOORS MAY SCRATCH OR
DAMAGE YOUR FLOOR. • Water will drip from the tool after use and may puddle. To avoid damage to wood
and laminate flooring and to avoid potential slip hazard, after use (a) do not leave the product on wood and
laminate surfaces and remove to a hard surface and (b) place unit on absorbent material (such as a towel) to
soak up drips.
GROUNDING INSTRUCTIONS
This appliance must be grounded. If it should malfunction or breakdown, grounding provides a path of least
resistance for electric current to reduce the risk of electric shock. This appliance is equipped with a cord having
LIMITED WARRANTY FOR HOOVER® PRODUCT / 2 (TWO) YEAR LIMITED WARRANTY (DOMESTIC USE)
If this product is not as warranted, contact TTI Floor Care North America Customer Service at 1-800-944-9200.
Please have available the proof of purchase and model number for the warranted product.
WHAT THIS WARRANTY COVERS: This limited warranty provided by Royal Appliance Mfg. Co., doing business
as TTI Floor Care North America (referred to hereafter as “Warrantor”) applies only to products purchased in the
U.S. (including its territories and possessions), a U.S. Military Exchange, or Canada. When used and maintained
in normal household use and in accordance with the Owner’s Guide, this product is warranted against original
defects in material and workmanship for 2 (TWO) year from the date of original purchase (the “Warranty
Period”). If Warrantor determines that the issue you are experiencing is covered under the terms of this
warranty (a “covered warranty claim”), we will, at our sole discretion and free of charge (subject to the cost of
shipping), either (i) repair your product; (ii) ship you a replacement product, subject to availability; or (iii) in the
event that the applicable parts or replacement are not reasonably available, ship you a similar product of equal
or greater value. In the unlikely event that we are unable to repair your product or ship a replacement or similar
product, we reserve the right, at our sole discretion, to issue you a refund or store credit (if applicable) of the
actual purchase price at the time of the original purchase as reflected on the original sales receipt. Parts and
replacements may be new, refurbished, lightly used, or remanufactured, in Warrantor’s sole discretion.
WHO THIS LIMITED WARRANTY COVERS: This limited warranty extends only to the original retail purchaser,
with original proof of purchase from Warrantor or an authorized dealer of Warrantor products, in the U.S., U.S.
Military Exchanges, and Canada.
WHAT THIS WARRANTY DOES NOT COVER: This warranty does not cover use of the product in a commercial
operation (such as maid, janitorial, and equipment rental services, or any other income-generating activity);
improper maintenance of the product; the product if it has been subject to misuse, negligence, neglect,
vandalism, or the use of voltages other than that on the data plate of this product. This warranty does not cover
damage resulting from an act of God, accident, owner’s acts or omissions, service of this product by other
than Warrantor or a Warrantor authorized service provider (if applicable), or other acts beyond the control
of Warrantor. This warranty also does not cover use outside the country in which the product was initially
purchased, or resale of the product by the original owner. Pick-up, delivery, transportation, and house calls
are not covered by this warranty. In addition, this warranty does not cover any product that has been altered
or modified, or repairs made necessary by normal wear or the use of other products, parts, or accessories
which are either incompatible with this product or adversely aect this product’s operation, performance, or
durability. Normal wear items are not covered under this warranty. Depending on the product, normal wear
items may include, but are not limited to, belts, filters, brush rolls, blower fans, blower and vacuum tubes, and
vacuum bags and straps.
OTHER IMPORTANT TERMS: This warranty is not transferable and may not be assigned; any assignment made
in contravention of this prohibition is void. This warranty shall be governed and construed under the laws of
the state of North Carolina. The Warranty Period will not be extended by any replacement of batteries, parts, or
products or by virtue of any repair performed under this warranty.
THIS LIMITED WARRANTY IS THE EXCLUSIVE WARRANTY AND REMEDY, AND ALL EXPRESS AND IMPLIED
WARRANTIES OTHER THAN THE LIMITED WARRANTY SET FORTH ABOVE, INCLUDING IMPLIED WARRANTIES OF
MERCHANTABILITY AND FITNESS FOR A PARTICULAR PURPOSE, ARE EXPRESSLY DISCLAIMED. IN NO EVENT
WILL WARRANTOR BE LIABLE FOR ANY SPECIAL, INDIRECT, INCIDENTAL OR CONSEQUENTIAL DAMAGES OF ANY
KIND OR NATURE TO OWNER OR ANY PARTY CLAIMING THROUGH OWNER, WHETHER BASED IN CONTRACT,
NEGLIGENCE, TORT, OR STRICT PRODUCTS LIABILITY OR ARISING FROM ANY CAUSE WHATSOEVER, EVEN IF
THIS WARRANTY FAILS OF ITS ESSENTIAL PURPOSE. TO THE EXTENT PERMITTED BY APPLICABLE LAW, NO
WARRANTIES THAT ARISE BY OPERATION OF LAW, IF APPLICABLE, SHALL EXCEED THE DURATION OF THE LIMITED
WARRANTY PROVIDED HEREIN. Warrantor’s liability for damages to you for any costs whatsoever arising out of
this statement of limited warranty shall be limited to the amount paid for this product at the time of original
purchase.
Some states do not allow the exclusion or limitation of incidental or consequential damages, disclaimers of
implied warranties, or limitations on the duration of implied warranties, so the above exclusions, disclaimers,
and/or limitations may not apply to you. This warranty gives you specific legal rights, and you may also have
other rights, which vary from state to state.
GENUINE PARTS AND ACCESSORIES: We recommend using only with genuine HOOVER® solutions (for carpet
and spot cleaners), parts, and accessories. Damage caused by use with other than genuine HOOVER® solutions,
parts, and accessories is not covered by and may void your warranty.
WARRANTY
2
D
D
F
E
G
1
A
C
B
THERMAL PROTECTION
A thermal protector has been designed
into your cleaner to protect it from
overheating. When the thermal protector
activates the cleaner will stop running.
If this happens proceed as follows:
1. Turn cleaner OFF and unplug it
from the electrical outlet.
2. Empty dirty water tank.
3. Inspect for any obstructions.
Clear obstructions if present.
4. When cleaner is unplugged and
motor cools for 30 minutes, the
thermal protector will deactivate
and cleaning may continue.
If the thermal protector continues to
activate after following the above steps,
your cleaner needs servicing.
WARNING:
To reduce the risk of
personal injury - Unplug before
cleaning or servicing.
This product contains no serviceable parts.
If appliance is not working as it should, has
been dropped, damaged, left outdoors, or
dropped into water, call customer service at
1.800.944.9200 prior to continuing use.
HOW TO CLEAN THE DIRTY
WATER TANK
Press TANK RELEASE button then lift lid
o for emptying and rinsing. Clean water
will help remove dirt & debris from the
tank. Let air dry before reinstalling.
1
MAINTENANCE
1
2
3
Plug power cord into electrical outlet.
Press Red Button on top of unit to turn ON.
Spray a generous amount of cleaning
solution over the soiled area by pressing
the trigger behind the tool and scrub the
stain in a back and forth motion.
To lift the stain, suction up the dirt and
cleaning solution by applying downward
pressure on the front of the cleaning
tool and pulling towards you. Repeat as
needed.
IMPORTANT: Empty Dirty Water Tank when
you hear an audible change. Ensure the
tank is secured before cleaning.
OPERATION
STORAGE: Wrap cord around the cord
hooks for convenient storage. Attach the
plug end to the cord.
For fast cord release, simply turn upper
cord wrap downward.
For best results, pretreat stains with a
HOOVER® spot treatment (see HOOVER®
Cleaning Solution Guide) to help loosen and
remove even the most stubborn stains.
Distribute a generous amount of pretreat spray
on spot, stain, or high trac area.
Always follow specific directions found on
solution label.
Wait 5-10 minutes before using machine.
CAUTION:
Do not clean over floor
electrical outlets. Water will drip from
the tool after use and may puddle. To
avoid damage to wood and laminate
flooring and to avoid potential slip
hazard, after use (a) do not leave the
product on wood and laminate surfaces
and move to a hard surface and (b)
place unit on an absorbent material
(such as a towel) to soak up drips.
WARNING:
To reduce risk of fire
and electric shock due to internal
component damage, use only HOOVER®
cleaning products intended for use with
the appliance as noted.
LUBRICATION: The motor is equipped
with bearings which contain sufficient
lubrication for their lifetime. The addi-
tion of lubricant could cause damage. Do
not add lubricant to motor bearings.
WAS: Review Emptying & Cleaning the Dirty Water Tank.
NOW: Review Cleaning the Dirty Water Tank.
WAS: Review Solution Tank Installation.
NOW: Review “Getting Started” for Solution Tank Installation.
MISE EN GARDE :
Ne
déplacez pas l’appareil sur des prises de
courant au sol. De l’eau s’écoulera de l’outil
après l’utilisation et peut s’accumuler. Pour
éviter d’endommager les parquets en bois
et les planchers lamellés et pour éviter les
risques de chute, observez les consignes
suivantes après l’utilisation: a) ne laissez
pas l’appareil sur les surfaces en bois ou
lamellées, mais déplacez-le plutôt sur une
surface dure; b) placez l’appareil sur un
matériau absorbant (tel qu’une serviette)
pour éponger tout excédent d’eau.
SHAMPOUINEUSE POUR TAPIS
ET TISSUS D’AMEUBLEMENT
PORTABLE
CONSIGNES DE SÉCURITÉ IMPORTANTES
CONSERVEZ CES INSTRUCTIONS
LISEZ TOUTES LES MISES EN GARDE ET LES DIRECTIVES AVANT D’UTILISER CE PRODUIT.
AVERTISSEMENT :
Lorsque vous utilisez un produit électrique, veuillez toujours suivre
les consignes de sécurité élémentaires pour éviter une décharge électrique, un incendie et (ou) des
blessures graves, y compris les suivantes:
• Assemblez complètement le produit avant de l’utiliser. • N’utiliser
l’appareil qu’à la tension spécifiée sur la plaque signalétique située sur sa partie inférieure arrière. • Ne pas laisser l’appareil
sans surveillance lorsqu’il est branché. Le débrancher quand il n’est pas utilisé et avant de le nettoyer ou d’en faire
l’entretien. • N’exposez pas l’ap-pareil à la pluie. Rangez l’appareil à l’intérieur. • N’immergez pas l’appareil. Utilisez
seulement sur les surfaces humidifiées par le processus de nettoyage. • Pour réduire les risques d’incendie et de décharge
électrique causés par des composants internes endommagés, utilisez uniquement les produits nettoyants HOOVER
MD
conçus
pour cet appareil. Consultez la section «Produits nettoyants» du présent guide. • Ne permettez pas aux enfants de jouer
avec l’appareil. Cet appareil ne doit pas être utilisé par des enfants de moins de 12ans. Exercez une surveillance étroite
lorsque l’appareil est utilisé par un enfant ou près de lui. Gardez l’appareil hors de la portée des enfants et ne laissez pas ces
derniers introduire leurs doigts ou d’autres objets dans aucune ouverture afin d’éviter les blessures ou les bris. • Utiliser cet
appareil uniquement de la façon décrite dans ce guide. Utiliser uniquement les accessoires et les produits recommandés par
le fabricant. • N’utilisez pas le produit si le cordon d’alimentation ou la fiche est endommagé. Si le produit ne fonctionne pas
comme il le devrait, est tombé, est endommagé, a été laissé à l’extérieur ou a pris l’eau, communiquez avec le service à la
clientèle au 1 800 944.9200 avant de continuer à l’utiliser. • Ne pas tirer l’appareil par le cordon, ne pas se servir du cordon
comme poignée, ne pas fermer de portes sur le cordon et ne pas contourner des coins ou des rebords tranchants avec le
cordon. Ne pas placer l’appareil sur le cordon. Éviter de faire rouler l’appareil sur le cordon. Tenir le cordon éloigné de toute
surface chauée. • Ne pas tirer sur le cordon pour débrancher l’appareil. Pour le débrancher, tirer sur la fiche plutôt que sur
le cordon. • Ne pas manipuler la prise ou l’appareil avec les mains mouillées. • Ne pas introduire d’objets dans les
ouvertures. Ne pas utiliser l’appareil si les ouvertures sont obstruées: retirer la poussière, les peluches, les cheveux et tout
ce qui est susceptible de réduire le débit d’air. • Garder les cheveux, les vêtements amples, les doigts ou toute autre partie
du corps à bonne distance des ouvertures et des pièces mobiles. • Mettre toutes les commandes en position d’arrêt avant de
débrancher l’appareil. • Ne pas aspirer des liquides inflammables ou combustibles comme de l’essence ou de la sciure de
bois, ni utiliser l’appareil à proximité de ces matériaux. • Ne brancher qu’à une prise électrique correctement mise à la terre.
Consulter la section «Instructions de mise à la terre». • Ne pas utiliser l’appareil pour ramasser des matières qui dégagent
de la fumée ou qui brûlent, comme des cigarettes, des allumettes ou des cendres encore chaudes. • Ne pas utiliser l’appareil
si les filtres et les réservoirs ne sont pas en place. • Ne pas passer l’appareil sur des prises électriques au sol. • Éloignez cet
appareil dès la fin de son utilisation pour éviter les trébu-chements.
MISE EN GARDE :
POUR RÉDUIRE LES RISQUES DE DOMMAGE : • Éviter de ramasser des objets durs
ou aux arêtes tranchantes avec l’appareil, car ils peuvent l’endommager. • Ranger l’appareil adéquatement à l’intérieur, dans
un endroit sec. Ne pas l’exposer à des températures de gel. • Ne pas utiliser d’objets aux arêtes tranchantes pour nettoyer le
tuyau, car cela risquerait de l’endommager. • Pour réduire le temps de séchage, s’assurer de bien aérer l’espace nettoyé
lorsque cet appareil est utilisé avec des détergents ou d’autres produits nettoyants. • Pour éviter d’aplatir les fibres de la
moquette ou de la salir de nouveau, éviter tout contact avec celle-ci jusqu’à ce qu’elle soit sèche. Garder les enfants et les
animaux de compagnie éloignés de la moquette jusqu’à ce qu’elle soit complètement sèche. • Ne pas ranger l’appareil avec
le produit nettoyant encore présent dans le réservoir. • N’UTILISEZ PAS CET APPAREIL SUR DES PLANCHERS DURS, À MOINS
D’AVOIR L’ACCESSOIRE ADÉQUAT. CE FAISANT, VOUS POURRIEZ ÉGRATIGNER OU ENDOMMAGER VOTRE PLANCHER. • De l’eau
s’écoulera de l’outil après l’utilisation et peut s’accumuler. Pour éviter d’endommager les planchers en bois et stratifiés et
empêcher qu’ils deviennent glissants, après l’utilisation, (a) ne pas laisser l’appareil sur les surfaces en bois ou stratifiées,
mais le déplacer sur une surface dure et (b) le placer sur un matériau absorbant (une serviette, par exemple) permettant
d’éponger les déversements.
GARANTIE LIMITÉE POUR LES PRODUITS HOOVER
MD
/ GARANTIE LIMITÉE DE DEUXANS (UTILISATION DOMESTIQUE)
Si le présent produit ne fonctionne pas comme il a été annoncé, communiquez avec le service à la clientèle de TTI Floor Care
North America en composant le 1800944.9200. Assurez-vous d’avoir en main la preuve d’achat et le numéro de modèle du
produit couvert par la garantie.
ÉLÉMENTS COUVERTS PAR LA PRÉSENTE GARANTIE: Cette garantie limitée fournie par Royal Appliance Mfg. Co., exerçant
ses activités sous TTI Floor Care North America (appelée «garant» ci-après) s’applique uniquement aux produits achetés
aux États-Unis (y compris ses territoires et possessions), au Canada et par l’intermédiaire du programme d’échanges
militaires américain. Ce produit est garanti pour des conditions normales d’utilisation et d’entretien domestiques, comme
le stipule le Guide d’utilisation, contre les défauts de matériaux et de fabrication pour une période complète de DEUXans à
compter de la date d’achat (ci-après la «période de garantie»). Si le garant détermine que le problème que vous rencontrez
est couvert en vertu des modalités de cette garantie (une «réclamation couverte par la garantie»), nous prendrons l’une
des mesures suivantes à notre entière discrétion et sans frais (sous réserve du coût d’expédition): i) nous réparerons votre
produit, ii) nous vous expédierons un produit de rechange, selon la disponibilité des produits, ou iii) nous vous enverrons un
produit similaire de valeur égale ou supérieure dans le cas où les pièces ou le produit de rechange applicables ne sont pas
raisonnablement disponibles. Dans le cas peu probable où nous serions incapables de réparer votre produit ou d’expédier
un produit de rechange ou un produit similaire, nous nous réservons le droit, à notre entière discrétion, de vous orir un
remboursement ou un crédit en magasin (le cas échéant) équivalant au prix d’achat réel en date de l’achat initial, comme
indiqué sur le reçu de vente original. Les pièces de rechange peuvent être nouvelles, remises à neuf, légèrement utilisées ou
réusinées, à l’entière discrétion du garant.
PERSONNES COUVERTES PAR LA PRÉSENTE GARANTIE: La présente garantie limitée s’applique uniquement à l’acheteur
original, avec une preuve d’achat provenant du garant ou d’un détaillant autorisé des produits du garant aux États-Unis, au
Canada et par l’intermédiaire du programme d’échanges militaires américain.
ÉLÉMENTS NON COUVERTS PAR LA PRÉSENTE GARANTIE: La présente garantie ne couvre pas toute utilisation
commerciale du produit (p.ex., utilisation dans le cadre de services ménagers, de conciergerie ou de location de matériel ou
de toute autre activité générant un revenu), l’entretien inadéquat du produit, l’utilisation inadéquate du produit, la négligence,
les actes de vandalisme ou l’utilisation d’une tension électrique autre que celle indiquée sur la plaque signalétique de ce
produit. La présente garantie ne couvre pas les dommages résultant d’un cas de force majeure, d’un accident, d’actes ou
d’omission de la part du propriétaire, de l’entretien de ce produit autre que par le garant ou un fournisseur de service autorisé
par le garant (le cas échéant) ou en raison d’autres actes qui sont hors du contrôle du garant. La présente garantie ne couvre
pas non plus l’utilisation à l’extérieur du pays d’achat initial du produit ni sa revente par le propriétaire original. La présente
garantie ne couvre pas le ramassage, la livraison, le transport et la réparation à domicile. De plus, elle ne couvre pas les
produits qui ont été modifiés ou les réparations nécessaires en raison de l’usure normale ou de l’utilisation d’autres produits,
pièces ou accessoires qui sont incompatibles avec ce produit ou qui nuisent à son fonctionnement, à son rendement ou à sa
durabilité. Les articles ayant une usure normale ne sont pas couverts par cette garantie. Selon le produit, les articles ayant
une usure normale peuvent comprendre, sans s’y limiter, les courroies, les filtres, les rouleaux-brosses, les ventilateurs
souants, le soueur et les tuyaux d’aspirateur, les sacs d’aspirateurs et les attaches.
AUTRES CONDITIONS IMPORTANTES: La présente garantie n’est pas transférable et ne peut être cédée; toute cession
eectuée en violation de cette interdiction est annulée. La présente garantie sera régie et interprétée selon les lois de l’État
de la Caroline du Nord. La période de garantie ne peut pas être prolongée par une réparation ou un remplacement des piles,
des pièces ou des produits exécuté en vertu de la présente garantie.
LA PRÉSENTE GARANTIE LIMITÉE EST L’UNIQUE GARANTIE ET RECOURS ET TOUTE GARANTIE EXPLICITE OU IMPLICITE AUTRE
QUE LA GARANTIE LIMITÉE PRÉSENTÉE CI-DESSUS, Y COMPRIS LES GARANTIES IMPLICITES DE QUALITÉ MARCHANDE ET DE
CONVENANCE À UNE FIN PARTICULIÈRE, EST EXPRESSÉMENT DÉCLINÉE. LE GARANT NE POURRA EN AUCUN CAS ÊTRE TENU
RESPONSABLE DE TOUT DOMMAGE INTÉRÊT SPÉCIAL OU DOMMAGE INDIRECT, ACCESSOIRE OU CONSÉCUTIF DE QUELQUE
NATURE QUE CE SOIT SUBI PAR LE PROPRIÉTAIRE DU PRODUIT OU PAR TOUTE PARTIE RÉCLAMANT PAR L’INTERMÉDIAIRE DU
PROPRIÉTAIRE, QU’ILS RELÈVENT DE LA RESPONSABILITÉ CONTRACTUELLE, DE LA NÉGLIGENCE, DE LA RESPONSABILITÉ CIVILE
DÉLICTUELLE OU DE LA RESPONSABILITÉ STRICTE DU FAIT DES PRODUITS, OU QU’ILS DÉCOULENT DE QUELQUE CAUSE QUE
CE SOIT, MÊME SI LA PRÉSENTE GARANTIE N’ATTEINT PAS SON OBJET ESSENTIEL. DANS LES LIMITES PERMISES PAR LA LOI
APPLICABLE, AUCUNE GARANTIE RÉSULTANT D’UNE THÉORIE JURIDIQUE, LE CAS ÉCHÉANT, NE PEUT DÉPASSER LA DURÉE DE
LA GARANTIE LIMITÉE AUX PRÉSENTES. La responsabilité du garant à votre endroit pour tous les coûts, quels qu’ils soient,
découlant de cette déclaration de garantie limitée se limite au montant payé pour ce produit au moment de l’achat initial.
Certains États n’autorisent pas l’exclusion ni la restriction des dommages indirects ou accessoires, l’exclusion de garanties
implicites ou les limites de durée d’une garantie implicite; par conséquent, les restrictions ou exclusions précédentes
peuvent ne pas s’appliquer. La présente garantie vous donne des droits précis. Vous pouvez également avoir d’autres droits,
lesquels varient d’une province à l’autre.
PIÈCES ET ACCESSOIRES D’ORIGINE: Nous vous recommandons d’utiliser uniquement des solutions (pour les
shampouineuses), des pièces et des accessoires d’origine HOOVER
MD
. Les dommages causés par l’utilisation d’autres
solutions, pièces et accessoires que celles d’origine HOOVER
MD
ne sont pas couverts par votre garantie et peuvent l’annuler.
GARANTIE
Veuillez consulter le site Hoover.com
pour voir la vidéo didactique et la
FAQ sur cet shampouineuse.
MPORTANT : VEUILLEZ LIRE ATTENTIVEMENT
TOUTES LES INSTRUCTIONS AVANT D’ASSEMBLER
ET D’UTILISER CET APPAREIL.
Ce produit est destiné à un usage domestique seulement.
La garantie est nulle si l’appareil est utilisé à des fins commerciales.
Des questions ou des préoccupations?
Veuillez appeler le service à la clientèle au 1 800 944.9200 du lundi au vendredi, de 9h à 18h (HNE).
PRIÈRE DE NE PAS RETOURNER CE PRODUIT AU MAGASIN.
GUIDE D’UTILISATION
2
D
D
F
E
G
1
A
C
B
POWERDASH
TM
GO
LUBRIFICATION : Le moteur et le
rouleau-brosse sont dotés de roulements
contenant une quantité suffisante de
lubrifiant pour leur durée de vie. L’ajout de
lubrifiant pourrait causer des dommages.
C’est pourquoi vous ne devez pas ajouter de
lubrifiant dans les roulements du moteur.
©Techtronic Floor Care Technology Limited, 2020. Tous droits réservés. Distribué par Royal Appliance Mfg. Co. Charlotte, NC 28262. 964A00242-R0
Veuillez consulter le site Hoover.
com pour voir la vidéo didactique et
la FAQ sur cet shampouineuse.
Pièces de rechange et accessoires,
notamment des solutions, disponibles
sur le site Hoover.com.
Puede encontrar la versión en español
de este manual en Hoover.com en
esta página de productos.
Versión en
español:
Veuillez appeler le service à la
clientèle au 1 800 944.9200 du lundi
au vendredi, de 9h à 18h (HNE).
RANGEMENT : Enroulez le cordon autour
des crochets destinés à cet effet avant de
ranger l’appareil. Fixez la fiche au cordon.
Pour une libération rapide du cordon,
tournez simplement l’enroulement
supérieur du cordon vers le bas.
INSTRUCTIONS DE MISE À LA TERRE:
Cet appareil doit être mis à la terre. S’il devait mal
fonctionner ou être endommagé, la mise à la terre fournira au courant électrique une résistance moindre afin de réduire le
risque de décharge électrique. Cet appareil est muni d’un cordon électrique comportant un conducteur de protection (C) et
une fiche de mise à la terre (A). La fiche doit être insérée dans une prise appropriée (B) qui est bien installée et mise à la terre
conformément à tous les codes et règlements locaux.
AVERTISSEMENT:
Le branchement inapproprié du conducteur de
protection peut entraîner des risques de décharge électrique. Consultez un
électricien ou un technicien qualifié si vous n’êtes pas certain que la prise est bien
mise à la terre. Ne modifiez pas la fiche fournie avec l’appareil. Si elle ne s’insère
pas dans la prise, communiquez avec un électricien qualifié pour faire installer
une prise appropriée. Cet appareil a été conçu pour être utilisé sur un circuit d’une
tension nominale de 120 V. Il est équipé d’une fiche de mise à la terre semblable à
la fiche (A) illustrée à la figure 1.
Un adaptateur temporaire (D) peut être utilisé pour brancher cette fiche à une prise
à deux alvéoles (E), si une prise correctement mise à la terre n’est pas disponible
figure 2. L’adaptateur temporaire doit uniquement être utilisé en attendant qu’une
prise correctement mise à la terre (B) soit installée par un électricien qualifié
figure 1. La patte, le taquet ou toute autre partie saillante rigide (F) de l’adaptateur
doit être correctement connecté à une mise à la terre permanente (G) tel un
couvercle de boîte à prises correctement mis à la terre figure2. Lorsque l’adaptateur est utilisé, il doit être maintenu en place
à l’aide d’une vis à métaux. REMARQUE: Au Canada, l’utilisation d’un adaptateur temporaire n’est pas autorisée par le Code
canadien de l’électricité.
1
Retirez le réservoir de solution du côté de
l’unité, puis retirez le capuchon.
POUR COMMENCER
PRODUITS NETTOYANTS : CONSULTEZ
L’ENCART DU GUIDE DES SOLUTIONS HOOVER
ou rendez-vous sur le site Web Hoover.com/
cleaning-solutions.
2
3
4
Ajoutez la solution de nettoyage HOOVER
MD
jusqu’à la ligne de remplissage.
Remettez le capuchon et serrez-le. Faites
glisser le réservoir pour le remettre en
place dans l’appareil.
Déroulez le tuyau. Choisissez l’accessoire
le plus adapté et fixez-le correctement.
REMARQUE: Lisez les instructions du liquide de
nettoyage pour tapis HOOVER
MD
avant de l’utiliser.
MISE EN GARDE :
N’utilisez
pas l’aspirateur pour toiletter un animal.
MISE EN GARDE :
NE PAS
UTILISER CET APPAREIL SUR DES PLANCHERS
À SURFACE DURE. L'UTILISATION DE CET
APPAREIL SUR CE TYPE DE SURFACE RISQUE
DE RAYER OU D'ENDOMMAGER LES PLANCHERS.
Avant de commencer le nettoyage
N’utiliser la shampouineuse HOOVER
MD
que si
l’étiquette du tissu porte le code «W» (nettoy-
age à l’eau) ou «S/W» (solvant/à sec ou à l’eau).
Ne pas nettoyer si l’étiquette porte le code «S»
(solvant/à sec seulement).
Tester la résistance des couleurs sur une petite
surface hors de vue. Frotter délicatement la
surface à l’aide d’un chion mouillé. Attendre
dixminutes et vérifier si la couleur s’en va, ou
essuyer avec une serviette en papier.
REMARQUE: Pour prévenir les taches, utiliser
du papier d’aluminium ou du plastique pour
protéger les surfaces en bois ou en métal
d’éventuelles éclaboussures d’eau.
REMARQUE: Pour ne pas abîmer les planchers de
bois situés sous les tapis ou la moquette, poser
une matière étanche à l’eau (par exemple, du
plastique) en-dessous avant le nettoyage.
1
2
3
Branchez le cordon d’alimentation dans
une prise de courant. Appuyez sur le bou-
ton rouge situé sur le dessus de l’appareil
pour le mettre en marche.
Appliquez une quantité généreuse de
solution de nettoyage sur la zone tachée
en appuyant sur la gâchette derrière
l’accessoire et frottez la tache en eectuant
un mouvement d’avant en arrière.
Pour éliminer la tache, aspirez la saleté
et la solution de nettoyage en appliquant
une pression vers le bas à l’avant de
l’accessoire de nettoyage tout en le
tirant vers vous. Répétez l’opération si
nécessaire.
IMPORTANT: Videz le réservoir d’eau sale
lorsque vous entendez un changement audible.
Assurez-vous que le réservoir est bien fixé
avant le nettoyage.
FONCTIONNEMENT
Pour obtenir de meilleurs résultats, prétraitez
les taches à l’aide d’un traitement spécifique
HOOVER
MD
(voir le guide relatif aux solutions de
nettoyage HOOVER
MD
) pour faciliter l’élimination
des taches les plus tenaces.
Distribuez une quantité généreuse de solution
de prétraitement en la vaporisant sur la tache
ou la zone très passante.
Suivez toujours les directives spécifiques
indiquées sur l’étiquette du produit.
Attendez 5 à 10minutes avant d’utiliser la
machine.
AVERTISSEMENT :
Pour
réduire les risques de blessures,
débrancher l’appareil avant de le nettoyer
ou d’en effectuer l’entretien.
Ce produit ne contient pas de pièces réparables.
Si l’appareil ne fonctionne pas comme il le
devrait, est tombé, est endommagé, a été laissé
à l’extérieur ou a pris l’eau, apportez-le à un
centre de réparation ou communiquez avec le
service à la clientèle au 1 800 944.9200 avant de
continuer à l’utiliser.
NETTOYAGE DU RÉSERVOIR
D’EAU SALE
Videz le réservoir d’eau sale. Appuyez sur
le bouton de dégagement du réservoir,
puis soulevez le couvercle pour le vider et
le rincer. L’eau propre permettra d’enlever
la saleté et les débris du réservoir.
Laissez le réservoir sécher à l’air libre
avant de le remettre en place.
1
ENTRETIEN
AVERTISSEMENT :
Pour
réduire les risques d’incendie et de
décharge électrique causés par des
composants internes endommagés, utilisez
uniquement les produits nettoyants
HOOVER
MD
conçus pour cet appareil, comme
il est indiqué.
Rincez l’accessoire à main sous le robinet.
Enlevez le couvercle de la buse en
appuyant sur le bouton de dégagement
situé sur le dessus.
2
3
4
Enlevez l’accessoire à insérer et rincez-le
sous le robinet.
Pour accéder au tuyau afin de le nettoyer,
retirez les trois vis situées dans le bas de
la shampouineuse. Une fois retiré, faites
glisser la pièce en l’éloignant, puis rincez.
NETTOYAGE DU RÉSERVOIR
D’EAU SALE (SUITE)
PROTECTION THERMIQUE
Votre appareil est équipé d’un rupteur
thermique interne afin de le protéger
contre la surchauffe. L’appareil cessera de
fonctionner si ce rupteur thermique s’active.
Voici ce qu’il faut faire lorsque ceci
survient:
1. ÉTEIGNEZ l’appareil et débranchez-
le de la prise de courant.
2. Videz le réservoir d’eau sale.
3. Vérifiez la présence d’obstructions.
Dégagez toutes les obstructions
visibles.
4. Le rupteur thermique se réinitiali-
sera après le débranchement de
l’appareil et après que le moteur a
refroidi pendant 30 minutes; vous
pourrez à ce moment reprendre le
travail.
Votre appareil devra être réparé si le rupt-
eur thermique se réinitialise constamment
après avoir respecté les étapes ci-dessus.
PROBLÈME CAUSE POSSIBLE SOLUTION POSSIBLE
L'aspirateur ne
fonctionne pas
1. Le cordon d'alimentation n'est pas bien
branché dans la prise.
1. Brancher l'appareil fermement.
2. Un fusible a sauté ou le disjoncteur s'est
déclenché.
2. Vérifier le fusible ou le disjoncteur. Remplacer le fusible
ou réenclencher le disjoncteur.
3. Réparation nécessaire.
3. Consulter notre site Internet à l'adresse www.hoover.
com ou appeler le 1 800 944.9200.
L'aspirateur n'aspire
pas ou aspire mal
1. Le réservoir d'eau usée n'est pas installé
correctement.
1. Vérifiez l’emplacement du réservoir d’eau sale sur la base
du nettoyeur.
2. Le réservoir d'eau usée est plein. 2. Vider le réservoir d'eau usée.
3. Le réservoir d'eau usée est obstrué. 3. Nettoyer le réservoir d'eau usée.
4. La conduite d'air est obstruée. 4. Déboucher la conduite d'air.
De l'eau s'écoule de
l'appareil
1. Le réservoir d'eau usée est plein. 1. Vider le réservoir d'eau usée.
2. Le réservoir d'eau usée n'est pas installé
correctement.
2. Vérifiez l’emplacement du réservoir d’eau sale sur la base
du nettoyeur.
3. Le réservoir à solution n’est pas installé
correctement.
3. Consultez « Pour Commencer » pour l’installation du
réservoir de solution.
L’appareil ne distribue
pas d’eau.
1. Le réservoir à solution est vide. 1. Remplissez le réservoir à solution.
2. Le réservoir à solution n’est pas installé
correctement.
2. Consultez « Pour Commencer » pour l’installation du
réservoir de solution.
3. Réparation nécessaire. 3. Consulter notre site Internet à l'adresse www.hoover.
com ou appeler le 1 800 944.9200.
La buse du tuyau ne
pulvérisera pas après
avoir rempli le réser-
voir d’eau propre ou le
réservoir de solution.
1. L'air est bloqué dans la pompe et le tuyau. 1. Mettre la shampouineuse en marche. Si le tuyau ne
pulvérise pas le produit, amorcer la pompe en abaissant
le tuyau jusqu'au sol et maintenir la gâchette jusqu'à
1minute.
Le bruit du moteur
devient aigu
1. Le réservoir d'eau usée est plein. 1. Vider le réservoir d'eau usée.
2. Le réservoir d'eau usée est obstrué. 2. Nettoyer le réservoir d'eau usée.
3. La conduite d'air est obstruée. 3. Désobstruer la conduite d'air.
4. Le flotteur du réservoir d'eau usée a été
actionné.
4. Revérifier nettoyage du réservoir d’eau sale.
PIÈCES DE RECHANGE ET ACCESSOIRES, NOTAMMENT DES SOLUTIONS, DISPONIBLES SUR LE SITE HOOVER.COM.
SI L’APPAREIL NE FONCTIONNE PAS COMME IL LE DEVRAIT, EST TOMBÉ, EST ENDOMMAGÉ, A ÉTÉ LAISSÉ À L’EXTÉRIEUR OU A PRIS L’EAU,
APPORTEZ-LE À UN CENTRE DE RÉPARATION OU COMMUNIQUEZ AVEC LE SERVICE À LA CLIENTÈLE AU 1 800 944.9200 AVANT DE CONTINUER
À L’UTILISER.
IDENTIFIEZ TOUJOURS VOTRE NETTOYEUR PAR LE NUMÉRO DE MODÈLE COMPLET. (LE NUMÉRO DE MODÈLE FIGURE AU BAS DE L’APPAREIL.)
AVERTISSEMENT :
Pour réduire les risques de blessures, débrancher
l’appareil avant de le nettoyer ou d’en effectuer l’entretien.
DÉPANNAGE