Loading ...
Loading ...
Loading ...
9
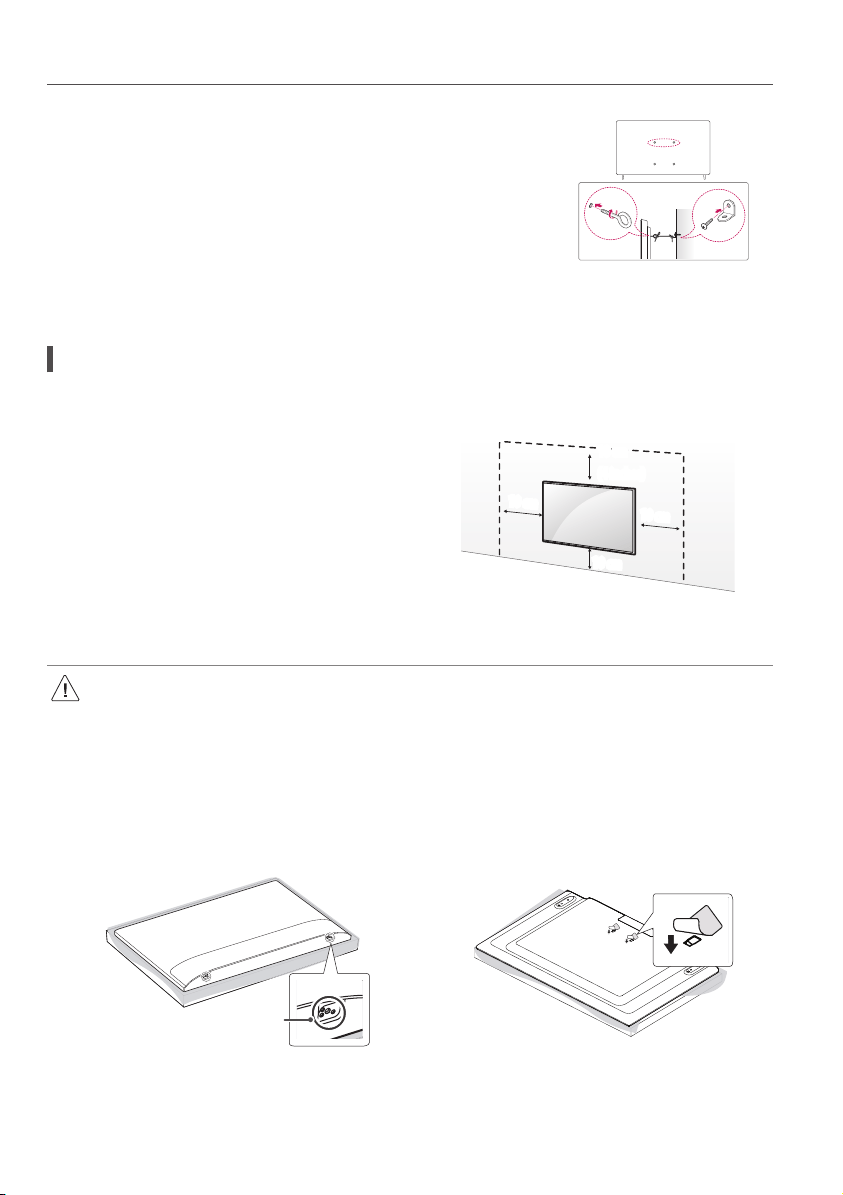
Securing TV to the Wall
1 Insert and tighten the eye-bolts, or TV brackets and bolts on the back of the TV.
• If there are bolts inserted at the eye-bolts position, remove the bolts first.
2 Mount the wall brackets with the bolts to the wall. Match the location of the wall bracket and the
eye-bolts on the rear of the TV.
3 Connect the eye-bolts and wall brackets tightly with a sturdy rope or cable. Make sure to keep
the rope parallel to the flat surface.
• Use a platform or cabinet that is strong and large enough to support the TV securely.
• Brackets, bolts and ropes are optional. You can obtain additional accessories from your local
dealer.
(Depending on model)
Mounting to the Wall
Attach an optional wall mount bracket at the rear of the TV carefully and
install the wall mount bracket on a solid wall perpendicular to the floor.
When you attach the TV to other building materials, please contact qualified
personnel. LG recommends that wall mounting be performed by a qualified
professional installer. Please use a wall mount bracket where the device is
adequately secured to the wall with enough space to allow connectivity to
external devices. It is advised to connect all the cables before installing fixed
wall mounts.
10cm
10cm
(4 inches)
10cm
10cm
(Depending on model)
• Remove the stand before installing the TV on a wall mount by performing the stand attachment in reverse.
• For more information of screws and wall mount bracket, refer to the Separate Purchase.
• If you intend to mount the product to a wall, attach VESA standard mounting interface (optional parts) to the back of the product.
When you install the set to use the wall mounting bracket (optional parts), fix it carefully so as not to drop.
• When mounting a TV on the wall, make sure not to install the TV by hanging the power and signal cables on the back of the TV.
• When installing the wall mounting bracket, it is recommended to cover the stand hole using tape, in order to prevent the influx of dust and
insects. (Depending on model)
Stand hole
(Depending on model)
Loading ...
Loading ...
Loading ...