Loading ...
April 2015
NETGEAR, Inc.
350 East Plumeria Drive
San Jose, CA 95134, USA
© NETGEAR, Inc. NETGEAR and the NETGEAR Logo are trademarks of NETGEAR, Inc. Any non‑NETGEAR
trademarks are used for reference purposes only.
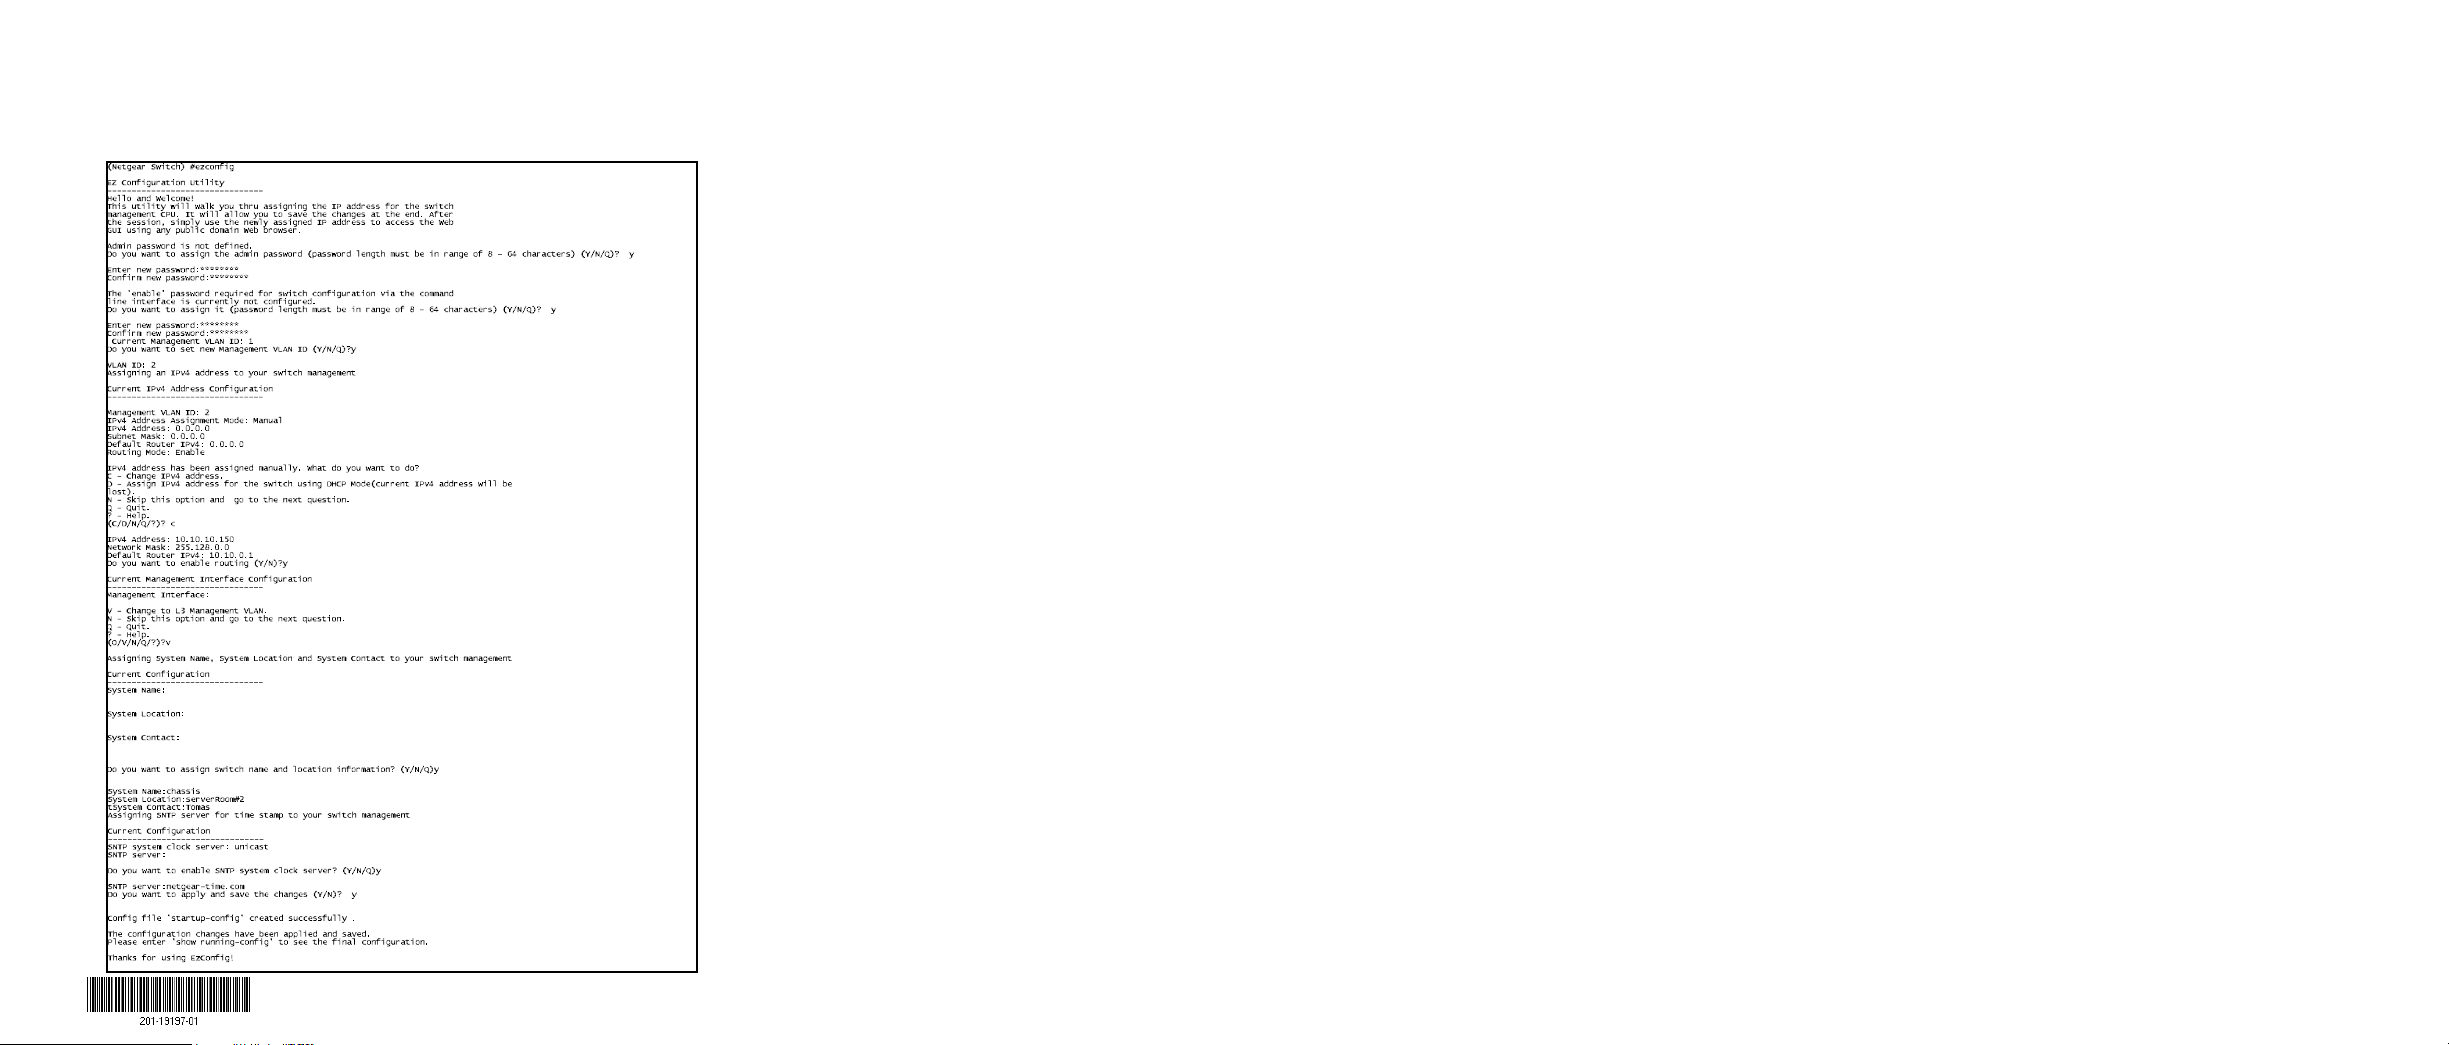
The ezconfig utility is now running in the switch.
7. Set a static IP address and subnet mask using the ezconfig utility as
shown in the following example.
Make sure that the switch IP address is in the same subnet as the
computer.
8. Use the switch IP address returned by ezconfig to log in to the switch.
For information about how to perform extensive CLI management, see
the CLI reference manual and the soware administration guide.
Computer in DHCP Client Mode with DHCP Server
By default, the switch is configured as a DHCP client to obtain its IP address
from a DHCP server in the connected network. You need to access the
switch from the serial console port.
¾ To configure the switch:
1. Make sure that the switch is connected to a DHCP server.
2. Find the switch IP address assigned by the DHCP server.
a. Perform steps 1 through 3 of the procedure Computer with a Static
IP Address.
b. Type the show ip interface vlan <management VLAN
ID> command, and press Enter.
By default, the management VLAN ID is 1.
The active switch IP address displays.
3. Log in to the switch through its web management interface using this IP
address.
Log in to the Switch from the Web
Manage your switch through its web interface with the appropriate IP
address for your configuration.
1. Type http://<ipaddress> into the URL field of your browser.
The login screen displays.
2. Type admin for the user name, leave the password field blank and click
LOGIN.
The System Information screen displays. You can now navigate from this
point to configure your switch.
Support
Thank you for selecting NETGEAR products.
Aer installing your device, locate the serial number on the label of your
product and use it to register your product at https://my.netgear.com.
You must register your product before you can use NETGEAR telephone
support. NETGEAR recommends registering your product through the NETGEAR
website. For product updates and web support, visit
http://support.netgear.com.
NETGEAR recommends that you use only the ocial NETGEAR support
resources.
For the current EU Declaration of Conformity, visit
http://support.netgear.com/app/answers/detail/a_id/11621/.
For regulatory compliance information, visit
http://www.netgear.com/about/regulatory/.
See the regulatory compliance document before connecting the power supply.