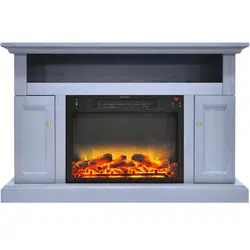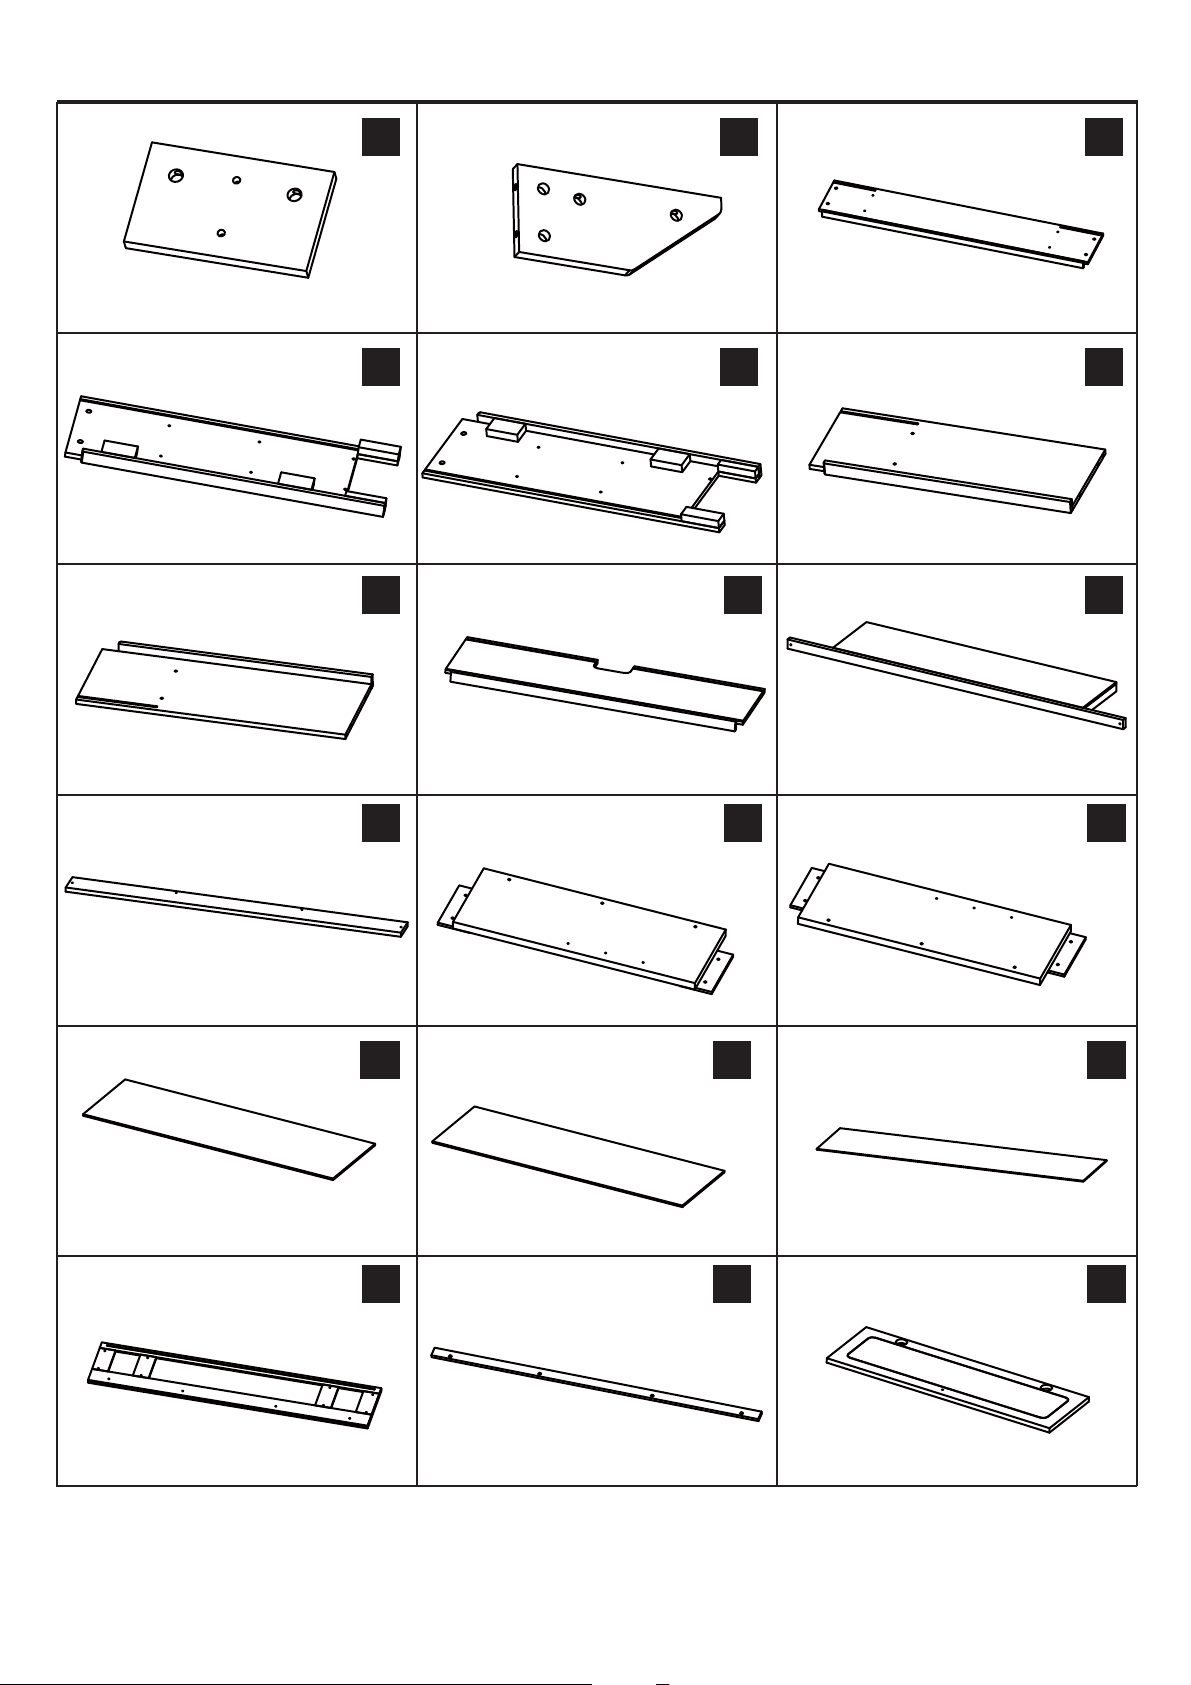
PACKAGE CONTENTS
A B C
D E F
G
H
I
J K
L
N
M1
M2
Q1
O
P
2
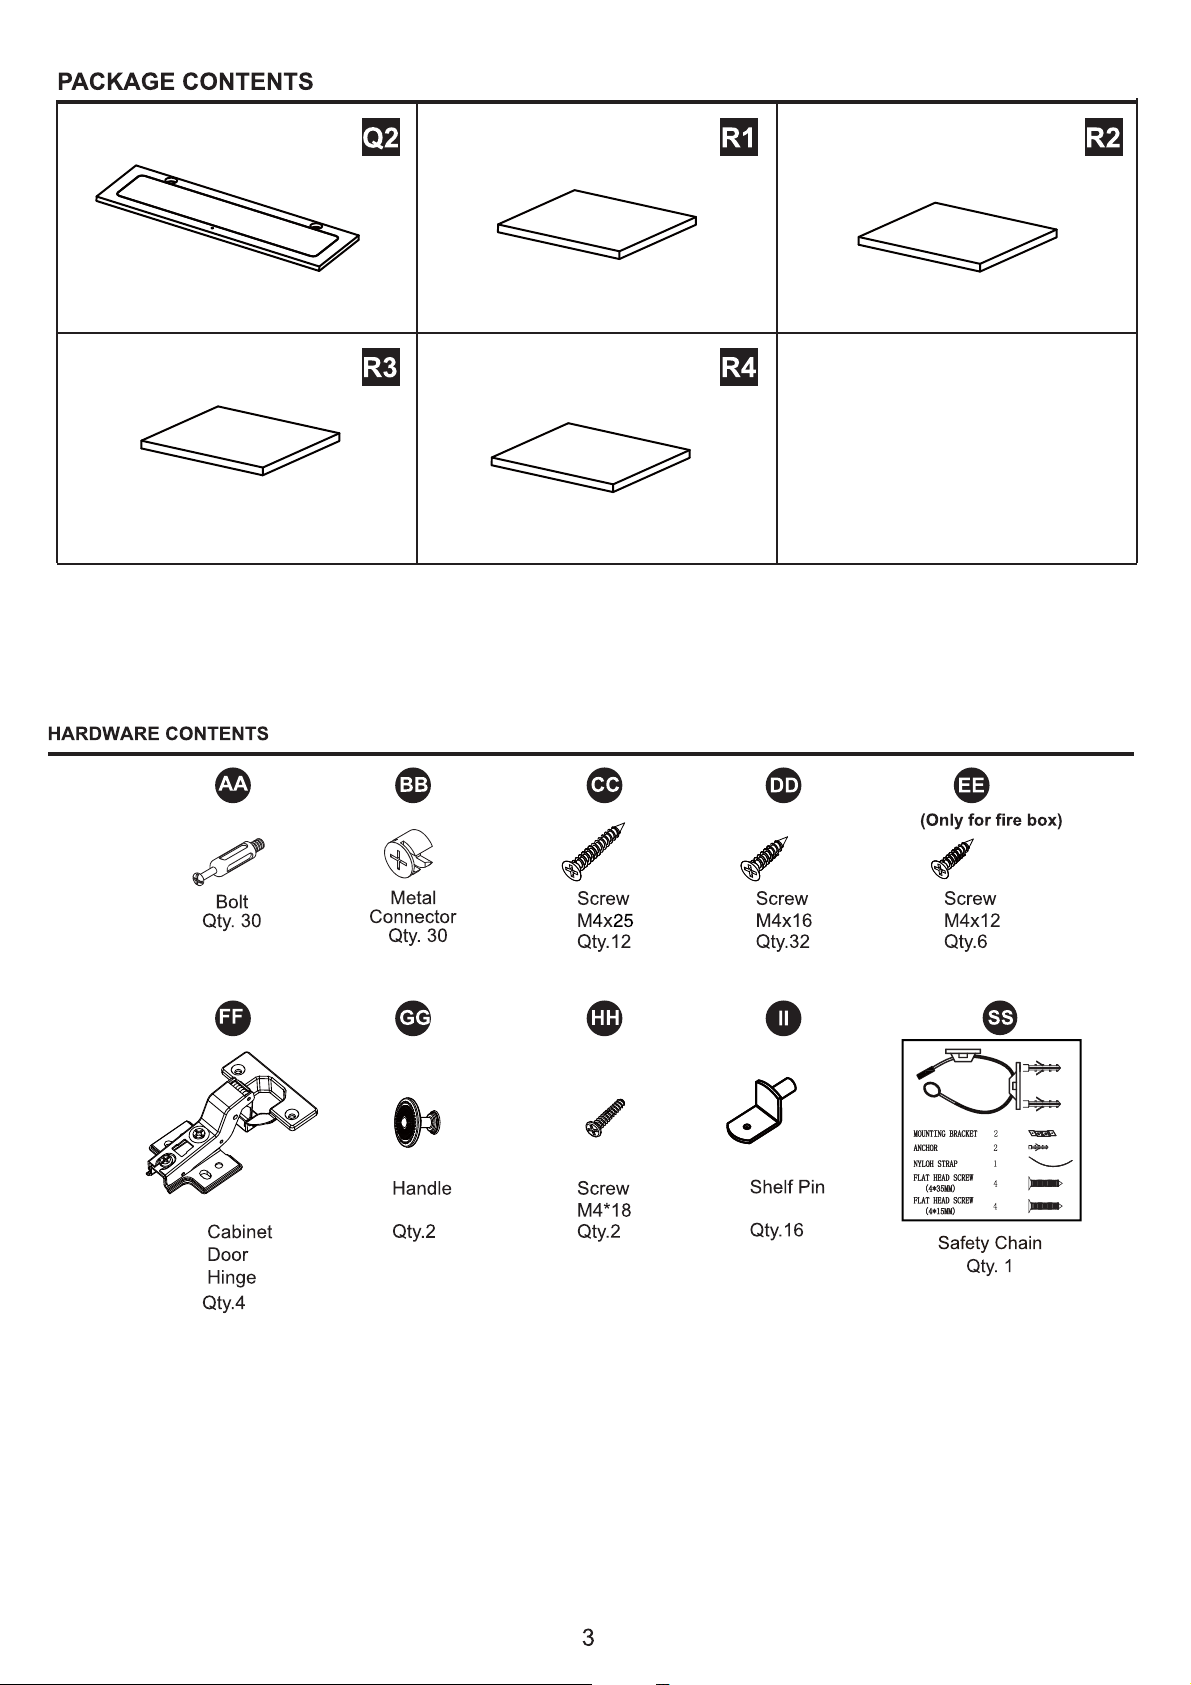
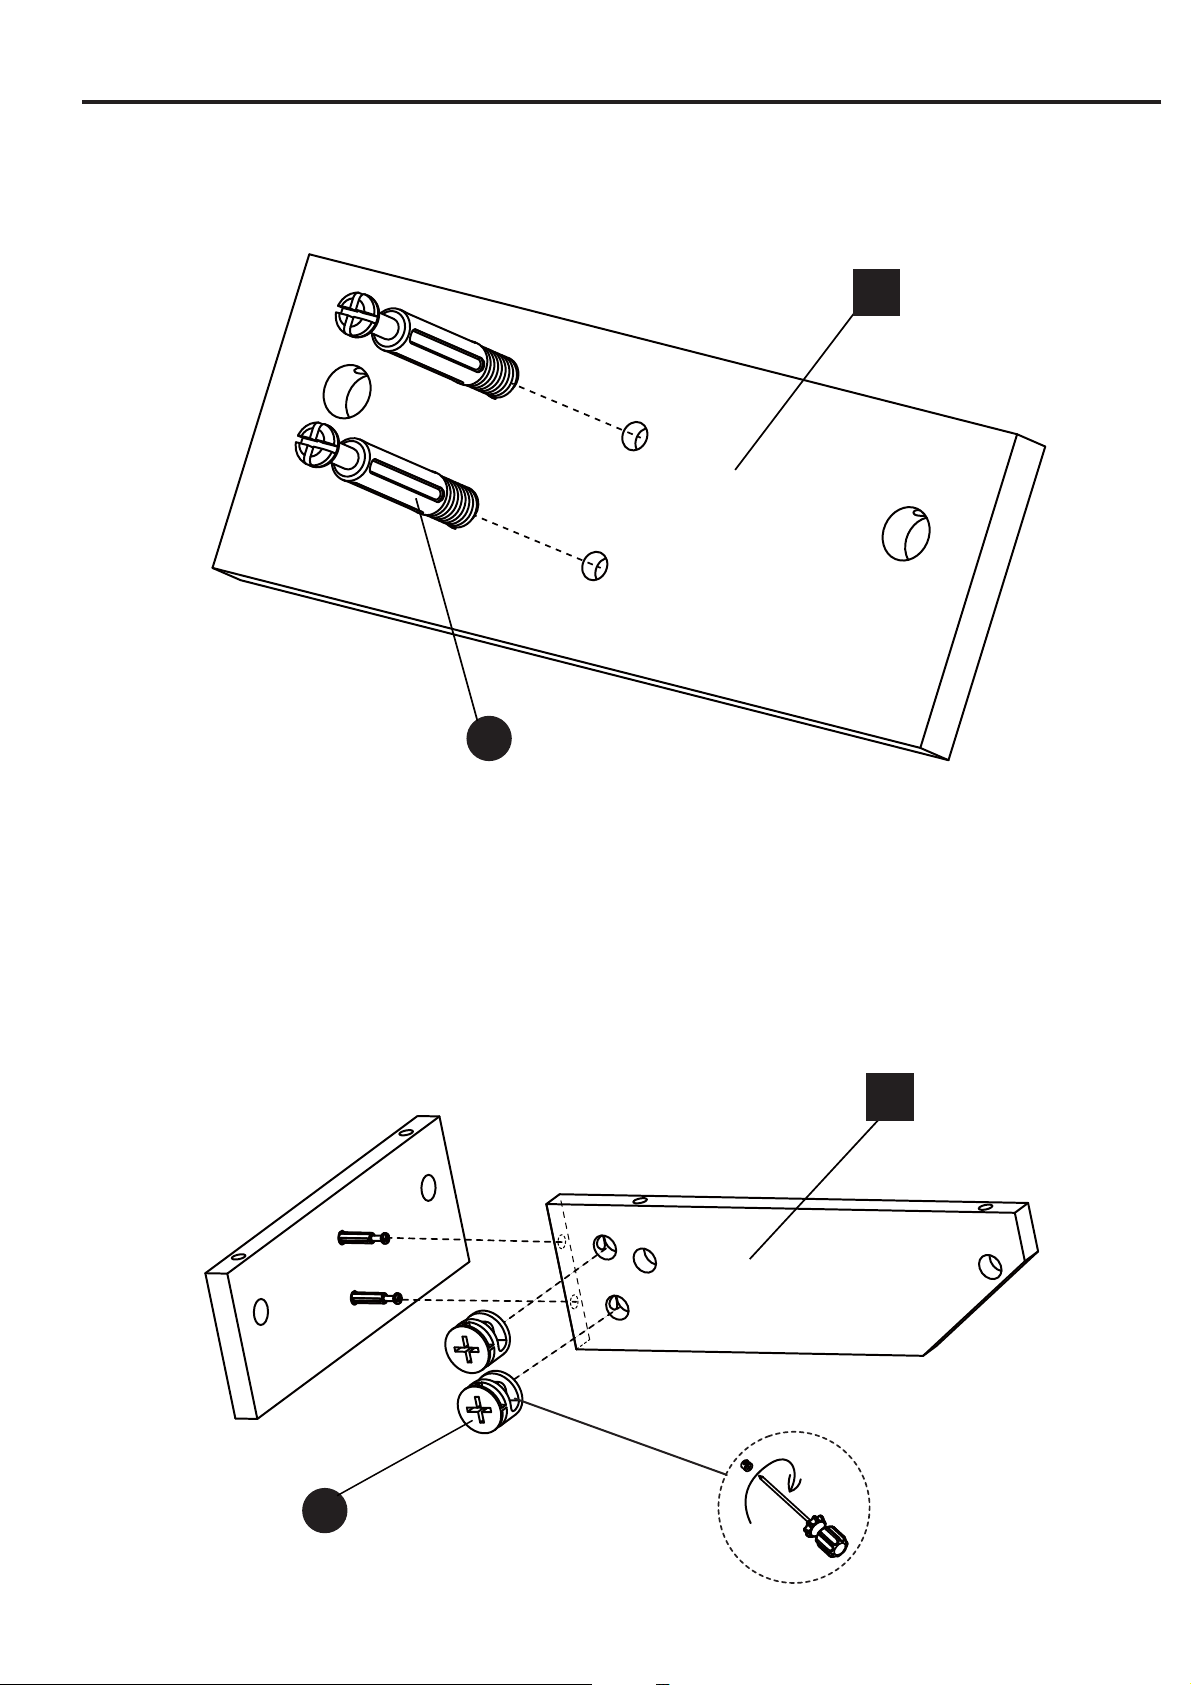
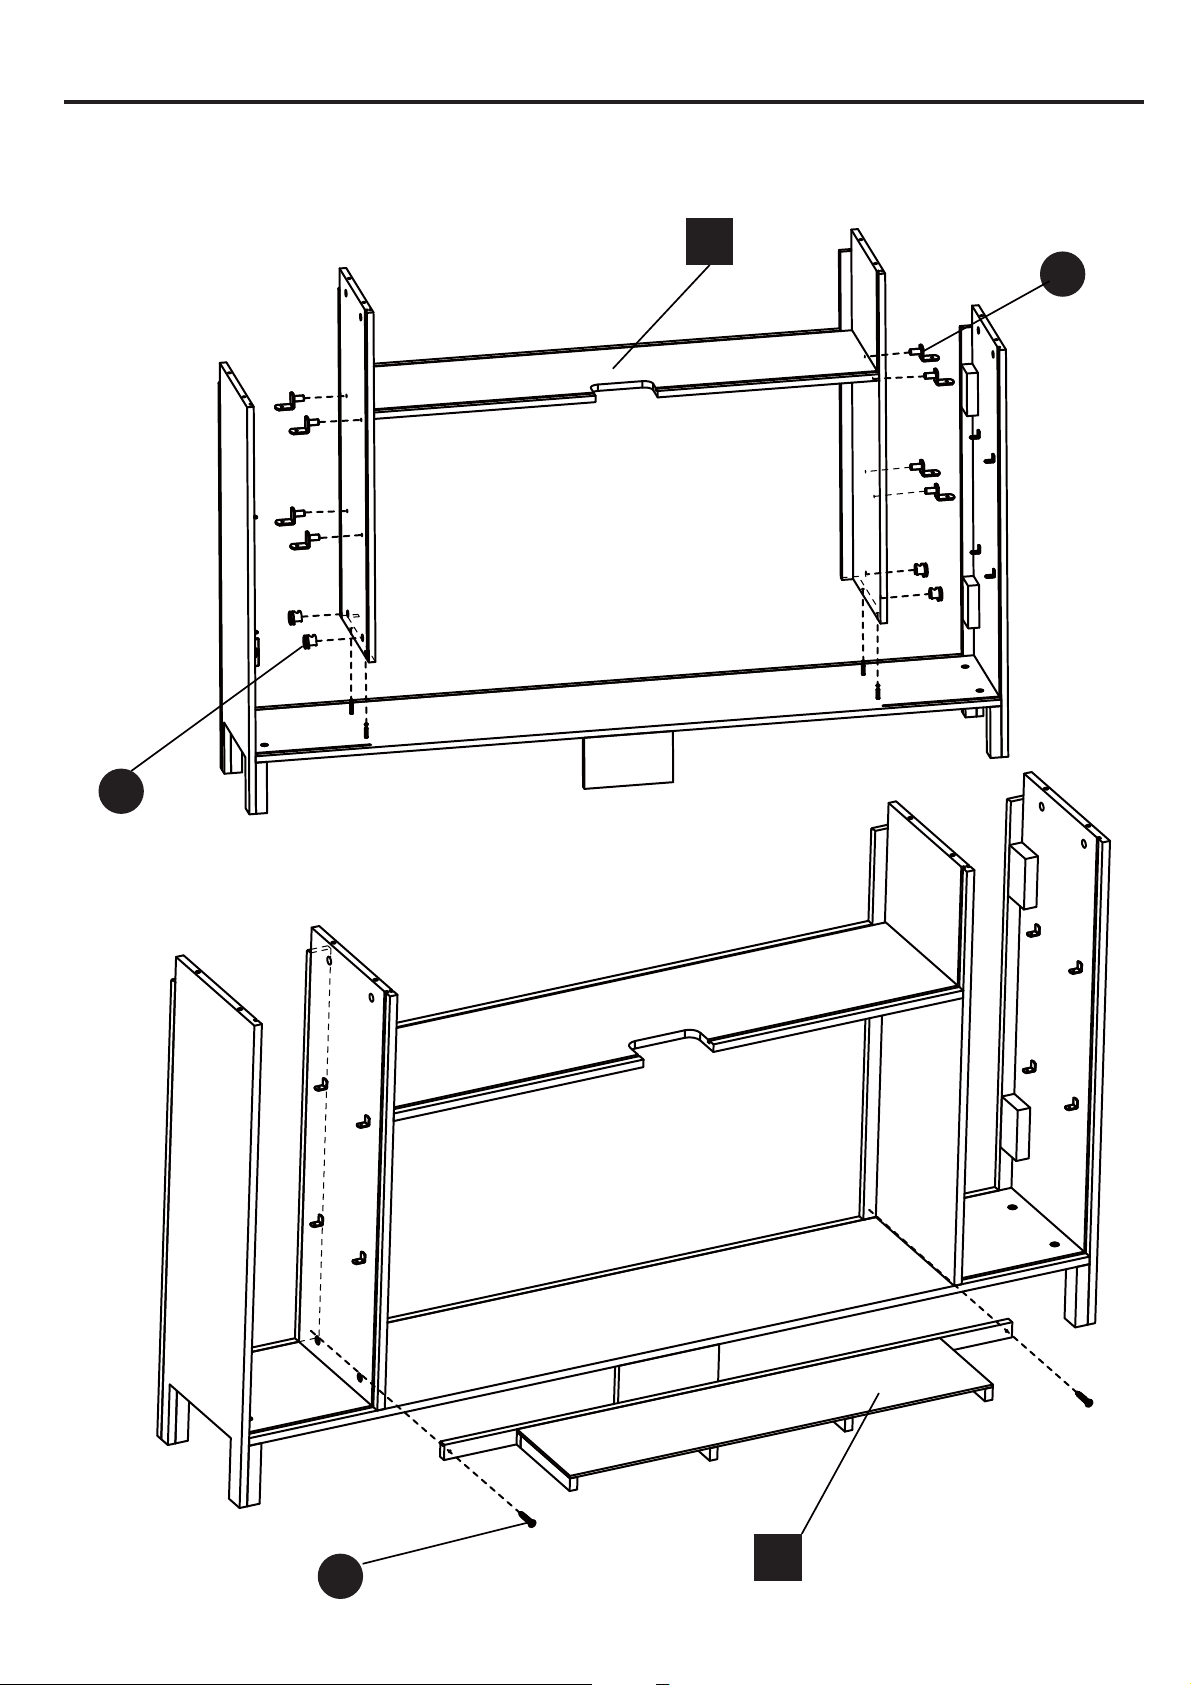
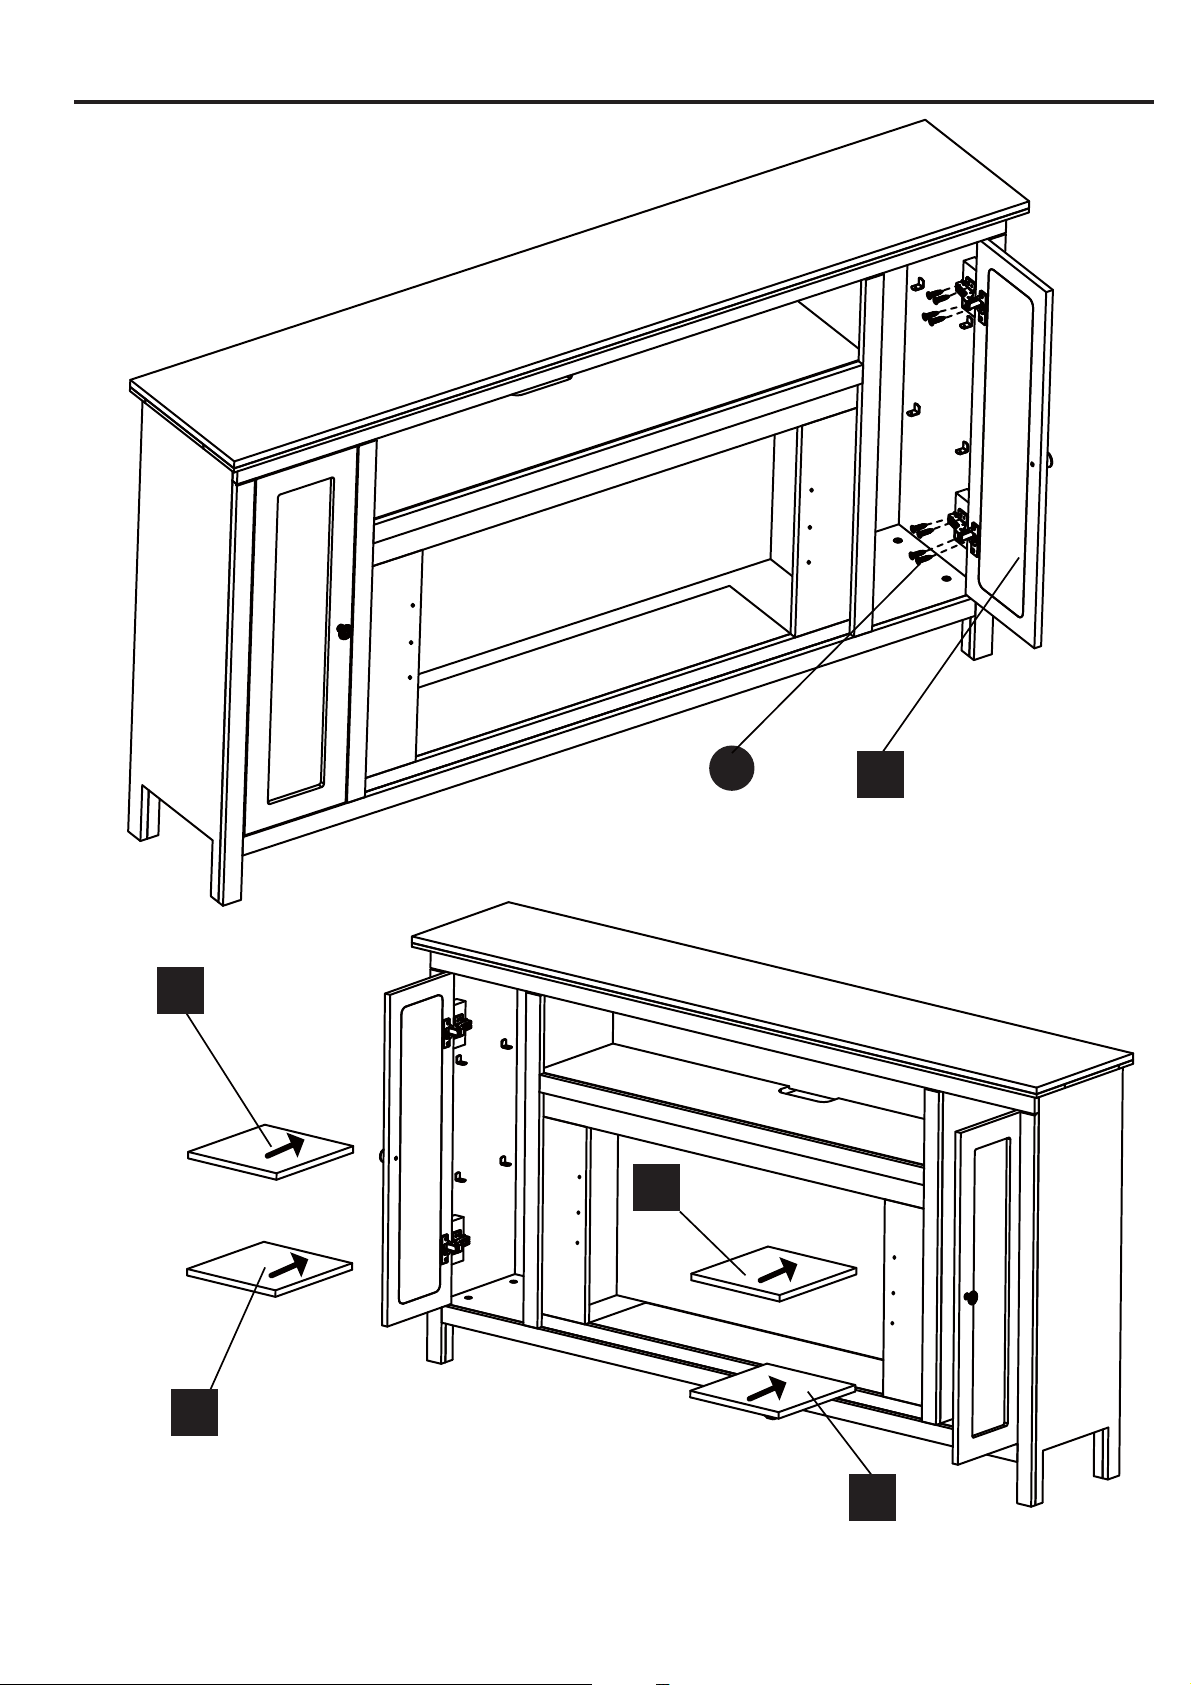
PACKAGE STEPS
1.
2.
B
A
BB
X2
AA
X2
5
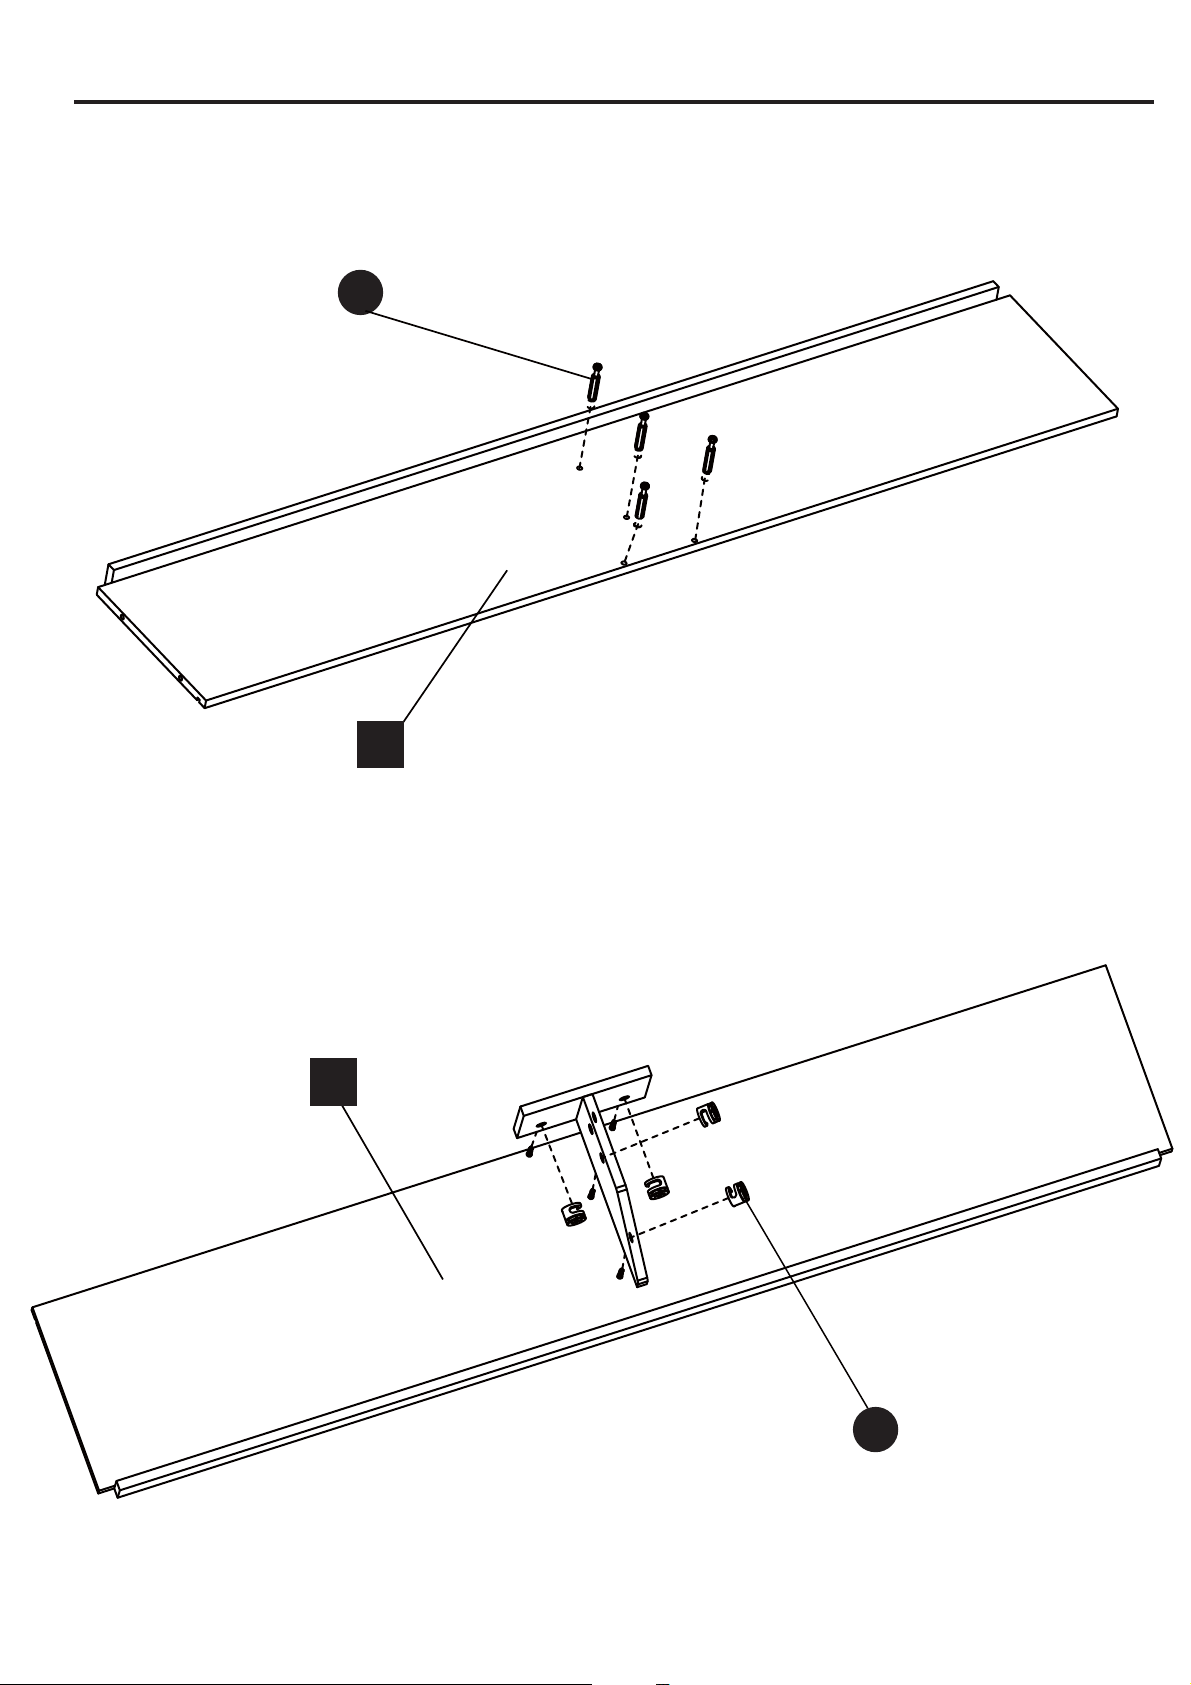
PACKAGE STEPS
3.
4.
C
C
BB
X4
AA
X4
6
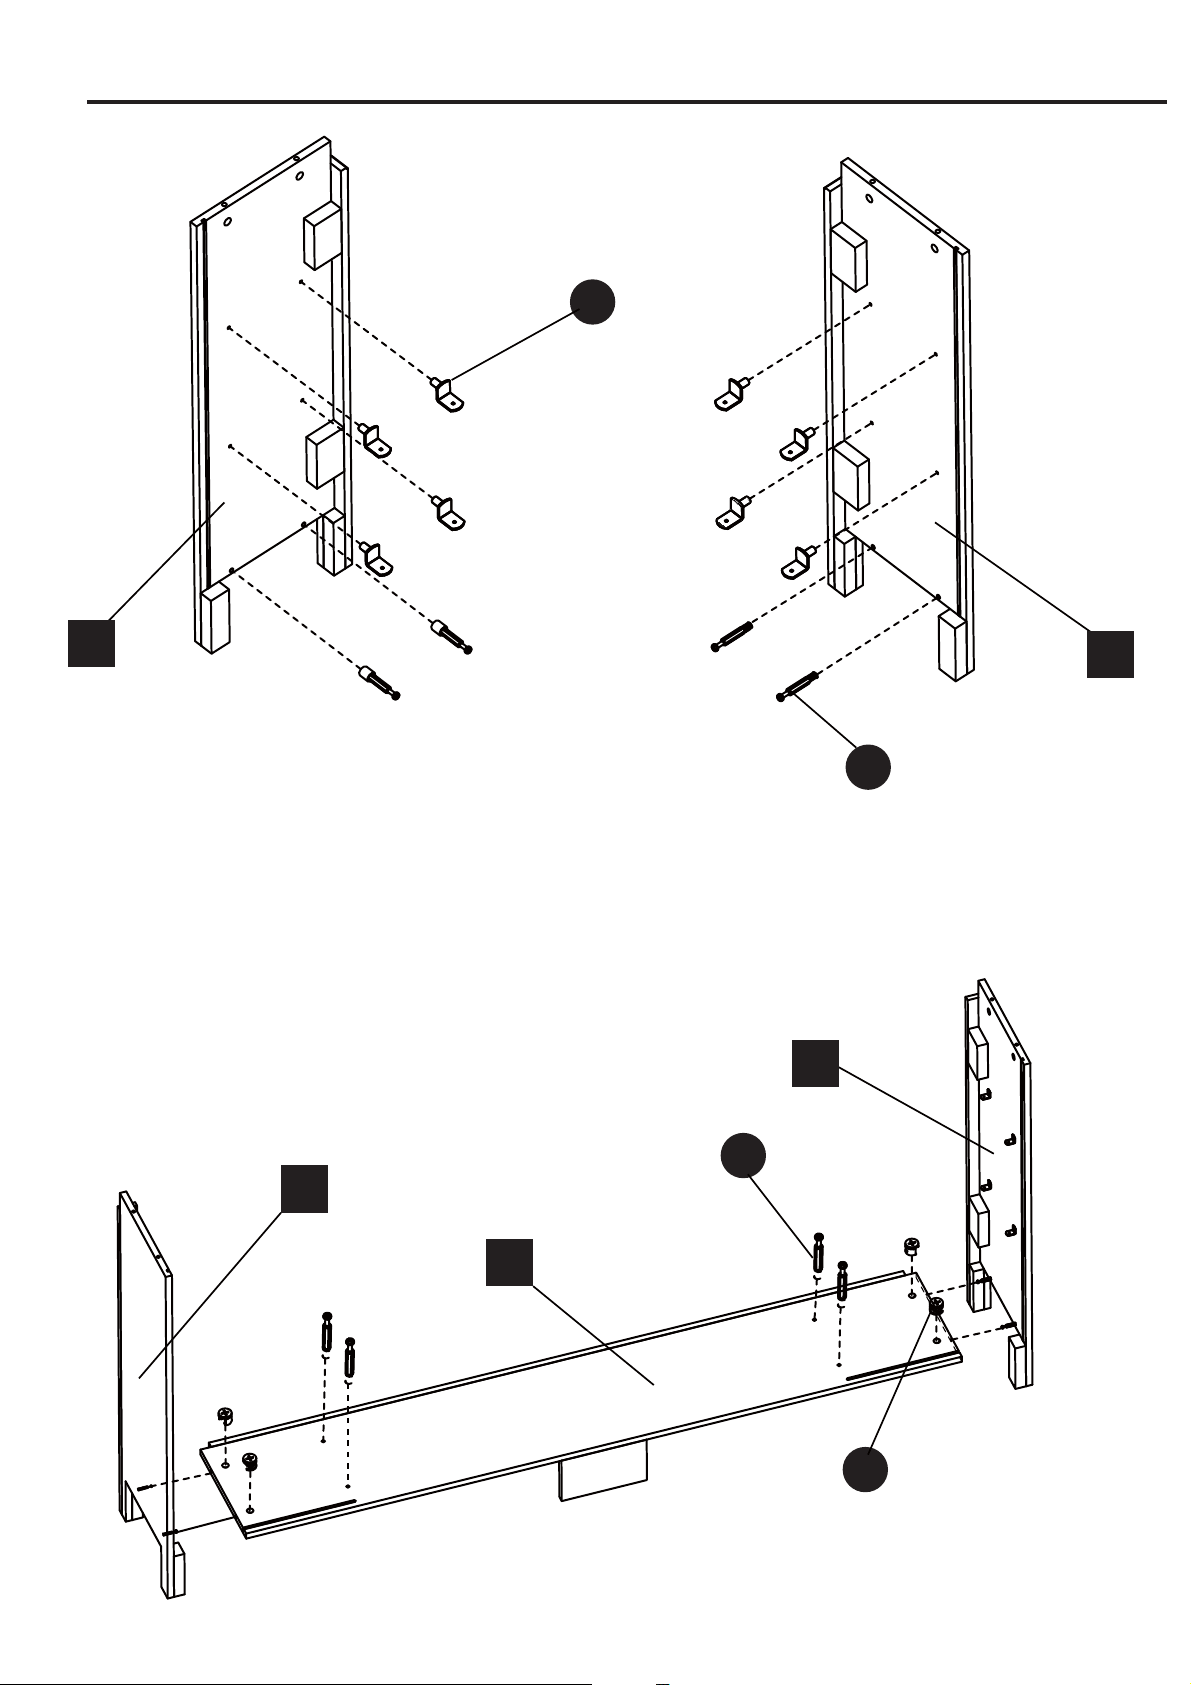
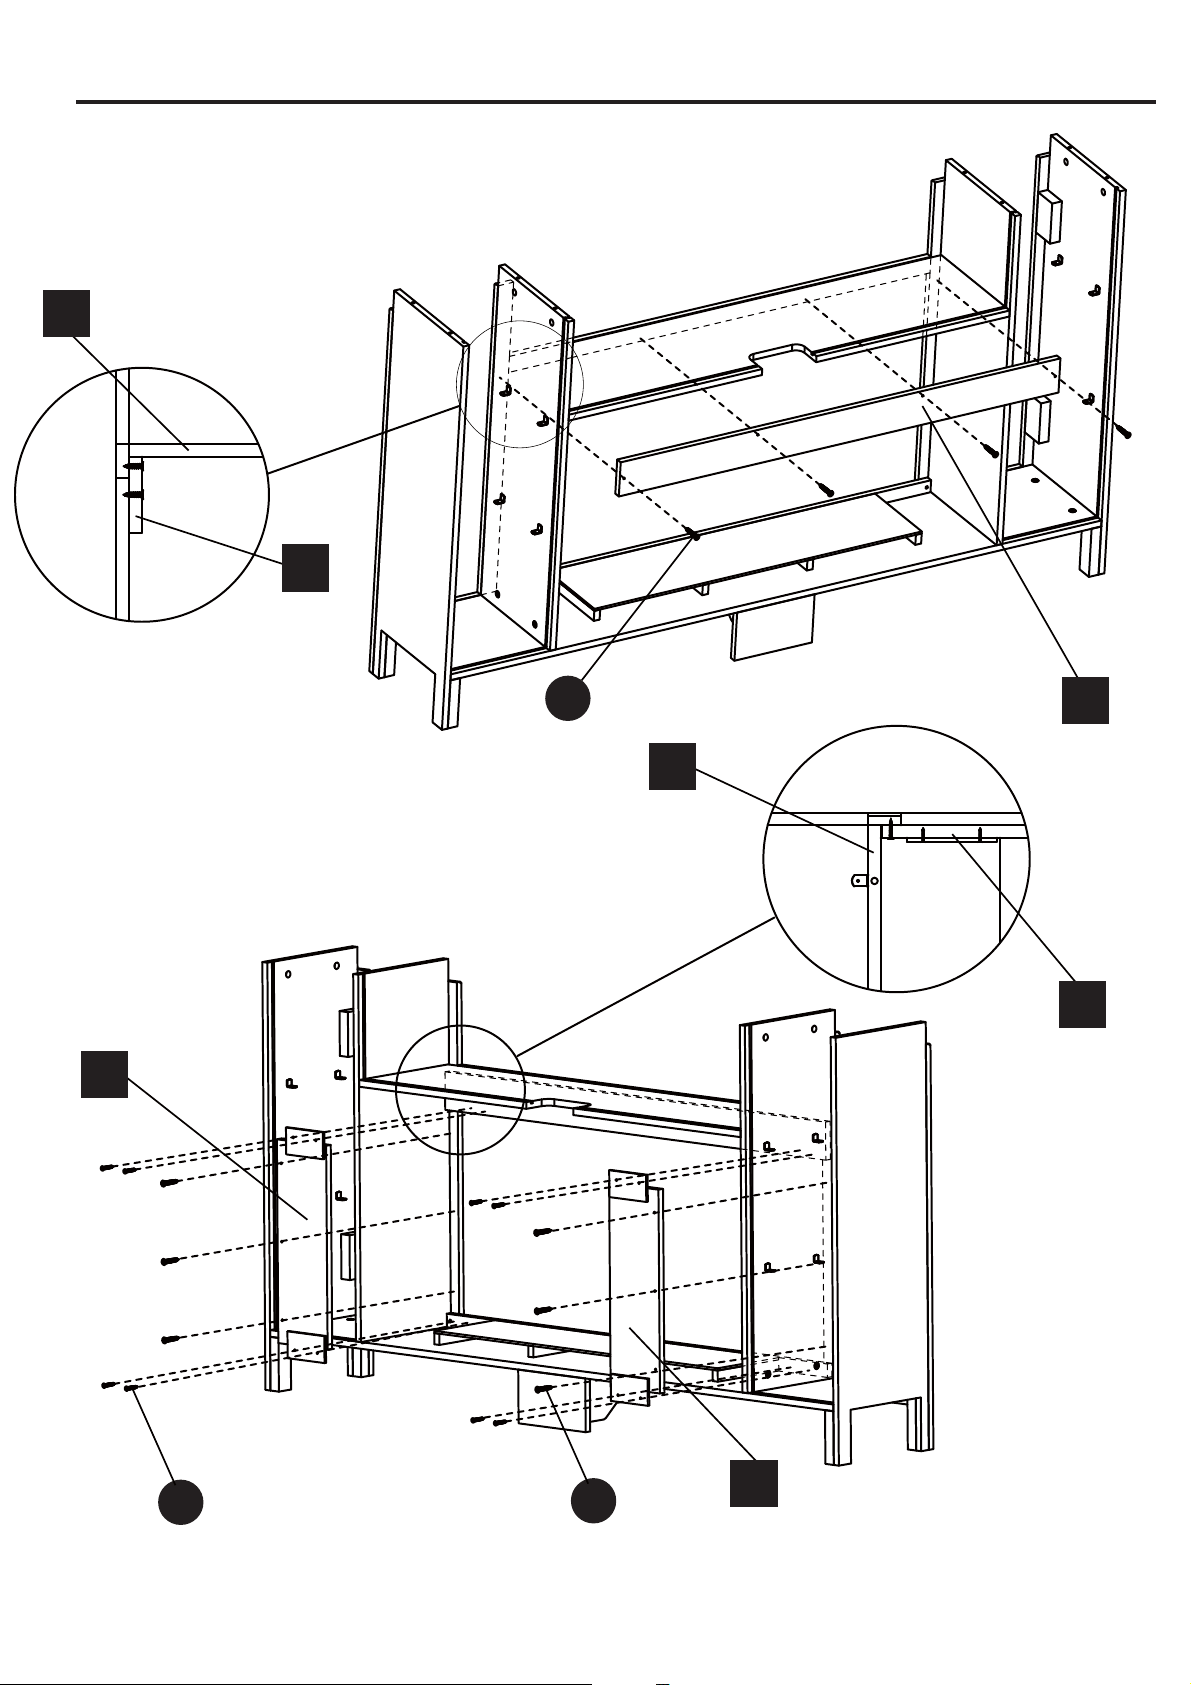
PACKAGE STEPS
5.
6.
D
E
E
C
D
II
X8
AA
X4
AA
X4
BB
X4
7
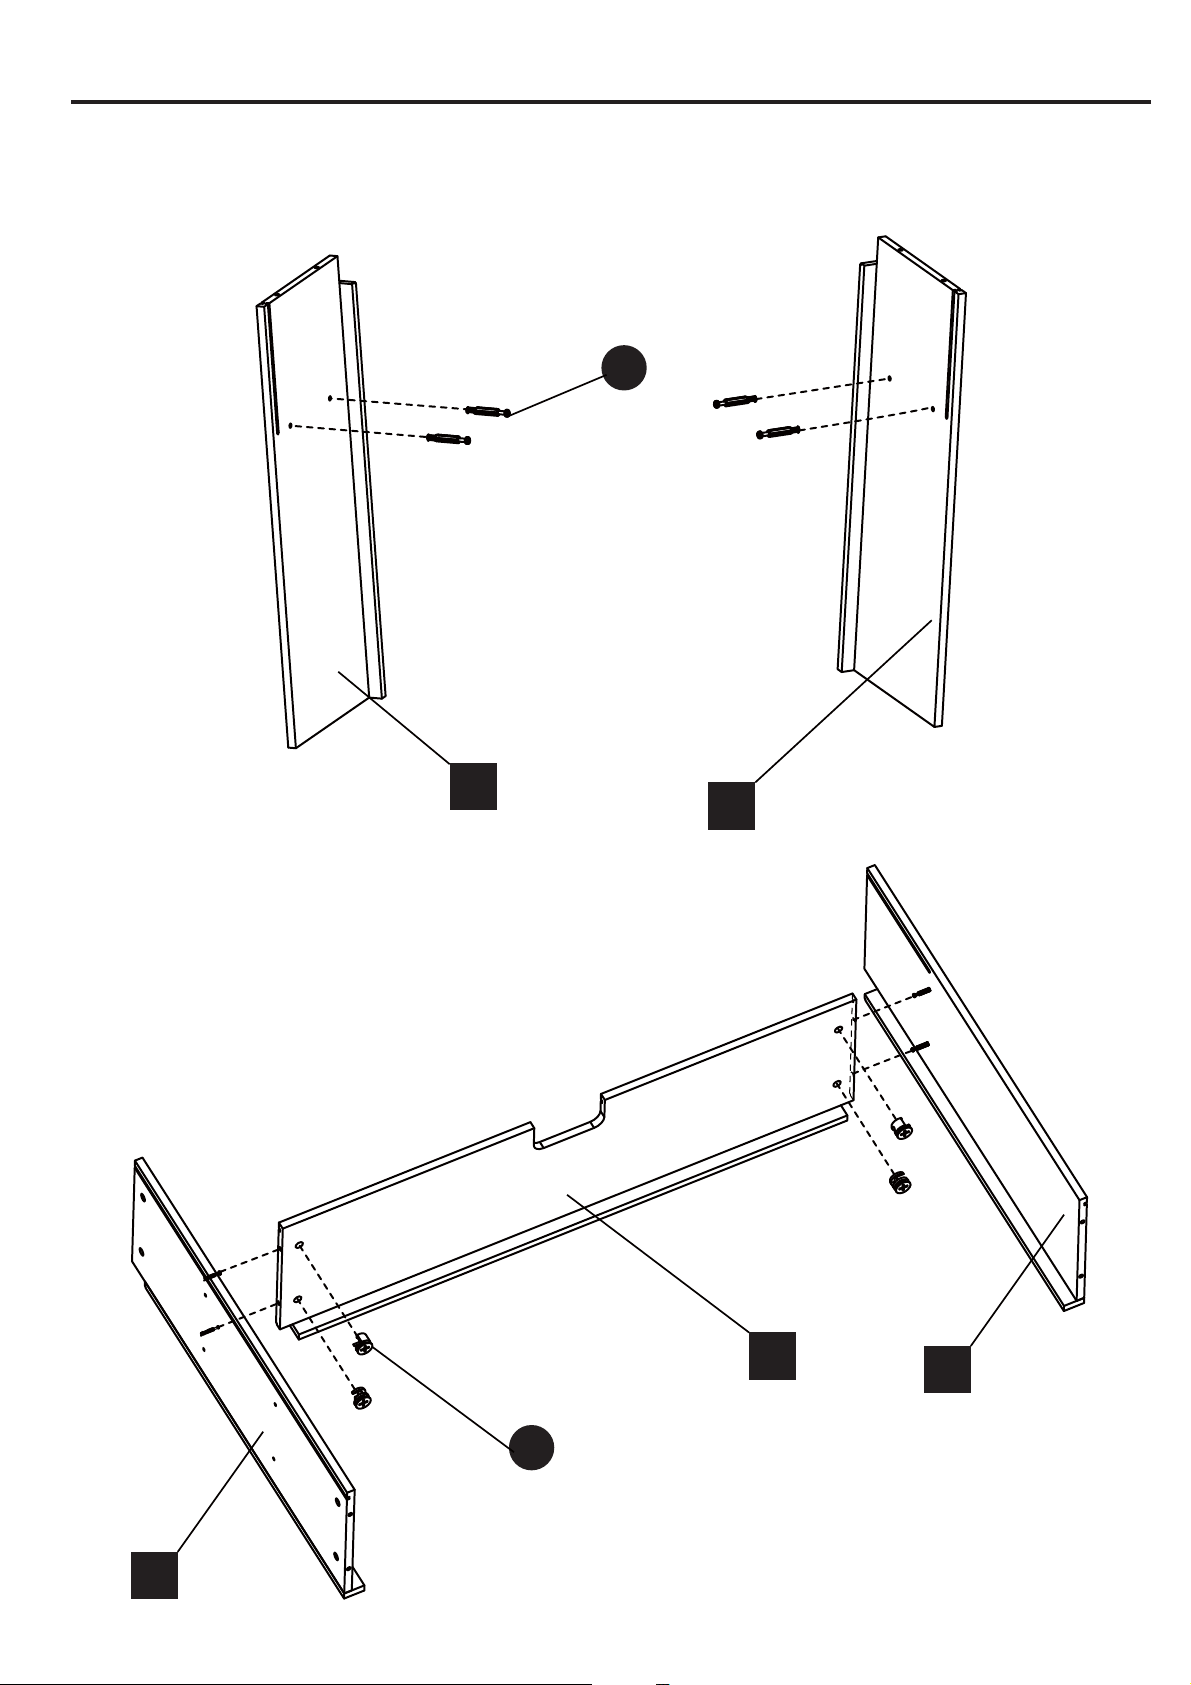
PACKAGE STEPS
7.
8.
G
F
G
F
H
AA
X4
BB
X4
8
PACKAGE STEPS
9.
10.
H
I
II
X8
BB
X4
CC
X2
9
PACKAGE STEPS
11.
12.
J
G
L
L
K
CC
X4
CC
X6
DD
X8
J
H
10

PACKAGE STEPS
13.
14.
M2
N
M1
O
AA
X12
11
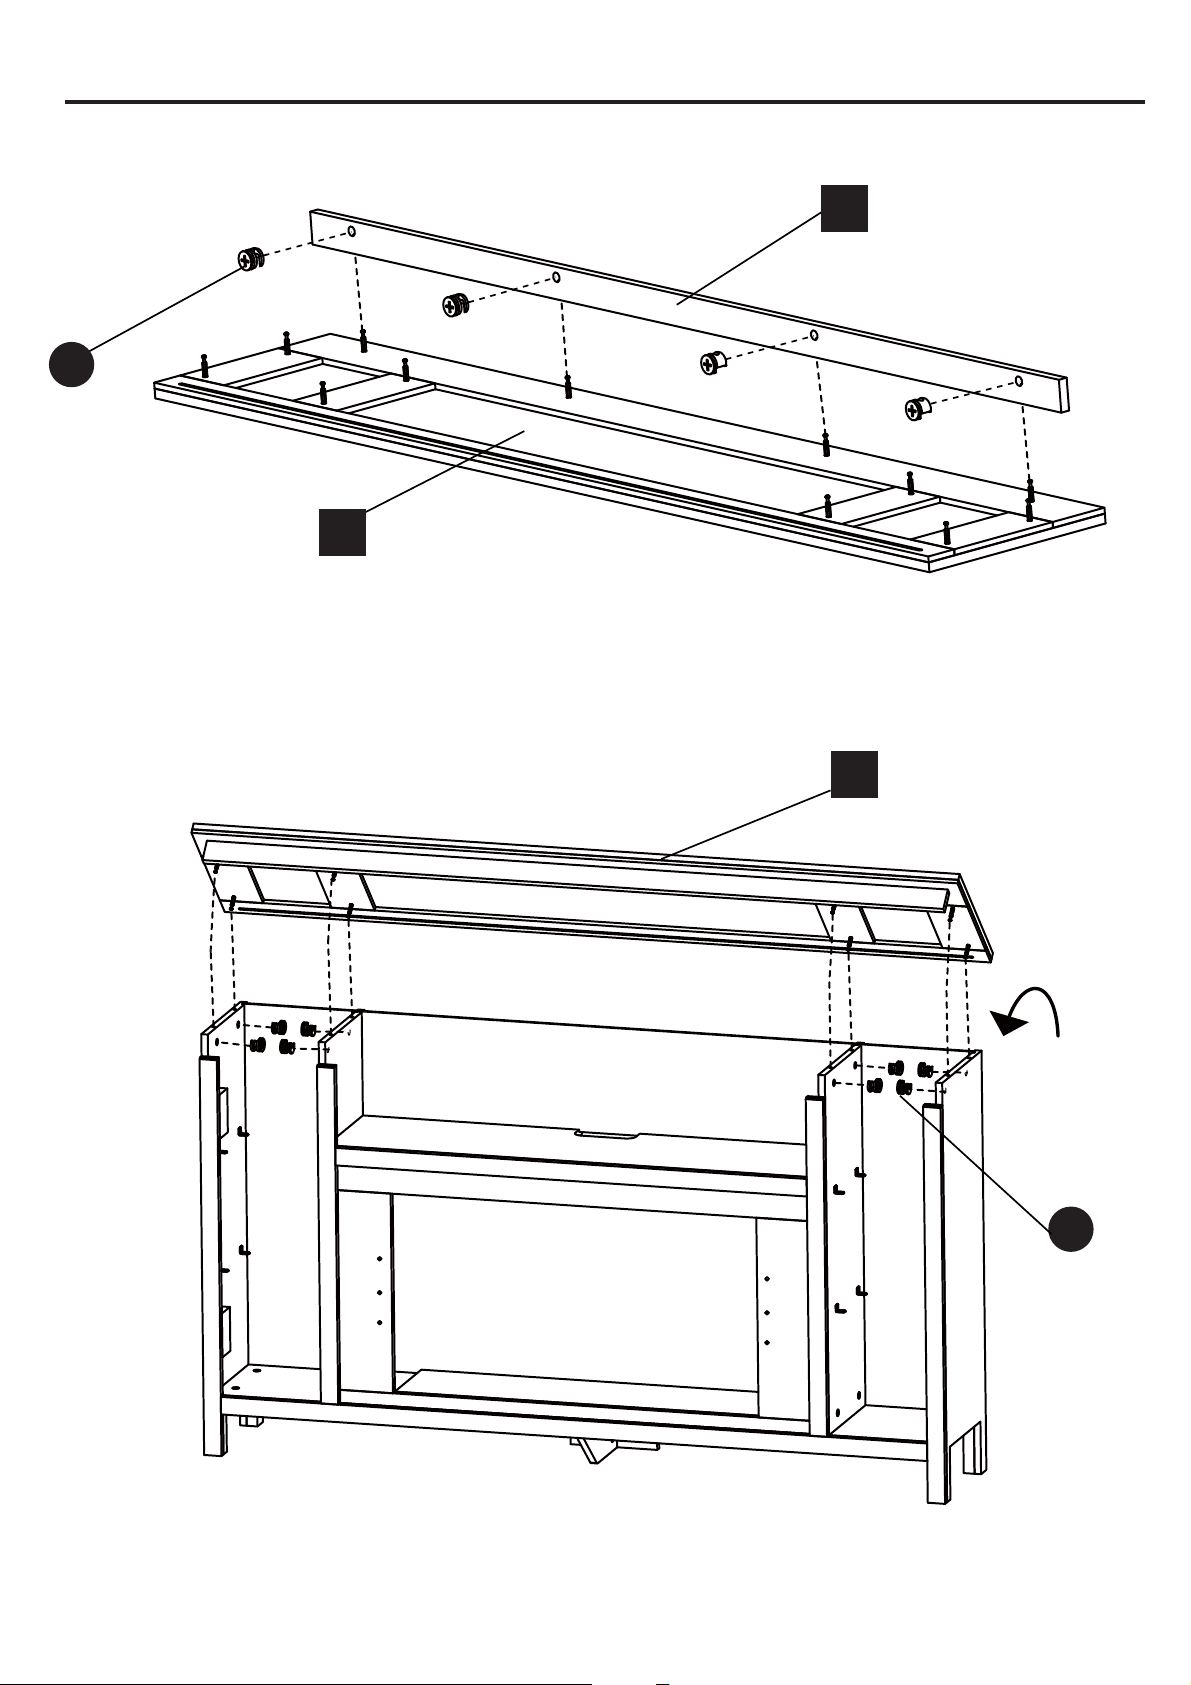
PACKAGE STEPS
15.
16.
P
O
O
BB
X8
BB
X4
12
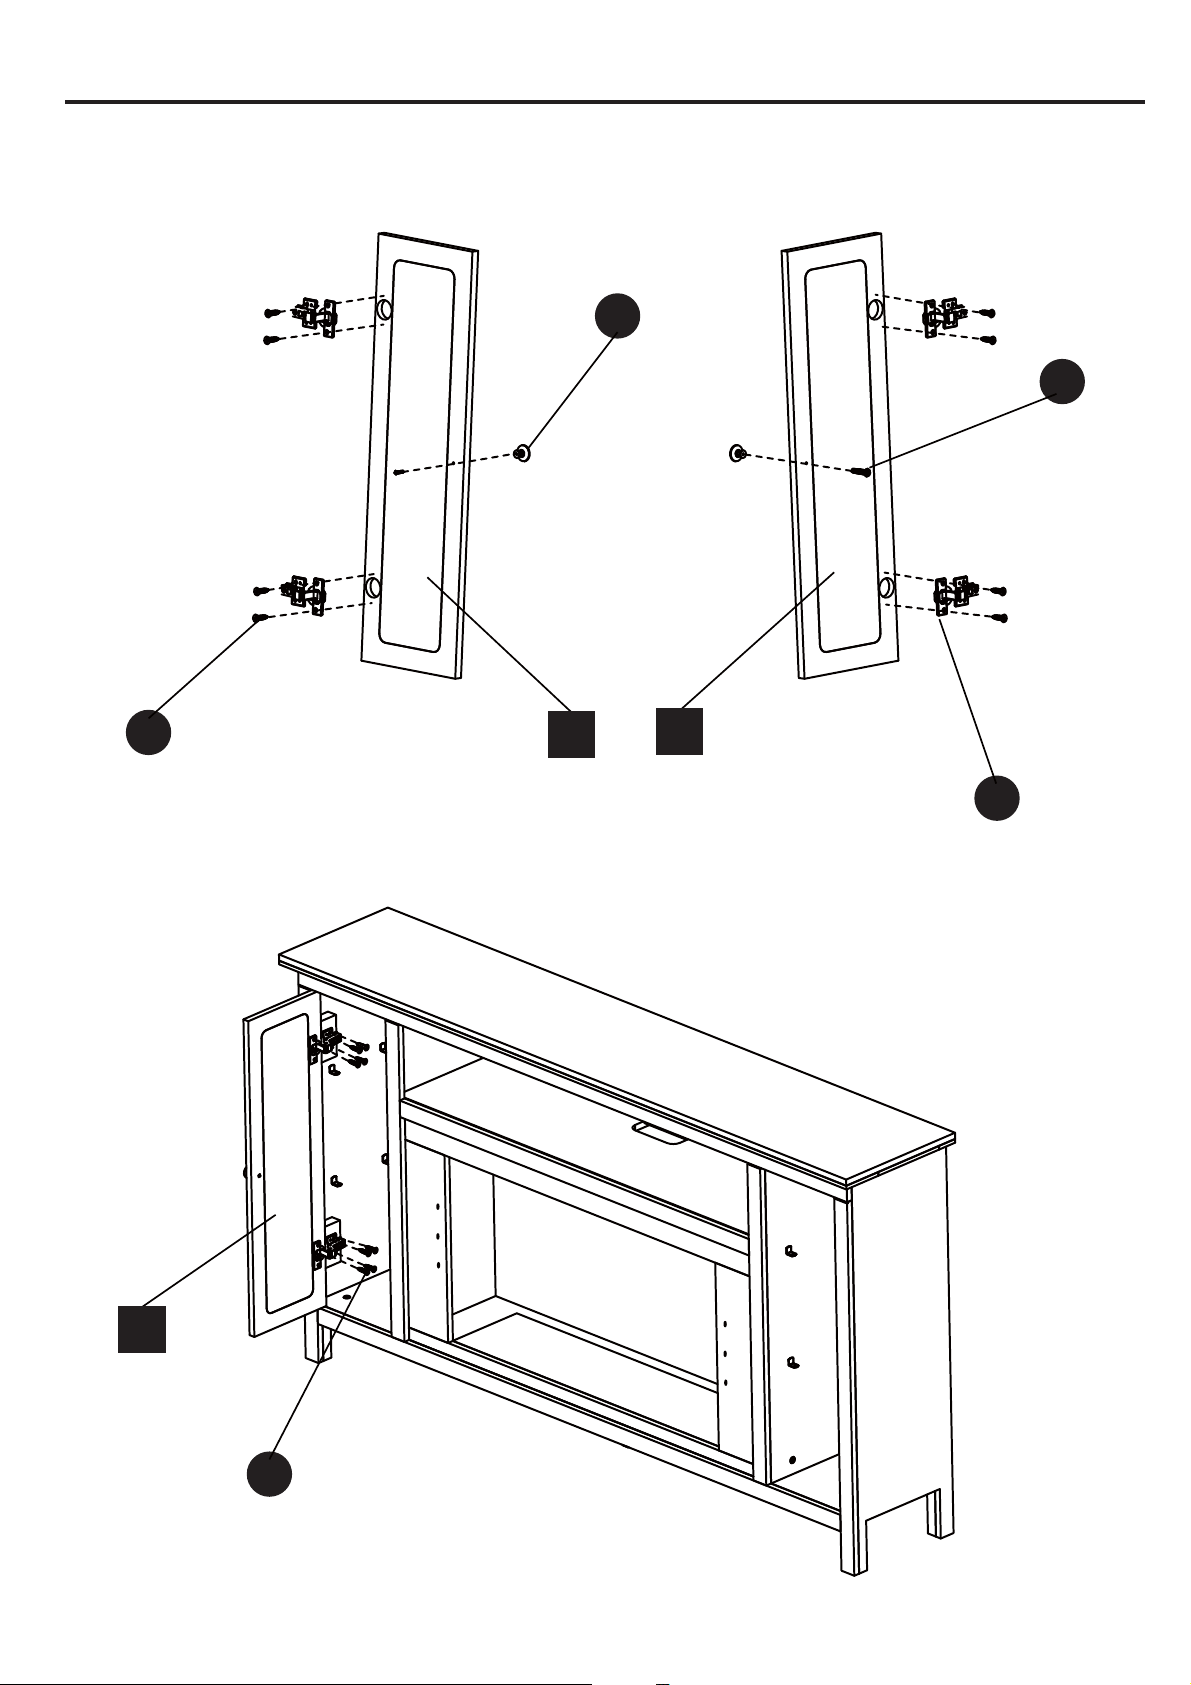
PACKAGE STEPS
17.
18.
Q2
Q1
Q1
DD
X8
DD
X8
GG
X2
FF
X4
HH
X2
13
PACKAGE STEPS
20.
19.
R3
R4
R2
R1
Q2
DD
X8
14

)
15
PACKAGE STEPS
(3). Reinstall the glass pane onto the fire box.
21.Inserting the fire box(X42WMEF1BLK/WHT)
(1). Remove the outer glass from the fire box (Please refer to the fire box
manual ( Page 6) supplied with the fire box)
(2). Set the fire box into the mantel and secure the side trim pieces on
the mantel with screws.
EE
X6
STEP1
STEP2
16
PACKAGE STEPS
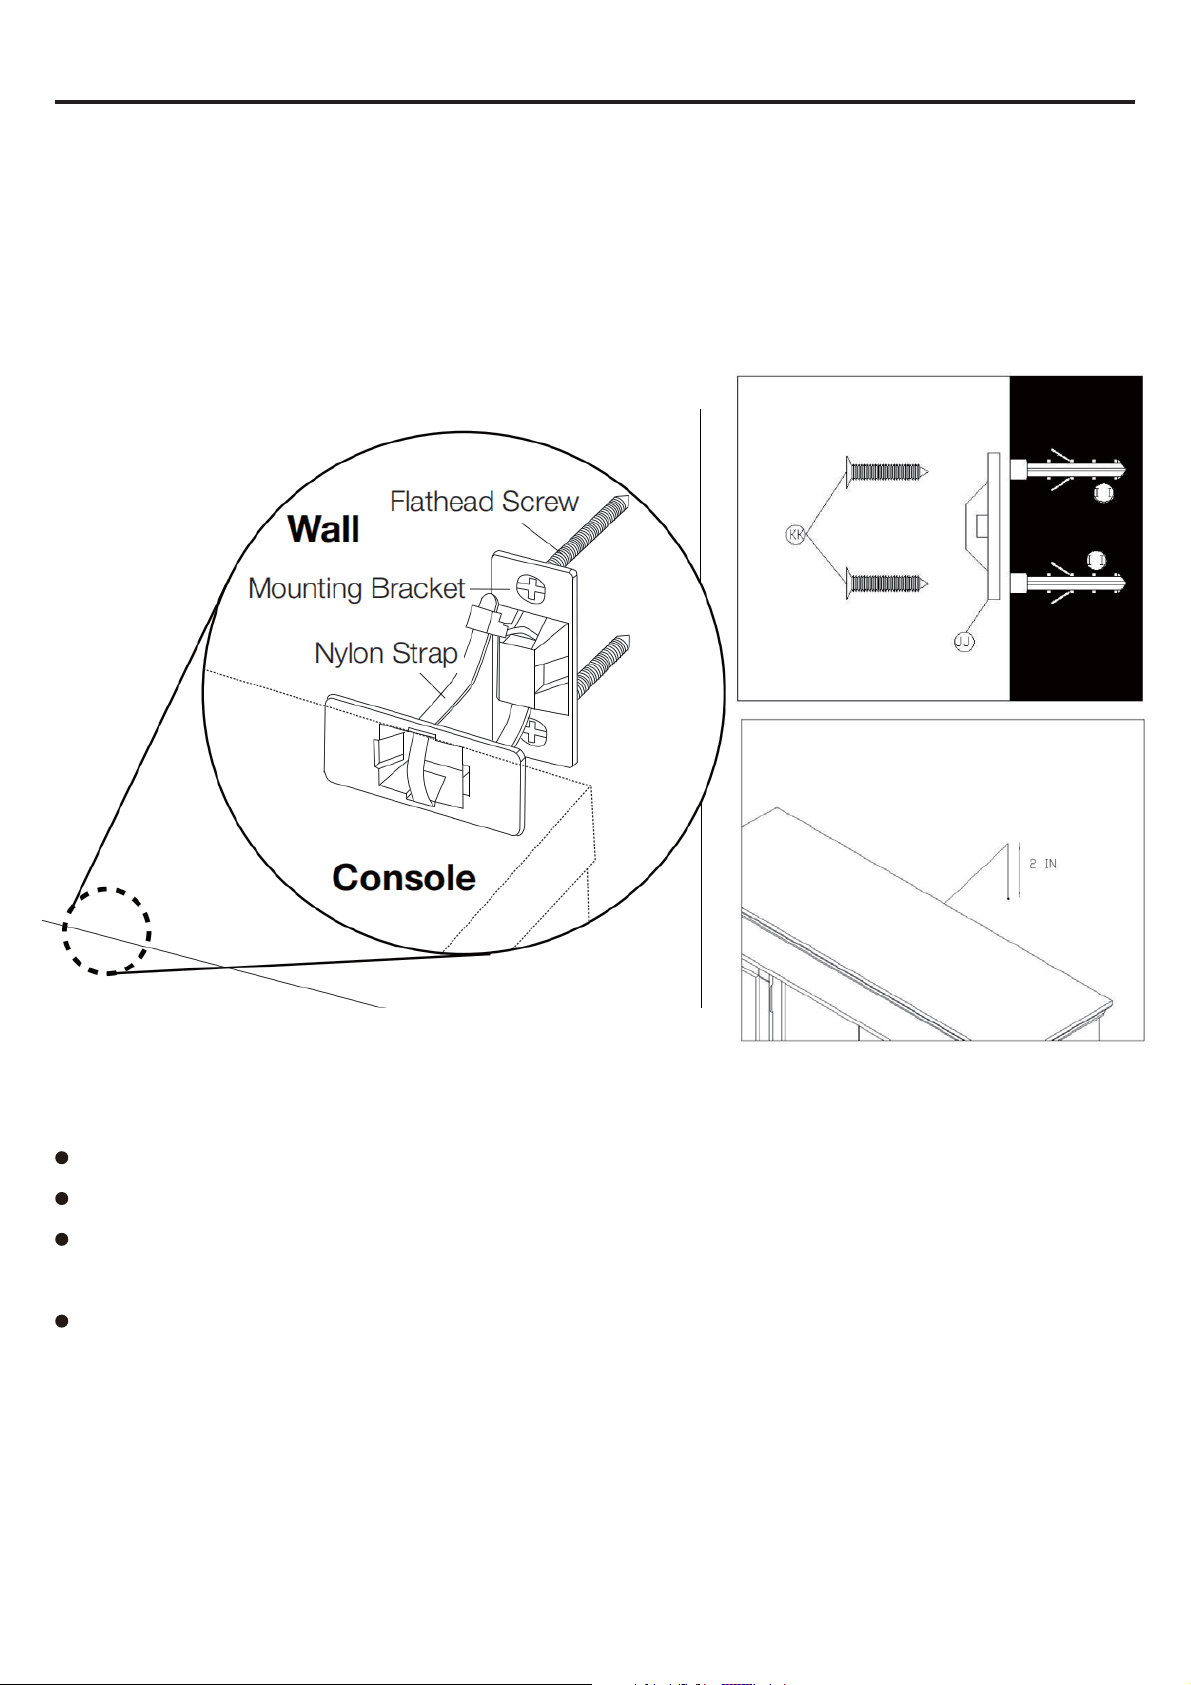
IMPORTANT - Safety Chain Installation
WARNING:
INSTALLATION:
This mantel is heavy furniture. Please be sure to correctly attach the safety chain to both the mantel and an adjacent wall.
Failure to do so can cause serious injury or death.
Assemble the mantel and place it in position
Attach one end of the chain to a wall stud using the screw included
Attach the other screw – through a link in the chain – to the center of the mantel’s top board (you may need to drill a small
starter hole). Put the screw through the chain link that allows the least amount of slack in the chain.
Carefully test that the installed chain adequately prevents tipping or tilting of the mantel.
NOTE: The chain must be as short as possible to prevent the mantel tipping forward. Do not allow slack in the chain.