Loading ...
Loading ...
Loading ...
7
Recipes
6
Basic Donut Recipe
Makes 24 mini donuts
• 1 cup our
• 1/2 cup sugar
• 1 tablespoon baking powder
• 1 egg
• 1/2 cup milk
• 1/2 teaspoon vanilla
• 4 tablespoons cooking oil
• sugar, powdered sugar,
• cinnamon-sugar for coating
1. Use a brush or paper towel to apply a generous coat of oil to each of the cavities on the upper
and lower baking plates. Plug Treat Baker into a 120V AC electrical outlet to preheat.
2. Prepare Mini Donuts: Stir dry ingredients together.
3. Add egg, milk and vanilla. Beat 1 minute using an electric mixer or beat vigorously by hand.
4. Add oil and continue to beat 1 additional minute.
5. When the red READY light illuminates, add 1 heaping tablespoon batter into each mini donut
mold. You can use a squeezer or cake decorating bag with wide tip to add batter into each
cavity.
6. Bake for 3 minutes until mini donuts are golden.
7. While still warm, dip donuts in sugar, powdered sugar, or a mixture of cinnamon and sugar,
coating well.
Glazed Chocolate Donuts
Makes 24 mini donuts
• Makes 24 mini donuts
• 1 cup all purpose our
• 1/2 teaspoon cornstarch
• 1/3 cup sugar
• 3 tablespoons (heaping) cocoa powder
• 1 teaspoon baking powder
• 3/8 teaspoon salt
• 1/4 cup sour cream
• 1 large egg
• 1/4 teaspoon vanilla extract
• 1/2 cup milk
Donut Glaze
GLAZES
1. Use a brush or paper towel to apply a generous coat of oil to each of the cavities on the upper
and lower baking plates. Plug Treat Baker into a 120V AC electrical outlet to preheat.
2. Prepare Mini Donuts: In a large bowl, whisk together cake our, sugar, cocoa powder, baking
powder, and salt.
3. In another bowl, combine sour cream, egg, vanilla extract, and milk. Whisk well to incorporate.
4. Pour the wet ingredients in with the dry ingredients and whisk until well incorporated.
5. When the red READY light illuminates, add 1 heaping tablespoon batter into each mini donut
mold. You can use a squeezer or cake decorating bag with wide tip to add batter into each cavity.
6. Bake for 3 minutes until mini donuts are golden. Place hot donuts a wire cooling rack.
7. Prepare Glaze: In a small bowl, whisk milk into sugar.
8. Dip the top of each donut into the glaze, and twist to coat. Lift the donut straight up and let the
excess drip off, then place the donuts glaze-side up on a lined baking sheet. Allow to rest about
15 minutes to let the glaze set before serving. Best eaten within a few hours.
• Baked donuts freeze well. Cool completely on a wire rack. Store in a plastic freezer bag or in a covered
container. Thaw frozen donuts in a toaster oven until hot and crisp or place in a microwave oven for 10
seconds. Do not over-cook.
• Add glazes and toppings to the thawed donuts.
For lower sugar donuts:
• Use sugar substitutes.
• Use sugar-free maple syrup.
• Use sugar-free or no sugar added avored gelatin, puddings, jellies, jams, etc. for avorings and
toppings.
For lower fat, lower cholesterol donuts:
• Use skim milk.
• Adapt recipes by eliminating the egg yolk. Always use liquid vegetable oils such as canola,
corn or sunower, instead of butter.
For higher fiber donuts:
• Substitute 1⁄2 cup or more of white our with whole-wheat our.
• Substitute 1⁄4 cup of white our with wheat or oat bran.
User Maintenance Instructions
This appliance requires little maintenance. It contains no user serviceable parts.
Do not try to repair it yourself. Contact a qualied appliance repair technician if the product requires servicing.
Care and Cleaning
CAUTION: Unplug from electrical outlet and allow to cool thoroughly before cleaning.
1. The Donut Maker does not disassemble for cleaning.
2. Never immerse appliance in water or other liquids. Never place Donut Maker in dishwasher.
3. The donut cooking plates should be cleaned and conditioned before each heating.
4. Brush cooking plates with a clean, soft pastry brush or cloth. To condition plates, lightly coat the
cooking surfaces with solid vegetable shortening or vegetable oil. Carefully follow suggested cleaning
procedures below. After a time, if donuts show signs of sticking, recondition as needed.
5. To protect the premium quality non-stick surfaces, use only plastic, nylon or wooden utensils.
6. To remove any batter baked onto the cooking plates, pour a small amount of cooking oil onto the
hardened batter. Allow to set for 5 minutes, then wipe softened batter off with a paper towel or soft
cloth. Remove stubborn stains with a plastic mesh puff or pad. A clean round kitchen brush or a
toothbrush works well to remove baked-on batter from the molds. For best results, use only products
with directions stating they are safe for cleaning non-stick cooking surfaces. Do not use steel wool or
coarse scouring pads.
7. The exterior nish should be cleaned with a non-abrasive cleaner
and a soft, damp cloth. Dry thoroughly.
Storing Instructions
1. Make sure unit is unplugged and fully cooled.
2. Secure the lid shut with the latch.
WARNING: Never store Donut Maker while
it is hot or still plugged in.
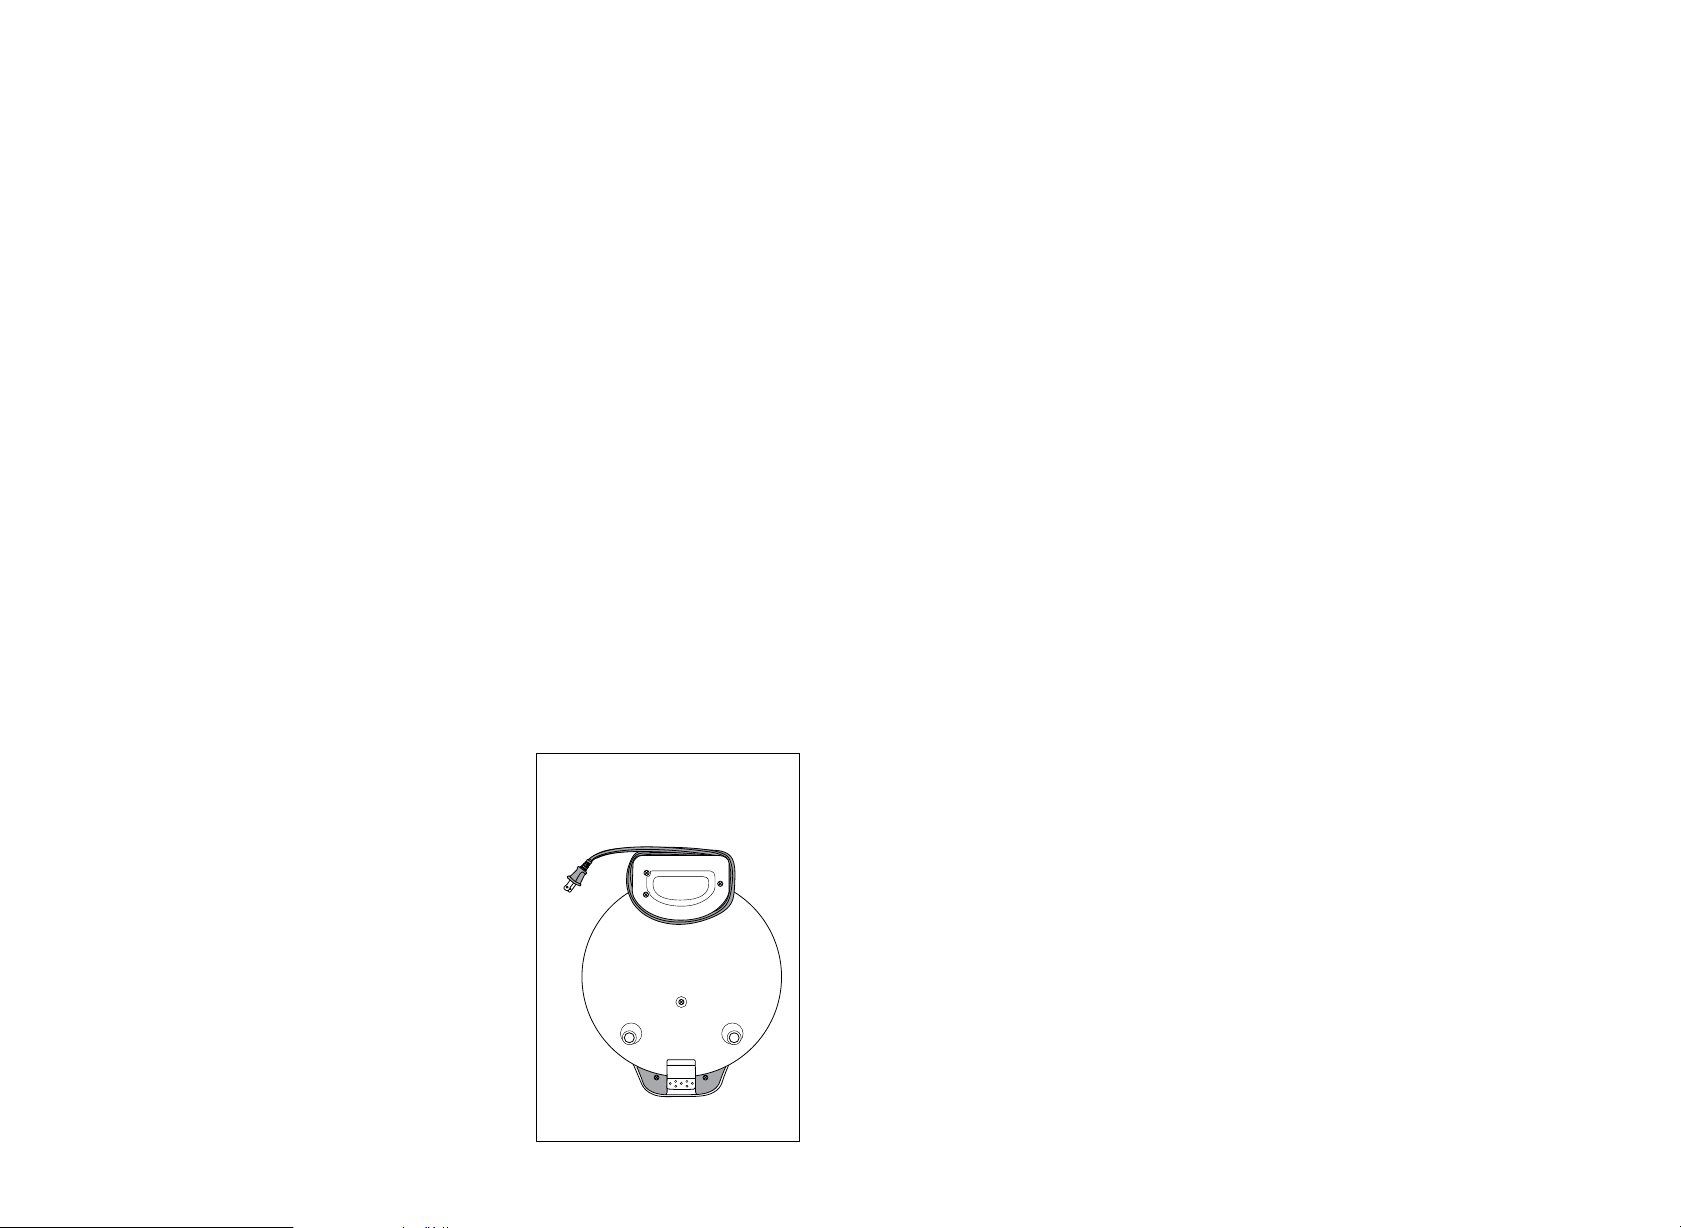
3. Use the cord wrap on the bottom of the Donut Maker to store the
cord. (See Figure 2.)
4. Do not put any stress on cord where it enters unit, as this could
cause cord to fray and break.
5. Store Donut Maker in its box or stand unit on its end
for easy and compact storage
Figure 2
Loading ...
Loading ...
Loading ...