Loading ...
Loading ...
Loading ...
INSTALLATION MANUAL
INSTALLATION
12
RECIRCULATION
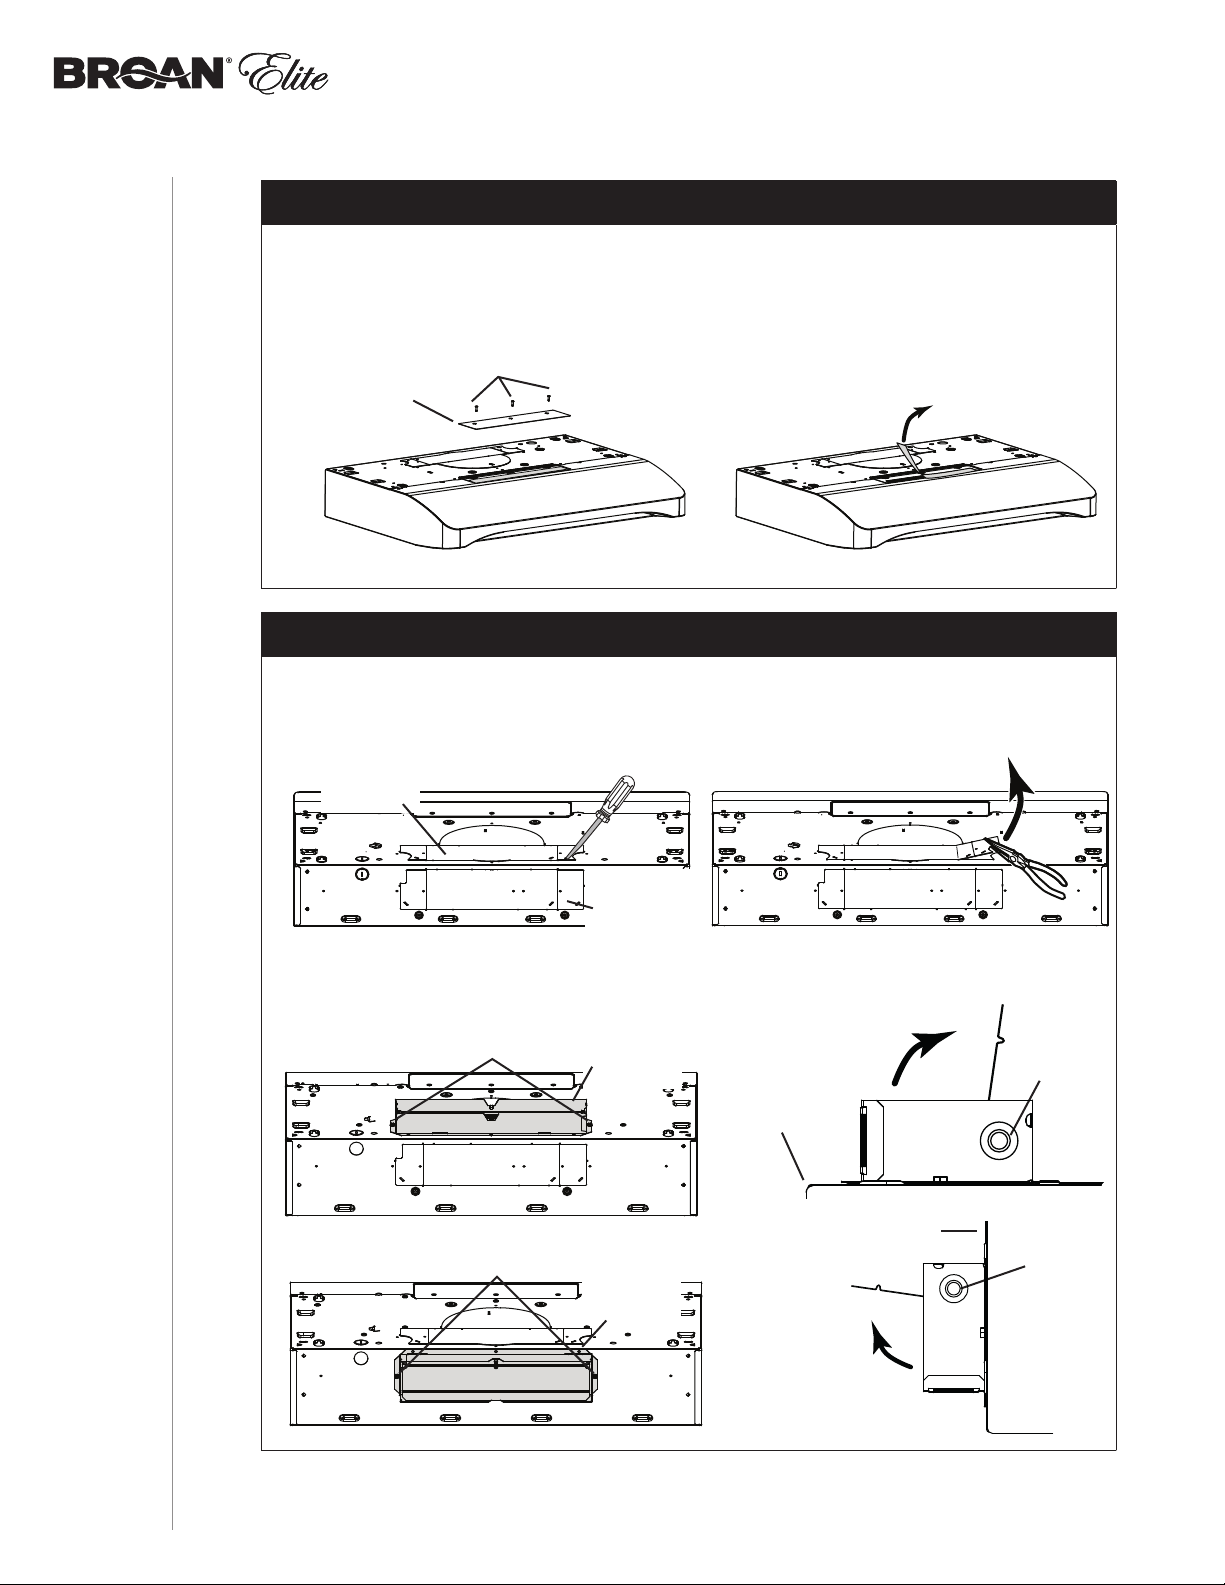
COVER PLATE
SCREWS
NON-DUCTED INSTALLATION ONLY
7 ] Remove 3 screws retaining the recirculation cover plate to the hood. Discard this plate with
its screws. Peel off and discard the membrane covering the recirculation grille, ensuring
the openings are totally cleared.
3¼” x 14” DUCTED INSTALLATION ONLY
TIP: Insert a small length of duct over the 3¼” x 14” damper assembly and seal the joint using
aluminum foil duct tape to ease connection with the house ductwork.
8 ] Remove 3¼” x 14” vertical or 3¼” x 14” horizontal knockout plate as appropriate for
your ducting method (see F
IGURES 1 A and 1 B).
3¼” X 14”
VERTICAL
KNOCKOUT
PLATE
3¼” X 14”
HORIZONTAL
KNOCKOUT
PLATE
FIGURE 1 A
3¼” X 14”
DAMPER
ASSEMBLY
TOP/BACK
EDGE OF
HOOD
DAMPER
FLAP
PIVOT
SCREWS
FIGURE 2 A FIGURE 2 B
9 ] Attach 3¼” x 14” Damper Assembly on top OR back of hood over the knockout opening.
When installed, the 3¼” x 14” damper assembly must open as shown in FIGURE 2 B.
FIGURE 1 B
3¼” X 14”
DAMPER
ASSEMBLY
BACK OF
HOOD
DAMPER
FLAP
PIVOT
SCREWS
Loading ...
Loading ...
Loading ...