Loading ...
Loading ...
Loading ...
2-Point Calibration
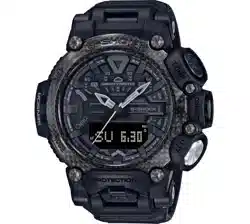
1. Enter the Compass Mode.
l
Navigating Between Modes
2. Hold down (D) for at least two seconds.
Release the button when [SET] starts
flashing and then
appears on the
display.
3. Press (E).
This causes [
o
1] to appear on the display.
4. While keeping the watch horizontal, press
(C).
This starts calibration of the first point,
which causes [WAIT] to appear on the
display. When calibration is successful,
indicators will appear on the display in the
following sequence: [OK]
n
[TURN]
n
[180°]
n
[
p
2].
5. Rotate the watch 180 degrees, taking care
to be as exact as possible.
6. Press (C).
●
This starts calibration of the second
point, which causes [WAIT] to appear
on the display.
●
When calibration is successful, [OK] will
appear on the display and the watch will
return to the Digital Compass screen.
This completes the calibration
operation.
Note
●
[ERR] will appear if calibration fails for
some reason. If this happens, restart
the above procedure from step 2.
Auto Calibration
Your watch performs auto bearing calibration.
●
When bearing calibration starts, the second
hand will move to 12 o’clock, and the digital
display contents will flash.
Second hand
Note
●
Auto bearing calibration is performed
when the conditions below exist.
ー
Watch is worn on the wrist.
ー
Watch is in the Timekeeping Mode.
ー
You are walking
●
After calibration is successful, auto
calibration will not be performed again
for 24 hours.
Setting Up for True North Readings
(Magnetic Declination Calibration)
If you want the watch to indicate true north
instead of magnetic north, you need to specify
your current location’s magnetic declination
direction (east or west) and declination angle.
l
Magnetic North and True North
●
The magnetic declination angle value can
be set in 1° (degree) units only. Use a value
that is closest to the angle you want to set.
Example: For an angle of 7.4°, set 7°.
Example: For an angle of 7°40’ (7 degrees,
40 minutes), set 8°.
Note
●
Magnetic declination angles (east or
west) and angle degree values for
specific locations can be found on
geographic maps, mountain climbing
maps, and other maps that include
contour lines.
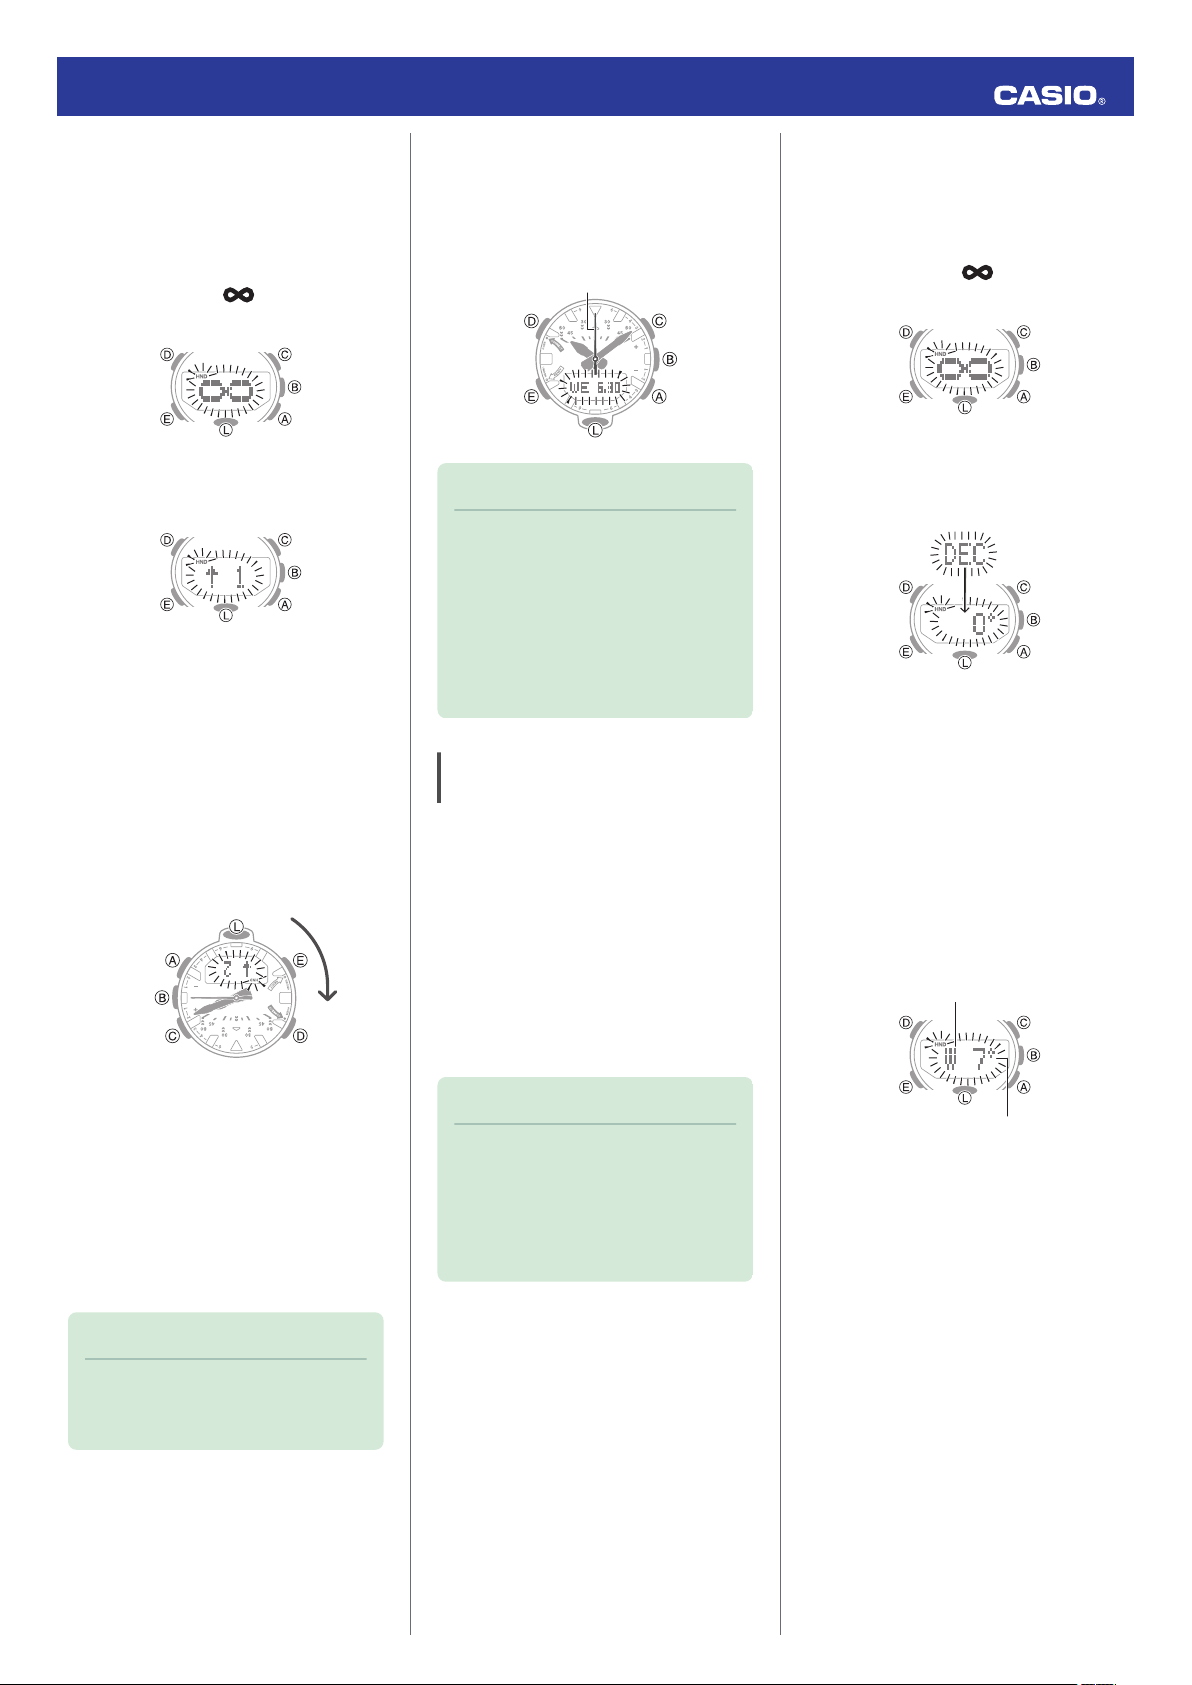
1. Enter the Compass Mode.
l
Navigating Between Modes
2. Hold down (D) for at least two seconds.
Release the button when [SET] starts
flashing and then
appears on the
display.
3. Press (E) twice.
[DEC] will appear on the display, followed
by [0°].
4. Use (A) (East) and (C) (West) to change
the magnetic declination direction and
angle.
Setting range: 90° west to 90° east
[0° (OFF)]: Magnetic north
[E]: East declination (Magnetic north is
east of true north.)
[W]: West declination (Magnetic north is
west of true north.)
●
To return the setting to [0° (OFF)], press
(A) and (C) at the same time.
Magnetic declination angle
Magnetic declination direction
5. Press (D) to exit the setting screen.
Operation Guide 5635
18
Loading ...
Loading ...
Loading ...