
Loading ...
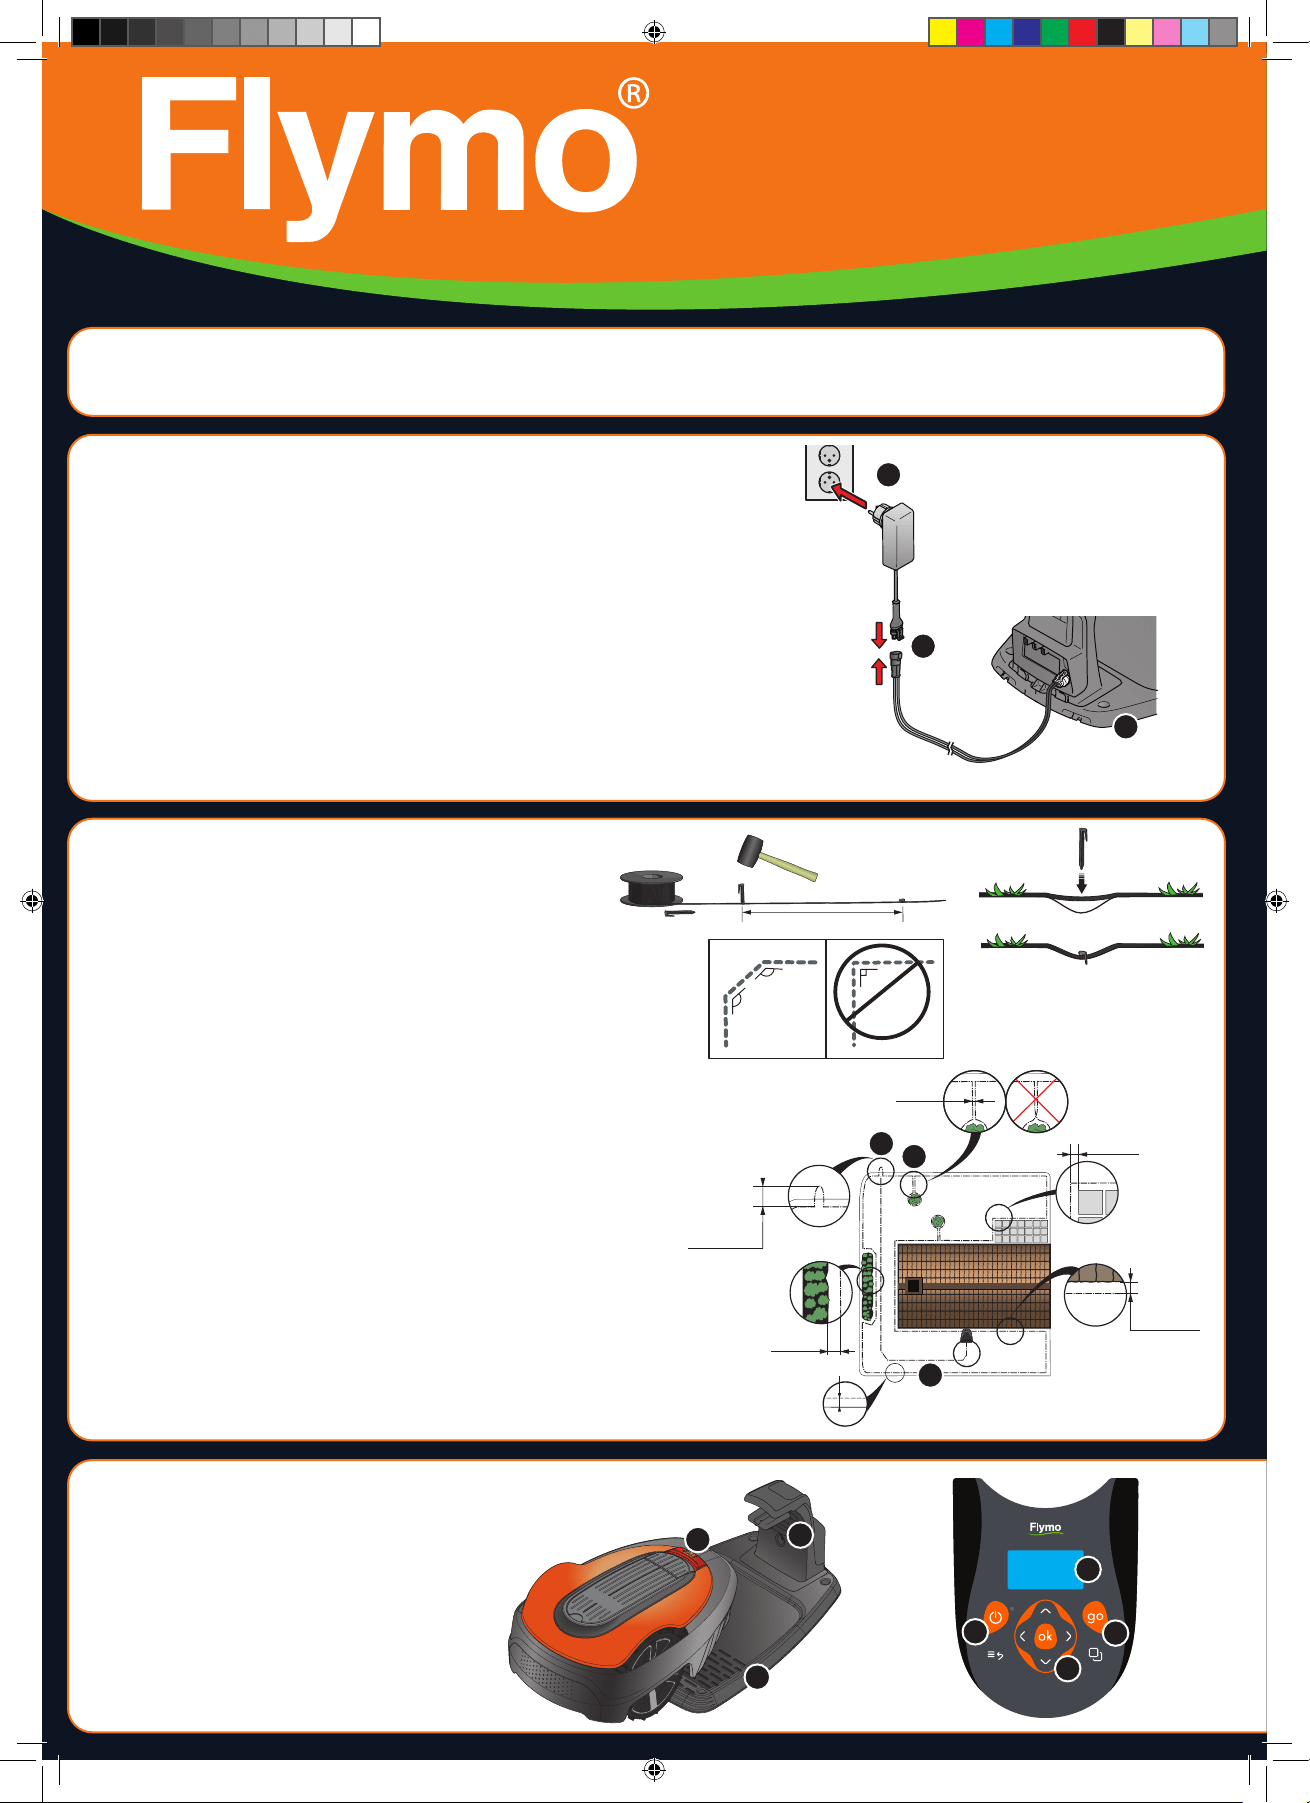
1. STOP button
2. LED for function check of the charging station,
boundary and guide wires
3. Charging station
4. Display
5. Keypad
6. ON/OFF button
7. Start button
1. To install the charging station
1. Attach the charging tower to the baseplate.
2. Place the charging station on a flat level surface where there is open space.
NOTE: To place the charging station in a limited space, under a veranda or in a
corner. Please read the Operator’s manual.
3. Connect the low voltage cable to the charging station and the power supply.
4. If outdoor, put the power supply at a minimum height of 30 cm / 12 in from the
ground.
5. Connect the power supply to a 100-240 V wall socket.
6. Place the robotic lawn mower in the charging station.
7. Push the ON/OFF button for 3 seconds to switch on the robotic lawn mower to
charge the battery while the boundary wire is laid.
NOTE: Do not continue with any product settings before the installation is complete.
2. To install the boundary wire
1. Lay the boundary wire so that it forms a loop around the
whole work area using stakes supplied or bury the wire.
NOTE: Do not lay the boundary wire in sharp bends.
2. Adapt the distance between the boundary wire and different
objects.
A: Lay the boundary wire around all work area in a loop.
B: High obstacles > 5 cm / 2 in e.g. wall or fence.
C: Low obstacles 1-5 cm / 0.4-2 in. or a dropped edge e.g. flower bed.
D: Objects level with the lawn 0-1 cm / 0.4 in e.g. path, paving stones.
E: Make an island to isolate areas.
3. Make an eyelet at the point on the boundary wire where the
guide wire is later connected (F).
4. To handle slopes, passages and secondary areas, refer to
the Operator’s manual.
For more information and instructions, please read the complete supplied Operator‘s manual or visit the Flymo website www.flymo.com/uk.
Installation support videos can be found on the www.flymo.com/uk website.
4
A
B
C
F
E
D
135º
135º
90º
30 cm / 12”
10 cm / 4”
0 cm / 0”
10 cm / 4”
35 cm / 14”
5
3
5
4
1
3
2
6
7
2
1
3
2
QG_P01_Flymo_1141897-26.indd 2QG_P01_Flymo_1141897-26.indd 2 2020-04-14 9:10:062020-04-14 9:10:06
Loading ...
Loading ...