Loading ...
Loading ...
Loading ...
4
2. PREPARE THE INSTALLATION
NOTE: Before proceeding to the installation, check the contents of the box. If items are missing or damaged, contact the manufacturer.
Make sure that the following items are included:
- Hood
- Accessories:
• 2 hybrid filters
• 3¼” x 10” adapter/damper (located in one styrofoam end cap)
• Parts bag (located in one styrofoam end cap) including:
1 wire clamp, 9 no. 8 x 1/2” screws, 2 wire connectors and 3 no. 6 x 1/2” standard screws
Parts sold separately:
- Ducts, elbows, wall or roof caps
- Transition 3¼” x 10” to 6” round (optional, for 6” round ducts installation only)
- Glass panel for UCB3I30SBN and UCB3I36SBN models (see service parts list on page 11)
NOTES: 1. During installation, protect countertop and/or cooktop.
2. If the bottom of the cabinet is recessed, attach four 1’’ wide wood strips (not
included), as shown at right, in order to properly attach the hood to the
cabinet. The wood strips must be as thick as recess.
WARNING
!
When performing installation, servicing or cleaning the unit, it is recommended to wear safety glasses and gloves.
HO0028A
CABINET BOTTOM
’’¾1’’¾1
10¼’’
5¼’’
1”
1”
1”
1”
Cut-out the openings for duct (A) and power cable (B), in cabinet or wall, according to the direction of discharge chosen. See figures below.
C
L
HD0407A
3½”
5¼” 5¼”
3”
B
1½” DIA.
A
7/8”
HORIZONTAL DISCHARGE
C
L
7/8’’
3½’’
5¼’’ 5¼’’
2¼’’
HD0566A
A
CABINET BOTTOM
2’’
1½’’
B
1/4’’
VERTICAL DISCHARGE
3. PREPARE THE HOOD
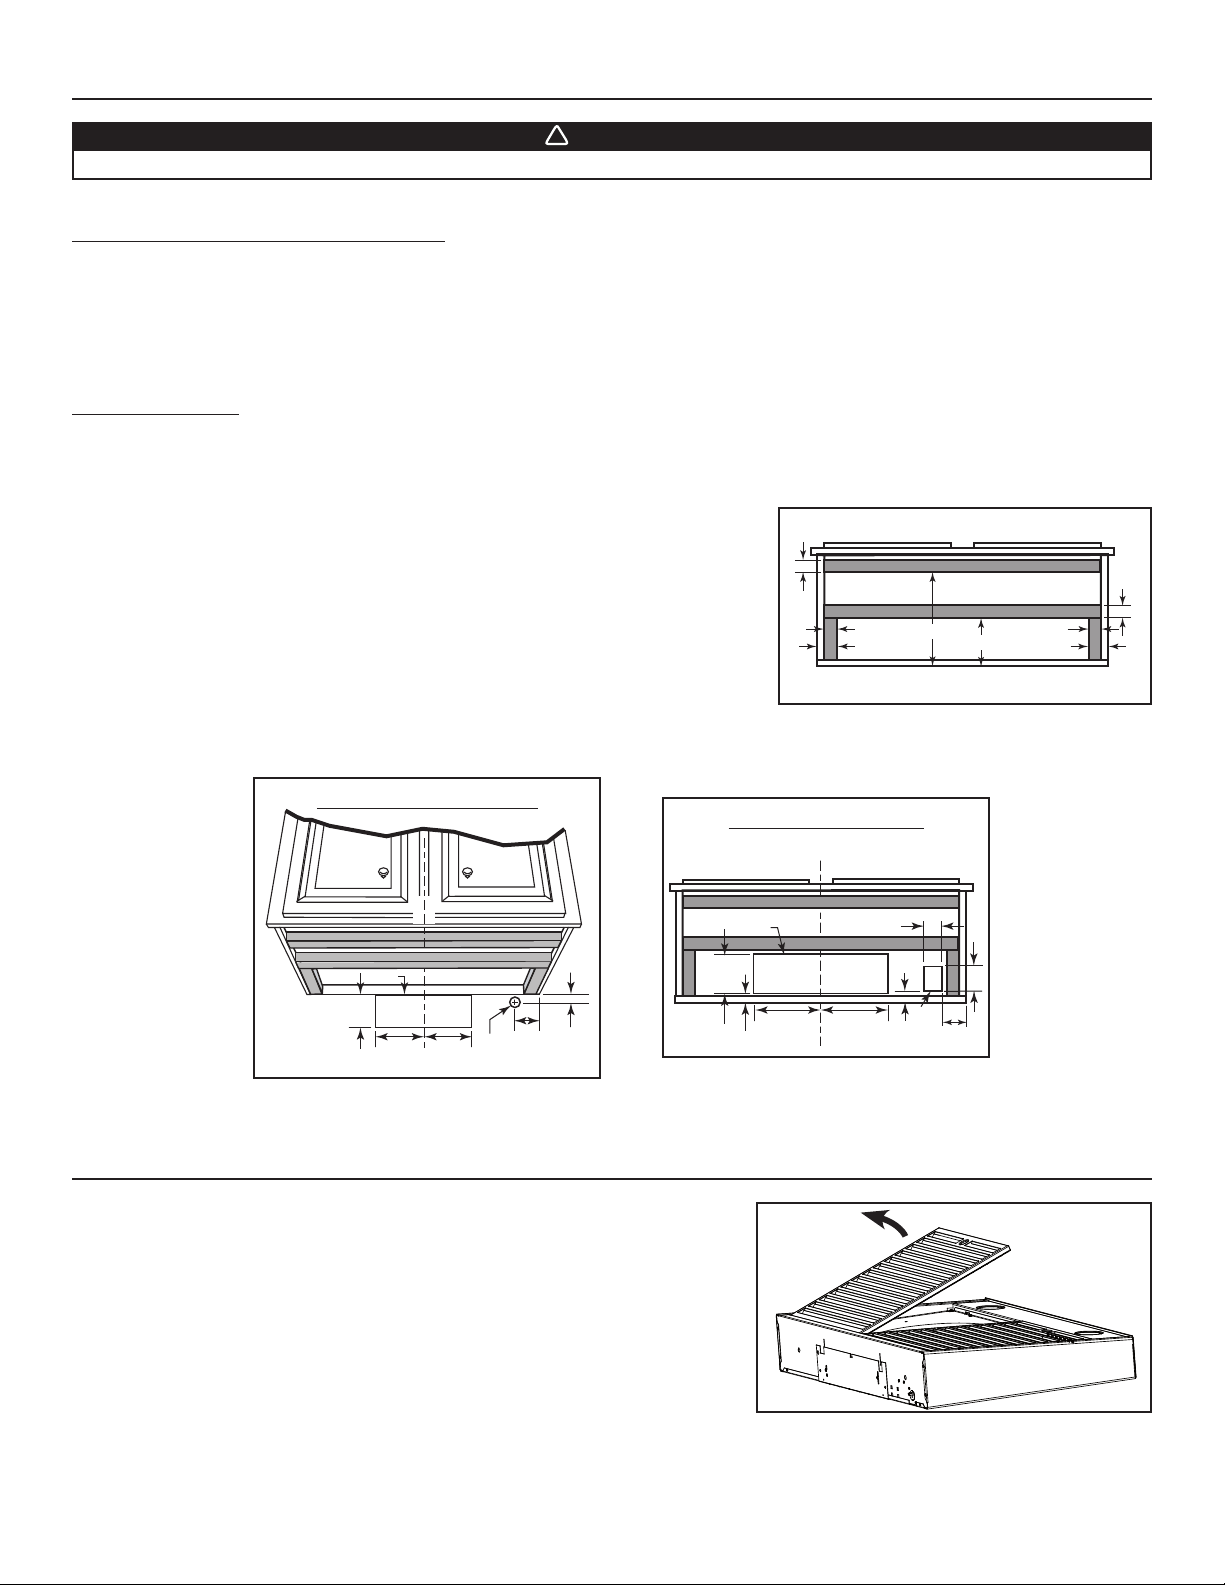
3.1 Lay the hood filters up on a table. Use a piece of cardboard to avoid damaging the
table or the hood. Remove tape on filters. Lift filters by pushing them towards the
back and flip them up, then set the filters aside.
HD0553
Loading ...
Loading ...
Loading ...