
Loading ...
Loading ...
Loading ...
GENERAL INSTRUCTIONS
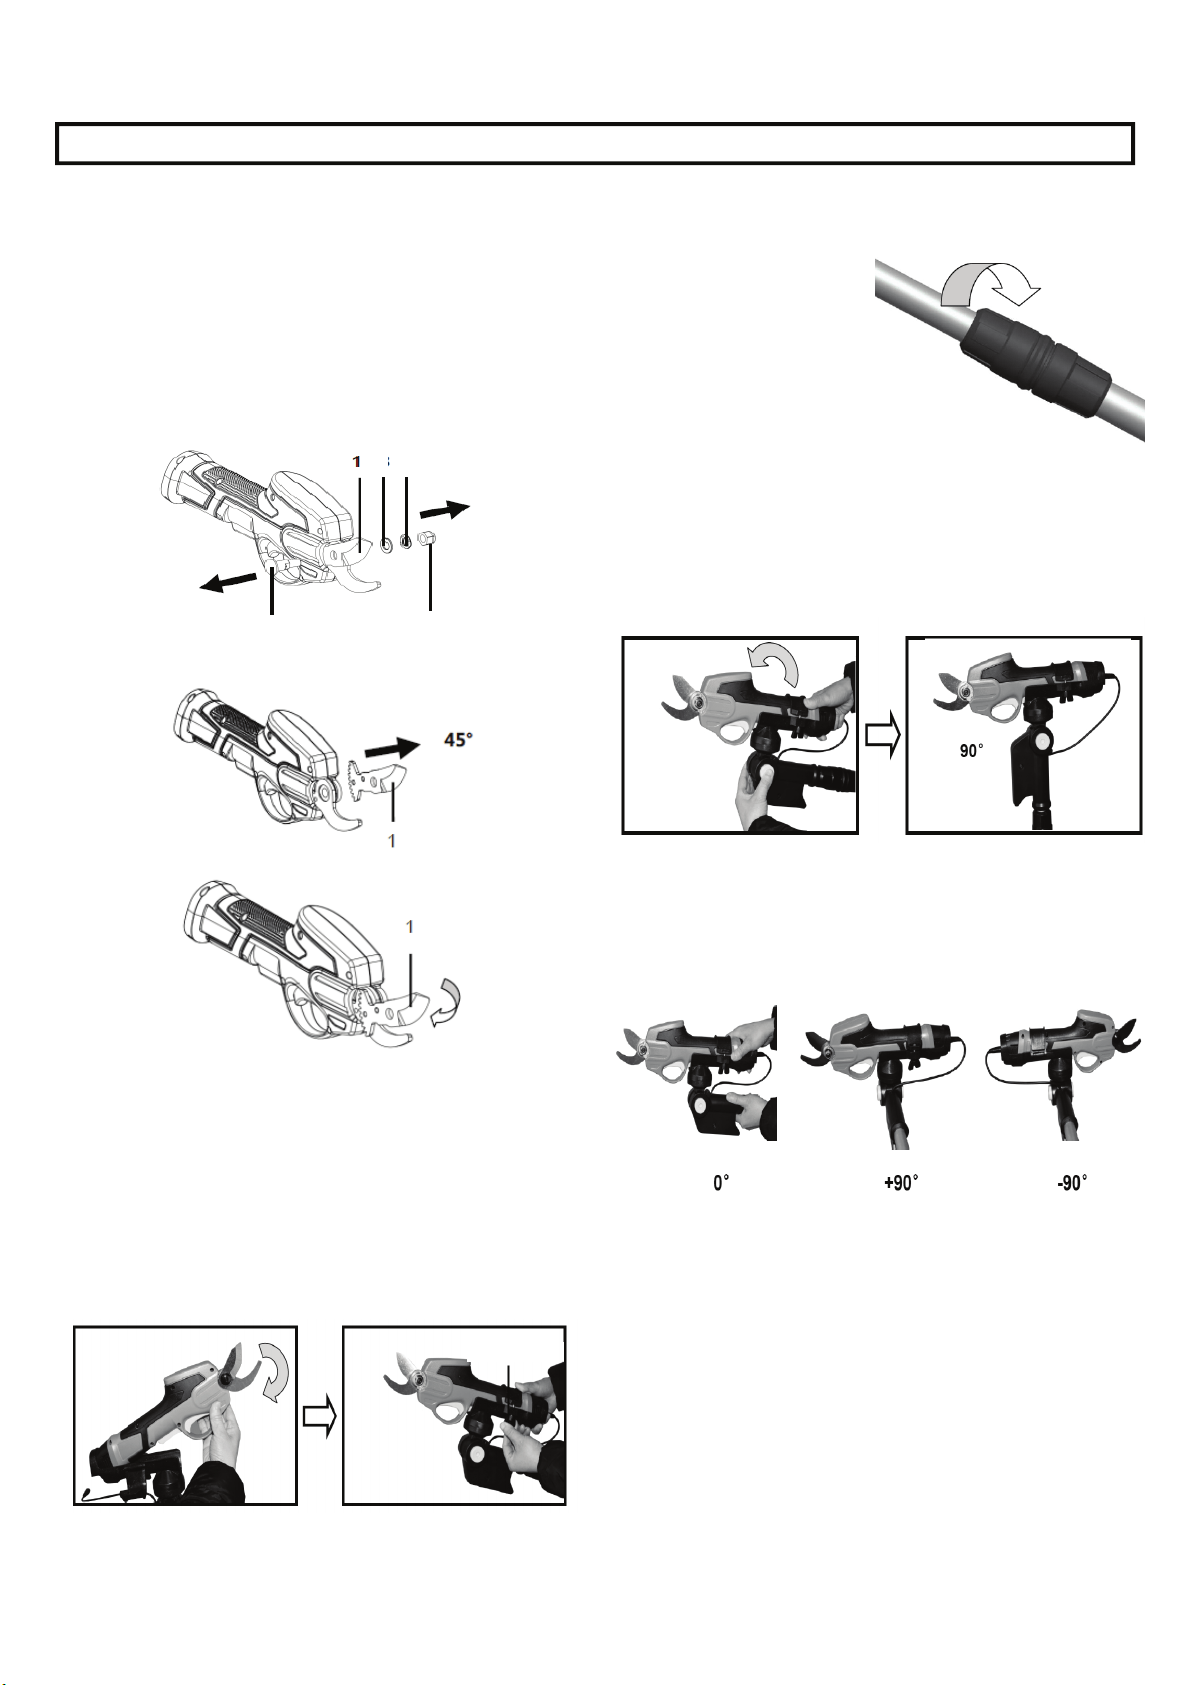
To Insert the moving blade (1), be careful not to
allow any foreign matter to become attached to
the blade gear and do not damage it. First Insert
part of the tooth of the blade into the case as shown,
then rotate the blade (1) until the hole of the blade
(1) is aligned to the hole of the aluminum gearbox.
Incorrect location of the blade will damage the
machine. Install the blade bolt then install the
washer (4) and the wave washer (3). Attach the
blade nut (2) and tighten. Do not over tighten.
6
Model PR17216PS
2
3 4
5
USING THE EXTENTION AND ROTATION FEATURE ON
THE CONNECTING POLE
Extend or shorten the
length of the telescopic pole
by loosening the clamp
coupling for telescopic pole
and pull in or push out the
lower section to achieve the
correct length. Then tighten
the coupling.
Adjusting the angle of pruner in the vertical direction
Press the rotating button on both sides for the angle of tilt
adjustment . Set the pruner to the desired tilt. Release the
button and allow the pruner to lock into position to lock the
angle of tilt. Four different locking angles are possible. The
adjusting range is from 0 ° to 90 °.
Adjusting the angle of pruner in the horizontal direction
Holding the connecting pole with one hand, and the pruner
bracket with the other. Rotate the pruner bracket firmly to the
desired angle. The adjusting range is from -90 ° to +90 °.
CONNECTING THE POLE
Using the telescopic long handle. You can prune the
branches farther away .
Holding the connecting pole with one hand, and the front
of the pruner with the other, push the battery pack of the
pruner in to the pruner bracket until the pruner is fully in
place. Close the pruner cover and tighten the butterfly
bolt. Then connect the power connector to the battery
pack on the pruner.
To take apart, proceed in the reverse order.
Butteryfly bolt
Fig.4
Fig.5
Fig.6
Loading ...
Loading ...
Loading ...