Loading ...

Introduction
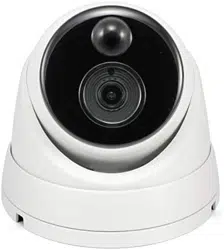
Congratulations on the purchase of your Swann
Thermal-Sensing Camera.
• Enjoy day & night protection with the latest
thermal-sensing security & have a bird’s eye
view of your premises
• See what’s happening during the night with in-
frared cut filter & powerful LEDs
• State-of-the-art True Detect PIR motion sensor
is designed for security applications with the
ability to reliably detect people, cars, large pets
& other heat-generating large objects
• With more accurate motion detection you have
more reliable push notifications & activity-trig-
gered recording, eliminating false triggers due
to the wind, leaves falling, bugs, rain & more,
saving you hard drive space & playback time
Important instructions
1. Make sure the camera is fixed correctly and stable
if fastened in place.
2. Never place strain of any kind on the network ca-
ble connection. It’s designed to clip into the Ethernet
port, but it won’t support weight and can be broken.
3. Do not operate if wires and terminals are exposed.
Important Note: All jurisdictions have specific laws
and regulations relating to the use of cameras. Be-
fore using any camera for any purpose, it is the buy-
er’s responsibility to be aware of all applicable laws
and regulations that limit the use of cameras.
About this Manual: The content in this manual is for
information purposes only and is subject to change
without notice. While every effort is made to ensure
that this manual is accurate at the time of printing, no
liability is assumed for any errors occurred.
1. Take into consideration what you want to monitor
and where you’ll get the best view of it.
2. How you’re going to connect the camera to your
monitoring system; remember that cables and
connections should be kept out of the weather.
3. How to keep the camera out of harm’s way. It’s
recommended to mount your camera at an elevated
position.
4. Place your camera as close to the area of interest
as practicable. The best position is from about
13ft/4m above looking slightly down, keeping in mind
the details you are looking for.
5. Although the sky looks nice when you look at the
live view from your camera, it is an unlikely direction
for an offender to approach. Make sure your camera
has minimal sky in it as the light in daylight can make
the foreground of the image darker.
6. Think about the most likely way a potential offender
may approach your home, use your camera to give
you the best coverage of these areas.
7. The camera’s casing is resistant to different
weather conditions and tampering. It would take an
overwhelming event to damage the housing.
8. Even though the camera is weather and water-
resistant, prolonged exposure to adverse weather
conditions such as sunlight or excessive moisture,
may eventually damage the internal components of
the camera and adversely affect its performance.
9. Run cables inside a wall cavity or other protected
enclosure, and ensure that all wiring and connectors
are insulated and protected from moisture.
10. Don’t put your cable near live electrical wiring. AC
electricity generates radio “noise” which can interfere
with the signal from your camera.
1
Connecting the Camera2
Camera Location Tips4
To connect the camera to your NVR, simply connect the supplied Ethernet cable to the LAN connection on the
camera then plug the other end of the cable into one of the camera inputs on the back of your NVR.
Please note: The power connector is provided as an alternative power option if required. Your NVR will
provide power over the Ethernet cable when connected and a separate power adapter is not required.
CAM7CAM7 CAM5CAM5
CAM8CAM8 CAM6CAM6
CAM3CAM3
CAM4CAM4
CAM1CAM1
CAM2CAM2
WANWANAUDIO OUTAUDIO OUT VGAVGA
48V48V
Power
Ethernet Cable
LAN
The camera can be mounted onto a flat vertical or horizontal surface
and must be of sufficient strength to hold the camera.
→ Hold the dome enclosure (1) and the dome ring (2) then rotate
the mounting bracket (3) clockwise to remove it from the
camera.
→ Position the camera bracket (4) in the location you want to
mount it, and mark the mounting holes on the surface to
position the screws (a mounting template has been included).
→ Using the appropriate screws for the surface you are mounting
to, secure the bracket in place.
→ Run the cable then place the camera into the dome enclosure
and dome ring and aim the camera to the desired position. The
camera can be rotated left or right or up and down. Check the
image on your DVR and make adjustments as necessary.
→ After you’ve finished adjusting the viewing position, rotate the
dome ring to the mounting bracket counter clockwise to lock
the position in place.
Mounting the Camera3
4
1
3
2