
Loading ...
Loading ...
Loading ...
5 PROPOSITION 65
WARNING
This product contains a chemical known to the state of
California to cause cancer, birth defects or other
reproductive harm. Some dust created by power sanding,
sawing, grinding, drilling, and other construction activities
contains chemicals known to cause cancer, birth defects or
other reproductive harm. Some examples of these chemicals
are:
• Lead from lead-based paints;
• Crystalline silica from bricks and cement and other
masonry products;
• Arsenic and chromium from chemically treated lumber.
Your risk of exposure to these chemicals varies depending
on how often you do this type of work. To reduce your
exposure to these chemicals, work in a well-ventilated area,
and work with approved safety equipment, such as dust
masks that are specially designed to filter out microscopic
particles.
Save these instructions.
6 INSTALLATION
WARNING
Do not change or make accessories that are not
recommended by the manufacturer.
WARNING
Do not put in the safety key or the battery pack until you
assemble all the parts.
6.1 UNPACK THE MACHINE
WARNING
Make sure that you correctly assemble the machine before
use.
WARNING
• If the parts are damaged, do not use the machine.
• If you do not have all the parts, do not operate the
machine.
• If the parts are damaged or missing, speak to the service
center.
1. Open the package.
2. Read the documentation in the box.
3. Remove all the unassembled parts from the box.
4. Remove the machine from the box.
5. Discard the box and package in compliance with local
regulations.
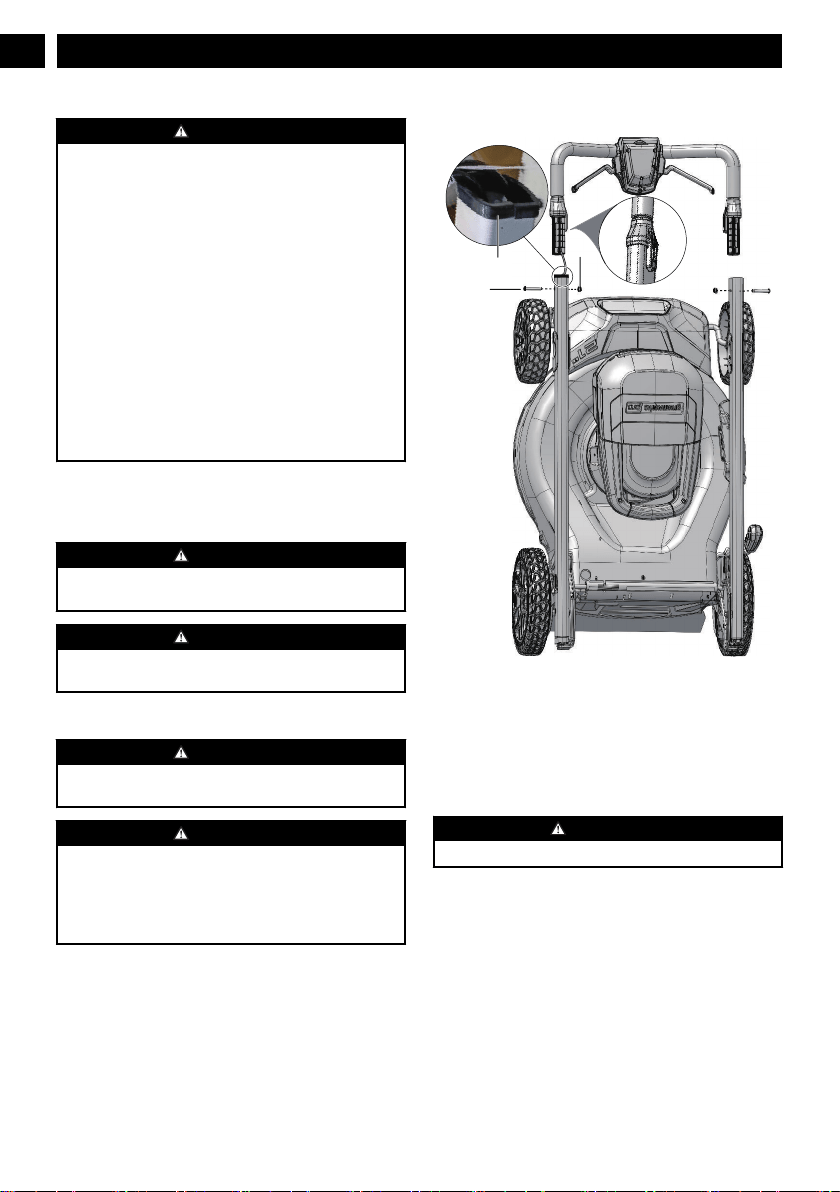
6.2 PLACE THE MOWER UPRIGHT IN
VERTICAL POSITION
13
G
14
1. Place the mower upright in vertical position.
2. Remove the packing material from the cable.
3. Remove the rubber edge guard (G) from the upper
handle.
4. Insert the upper handle (4) into the lower handle (5).
5. Put the bolts (13) through the holes and tighten with the
nuts (14), using a Philips head screwdriver (not included).
WARNING
Do not damage the cable while installing the upper handle.
8
English
EN
Loading ...
Loading ...
Loading ...