Loading ...
Loading ...
Loading ...
13
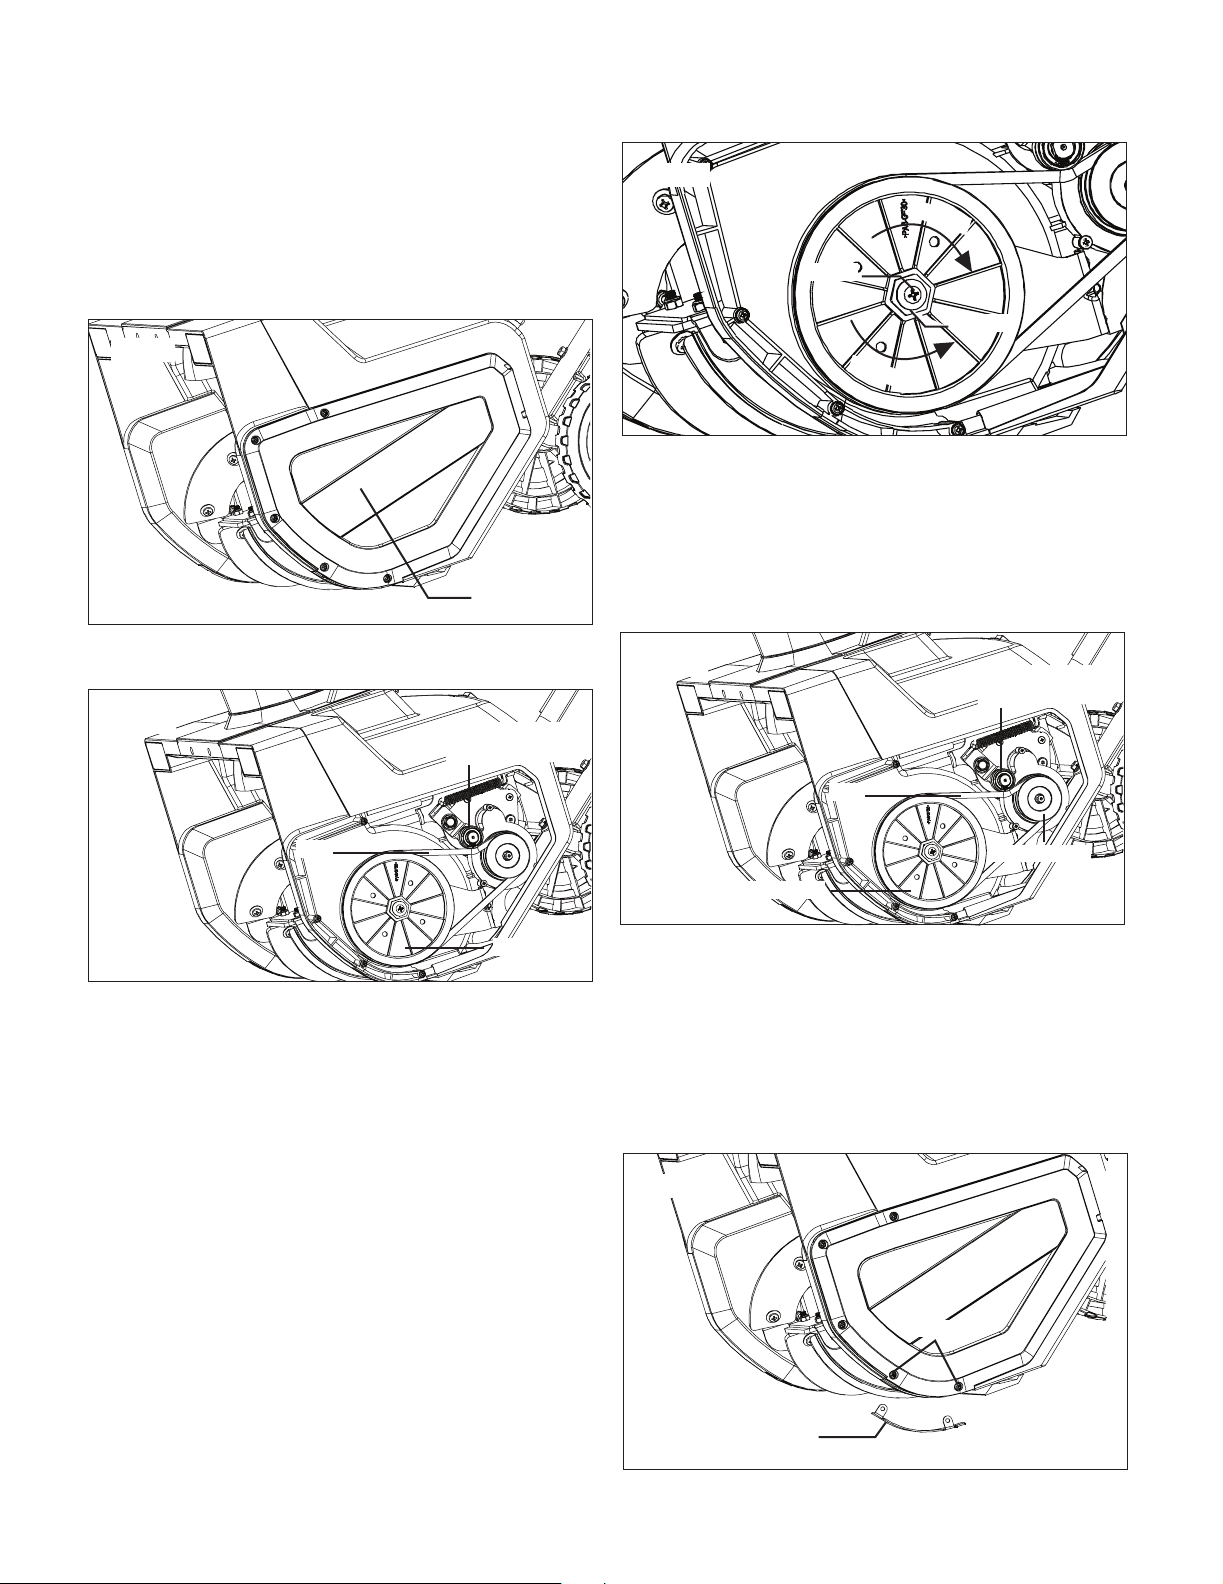
Replacing the Belt + Pulley
NOTE: Determine the left and right hand side of the snow
thrower by standing behind the unit in the normal operating
position.
1. Remove the screws from the left panel of the snow
thrower and remove the left panel (Fig. 22).
2. Lift the belt tension pulley and roll the worn belt up and o
the big pulley from the top of the big pulley (Fig. 23).
3. To replace the big pulley, remove the screw and washer
from the middle of the pulley. While securing the auger
so it does not spin, use a 7/8-inch socket to turn the
outer nut of the pulley clockwise (the pulley is left-handed,
so loosening and tightening occur in reverse orientation;
clockwise to loosen and counterclockwise to tighten).
Once the old pulley is removed, replace the big pulley
and tighten the outer nut counterclockwise with the
7/8-inch socket. Replace and tighten the screw and
washer (Fig. 24).
NOTE: Heavy wet snow puts a load on belts, thus
requiring more frequent belt replacement.
4. To install the new belt, lift the belt tension pulley and roll
the new belt onto the small pulley at an angle. Then roll
the belt onto the top of big pulley by rotating the big pulley
counterclockwise as the belt grips the top of the big pulley
(Fig. 25).
5. Replace the left panel of the snow blower with all screws
(Fig. 24).
Replacing the Skid Shoes
The skid shoes are located at the bottom of the side panels.
Unfasten the two screws on the side panel to remove the worn
skid shoes (Fig. 26). Install the replacement by fastening it to
the side panel with the same two screws.
Fig. 22
Left panel
Fig. 23
Big pulley
Belt tension
pulley
Belt
Fig. 24
Screw
Washer
Loosen
Tighten
Fig. 25
Big pulley
Belt tension
pulley
Belt
Small pulley
Fig. 26
Skid shoe
Screws
Loading ...
Loading ...
Loading ...