Loading ...
Loading ...
3
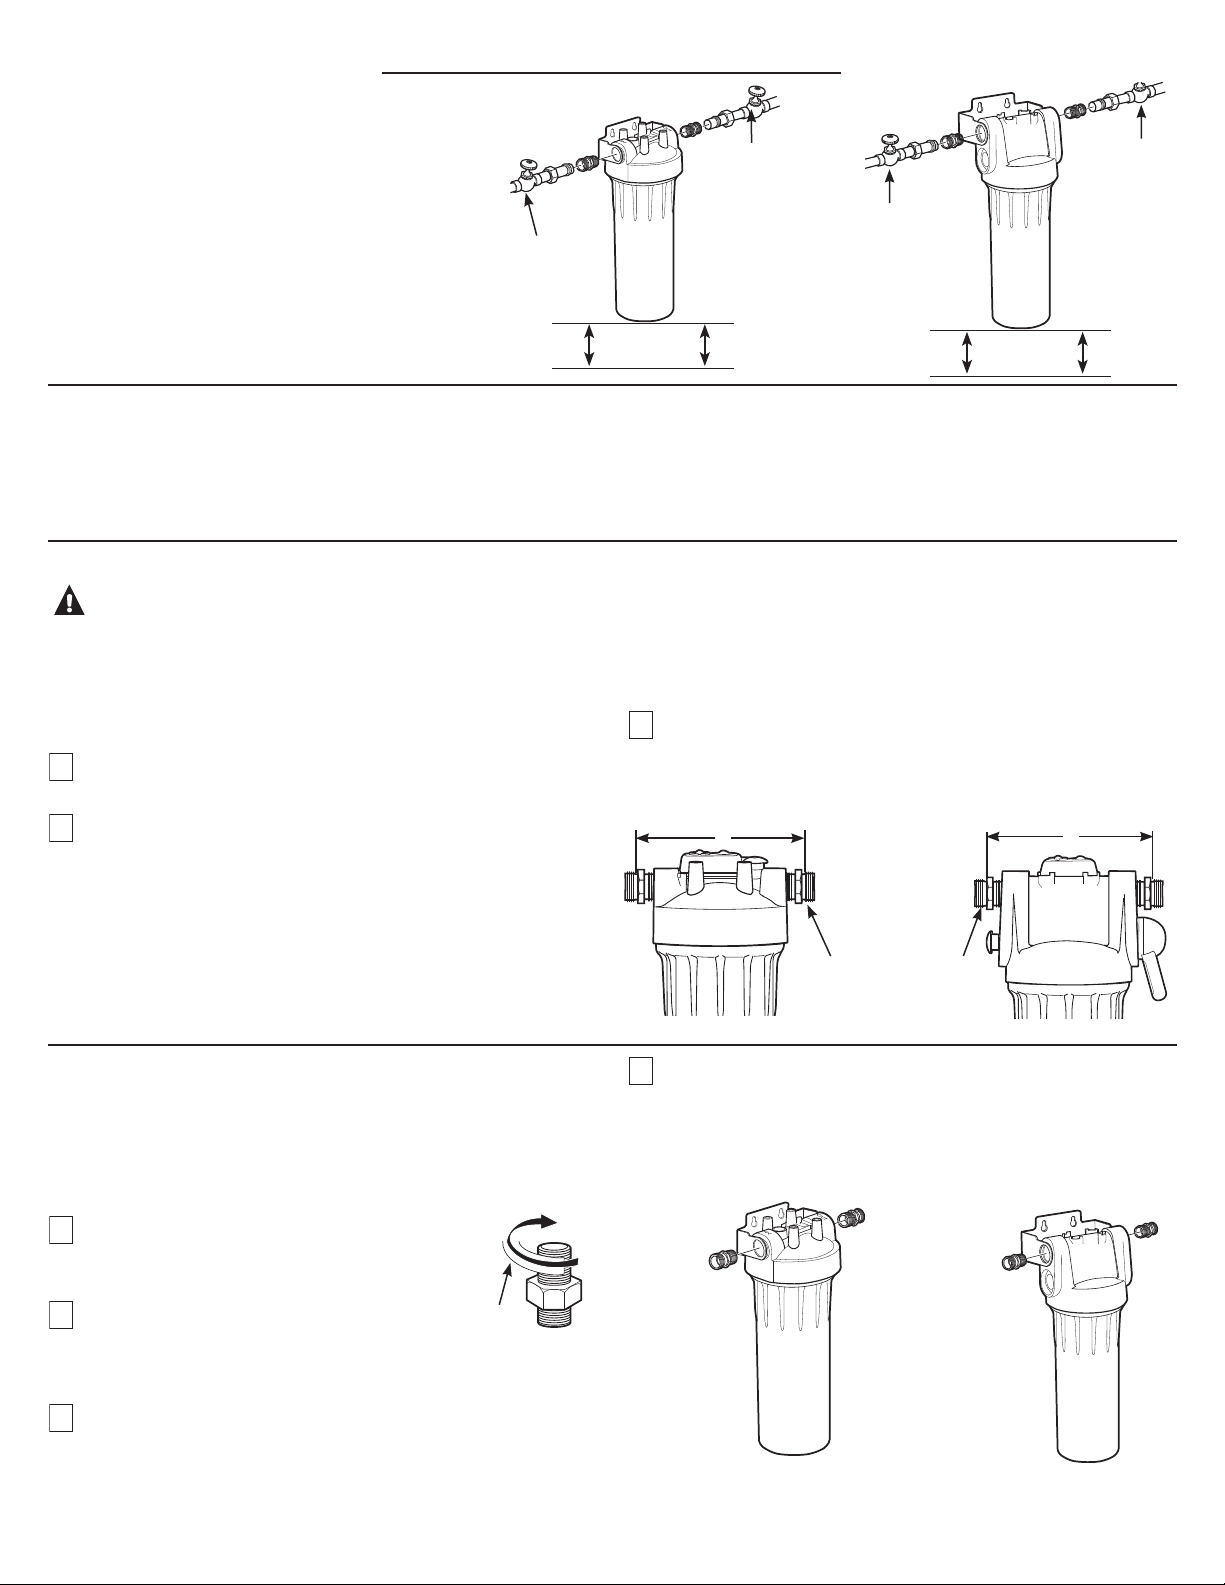
Installation Overview
NOTE: Be sure to allow a minimum space of 1
1
ø2”–
2” under the filter for removing the filter housing
to change the cartridge.
GXWH04F
GXWH20S
Recommended
shut-off valve
Recommended
shut-off valve
Select Location
Select a location for the filter that is:
protected from freezing.
not exposed to direct sunlight.
It is recommended that a shut-off valve be placed on both sides
of the filter.
It is recommended that a mounting bracket be used.
Install Fittings and Mounting Bracket
Instructions are for installing fittings onto 3/4s copper plumbing.
If the unit is to be installed on any other type of tubing (plastic, PVC,
galvanized), different hardware must be purchased. See instructions
with additional hardware purchased, or consult
a qualified plumber.
1
Apply about 12s of Teflon tape, in a clockwise
direction, to the pipe threads of each fitting.
DO NOT use joint compound on any parts.
2
Use the bracket as a template to find the
two screw locations. Wood screws are
provided. If mounted onto other surface, use appropriate
hardware.
3
Drill a 3/16s hole on each marked screw location (optional); then
drive the two wood screws until about 1/4s of thread
is left. Ensure at least one screw is anchored into wall stud.
4
Assemble a fitting through the mounting bracket hole to
the inlet and outlet of the head. Start each fitting by hand
to make sure they don’t cross-thread. Use a 1
1
ø8s wrench to
tighten fittings firmly. DO NOT OVERTIGHTEN.
Cut Water Line
WARNING:
A copper or galvanized cold water pipe may be used to ground
electrical outlets in the home. Failure to maintain this ground path
may result in an electric shock hazard. If the cold water pipe is used
to ground electric outlets, please refer to Installing the Ground Wire
section before cutting the pipe.
1
Turn off the water supply and open a nearby faucet to drain the
water out of the pipes.
2
Using a tape measure or ruler, measure the distance “D”
as shown.
NOTE: I
t is recommended that the shut-off valve be placed
before and after the filter as shown in the Installation Overview
illustration.
Select a secure location to install the filter and mounting bracket.
The location should align the filter housing with the inlet and
outlet pipes and should not cause the pipes to bend. Mark the
distance “D” on the pipe. D is about 5
1
ø4s for GXWH04F model and
5
3
ø4s for GXWH20S model.
3
Using a pipe cutter, cut pipe. Sand (file) the cut ends of the pipe
to ensure that they are square and smooth.
NOTE: Have a bucket and towel available to collect excess water.
Measure to
shoulder
of fittings. Copper
pipe butts against
this shoulder.
D
D
GXWH04F
GXWH20S
Recommended
shut-off valve
Recommended
shut-off valve
GXWH04F
GXWH20S
STEP-BY-STEP INSTALLATION INSTRUCTIONS
Teflon tape
1
1
ø2”–2”
1
1
ø2”–2”
Loading ...
Loading ...
Loading ...