Smart Choice
™
BEFORE BEGINNING INSTALLATION, READ
ALL MANUFACTURER’S INSTALLATION
INSTRUCTIONS THOROUGHLY
DANGER
FIRE AND ELECTROCUTION HAZARD
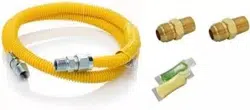
This Kit Includes:
One 4' Long x 5/8" OD Gas Supply Line
Two 5/8" OD Flare x 1/2" MIP Fitting
Two 5/8" OD Flare x 3/4" MIP Fitting
One Tube of Thread Sealant
One Tube of Leak Detector Solution
1
pn/ 5304501585
YOU DO NOT POSSESS THE NECCESSARY
Universal Gas Line
Installation Kit

2
NOTE
The electrical service to the appliance must conform
with local codes and ordinances and the latest edition of
Canada, the Canadian Electrical Code C22.1 part 1.
WARNING
For your safety the information in this manual must be
followed to minimize the risk of fire or explosion or to
prevent property damage, personal injury or loss of life.
Do not store or use gasoline or other flammable vapors
and liquids in the vicinity of this or any other appliance.
WARNING
Destroy the carton and plastic bags after the appliance
is unpacked. Children might use them for play. Cartons
covered with rugs, bedspreads, or plastic sheets can
become airtight chambers causing suffocation. Place all
materials in a garbage container or make materials
inaccessible to children.
IMPORTANT
The instructions in this manual and all other literature
included with this installation kit are not meant to cover
every possible condition and situation that may occur.
installing, operating and maintaining any appliance.
Maximum benefi
yment are achieved when all
the Safety and Operating Instructions are understood
and practiced.
CAUTION
EXCESSIVE WEIGHT HAZARD
person move or lift the appliance
Pre-Installation Requirements
Tools and materials needed for installation:
• Adjustable pliers
• Adjustable wrench
• Pipe wrench for gas supply
• Gas line shutoff valve

3
IMPORTANT SAFETY INSTRUCTIONS
WARNING
For your safety the information in this manual must be followed to minimize the risk of fire or explosion or to prevent
property damage, personal injury or loss of life. Do not store or use gasoline or other flammable vapors and liquids in the
vicinity of this or any other appliance.
CAUTION
EXCESSIVE WEIGHT HAZARD
To avoid back or other injury, have more than one person
move or lift the appliance.
Read all of the following instructions before installing and using this appliance:
• Destroy the carton and plastic bags after the appliance is unpacked. Children might use them for play. Cartons covered
with rugs, bedspreads, or plastic sheets can become airtight chambers causing suffocation. Place all materials in a
garbage container or make materials inaccessible to children.
• Installation and service must be performed by a qualified installer, service agency or the gas supplier.
• Install the appliance according to the manufacturer’s instructions and local codes.
• The electrical service to the appliance must conform with local codes and ordinances and the latest edition of the
National Electrical Code, ANSI/NFPA 70, or in Canada, the Canadian electrical code C22.1 part 1.
• The gas service to the must conform with local codes and ordinances and the latest edition of the National Fuel Gas
Code ANSI Z223.1, or in Canada, CAN/ACG B149.1-2000. An individual manual shut-off valve must be installed within
6 ft (1.83 m) of the appliance in accordance with the National Fuel Gas Code, ANSI Z223.1/NFPA 54.
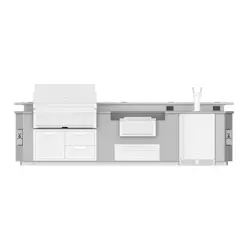
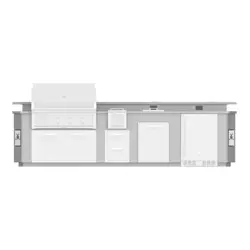
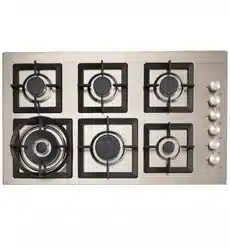
• The appliance is designed for HOME USE only and installation is not recommended for commercial applications such
as restaurants, beauty salons, etc.
• The instructions in this manual and all other literature included with the appliance are not meant to cover every possible
condition and situation that may occur. Good safe practice and caution MUST be applied when installing, operating and
maintaining any appliance.
WARNING - RISK OF FIRE
WHAT TO DO IF YOU SMELL GAS:
• Do not try to light any appliance.
• Do not touch any electrical switch; do not use any
phone in your building.
• Clear the room, building or area of all occupants.
• Immediately call your gas supplier from a neighbor’s
phone. Follow the gas supplier’s instructions.
• If you cannot reach your gas supplier, call the
fire department.
Save these instructions for
future reference.

4
INSTALLATION INSTRUCTIONS - Gas Line
Open position
to appliance
from gas supply
Gas Connection
1 Ensure the manual gas supply shut off valve is in the
manometer is not available, test all connections
by using the supplied leak detection solution.
Open the shutoff valve in the gas supply line
to allow gas to flow through the pipe.
minutes for gas to move through the gas line.
WARNING
flame.
be
installed by a qualified gas technician.
The supply line must be equipped with an approved
manual shutoff valve. This valve should be located in
the same room as the appliance and should be in a
location that allows ease of opening and closing. Do
not block access to the gas shutoff valve.
2 Identify the thread size of the shut off valve.
Flare
Union
Flare
Union
GAS FLOW
Manual
Shutoff
Open
All connections must be wrench-tightened
Flexible
Nipple
OFF position and remove the shipping cap from
the gas pipe at the rear of the appliance.
Limited Warranty
Smart Choice
®
Parts and Accessories
are warranted to be free from defects in
material and workmanship for a period of 90
days from date of purchase. If this product is
found to be defective, return to place of
purchase for
replacement. Smart Choice
®
Parts
& Accessories
shall not be liable for damages or
delays caused
by defects in material or
workmanship, improper installation,
consequential loss, service call costs,
installation or reinstallation
costs, or by failure due to normal wear.
Made In The USA With Globally
Sourced Components
3 Attach the flexible gas line connector to the fitting
female flare nut of the flexible gas supply line onto
4 Identify the threaded connection at the appliance.
a. If the appliance has a 3/8" Male Iron Pipe thread
connection apply sealant to the connection and thread
the 3/8" Female Iron Pipe thread fitting onto the
appliance connection. Wrench tighten.
b. If the appliance has a 1/2" Female Iron Pipe thread
connection apply sealant to the 1/2" Male Iron Pipe fitting
provided with the kit and thread the 1/2" Male Iron Pipe
thread fitting into the appliance connection.
5 Attach the other end of the flexible gas line connector to
the flare fitting installed in step 4 above. Wrench tighten.
a. If the shutoff valve has 1/2" Female Iron Pipe threads
use the supplied 1/2" Male Iron Pipe Thread fitting. Apply
pipe thread sealant to the male iron pipe threads on the
supplied fitting and thread the iron pipe thread into the
shutoff valve. Wrench tighten.
use the supplied 3/4" Male Iron Pipe Thread fitting. Apply
pipe thread sealant to the male iron pipe threads on the
fitting and thread the iron pipe thread into the shutoff