
EN - 1
ATTENTION:
Range hood must only be installed by a qualied technician, in accordance
with the manufacturer’s instrucons and local laws and regulaons.
Manufacturer accepts no liability for damage to product or any other inciden-
tal damages, in case of improper installaon or misuse.
Please read these instrucons carefully before beginning the installaon.
If you have any quesons regarding installaon, operaon, or maintenance of
the product, please visit hps://futurofuturo.com.
WARNINGS:
Range hood is supplied with a 3-pin, US/Canada standard, power plug, which
must be connected to a dedicated line that provides 110 volts AC @ 60 Hz
current. Maximum power consumpon 3.5 amps.
Do NOT cut power plug and aempt to connect range hood directly to wiring.
Prior to cleaning, replacing light bulbs, or any other maintenance or service of
the range hood, ensure that all power sources are turned o.
Respect local legislaon and regulaons regarding the exhaust air when the
sucon is operang. Failure to respect and perform all the maintenance and
cleaning operaons described in this handbook could cause a re hazard.
NOTE TO INSTALLER:
Electrical components, power connecon, and any other non-user- erviceable
parts of the range hood, remote blower kit (if present), and/or make-up air system
(if present), should not be accessible to the user aer installaon, only to a techni-
cian, via removable access panels.
INSTALLATION GUIDELINES:
The recommended distance between the boom of the hood and the cooking
surface is: 26” - 30”.
Installing the range hood at a higher distance will result in decreased capture
performance, and is not recommended.
Range hood must be securely aached to a load-bearing element, such as a
joist, stud, plywood backing, or sot box. Range hoods should not be aa-
ched to sheetrock or false ceiling alone, even with molly/toggle bolts. The ma-
nufacturer accepts no responsibility for damage, either to the range hood or
to the kitchen environment, or any injury, due to improperly secured range
hoods.

EN - 2
COMPATIBLE COOKING EQUIPMENT :
The range hood is designed for use with all types & brands of residenal (NOT
commercial), indoor, standard cooking equipment, including: ranges, cooktops,
and ovens, that use any combinaon of gas, electric, and inducon heang. It is
not designed for commercial operaon or grilling.
RISK OF FIRE:
The grease lters should be regularly cleaned in the dishwasher to prevent excessi-
ve accumulaon of grease. Do not clean grease lters by hand, to avoid damaging
the ltraon mesh. The surface of the range hood itself should also be regularly
cleaned to prevent grease build-up. Do not leave cooking equipment unaended
while cooking, as overheated pans may catch re. Do not ambe or grill under the
range hood.
MISCELLANEOUS WARNINGS:
Do not stare directly into operang lights of the range hood (as well as any other
household light sources). It is recommended to use the venlaon equipment eve-
ry me cooking is performed, to avoid heat congeson.
EN - 3
CONTROLS & OPERATION
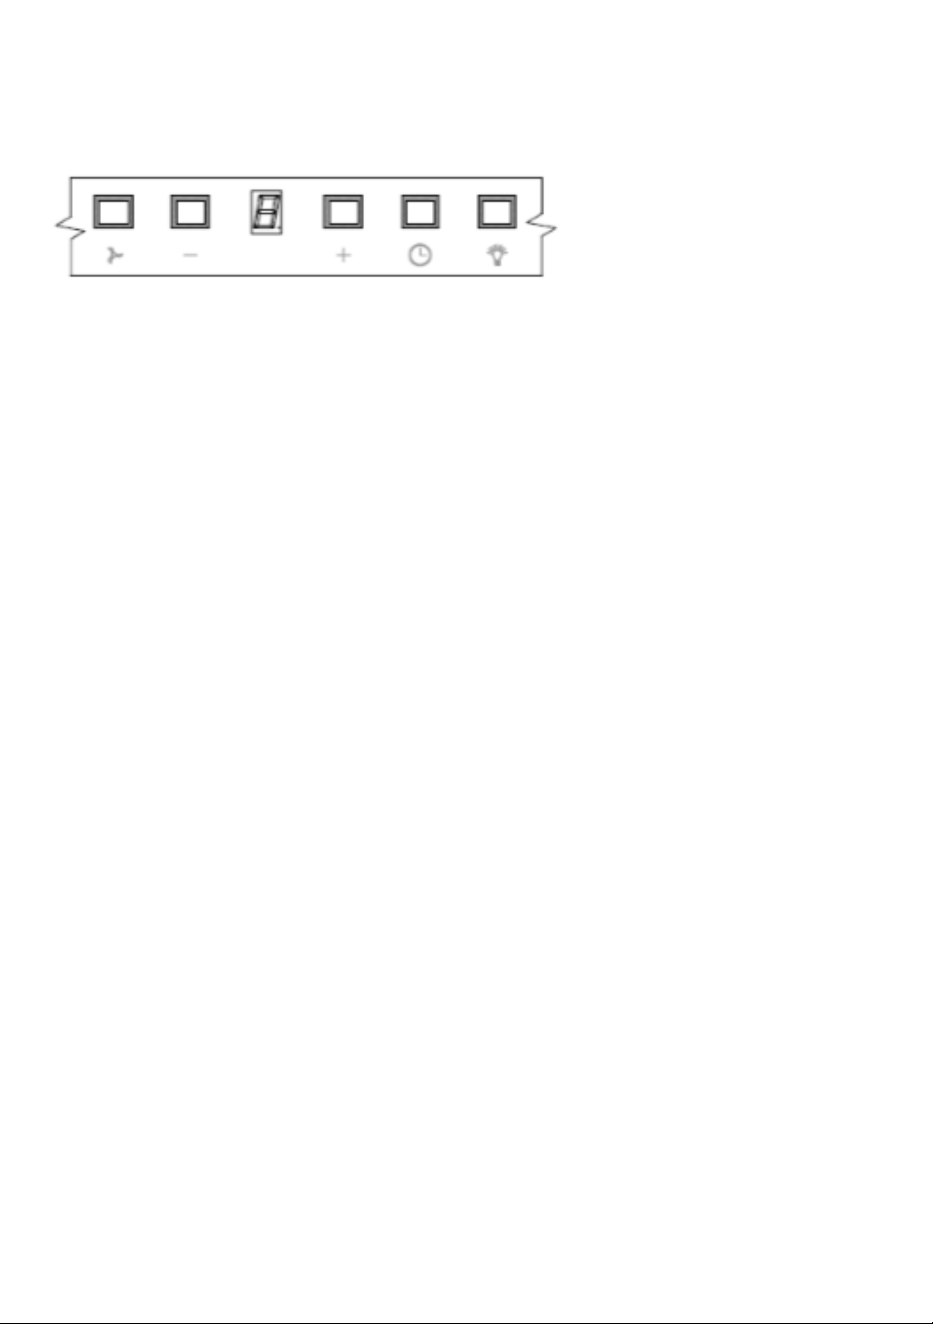
DIGITAL / TOUCH CONTROLS (5 SENSORS + DISPLAY)
1 2 3 4 5 6
1. BLOWER ON/OFF - this sensor turns the hood blower (”fan”) on at 2n
speed, and o.
2. SPEED DECREASE - decreases the blower speed.
3. DISPLAY - shows the current speed.
Filter Cleaning Reminder Feature: aer 100 hours of operaon, a “0” (zero)
or leer “A” will ash on the display, indicang that the metal grease lters
should be cleaned (in the dishwasher). Aer cleaning the lters: turn o the
hood, and reset the 100-hour mer by pressing the TIMER buon (clock
icon) for 3 seconds. The “-” (dash) symbol will appear on the display to indi-
cate that the mer has been reset.
4. SPEED INCREASE - increases the blower speed. When maximum speed is
reached, the number on the display will ash, and aer 5 minutes the speed
will be automacally lowered.
5. TIMER - Delayed Shut-O Feature: pressing this buon while the hood is
operaonal, will acvate a 10-minute mer, aer which the hood will shut
o automacally. This is a convenient way to clean up the remaining odors
when you’re nished cooking, without having to return to the hood and shut
it o manually.
6. LIGHTS - turns the lights on and o.
EN - 4
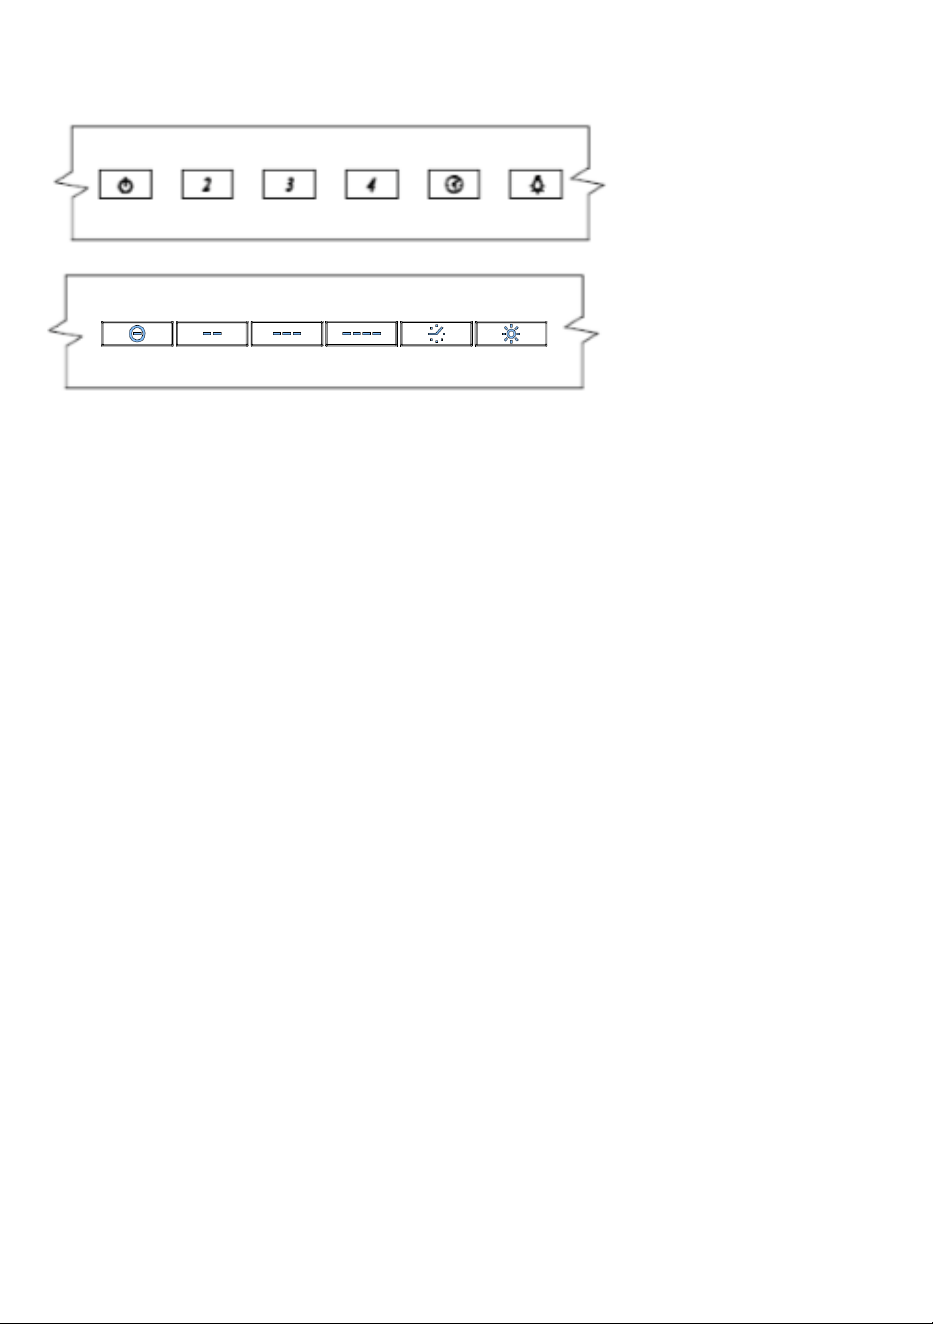
SOFT TOUCH CONTROLS WITH BACKLIGHT:
1 2 3 4 5 6
1. BLOWER ON/OFF - this buon turns the hood blower (”fan”) on at 1st
speed, and o.
2. 2ND SPEED - changes blower speed to 2nd.
3. 3RD SPEED - changes blower speed to 3rd.
4. 4TH SPEED - changes blower speed to 4th (maximum). At this speed, the
backlight will ash, and aer 5 minutes the speed will be automacally lo-
wered to 2nd speed.
5. TIMER - Delayed Shut-O Feature: pressing this buon while the hood is
operaonal, will acvate a 10-minute mer, aer which the hood will shut
o automacally. This is a convenient way to clean up the remaining odors
when you’re nished cooking, without having to return to the hood and shut
it o manually.
6. LIGHTS - turns the lights on and o.

EN - 5
SOFT-TOUCH CONTROLS:
1 2 3 4 5
This control panel version features 4 “so-touch” buons, and a variable-color LED
(red & green).
1. LIGHTS ON/OFF - turns the lights on and o.
2. SPEED DECREASE - decreases the blower speed.
3. SPEED INCREASE - increases the blower speed. At 4th speed maximum), the
LED ashes quickly, and aer 5 minutes, the hood will automacally reduce
the blower to the 2nd speed.
4. BLOWER ON/OFF + DELAYED SHUT-OFF - turns on the blower (at 2nd
speed). Pressing this buon for 3 seconds acvates the “Delayed Shut-O”
funcon, which will automacally turn o the hood aer 10 minutes. When
this funcon is acvated, the LED will ash slowly.
5. STATUS LED
EN - 6
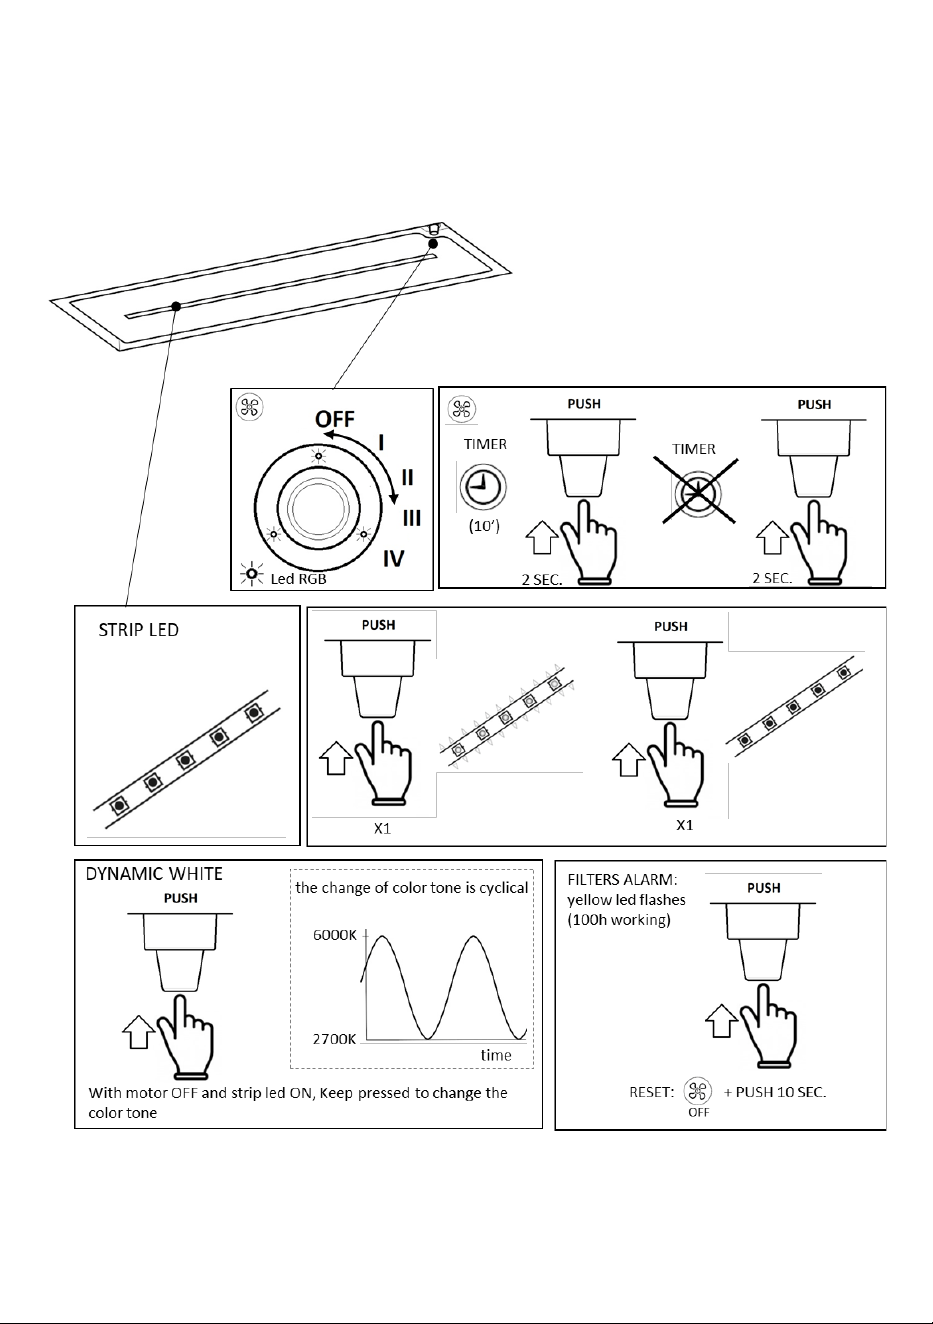
ROTARY CONTROL:
EN - 7
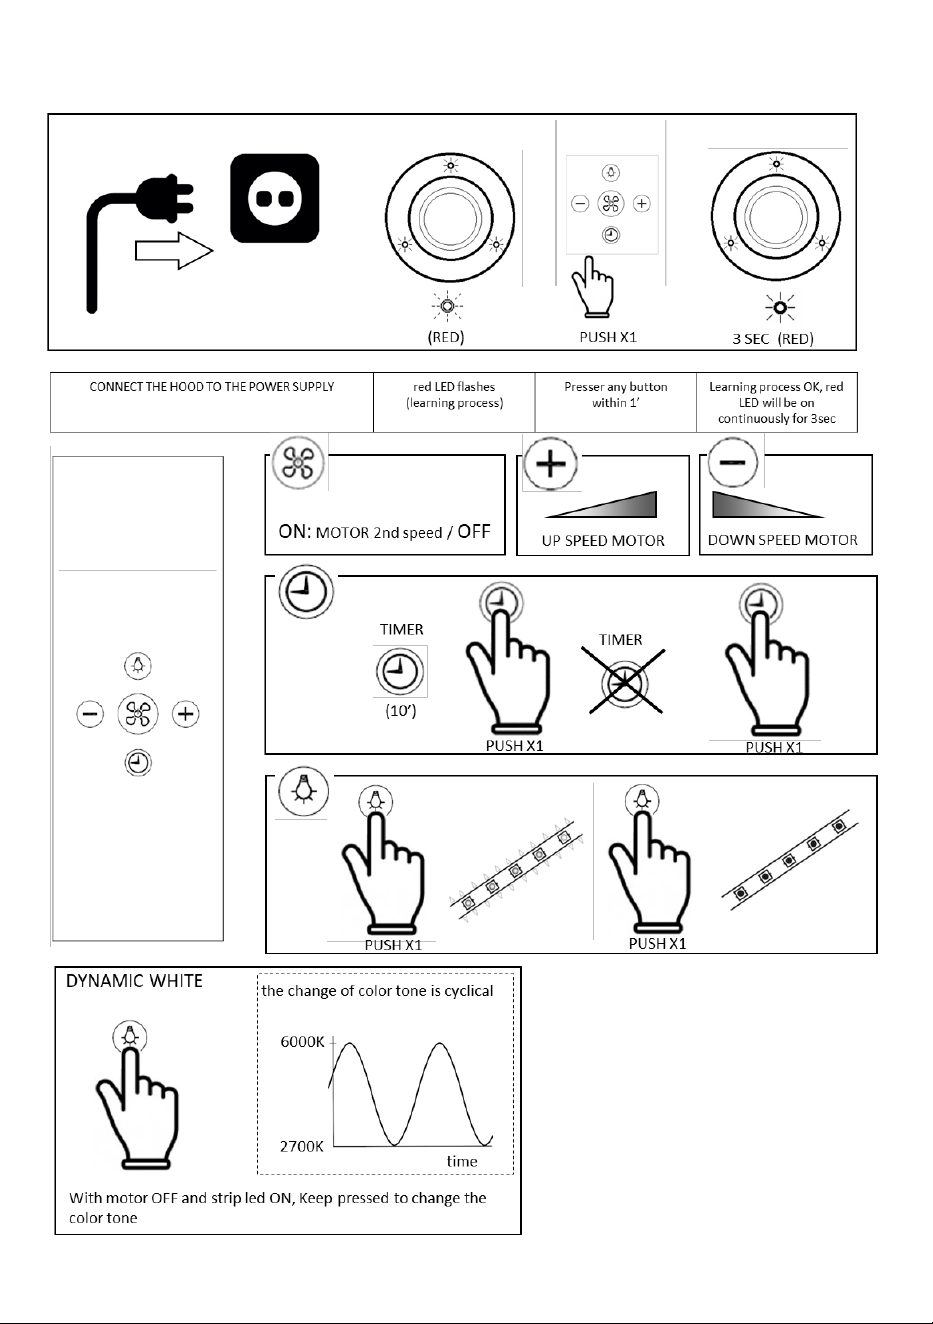
OPTIONAL: remote control learning process
EN - 8
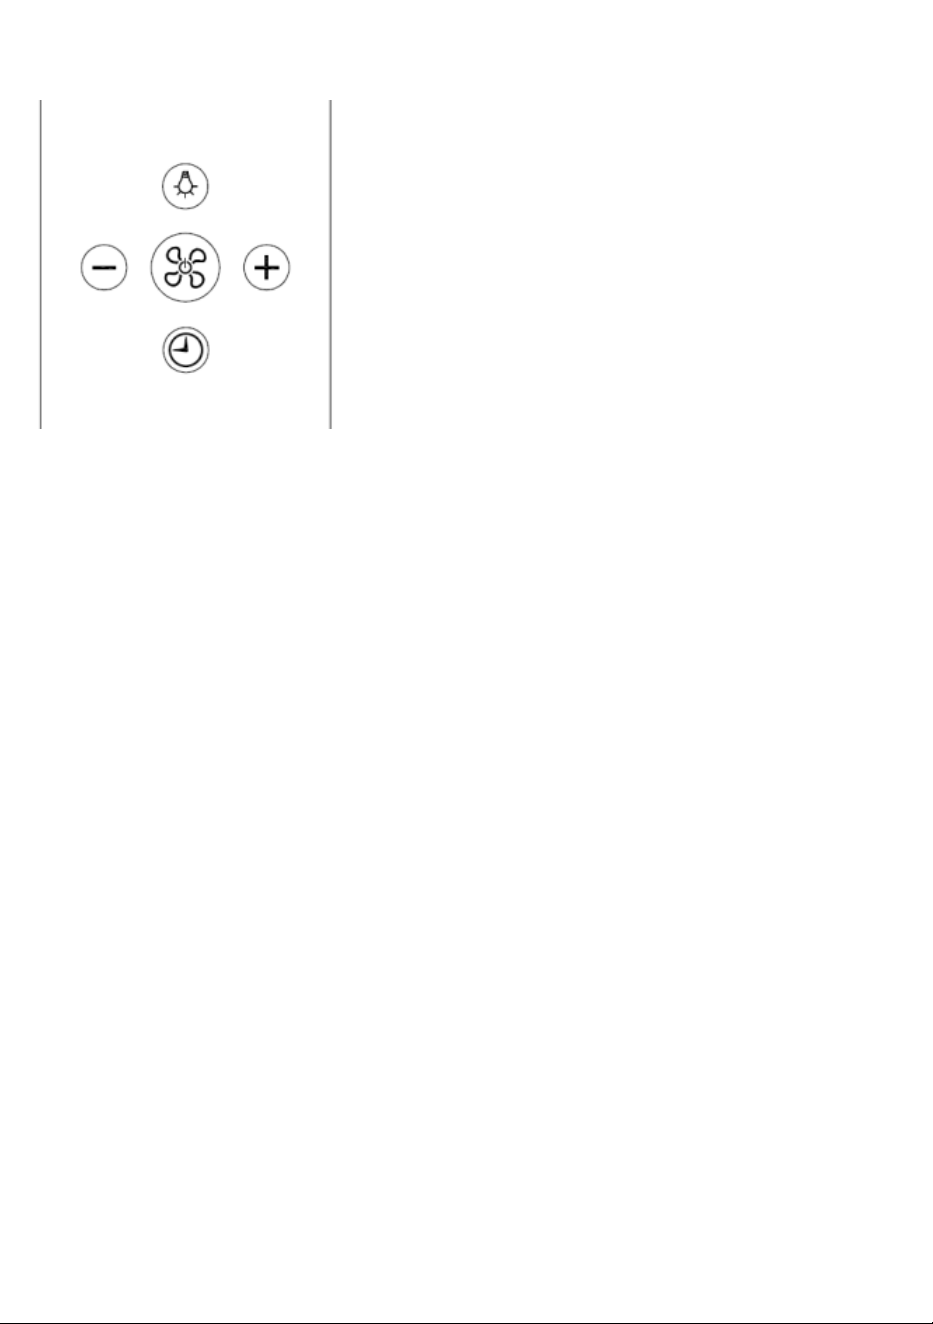
REMOTE CONTROL:
1 (top) - LIGHTS ON/OFF - turns the lights on and o.
2 (le) - SPEED DECREASE - lowers the blower speed.
3 (center) - BLOWER ON/OFF - turns on the blower at
2nd speed / turns o the blower.
4 (right) - SPEED INCREASE - increases the blower
speed. At 4th speed (maximum), the LED will ash,
and aer 5 minutes, the hood will automacally de-
crease to 2nd speed.
5 (boom) - TIMER - Delayed Shut-O Funcon: pres-
sing this buon will acvate a 10-minute mer, aer
which the hood will automacally shut o.
REMOTE CONTROL LEARNING MODE (”PAIRING”):
Range hood models equipped with a remote control are already congured.
Models for which an oponal remote control was purchased, need to have the
remote set up at the 1st use.
To set up the remote:
1. DIGITAL / TOUCH / SOFT TOUCH CONTROLS: With the range hood turned
OFF, press and HOLD the “+” buon for 5 seconds.
SOFT TOUCH CONTROLS WITH BACKLIGHT: With the range hood turned OFF,
press and HOLD the “4” buon for 5 seconds.
2. The LED or backlight (depending on model) will start ashing. This indicates
that the hood is in “Remote Learning Mode”.
3. Press any buon on the remote control.
4. LED or backlight will change from ashing to connuously lit for 3 seconds,
then turn o.
5. Conrm that the remote has been “paired” with the range hood by using its
controls. If the range hood does not respond, turn it o and repeat the lear-
ning procedure. If the procedure fails, replace the baery/baeries in the
remote control with fresh ones, and try it again.

EN - 9
DUCTED VS DUCTLESS INSTALLATION
Unless otherwise specied, any Futuro Futuro range hood can be installed in duc-
ted or ductless (“recirculang”) mode. In ducted mode, a duct conveys the air to
the outside; in ductless mode, addional ltering cartridges clean the air before
it’s released back into the kitchen. There are specic instrucons for both modes -
please read them carefully.
DUCTLESS INSTALLATION:
Recirculang ltering cartridges must be replaced according to the instrucons
specic to the range hood model and/or type of cartridges. Failure to replace lte-
ring cartridges may lead to severely
reduced airow, decreased range hood performance, and eventual damage of the
range hood internal components.
DUCTED INSTALLATION:
Installaon must be performed in accordance with local building code requi-
rements and/or regulaons.
It is strongly recommended that the duct used is the rigid type (NOT exible
type), in order to ensure smooth airow, less noise, higher performance, and
long-term reliability.
For duct dimensions, such as diameter and maximum length, please refer to
the instrucons of the specic range hood model.
Do not connect the range hood to ducng used by other appliances, heang
or cooling equipment. The range hood duct must be its own, separate line.
Duct must lead to the outside of the house. Do NOT vent into enclosed spaces
such as acs.
Duct must be terminated by a duct cap or cover that conforms to the local
building codes and regulaons. It is strongly recommended that the cap inclu-
des a “damper” (airow controller, backdra damper, etc) to prevent cold air
from blowing back inside.

EN - 10
CARE & MAINTENANCE
Before cleaning or maintenance, disconnect the power to the range hood. These
general instrucons apply to the vast majority of range hoods. Certain specic mo-
dels may include addional cleaning or operang instrucons, as detailed in their
model-specic manual.
CLEANING RANGE HOOD BODY:
Stainless-steel range hoods should be cleaned with a non-abrasive cleaner, such as
WD-40. Models that feature enamel nish, or glass surfaces, should be cleaned
with a non-abrasive glass cleaner, or a warm moist dish cloth. Do not use abrasive
substances, such as stainless steel polishes, cleaning powders, scrubbing sponges,
or steel wool.
CONDENSATION:
It’s generally recommended to turn on the range hood a few minutes before coo-
king, in order to establish airow and prevent condensaon from the hot steam
hing the cold surface of the range hood. It’s also recommended to use the De-
layed Shut-O feature (10-minute mer), so that any moist air remaining in the
hood or ductwork is completely expelled.
Another cause for condensaon could be improper duct size or blockage. If con-
densaon occurs regularly, or if you feel air coming out of the range hood
(backdra), denitely check the ductwork to ensure it’s at least the same or larger
diameter as the blower output, not blocked, and that the backdra / louvers on
the end-cap is opening easily.
LIGHTS REPLACEMENT
LED LIGHTING:
Under normal operang condions, LED lights generally don’t require replace-
ment. However, in the rare that an LED light xture needs to be replaced, the re-
placement should be conducted only by a technician using original replacement
parts.
EN - 11
HALOGEN LIGHTING:
range hoods equipped with halogen lights may need occasional light bulb replace-
ment. Follow the replacement procedures in the model-specic manual for direc-
ons. Remember to never touch halogen bulbs (of any type, anywhere) with bare
hands, since this will signicantly shorten the life of the halogen bulb.
INCANDESCENT & FLUORESCENT LIGHTING:
range hoods equipped with incandescent or uorescent lighng will also need oc-
casional light bulb replacement - please follow the instrucons in the model-
specic manual.
FILTERS MAINTENANCE
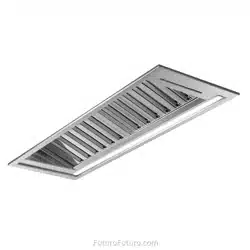
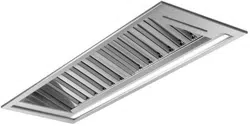
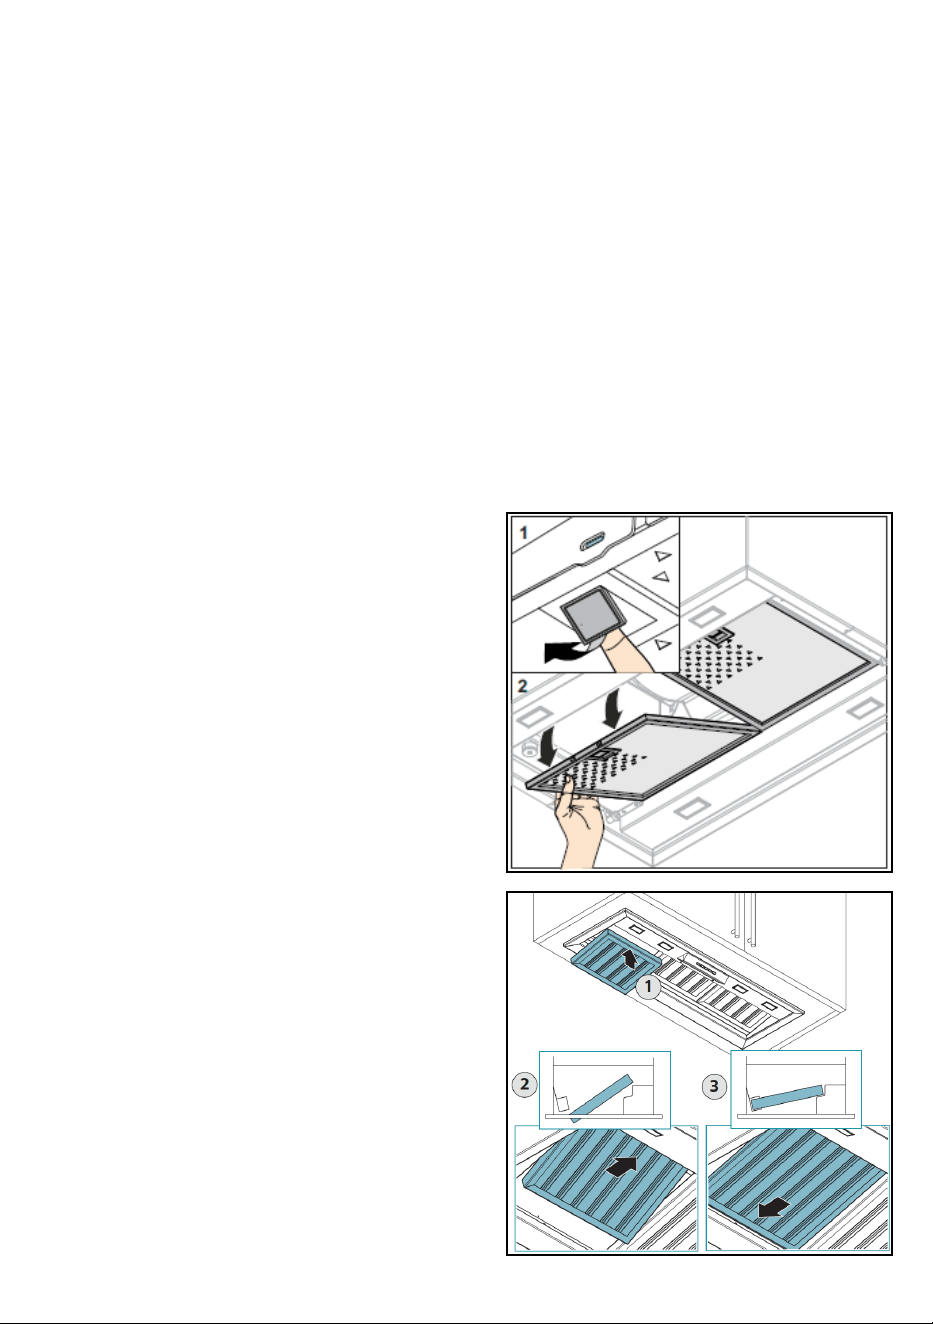
METAL GREASE FILTERS:
All Futuro Futuro range hoods are equipped
with dishwasher-safe metal grease lters.
The lters should be cleaned on a regular
basis, to avoid a heavy buildup of grease. Do
not clean the lters by hand, since that may
damage or crumple the metal mesh.
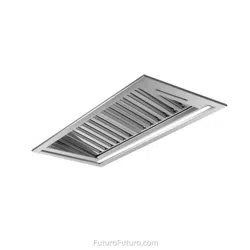
To remove the metal lters - support the
lter with 1 hand, and press / pull the loc-
king latch with the other. To reinstall the
lter: align the rear tabs with the holes in
the hood frame/holder, press/pull the latch
to retract the front tab, insert the lter, and
ensure it’s securely in place.
Many of our range hood models include a
feature called “Filter Cleaning Reminder”,
which will acvate a light on the control pa-
nel aer a certain me, to remind you to
clean the lters.

EN - 12
CHARCOAL FILTERS (DUCTLESS INSTALLATIONS):
If the range hood is not ducted to the outside, then charcoal lters should be used,
in addion to the metal lters. The acvated charcoal parcles trap odors, before
the air is released back into the kitchen.
Regular charcoal lters are NOT washable, they must be replaced periodically. The
replacement frequency depends on your cooking style and frequency. You can tell
that the lters are saturated when the hood no longer absorbs odors. Replace-
ment lters are available in the “Accessories” secons of our website.
Long-Life / Rechargeable charcoal lters can be cleaned & reacvated. To do so,
place the lter in the dishwasher, by itself (to avoid having random food parcles
geng trapped in the lter), and wash it on the highest temperature using regular
dishwasher detergent/pod/pac. Aer washing, place the lter in the oven at 220
degrees for 10 minutes. Note that even with washing and recharging, eventually
the lter will stop absorbing odors, and would need to be replaced.
OTHER FILTER TYPES:
Some models are equipped with addional ltraon cartridges and/or modules.
Please follow the instrucons in the model-specic manual for guidelines on re-
charging or replacing those cartridges.
WARRANTY
All Futuro Futuro products are covered by a US/Canada standard warranty (1 year
parts & labor).
For any quesons or concerns, including repair requests, please contact us via
hps://futurofuturo.com.
WK45 Y2020 REL.02 COD.DOLIFUTURO00000087