7215860100R02
CONSUMER SAFETY INFORMATION: PLEASE READ THIS MANUAL BEFORE
INSTALLING AND OPERATING THIS APPLIANCE. FAILURE TO FOLLOW THESE
INSTRUCTIONS MAY RESULT IN A POSSIBLE ELECTRIC SHOCK, FIRE HAZARD,
AND/OR INJURY AND WILL VOID THE WARRANTY.
To view the full line of Dimplex products,
visit www.dimplex.com
Owner’s Manual
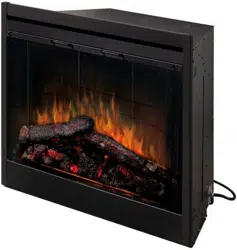
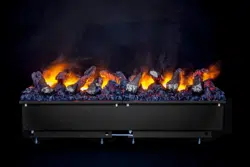
Models: SWM4220 & SWM4820
A BRAND OF GLEN DIMPLEX AMERICAS
2
Table of Contents
Conventions used in this manual:
!
NOTE: Procedures and techniques considered important enough to emphasize.
CAUTION: Procedures and techniques which, if not carefully followed, will result in
damage to the equipment.
WARNING: Procedures and techniques which, if not carefully followed, will expose the
user to the risk of fire, serious injury, or death.
Welcome ..............................................................3
IMPORTANT INSTRUCTIONS ..............................4
Specifications ....................................................... 6
Installation ............................................................7
Operation ...........................................................14
Maintenance ......................................................18
Troubleshooting ..................................................19
Warranty .............................................................20
Technical Support ...............................................22

3
Welcome
Please use our convenient online registration page to record your model and serial
numbers for future reference at:
www.dimplex.com/register
CAUTION: Read all instructions and warnings carefully before starting installation.
Failure to follow these instructions may result in a possible electric shock or fire hazard
and will void the warranty.
Serial Number
Model Number
PRECAUCION
ATTENTION
CAUTION
XXXXX
XXXXXXXXXX
AIR HEATER
CHAUFFE-AIR
CALENTADOR DE AIRE
WATTS
VATIOS
VOLTS
VOLTIOS
CAT. #
№ DE CAT.
CAT. NO.
CSA #
SERIAL NO. / № DE SÉRIE /№ DE SERIE:
MADE IN CHINA FOR: / FAIT EN CHINE POUR:
HECHO EN CHINA POR:
NO NEED TO RETURN TO THE STORE
Questions with operation or assembly? Require Parts Information?
Product Under Manufacturer’s Warranty?
Contact us at: www.dimplex.com/customer_support
For Troubleshooting and Technical Support
OR Toll-Free 1-888-346-7539
In order to better serve you, please have your model and serial numbers
ready or register your product online before calling (see above).
4
Read this manual before attempting
to install or use the electric fireplace.
Always comply with the warnings and
safety instructions contained in this
manual to prevent personal injury or
property damage.
When using electrical appliances, basic
precautions should always be followed
to reduce the risk of fire, electric shock
and injury to persons, including the
following:
• This appliance is hot when in use. To
avoid burns, do not let skin touch hot
surfaces. Keep combustible materials,
such as furniture, pillows, bedding,
papers, clothes and curtains at least
3 ft. from the bottom of this appliance
and keep away from the front.
• Extreme caution is necessary when
any heater is used by, or near, children
or invalids, and whenever the heater is
left operating and unattended.
• Do not operate any heater with a
damaged cord or plug, after the
appliance malfunctions, or if it has
been dropped or damaged in any
manner. Disconnect from power
and call Technical Service or have it
inspected by a qualified electrician.
• To disconnect the fireplace, turn the
controls off, then remove the plug from
the outlet.
• Do not use outdoors.
IMPORTANT INSTRUCTIONS
• Do not insert or allow foreign objects
to enter any ventilation or exhaust
opening as this may cause an electric
shock, fire, or damage the fireplace.
• To prevent a possible fire, do not block
air intakes or exhaust in any manner.
• Do not use feet option unless the air
deflector is installed.
• Do not use on soft surfaces, like a
bed, where openings may become
blocked.
• All electrical heaters have hot, and
arcing, or sparking parts inside. Do not
use it in areas where gasoline, paint or
flammable liquids are used or stored.
• Use this appliance only as described
in the manual. Any other use not
recommended by the manufacturer
may cause fire, electric shock or injury
to persons.
• If possible, always unplug this
appliance when not in use.
• Any repairs to this fireplace should
be carried out by a qualified service
person.
• Under no circumstances should this
fireplace be modified. Parts that have
to be removed for servicing must
be replaced prior to operating this
fireplace again.
• This heater is not intended for use in
bathrooms, laundry areas and similar
indoor locations. Never place the
heater where it may fall into a bathtub
or other water containers.
SAVE THESE INSTRUCTIONS
5
CAUTION
RISK OF ELECTRIC SHOCK
DO NOT OPEN
NO USER-SERVICEABLE PARTS INSIDE
• Always connect to properly grounded
outlets.
• Do not run cord under carpeting.
Do not cover cord with throw rugs,
runners or the like. Arrange the cord
away from heavily trafficked areas,
where it will not be tripped over.
• Always plug heaters directly into a wall
outlet/receptacle. Never use with an
extension cord or a relocatable power
tap (outlet/power strip).
• There is a resettable cutout switch
inside the heater. Should the heater
overheat, the cutout will turn the
fireplace heater off. To reset the cutout
switch unplug the unit and wait 5
minutes before plugging it back in.
Caution: If you need to continuously
reset the cutout, unplug the unit and
call Technical Support.
• Remote control contains a small
battery. Keep away from children. If
swallowed, seek medical attention
immediately.
IMPORTANT INSTRUCTIONS
FCC Compliance
CAUTION: This equipment has been
tested and found to comply with the limits for
Class B digital devices, pursuant to part 15
of the FCC rules. These limits are designed to
provide reasonable protection against harmful
interference in a residential installation. The
equipment generates, uses and can radiate
radio frequency energy and, if not installed
and used in accordance with the instructions,
may cause harmful interference to radio or
television reception, which can be determined
by turning the equipment off and on. The
user is encouraged to try and correct the
interference by one or more of the following
measures:
• Reorient or relocate the receiving antenna
• Increase the separation between the
equipment and the receiver
• Connect the equipment into an outlet on
a circuit different from that to which the
receiver is connected
• Consult the dealer or an experienced radio/
TV technician for help
This device complies with Part 15 of the FCC
rules. Operation is subject to the following two
conditions:
1. This device may not cause harmful
interference, and
2. This device must accept any interference
received, including interference that may
cause undesired operation.
Modifications not approved by the party
responsible for compliance could void user’s
authority to operate the equipment. This
Class B digital apparatus complies with
Canadian ICES-003.
6
Specications
Electrical
Voltage: 120VAC 60Hz
Watts: 1400 Watts
Amps: 12 A
Wiring: Plug-In
Bulb Type: LED
Approvals:
Dimensions
SWM4220
Width: 42" (106.7 cm)
Height: 18-1/8" (46.0 cm)
Height with feet: 20-7/8" (52.9 cm)
Depth: 5" (12.8 cm)
Depth with feet: 10-7/8" (27.6 cm)
Weight
33.7 lbs (15.3 kg)
SWM4820
Width: 48" (121.9 cm)
Height: 18-1/8" (46.0 cm)
Height with feet: 20-7/8" (52.9 cm)
Depth: 5" (12.8 cm)
Depth with feet: 10-7/8" (27.6 cm)
Weight
36.4 lbs (16.5 kg)
7
Installation
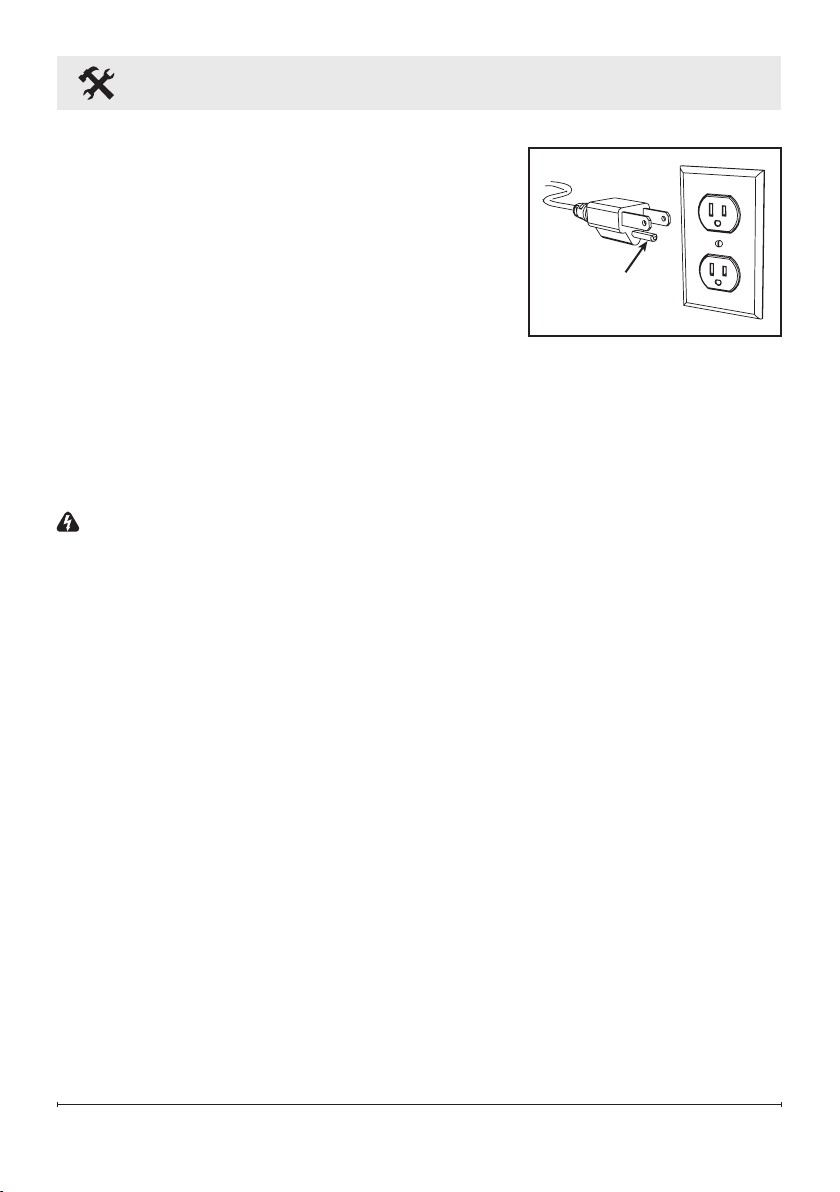
GROUNDING INSTRUCTIONS
• This product is equipped with a cord that has an
equipment-grounding conductor and a grounding
plug. The plug must be plugged into an appropriate
outlet that is properly installed and grounded in
accordance with all local codes and ordinances.
• This heater is for use on 120 volts. The cord has a
plug as shown.
• A 15 Amp, 120 Volt circuit is required. A dedicated circuit is preferred,
but not essential in all cases. A dedicated circuit will be required if,
after installation, the circuit breaker trips or the fuse blows on a
regular basis when the heater is operating. Additional appliances
on the same circuit may exceed the current rating of the circuit breaker.
WARNING: Electrical outlet wiring must comply with local building codes and other
applicable regulations to reduce the risk of fire, electric shock, or injury to persons.
Grounding
Pin
8
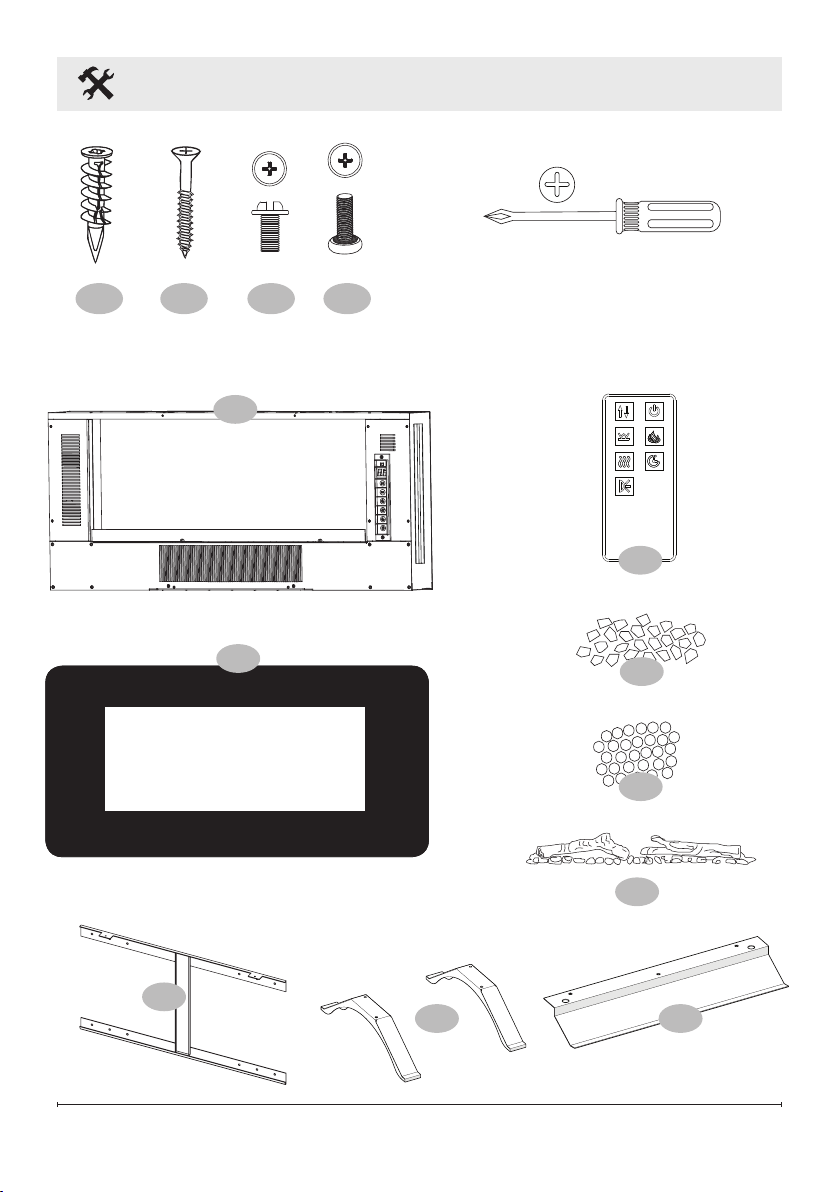
Package Contents
Tools required
x4
A
x4
B
x4
C
x4
D
2
1
3
4
8
9
5
6
7
9
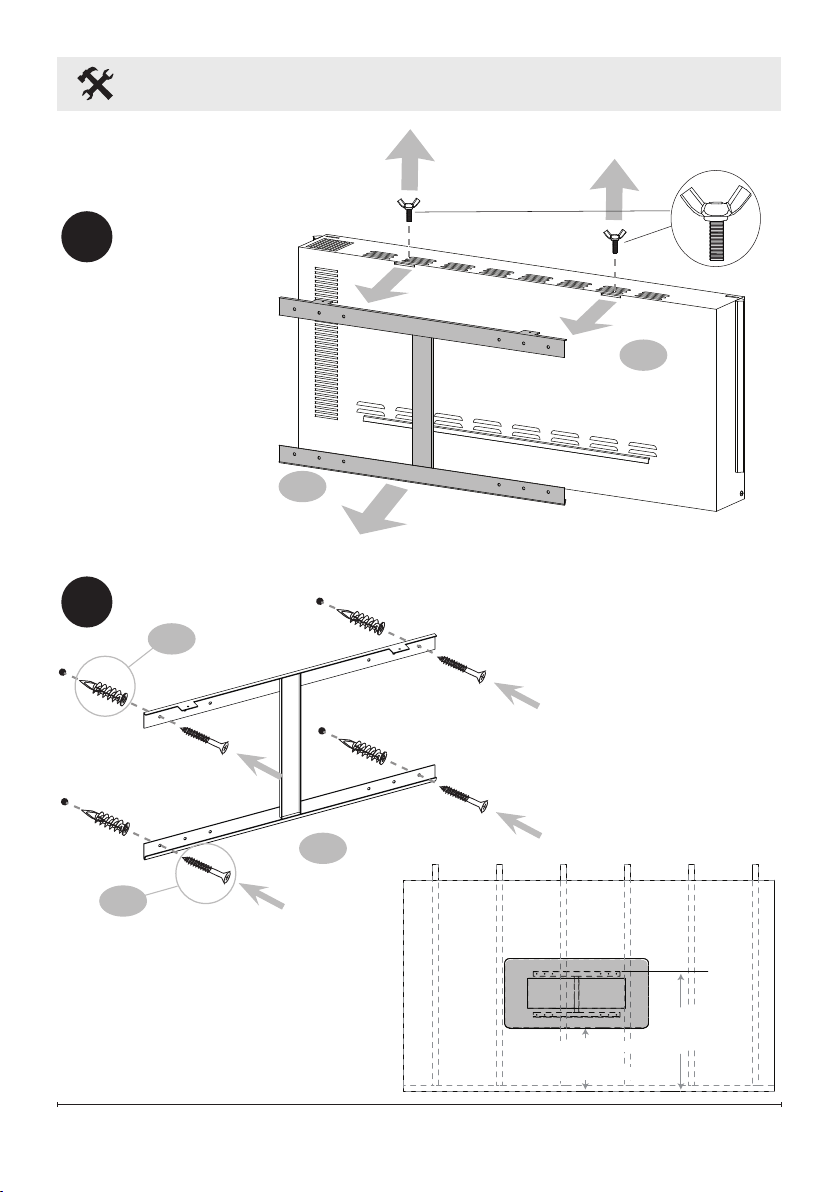
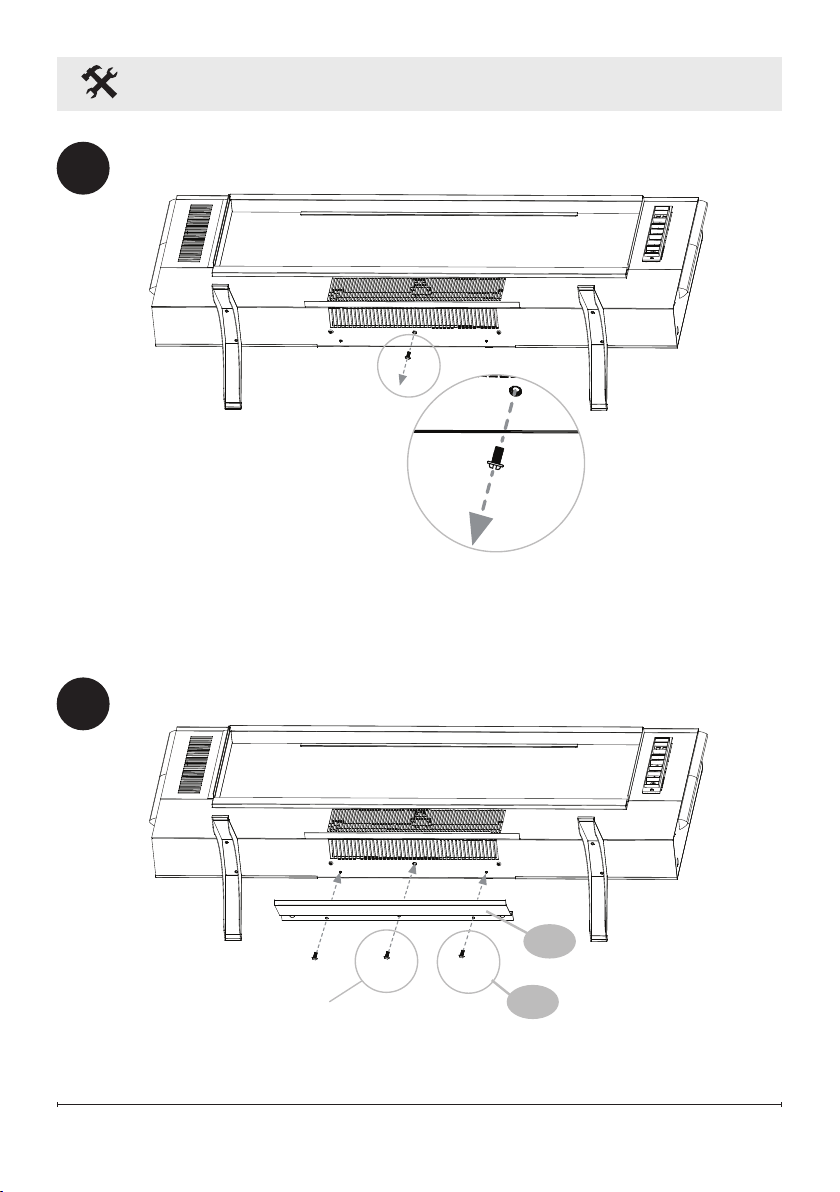
Installation
WALL-MOUNT
INSTALLATION
1
x4
B
x4
A
1
2
3
3
36 IN
|
PO
|
PLG
(
91 cm
)
MINIMUM / MÍNIMA
50 IN
|
PO
|
PLG
(127 cm)
MINIMUM / MÍNIMA

10
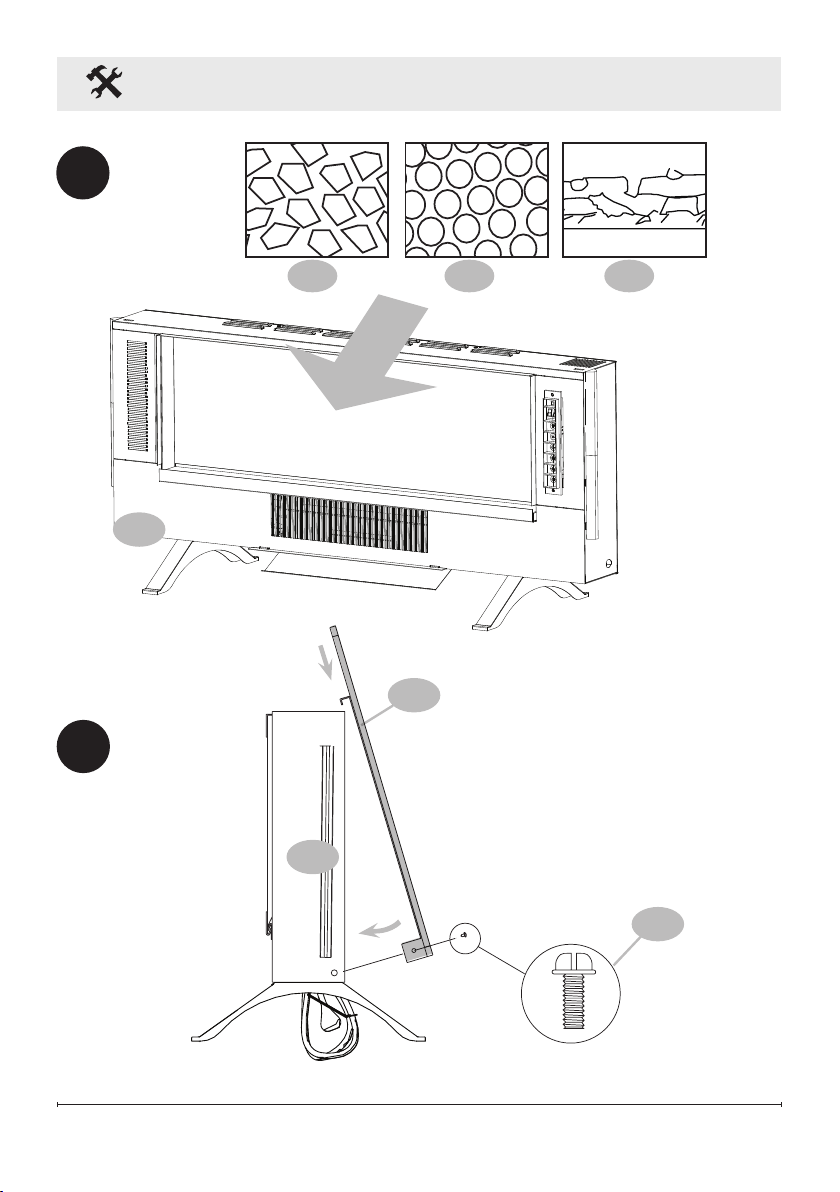
Installation
3
1
3
4
Wall
1
5 6 7
11
Installation
1
2
5
x2
C
Wall
TABLE TOP INSTALLATION
1
x4
D
8
12
Installation
2
3
x2
C
Remove screw
and save for
step 3
Replace screw
from step 2
9
13
Installation
4
1
1
2
Feet
x2
C
5
5 6 7
14
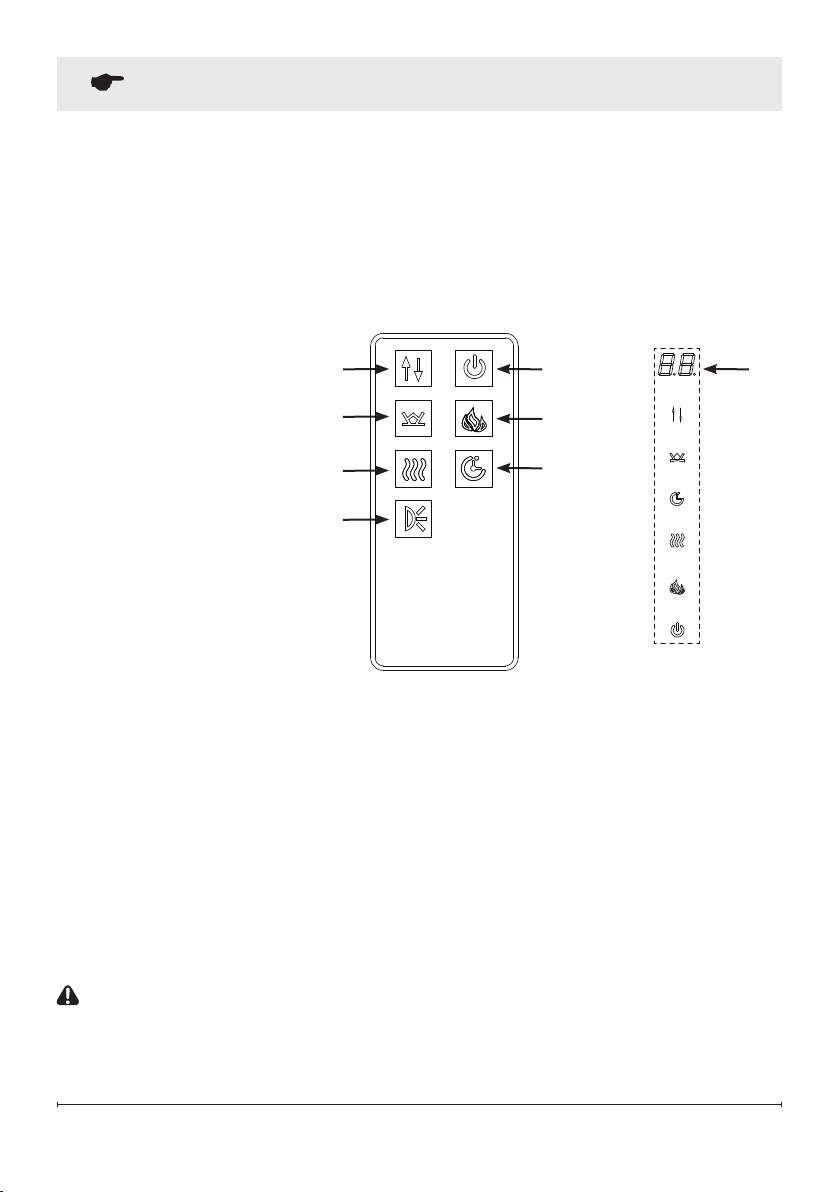
Operation
The wall-mount fireplace can be operated with the multi–function IR remote control or
from the touchscreen controls on the front glass of the fireplace.
Once the fireplace is turned on the digital display and the control icons on the front glass
will illuminate. If no button or icon is pressed within 10 seconds, the fireplace controls
will deactivate by turning off the digital display first and then the icons. To reactivate the
controls press any button on the remote or touch any icon on the front glass.
!
NOTE: The heater on your fireplace may emit a slight, harmless odor when first
used. This odor is a normal condition caused by initial heating of internal heater
parts and will not occur again.
CUTOFF SWITCH
!
NOTE: There is a safety temperature cutoff switch (cutout) inside the heater. If the
heater overheats, the cutout will shut off the supply power.
It can be reset by unplugging the unit and waiting 5 minutes before plugging the
unit back on.
CAUTION: If you need to continuously reset the heater, unplug the unit and call
technical service at 1-888-346-7539.
1
2
3
4
5
6
8
1. Power ON/OFF
2. Flame Control
3. Heat Control
4. Timer Control
5. Ember Bed
6. Level Selection
7. Backlight Control
8. Digital Display
1 86
5
3
7
2
4
15
the Level Selection button to change the brightness of the flames from the available
options: 3- High, 2- Medium and 1- Low.
When the dynamic color rotation is selected and L1 is displayed, press the Level
Selection button to change the color transition speed. Three speed options are
available: 1- Slow, 2- Medium, 3- Fast.
HEAT CONTROL
Press the Heat Control button once to turns the heater ON and OFF.
With the Heat ON and set temperature displayed, press the Level Selection multiple
times to cycle through the 11 temperature settings: 82°F, ON, 64°F, 66°F, 68°F,
70°F, 72°F, 74°F, 76°F, 78°F, 80°F (27°F, ON, 18°C, 19°C, 20°C, 21°C, 22°C, 23°C,
24°C, 25°C, 26°C).
ON means the heater will work continuously.
Operation
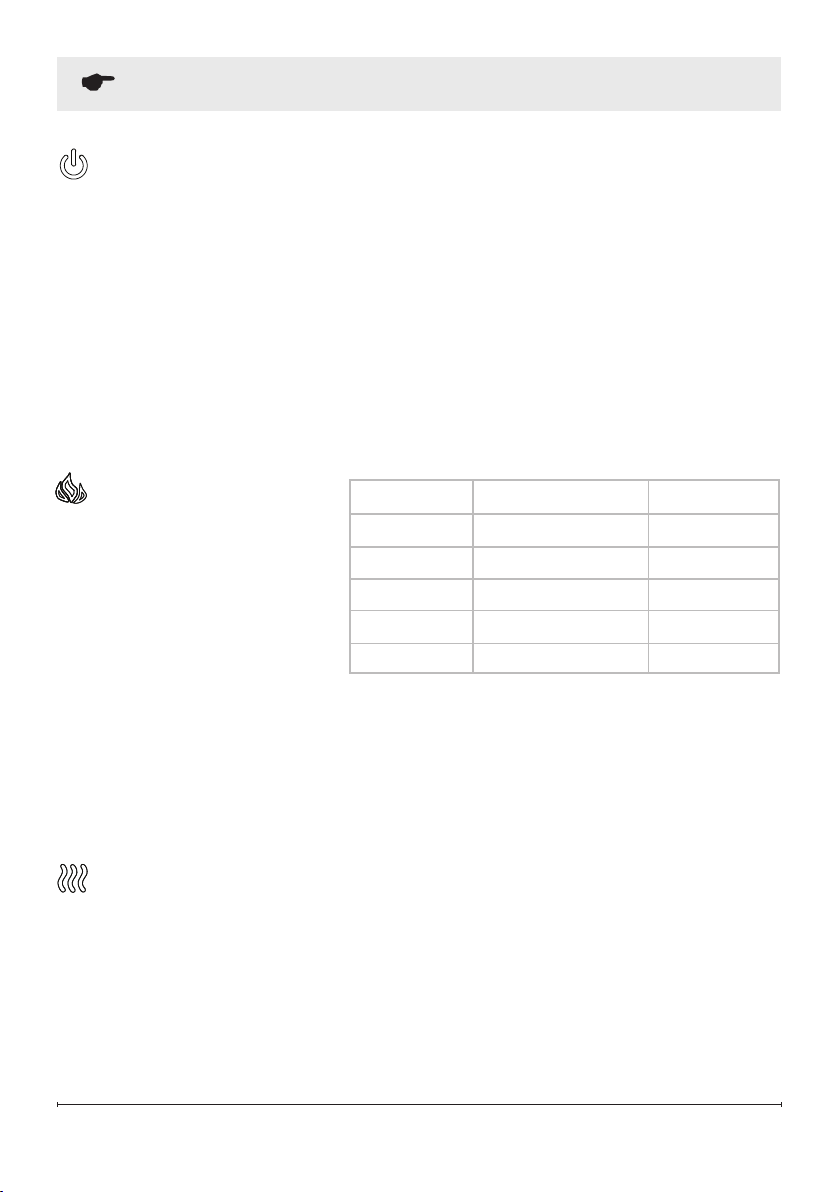
FLAME CONTROL
This button is used to turn
flames ON, alter flame color and
to turn flames OFF.
Press the Flame Control button
multiple times to cycle through
the following options: While
L4, L3 or L2 is displayed, press
POWER ON/OFF
The Power ON/OFF button turns the fireplace ON and OFF. When the fireplace is
OFF, pressing the Power ON/OFF button on the remote control or touching the icon
on the front glass will turn ON the fireplace. If the Power ON/OFF button is pressed
again within 10 seconds it will turn OFF the fireplace. With inactive controls, press
twice to turn OFF the fireplace. The first press on the Power ON/OFF button lights
up the touchscreen icons and activates the controls.
The fireplace has a built-in memory function. When the fireplace is turned back
on, the display will show the last selected function and it will start at the last used
settings (except timer). If the fireplace is disconnected from the main power source,
it will restart at the default settings.
Button Press Flame Color Display Value
1st Press Red & Yellow L4
2nd Press Blue L3
3rd Press Red, Yellow & Blue L2
4th Press Color Rotation L1
5th Press OFF NONE
16
Operation
Changing the temperature unit (°C °F):
With Heat ON and display showing the set temperature, press and hold the Power
ON/OFF button on the touchscreen for 5 seconds. The display will flash 3 times and
units will switch from °F to °C or °C to °F.
!
NOTE: This can only be done through the touchscreen controls.
Heater Enable & Disable Function:
From the touchscreen controls, press and hold the Heat Control icon for 10
seconds. The ember bed will flash six times to indicate that the heater function is
disabled. When the Heat Control button is pressed while the heat is disabled, the
ember bed will flash but the heater will not operate.
To enable the heater again, press and hold the Heat Control button for 10 seconds.
After the ember bed flashes for a second time, heat function is restored.
!
NOTE: This can only be done through the touchscreen controls.
TIMER CONTROL
The Timer Control button is used to activate or deactivate the sleep timer.
Pressing the Timer Control turns the timer ON and ‘8h’ appears on the display.
Pressing the Timer Control button a second time within 10 seconds will turn the
timer OFF. To set the timer, use the Level Selection control to select the desired time
from the following: 8h, 1h, 2h, 3h, 4h, 5h, 6h, 7h.
The fireplace will shut off after the selected time period. Switching the fireplace OFF
with the Power ON/OFF will clear any timer setting.
EMBER BED
The ember bed button is used to change the ember bed color.
Press the ember bed button multiple times to cycle through color options. ‘d8’
through ‘d2’ indicate different solid color options. d1 indicates the color rotation
option.
Use the Level Selection button while d2 through d8 is displayed to change the
brightness of the ember bed: 1- Low, 2- Medium, 3- High.
17
Operation
Use the Level Selection button while d1 is displayed to change the speed of the
color rotation: 1- Low, 2-Medium, 3- High.
BACKLIGHT CONTROL
The backlight control button is used to turn on and change the color of the
backlight.
Press the backlight control button once to turn ON the back light. Press multiple
times to cycle through different color options and to turn the back light OFF.
Use the Level Selection button while F4, F3, or F2 is displayed to change the
brightness of the backlight: 1- Low, 2- Medium, 3- High.
Use the Level Selection button while F1 is displayed to change the backlight color
rotation speed 1- Low, 2- Medium, 3- High.
!
NOTE: The backlights can be operated from the remote control.
LEVEL SELECTION
The Level Selection button is used to adjust the Heat setting, Flame and Ember
bed Brightness, Color, Rotation, speed and timer setting. See relevant section for
more details.
Button Press Flame Color Display Value
1st Press Yellow F4
2nd Press Blue F3
3rd Press Yellow & Blue F2
4th Press Color Rotation F1
5th Press OFF NONE

18
Maintenance
• Clean the metal trim using a water-dampened soft, clean cloth. DO NOT use brass
polish or household cleaners as these products will damage the metal trim.
• The motors used on the fan and the flame generator assembly are pre-lubricated
for extended bearing life and require no further lubrication. However, periodic
cleaning/vacuuming of the fan/heater and air intake/output vents is recommended.
The heater should be cleaned and inspected regularly, depending on conditions,
and at least at yearly intervals.
WARNING: Any electrical repairs of this unit should be carried out by a licensed
electrician in accordance with national and local codes.
WARNING: Disconnect power by unplugging the power and allowing heater to
cool before attempting any maintenance or cleaning to reduce the risk of fire,
electric shock, or injury.
!
NOTE: When the heater is not in use, the heater should be stored in a dry
location, away from possible damage. The power cord should be stored properly
to avoid contact with hot or sharp objects.
Remote Control
The battery compartment is located on the back end of the remote control.
1. Press and slide the battery cover open.
2. Insert one 3V (CR2032) battery (included) with the + side up into the battery
compartment.
3. Replace the battery cover.
!
NOTE:
The battery should be removed if the product is to be left unused for a
long time.
Replacing the Remote Control Batteries
• When replacing the battery, replace with new battery of the correct type.
• Non-rechargeable battery is not to be recharged. Exhausted battery is to be
removed from the product and properly disposed of.
19
Maintenance
Disposal of
Used Batteries
Batteries may contain hazardous substances that could be endangering to
environment and human health.
• This symbol marked on the battery and/or packaging indicates that used batteries
shall not be treated as municipal waste. Instead they shall be left at the appropriate
collection point for recycling.
• By ensuring the used batteries are properly disposed of, you will help prevent
potential negative consequences for the environment and human health. The
recycling of materials will help to conserve natural resources.
For more information about collection and recycling of used batteries, please
contact your local municipality, your waste disposal service or the point of sale
where you purchased this item.
Troubleshooting
Fault code Fault Cause Solution
E1 The heater overheating Call after-sales service.
E2 Thermistor is defective. Call after-sales service.
E3 The heater not working. If the vents are dirty or clogged. Unplug
the power, clean the dust and debris of
the vent area. Wait for 5 minutes, plug
in and turn on the heater. If the heater
still don't work, please call after-sales
service.

20
Warranty
One Year Limited Warranty
Products to which this limited warranty
applies
This limited warranty applies to your newly
purchased Dimplex electric compact
insert. This limited warranty applies only
to purchases made in any province of
Canada except for Yukon Territory, Nunavut,
or Northwest Territories or in any of the
50 States of the USA (and the District of
Columbia) except for Hawaii and Alaska.
This limited warranty applies to the original
purchaser of the product only and is not
transferable.
Products excluded from this limited warranty
Light bulbs are not covered by this limited
warranty and are the sole responsibility of
the owner/purchaser. Products purchased
in Yukon Territory, Nunavut, Northwest
Territories, Hawaii, or Alaska are not covered
by this limited warranty. Products purchased
in these States, provinces, or territories are
sold AS IS without warranty or condition
of any kind (including, without limitation,
any implied warranties or conditions of
merchantability or fitness for a particular
purpose) and the entire risk of as to the
quality and performance of the products
is with the purchaser, and in the event of a
defect the purchaser assumes the entire cost
of all necessary servicing or repair.
What this limited warranty covers and for
howlong
Products covered by this limited warranty
have been tested and inspected prior to
shipment and, subject to the provisions
of this warranty, Glen Dimplex Americas
Ltd. (herein called Glen Dimplex Americas)
warrants such products to be free from
defects in material and workmanship for a
period of 12 months from the date of the first
purchase of such product.
The limited 12 month warranty period
also applies to any implied warranties that
may exist under applicable law. Some
jurisdictions do not allow limitations on how
long an implied warranty lasts, so the above
limitation may not apply to the purchaser.
What this limited warranty does not cover
This limited warranty does not apply to
products that have been repaired (except
by Glen Dimplex Americas or its authorized
service representatives) or otherwise altered.
This limited warranty does further not apply
to defects resulting from misuse, abuse,
accident, neglect, incorrect installation,
improper maintenance or handling, or
operation with an incorrect power source.
What you must do to get service under this
limited warranty
Defects must be brought to the attention
of Technical Service at 1-888-346-7539.
Please have proof of purchase, catalogue/
model and serial numbers available when
calling. Limited warranty service requires a
proof of purchase of the product.
What Glen Dimplex Americas will do in the
event of a defect
In the event a product or part covered by this
limited warranty is proven to be defective in
material or workmanship during the 12 month
limited warranty period you have the following
rights:
• Glen Dimplex Americas will in its sole
discretion either repair or replace such

21
defective product or part without charge.
If Glen Dimplex Americas is unable
to repair or replace such product or
part, or if repair or replacement is not
commercially practicable or cannot be
timely made, Glen Dimplex Americas may,
in lieu of repair or replacement, choose
to refund the purchase price for such
product or part.
• Limited warranty service will be performed
solely by dealers or service agents of Glen
Dimplex Americas authorized to provide
limited warranty services.
• The purchaser is responsible for removal
and transportation of such product or part
(and any repaired or replacement product
or part) to and from the authorized
dealer’s or service agent’s place of
business.
• This limited warranty does not entitle the
purchaser to on-site or in-home services.
On-site or in-home services may be
performed at the purchaser’s specific
request and expense at Glen Dimplex
Americas then-current rates for such
services.
• Glen Dimplex Americas will not be
responsible for, and the limited warranty
services shall not include, any expense
incurred for installation or removal of
the product or part (or any replacement
product or part) or any labour or
transportation costs. Such costs shall be
the purchaser’s responsibility.
How State and Provincial law apply
This limited warranty gives you specific legal
rights, and you may also have other rights
which vary from jurisdiction to jurisdiction.
The provisions of the United Nations
Convention on Contracts for the Sale of
Goods shall not apply to this limited warranty
or the sale of products covered by this
limited warranty.
What Glen Dimplex Americas and its dealers
and service agents are also not responsible
for:
IN NO EVENT WILL GLEN DIMPLEX
AMERICAS, OR ITS DIRECTORS,
OFFICERS, OR AGENTS, BE LIABLE TO
THE PURCHASER OR ANY THIRD PARTY,
WHETHER IN CONTRACT, IN TORT, OR ON
ANY OTHER BASIS, FOR ANY INDIRECT,
SPECIAL, PUNITIVE, EXEMPLARY,
CONSEQUENTIAL, OR INCIDENTAL LOSS,
COST, OR DAMAGE ARISING OUT OF
OR IN CONNECTION WITH THE SALE,
MAINTENANCE, USE, OR INABILITY TO
USE THE PRODUCT,
EVEN IF GLEN DIMPLEX AMERICAS OR ITS
DIRECTORS, OFFICERS, OR AGENTS HAVE
BEEN ADVISED OF THE POSSIBILITY OF
SUCH LOSSES, COSTS OR DAMAGES, OR
IF SUCH LOSSES, COSTS, OR DAMAGES
ARE FORESEEABLE. IN NO EVENT WILL
GLEN DIMPLEX AMERICAS, OR ITS
OFFICERS, DIRECTORS, OR AGENTS
BE LIABLE FOR ANY DIRECT LOSSES,
COSTS, OR DAMAGES THAT EXCEED THE
PURCHASE PRICE OF THE PRODUCT.
SOME JURISDICTIONS DO NOT ALLOW
THE EXCLUSION OR LIMITATION OF
INCIDENTAL OR CONSEQUENTIAL
DAMAGES, SO THE ABOVE LIMITATION
OR EXCLUSION MAY NOT APPLY TO THE
PURCHASER.

In keeping with our policy of continuous
product improvement, we reserve the
right to make changes without notice.
© 2020 Glen Dimplex Americas
Technical Service
Contact our friendly customer service team for technical and trouble-shooting
support. Make sure you have your sales receipt, location of purchase, and the
model and serial number of your product.
1-888-346-7539 | www.dimplex.com/contact_us