Loading ...
Loading ...
Loading ...
Page 7
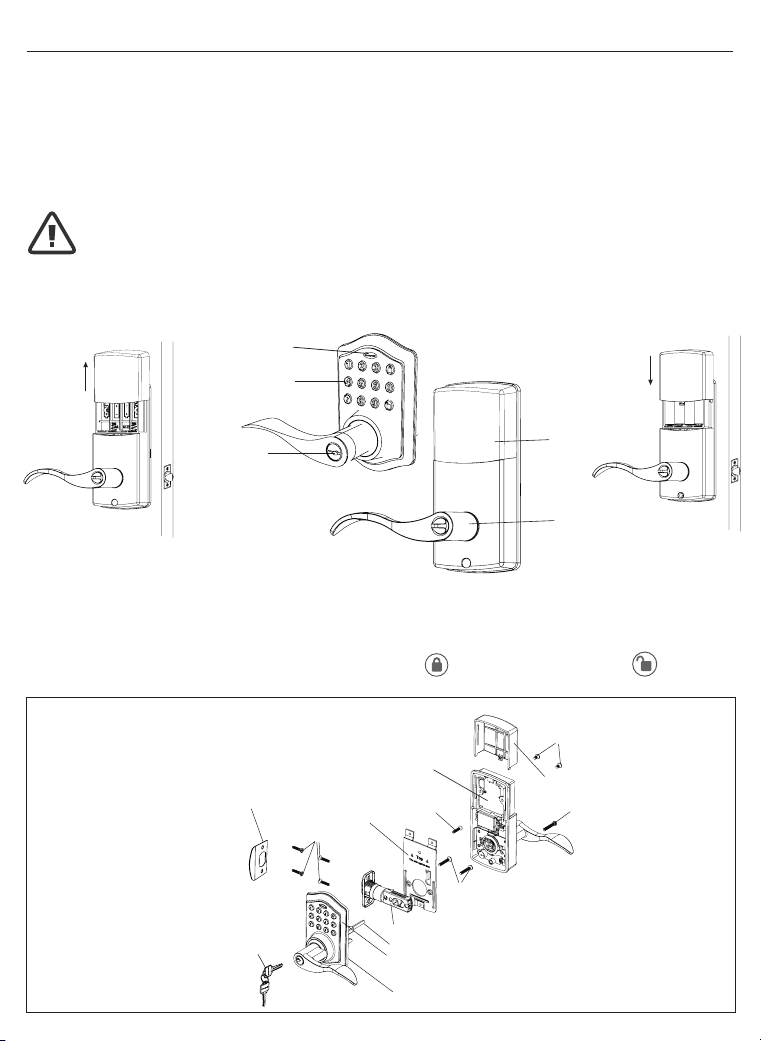
13. Installing Batteries
a.Insert4AAhighqualityAlkalinebatteriesintotheBatteryCompartmentinthe
directionnoted+/-ontheCompartment.TheLockwillbeep2times,thekeypad
willilluminateblue,andtheHoneywellbuttonwillashgreentwicetosignifythat
ithasreceivedpower(Figure13a).
b.SlidetheBatteryCoverdownintothetrackontheInteriorAssemblytocover
thebatteries(Figure13b).
14. Testing Lock
WiththeDoorOpen
a.TesttheLockusingtheInteriorLever.TheLatchshouldmovesmoothly.
b.TestthelockusingtheKeypad.Tolockpressandthenpress“1234”
to unlock.
INSTALLINGINTERIORASSEMBLY(CONT.)
Override
AccessKey
Exterior Assembly
Interior Assembly
Interior
Lever
Battery
Cover
Light Indicator
Keypad
NOTE: Do not touch the Keypad until the blue light turns off.
Do not use rechargeable batteries or non-alkaline batteries.
Figure13a-b
INSTALLATION OVERVIEW
Strike Plate
BatteryCover
InteriorAssembly
Keys
Exterior
Assembly
Rubber Gasket
Tailpiece
Mounting Plate
Latch
5/16”(8mm)screws
Optional
3/4”(19mm)screw
3/4”(19mm)screws
7/8”(22mm)screws
1”(25mm)Screw
Loading ...
Loading ...
Loading ...