
Loading ...
Loading ...
Loading ...
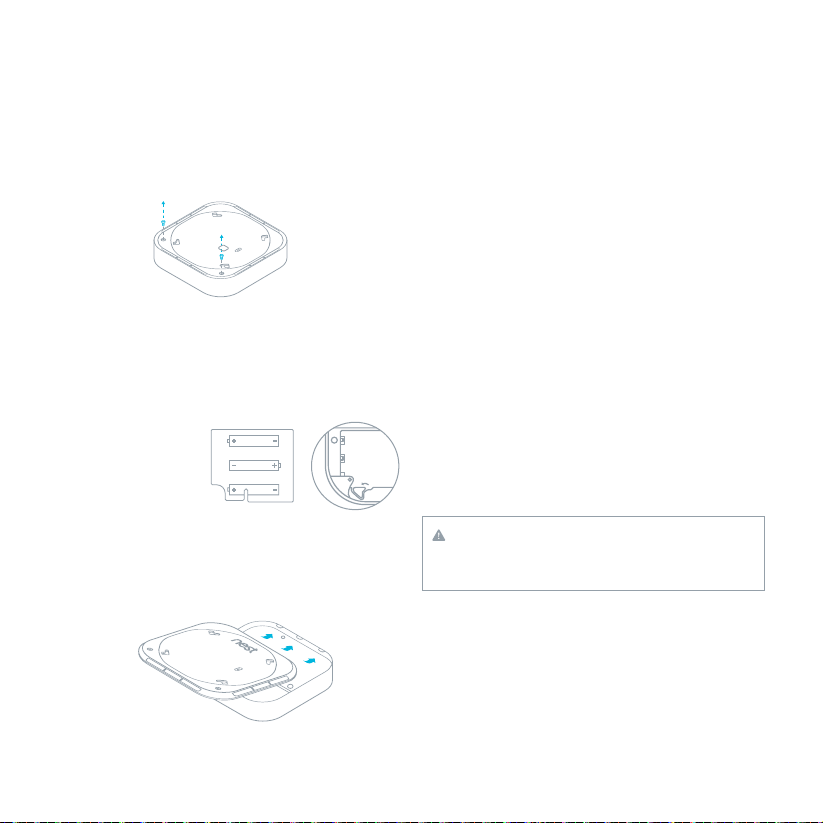
1. First battery
2. Second battery
3. Third battery. This
battery will push the
bracket into place.
1
2
3
18
REPLACING THE BACKUP BATTERIES
1. Remove your Nest Protect from its backplate.
2. Using a Phillips screwdriver, unscrew the two
screws from the battery door on the back of
Nest Protect.
3. Replace the batteries. Make sure to use
Energizer Ultimate Lithium batteries and
install them in the right order. If you install
them out of order, you may not be able to
close the battery compartment.
4. Reattach the battery door by sliding it into
the tabs located on the opposite side from
the batteries, replacing the screws and then
reattaching Nest Protect back to its base.
5. Press the Nest button to run a test.
SERVICING
Step 1: Before sending Nest Protect for service,
visit nest.com/support
Step 2: If your Nest Protect needs servicing,
first contact our support team to get a
return number.
Step 3: Send it to
Nest Labs
(YOUR RETURN NUMBER)
4 East Stow Road
Marlton, NJ 08053 USA
RECYCLING AND DISPOSAL
Visit www.nest.com/recycle
EXPIRATION
Nest Protect has a limited life like any smoke/
CO alarm. Nest Protect lifetime is 7 years.
You will need to replace Nest Protect after
7 years with a brand new Nest Protect. Check
the date of replacement written on the back
of Nest Protect.
WARNING
You’ll no longer be protected from smoke or
CO if you don’t replace your Nest Protect.
About two weeks before it expires, Nest
Protect will light up with a yellow light. Press
the Nest button and it will say, “Nest Protect
has expired. Replace it now.” Buy a new alarm
and recycle the expired one. Make sure you
test your new Nest Protect once it’s installed.
Page: 18
Loading ...
Loading ...
Loading ...