Loading ...
Loading ...
Loading ...
- 9
Set the programme switch to sweep
with roller brush and side brush.
The side-brushes lift up.
Set programme selection to "Drive".
Drive machine backwards.
Check sweeping mirror.
The width of the sweeping track should lie
between 40-50 mm.
Set the sweeping track using the two
adjusting screws.
Check sweeping mirror.
Drive the waste container up and se-
cure it with the safety rod.
DANGER
Risk of injury! Always apply the safety bar
when the waste container is raised.
Fold the safety rod for the high empty-
ing up and insert it into the holder (se-
cured).
1 Holder of safety rod
2 Safety rod
Open the side cover as described in
Chapter "Replace brush roller".
Release the 6 wing nuts on the side
holding plate.
Loosen 3 nuts (SW 13) on the front
holding plate.
Press the side seal down (elongated
hole) until it is about 1 to 3 mm to the
floor.
Screw in the holding plates.
Repeat the procedure on the other side
of the appliance.
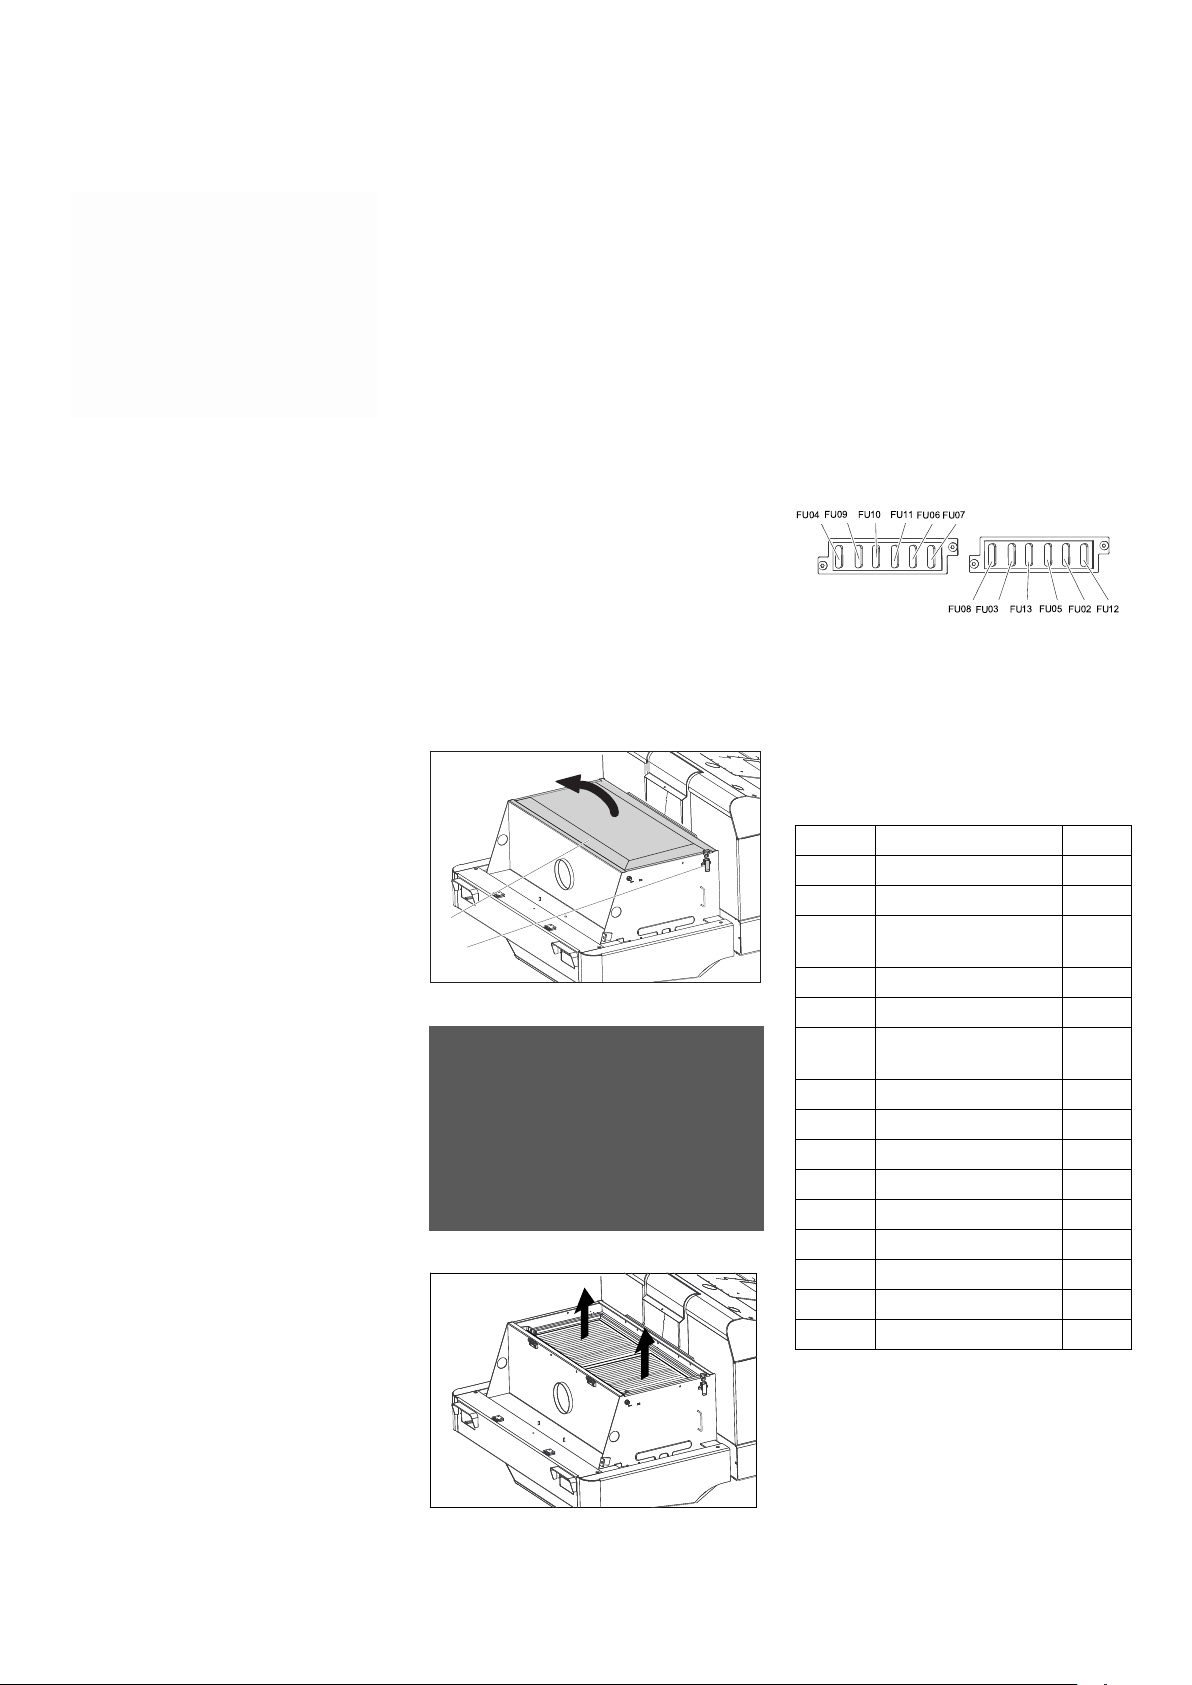
Clean the dust filter with the filter clean-
ing button.
몇 WARNING
Empty waste container before replacing
dust filter. Wear a dust mask when working
around the dust filter. Observe safety regu-
lations on the handling of fine particulate
material.
Open the lock, remove the star grip
screw to do this.
Fold cover forwards.
Open filter cap.
Fold the filter vibrator forward.
Replace the dust filter.
Close the filter cover.
Unscrew the head lamps.
Take out the head lamps and pull out
the plug.
Note: Note the positions of the plugs.
Dismantle the head lamps.
Dismantle the head lamp casing and
hold it horizontally because the lamp
unit is not fastened.
Unlock the bracked and take out the
bulb.
Insert new bulb.
Reinstall in reverse sequence.
Note: Remove the glass of the direction-in-
dicator lamp from its casing to replace the
bulb.
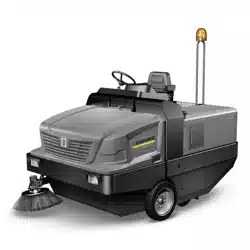
Open the fuse holder.
Check the fuses.
Replace defective fuses.
Note: The fuse FU 01 (main fuse) is locat-
ed on the electronics casing.
The fuses FU 14, FU 15 and FU 16 are lo-
cated in the electronics casing. Attention:
Opening of electronics casing and replac-
ing of fuses only by customer service.
Note: Only use fuses with identical safety
ratings.
Adjust the side seals
Manually clean the dust filter
Replacing dust filter
2
1
Changing the headlight bulb (option)
Changing the blinker bulb (option)
Replacing fuses
FU 01 Main fuse 330 A
FU 02 Seat contact switch 3 A
FU 03 Driver cabin (optional) 10 A
FU 04 Driving direction
switch
5 A
FU 05 Multifunction display 3 A
FU 06 Hydraulic oil cooler 25 A
FU 07 Program selection
switch
15 A
FU 08 Horn 10 A
FU 09 Left lighting 7,5 A
FU 10 Right lighting 7,5 A
FU 11 Working light 10 A
FU 12 Beacon lamp 5 A
FU 13 Vibrator system 10 A
FU 14 Motor 3 A
FU 15 Voltage converter 20 A
FU 16 Key switch 3A
23EN
Loading ...
Loading ...
Loading ...