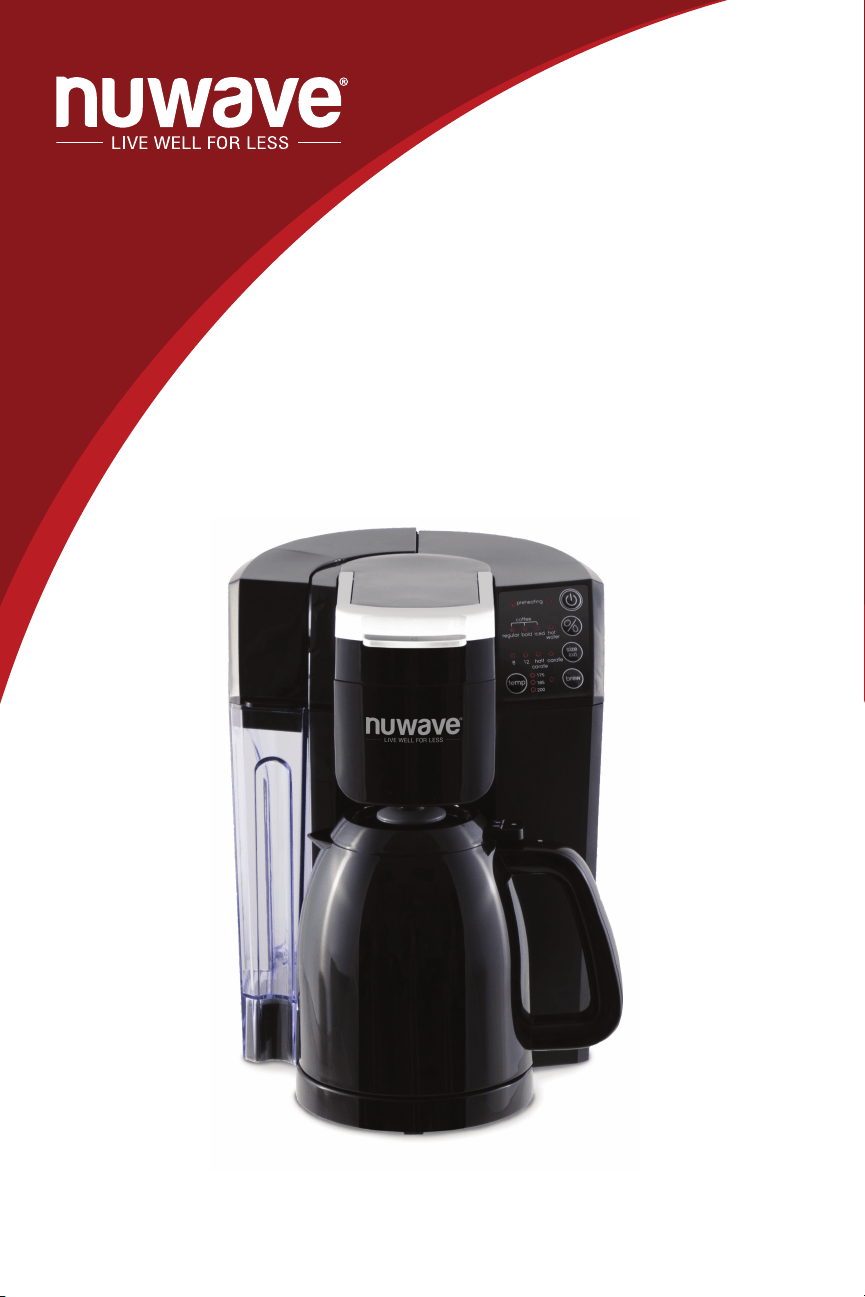
Owner’s Manual
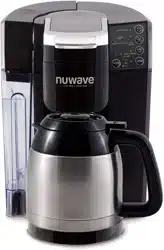
NuWave BruHub
TM
3-in-1 Coffee Maker
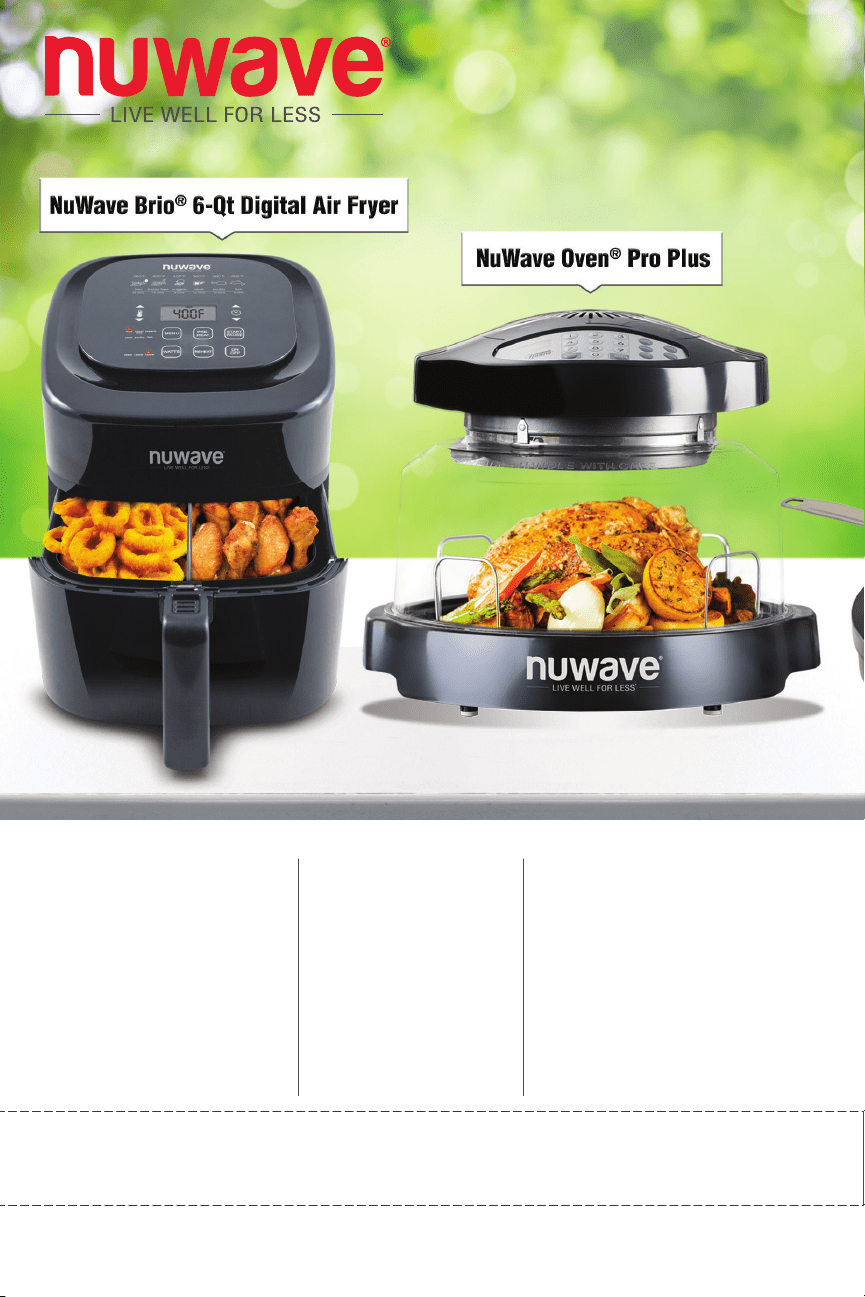
NuWave Brio
®
6Q
Digital Air Fryer
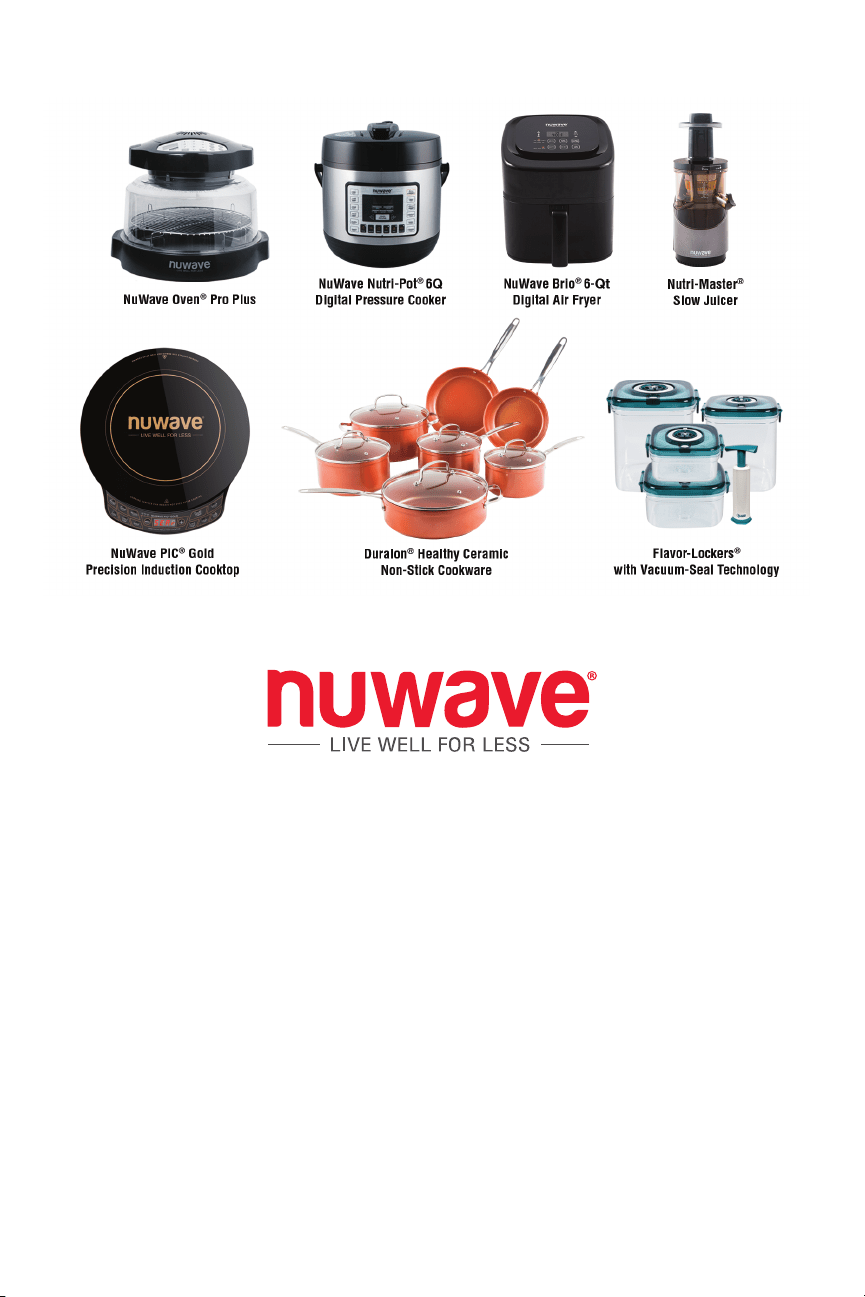
NuWave
Oven
®
Pro Plus
Super-heated air cooks
your food to crispy,
tender perfection.
The digital touch screen
gives you precise
temperature control.
Cook healthier
meals faster and
more efficiently
with Triple Combo
Cooking Power.
NuWave PIC
(Precision Induction
Cooktop)
Cook faster, safer,
and more efficiently
than you ever could
on your gas or
electric stovetop.
For more about our innovative products, visit:
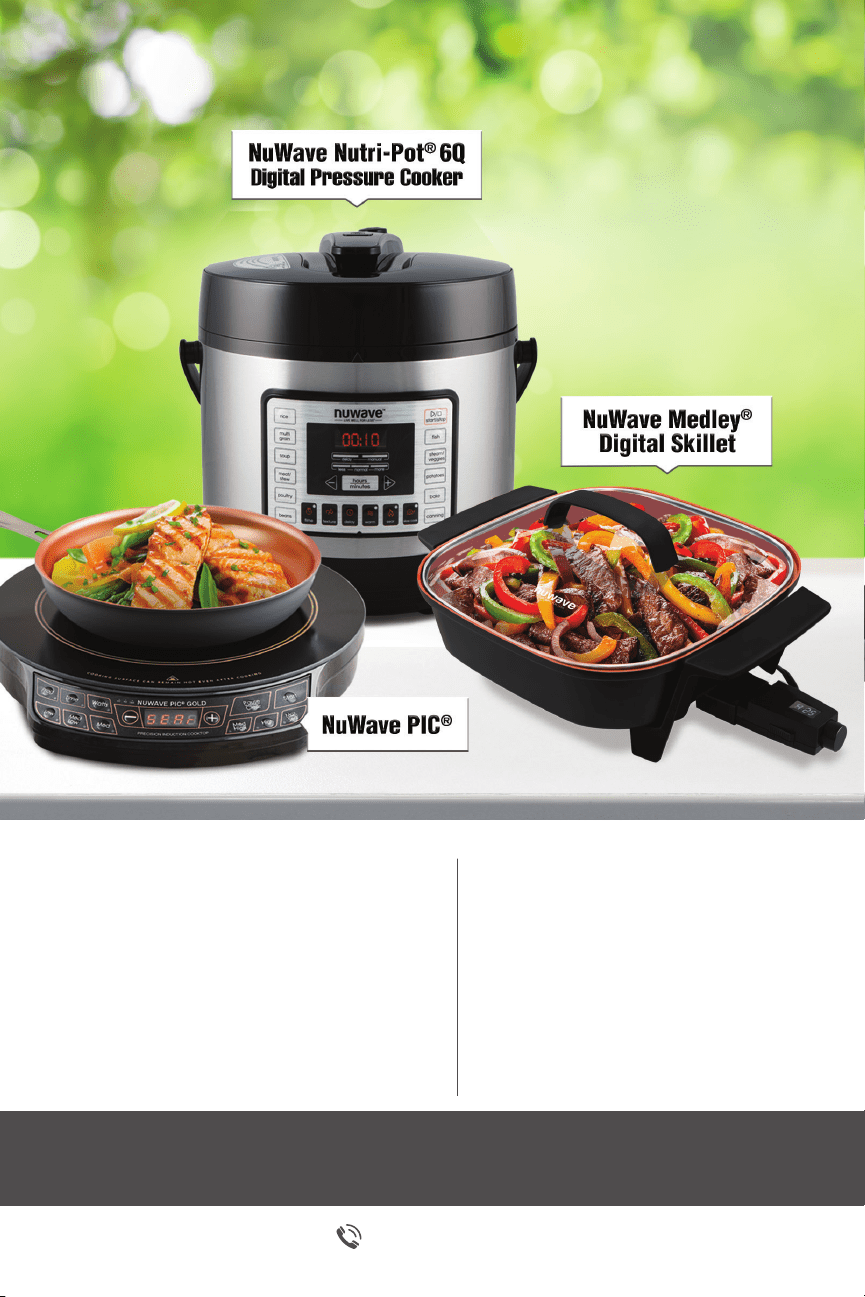
NuWave Nutri-Pot
®
6Q
Digital Pressure Cooker
Easily cook rice, poultry, vegetables
and more all with the press of a
button! The Nutri-Pot’s safety release
valve and hinged lid make for
convenient and safe operation.
NuWave Medley
®
Digital Skillet
Coated with Duralon
®
Healthy
Ceramic Non-Stick coating
for easy cleanup. Includes a
premium tempered, vented
glass lid.
1-877-689-2838
NuWaveNow.com
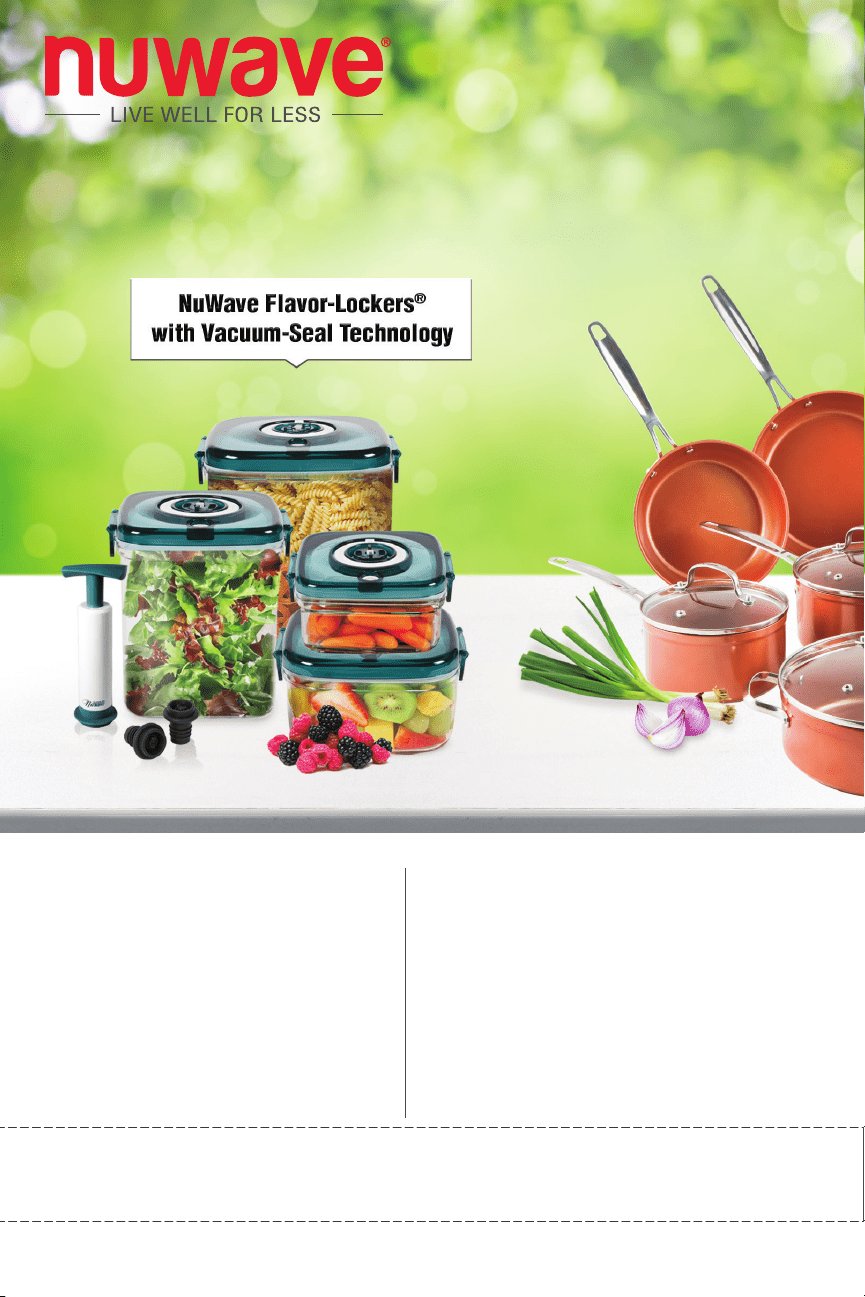
NuWave Flavor-Lockers
®
with Vacuum-Seal Technology
Keep food fresh for up to 21 days!
Slow the growth of mold by removing
trapped oxygen with a few easy pumps.
NuWave Duralon
®
Healthy
Ceramic Non-Stick
Cookware
Coated with Duralon Healthy
Ceramic Non-Stick coating for
easy cleanup, this versatile
cookware is perfect for use in
ovens or on gas, electric, and
even induction cooktops.
For more about our innovative products, visit:
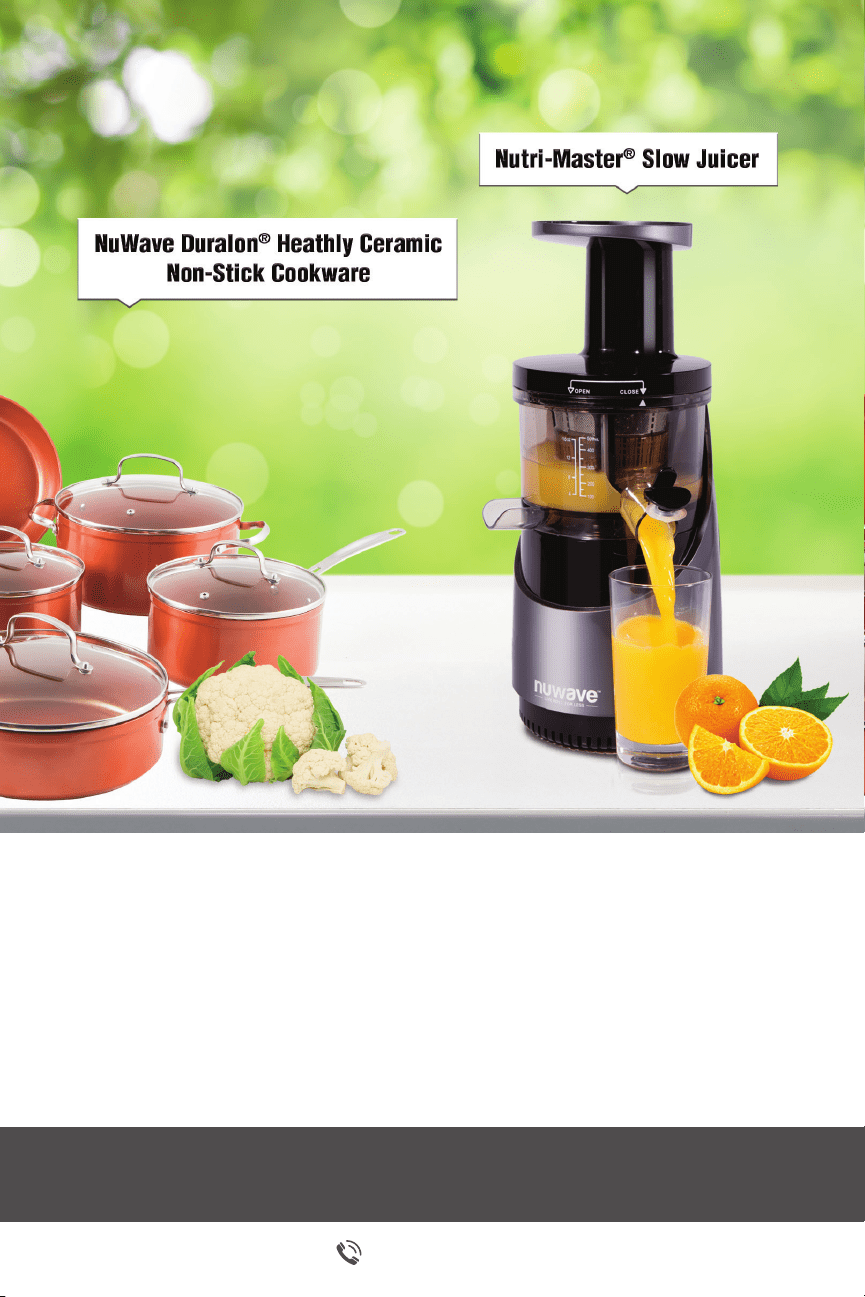
NuWave Nutri-Master
®
Slow Juicer
The Nutri-Master, with a low 48 RPM, is both
incredibly quiet and powerful enough to extract
juice from nuts and hard vegetables.
1-877-689-2838
NuWaveNow.com

6
Owner’s Manual
When using electrical appliances, basic safety precautions should always
be followed including the following:
1. Read all instructions.
2. Close supervision is necessary when any appliance is used by or near
children.
3. Do not touch hot surfaces. Care must be taken as burns can occur from
touching hot parts of the coffee maker.
4. To protect against electric shock, do not place cord, plug, or base in water
or other liquid.
5. Unplug from outlet when the coffee maker is not in use and allow to cool
before cleaning.
6. Only operate the coffee maker on at surface, away from the edge of
counter.
7. Do not operate appliance with a damaged supply cord or plug, or after
the appliance malfunctions, is dropped or is damaged in any manner.
Supply cord replacement and repairs must be conducted by the
manufacturer, its service agent, or similarly qualied persons.
Call Customer Service at 1-877-689-2838 or email help@nuwavenow.com
for information on repairs.
8. The use of accessory attachments not recommended by the appliance
manufacturer may result in re, electrical shock, or bodily injury up to and
including death.
9. Do not use outdoors.
10. Do not use appliance for other than intended use.
TABLE OF CONTENTS
OWNER’S MANUAL
Important Safeguards ...................................................................................6-7
Save These Instructions ..................................................................................7
Parts..............................................................................................................8-9
Before First Use .............................................................................................10
Assembly .................................................................................................. 11-14
Functions ..................................................................................................15-16
Insert & Beverage Selection Charts ...............................................................17
Cleaning and Maintenance .......................................................................18-20
Troubleshooting ........................................................................................21-22
Warranty ........................................................................................................23
IMPORTANT SAFEGUARDS

7
Owner’s Manual
IMPORTANT SAFEGUARDS
11. Do not let cord hang over edge of table or counter or touch hot surfaces,
including stove.
12. Do not place coffee maker on or near a gas or electric burner or in an oven.
13. To disconnect coffee maker, press the power button off and then remove
plug from wall outlet.
14. WARNING! To reduce the risk of re or electric shock, do not remove the
bottom cover.
15. Do not open lid during a brewing cycle.
16. The Single Serve Insert contains sharp pieces! Use caution when
assembling, disassembling, or cleaning parts.
SAVE THESE INSTRUCTIONS
Other Consumer Safety Information
This appliance is intended for household use only.
a) A short power-supply cord (or detachable power-supply cord) is provided to
reduce risks resulting from becoming entangled in or tripping over a longer cord.
b) Longer detachable power-supply cords or extension cords are available and
may be used if care is exercised in their use.
c) If a long detachable power-supply cord or extension cord is used:
1) The marked electrical rating of the detachable power-supply cord or
extension cord should be at least as great as the electrical rating of the
appliance;
2) If the appliance is of the grounded type, the extension cord should be a
grounding-type 3-wire cored; and
3) The longer cord should be arranged so that it will not drape over the
counter top or table to where it can be pulled on by children or tripped over.
8
Owner’s Manual
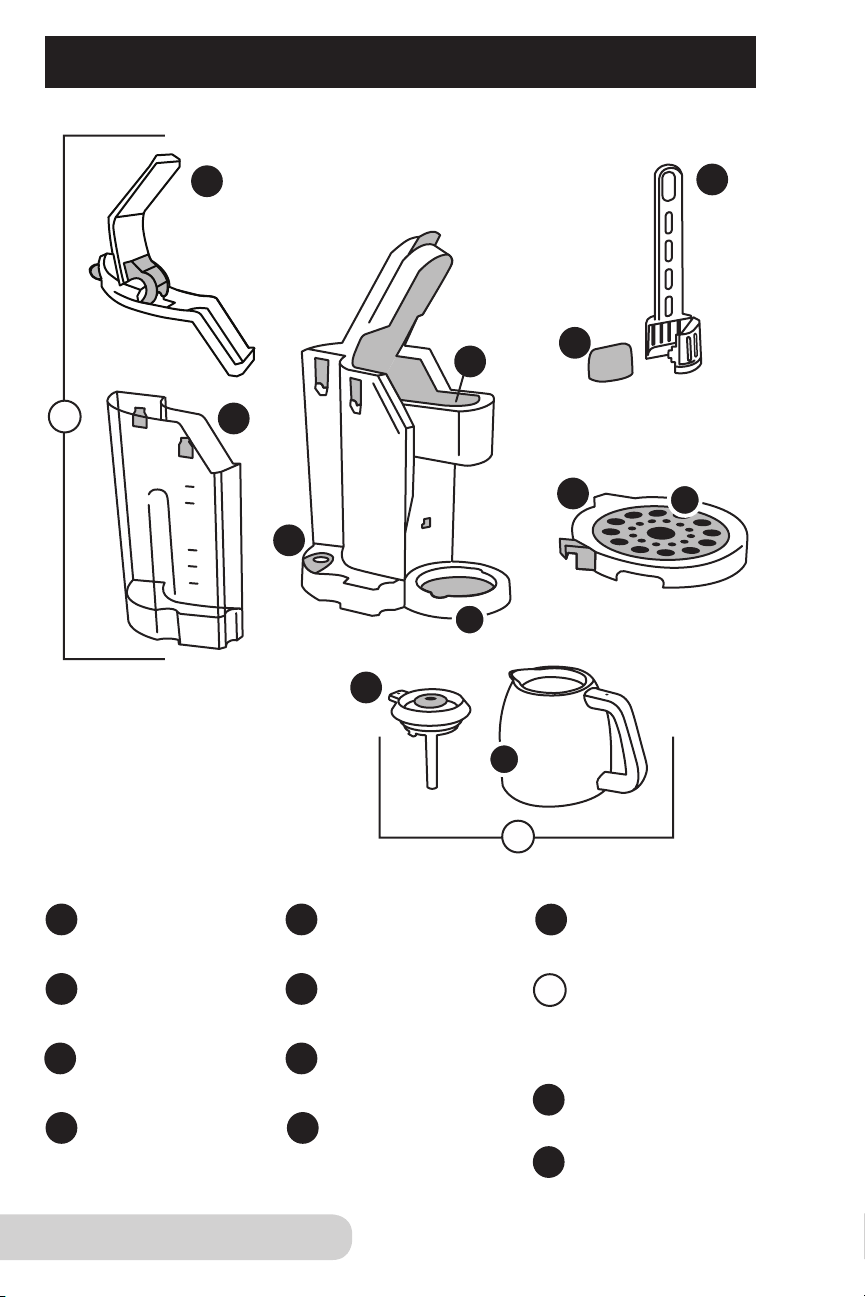
PARTS FOR YOUR NUWAVE BRUHUB
TM
1
2
3
4
6
7
Tank Lid
Screen
Part #: 45126
Carafe Base
Part #: 45121A
Drip Tray Base
Part #: 451213
Mug Tray
Part #: 451214
Charcoal Filter
Part #: 45116
Water Tank
Part #: 451201
BruHub
TM
Base
Part #: 45110
Charcoal Filter Holder
Part #: 451205
1
2
3
4
5
6
7
8
11
12
12
Plastic Thermal Carafe
Part #: 45121
SS Thermal Carafe
Part #: 45131 (optional)
11
9
8
2
Insert Chamber
9
5
Carafe Lid
Part #: 45121B
10
10
9
Owner’s Manual
PARTS FOR YOUR NUWAVE BRUHUB
TM
(Continued)
13
15
19
Hot Water Insert
Part #: 451204
Custom Brew Filter Basket
Custom Brew Insert with Filter Basket
Part #: 451203
Custom Brew Cap
Hot Water Cap
Single Serve Insert
Part #: 451202
Coffee Scooper
Part #: 45129
13
14
14
15
19
18
20
18
16
Custom Brew Insert
20
17
16
17

10
Owner’s Manual
BEFORE FIRST USE
Before rst use or when the appliance has not been used for an extended period
of time, run a cleansing brew at least once with water only:
MAX Fill Line
1. Fill the Water Tank to
the MAX Fill Line.
• Water Tank can be lled
while in the unit or
detached.
2. Insert Hot Water Insert into the
Insert Chamber.
• See Assembly for the
Hot Water Insert on
page 14
.
3. Set full-sized Carafe on the Drip Tray Base.
4. Press “Power” to preheat.
5. Select “hot water” for the
coffee selection.
6. Select “carafe” for size
selection.
7. Press “brew”.
• Repeat steps 1-7.
11
Owner’s Manual
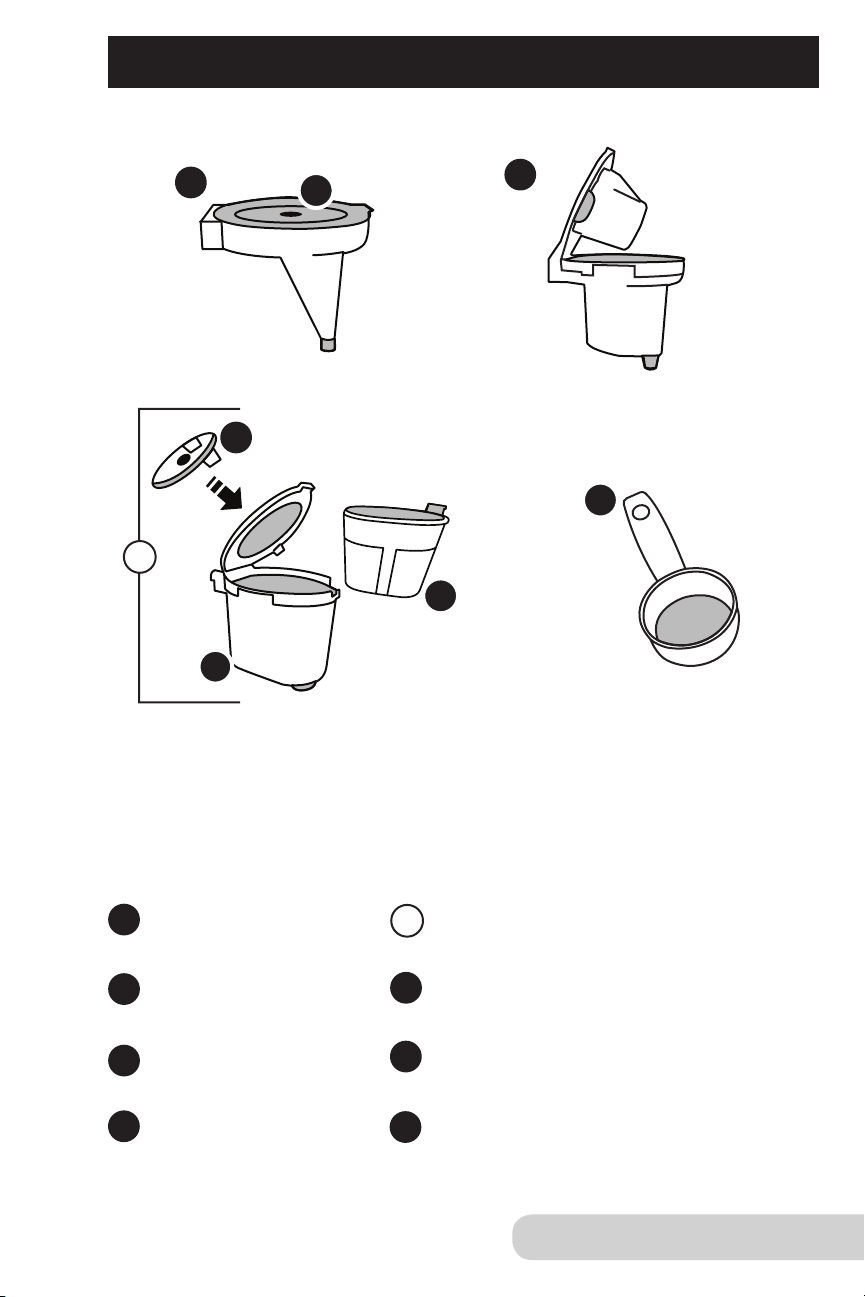
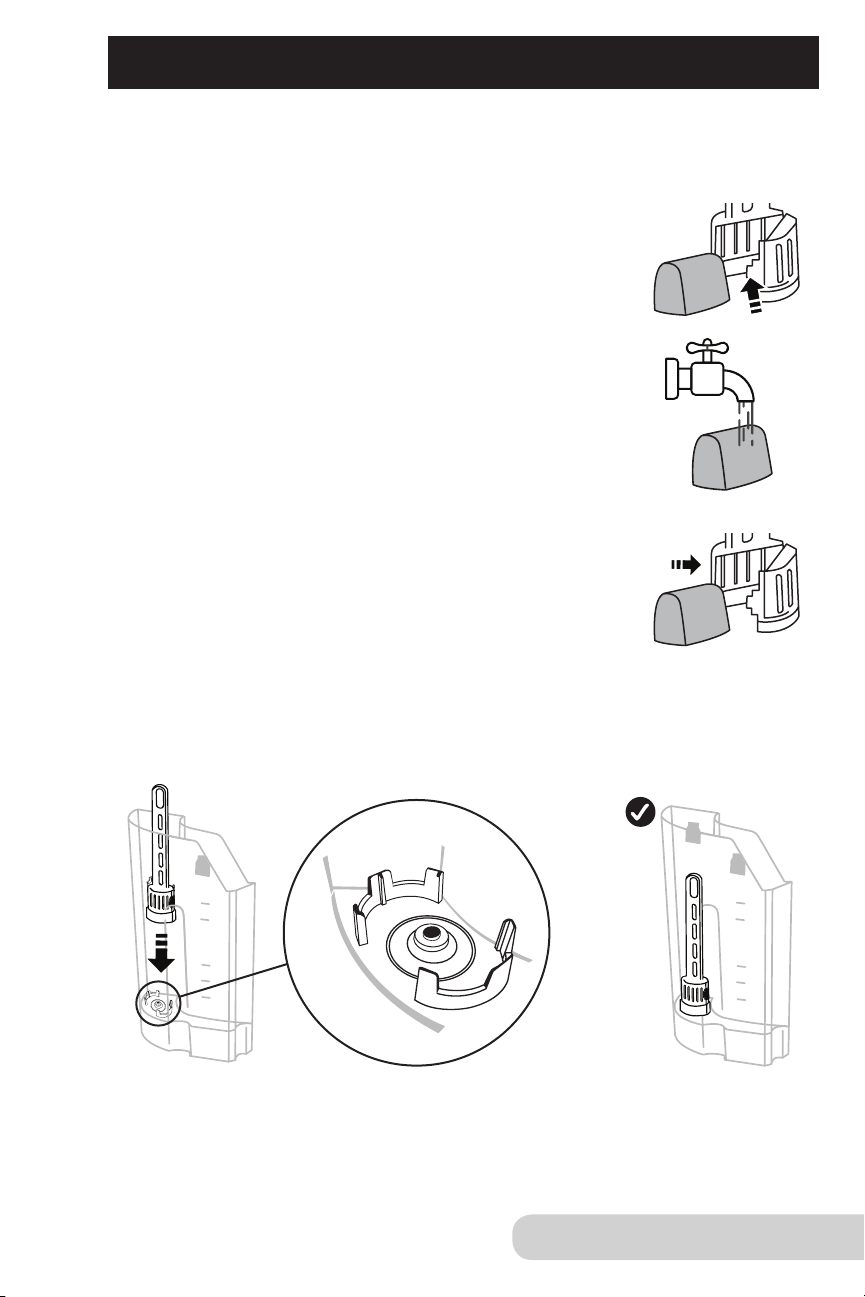
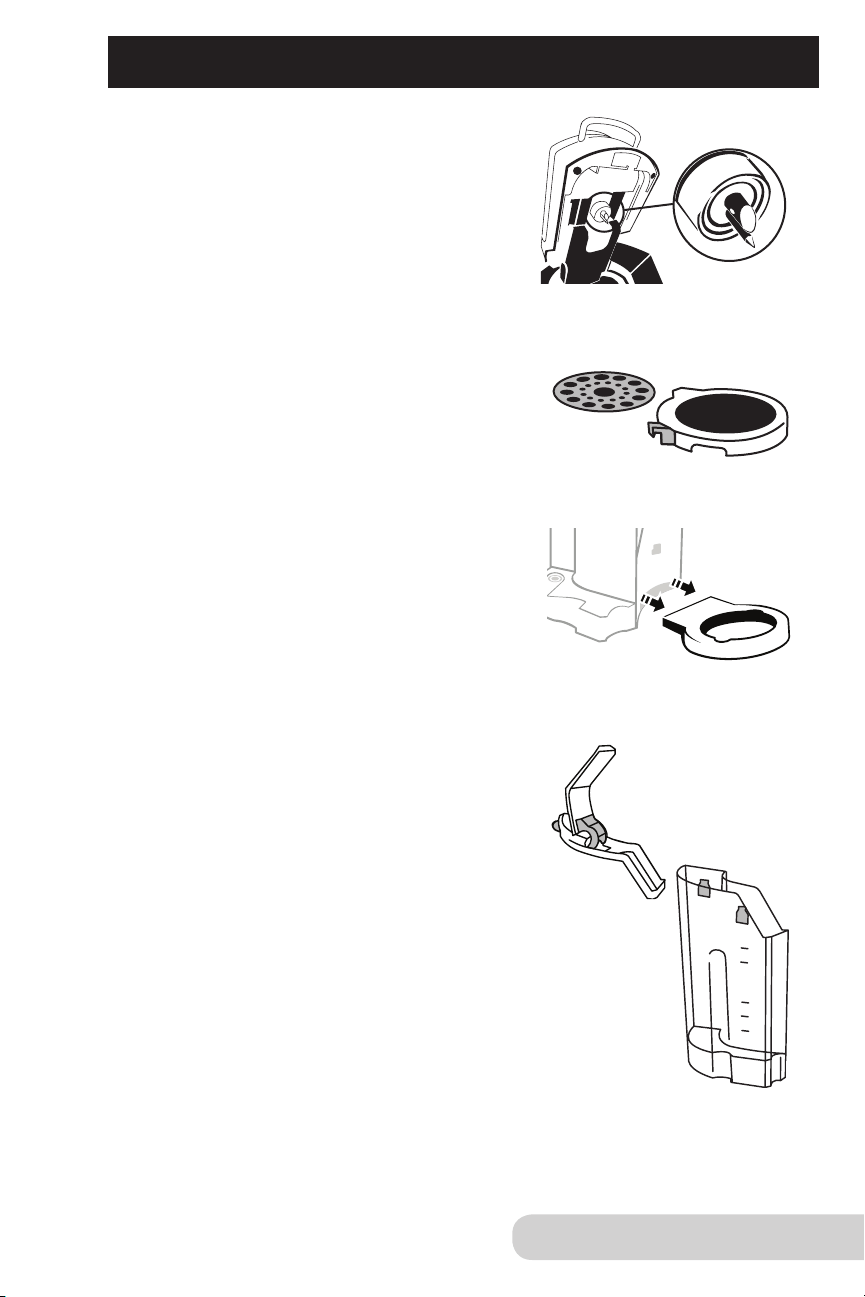
CHARCOAL FILTER HOLDER ASSEMBLY
For additional water purication, use the supplied (optional) Charcoal
Filter Holder with Filter. Note: The coffee maker will still operate
without Charcoal Filter Holder installed.
1. Before rst use, apply pressure to release tab to open
Charcoal Filter Holder compartment and
remove Charcoal Filter.
2. Flush Filter by running under cold tap water for 1-3
minutes before initial use. After ushing, allow the
Filter to drain completely.
3. Carefully place Filter back into compartment and
snap to close.
• Flat side (base) of cartridge must face down inside
Filter Holder compartment.
4.Insert the Charcoal Filter Holder into the Water Tank. The Filter Holder’s
base should sit rmly into the channel.
12
Owner’s Manual
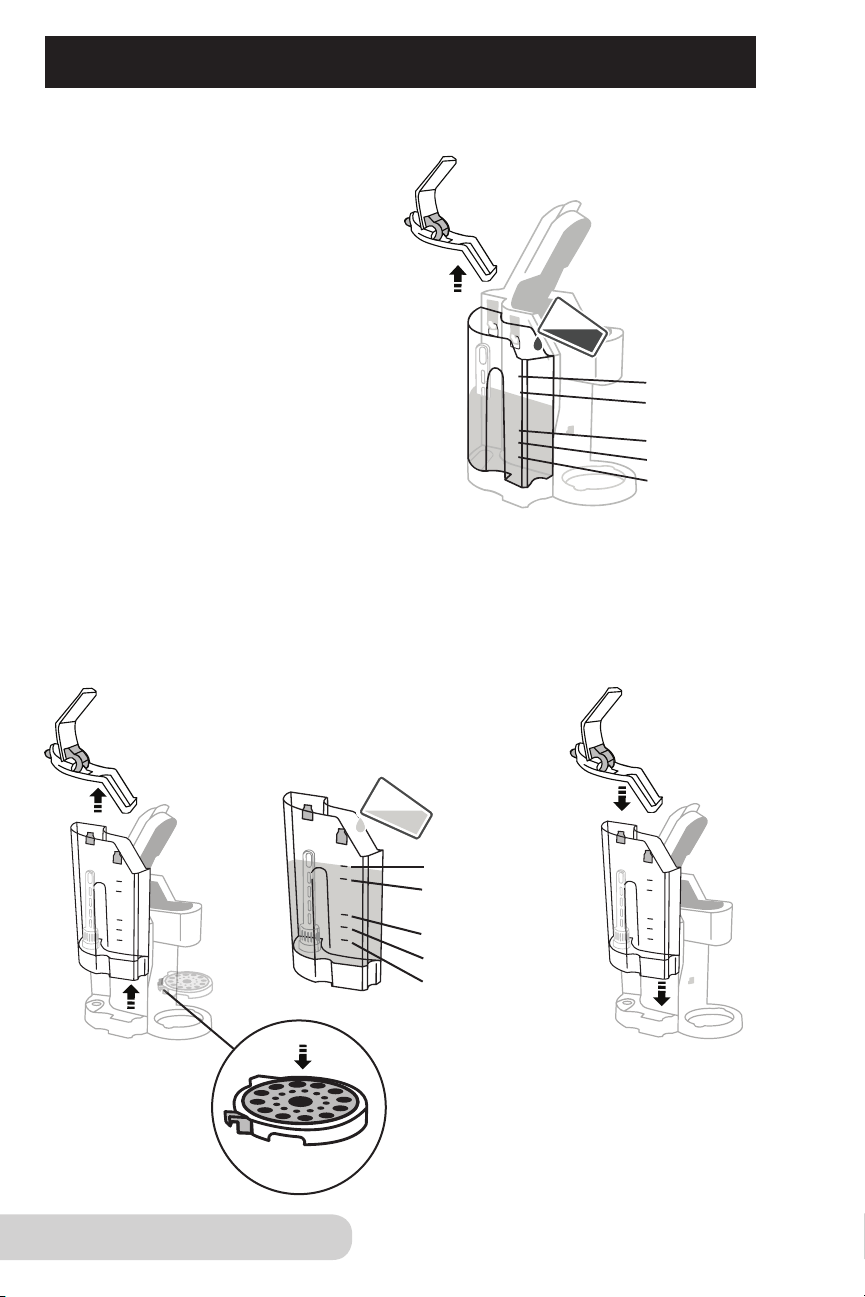
WATER COMPARTMENT
Fill water directly in the Water Tank when attached, or remove rst.
To ll directly in the Water Tank:
1. Lift the Water Tank Lid up and pour
in water to appropriate ll line.
2. Close the Water Tank Lid.
• Coffee maker will not operate when tank
is removed or when there is no water.
To ll Water Tank when removed:
1. Lift Water Tank Lid and place to the side.
2. Lift Water Tank up to remove from the side.
3. Fill to appropriate ll line.
4. Slide Water Tank straight down, ensuring the hooks t snug with Water Tank.
5. Place lid back on top of Water Tank.
IMPORTANT: When raising
Mug Tray to a higher level,
insert into holes. Press down
to ensure Mug Tray is secure.
MAX Fill Line
Full Carafe
Half Carafe
12oz Cup
8oz Cup
MAX Fill Line
Full Carafe
Half Carafe
12oz Cup
8oz Cup

13
Owner’s Manual
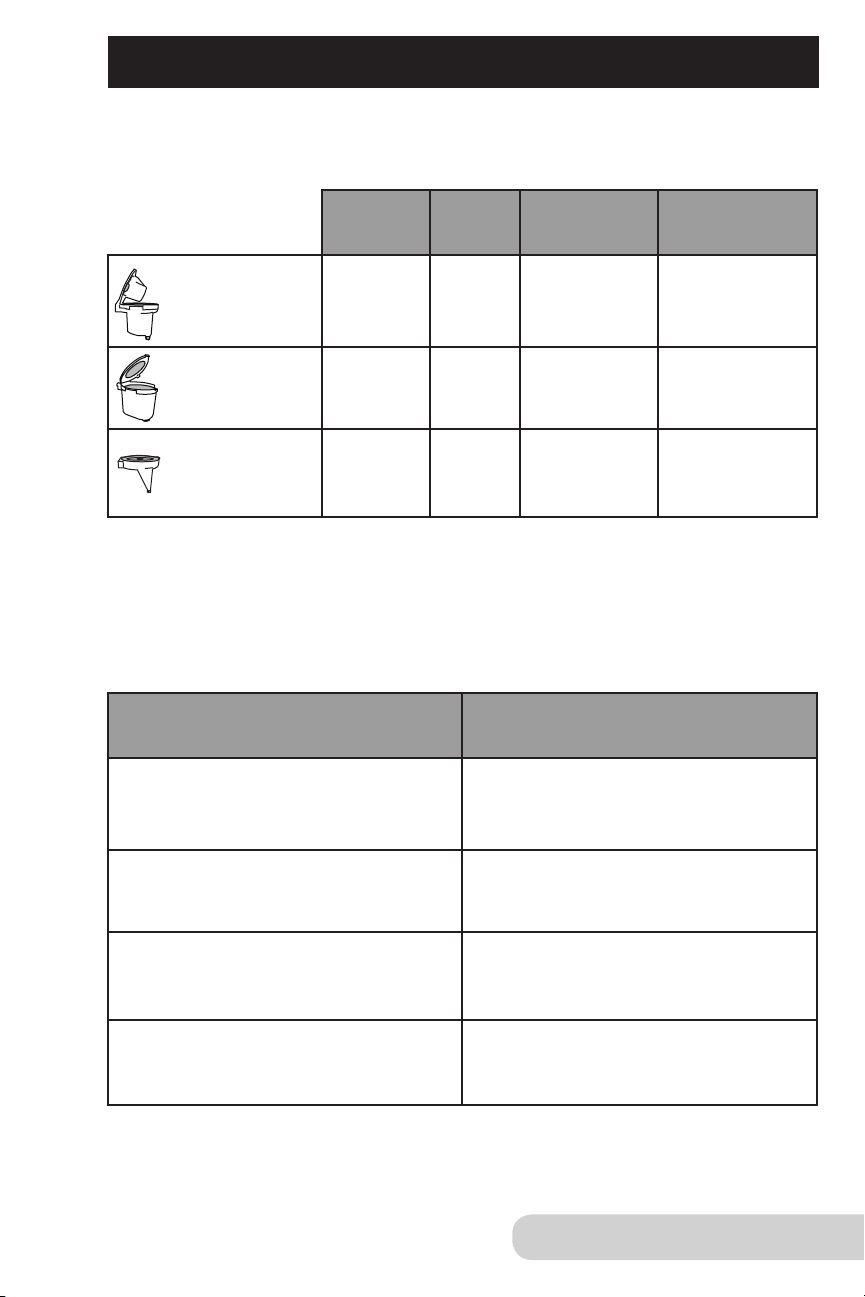
With your NuWave BruHub
TM
3-in-1 Coffee Maker, you can choose from three
different inserts to customize your coffee-drinking experience and preference.
Single Serve Insert
1. Line up dots with each other and
place Single Serve Insert into
the Insert Chamber.
2. Place pod into Single Serve Insert
until connected, indicating needle
has gone through.
3. Close down Single Serve Lid.
• Make sure lid is fully closed.
• Use Mug Tray on Drip Tray Base
and Screen for smaller cups and mugs.
• Use “8” and “12” sizes for Single Serve Insert.
Custom Brew Insert
1. Place Filter Basket inside
Custom Brew Insert.
2. Line up dots with each other and place
Custom Brew Insert directly down
into Insert Chamber.
3. Fill with appropriate amount
of coffee grounds.
4. Close lid.
• Use “8”, “12”, “half carafe” and “carafe”
for Custom Brew option.
• Always use NuWave’s customized carafe
when using the Custom Brew Insert.
ASSEMBLY FOR INSERTS

14
Owner’s Manual
ASSEMBLY FOR INSERTS (CONT.)
CARAFE ASSEMBLY
1. Place Carafe Lid on top of
Carafe Base.
2. Line up dots by turning
clockwise to lock into place.
Hot Water Insert
Line up dots with each other and place
Hot Water Insert directly down
into Insert Chamber. Close lid.
• Use Mug Tray on Tray Base for smaller
cups and mugs.
• Use “8”, “12”, “half carafe”, and “carafe”
for Hot Water Insert.
15
Owner’s Manual
FUNCTIONS FOR THE NUWAVE BRUHUB
TM
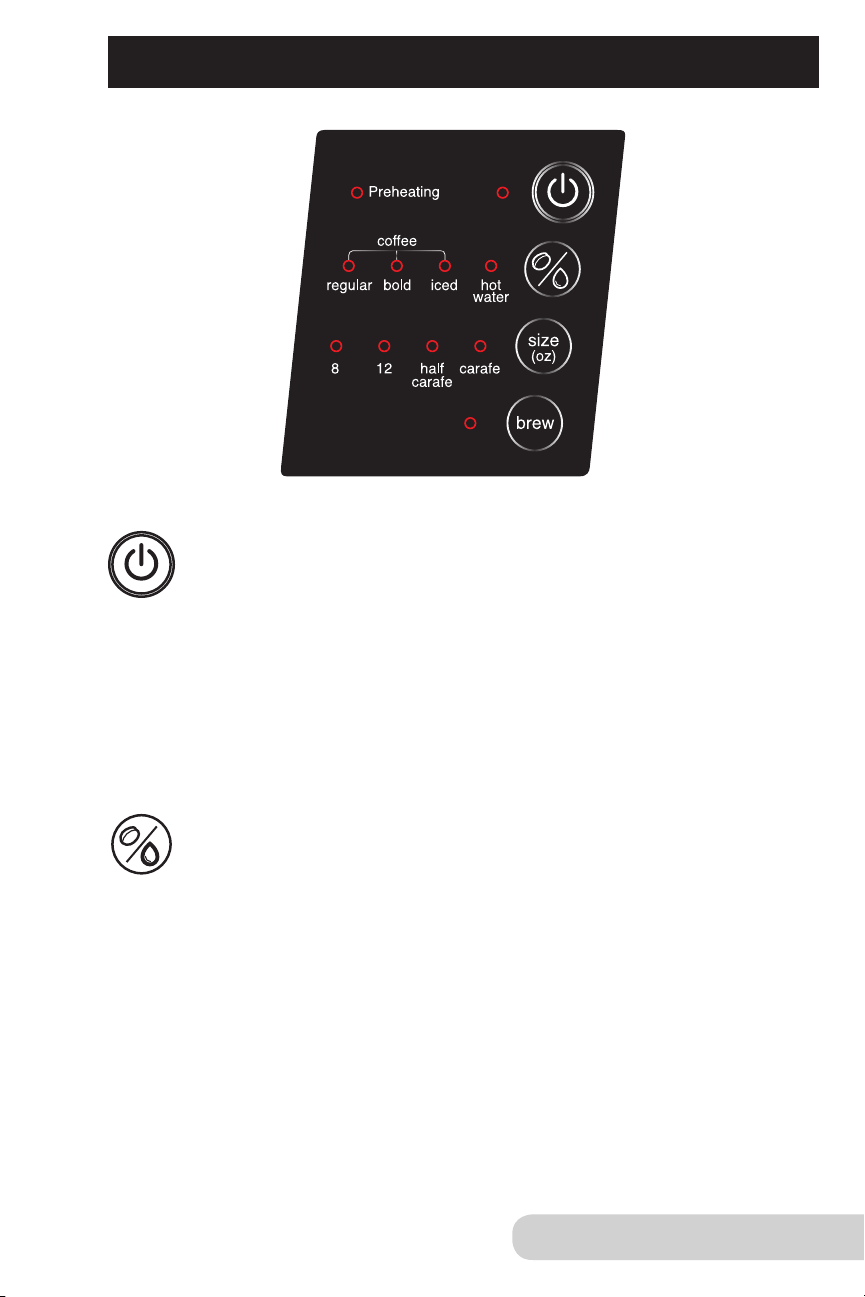
Power Button:
1. Press “Power” button once to turn the unit on. There will be a blue
light next to “Power” button to indicate it is on.
• When you press the “Power” button, there will be a red light next
to “Preheating”. Once it has preheated, the red light will turn off,
indicating the water is ready to brew. Once it has preheated, press
“Brew”.
• Unit will beep when the brew is complete.
2. Press “Power” again to turn the unit off.
Coffee selection function:
This lets you select your favorite beverage with the push of a button.
1. Default is set for “regular”.
2. Press the “beverage selection” button once and the blue light
next to “bold” will be lit.
3. Press the “beverage selection” button again to change the
selection to “iced”, “hot water”, or back to “regular”.
• When “iced” is selected, half of the amount will be dispersed.
For example, instead of 8oz, 4oz will be brewed, making the
beverage more concentrated.
• Refer to Insert & Beverage Selection Charts for more information.

16
Owner’s Manual
FUNCTIONS FOR THE NUWAVE BRUHUB
TM
(CONT.)
Size selection function:
This lets you choose your amount of beverage you would like brewed.
1. Default is set for “8”, which is 8 ounces.
2. Press the “size selection” button once and the blue light next to
“12” will be lit.
3. Press the “size selection” button again to change the selection to
“half carafe”, “carafe”, and back to “8”.
• Refer to Insert & Beverage Selection Charts for more information.
Brew function:
Once you have hit “Power” to turn the unit on, have chosen your
selection of beverage, and size, you can now brew.
1. Press the “Brew” button.
• There will be a red light next to “Preheating”. Once unit has
preheated, the red light will turn off, indicating the water is ready
to brew and unit will start brewing.
• Unit will beep when the brew is complete.
• DO NOT lift lid during brewing cycle. You must wait until brew
cycle is nished.
2. To stop the brewing function, press “Brew” button again.
NOTE
• Appliance will not preheat or brew if lid is not fully closed.
size
(oz)
brew
17
Owner’s Manual
INSERT & BEVERAGE SELECTION CHARTS
BEVERAGE SELECTION:
Scooper holds 8 grams of coffee grounds when leveled.
* Adjust strength of coffee by using more or less grounds.
Size
Scoops
8oz cup
1 to 2 scoops
12oz cup 2 to 3 scoops
Half Carafe (21oz) 3 to 4 scoops
Full Carafe (42oz) 4 to 5 scoops
INSERT SELECTION:
Inserts 8oz 12oz
1/2 Carafe
21oz
Full Carafe
42oz
Single Serve
Insert
x x
*
Custom Brew
Insert
x x x x
Hot Water
Insert
x x x x
* You must use carafe with this insert.

18
Owner’s Manual
CLEANING AND MAINTENANCE
To clean Hot Water Insert, pull up Hot Water
Cap to separate and clean insides of both parts.
• Hot Water Insert and Hot Water Cap are
dishwasher safe, top rack only.
• Hot Water Cap snaps back on after it’s cleaned.
For Custom Brew Insert, lift up Custom Brew Lid
to clean inside. Remove Custom Brew Insert Cap.
• Press in the tabs to remove Custom Brew
Cap from Custom Brew Lid.
• Custom Brew Cap is dishwasher safe, top rack only.
• Remove Filter Basket to clean individually.
• After cleaning, place inner Custom Brew Cap
back in lid by lining up the red arrows and pushing
down on the lid until you hear a snap.
• Custom Brew Insert is dishwasher safe, top rack only.
Tip: Cleaning Custom Brew Insert after each use
is recommended.
For Single Serve Insert, remove insert and ip the
top of lid to clean inside.
• Single Serve Insert is dishwasher safe, top rack only.
• Insert can be hand-washed with running hot water.
• Sharp needle is located in Single Serve Insert.
Use caution when cleaning.
C
A
U
T
I
O
N
:
S
H
A
R
P
N
E
E
D
L
E
S
,
D
O
N
O
T
P
U
T
F
I
N
G
E
R
S
I
N
T
H
E
C
H
A
M
B
E
R
19
Owner’s Manual
Cleaning needle under Lid:
The needle is located under the Lid.
To clean needle, use a thin piece of metal
or metal wire brush to free the part and
area with any blockage.
The Mug Tray is detachable and can be
removed and cleaned. The two layers can
be separated.
• The Mug Tray is dishwasher safe, top
rack only.
The Drip Tray Base is detachable and can
be removed and cleaned.
• The base is dishwasher safe, top rack only.
*Parts should be cleaned in dishwasher
set to a low-temperature-energy cycle.
Cleaning the Water Tank and Lid:
To clean the Water Tank, hand-wash only.
• Do not put Water Tank in the dishwasher.
To clean the Water Tank Lid, hand-wash or
wipe clean with a damp cloth.
• Lid is dishwasher safe, top rack only.
The Water Tank for the BruHub should be
periodically cleaned.
1. Put 1 tablespoon of white vinegar and
2 cups of water in Water Tank.
2. Choose “12” selection, “hot water” and press “Brew”.
3. Once complete, add fresh water and repeat steps.
4. Hand-wash the Water Tank with a damp, soapy,
soft cloth, and rinse thoroughly.
5. Let the Water Tank air-dry before returning it back to the Base.
CLEANING AND MAINTENANCE (CONT.)

20
Owner’s Manual
CLEANING AND MAINTENANCE (CONT.)
Cleaning Carafe:
To clean the Carafe, use warm soapy water
and rinse thoroughly. Use a soft foam brush
with a long handle to reach the bottom.
• The Carafe Lid is removable and is dishwasher
safe, top rack only.
External Cleaning
To clean the exterior of your coffee maker, wipe with a damp, soapy, soft cloth.
Descaling
Scale is a buildup that can occur over time after many uses of your appliance.
Descaling should be performed every few months to keep your BrewHub
working effectively and efciently. Parts that come into contact with water during
the brewing process can have a calcium buildup. Also, the heating element may
have deposits that need to be removed.
To descale, use the carafe, fresh water, a safe descaling solution, and perform
task near a sink.
1. Turn unit “OFF”.
2. Take out Removable Water Tank from unit and empty.
3. Pour descaling solution into the Removable Water Tank.
4. Pour fresh water into the Water Tank.
5. Place Water Tank back into the appliance.
6. Turn unit “On”.
7. Place carafe on tray.
8. Hit “Brew” and use largest amount of size for the cycle.
9. When nished, pour all liquid contents into sink.
10. Turn unit “Off”.
11. Remove Water Tank and rinse the tank in the sink thoroughly.
12. Remove any excess liquid solution on the Lid above the Water Tank,
detachable Drip Tray Base, and other areas.
13. Place Water Tank back into unit and ll with fresh water near
the Max Fill Line.
14. Run the largest brew size on the unit.
15. Run multiple brew cycles on the unit.
• You may need to ll Water Tank more than once during nal
rinsing process.
16. Turn off appliance and unplug.
17. If there is any descaling solution left over in Water Tank, repeat
steps 11-16.

21
Owner’s Manual
TROUBLESHOOTING
When unit is powered on and no water is in the unit:
• Unit will beep, and within 15 seconds it will shut off.
• If you press “Brew” and there is no water, a continuous beep will sound for up
to 15 seconds until you add water.
• If you do not add water within 15 seconds of the continuous beeping, the
unit will shut off, and beeping will stop.
If unit is in the middle of brewing and there is not enough water:
• A continuous beep will sound for up to 15 seconds until you add more water.
• If you do not add water after 15 seconds of the continuous beeping, the unit
will shut off.
If unit shuts off and you power up the unit again with no water.
• Unit will beep, and within 15 seconds it will shut off.
• If you press “Brew” and there is no water, a continuous beep will sound for up
to 15 seconds until you add water.
• If you do not add water within15 seconds of the continuous beeping, the unit
will shut off, and beeping will stop.
• Press “Brew” after the 15 seconds have passed.
Consistent beeping:
• Need to make sure enough water is in the Water Tank.
• The Water Tank has been removed from coffee maker.
Not brewing right away:
• Appliance needs to preheat.
• Needs appropriate amount of water.
• Unit may have automatically shut off. Simply press “Power” to turn back on.
In use unit not preheating or brewing:
• Check to see if the lid is open. Close the lid. Appliance will not preheat or
brew if lid is not closed.
22
Owner’s Manual
TROUBLESHOOTING (CONT.)
WARNING
Please immediately unplug and contact Customer Service
Department if you experience other problems.
1-877-689-2838 or help@nuwavenow.com
Coffee grounds are going into the brewed coffee:
• Do not overll the lter (do not exceed the MAX line in the lter).
• Recommended to use “drip” coffee grounds or “coarse” grounds
when using the Filter Basket.
Coffee maker Filter Basket clogs during brewing process:
• Recommended to use “drip” coffee grounds or “coarse” grounds when
using the Filter Basket.

23
Owner’s Manual
LIMITED WARRANTY
The BruHub 3-in-1 Coffee Maker
THE MANUFACTURER WARRANTS
The NuWave BruHub
TM
3-in-1 Coffee Maker, including the BruHub
TM
Base, the Water Tank
Lid, the Water Tank, the Drip Tray Base, the Mug Tray, the Screen, the Charcoal Filter
Holder, the Plastic Thermal Carafe, the Hot Water Insert, the Single Serve Insert, and the
Custom Brew Insert with Filter Basket are to be free from manufacturer defects. All electrical
components are warrantied, for 1 year from the date of purchase, under normal household
use, and when operated in accordance with the Manufacturer’s written instructions.
The Manufacturer will provide the necessary parts and labor to repair any part of the NuWave
BruHub
TM
3-in-1 Coffee Maker at NuWave, LLC Service Department. After the expiration of the
warranty, the cost of the labor and parts will be the responsibility of the owner.
THE WARRANTY DOES NOT COVER
The Limited Warranty is voided if repairs are made by an unauthorized dealer and/or the
serial number data plate is removed and/or defaced. Normal deterioration of nish due
to use or exposure is not covered by this Warranty. This Limited Warranty does not cover
failure, damages or inadequate performance due to accident, acts of God (such as lightning),
uctuations in electric power, alterations, abuse, misuse, misapplications, corrosive-type
atmospheres, improper installation, failure to operate in accordance with the Manufacturer’s
written instructions, abnormal use or commercial use. NuWave, LLC reserves the right to void
the Limited Warranty, where allowable by law, for products purchased from an unauthorized
dealer.
TO OBTAIN SERVICE
The owner shall have the obligation and responsibility to: Pay for all services and parts not
covered by the warranty; prepay the freight to and from Service Department for any part
or system returned under this warranty; and carefully package the product using adequate
padding material to prevent damage in transit. The original container is ideal for this purpose.
Include in the package the owner’s name, address, daytime telephone number, a detailed
description of the problem, and your “RGA number.” Call 1-877-689-2838 or email help@
nuwavenow.com to obtain the RGA number (Return Goods Authorization number). Provide
the cooking system model & serial number and proof of date of purchase (a copy of the
receipt) when making claims under this warranty.
MANUFACTURER’S OBLIGATION
The Manufacturer’s obligation under this Limited Warranty is limited, to the extent
allowable by law, to repairing or replacing any part covered by this Limited Warranty which
upon examination is found to be defective under normal use. The Limited Warranty is
applicable only within the continental United States and only to the original purchaser of
the manufacturer’s authorized channels of distribution. THE LIMITED WARRANTY MAY
NOT BE ALTERED, VARIED OR EXTENDED EXCEPT BY A WRITTEN INSTRUMENT
EXECUTED BY THE MANUFACTURER. THE REMEDY OF REPAIR OR REPLACEMENT
AS PROVIDED UNDER THIS LIMITED WARRANTY IS EXCLUSIVE. IN NO EVENT
SHALL THE MANUFACTURER BE LIABLE FOR ANY CONSEQUENTIAL OR INCIDENTAL
DAMAGES TO ANY PERSON, WHETHER OR NOT OCCASIONED BY NEGLIGENCE OF
THE MANUFACTURER, INCLUDING WITHOUT LIMITATION, DAMAGES FOR LOSS OF
USE, COSTS OF SUBSTITUTION, PROPERTY DAMAGE, OR OTHER MONEY LOSS.
Some states do not allow the exclusion or limitation of incidental or consequential damages, so
the above limitation exclusions may not apply. This Limited Warranty gives specic legal rights,
and there may also be other rights which vary from state to state. EXCEPT AS OTHERWISE
EXPRESSLY PROVIDED ABOVE, THE MANUFACTURER MAKES NO WARRANTIES
EXPRESSED OR IMPLIED ARISING BY LAW OR OTHERWISE, INCLUDING WITHOUT
LIMITATION, THE IMPLIED WARRANTIES OF MERCHANTABILITY AND FITNESS FOR A
PARTICULAR PURPOSE TO ANY OTHER PERSON. READ YOUR OWNER’S MANUAL.
IF YOU STILL HAVE ANY QUESTIONS ABOUT OPERATION OR WARRANTY OF THE
PRODUCT, PLEASE CONTACT NUWAVE, LLC.
READ YOUR OWNER’S MANUAL: If you still have any questions about operation or
warranty of the product, please contact NuWave, LLC at: 1-877-689-2838 or email
help@nuwavenow.com.
Item No. BM 45001
Rev. 08A
Model: 45001 120V, 60Hz, 1500 Watts
For patent information please go to: www.nuwavenow.com/legal/patent
Designed & Developed in USA by:
NuWave, LLC
1755 N. Buttereld Rd.
Libertyville, IL 60048, U.S.A.
Customer Service:
1-877-689-2838 • help@nuwavenow.com
Made in China
©2017 NuWave, LLC • All Rights Reserved.
www.nuwavenow.com
FOR HOUSEHOLD USE ONLY