Loading ...
Loading ...
Loading ...
5
VACUUMING
• When operating the appliance, make sure
the hose is not trapped, twisted or blocked.
Two hose positions while vacuuming:
1. You can vacuum with the handle (2)
and hose (4) wrapped around the main
appliance. Cleaning in this mode is great
for quick pick-ups because the vac is in
it’s most compact form.
2. You can vacuum with the handle (2) and
hose (4) unwrapped from the main appliance
allowing you to reach up to approximately 4
feet (1.2 m) from the appliance.
•
With handle and hose unwrapped the
appliance can be carried using the built-in
handle on the main appliance.
• The handle can also be removed from the
hose so that you can connect an accessory
directly to the hose cuff (17) when desired.
HINTS FOR OPTIMUM USE
• When vacuuming stairs, always start at
the bottom and work your way up.
•
Use the pet hair cleaning tool to agitate and
suction up pet hair and ground-in debris from
carpeted or upholstery surfaces.
• In order to keep the suction force
optimized, the filters must be cleared
regularly during use.
CLEANING AND MAINTENANCE
WARNING: Do not, under
any circumstances,
immerse the
appliance in water. A damp cloth and
soapy water should be used to clean the
exterior of the appliance. Always make sure
the appliance is completely dry before reuse
or storage.
EMPTYING THE DUST CONTAINER
(FIGURE F)
The dust container must be emptied
regularly, preferably after every use.
• Pull the door latch (8) and open the dust
container door (5).
• Tilt appliance to empty dirt.
• Tap the back end of appliance if debris
does not fall out easily or remove filters
for better access.
F
8
5
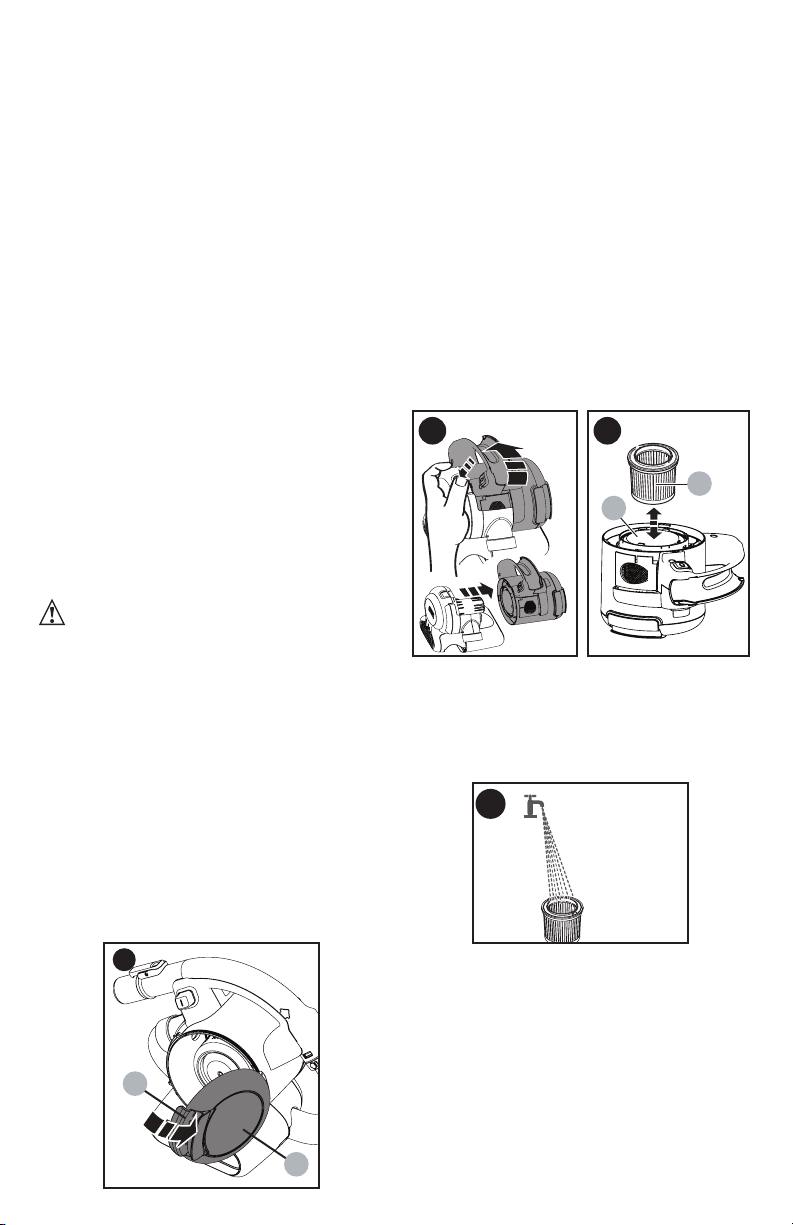
CLEANING FILTERS (FIGURES G - I)
Both the plastic pre-filter (18) and the
pleated filter (19) are re-usable and should
be cleaned regularly.
• Unwrap the hose (4) and handle (2) from
the main part of the appliance.
• Pull the door latch (8) and open the dust
container door (5)
and empty contents
into a waste basket.
• Push and hold the release button on the
opposite side of the handle from the dust
container door (5).
• Rotate the handle toward the back of the
appliance
as shown in figure G
.
• Pull the dust container to the side, away
from the base of the appliance.
• Remove the pleated filter from the pre-filter
by pulling firmly
as shown in figure H
.
• Tap the filters vigorously to remove loose
dust.
G
19
18
H
• If necessary, wash the filters (18, 19) in
warm, soapy water
as shown in figure I
.
• Make sure that the filter is dry before
refitting it to the appliance.
• Refit the pleated filter into the plastic pre-
filter.
I
T
O REPLACE THE DUST CONTAINER
• Slide the container back onto the base and
rotate the handle toward the front of the
appliance until an audible click is heard.
Ensure that the container is fully fastened
back onto the base.
• Close the container door and make sure it
clicks into place.
Loading ...
Loading ...