User manual Food Dehydrator
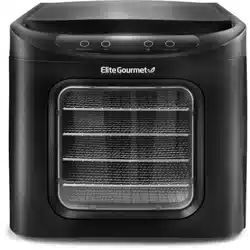
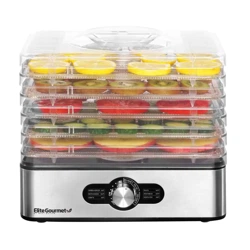
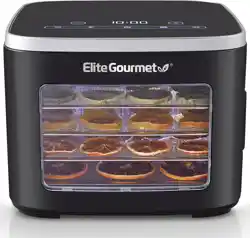
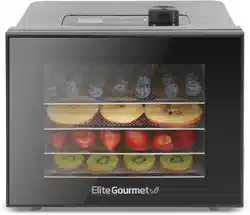
PARTS IDENTIFICATION
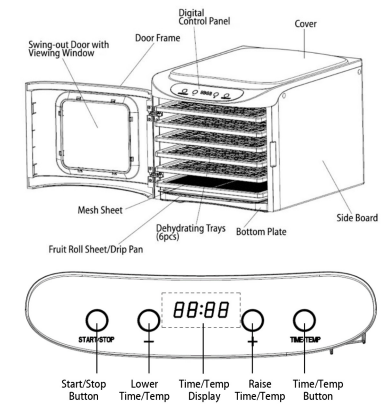
- Digital Control Panel - Adjust the Timer and Temperature controls.
- TIME/TEMP Button - Press to toggle between the Timer or Temperature function. The dehydrating timer range is in 30-minute increments from 30 minutes to 24 hours. The temperature range is from 95°F-160°F.
- Swing-Out Door with Viewing Window - The door swings out from left to right to easily access the food trays. Ensure that all dehydrating trays are fully pushed back before you open or shut the door.
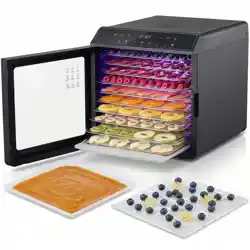
- Dehydrating Trays - Includes six dehydrating trays, designed with perforation to allow air to circulate for optimal dehydration. Also ideal to allow moisture or debris to drip to the lower drip pan.
- Fruit Roll Sheet / Drip Pan - Allows you to dry fragile or thinly sliced foods. The sheet has smaller perforations that will allow foods to stay intact while they are dehydrating. Use this feature to dry rolled fruit or fruit leather. Always use the Fruit Roll sheet along with a dehydrating tray. Lightly coat the sheet with cooking spray before adding fruit or other fragile foods for dehydrating. The spray will help assist foods to slip off easily after they have been dehydrated. It can also be used as the drip pan to catch any food moisture or drippings from food while dehydrating to ensure easy clean up.
BEFORE FIRST USE
CLEANING:
- Always ensure the Dehydrator is placed on a stable, flat surface that is clean and dry.
- Wash the Dehydrating Trays and Fruit Roll Sheet in a warm soapy water. Dry thoroughly before using.
- Clean the exterior of the dehydrator and door with a soft, damp cloth. Dry with a paper towel or soft cloth.
- When ready to use, plug the Dehydrator into an electrical outlet. The digital display will indicate “8888”.
- Program the Dehydrator as a dry-run for 30 minutes at the highest temperature setting before you attempt to dehydrate food. This prepares the interior for your initial use and burns off any remaining manufacturer residue. Smoke or odors are normal during the initial dry-run.
HOW TO USE
SETTING THE TIME AND TEMPERATURE SETTING:
- Place prepared foods on the Dehydrator Trays (see food preparation tips) and securely close door. Note: Do not overload the dehydrating trays with food.
- Place food on the dehydrating trays in single layers ONLY, not touching or overlapping in any way. This ensures the best dehydration results.
- Plug the Dehydrator into an electrical outlet. The digital display will indicate “8888”.
- Check your recipe instructions or the chart in this manual to set your desired temperature and time (See Page 10).
- Press the “START/STOP” button, then press the “TIME/TEMP” button to toggle between setting the time and temperature. Use the +/- button to adjust the time and temperature. The dehydrating time range is in 30-minute increments from 30 minutes to 24 hours. The temperature range is from 95F°-160°F.
- Once the desired temperature and time has been selected, the dehydrator will auto set. The display will flash for 5 seconds and then become solid and begin the dehydrating process automatically.
- To shut off the Dehydrator prior to completing the drying cycle, press the START/STOP button.
CHANGING TIME & TEMP SETTINGS WHILE DEHYDRATING:
You can change the time or temperature of the dehydrating process before or after you have started the dehydration cycle.
The dehydrating time range is in 30-minute increments from 30 minutes to 24 hours. The temperature range is from 95F°-160°F.
To change the Dehydration Time in the middle of the cycle:
- Press the TIME/TEMP Button.
- Press the “+” icon to increase the time.
- Press the “-” icon to decrease the time.
To change the Dehydration Temp. in the middle of the cycle:
- Press the TIME/TEMP Button.
- Press the “+” icon to increase the time.
- Press the “-” icon to decrease the time. Increases or decreases in Temperature are done in 5° F increments.
NOTES ON TIME AND TEMPERATURE ADJUSTMENTS:
- The time remaining in the dehydrating process is always shown on the LED display.
- When the new temperature is set, the LED display will automatically return to indicate the remaining dehydrating time.
- You can check the new temperature by pressing the TIME/ TEMP button.
WHEN DEHYDRATING PROCESS IS COMPLETE:
- When the dehydrating process is complete, the LED display will indicate "END".
- The heating element will automatically turn off.
- The automatic fan will automatically turn off after 10 seconds.
- The dehydrator will beep to indicate that the dehydrating process is complete.
- The LED display will display "END".
- Carefully remove food on trays using potholders or oven mitts.
- Unplug power cord from the wall outlet.
CAUTION: Use caution when opening the door while food is dehydrating. Although temperatures are not very high, burns can occur from the hot air. Use potholders or mitts while opening and closing the door and handling the dehydrating trays. Opening the door can increase dehydrating time.
FOOD DEHYDRATING GUIDE
- Depending on the moisture in the food itself and the humidity in the air, dehydrating operation time can vary.
- Use the dehydrator in a dust free, well-ventilated, warm and dry room.
- Do not use the dehydrator outdoors.
- Fruit and vegetables dried in your food dehydrator will be different in appearance from those sold in health food stores and supermarkets. This is due to your food dehydrator uses no preservatives, no artificial coloring and only natural additives.
- One easy way to determine if food is dried is to place a piece in a small zipper seal plastic bag. Seal the bag and shake it lightly. If moisture appears, the food is not ready to be removed.
SELECTING THE TYPE OF FOOD TO DEHYDRATE:
- Food to be dried should be in good condition. Select fruits that are just ripe; they have the highest natural form of sugar and are best for dehydrating.
- Fruits that are not ripe may have a flat, bitter taste.
- Vegetables should be fresh and tender.
- Check fruits and vegetables for marks or bruises and cut away these portions before preparing for dehydration.
- Avoid using overripe fruits and vegetables with spoiled portions.
- Meat, poultry and fish should be fresh and lean.
- Preparation, dehydration time and storage of foods also influence their quality and taste. Follow the preparation, dehydration and storage instructions in this manual to ensure the best-quality dried foods.
- WARNING: If you suspect food is contaminated, freeze at 0° for 48 hours to prevent bacteria growth, or heat at 175°F for 15 minutes to pasteurize it. Some nutrition may be lost, but it will stop the contamination process.
VEGETABLES:
Vegetables dried at home require a little more effort in processing and storage than do fruits because they are low in acid and have little sugar. Some vegetables have a poor quality when dehydrated and are better frozen than dried. Others, such as potatoes, are available at reasonable prices all year round, and it may not be worth your time to dry them unless they are used for lightweight camping. Be selective in the vegetables you choose to dry
Preparation:
- Select only the highest quality, most fresh, crisp and tender vegetables for dehydrating.
- Wash vegetables carefully and thoroughly before dehydrating to remove any dirt and bacteria.
- Most vegetables should be peeled, trimmed, cut, or shredded prior to dehydrating.
Pretreatment Methods:
- It is recommended to blanch vegetables prior to dehydrating. Avoid hot water blanching because it destroys the enzymes that produce off flavors during storage, resulting in poor texture and poor re-hydration.
- It is recommended to use the two below blanching methods instead:
- Steam blanching is preferred over water blanching because there is less flavor and vitamin loss.
- Microwave blanching is also excellent and usually keeps a brighter color in the vegetables after dehydrating.
Steam Blanching:
- Layer prepared vegetables in the top portion of a food steamer, no more than 2 to 2 ½ inches deep.
- Steam until vegetables are heated all the way through but are not cooked enough to eat (usually 2 to 3 minutes). Small pieces may need occasional stirring to steam blanch evenly.
- Transfer steamed vegetables directly to dehydrating trays, working as quickly as possible.
Microwave Blanching:
- Microwave ovens are convenient for blanching fresh vegetables. Prepare vegetables for steam blanching by placing vegetables with a small amount of water (refer to your microwave oven cooking chart) in a covered casserole dish.
- Cook for only ¼ to 1/3 the time specified in the chart, stirring well after half of the blanching time.
- Transfer blanched vegetables directly to dehydrating trays, working as quickly as possible.
DEHYDRATING TIPS:
Dehydrating time for pre-treated fruit will vary according to the following factors:
- Thickness of fruit pieces or slices
- Number of trays with food being dried
- Volume of food being dried
- Moisture or humidity in your environment
- Your preference of dehydrating for each type of dried food
It is recommended to:
- Check your food frequently every hour during the dehydrating cycle.
- Label food with the name of food contents, date and weight before dehydrating. It will also be helpful to note the dehydrating time for future reference.
- Blanched vegetables & fruits will give the best results in dehydrating.
- Correct food storage after dehydrating
PREPARATION & PRETREATMENT OF FRUITS:
Most fruits are suitable for dehydrating at home, but some fruits will require more dehydrating time than others; the guidelines offered below will help you get started. Some fruits might not be suitable for dehydrating all year round, so it will be helpful to learn which fruits are in season and experiment with those first.
Preparation:
- Wash fruits well and remove any bruised or overripe portions. Peel if desired. Larger fruits may be halved.
- If fruit size varies, slice into 3/8” - ½” thick for more even dehydrating.
- Smaller fruits such as grapes and cherries may be dried whole.
- Remove any pits or stones from fruits such as prunes, cherries, apricots, etc.
- Fruits that have been artificially waxed to prevent moisture loss should always be peeled. Peeling is optional with other fruits.
- Dried pear skins tend to be grainy, and peach peels are a little fuzzy.
- Most fruits can be placed directly on the dehydrating trays as they are prepared such as pineapples, grapes, strawberries, prunes, etc. However, apples, apricots, peaches and pears turn brown when cut. These may be pretreated to slow browning and to prevent vitamins A and C loss, but your attention is called to the cautions set forth below, which are for your protection.
Pretreatment Methods:
It is not necessary to always pre-treat food in order to dehydrate it. However, pretreatment often makes food look better, increases the shelf life and can even enhance the nutritional value of some foods. Experiment with both treated and untreated food in your storage to see which will best suit your needs. Proper storage is critical to the quality of the stored product, whether treated or untreated.
Natural Pre-Dips:
Use pineapple or lemon juice as a natural alternative to reduce browning. Slice fruit directly into juice. Remove promptly (about 2 minutes) and place on dehydrating trays. Fruits may also be dipped in honey, spices, lime or orange juice, jello powders or sprinkled with shredded coconut to give them a snappy dried flavor. Use your imagination and make your own dip.
Sodium Bisulfate:
Ask for food-safe, (USP) grade only. Dissolve 1 teaspoon of sodium bisulfate in one quart of water. Prepare small amounts of fruit and dip for 2 minutes in the solution. This helps prevent loss of vitamin C and maintains a bright color. Sodium bisulfate is available in most pharmacy/drug stores.
Popping Backs:
When dehydrating fruit halves, especially apricots, it has been suggested that popping the back (“inside out”) will speed the dehydrating time. This is true, but it also results in the loss of the nutritional juices to the bottom of the dehydrator. Instead, cut each half in half again to give the end product more nutritional value, a brighter color, and faster reconstitution capabilities.
MEAT DEHYDRATING PREPARATION:
CAUTION! The United States Department of Agriculture recommends meat be precooked prior to or cooked after dehydrating to reduce the risk of food borne illnesses. Normally raw meat is used for making jerky. However, cooked meat as well as raw meat can be dehydrated. Make sure to always cut meat down to bite size before dehydration. It is much easier to work with beforehand.
Be extra careful when making jerky from raw chicken or turkey; salmonella bacteria may be present in poultry when it is purchased. It is extremely important to cut raw chicken or turkey into portions that do not exceed 1/4” thickness. Any marinade must soak into the meat at least 10 minutes. It is not recommended to remove any excess marinade sauce. Never consume food that tastes, smells or looks improper.
Raw Meat For Beef Jerky:
- Only use meat that is at least 93% fat-free to make jerky. Make sure to trim off all the fat before slicing into bite-size portions. It is recommended to slice meat about 1/8” - 1/4” thickness.
- Marinating beef has many different combination recipes. Please see some recipe samples below for your preference:
Traditional Jerky: (Good for approximately 3-5 lbs of beef, fish, or poultry)
| ½ lb brown sugar |
|
*Spices of your choosing |
| 3 cups soy sauce |
|
½ cup liquid smoke (optional) |
- Mix all ingredients together. Make sure the brown sugar is dissolved. Let mixture sit for approximately 15 minutes. Place cut up meat into the marinade and cover. Let stand for 10 minutes refrigerated. Make sure to turn meats periodically to coat thoroughly. Drain any excess liquid.
- Place meats onto trays and dehydrate. Dehydrating time for a full 5-tray set up will take approximately 24-36 hours.
NUTS:
- Remove shells to the nuts and rinse nuts with warm water. Pat dry and spread on trays. Most nuts will take approximately 20-30 hours to dehydrate; they should be allowed to dehydrate until brittle.
- After dehydrating, allow to cool. Nuts that will not be consumed within a day or two should be frozen to ensure freshness. Remove nuts from the freezer and allow them to defrost before using.
FLOWERS:
- For best results, pick flowers after the morning dew rises and before the evening mist sets in. Do not use flowers that have been sprayed with insecticides or other chemicals. If dehydrating at the same time as herbs intended for consumption, place flowers on bottom trays and herbs on top trays; this is to prevent any “drippings” from the flowers to fall onto the herbs.
HERBS:
- Rinse and pat dry. Remove any dead, mushy or discolored portions, but leave the stem and do not break apart until dehydrating. Spread herbs or flowers on tray and allow them to dehydrate for about 2-7 hours, depending on their type. When dehydrating is complete, remove from tray and allow to cool.
- Remove from stem and break leaves or buds apart, or crush if desired. If dehydrating seeds, choose when pods have changed in color.
HELPFUL HINTS:
- Always preheat the dehydrator for at least 5 minutes before using.
- If the dehydrator has been stored away for some time, wash before using.
- Fresh vegetables and fruits are best for dehydrating. Canned goods do not dehydrate as well.
- Vegetables and fruits should always be cleaned before preparation and pretreatment. For best results, always prepare and pre-treat fruits and vegetables as outlined in this manual.
- It is relatively safe to leave the dehydrator on when dehydrating foods take a long time, but make sure to set the dehydrator in a safe place.
- Exact dehydrating time varies greatly depending on several factors: type, size and quality of food, quantity placed on trays and personal preference. It will help to keep a personal notepad where you can write down your own notes. Keep notes on the type of food, weight before and after dehydrating, total dehydrating time and final results.
CLEANING AND MAINTENANCE
This appliance requires little maintenance. It contains no user serviceable parts. Do not try to repair it yourself. Refer it to qualified personnel if servicing is needed. Always unplug the dehydrator from electrical outlet when not in use and before cleaning.
TO CLEAN:
- Always allow the dehydrator to cool completely before cleaning.
- Unplug the dehydrator before cleaning.
- After each use, clean and dry the dehydrating trays, mesh sheet, and fruit roll sheet in warm, soapy water.
- Use a damp cloth to clean the dehydrator and door as needed.
- Do not immerse the dehydrator in water. Use nonabrasive cleaners or soft soap only.
- Do not place mesh sheet and fruit roll sheet in dishwasher.
TO STORE:
- Unplug unit; store in its box in a clean, dry place. Never store it while it is hot or still plugged in. Never wrap cord tightly around the appliance. Do not put any stress on the cord where it enters the unit, as it could cause the cord to fray and break.
DEHYDRATING TIME & TEMP. CHART
| |
TIME (hours) |
TEMPERATURE (°F) |
PREPARATION |
| FRUIT |
|
|
|
| Apples |
6 - 7 |
135 - 145 |
Slice ¼ inch thick |
| Bananas |
7 - 8 |
135 - 145 |
Slice ¼ inch thick |
| Blueberries |
36 - 42 |
135 - 145 |
Arrange whole |
| Grapes |
42 - 48 |
135 - 145 |
Slice in half |
| Mangos |
4 - 6 |
135 - 145 |
Slice 1/8 inch thick |
| Pineapples |
8 - 9 |
135 - 145 |
Slice ¼ inch thick |
| Raspberries |
24 - 48 |
135 - 145 |
Arrange whole |
| Strawberries |
8 - 10 |
135 - 145 |
Slice ½ inch thick |
| Tomatoes |
6 - 8 |
135 - 145 |
Slice ¼ inch thick |
| VEGETABLES |
|
|
|
| Herbs |
4 - 6 |
100 - 115 |
Arrange on tray |
| Beets |
4 - 6 |
125 - 140 |
Peel, slice 1/8 inch thick |
| Bell Peppers |
10 - 12 |
125 - 140 |
Slice ¼ inch thick |
| Broccoli |
4 - 5 |
125 - 140 |
Break into florets |
| Carrots |
4 - 6 |
125 - 140 |
Peel, slice 1/8 inch thick |
| Celery |
3 - 4 |
125 - 140 |
Slice ¼ inch thick |
| Kale |
4 - 5 |
125 - 140 |
Arrange whole |
| Mushrooms |
3 - 4 |
125 - 140 |
Slice ¼ inch thick |
| Summer Squash |
4 - 6 |
125 - 140 |
Slice ¼ inch thick |
| Yams |
4 - 5 |
125 - 140 |
Slice ¼ inch thick |
| MEAT |
|
|
|
| Beef |
5 - 6 |
150 - 160 |
Trim fat, slice ¼ inch thick |
| Poultry |
5 - 6 |
150 - 160 |
Trim fat, slice ¼ inch thick |
| Fish |
5 - 6 |
150 - 160 |
Trim fat, slice ¼ inch thick |
FOOD PACKAGING AND STORAGE
- Dried foods need to be properly packaged to prevent re-absorption of moisture and microbial deterioration. Pack food in clean, dry, airtight containers. Glass jars or freezer containers with tight-fitting lids are good for storage. Re-sealable plastic freezer bags are also acceptable.
- Store packaged dried food in a dry, cool location away from light. Higher temperatures and exposure to light will shorten the storage time and result in loss of quality and nutrients. Most dried fruit, when properly packaged and stored, will be good for 1 year at 60°F or 6 months at 80°F. Fruit leather/rolls should keep for up to 1 month at room temperature. Vegetables have about half the storage life as fruit. If food is to be kept longer, then store it in a freezer.
- Package vegetables and fruits in separate containers to avoid flavor transfer.
Packaging:
DRIED FOODS MUST BE PROPERLY PACKAGED IN ORDER TO KEEP WELL. Package your dried foods in freezer plastic bags, squeezing out as much air as possible. Heat-sealable bags may also be used. Store the plastic bags inside of airtight metal, plastic or glass containers. Storing foods in rigid containers without first putting them into the freezer bags exposes the dried foods to air. Vacuum packaging equipment for home use is available in some stores around the country. Vacuum packaging will greatly extend shelf life.
Storage Conditions:
Store properly packaged dried foods in a cool, dark place. The cooler the food is kept, the longer the optimal quality will be maintained. For every 18°F drop in temperature, the shelf life increases 2 to 3 times. If you have room in a refrigerator or freezer, keep your dried foods there. Otherwise, find the coolest place in your home to store dried foods. Light also causes the quality and nutritive value to deteriorate. Keep dried foods in the dark or in opaque containers.
Shelf Life:
Fruits have a naturally high sugar and acid content, which allows them to dry well and store for longer periods of time than vegetables. When properly packaged and stored at room temperature or below (70°F or less), most fruits will maintain a high quality and nutritional value up to a year. Most vegetables are best when eaten within six months.
FRUITS AND VEGETABLES KEPT BEYOND THE RECOMMENDED TIME MAY NOT BE AS NUTRITIOUS OR TASTE AS GOOD BUT WILL NOT SPOIL UNLESS THE PACKAGING IS NO LONGER INTACT.