Loading ...
Loading ...
Loading ...
11
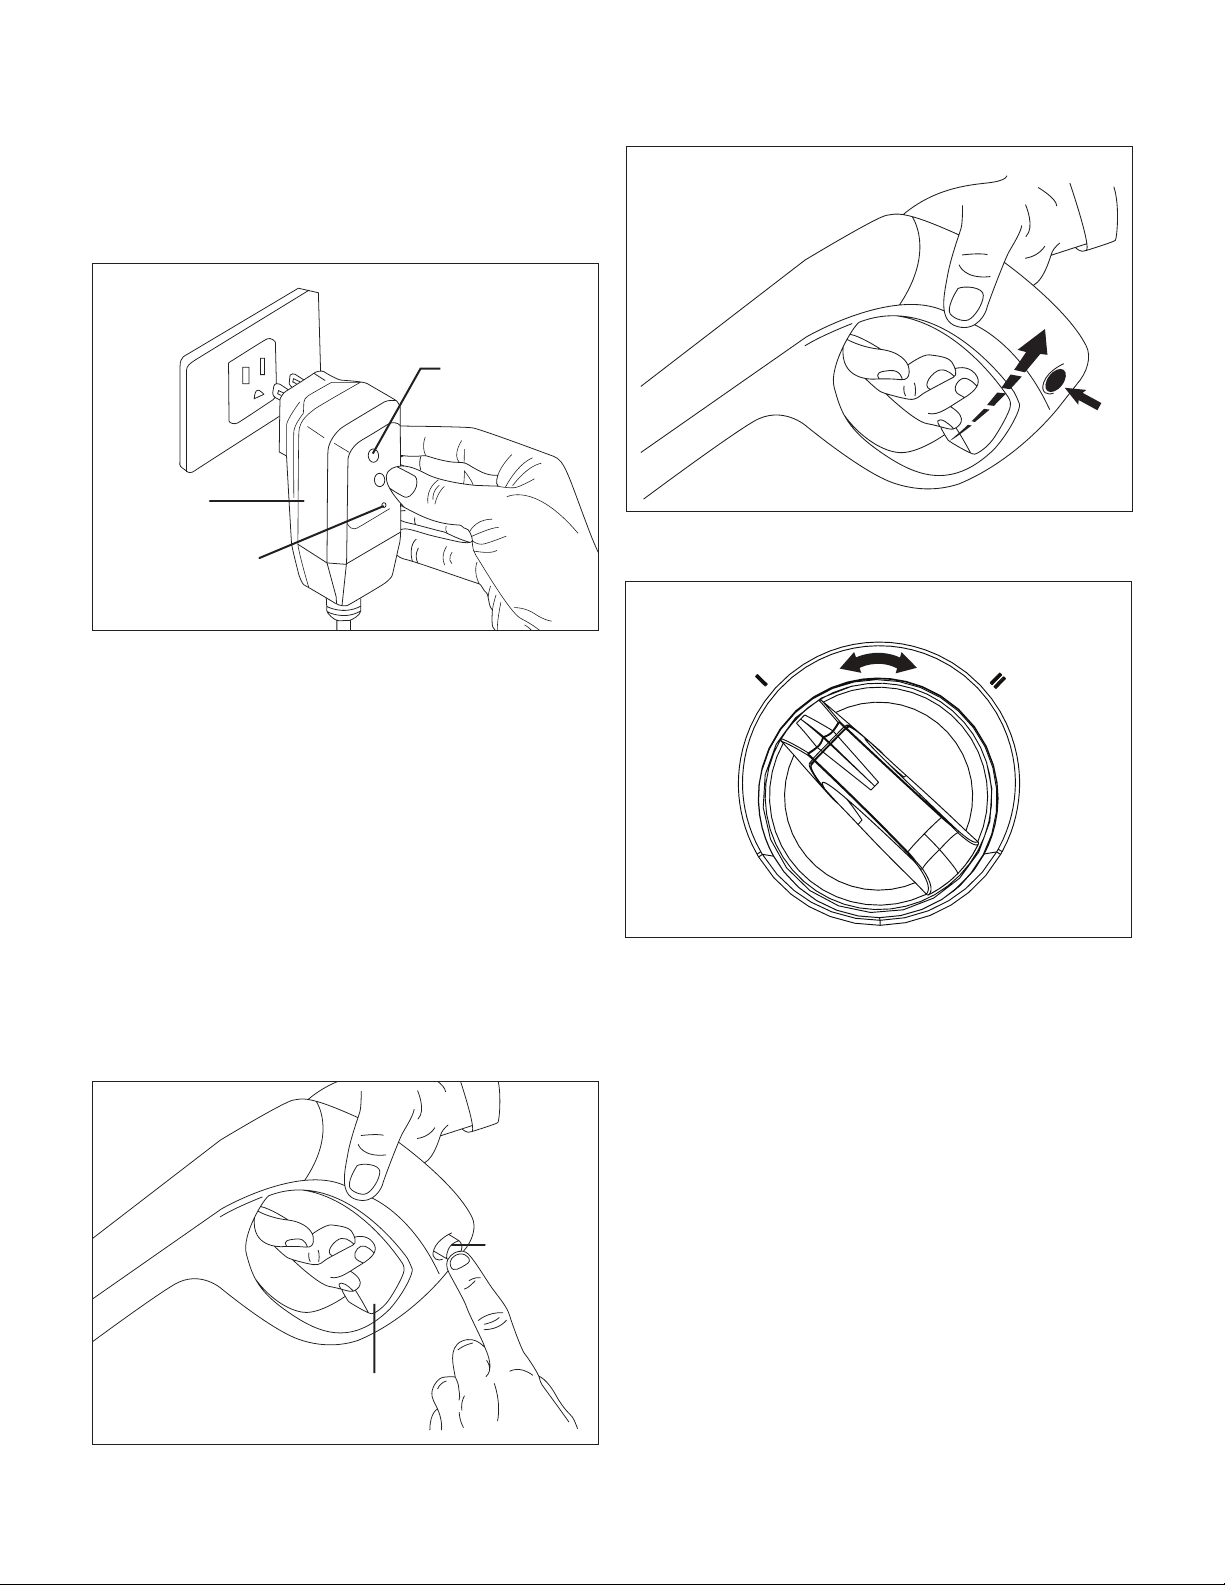
12. Check that the electrical supply voltage and frequency
(Volt/Hz) correspond to those specied on the pressure
washer rating plate. If the power supply is correct, you
may now plug the pressure washer into the power outlet
(Fig. 13).
NOTE: The GFCI may need to be reset when rst plugged
into the electric outlet. Press the "Reset" button until the
power light indicator on the GFCI illuminates.
Operation
mIMPORTANT! This pressure washer is equipped with
a micro-switch sensitive to water ow. This Total Stop System
(TSS) senses water ow in the pump. When the trigger is
released, water stops owing through the pump. The TSS then
automatically turns the motor o to protect the pump from
overheating, thus saving energy and prolonging pump life.
1. Turn the water supply tap on completely.
2. Release the safety lock, then press the trigger for a few
seconds until the water ow is steady. Operating the
pressure washer in this manner will allow air to escape and
discharge residual pressure in the hose (Figs. 14 and 15).
3. Turn the ON/OFF switch (pressure select dial) to the LOW (I)
or HIGH (II) position to start the pressure washer (Fig. 16).
Using the adjustable spray nozzle
mWARNING! High-pressure jets can be dangerous if
subject to misuse. The jet must not be directed at persons,
pets, live electrical equipment, or the appliance itself.
1. The spray wand is equipped with an adjustable nozzle.
2. The water pressure can be adjusted to low pressure (–)
and high pressure (+) by turning the pressure adjustment
knob. The nozzle tip can be adjusted from pencil spray
(wide open tip) to fan spray (narrow tip) by turning the
nozzle tip adjustment knob (Fig. 17).
NOTE: When using the unit with detergent, the spray
nozzle has to be set into low pressure and fan spray. The
pressure settings on the spray nozzle are only meant to
work with detergent, it will not aect the overall working
pressure of the unit.
RESET
TEST
Fig. 13
GFCI
Power light
indicator
Reset
Fig. 14
Trigger
Safety lock
Fig. 15
STOP
LOW
0
HIGH
Fig. 16
Loading ...
Loading ...
Loading ...