Loading ...
Loading ...
Loading ...
en Before using for the first time
12
--------
KBefore using for the first
time
Bef or e us i ng f or t he f i r st time
Before you can use your new appliance, you must
make some settings. You must also clean the cooking
compartment and accessories.
Initial use
The time will appear on the display once the appliance
is connected to the power supply. Set the current time.
Setting the time
Make sure that the function selector is set to the "Off"
position.
The time starts at "12:00".
1. Use the A or @ button to set the time.
2. Touch the v button to confirm.
The current time will be shown on the display.
Cleaning the cooking compartment and
accessories
Before using the appliance to prepare food for the first
time, you must clean the cooking compartment and
accessories.
Cleaning the cooking compartment
To remove the new-appliance smell, heat up the
cooking compartment when empty and with the oven
door closed.
Ensure that there is no leftover packaging, such as
polystyrene pellets, in the cooking compartment and
remove the adhesive tape that is in or on the appliance.
Before heating the appliance, wipe the smooth surfaces
in the cooking compartment with a soft, wet cloth. Keep
the kitchen ventilated while the appliance is heating.
Make the settings indicated. You can find out how to set
the type of heating and the temperature in the next
section. ~ "Operating the appliance" on page 13
Switch off the appliance after the cooking time
indicated.
After the cooking compartment has cooled down, clean
the smooth surfaces with soapy water and a dish cloth.
Cleaning the accessories
Clean the accessories thoroughly using soapy water
and a dish cloth or soft brush.
Grill tray
Use for grilling in place of the wire rack or as a splatter guard. Use in
the universal pan only.
Baking stone
For home-made bread, bread rolls and pizzas that you wish to have a
crispy base.
The baking stone must be preheated to the recommended tempera-
ture.
Glass roasting dish
For stews and bakes.
Glass pan
For bakes, vegetable dishes and baked items.
Pull-out system, one level
Fitting pull-out rails at position 2 will allow you to pull accessories out
further without them tipping.
Pull-out system, two levels
Fitting pull-out rails at positions 2 and 3 will allow you to pull accesso-
ries out further without them tipping.
Pull-out system, three levels
Fitting pull-out rails at positions 1, 2 and 3 will allow you to pull acces-
sories out further without them tipping.
Settings
Heating function
3D hot air
<
Temperature maximum
Duration One hour
Operating the appliance en
13
1Operating the appliance
Oper at i ng t he appl i anc e
You have already learnt about the controls and how
they work. Now we will explain how to apply settings on
your appliance.
Switching the appliance on and off
Use the function selector to switch the appliance on or
off. Turning the function selector to any position other
than the "Off" position switches on the appliance. To
switch off the appliance, always turn the function
selector to the "Off" position.
Setting the heating function and temperature
It is very easy to apply the settings you require to your
appliance using the function and temperature selector.
To find out which heating function is best for which type
of food, refer to the beginning of the instruction manual.
Example in the picture: 3D hot air at
<190 °C.
1. Use the function selector to set the heating function.
2. Use the temperature selector to set the temperature
or grill setting.
The appliance will start heating after a few seconds.
Once the food is cooked, turn the function selector to
the "Off" position to switch the appliance off.
Changing
The heating function and temperature can be changed
at any time using the relevant selector.
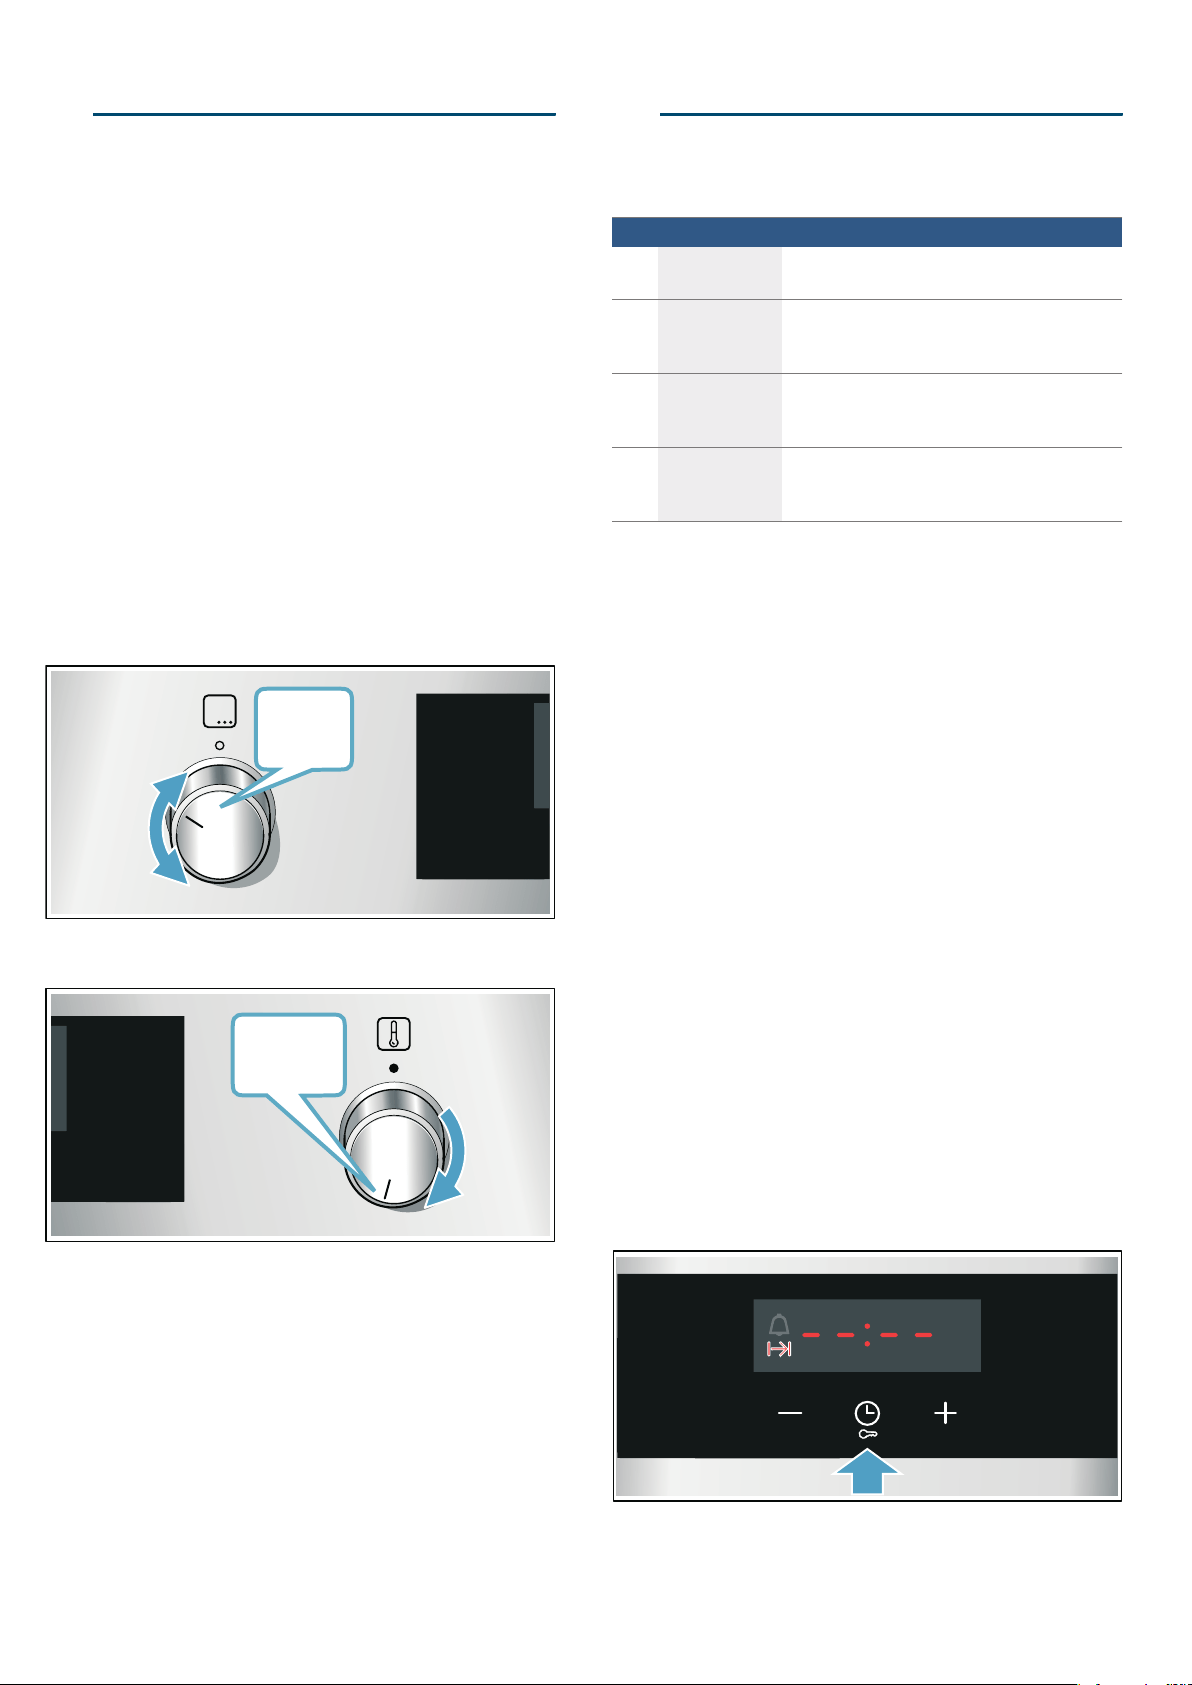
OTime-setting options
Ti me- set t i ng opt i ons
Your appliance has different time-setting options.
Before you can call up the cooking time using the
v button, you will need to set a heating function. Once
you have set a cooking time, the end time can be called
up.
An audible signal will sound once the cooking time or
timer duration has elapsed. You can cancel the audible
signal early by touching the v button.
Setting the cooking time
You can set the cooking time for your food on the
appliance. This prevents the food from accidentally
being cooked for too long, and means that you do not
have to stop what you are doing to switch off the oven.
The maximum time that can be set is 23 hours and 59
minutes. The cooking time can be set in 1-minute
increments up to one hour, and then in 5-minute
increments.
The cooking time will start at a different default value
depending on which button you touch first:
10 minutes if you touch the
A button and 30 minutes if
you touch the @ button.
Example in the picture: Cooking time of 45 minutes.
Details in the diagram may differ from what you see on
your appliance.
1. Set the type of heating and temperature or setting.
2. Touch the v button twice.
The cooking time x will be highlighted on the
display.
&
Time-setting option Use
x
Cooking time Once the set cooking time has elapsed, the
appliance will automatically stop heating.
y
End time Enter a cooking time and the required end
time. The appliance will start up automatically
so that it finishes cooking at the required time.
Q
Timer The timer functions like an egg timer. It runs
independently of the appliance when it is
heating and does not affect the appliance.
v
Time When no other function is running in the fore-
ground, the appliance will show you the time
of day on the display.
[
Loading ...
Loading ...
Loading ...