Loading ...
Loading ...
Loading ...
Installing / Removing Battery Pack
WARNING: Always remove battery pack from your
tool when you are assembling parts, making
adjustments, cleaning, or when not in use. Removing
battery pack will prevent accidental starting that could
cause serious personal injury.
To install battery pack: (Fig. 1)
■ Align grooves on battery pack with raised ribs in the
tool’s battery port and slide the battery pack into the tool.
WARNING: Make sure the latch on the tool snaps in
place and the battery pack is fully seated and secure
in the battery port before beginning operation. Failure
to securely seat the battery pack could cause the
battery pack to fall out, resulting in serious personal
injury.
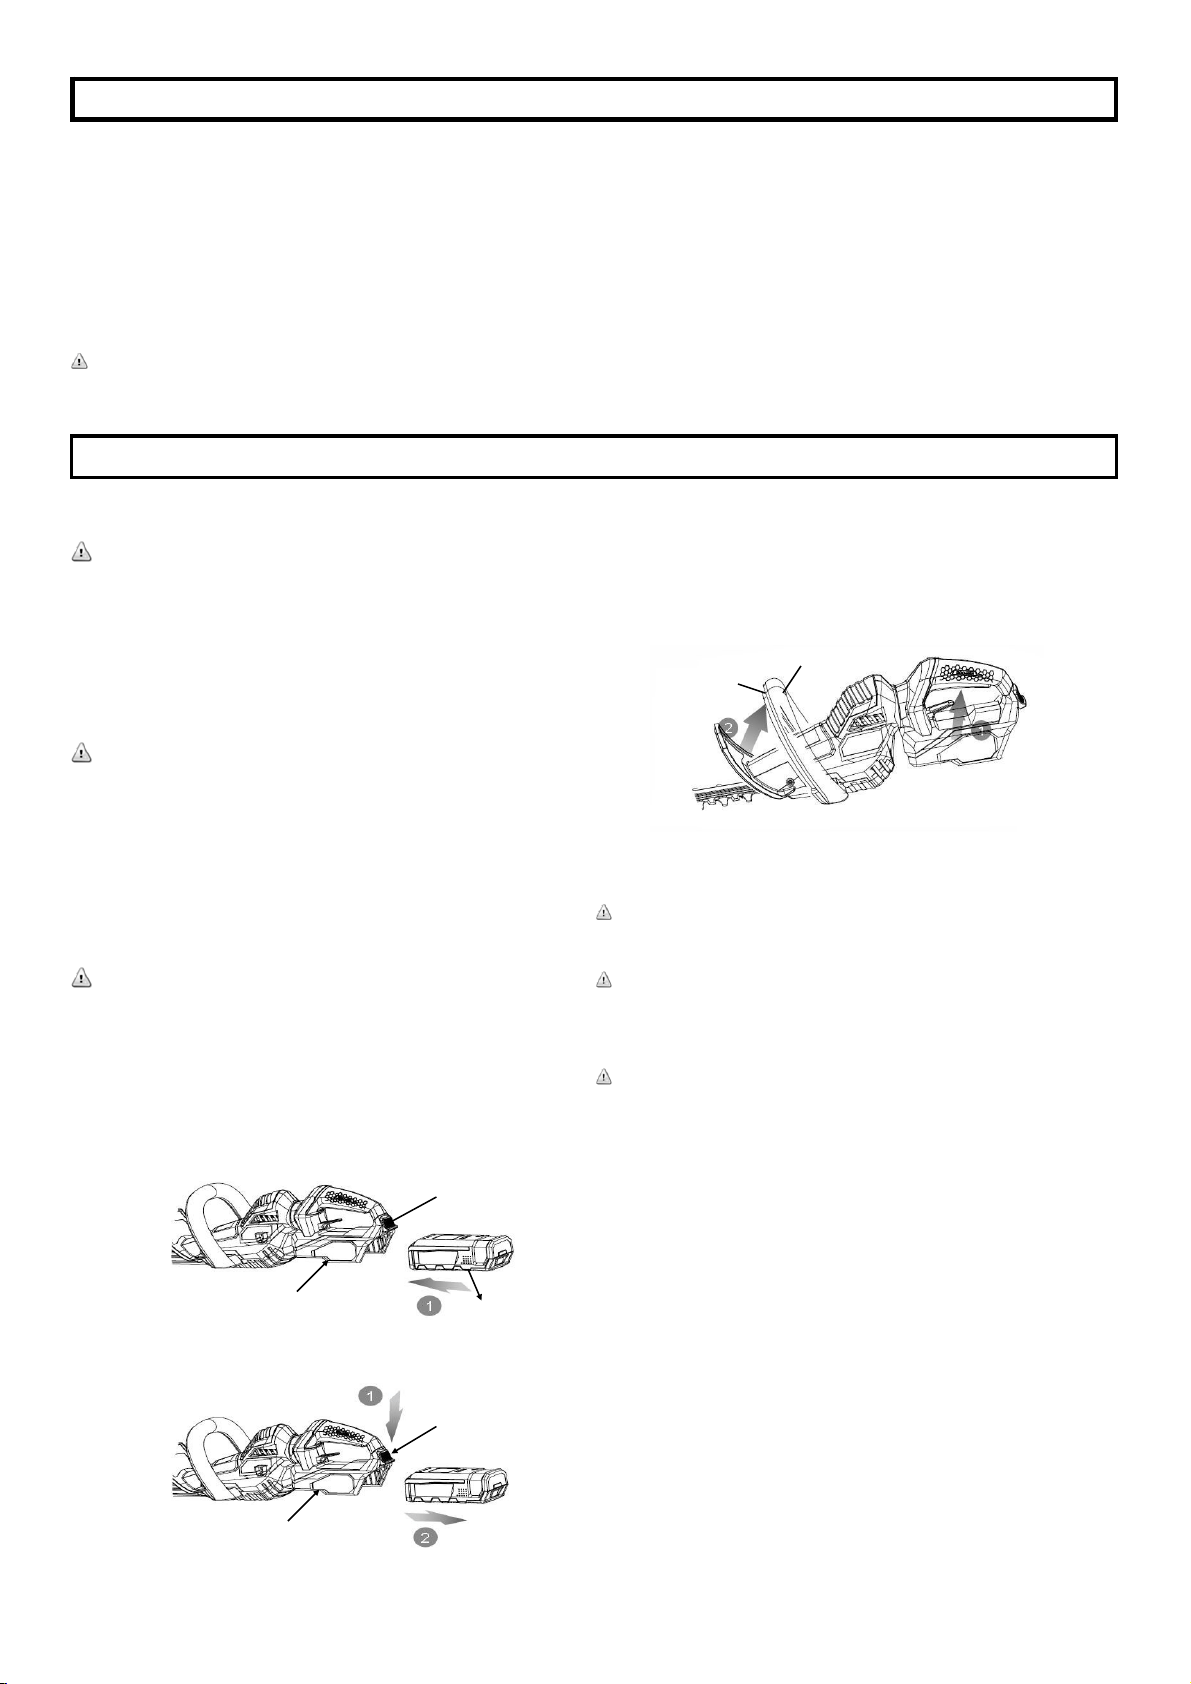
To remove battery pack: ( Fig. 2)
■ Press the battery latch button on the tool and pull the
battery pack out.
WARNING: To avoid serious personal injury, always
remove the battery pack and keep hands clear of the
trigger lock- out when carrying or transporting the
tool.
UNPACKING
This product requires no assembly.
Carefully remove the product and any accessories from the
box. Make sure that all items listed in the packing list are
included.
Inspect the product carefully to make sure no breakage or
damage occurred during shipping.
Do not discard the packing material until you have carefully
inspected and satisfactorily operated the product.
If any parts are damaged or missing, please call
1-800-618-7474 for assistance.
PACKING LIST
— Hedge Trimmer
— Charger
— Battery Pack
— Blade Cover
— Owner’s Manual
WARNING: If any parts are damaged or missing do not
operate this product until the parts are replaced. Failure to
heed this warning could result in serious personal injury.
OPERATING
Starting / Stopping the Hedge Trimmer
To start:
■ Remove the blade cover.
■ Hold the unit by both handles.
■ Grasp the front handle firmly,pulling the secondary
switch toward the handle.
■ Press the switch trigger to begin normal operation.
To stop:
■ Release the switch trigger or the secondary switch to stop
the hedge trimmer.
CAUTION: Blade coasts after turned off.
Do not use under wet conditions.
Do not store with switch locked on.
WARNING: To guard against injury, observe the following:
− Read instruction manual before using,
− Save instruction manual.
− Keep hands away from blades.
− Keep hands on handles. Don’t overreach.
WARNING: Do not allow familiarity with this type of product to
make you careless. Remember that a careless fraction of a
second is sufficient to inflict serious injury.
ASSEMBLY
5
Model LHT12462S
ROTATING THE REAR HANDLE
The tool rear handle has 5 different operating angles. +/- 45
degree, +/-90 degree and 0 degree. To get the desired
operating angle, use left hand hold the front handle and use
right hand hold the rear handle, without pressing the trigger,
pull the lever and rotate the rear handle to the desired angle
and release the lever.
NOTE: Trigger cannot be released if the rear handle is not
aligned to the correct angle.
BLOCK RELEASE GEAR BOX
This hedge trimmer is equipped with a block release system.
If the blade jams, the blades will automatically retract allowing
the jam to be cleared easily. Release the triggers, remove
jammed material, then squeeze trigger again to restart the
hedge trimmer. If the stem is too dense or too hard to be
trimmed, use a pruning saw to clear the stem.
Fig. 1
Fig. 2
Latch
Battery Port
Battery Pack
Latch
Battery Port
Front Handle
Secondary Switch
Loading ...
Loading ...
Loading ...