Loading ...
Loading ...
3
WARNING
!
This hood is equipped with a RF receiver (optional remote control sold separately). Changes or modifications
not expressly approved by the party responsible for compliance could void the user’s authority to operate this
product. The remote control has been tested and found to comply with the limits for a Class B digital device,
pursuant to part 15 of the FCC Rules and the Canadian ICES-003. These limits are designed to provide reasonable
protection against harmful interference in a residential installation. The remote control generates, uses and can
radiate radio frequency energy and, if not installed and used in accordance with the instructions, may cause
harmful interference to radio communications. However, there is no guarantee that interference will not occur in
a particular installation. If this equipment does cause harmful interference to radio or television reception, which
can be determined by turning the equipment off and on, the user is encouraged to try to correct the interference
by one or more of the following measures:
• Reorient or relocate the receiving antenna
• Increase the separation between the equipment and receiver
• Connect the equipment into an outlet on a circuit different from that to which the receiver is connected
TABLE OF CONTENTS
1. I NSTALL DUCTWORK ................................................................................................................................................................................... 3
2. P
REPARE INSTALLATION ............................................................................................................................................................................... 4
3. M
EASURE INSTALLATION .............................................................................................................................................................................. 4
4. INSTALL MOUNTING BRACKET ........................................................................................................................................................................ 5
5. ASSEMBLE ANGLE BRACKETS ........................................................................................................................................................................ 6
6. REMOVE HYBRID FILTERS ............................................................................................................................................................................. 7
7. I NSTALL GLASS PANELS (SBN MODEL ONLY) ...................................................................................................................................................... 7
8. PREPARE HOOD (ALL MODELS) .................................................................................................................................................................. 8-9
9. INSTALL HOOD ...................................................................................................................................................................................... 9-10
10. CONNECT WIRING .....................................................................................................................................................................................11
11. REINSTALL HYBRID FILTERS .........................................................................................................................................................................11
12. LED LIGHTING .........................................................................................................................................................................................12
13. CARE .....................................................................................................................................................................................................12
14. OPERATION ........................................................................................................................................................................................ 13-14
15. WIRING DIAGRAM ......................................................................................................................................................................................14
16. SERVICE PART S ........................................................................................................................................................................................15
17. WARRANTY .............................................................................................................................................................................................16
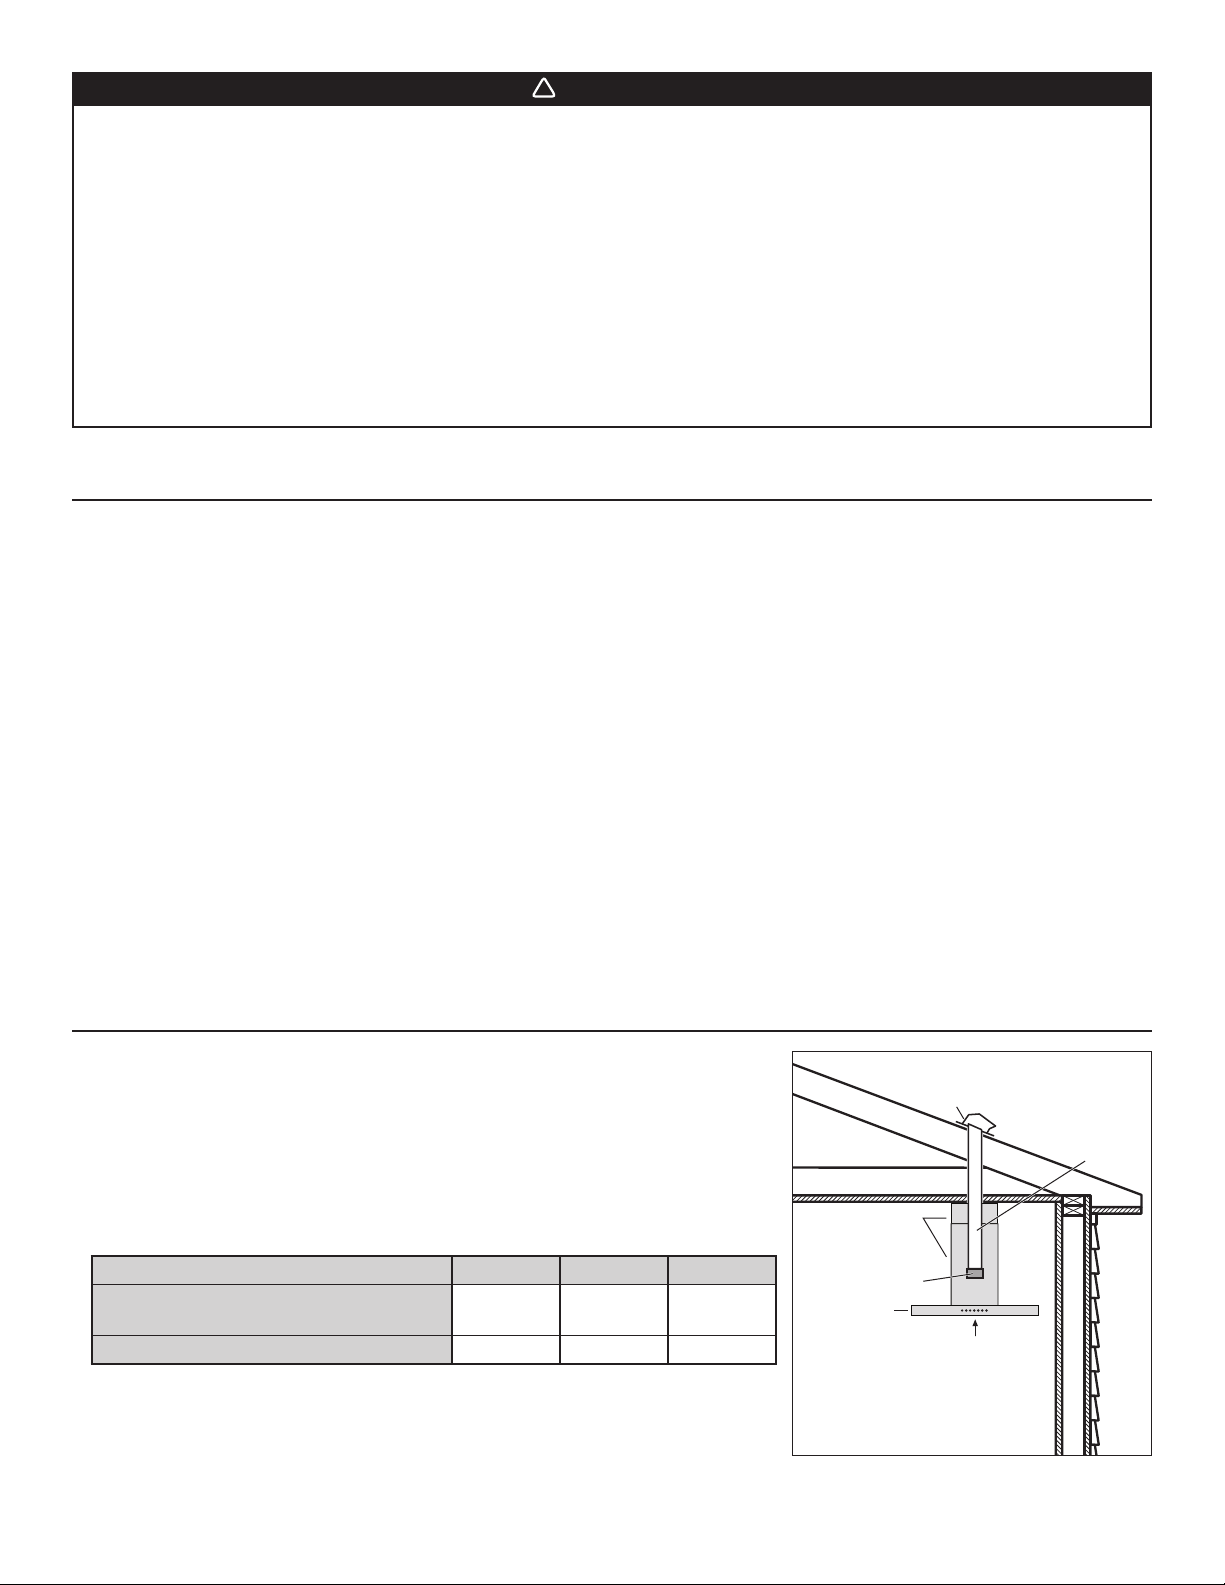
1. INSTALL DUCTWORK
Plan where and how the ductwork will be installed.
A straight, short duct run will allow the hood to perform most efficiently.
Install proper-sized ductwork, elbows and roof cap. Connect metal ductwork to cap and
work back towards the hood location. Use 2” metal foil duct tape to seal the joints.
Run 3-wire power supply cable to installation location.
We recommend to install the hood at a minimum distance of 30” above cooking
surface. A maximum of 36” above cooktop is highly recommended for best capture
of cooking impurities.
8” ROUND DUCT
ROOF CAP
HOOD
HH0152A
DECORATIVE
FLUE
8” ROUND
ADAPTER
/DAMPER
30” TO 36” ABOVE
COOKING SURFACE
CEILING HEIGHT 8 FEET 9 FEET 10 FEET*
M
INIMUM DISTANCE RECOMMENDED ABOVE
COOKTOP
30 IN. 30 IN. 30 IN.
M
AXIMUM RECOMMENDED HEIGHT 34 IN. 36 IN. 36 IN.
* 10-ft. ceilings require 10-ft flue extension, part no. AEICB3SB (stainless steel) or
no. AEICB3BLS (black stainless steel) (sold separately).
Distances over 36” are at the installer and users discretion.
Loading ...
Loading ...
Loading ...