Loading ...
Loading ...
Loading ...
6
Door Reversing Instructions
Tools Needed:
• 1/8” Hex Key
• 5/32” Hex Key
• Phillips Screwdriver
1. Open door and remove Hinge Pin from the Upper Hinge using a 1/8” Hex Key tool (Fig. 6), making sure to steady the
door Slowly remove the door from the Upper Hinge and lift to remove o the base Lower Hinge.
2. Using a Phillips Screwdriver, remove the 6 screws from both the Upper and Lower Hinges and save for later steps
3. Once the Hinges are removed from the unit, using a Phillips Screwdriver, remove the Bushing Screw and Hinge Pin
Screw and save for later steps (Fig. 6a).
4. On the Bottom Hinge, reattach the Bushing Screw and Hinge Pin Screw to the opposite side (Fig. 6b)
Figure 7a - Lower Hinge
Bracket (Before
Reversal)
Figure 7c - Upper Hinge
Bracket (After Reversal)
Figure 7b - Lower Hinge
Bracket (After Reversal)
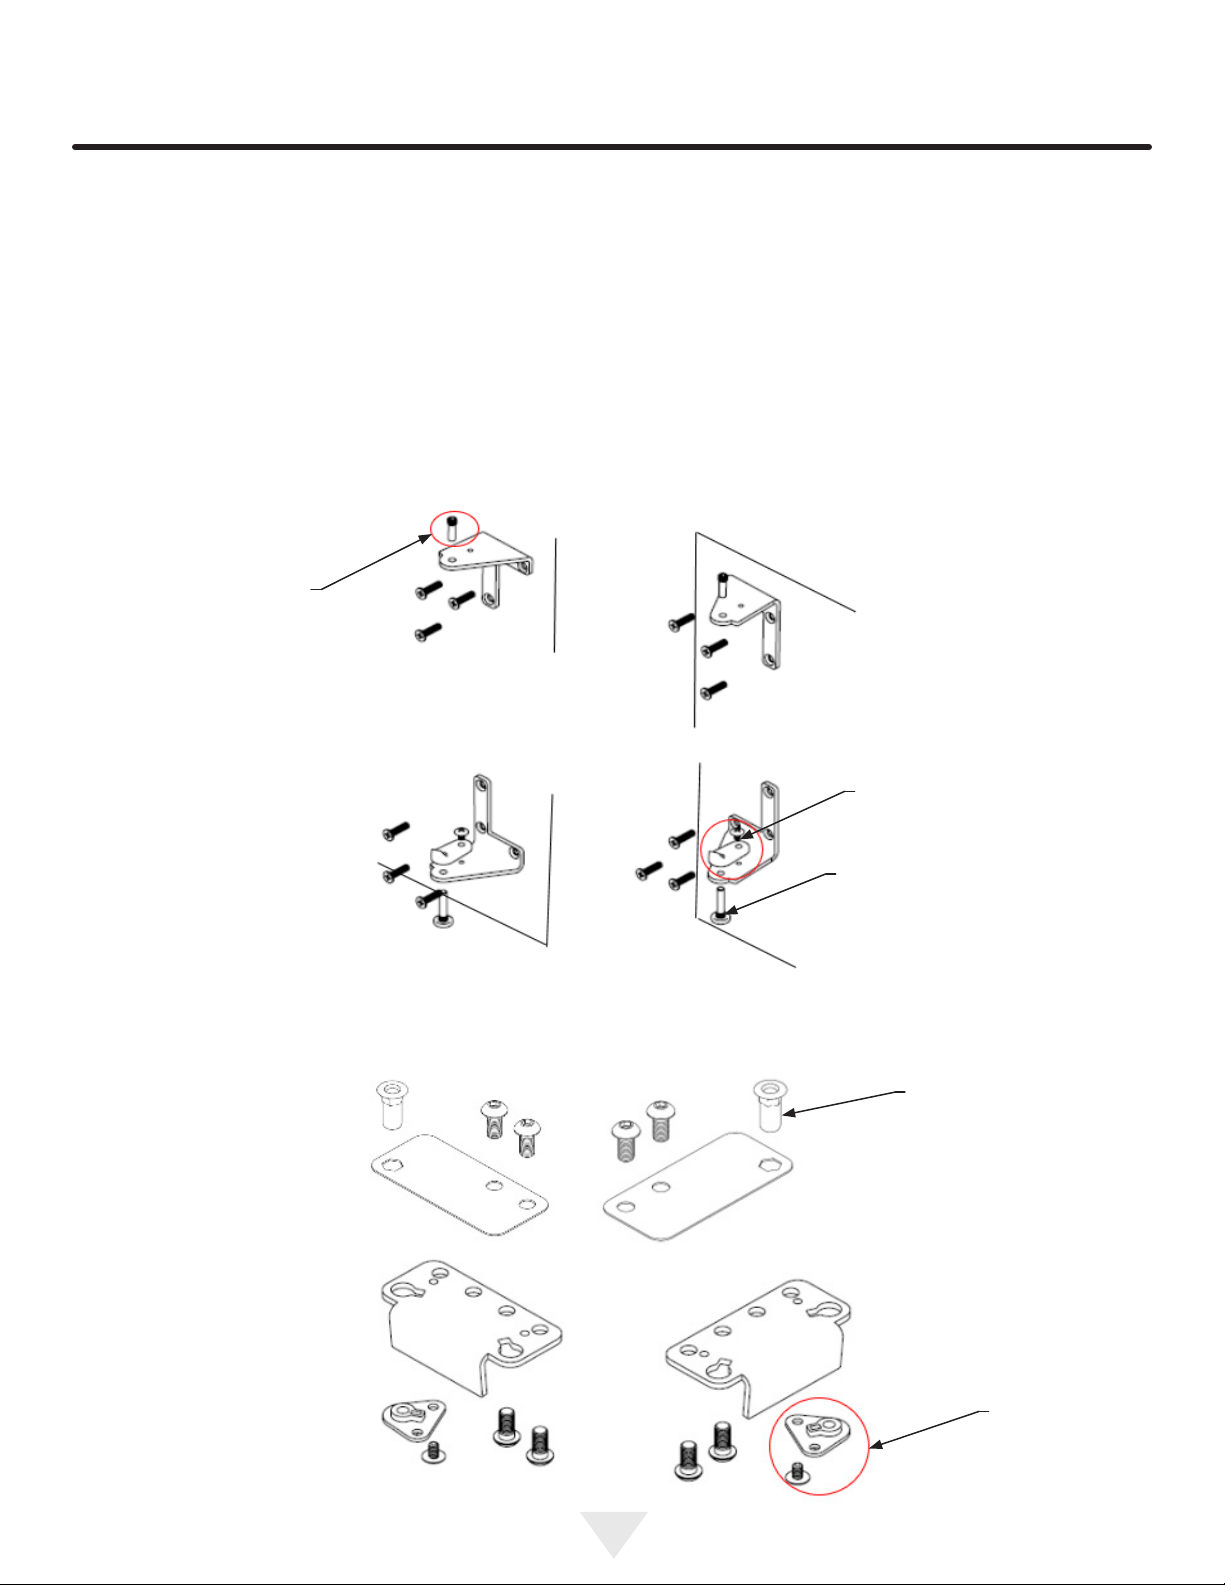
5. Using a 5/32” Hex Key, remove the Upper and Lower Hinge Brackets from the door (Fig. 7), saving all components.
Remove black plugs from opposite side of door. ip the Upper Hinge Bracket and reattach the Hinge Bushing (Fig. 7) and
screw into place on the opposite side of the door (where plugs were removed). Remove the Cam Closer from the Lower-
Hinge Bracket (Fig. 7) and attach it to the opposite side (Fig. 7b).
DOOR REVERSAL
Hinge Pin
Figure 6 - Upper Right
Hinge Orientation
(Before Reversal)
Hinge Pin
Screw
Bushing
Screw
Figure 6a - Lower Right
Hinge Orientation
(Before Reversal)
Figure 6c - Upper Left
Hinge Orientation
(After Reversal)
Figure 6b - Upper Left
Hinge Orientation
(After Reversal)
Hinge
Bushing
Cam Closer
Figure 7 - Upper Hinge
Bracket
(Before Reversal)
Loading ...
Loading ...
Loading ...