Loading ...
Loading ...
Loading ...
28
Watching TV (TV Guide On Screen)
Press a/b to select the program you want
to edit.
Press MENU to display “Schedule Options”.
Highlight “SCHEDULE” on the Service Bar.
1
2
3
Edit reminder
Press a/b to select “edit reminder”, and then
press ENTER to display “Remind Options”.
• You can change the setting items again.
Press ENTER to highlight “schedule
reminder”.
4
5
Press ENTER again to exit.
6
Press a/b to select the program you want
to delete.
Press MENU to display “Schedule Options”.
Highlight “SCHEDULE” on the Service Bar.
1
2
3
Delete recording
Press a/b to select “delete recording”, and
then press ENTER.
• Confirmation screen displays.
Press a/b to select “yes” or “no”.
4
5
Press a/b to select the program you want
to edit.
Press MENU to display “Schedule Options”.
Highlight “SCHEDULE” on the Service Bar.
1
2
3
Edit recording
Press a/b to select “edit recording”, and then
press ENTER to display “Record Options”.
• You can change the setting items again.
Press ENTER to highlight “schedule
recording”.
4
5
Press ENTER again to exit.
6
Highlight “SCHEDULE” on the Service Bar.
1
Press a/b to select “new manual recording”
and then press ENTER.
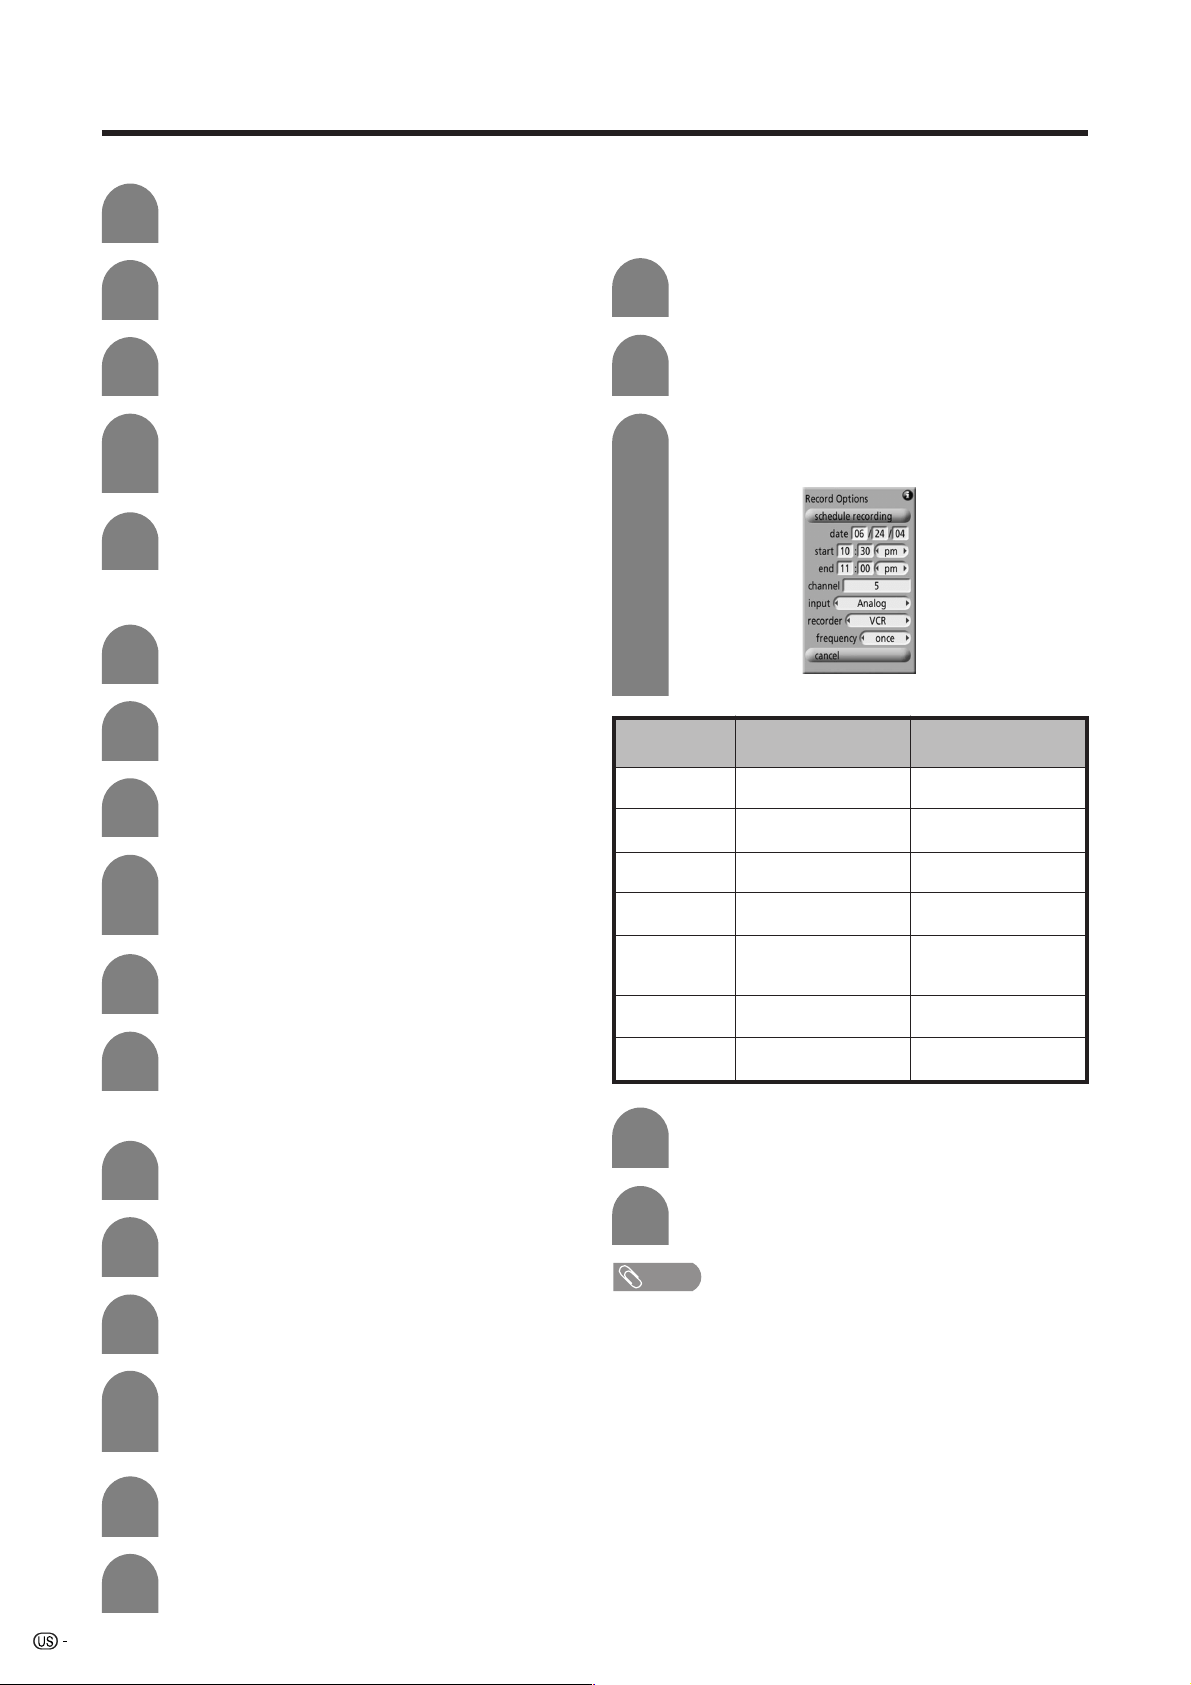
New manual recording
Aside from setting recordings using the program
LISTINGS menus, you can also define the schedule of
recordings manually by following the steps below.
• “Record Options” screen displays.
Press ENTER to highlight “schedule
recording”.
NOTE
• The program set to be manually recorded is listed by
channel number in the SCHEDULE.
5
Press ENTER again to exit.
2
3
4
Press MENU to display the “Schedule
Options”.
—
—
—
—
analog/digital air/
digital cable/input 1/
input 2/input 3
VCR/i.LINK
once/weekly/daily/off
Setup
items
date
start
end
channel
input
recorder
frequency
DescriptionSelectable items
Set a date to record
Set a start time to
record
Set an end time to
record
Set a channel to
record using 0–9
Set the external
recording device or
antenna source
Select a recorder you
connected
Set the recording
cycle
Loading ...
Loading ...
Loading ...