Loading ...
Loading ...
Loading ...
7
2. Setting up the monitor
In the OSD shown above, you can press
buttons at the front bezel of the monitor
to move the cursor, and press OK button to
confirm the choice or change.
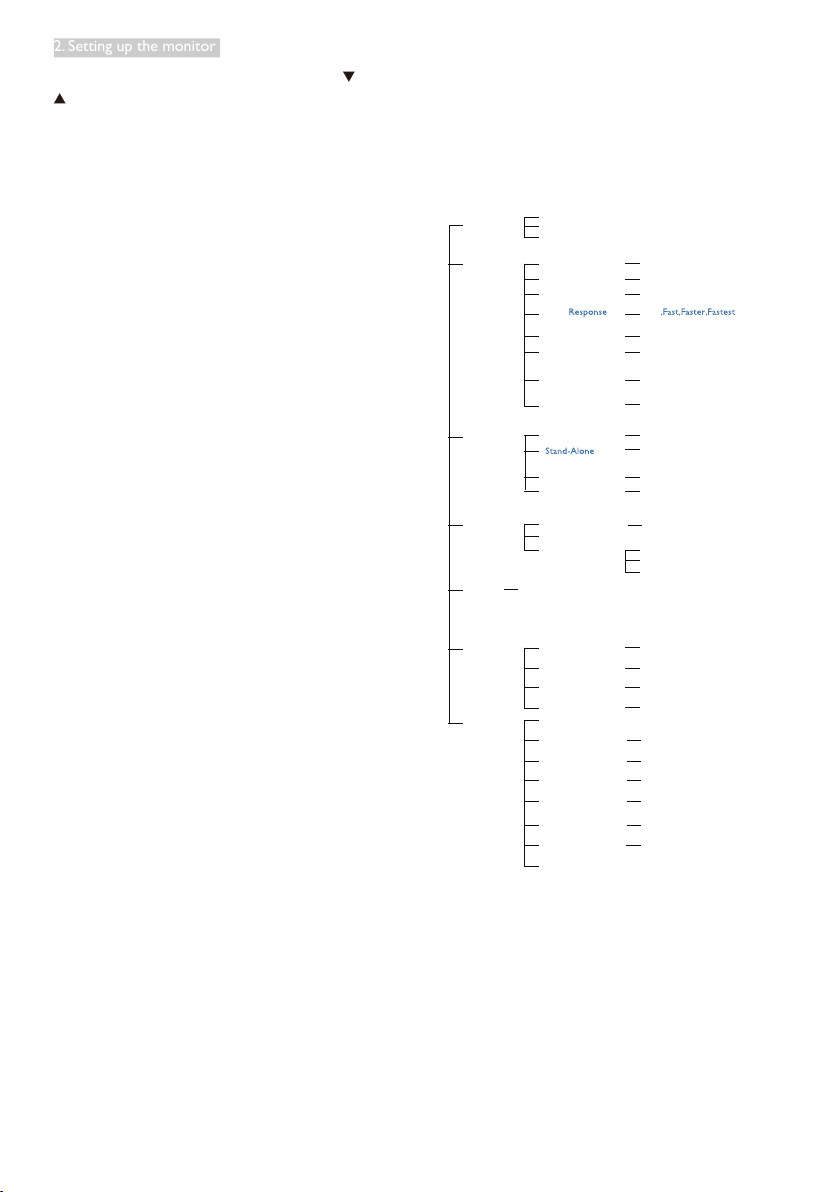
The OSD Menu
Below is an overall view of the structure of
the On-Screen Display. You can use this as a
reference when you want to work your way
around the different adjustments later on.
Main menu Sub menu
Picture
Wide Screen, 4:3
0~100
0~100
Picture Format
Brightness
Contrast
OSD Settings
0~100
0~100
Off, 1, 2, 3, 4
5s, 10s, 20s, 30s, 60s
Horizontal
Vertical
Transparency
OSD Time Out
Setup
0~100
On, Off
Yes, No
0~100
0~100
0~100
H. Position
Auto
V. Position
Phase
Clock
Resolution
Notification
Reset
Information
Language
Color
6500K, 9300K
Red: 0~100
Green: 0~100
Blue: 0~100
Color Temperature
sRGB
User Define
Audio
On, Off
Volume
Mute
(available for
selective models)
VGA
DVI (available for selective models)
HDMI (available for selective models)
Input
SmartContrast
0~100
Off
(available for selective models)
(available for selective models)
(available for selective models)
On, Off
Audio In, HDMI
Audio Source
English, Deutsch, Español, Ελληνική, Français, Italiano,
Maryar, Nederlands, Português, Português do Brazil,
Polski , Русский, Svenska, Suomi, Türkçe, Čeština,
Українська, 简体中文, 繁體中文,日本語,한국어
(available for selective models)
On, Off
Smart
On, Off
(available for selective models)
On, Off
OverScan
Pixel Orbiting
Gamma
1.8, 2.0, 2.2, 2.4, 2.6
(available for selective models)
Loading ...
Loading ...
Loading ...