2
Owner’s Record
The model and serial numbers are located at the rear of the unit.
Record these numbers in the spaces provided below. Refer to them
whenever you call upon your dealer regarding this product.
Model No.
Serial No.
To prevent fire or shock hazard, do not expose the
unit to rain or moisture.
Dangerously high voltages are present inside the
unit. Do not open the cabinet. Refer servicing to
qualified personnel only.
FCC Notice
This equipment has been tested and found to comply with the limits
for a Class B digital device, pursuant to Part 15 of the FCC Rules.
These limits are designed to provide reasonable protection against
harmful interference in a residential installation. This equipment
generates, uses, and can radiate radio frequency energy and, if not
installed and used in accordance with the instructions, may cause
harmful interference to radio communications. However, there is no
guarantee that interference will not occur in a particular installation.
If this equipment does cause harmful interference to radio or
television reception, which can be determined by turning the
equipment off and on, the user is encouraged to try to correct the
interference by one or more of the following measures:
– Reorient or relocate the receiving antenna.
– Increase the separation between the equipment and receiver.
– Connect the equipment into an outlet on a circuit different from
that to which the receiver is connected.
– Consult the dealer or an experienced radio/TV technician for
help.
You are cautioned that any changes or modifications not expressly
approved in this manual could void your authority to operate this
equipment.
INFORMATION
This product complies with Swedish National Council for Metrology
(MPR) standards issued in December 1990 (MPR II) for very low
frequency (VLF) and extremely low frequency (ELF).
INFORMATION
Ce produit est conforme aux normes du Swedish National Council
for Metrology de décembre 1990 (MPR II) en ce qui concerne les
fréquences très basses (VLF) et extrêmement basses (ELF).
Hinweis
Dieses Gerät erfüllt bezüglich tieffrequenter (very low frequency)
und tiefstfrequenter (extremely low frequency) Strahlung die
Vorschriften des „Swedish National Council for Metrology (MPR)“
vom Dezember 1990 (MPR II).
INFORMACIÓN
Este producto cumple las normas del Consejo Nacional Sueco
para Metrología (MPR) emitidas en diciembre de 1990 (MPR II)
para frecuencias muy bajas (VLF) y frecuencias extremadamente
bajas (ELF).
Dieses Garät entspricht den folgenden europäischen EMV-
Vorschriften für Betrieb in Wohngebieten, gewerblicher Gebleten
und Leichtindustriegebieten.
EN55022/1994 Klasse B
EN50082-1/1997
EN61000-3-2/1995
Production Model name: GDM-5410 (19.8” viewing image)
WARNING
Declaration of Conformity
Trade Name: Sun Microsystems, Inc.
Model No.: GDM-5410
Responsible Party: Sony Electronics Inc.
Address: 1 Sony Drive, Park Ridge, NJ. 07656 USA
Telephone No.: 201-930-6970
This device complies with Part 15 of the FCC Rules. Operation
is subject to the following two conditions: (1) This device may
not cause harmful interference, and (2) this device must accept
any interference received, including interference that may
cause undesired operation.
Hinweise
• Aus ergonomischen Gründen wird empfohlen, die
Grundfarbe Blau nicht auf dunklem Untergrund zu verwenden
(schlechte Erkennbarkeit, Augenbelastung bei zu geringem
Zeichenkontrast).
• Aus ergonomischen Gründen (flimmern) sollten nur
Darstellungen bei Vertikalfrequenzen ab 70 Hz (ohne
Zeilensprung) verwendet werden.
• Die Konvergenz des Bildes kann sich auf Grund des
Magnetfeldes am Ort der Aufstellung aus der korrekten
Grundeinstellung verändern. Zur Korrektur empfiehlt es sich
deshalb, die Regler an der Frontseite für Konvergenz so
einzustellen, daß die getrennt sichtbaren Farblinien für Rot,
Grün und Blau bei z.B. der Darstellung eines Buchstabens
zur Deckung (Konvergenz) gelangen.
Siehe hierzu auch die Erklärungen zu Konvergenz.
NOTICE
This notice is applicable for USA/Canada only.
If shipped to USA/Canada, install only a UL LISTED/CSA
LABELLED power supply cord meeting the following
specifications:
SPECIFICATIONS
Plug Type Nema-Plug 5-15p
Cord Type SVT or SJT, minimum 3
×
18 AWG
Length Maximum 15 feet
Rating Minimum 7 A, 125 V
NOTICE
Cette notice s’applique aux Etats-Unis et au Canada
uniquement.
Si cet appareil est export* aux Etats-Unis ou au Canada, utiliser
le cordon d’alimentation portant la mention UL LISTED/CSA
LABELLED et remplissant les conditions suivantes:
SPECIFICATIONS
Type de fiche Fiche Nema 5-15 broches
Cordon Type SVT ou SJT, minimum 3
×
18 AWG
Longueur Maximum 15 pieds
Tension Minimum 7 A, 125 V
As an
E
NERGY
S
TAR Partner, Sun
Microsystems, Inc. has determined
that this product meets the
E
NERGY
S
TAR guidelines for energy
efficiency.
This monitor complies with the
TCO’99 guidelines.
3
Table of Contents
• VESA and DDC
are trademarks of the
Video Electronics Standard
Association.
•
E
NERGY
S
TAR is a U.S. registered
mark.
• All other product names mentioned
herein may be the trademarks or
registered trademarks of their respective
companies.
• Furthermore, “” and “” are not
mentioned in each case in this manual.
EN
Precautions. . . . . . . . . . . . . . . . . . . . . . . . . . . . . . . . . . . . . . . . . . . . 4
Identifying parts and controls . . . . . . . . . . . . . . . . . . . . . . . . . . . . . . 5
Setup. . . . . . . . . . . . . . . . . . . . . . . . . . . . . . . . . . . . . . . . . .6
Step 1:
Remove the rear cover . . . . . . . . . . . . . . . . . . . . . . . . . . . . 6
Step 2:
Connect your monitor to your computer . . . . . . . . . . . . . . . 6
Step 3:
Connect the power cord. . . . . . . . . . . . . . . . . . . . . . . . . . . . 6
Step 4:
Attach the rear cover . . . . . . . . . . . . . . . . . . . . . . . . . . . . . . 6
Step 5:
Turn on the monitor and computer . . . . . . . . . . . . . . . . . . . 6
Selecting the on-screen menu language (LANGUAGE). . . . . . . . . . 7
Selecting the input signal . . . . . . . . . . . . . . . . . . . . . . . . . . . . . . . . . 7
Automatically sizing and centering the picture . . . . . . . . . . . . . . . . . 7
Customizing Your Monitor . . . . . . . . . . . . . . . . . . . . . . . .8
Navigating the menu. . . . . . . . . . . . . . . . . . . . . . . . . . . . . . . . . . . . . 8
Adjusting the brightness and contrast. . . . . . . . . . . . . . . . . . . . . . . . 9
Adjusting the size of the picture (SIZE/CENTER). . . . . . . . . . . . . . 10
Adjusting the centering of the picture (SIZE/CENTER) . . . . . . . . . 10
Enlarging or reducing the picture (ZOOM) . . . . . . . . . . . . . . . . . . . 10
Adjusting the shape of the picture (GEOMETRY) . . . . . . . . . . . . . 10
Adjusting the convergence (CONVERGENCE) . . . . . . . . . . . . . . . 11
Adjusting the quality of the picture (SCREEN) . . . . . . . . . . . . . . . . 11
Adjusting the color of the picture (COLOR) . . . . . . . . . . . . . . . . . . 12
Additional settings (OPTION) . . . . . . . . . . . . . . . . . . . . . . . . . . . . . 13
Resetting the adjustments . . . . . . . . . . . . . . . . . . . . . . . . . . . . . . . 14
Technical Features . . . . . . . . . . . . . . . . . . . . . . . . . . . . .14
Power saving function. . . . . . . . . . . . . . . . . . . . . . . . . . . . . . . . . . . 14
Troubleshooting. . . . . . . . . . . . . . . . . . . . . . . . . . . . . . . .15
If thin lines appear on your screen (damper wires). . . . . . . . . . . . . 15
On-screen messages . . . . . . . . . . . . . . . . . . . . . . . . . . . . . . . . . . . 15
Trouble symptoms and remedies . . . . . . . . . . . . . . . . . . . . . . . . . . 16
Self-diagnosis function . . . . . . . . . . . . . . . . . . . . . . . . . . . . . . . . . . 18
Specifications. . . . . . . . . . . . . . . . . . . . . . . . . . . . . . . . . .18
Appendix. . . . . . . . . . . . . . . . . . . . . . . . . . . . . . . . . . . . . . . i
TCO’99 Eco-document . . . . . . . . . . . . . . . . . . . . . . . . . . . . . . . . . . . .i
4
Precautions
Warning on power connections
Use an appropriate power cord for your local power supply.
• Before disconnecting the power cord, wait at least 30 seconds
after turning off the power to allow the static electricity on the
screen’s surface to discharge.
• After the power is turned on, the screen is demagnetized
(degaussed) for about 2 seconds. This generates a strong
magnetic field around the screen which may affect data stored
on magnetic tapes and disks placed near the monitor. Be sure to
keep magnetic recording equipment, tapes, and disks away
from the monitor.
Installation
Do not install the monitor in the following places:
• on surfaces (rugs, blankets, etc.) or near materials (curtains,
draperies, etc.) that may block the ventilation holes
• near heat sources such as radiators or air ducts, or in a place
subject to direct sunlight
• in a place subject to severe temperature changes
• in a place subject to mechanical vibration or shock
• on an unstable surface
• near equipment which generates magnetism, such as a
transformer or high voltage power lines
• near or on an electrically charged metal surface
Maintenance
• Clean the screen with a soft cloth. If you use a glass cleaning
liquid, do not use any type of cleaner containing an anti-static
solution or similar additive as this may scratch the screen’s
coating.
• Do not rub, touch, or tap the surface of the screen with sharp or
abrasive items such as a ballpoint pen or screwdriver. This type
of contact may result in a scratched picture tube.
• Clean the cabinet, panel and controls with a soft cloth lightly
moistened with a mild detergent solution. Do not use any type
of abrasive pad, scouring powder or solvent, such as alcohol or
benzene.
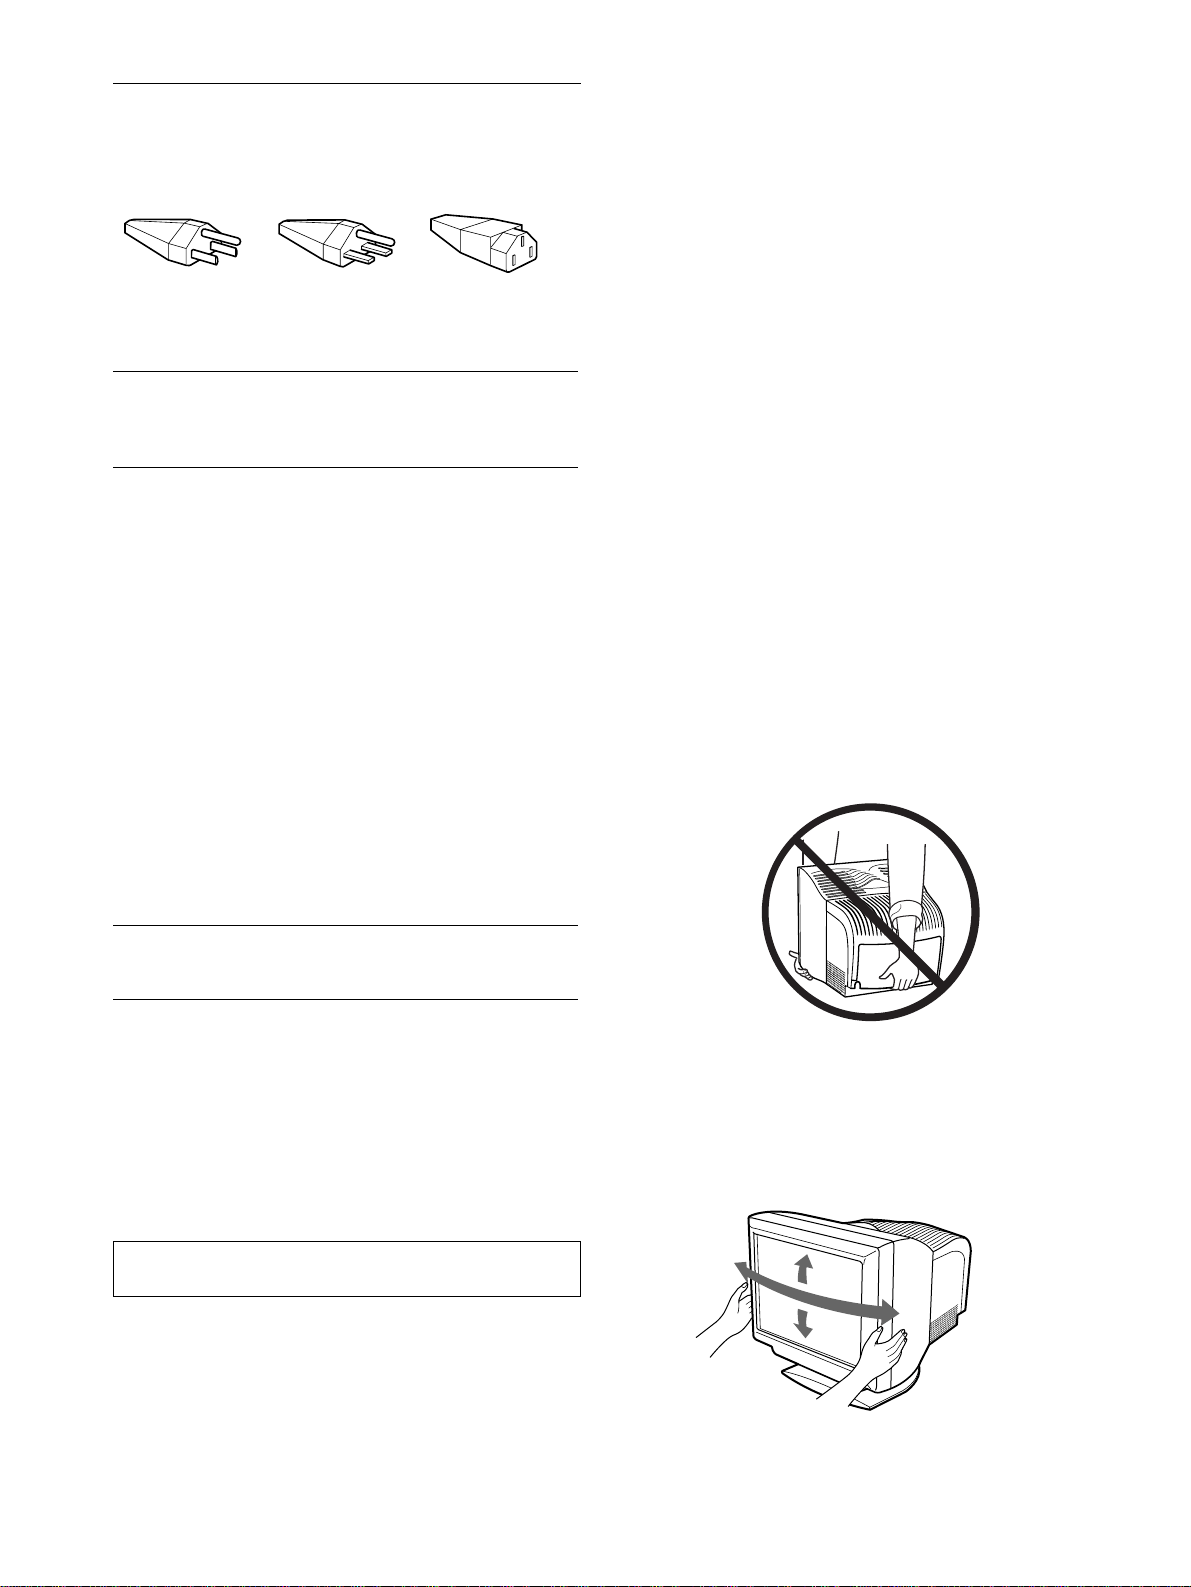
Transportation
When you transport this monitor for repair or shipment, use the
original carton and packing materials.
Do not lift this monitor by grasping the rear cover as shown
below, as the rear cover may come off.
Use of the tilt-swivel
This monitor can be adjusted within the angles shown below. To
turn the monitor vertically or horizontally, hold it at the bottom
with both hands.
United States,
Canada,
Tai wa n,
Korea, Japan
Continental
Europe
United
Kingdom,
Ireland
Australia,
New Zealand
Plug Type
NEMA S-15P
Plug Type
CEE7/VII
(Schuko)
Plug Type
B S 1363
Plug Type
SAA AS 3112
Cord Type
SJT
Cord Type
HAR(HO5VV
-F3G1.0)
Cord Type
HAR(HO5VV
-F3G1.0)
Cord Type
CDB03PLP
Min. cord set
rating
10 A/125 V
18/3AWG
Min. cord set
rating
10 A/250 V
Min. cord set
rating
10 A/250 V
Min. cord set
rating
10 A/250 V
Cord Length
(+/– 0.1 m)
2 m
Cord Length
(+/– 0.1 m)
2.5 m
Cord Length
(+/– 0.1 m)
2.5 m
Cord Length
(+/– 0.1 m)
2.5 m
Safety
Approval
UL/CSA
Safety
Approval
HAR
Safety
Approval
BSI, ASTA
Safety
Approval
Dept. of
Energy of
New South
Wales
Autoranging universal power supply works anywhere; the
monitor self-adjusts if the appropriate power cord and plug for
the local voltage are used.
The equipment should be installed near an easily accessible
outlet.
115 Volts 230 Volts
(not provided on
standard cord set)
CEE-22 cord set,
female end (all
power cord sets)
90°
5°
90°
15°
5
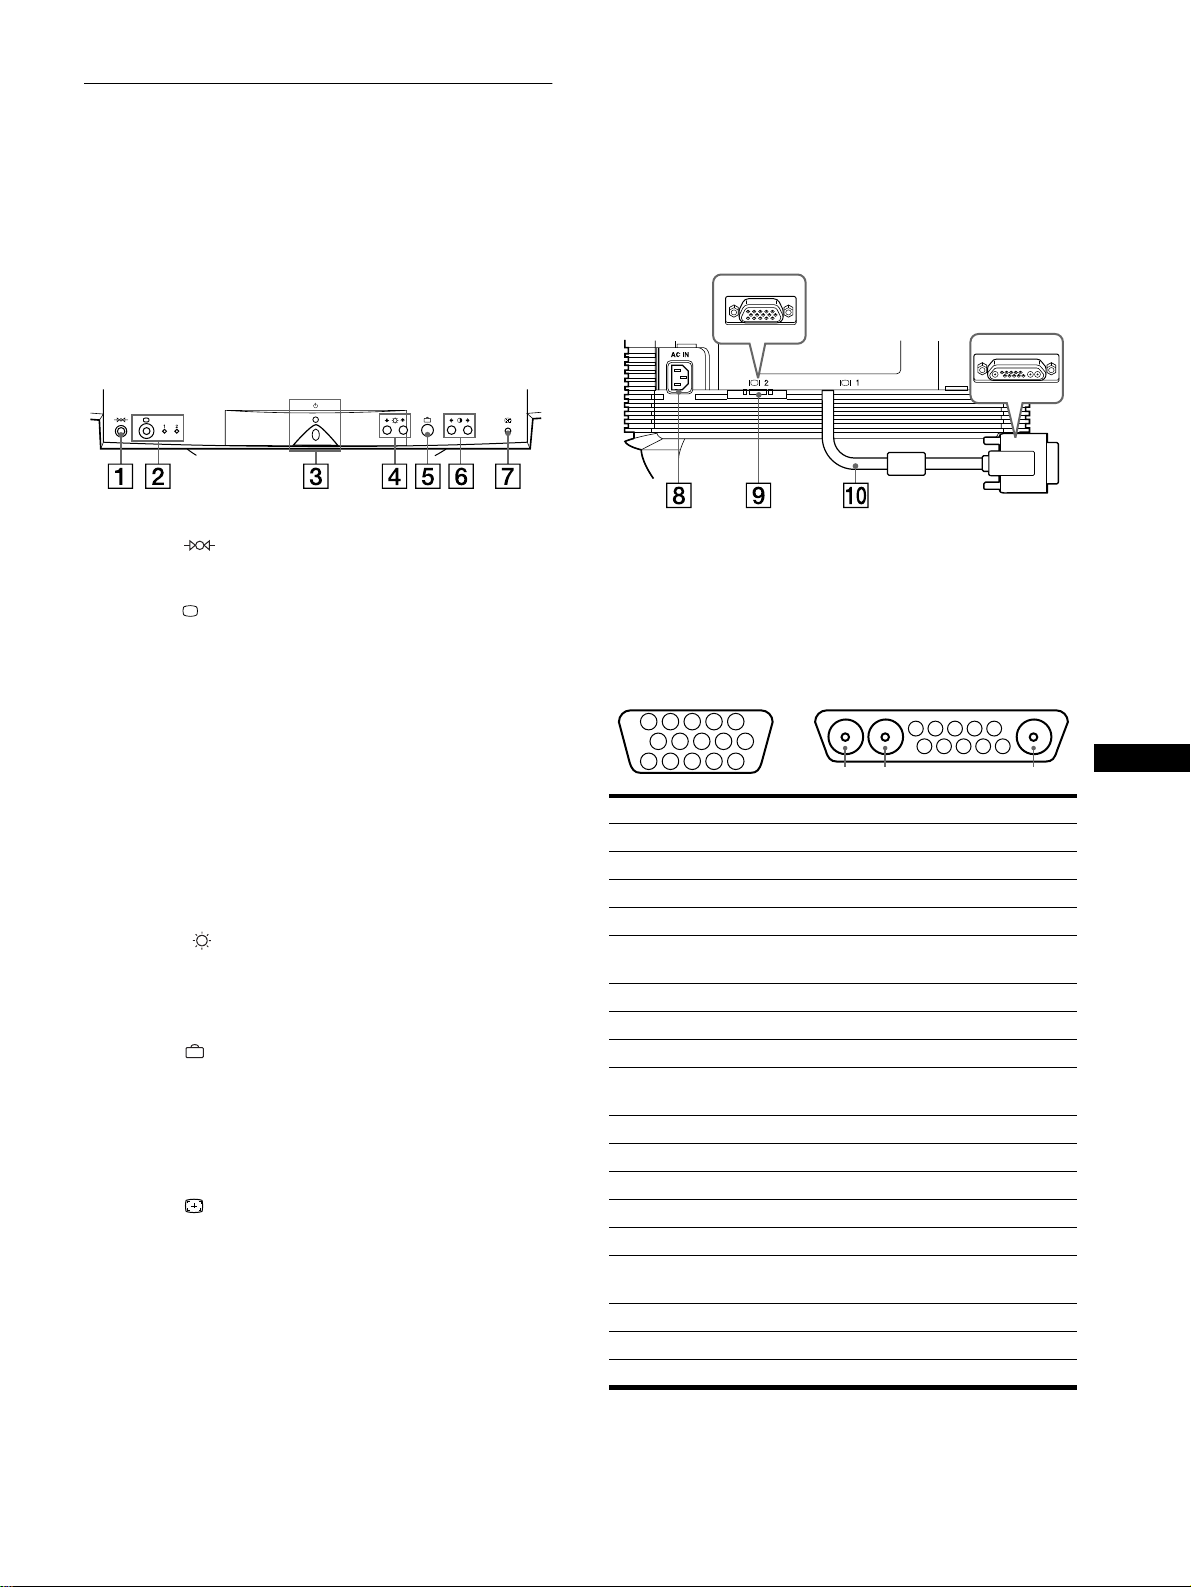
EN
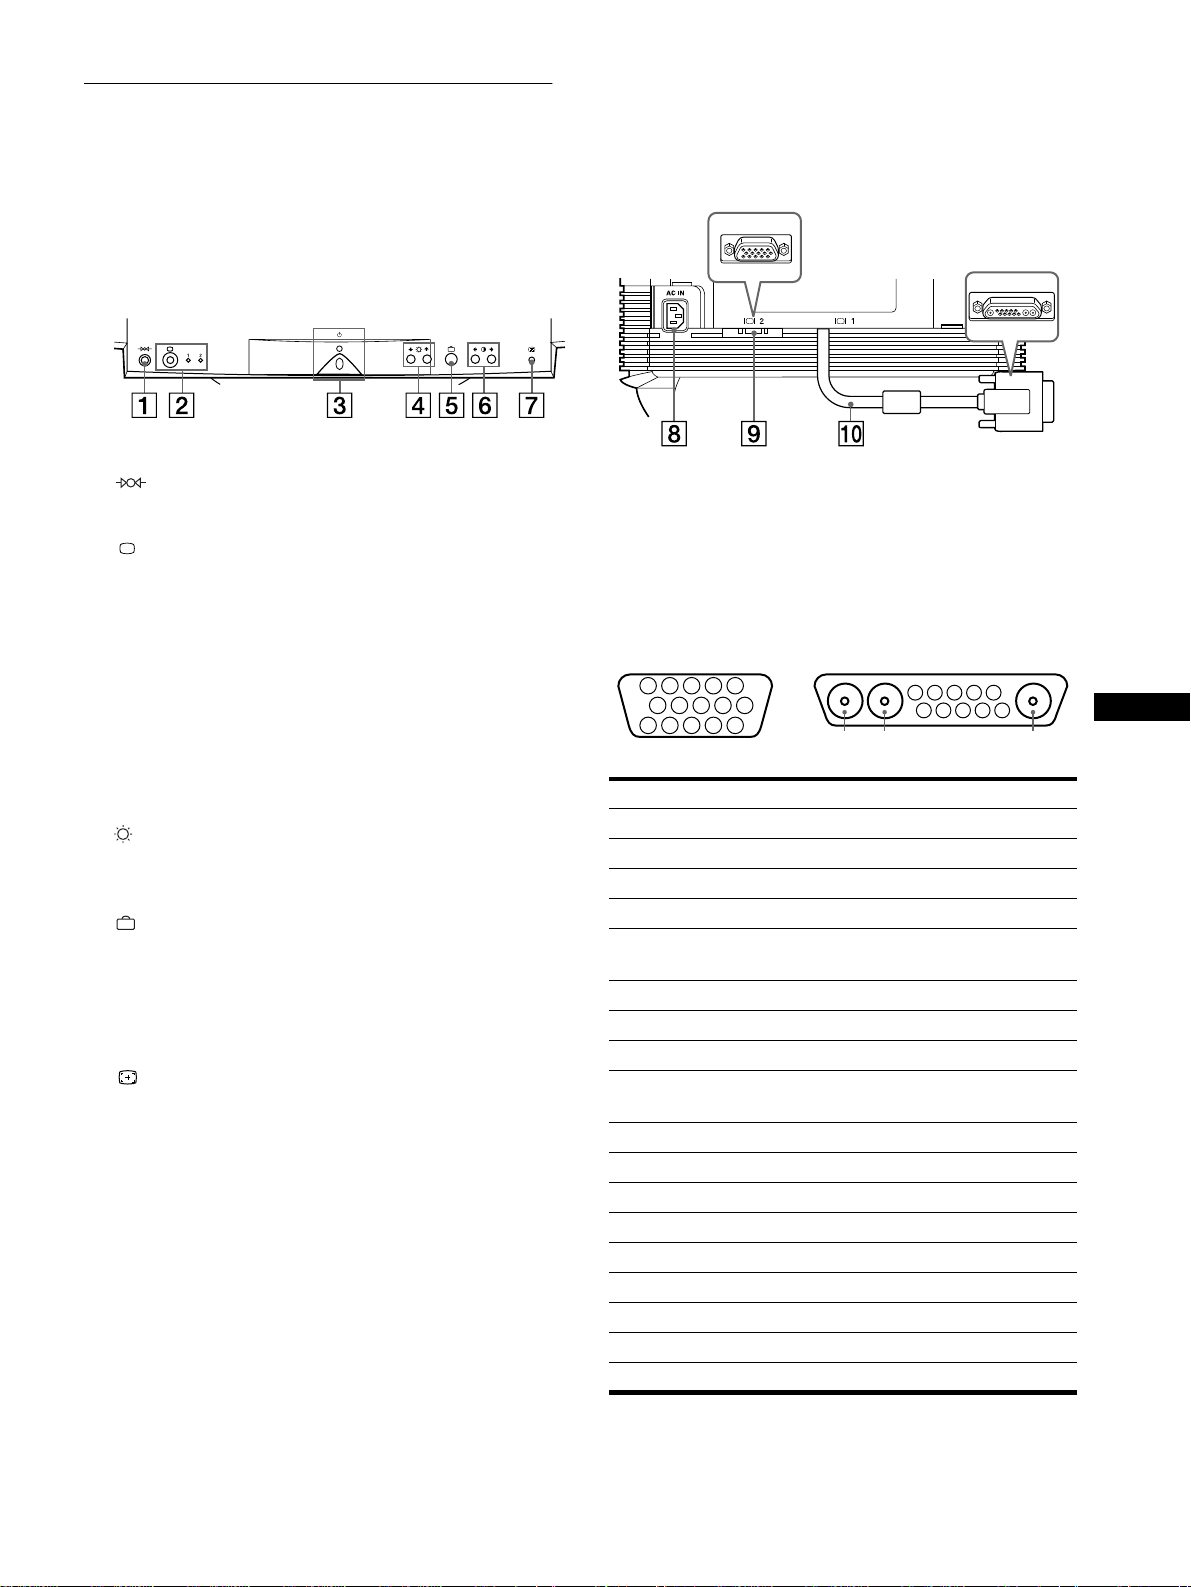
Identifying parts and controls
See the pages in parentheses for further details.
1
11
1
(reset) button (page 14)
This button resets the adjustments to the factory settings.
2
22
2
(input) button and 1 (13W3) / 2 (HD15) indicators
(page 7)
This button selects the 1 (13W3) or 2 (HD15) video input
signal.
Each time you press this button, the input signal and
corresponding indicator alternate.
3
33
3 1
(power) switch and indicator (pages 6, 14, 18)
This button turns the monitor on and off. The power indicator
lights up in green when the monitor is turned on, and either
flashes in green and amber, or lights up in amber when the
monitor is in power saving mode.
4
44
4
(brightness)
m
/
M
buttons (page 9)
7KHVHýEXWWRQVýGLVSOD\ýWKHý%5,*+71(66î&2175$67ýPHQXý
DQGýIXQFWLRQýDVýWKHýmîMýýEXWWRQVýZKHQýVHOHFWLQJýPHQXýLWHPVï
5
55
5
(menu) button (page 9)
This button displays the main menu.
6
66
6 6
66
6
(contrast)
<
/
,
buttons (page 9)
These buttons display the BRIGHTNESS/CONTRAST menu
and function as the </, buttons when making adjustments.
7
77
7
ASC (auto sizing and centering) button (page 7)
This button automatically adjusts the size and centering of the
picture.
8
88
8
AC IN connector (page 6)
This connector provides AC power to the monitor.
9
99
9
Video input 2 connector (HD15) (page 6)
This connector inputs RGB video signals (0.700 Vp-p,
positive) and sync signals.
q;
q;q;
q;
Video input 1 connector (13W3) (page 6)
This connector inputs RGB video signals (0.700 Vp-p,
positive) and sync signals.
* DDC (Display Data Channel) is a standard of VESA.
**Pins serve a dual purpose as combined sync input and as H.sync input
if V.Sync is present on pin no. 7.
Front
Rear (with the cover opened)
No.
9
99
9
Signal
0
00
0
Signal
A1 ––– Red
A2 ––– Green
A3 ––– Blue
1 Red Data Clock (SCL)*
2 Green
(Sync on Green)
DDC + 5V*
3Blue –––
4 ID (Ground) DDC Ground*
5 DDC Ground* C Sync**
6 Red Ground Bi-Directional Data
(SDA)*
7 Green Ground V. Sync
8 Blue Ground ID (100
Ω
)
9 DDC + 5V* ID (100
Ω
)
10 Ground Ground
11 ID (Ground) –––
12 Bi-Directional Data (SDA)* –––
13 H. Sync –––
14 V. Sync –––
15 Data Clock (SCL)* –––
5 4 3 2
1
678910
11
A3
12131415
5 4 3 2
1
678910
A2 A1
9
HD15
0
13W3
6
Setup
This monitor works with platforms running at horizontal
frequencies between 30 and 121 kHz.
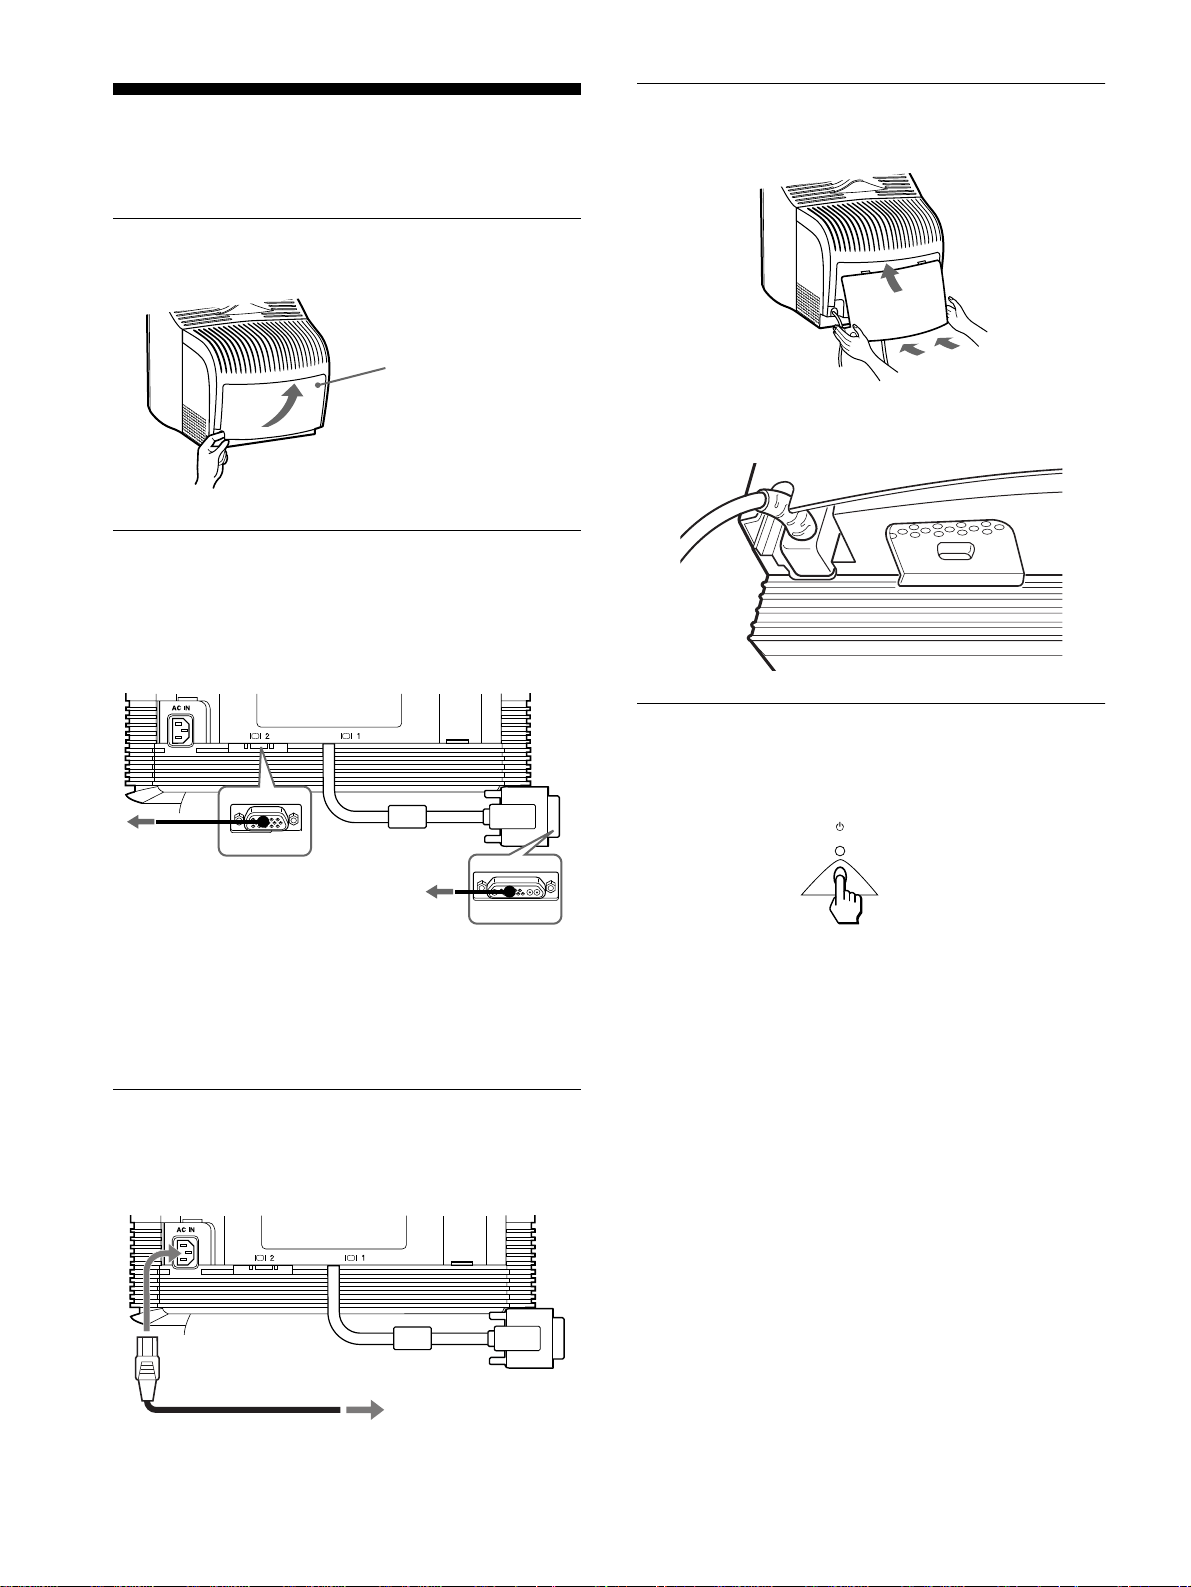
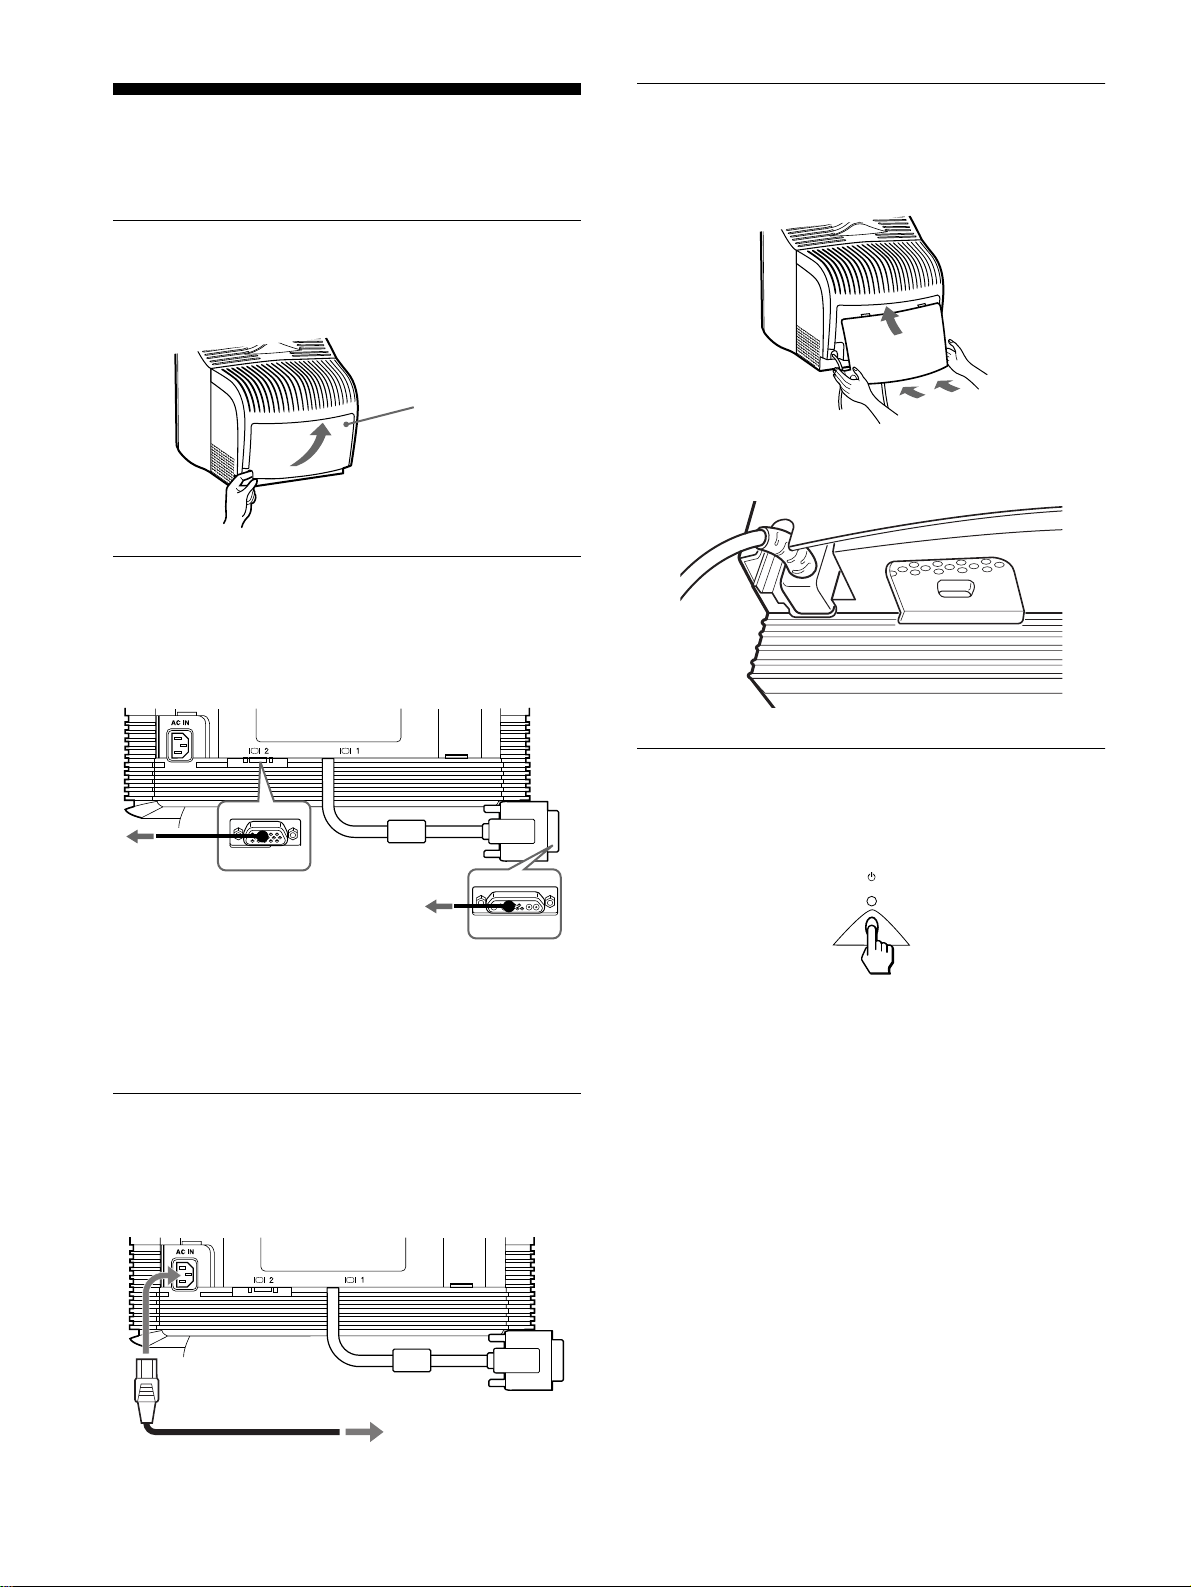
Step 1:Remove the rear cover
Before connecting, remove the rear cover of the monitor.
Step 2:Connect your monitor to
your computer
With the monitor and computer switched off, connect the video
signal cable to the video input connector of the monitor and to the
video output of the computer.
Notes
• Do not touch the pins of the video signal cable connector as this might
bend the pins.
• When connecting the video signal cable, check the alignment of the
connectors. Do not force the connector in the wrong way or the pins
might bend.
Step 3:Connect the power cord
With the monitor and computer switched off, first connect the
proper power cord for your local power supply to the monitor,
then connect it to a power outlet.
Step 4:Attach the rear cover
Attach the rear cover to the monitor.
Pass the AC cord through the cord opening at the bottom of the
rear cover.
Step 5:Turn on the monitor and
computer
First turn on the monitor, then turn on the computer.
The installation of your monitor is complete.
If necessary, use the monitor’s controls to adjust the picture.
If no picture appears on your screen
• Check that the monitor is correctly connected to the computer.
• If NO INPUT SIGNAL appears on the screen, follow the on-
screen messages (page 15).
• If you are replacing an old monitor with this model and OUT
OF SCAN RANGE appears on the screen, reconnect the old
monitor. Then adjust the computer’s graphic board so that the
horizontal frequency is between 30 – 121 kHz, and the vertical
frequency is between 48 – 160 Hz.
For more information about the on-screen messages, see “Trouble
symptoms and remedies” on page 16.
Cover
Flip open the bottom of
the cover and swing out to
remove.
To a computer
with an HD15
video output
To a computer with an
13W3 video output
power cord
to AC outlet
7
EN
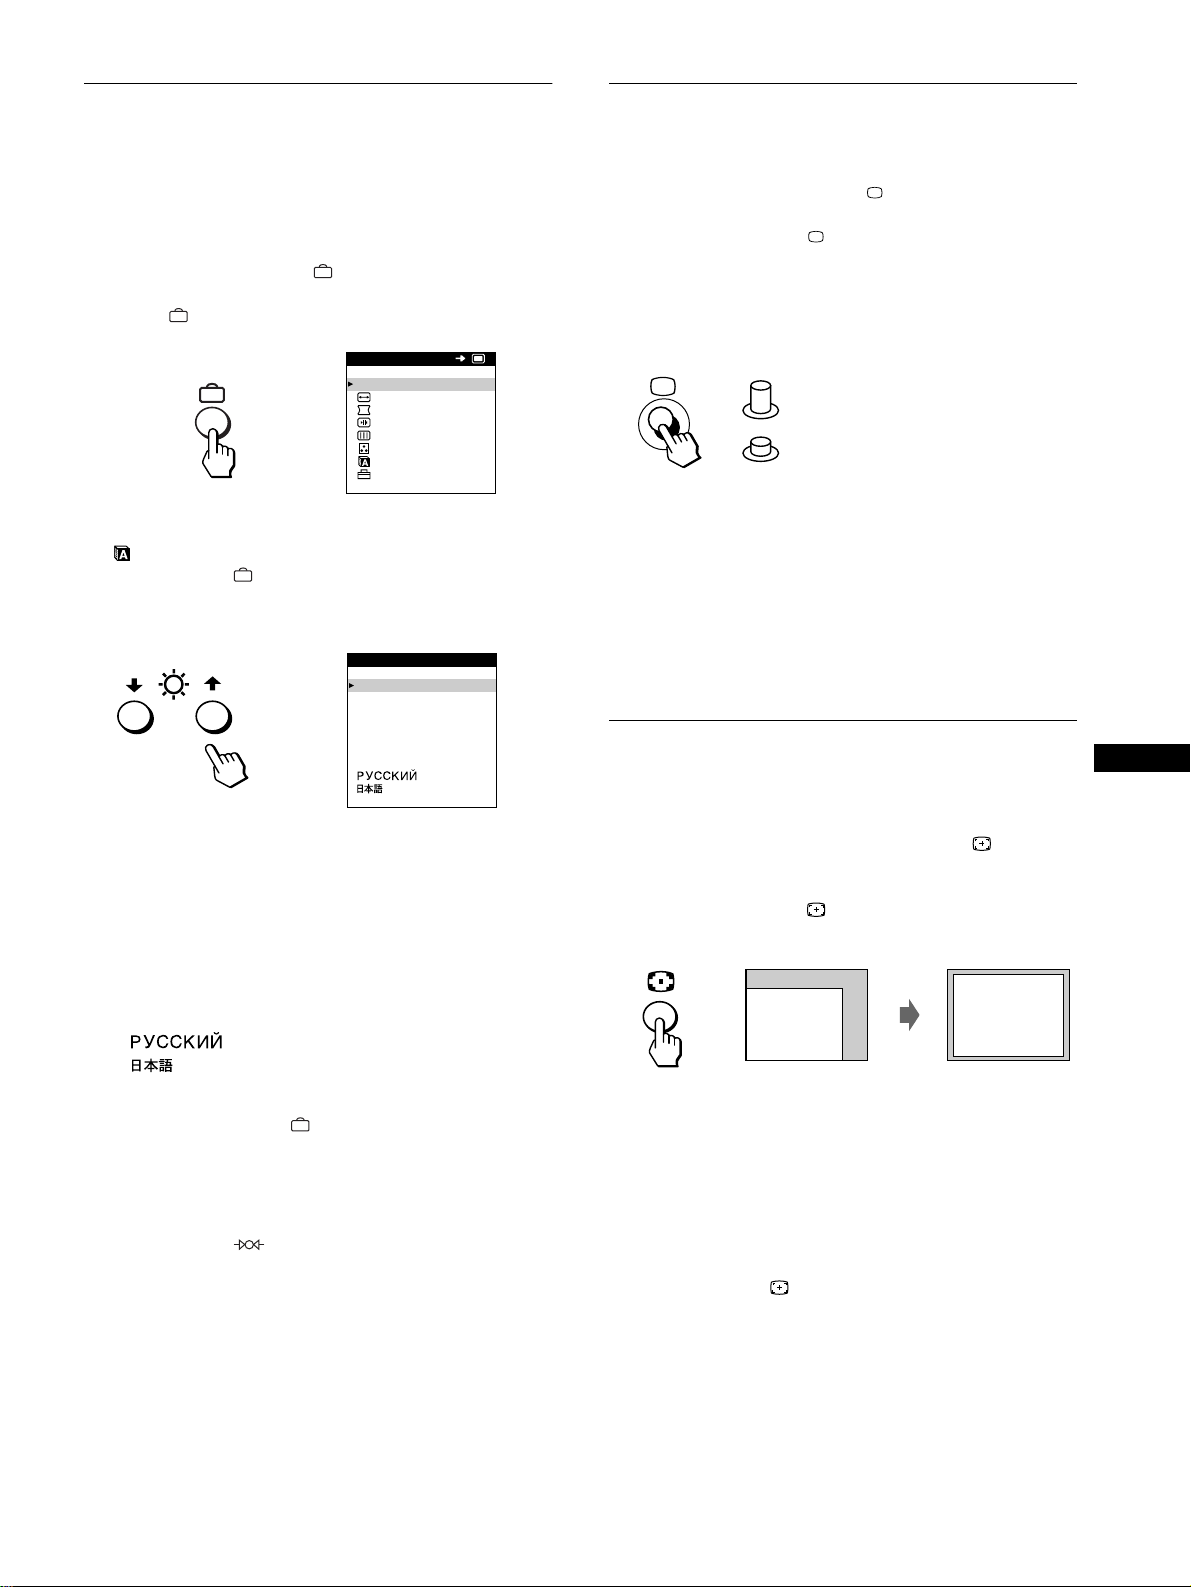
Selecting the on-screen menu
language (LANGUAGE)
English, French, German, Spanish, Italian, Dutch, Swedish,
Russian and Japanese versions of the on-screen menus are
available. The default setting is English.
1
Press the button.
See page 9 for more information on using the button.
2
Press the
m
/
M
buttons to highlight LANGUAGE
and press the button again.
See page 9 for more information on using the m/M buttons.
3
Press the
m
/
M
buttons to select a language.
• ENGLISH
• FRANÇAIS: French
• DEUTSCH: German
• ESPAÑOL: Spanish
• ITALIANO: Italian
• NEDERLANDS: Dutch
• SVENSKA: Swedish
• : Russian
• : Japanese
To close the menu
Press the button once to return to the main MENU, and twice to return
to normal viewing. If no buttons are pressed, the menu closes
automatically after about 30 seconds.
To reset to English
Press the (reset) button while the LANGUAGE menu is displayed
on the screen.
Selecting the input signal
You can connect two computers to this monitor using the video
input 1 and video input 2 connectors. To select one of the two
computers, use
the
button.
Press the
button.
Each time you press this button, the input signal and
corresponding indicator alternate.
When the button is pressed, INPUT 2 is selected, when the button
is unpressed, INPUT 1 is selected.
The selected connector appears on the screen for few seconds.
“INPUT 1” (video input 1 connector) or “INPUT 2” (video input
2 connector) appears on the screen.
Note
If no signal is input to the selected connector, NO INPUT SIGNAL
appears on the screen. After a few seconds, the monitor enters the power
saving mode. If this happens, switch to the other connector.
Automatically sizing and centering
the picture
You can easily adjust the picture to fill the screen by pressing the
(auto sizing and centering) button.
Press the button.
The picture automatically fills the screen.
Notes
• This function is intended for use with a computer that provides a full-
screen picture. It may not work properly if the background color is dark
or if the input picture does not fill the screen to the edges.
• Pictures with an aspect ratio of 5:4 (resolution: 1280 × 1024, 1600 ×
1280) are displayed at their actual resolution and do not fill the screen
to the edges.
• The displayed image moves for a few seconds when the button is
pressed. This is not a malfunction.
EXI T
SIZE/CENTER
GEOMETRY
CONVERGENCE
SCREEN
COLOR
LANGUAGE
OPT ION
MENU
OK
b
ENGL ISH
FRANÇA IS
DEUTSCH
ESPAÑOL
ITALIANO
NEDERLANDS
SVENSKA
LANGUAGE
b
INPUT 1 (video input 1 connector)
INPUT 2 (video input 2 connector)
8
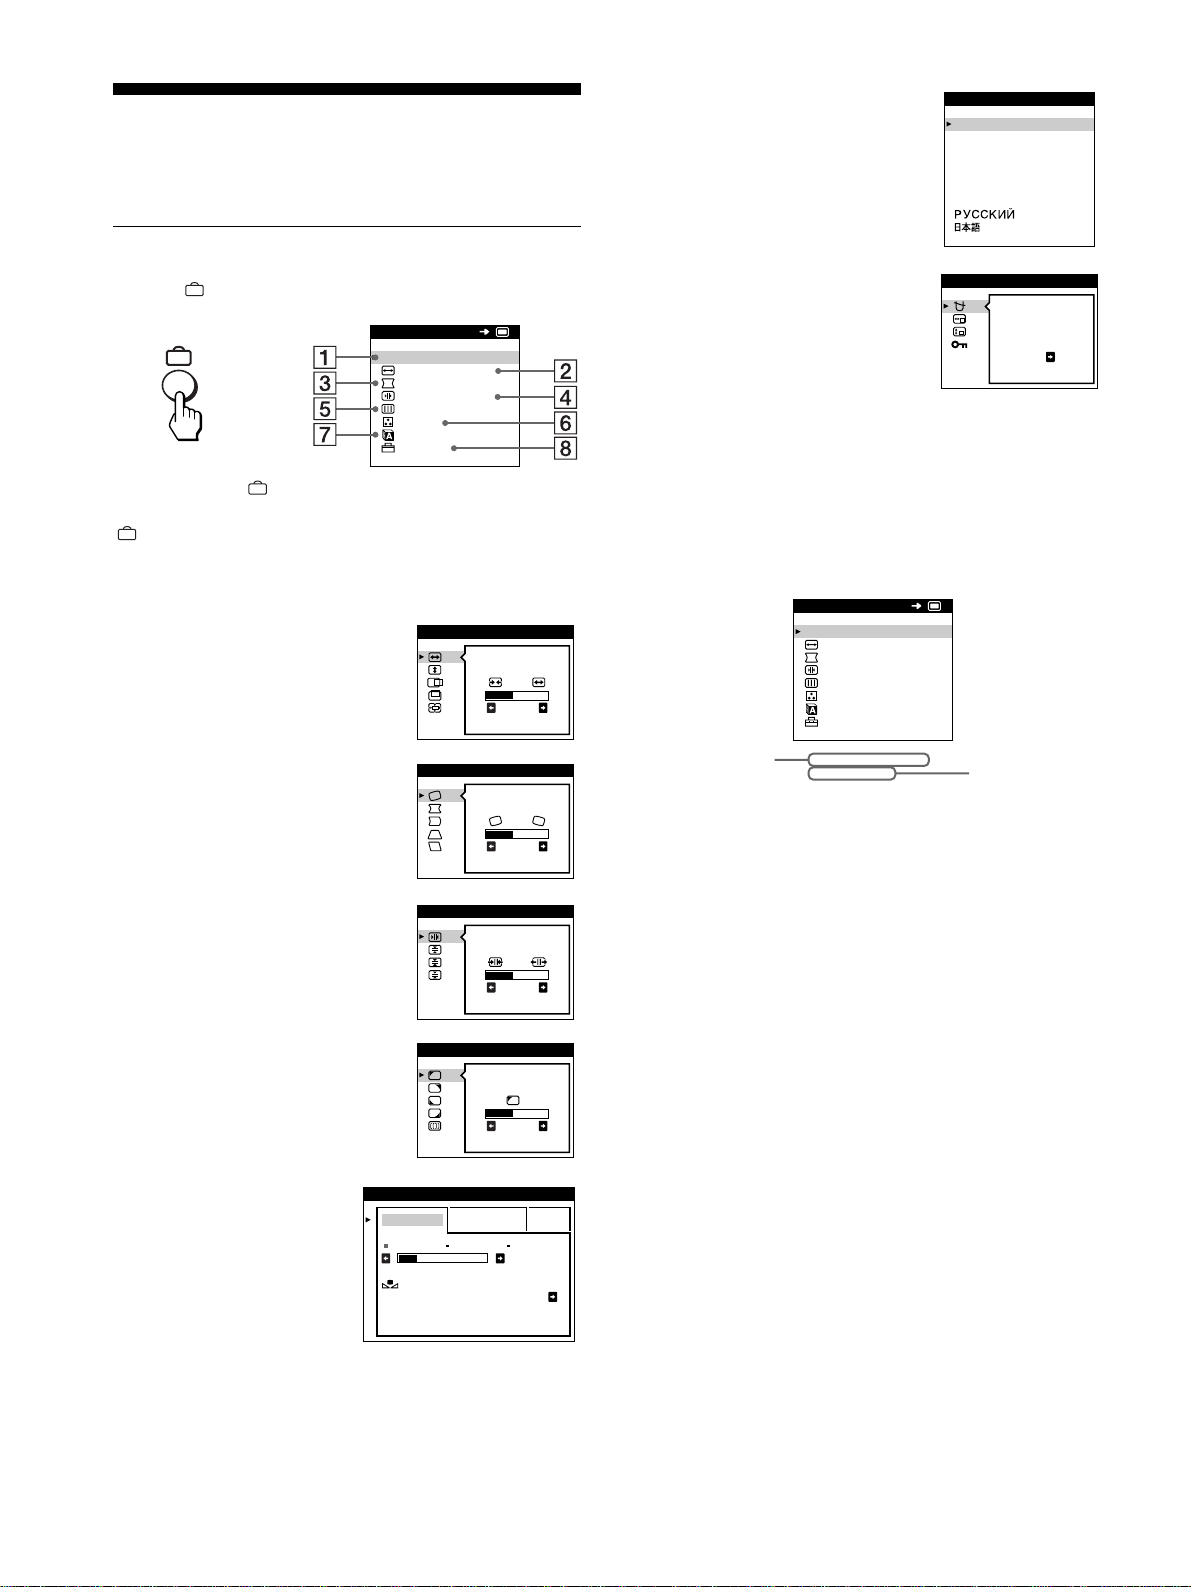
Customizing Your Monitor
You can make numerous adjustments to your monitor using the
on-screen menu.
Navigating the menu
Press the button to display the main MENU on your screen.
Use the m/M and buttons to select one of the following
menus. See page 9 for more information on using the m/M and
buttons.
x
xx
x
Displaying the current input signal
The horizontal and vertical frequencies of the current input signal
are displayed in the main MENU. If the signal matches one of this
monitor’s factory preset modes, the resolution is also displayed.
1
11
1
EXIT
Select EXIT to close the menu.
2
22
2
SIZE/CENTER (page 10)
Selects the SIZE/CENTER menu to
adjust the picture’s size, centering
or zoom.
3
33
3
GEOMETRY (page 10)
Select the GEOMETRY menu to
adjust the picture’s rotation and
shape.
4
44
4
CONVERGENCE (page 11)
Select the CONVERGENCE menu
to adjust the picture’s horizontal and
vertical convergence.
5
55
5
SCREEN (page 11)
Select the SCREEN menu to adjust
the picture’s quality. You can adjust
the landing and moire cancellation
effect.
6
66
6
COLOR (page 12)
Select the COLOR menu to
adjust the picture’s color
temperature. You can use
this to match the monitor’s
colors to a printed picture’s
colors.
EXI T
SIZE/CENTER
GEOMETRY
CONVERGENCE
SCREEN
COLOR
LANGUAGE
OPT ION
MENU
OK
b
26
SIZE/CENTER
26
GEOMETRY
TOP
BOT
26
CONVERGENCE
LANDING
26
SCREEN
EASY EXPERT s BGR
5000K 6500K 930 K0
50 K00
COLOR
RETURN ON
COLOR
7
77
7
LANGUAGE (page 7)
Select LANGUAGE to choose the
on-screen menu’s language.
8
88
8
OPTION (page 13)
Select OPTION to adjust the
monitor’s options. The options
include:
• degaussing the screen
• changing the on-screen menu
position
• locking the controls
ENGL ISH
FRANÇA IS
DEUTSCH
ESPAÑOL
ITALIANO
NEDERLANDS
SVENSKA
LANGUAGE
DEGAUSS
ON
OPT ION
MENU
EXI T
SIZE/CENTER
GEOMETRY
CONVERGENCE
SCREEN
COLOR
LANGUAGE
OPT ION
68.7kHz/ 85Hz
1024x 768
OK
the horizontal
and vertical
frequencies of
the current
input signal
the resolution
of the current
input signal
9
EN
x
xx
x
Using the ,
m
/
M
, and
<
/
,
buttons
1
Display the main MENU.
Press the button to display the main MENU on your
screen.
2
Select the menu you want to adjust.
Press the m/M buttons to highlight the desired menu. Press the
button to select the menu item.
3
Adjust the menu.
Press the m/M buttons to select the desired adjustment item.
Press the </, buttons to make the adjustment.
4
Close the menu.
Press the button once to return to the main MENU, and
twice to return to normal viewing. If no buttons are pressed,
the menu closes automatically after about 30 seconds.
x
xx
x
Resetting the adjustments
Press the (reset) button. See page 14 for more information
on resetting the adjustments.
Adjusting the brightness and
contrast
Brightness and contrast adjustments are made using a separate
BRIGHTNESS/CONTRAST menu.
These settings are stored in memory for the signals from the
currently selected input connector.
1
Press either one of the (brightness)
m
/
M
or
6
66
6
(contrast)
<
/
,
buttons.
The BRIGHTNESS/CONTRAST menu appears on the
screen.
2
Press the (brightness)
m
/
M
buttons to adjust the
brightness ( ), and
6
66
6
(contrast)
<
/
,
buttons to
adjust the contrast (
6
66
6
).
If you are using the sRGB mode
If you selected the sRGB mode in the COLOR menu, the
following BRIGHTNESS/CONTRAST menu appears on the
screen.
For more information about using the sRGB mode, see
“Adjusting the color of the picture (COLOR)” on page 12.
The menu automatically disappears after about 3 seconds.
b
b
26 26
BRIGHTNESS/CONTRAST
56 76
sRGB : 56 76
BRIGHTNESS/CONTRAST
10
Adjusting the size of the picture
(SIZE/CENTER)
This setting is stored in memory for the current input signal.
1
Press the button.
The main MENU appears on the screen.
2
Press the
m
/
M
buttons to highlight SIZE/CENTER
and press the button again.
The SIZE/CENTER menu appears on the screen.
3
First press the
m
/
M
buttons to select for
horizontal adjustment, or for vertical adjustment.
Then press the
<
/
,
buttons to adjust the size.
Adjusting the centering of the
picture (SIZE/CENTER)
This setting is stored in memory for the current input signal.
1
Press the button.
The main MENU appears on the screen.
2
Press the
m
/
M
buttons to highlight SIZE/CENTER
and press the button again.
The SIZE/CENTER menu appears on the screen.
3
First press the
m
/
M
buttons to select for
horizontal adjustment, or for vertical adjustment.
Then press the
<
/
,
buttons to adjust the
centering.
Enlarging or reducing the picture
(ZOOM)
This setting is stored in memory for the current input signal.
1
Press the button.
The main MENU appears on the screen.
2
Press the
m
/
M
buttons to highlight SIZE/
CENTER and press the button again.
The SIZE/CENTER menu appears on the screen.
3
Press the
m
/
M
buttons to select (zoom), and
press the
<
/
,
buttons to enlarge or reduce the
picture.
Note
Adjustment stops when either the horizontal or vertical size reaches its
maximum or minimum value.
Adjusting the shape of the picture
(GEOMETRY)
The GEOMETRY settings allow you to adjust the rotation and
shape of the picture.
The (rotation) setting is stored in memory for all input signals.
All other settings are stored in memory for the current input
signal.
1
Press the button.
The main MENU appears on the screen.
2
Press the
m
/
M
buttons to highlight GEOMETRY
and press the button again.
The GEOMETRY menu appears on the screen.
3
First press the
m
/
M
buttons to select the desired
adjustment item. Then press the
<
/
,
buttons to
make the adjustment.
Select To
rotate the picture
expand or contract the picture sides
shift the picture sides to the left or right
adjust the picture width at the top of the screen
shift the picture to the left or right at the top of the
screen
11
EN
Adjusting the convergence
(CONVERGENCE)
The CONVERGENCE settings allow you to adjust the quality of
the picture by controlling the convergence. The convergence
refers to the alignment of the red, green, and blue color signals.
If you see red or blue shadows around letters or lines, adjust the
convergence.
These settings are stored in memory for all input signals.
1
Press the button.
The main MENU appears on the screen.
2
Press the
m
/
M
buttons to highlight
CONVERGENCE and press the button again.
The CONVERGENCE menu appears on the screen.
3
First press the
m
/
M
buttons to select the desired
adjustment item. Then press the
<
/
,
buttons to
make the adjustment.
Adjusting the quality of the picture
(SCREEN)
The SCREEN settings allow you to adjust the quality of the
picture by controlling the moire and landing.
• If the color is irregular at the corners of the screen, adjust the
landing.
• If elliptical or wavy patterns appear on the screen, cancel the
moire.
The CANCEL MOIRE and MOIRE ADJUST settings are stored
in memory for the current input signal. All other settings are
stored in memory for all input signals.
1
Press the button.
The main MENU appears on the screen.
2
Press the
m
/
M
buttons to highlight SCREEN and
press the button again.
The SCREEN menu appears on the screen.
3
First press the
m
/
M
buttons to select the desired
adjustment item. Then press the
<
/
,
buttons to
make the adjustment.
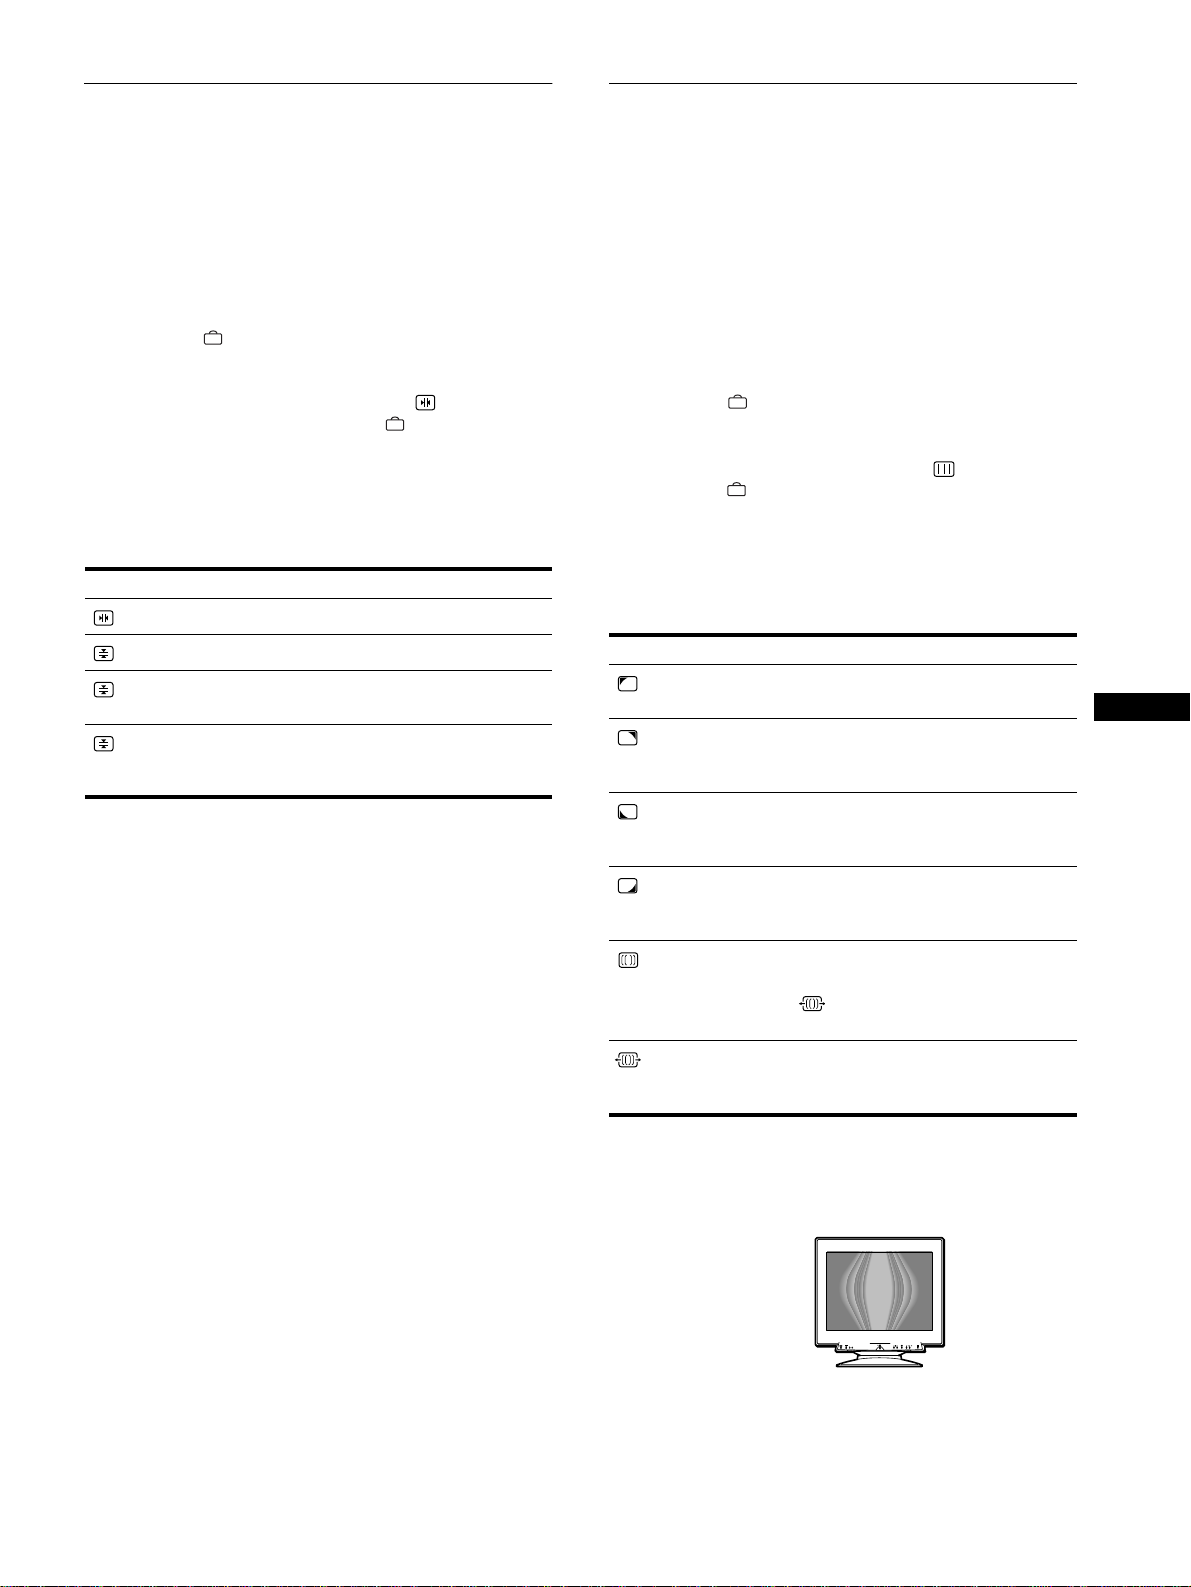
• Moire is a type of natural interference which produces soft, wavy lines
on your screen. It may appear due to interference between the pattern
of the picture on the screen and the phosphor pitch pattern of the
monitor.
Note
The picture may become fuzzy when CANCEL MOIRE is set to ON.
Select To
horizontally shift red or blue shadows
vertically shift red or blue shadows
TOP
V CONVER TOP
vertically shift red or blue shadows at
the top of the screen
BOT
V CONVER
BOTTOM
vertically shift red or blue shadows at
the bottom of the screen
Select To
LANDING
reduce any color irregularities in the
screen’s top left corner to a minimum.
LANDING
reduce any color irregularities in the
screen’s top right corner to a
minimum.
LANDING
reduce any color irregularities in the
screen’s bottom left corner to a
minimum.
LANDING
reduce any color irregularities in the
screen’s bottom right corner to a
minimum.
CANCEL MOIRE*
turn the moire cancellation function
ON or OFF.
(MOIRE ADJUST) appears in
the menu when you select ON.
MOIRE ADJUST
adjust the degree of moire
cancellation until the moire is at a
minimum.
Example of moire

12
Adjusting the color of the picture
(COLOR)
The COLOR settings allow you to adjust the picture’s color
temperature by changing the color level of the white color field.
Colors appear reddish if the temperature is low, and bluish if the
temperature is high. This adjustment is useful for matching the
monitor’s color to a printed picture’s colors.
1
Press the button.
The main MENU appears on the screen.
2
Press the
m
/
M
buttons to highlight COLOR and
press the button again.
The COLOR menu appears on the screen.
3
Press the
<
/
,
buttons to select the adjustment
mode.
There are three types of adjustment modes, EASY, EXPERT
and sRGB.
4
First press the
m
/
M
buttons to select the desired
adjustment item. Then press the
<
/
,
buttons to
make the adjustment.
Adjust the selected mode according to the following
instructions.
EASY mode
EXPERT mode
You can make additional adjustments to the color in greater detail
by selecting the EXPERT mode.
Setting the color temperature for each of the
video input connectors
You can set the fine tuning of the color temperature in EASY or
EXPERT mode for each of the video input connectors (INPUT 1
: 13W3 and INPUT 2 : HD15).
1
Select the same adjustment mode and color
temperature in the COLOR menu for both INPUT 1
and INPUT 2.
2
Fine tune the color temperature in each menu for
INPUT 1 and INPUT 2.
The settings are stored in memory for each of the INPUT 1
and INPUT 2 connectors.
For information on how to select the connector, see page 7.
1
First press the
m
/
M
buttons to select the color
temperature row
1
11
1
, then press the
<
/
,
buttons
to select a color temperature.
The preset color temperatures are 5000K, 6500K, and 9300K.
Since the default setting is 9300K, the whites will change
from a bluish hue to a reddish hue as the temperature is
lowered to 6500K and 5000K.
2
If necessary, fine tune the color temperature.
First press the
m
/
M
buttons to select the color
temperature adjustment row
2
22
2
, then press the
<
/
,
buttons to fine tune the color temperature.
If you fine tune the color temperature, the new color settings
are stored in memory for each of the three color temperatures
and item 1 of the on-screen menu changes as follows.
• [5000K]t[1]
• [6500K]t[2]
• [9300K]t[3]
EASY EXPERT s BGR
5000K 6500K 930 K0
50 K00
COLOR
RETURN ON
COLOR
1
Press the
m
/
M
buttons to select the color
temperature row
1
11
1
, then press the
<
/
,
buttons
to select a color temperature.
2
Press the
m
/
M
buttons to select the adjustment item
2
22
2
, then press the
<
/
,
buttons to adjust the BIAS
(black level).
This adjusts the dark areas of an image.
3
Press the
m
/
M
buttons to select the adjustment item
3
33
3
, then press the
<
/
,
buttons to adjust the GAIN
(white level).
This adjusts the light areas of an image.
You can adjust the R (red), G (green), B (blue) component of
the input signal when making changes to items 2 and 3.
If you fine tune the color temperature, the new color settings
are stored in memory for each of the three color temperatures
and item 1 of the on-screen menu change as follows.
• [5000K]t[1]
• [6500K]t[2]
• [9300K]t[3]
EASY EXPERT s BGR
5000K 6500K 930 K0
R BIAS 05
G BIAS 05
B BIAS 05
RGAIN 05
GGAIN 05
BGAIN 05
COLOR
13
EN
sRGB mode
The sRGB color setting is an industry standard color space
protocol designed to correlate the displayed and printed colors of
sRGB compliant computer products. To adjust the colors to the
sRGB profile, simply select the sRGB mode in the COLOR menu.
However, in order to display the sRGB colors correctly (
γ
=2.2,
6500K), you must set your computer to the sRGB profile and
adjust the brightness ( ) and contrast (6) to the numbers shown
in the menu. For information on how to change the brightness
( ) and contrast (6), see page 9.
Note
Your computer and other connected products (such as a printer), must be
sRGB compliant.
Restoring the color from the EASY or sRGB menus
The colors of most display monitors tend to gradually lose brilliance
over several years of service. The COLOR RETURN feature found
in the EASY and sRGB menus allows you to restore the color to the
original factory quality levels. The explanation below explains how
to restore the monitor’s color from the EASY menu.
1
Press the
<
/
,
buttons to select EASY or sRGB
mode.
2
First press the
m
/
M
buttons to select (COLOR
RETURN), then press the
,
button.
The picture disappears while the color is being restored (about
2 seconds). After the color is restored, the picture reappears
on the screen again.
Notes
• Before using this feature, the monitor must be in normal operation
mode (green power indicator on) for at least 30 minutes. If the monitor
goes into power saving mode, you must return the monitor to normal
operation mode and wait for 30 minutes for the monitor to be ready.
You may need to adjust your computer’s power saving settings to keep
the monitor in normal operation mode for the full 30 minutes. If the
monitor is not ready, the following message will appear.
• The monitor may gradually lose its ability to perform this function due
to the natural aging of the picture tube.
Additional settings (OPTION)
You can manually degauss (demagnetize) the monitor, change the
menu position, and lock the controls.
1
Press the button.
The main MENU appears on the screen.
2
Press the
m
/
M
buttons to highlight OPTION and
press the button again.
The OPTION menu appears on the screen.
3
Press the
m
/
M
buttons to select the desired
adjustment item.
Adjust the selected item according to the following
instructions.
Degaussing the screen
The monitor is automatically demagnetized (degaussed) when the
power is turned on.
To manually degauss the monitor, first press the
m
/
M
buttons to select (DEGAUSS). Then press the
,
button.
The screen is degaussed for about 2 seconds. If a second degauss
cycle is needed, allow a minimum interval of 20 minutes for the
best result.
Changing the menu’s position
Change the menu’s position if it is blocking an image on the
screen.
To change the menu’s on-screen position, first press
the
m
/
M
buttons to select (OSD H POSITION) for
horizontal adjustment, or (OSD V POSITION) for
vertical adjustment. Then press the
<
/
,
buttons to
shift the on-screen menu.
Locking the controls
To protect adjustment data by locking the controls, first
press the
m
/
M
buttons to select (CONTROL LOCK).
Then press the
,
button to select ON.
Only the 1 (power) switch, EXIT, and (CONTROL LOCK)
of the OPTION menu will operate. If any other items are
selected, the mark appears on the screen.
To cancel the control lock
Repeat the procedure above and set (CONTROL LOCK) to OFF.
EASY EXPERT s BGR
:56 :76 FOR s BGR
COLOR
RETURN ON
COLOR
EASY EXPERT s BGR
5000K 6500K 930 K0
50 K00
COLOR
RETURN
AVAI LABLE
AFTER WARM UP
COLOR
14
Resetting the adjustments
This monitor has the following three reset methods. Use the
(reset) button to reset the adjustments.
Resetting a single adjustment item
Use the
, m/M buttons to select the adjustment item you want
to reset, and press the (reset) button.
Resetting all of the adjustment data for the
current input signal
Press the (reset) button when no menu is displayed on the
screen.
Note that the following items are not reset by this method:
• on-screen menu language (page 7)
• adjustment mode in the COLOR menu (EASY, EXPERT,
sRGB) (page 12)
• on-screen menu position (page 13)
• control lock (page 13)
Resetting all of the adjustment data for all input
signals
Press and hold the
(reset) button for more than two seconds.
Note
The
(reset) button does not function when
(CONTROL
LOCK) is set to ON.
Technical Features
Power saving function
This monitor meets the power-saving guidelines set by VESA,
E
NERGY
S
TAR, and NUTEK.
If no signal is received by the
monitor from the connected computer, the monitor will
automatically reduce power consumption as shown below.
* When your computer enters the “active off” mode, the input signal to
the monitor is cut off and “NO INPUT SIGNAL” appears on the screen.
After an interval, the monitor enters power saving mode.
Power mode Power consumption
1
(power)
indicator
normal
operation
≤
160 W green
active off*
≤
3 W amber
power off
<
1 W off
15
EN
Troubleshooting
Before contacting technical support, refer to this section.
If thin lines appear on your screen
(damper wires)
The lines you are experiencing on your screen are normal for the
Trinitron monitor and are not a malfunction. These are shadows
from the damper wires used to stabilize the aperture grille and are
most noticeable when the screen’s background is light (usually
white). The aperture grille is the essential element that makes a
Trinitron picture tube unique by allowing more light to reach the
screen, resulting in a brighter, more detailed picture.
On-screen messages
If there is something wrong with the input signal, one of the
following messages appears on the screen.
If NO INPUT SIGNAL appears on the screen
If OUT OF SCAN RANGE appears on the screen
For more information, see “Trouble symptoms and remedies” on
page 16.
1
11
1
The selected connector
This message shows the currently selected connector
(INPUT 1 or INPUT 2).
2
22
2
The input signal condition
NO INPUT SINGAL
This indicates that no signal is input, or that no signal is input
from the selected connector.
3
33
3
The remedies
One or more of the following messages may appear on the
screen.
• If ACTIVATE COMPUTER appears on the screen, try
pressing any key on the computer, and confirm that your
computer’s graphic board is completely seated in the
correct bus slot.
• If CHECK INPUT SELECTOR appears on the screen, try
changing the input signal (page 7).
• If CHECK SIGNAL CABLE appears on the screen, check
that the monitor is correctly connected to the computer
(page 6).
Damper wires
MON I TOR I S WORK I NG
INPUT 1 :
NO INPUT S IGNAL
ACT I VATE COMPUTER
CHECK I NPUT SELECT RO
CHECK SIGNAL CABLE
WH I T E
RED
GREEN
BLUE
INFORMATION
1
11
1
The selected connector and the frequencies of the
current input signal
This message shows the currently selected connector
(INPUT 1 or INPUT 2). If the monitor recognizes the
frequencies of the current input signal, the horizontal and
vertical frequencies are also displayed.
2
22
2
The input signal condition
OUT OF SCAN RANGE
This indicates that the input signal is not supported by the
monitor’s specifications.
3
33
3
The remedies
CHANGE SIGNAL TIMING appears on the screen. If you
are replacing an old monitor with this monitor, reconnect the
old monitor. Then adjust the computer’s graphic board to that
the horizontal frequency is between 30 - 121 kHz, and the
vertical frequency is between 48 - 160 Hz.
MON I TOR I S WORK I NG
INPUT 1:130.0kHz/ H57
OUT OF SCAN RANGE
CHANGE S I GNAL T IMI NG
WH I T E
RED
GREEN
BLUE
INFORMATION
z

16
Trouble symptoms and remedies
If the problem is caused by the connected computer or other equipment, please refer to the connected equipment’s instruction manual.
Use the self-diagnosis function (page 18) if the following recommendations do not resolve the problem.
Symptom Check these items
No picture
If the 1 (power) indicator is not lit • Check that the power cord is properly connected.
• Check that the 1 (power) switch is in the “on” position.
If the NO INPUT SIGNAL message
appears on the screen, or if the 1
(power) indicator is either amber or
alternating between green and amber
•Check that
the
button setting is correct (page 7).
• Check that the video input connector pins are not bent or pushed in.
x
Problems caused by the connected computer or other equipment
• The computer is in power saving mode. Try pressing any key on the computer keyboard.
• Check that the computer’s power is “on.”
• Check that the graphic board is completely seated in the proper bus slot.
If the NO INPUT SIGNAL and
CHECK SIGNAL CABLE message
appear on the screen, or if the 1
(power) indicator is either amber or
alternating between green and amber
• Check that the video signal cable is properly connected and all plugs are firmly seated in
their sockets (page 6).
• Check that the video input connector pins are not bent or pushed in.
•Check that
the
button setting is correct (page 7).
x
Problems caused by the connected computer or other equipment
• Check that the graphic board is completely seated in the proper bus slot.
If the OUT OF SCAN RANGE
message appears on the screen
x
Problems caused by the connected computer or other equipment
• Check that the video frequency range is within that specified for the monitor. If you
replaced an old monitor with this monitor, reconnect the old monitor and adjust the
frequency range to the following.
Horizontal: 30 – 121 kHz
Vertical: 48
–
160 Hz
If no message is displayed and the 1
(power) indicator is green or flashing
amber
• Use the Self-diagnosis function (page 18).
Picture flickers, bounces,
oscillates, or is scrambled
• Isolate and eliminate any potential sources of electric or magnetic fields such as other
monitors, laser printers, electric fans, fluorescent lighting, or televisions.
• Move the monitor away from power lines or place a magnetic shield near the monitor.
• Try plugging the monitor into a different AC outlet, preferably on a different circuit.
• Try turning the monitor 90
°
to the left or right.
x
Problems caused by the connected computer or other equipment
• Check your graphics board manual for the proper monitor setting.
• Confirm that the graphics mode and the frequency of the input signal are supported by this
monitor. Even if the frequency is within the proper range, some video boards may have a
sync pulse that is too narrow for the monitor to sync correctly.
• Adjust the computer’s refresh rate (vertical frequency) to obtain the best possible picture.
Picture is fuzzy
• Adjust the brightness and contrast (page 9).
• Degauss the monitor* (page 13).
• If CANCEL MOIRE is ON, the picture may become fuzzy. Decrease the moire
cancellation effect or set CANCEL MOIRE to OFF (page 11).
17
EN
* If a second degauss cycle is needed, allow a minimum interval of 20 minutes for the best result. A humming noise may be heard, but this is not a
malfunction.
Displaying this monitor’s name, serial number,
and date of manufacture.
While the monitor is receiving a video signal, press and hold the
button for more than five seconds to display this monitor’s
information box.
If the problem persists, call your service representative and give
the following information.
• Model name: GDM-5410
• Serial number
• Name and specifications of your computer and graphics board.
Picture is ghosting
• Eliminate the use of video cable extensions and/or video switch boxes.
• Check that all plugs are firmly seated in their sockets.
Picture is not centered or sized
properly
• Press the button (page 7).
• Adjust the size (page 10) or centering (page 10). Note that some video modes do not fill
the screen to the edges.
Edges of the image are curved
• Adjust the geometry (page 10).
Wavy or elliptical pattern (moire)
is visible
• Set CANCEL MOIRE to ON and adjust the degree of moire cancellation until the moire is
at a minimum (page 11).
x
Problems caused by the connected computer or other equipment
• Change your desktop pattern.
Color is not uniform
• Degauss the monitor* (page 13). If you place equipment that generates a magnetic field,
such as a speaker, near the monitor, or if you change the direction the monitor faces, color
may lose uniformity.
• Adjust the landing (page 11).
White does not look white
• Adjust the color temperature (page 12).
Letters and lines show red or blue
shadows at the edges
• Adjust the convergence (page 11).
Monitor buttons do not operate
( appears on the screen)
• If the control lock is set to ON, set it to OFF (page 13).
COLOR RETURN function does
not operate
• Before using this function, the monitor must be in normal operation mode (green power
indicator on) for at least 30 minutes. For more information on using the COLOR
RETURN function, see page 13.
• Adjust the computer’s power saving settings to keep the monitor in normal operation
mode for more than 30 minutes.
• The monitor may gradually lose its ability to perform this function due to the natural aging
of the picture tube.
A hum is heard right after the
power is turned on
• This is the sound of the auto-degauss cycle. When the power is turned on, the monitor is
automatically degaussed for two seconds.
Symptom Check these items
EASY EXPERT s BGR
5000K 6500K 930 K0
50 K00
COLOR
RETURN
AVAI LABLE
AFTER WARM UP
COLOR
SER NO
:
1234567
MODEL
:
GDM 5410
MANUFACTURED
: 1999-52
INFORMATION
Example
b
18
Self-diagnosis function
This monitor is equipped with a self-diagnosis function. If there is
a problem with your monitor or computer(s), the screen will go
blank and the 1 (power) indicator will either light up green or
flash amber. If the 1 (power) indicator is lit in amber, the
computer is in power saving mode. Try pressing any key on the
keyboard.
If the
1
(power) indicator is green
1
Remove any plugs from the video input 1 and 2
connectors, or turn off the connected computer(s).
2
Press the
1
11
1
(power) button twice to turn the monitor
off and then on.
3
Press the
,
button for 2 seconds before the
monitor enters power saving mode.
If all four color bars appear (white, red, green, blue), the monitor
is working properly. Reconnect the video input cables and check
the condition of your computer(s).
If the color bars do not appear, there is a potential monitor failure.
Inform your service representative of the monitor’s condition.
If the
1
(power) indicator is flashing amber
Press the
1
(power) button twice to turn the monitor off
and then on.
If the 1 (power) indicator lights up green, the monitor is working
properly.
If the 1 (power) indicator is still flashing, there is a potential
monitor failure. Count the number of seconds between amber
flashes of the 1 (power) indicator and inform your service
representative of the monitor’s condition. Be sure to note the
model name and serial number of your monitor. Also note the
make and model of your computer and video board.
Specifications
CRT 0.24 mm aperture grille pitch
21 inches measured diagonally
90-degree deflection
FD Trinitron
Viewable image size Approx. 403.8
×
302.2 mm (w/h)
(15.9
×
11.9 inches)
19.8" viewing image
Recommended resolution Horizontal: 1280 dots
Vertical: 1024 lines
Standard image area Approx. 388
×
291 mm (w/h)
(15
1
/
4
×
11
1
/
2
inches)
or
Approx. 364
×
291 mm (w/h)
(14
3
/
8
×
11
1
/
2
inches)
Deflection frequency* Horizontal: 30 to 121 kHz
Vertical: 48 to 160 Hz
AC input voltage/current 100 to 240 V, 50 – 60 Hz, 2.0 – 1.0 A
Power consumption Approx. 145 W
Dimensions
Approx. 501
×
498
×
498 mm (w/h/d)
(19
3
/
4
×
19
5
/
8
×
19
5
/
8
inches)
Mass Approx. 32 kg (70 lb 9 oz)
Plug and Play DDC1/2B/2Bi, GTF**
* Recommended horizontal and vertical timing condition
• Horizontal sync width duty should be more than 4.8% of total
horizontal time or 0.8 µs, whichever is larger.
• Horizontal blanking width should be more than 2.3 µsec.
• Vertical blanking width should be more than 450 µsec.
** If the input signal is Generalized Timing Formula (GTF)
compliant, the GTF feature of the monitor will automatically
provide an optimal image for the screen.
Design and specifications are subject to change without notice.
1
(power) indicator

i
Appendix
TCO’99 Eco-document
x
Congratulations!
You have just purchased a TCO’99 approved and labelled
product! Your choice has provided you with a product developed
for professional use. Your purchase has also contributed to
reducing the burden on the environment and also to the further
development of environmentally adapted electronics products.
x
Why do we have environmentally labelled
computers?
In many countries, environmental labelling has become an
established method for encouraging the adaptation of goods and
services to the environment. The main problem, as far as
computers and other electronics equipment are concerned, is that
environmentally harmful substances are used both in the products
and during their manufacture. Since it is not so far possible to
satisfactorily recycle the majority of electronics equipment, most
of these potentially damaging substances sooner or later enter
nature.
There are also other characteristics of a computer, such as energy
consumption levels, that are important from the viewpoints of
both the work (internal) and natural (external) environments.
Since all methods of electricity generation have a negative effect
on the environment (e.g. acidic and climate-influencing
emissions, radioactive waste), it is vital to save energy.
Electronics equipment in offices is often left running
continuously and thereby consumes a lot of energy.
x
What does labelling involve?
This product meets the requirements for the TCO’99 scheme
which provides for international and environmental labelling of
personal computers. The labelling scheme was developed as a
joint effort by the TCO (The Swedish Confederation of
Professional Employees), Svenska Naturskyddsforeningen (The
Swedish Society for Nature Conservation) and Statens
Energimyndighet (The Swedish National Energy
Administration).
Approval requirements cover a wide range of issues:
environment, ergonomics, usability, emission of electric and
magnetic fields, energy consumption and electrical and fire
safety.
The environmental demands impose restrictions on the presence
and use of heavy metals, brominated and chlorinated flame
retardants, CFCs (freons) and chlorinated solvents, among other
things. The product must be prepared for recycling and the
manufacturer is obliged to have an environmental policy which
must be adhered to in each country where the company
implements its operational policy.
The energy requirements include a demand that the computer and/
or display, after a certain period of inactivity, shall reduce its
power consumption to a lower level in one or more stages. The
length of time to reactivate the computer shall be reasonable for
the user.
Labelled products must meet strict environmental demands, for
example, in respect of the reduction of electric and magnetic
fields, physical and visual ergonomics and good usability.
Below you will find a brief summary of the environmental
requirements met by this product. The complete environmental
criteria document may be ordered from:
TCO Development
SE-114 94 Stockholm, Sweden
Fax: +46 8 782 92 07
Email (Internet): developmen[email protected]
Current information regarding TCO’99 approved and labelled
products may also be obtained via the Internet, using the
address: http://www.tco-info.com/
x
Environmental requirements
Flame retardants
Flame retardants are present in printed circuit boards, cables,
wires, casings and housings. Their purpose is to prevent, or at least
to delay the spread of fire. Up to 30% of the plastic in a computer
casing can consist of flame retardant substances. Most flame
retardants contain bromine or chloride, and those flame retardants
are chemically related to another group of environmental toxins,
PCBs. Both the flame retardants containing bromine or chloride
and the PCBs are suspected of giving rise to severe health effects,
including reproductive damage in fish-eating birds and mammals,
due to the bio-accumulative
*
processes. Flame retardants have
been found in human blood and researchers fear that disturbances
in foetus development may occur.
The relevant TCO’99 demand requires that plastic components
weighing more than 25 grams must not contain flame retardants with
organically bound bromine or chlorine. Flame retardants are allowed
in the printed circuit boards since no substitutes are available.
Cadmium**
Cadmium is present in rechargeable batteries and in the colour-
generating layers of certain computer displays. Cadmium
damages the nervous system and is toxic in high doses. The
relevant TCO’99 requirement states that batteries, the colour-
generating layers of display screens and the electrical or
electronics components must not contain any cadmium.
(continued)

ii
Mercury**
Mercury is sometimes found in batteries, relays and switches. It
damages the nervous system and is toxic in high doses. The
relevant TCO’99 requirement states that batteries may not contain
any mercury. It also demands that mercury is not present in any of
the electrical or electronics components associated with the
labelled unit.
CFCs (freons)
The relevant TCO’99 requirement states that neither CFCs nor
HCFCs may be used during the manufacture and assembly of the
product. CFCs (freons) are sometimes used for washing printed
circuit boards. CFCs break down ozone and thereby damage the
ozone layer in the stratosphere, causing increased reception on
earth of ultraviolet light with e.g. increased risks of skin cancer
(malignant melanoma) as a consequence.
Lead**
Lead can be found in picture tubes, display screens, solders and
capacitors. Lead damages the nervous system and in higher doses,
causes lead poisoning. The relevant TCO’99 requirement permits
the inclusion of lead since no replacement has yet been developed.
* Bio-accumulative is defined as substances which accumulate
within living organisms.
** Lead, Cadmium and Mercury are heavy metals which are Bio-
accumulative.

19
Table des Matières
• VESA et DDC
sont des marques
commerciales de Video Electronics
Standard Association.
•
E
NERGY
S
TAR est une marque
déposée aux Etats-Unis.
• Tous les autres noms de produits
mentionnés dans le présent mode
d’emploi peuvent être des marques
commerciales ou des marques
commerciales déposées de leurs
sociétés respectives.
• Les symboles “
” et “
” ne sont pas
mentionnés systématiquement dans le
présent mode d’emploi.
FR
Précautions. . . . . . . . . . . . . . . . . . . . . . . . . . . . . . . . . . . . . . . . . . . 20
Identification des composants et des commandes. . . . . . . . . . . . . 21
Installation . . . . . . . . . . . . . . . . . . . . . . . . . . . . . . . . . . . .22
1re étape:
Dépose du couvercle arrière. . . . . . . . . . . . . . . . . . . . . 22
2e étape:
Raccordez le moniteur à votre ordinateur . . . . . . . . . . . 22
3e étape:
Branchez le cordon d’alimentation. . . . . . . . . . . . . . . . . 22
4e étape:
Fixation du couvercle arrière . . . . . . . . . . . . . . . . . . . . . 22
5e étape:
Mettez le moniteur et l’ordinateur sous tension . . . . . . . 22
Sélection de la langue d’affichage des menus (LANGUAGE) . . . . 23
Sélection du signal d’entrée . . . . . . . . . . . . . . . . . . . . . . . . . . . . . . 23
Réglage automatique de la taille et du centrage de l’image. . . . . . 23
Personnalisation de votre moniteur. . . . . . . . . . . . . . . .24
Pilotage par menus. . . . . . . . . . . . . . . . . . . . . . . . . . . . . . . . . . . . . 24
Réglage de la luminosité et du contraste . . . . . . . . . . . . . . . . . . . . 25
Réglage de la taille de l’image (TAILLE/CENTRE). . . . . . . . . . . . . 26
Réglage du centrage de l’image (TAILLE/CENTRE) . . . . . . . . . . . 26
Agrandir ou réduire l’image (ZOOM) . . . . . . . . . . . . . . . . . . . . . . . 26
Réglage de la forme de l’image (GEOMETRIE). . . . . . . . . . . . . . . 26
Réglage de la convergence (CONVERGENCE) . . . . . . . . . . . . . . 27
Réglage de la qualité de l’image (ECRAN). . . . . . . . . . . . . . . . . . . 27
Réglage des couleurs de l’image (COULEUR). . . . . . . . . . . . . . . . 28
Réglages supplémentaires (OPTION) . . . . . . . . . . . . . . . . . . . . . . 29
Réinitialisation des réglages. . . . . . . . . . . . . . . . . . . . . . . . . . . . . . 30
Caractéristiques techniques. . . . . . . . . . . . . . . . . . . . . .30
Fonction d’économie d’énergie. . . . . . . . . . . . . . . . . . . . . . . . . . . . 30
Dépannage . . . . . . . . . . . . . . . . . . . . . . . . . . . . . . . . . . . .31
Si de fines lignes apparaissent à l’écran (fils d’amortissement) . . . 31
Messages affichés à l’écran . . . . . . . . . . . . . . . . . . . . . . . . . . . . . . 31
Symptômes et remèdes . . . . . . . . . . . . . . . . . . . . . . . . . . . . . . . . . 32
Fonction d’autodiagnostic. . . . . . . . . . . . . . . . . . . . . . . . . . . . . . . . 34
Spécifications. . . . . . . . . . . . . . . . . . . . . . . . . . . . . . . . . .34
Appendix. . . . . . . . . . . . . . . . . . . . . . . . . . . . . . . . . . . . . . . i
TCO’99 Eco-document . . . . . . . . . . . . . . . . . . . . . . . . . . . . . . . . . . . .i

20
Précautions
Avertissement sur le raccordement à la source
d’alimentation
Utilisez un cordon d’alimentation approprié en fonction de la
tension d’alimentation secteur locale.
• Avant de débrancher le cordon d’alimentation, attendez au
moins 30 secondes après avoir actionné le commutateur
d’alimentation de manière à permettre la décharge de
l’électricité statique à la surface de l’écran.
• Après que le courant a été branché, l’écran est démagnétisé
pendant environ 2 secondes. Cela génère un puissant champ
magnétique autour de l’encadrement métallique qui peut
affecter les données mémorisées sur une bande magnétique ou
des disquettes situées à proximité. Placez ces systèmes
d’enregistrement magnétique, bandes et disquettes à l’écart du
moniteur.
Installation
N’installez pas le moniteur dans les endroits suivants:
• sur des surfaces molles (moquette, nappe, etc.) ou à proximité
de tissus (rideaux, tentures, etc.) qui risquent d’obstruer les
orifices de ventilation
• à proximité de sources de chaleur comme des radiateurs ou des
conduits d’air, ni dans un endroit directement exposé au
rayonnement solaire
• sujet à de fortes variations de température
• soumis à des vibrations ou à des chocs mécaniques
• sur une surface instable
• à proximité d’appareils générant un champ magnétique comme
un transformateur ou des lignes à haute tension
• à proximité de ou sur une surface métallique chargée
électriquement
Entretien
• Nettoyez l’écran à l’aide d’un chiffon doux. Si vous utilisez un
produit nettoyant pour vitres, n’utilisez aucun type de produit
contenant une solution antistatique ou des additifs similaires
parce que vous risquez de rayer le revêtement de l’écran.
• Ne frottez pas, ne touchez pas et ne tapotez pas la surface de
l’écran avec des objets abrasifs ou aux arêtes vives comme un
stylo à bille ou un tournevis. Ce type de contact risque en effet
de rayer le tube image.
• Nettoyez le châssis, le panneau et les commandes à l’aide d’un
chiffon doux légèrement imprégné d’une solution détergente
neutre. N’utilisez jamais de tampons abrasifs, de poudre à
récurer ou de solvants tels que de l’alcool ou du benzène.
Transport
Pour transporter ce moniteur en vue de réparations ou de son
expédition, utilisez le carton d’emballage et les matériaux de
conditionnement d’origine.
Ne soulevez pas ce moniteur en le saisissant par le couvercle
arrière comme illustré ci-dessous, car le couvercle arrière risque
sinon de se détacher.
Utilisation du support pivotant
Ce moniteur peut être réglé suivant les angles précisés ci-dessous.
Pour faire pivoter le moniteur verticalement et horizontalement,
maintenez-le des deux mains par la base.
Etats-Unis,
Canada,
Taiwan,
Corée, Japon
Europe
continentale
Royaume-
Uni, Irlande
Australie,
Nouvelle-
Zélande
Type de fiche
NEMA S-15P
Type de fiche
CEE7/VII
(Schuko)
Type de fiche
B S 1363
Type de fiche
SAA AS 3112
Type de câble
SJT
Type de câble
HAR(HO5VV
-F3G1.0)
Type de câble
HAR(HO5VV
-F3G1.0)
Type de câble
CDB03PLP
Intensité
minimale du
câble
10 A/125 V
18/3AWG
Intensité min.
du câble
10 A/250 V
Intensité min.
du câble
10 A/250 V
Intensité min.
du câble
10 A/250 V
Longueur du
câble 2 m
(+/– 0,1 m)
Longueur du
câble 2,5 m
(+/– 0,1 m)
Longueur du
câble 2,5 m
(+/– 0,1 m)
Longueur du
câble 2,5 m
(+/– 0,1 m)
Agrément de
sécurité
UL/CSA
Agrément de
sécurité
HAR
Agrément de
sécurité
BSI, ASTA
Agrément de
sécurité
Ministère de
l’Energie de
Nouvelle
Galles du Sud
Le bloc d’alimentation universel fonctionne partout; le
moniteur se règle automatiquement si vous utilisez le câble et la
fiche d’alimentation appropriés en fonction de la tension
secteur locale.
L’appareil doit être installé à proximité d’une prise murale
aisément accessible.
115 volts 230 volts
(non fourni sur le
câble standard)
Câble CEE-22,
prise femelle
(tous les câbles
d’alimentation)
90°
5°
90°
15°
21
FR
Identification des composants et
des commandes
Pour plus de détails, reportez-vous aux pages indiquées entre
parenthèses.
1
11
1 Touche (réinitialisation) (page 30)
Cette touche réinitialise les réglages aux valeurs par défaut.
2
22
2 Touche (entrée) et indicateurs 1 (13W3) / 2 (HD15)
(page 23)
Cette touche sélectionne le signal d’entrée vidéo 1 (13W3) ou
2 (HD15).
Chaque fois que vous appuyez sur cette touche, le signal
d’entrée et l’indicateur correspondant alternent.
3
33
3 Commutateur et indicateur 1 (alimentation)
(pages 22, 30, 34)
Cette touche met le moniteur sous et hors tension.
L’indicateur d’alimentation s’allume en vert lorsque le
moniteur est sous tension et clignote en vert et en ambre ou
s’allume en ambre lorsque le moniteur se trouve en mode
d’économie d’énergie.
4
44
4 Touches (luminosité) m/M (page 25)
Ces touches activent le menu LUMINOSITE/CONTRASTE
et servent de touchesýmî Mýýpour la sélection de paramètres de
menuï
5
55
5 Touche (menu) (page 25)
Cette touche affiche le menu principal.
6
66
6 Touches 6 (contraste) </, (page 25)
Ces touches affichent le menu LUMINOSITE/CONTRASTE
et servent de touches </, pour le réglage.
7
77
7 Touche ASC (taille et centrage automatiques)
(page 23)
Cette touche ajuste automatiquement la taille et le centrage de
l’image.
8
88
8 Connecteur AC IN (page 22)
Ce connecteur assure l’alimentation du moniteur.
9
99
9 Connecteur d’entrée vidéo 2 (HD15) (page 22)
Ce connecteur assure l’entrée des signaux vidéo RVB
(0,700 Vp-p, positifs) et des signaux de synchronisation.
0
00
0 Connecteur d’entrée vidéo 1 (13W3) (page 22)
Ce connecteur sert à l’entrée des signaux vidéo RVB
(0,700 Vp-p, positifs) et des signaux de synchronisation.
* DDC (Display Data Channel) est une norme de VESA.
** Les broches ont une double fonction d’entrée de synchronisation
combinée et d’entrée de synchronisation H si la synchronisation V est
présente sur la broche n° 7.
Arrière (avec le couvercle ouvert)Avant
N° Signal 9
99
9 Signal 0
00
0
A1 ––– Rouge
A2 ––– Vert
A3 ––– Bleu
1 Rouge
Données d’horloge (SCL)*
2 Vert (Synchronisation sur
le vert)
DDC + 5V*
3Bleu –––
4 ID (masse) Masse DDC *
5 Masse DDC* Synchronisation C**
6 Masse rouge Données bidirectionnelles
(SDA)*
7 Masse vert Synchronisation V.
8 Masse bleu ID (100
Ω
)
9 DDC + 5V* ID (100
Ω
)
10 Masse Masse
11 ID (masse) –––
12 Données bidirectionnelles
(SDA)*
–––
13 Synchronisation H. –––
14 Synchronisation V. –––
15
Données d’horloge (SCL)*
–––
5 4 3 2
1
678910
11
A3
12131415
5 4 3 2
1
678910
A2 A1
9
HD15
0
13W3
22
Installation
Ce moniteur fonctionne avec des plates-formes tournant à des
fréquences horizontales comprises entre 30 et 121 kHz.
1re étape:Dépose du couvercle
arrière
Avant le raccordement, déposez le couvercle arrière du moniteur.
2e étape:Raccordez le moniteur à
votre ordinateur
Le moniteur et l’ordinateur étant hors tension, connectez le câble
de signal vidéo au connecteur d’entrée vidéo du moniteur et à la
sortie vidéo de l’ordinateur.
Remarques
• Ne touchez pas les broches du connecteur du câble de signal vidéo, car
vous risqueriez de les plier.
• Lorsque vous branchez le câble de signal vidéo, vérifiez l’alignement
des connecteurs. Ne forcez pas le connecteur dans le mauvais sens, car
vous risquez sinon de plier les broches.
3e étape:Branchez le cordon
d’alimentation
Le moniteur et l’ordinateur étant hors tension, raccordez d’abord
le cordon d’alimentation correspondant à votre tension secteur
locale au moniteur, puis à une prise de courant.
4e étape:Fixation du couvercle
arrière
Fixez le couvercle arrière sur le moniteur.
Faites passer le câble d’alimentation secteur dans l’orifice prévu
à cet effet à la base du couvercle arrière.
5e étape:Mettez le moniteur et
l’ordinateur sous tension
Mettez d’abord le moniteur sous tension et puis l’ordinateur.
L’installation de votre moniteur est à présent terminée.
Si nécessaire, utilisez les commandes du moniteur pour régler
l’image.
Si aucune image n’apparaît à l’écran
• Vérifiez si le moniteur est correctement raccordé à l’ordinateur.
• Si l’indication PAS ENTREE VIDEO apparaît à l’écran, suivez
les messages affichés (page 31).
• Si vous remplacez un ancien moniteur par ce modèle et si
l’indication HORS PLAGE DE BALAYAGE apparaît à
l’écran, rebranchez l’ancien moniteur. Ajustez ensuite la carte
graphique de l’ordinateur de façon à ce que la fréquence
horizontale soit comprise entre 30 et 121 kHz et la fréquence
verticale entre 48 et 160 Hz.
Pour plus d’informations sur les messages affichés à l’écran,
reportez-vous à la section “Symptômes et remèdes” à la page 32.
Couvercle
Désengagez la base du
couvercle et faites-le
ensuite pivoter pour le
déposer.
vers un ordinateur
doté d’une sortie
vidéo HD15
vers un ordinateur
doté d’une sortie
vidéo 13W3
vers une prise murale
cordon d’alimentation
23
FR
Sélection de la langue d’affichage
des menus (LANGUAGE)
Les écrans de menu peuvent être affichés en français, anglais,
allemand, espagnol, italien, néerlandais, suédois, russe et
japonais. La sélection par défaut est l’anglais.
1
Appuyez sur la touche .
Voir page 25 pour plus d’informations sur l’utilisation de la
touche .
2
Appuyez sur les touches m/M pour mettre
LANGUAGE en évidence et appuyez de nouveau
sur la touche .
Voir page 25 pour plus d’informations sur l’utilisation des
touches m/M.
3
Appuyez sur les touches m/M pour sélectionner une
langue.
• ENGLISH: Anglais
• FRANÇAIS
• DEUTSCH: Allemand
• ESPAÑOL: Espagnol
• ITALIANO: Italien
• NEDERLANDS: Néerlandais
• SVENSKA: Suédois
• : Russe
• : Japonais
Pour quitter le menu
Appuyez une fois sur la touche pour revenir au MENU principal et
deux fois pour revenir à la visualisation normale. Si vous n’actionnez
aucune touche, le menu se referme automatiquement au bout de
30 secondes environ.
Pour restaurer l’anglais
Appuyez sur la touche (réinitialisation) pendant que le menu
LANGUAGE est affiché à l’écran.
Sélection du signal d’entrée
Vous pouvez raccorder deux ordinateurs à ce moniteur à l’aide
des connecteurs d’entrée vidéo 1 et 2. Pour sélectionner l’un des
deux ordinateurs, utilisez la touche .
Appuyez sur la touche .
Chaque fois que vous appuyez sur cette touche, le signal d’entrée
et l’indicateur correspondant alternent.
Lorsque cette touche est enfoncée, ENTREE 2 est sélectionné;
lorsque cette touche n’est pas enfoncée, ENTREE 1 est
sélectionné.
Le connecteur sélectionné apparaît sur l’écran pendant quelques
secondes.
“ENTREE 1” (connecteur d’entrée vidéo 1) ou “ENTREE 2”
(connecteur d’entrée vidéo 2) apparaît à l’écran.
Remarque
Si aucun signal n’est entré via le connecteur sélectionné, l’indication PAS
ENTREE VIDEO apparaît à l’écran. Au bout de quelques secondes, le
moniteur passe en mode d’économie d’énergie. Si cela se produit,
commutez l’autre connecteur.
Réglage automatique de la taille et
du centrage de l’image
Vous pouvez aisément ajuster l’image pour qu’elle remplisse
l’écran jusqu’aux bords en appuyant sur la touche (taille et
centrage automatiques).
Appuyez sur la touche .
L’image remplit automatiquement l’écran.
Remarques
• Cette fonction est destinée à être utilisée avec un ordinateur capable
d’afficher une image plein écran. Il se peut qu’elle ne fonctionne pas
correctement si la couleur d’arrière-plan est foncée ou si l’image entrée
ne remplit pas l’écran jusqu’aux bords.
• Les images d’un rapport hauteur/largeur de 5:4 (résolution: 1280
×
1024, 1600
×
1280) sont affichées suivant leur résolution réelle et ne
remplissent pas l’écran jusqu’aux bords.
• L’image affichée se déplace pendant quelques secondes lorsque vous
appuyez sur la touche
.
Il ne s’agit pas d’un dysfonctionnement.
SORT IR
TA I LLE /CENTRE
GEOMETR I E
CONVERGENCE
ECRAN
COULEUR
LANGUAGE
OPT ION
MENU
OK
b
ENGL ISH
FRANÇA IS
DEUTSCH
ESPAÑOL
ITALIANO
NEDERLANDS
SVENSKA
LANGUAGE
b
ENTREE 1
(connecteur d’entrée vidéo 1)
ENTREE 2
(connecteur d’entrée vidéo 2)
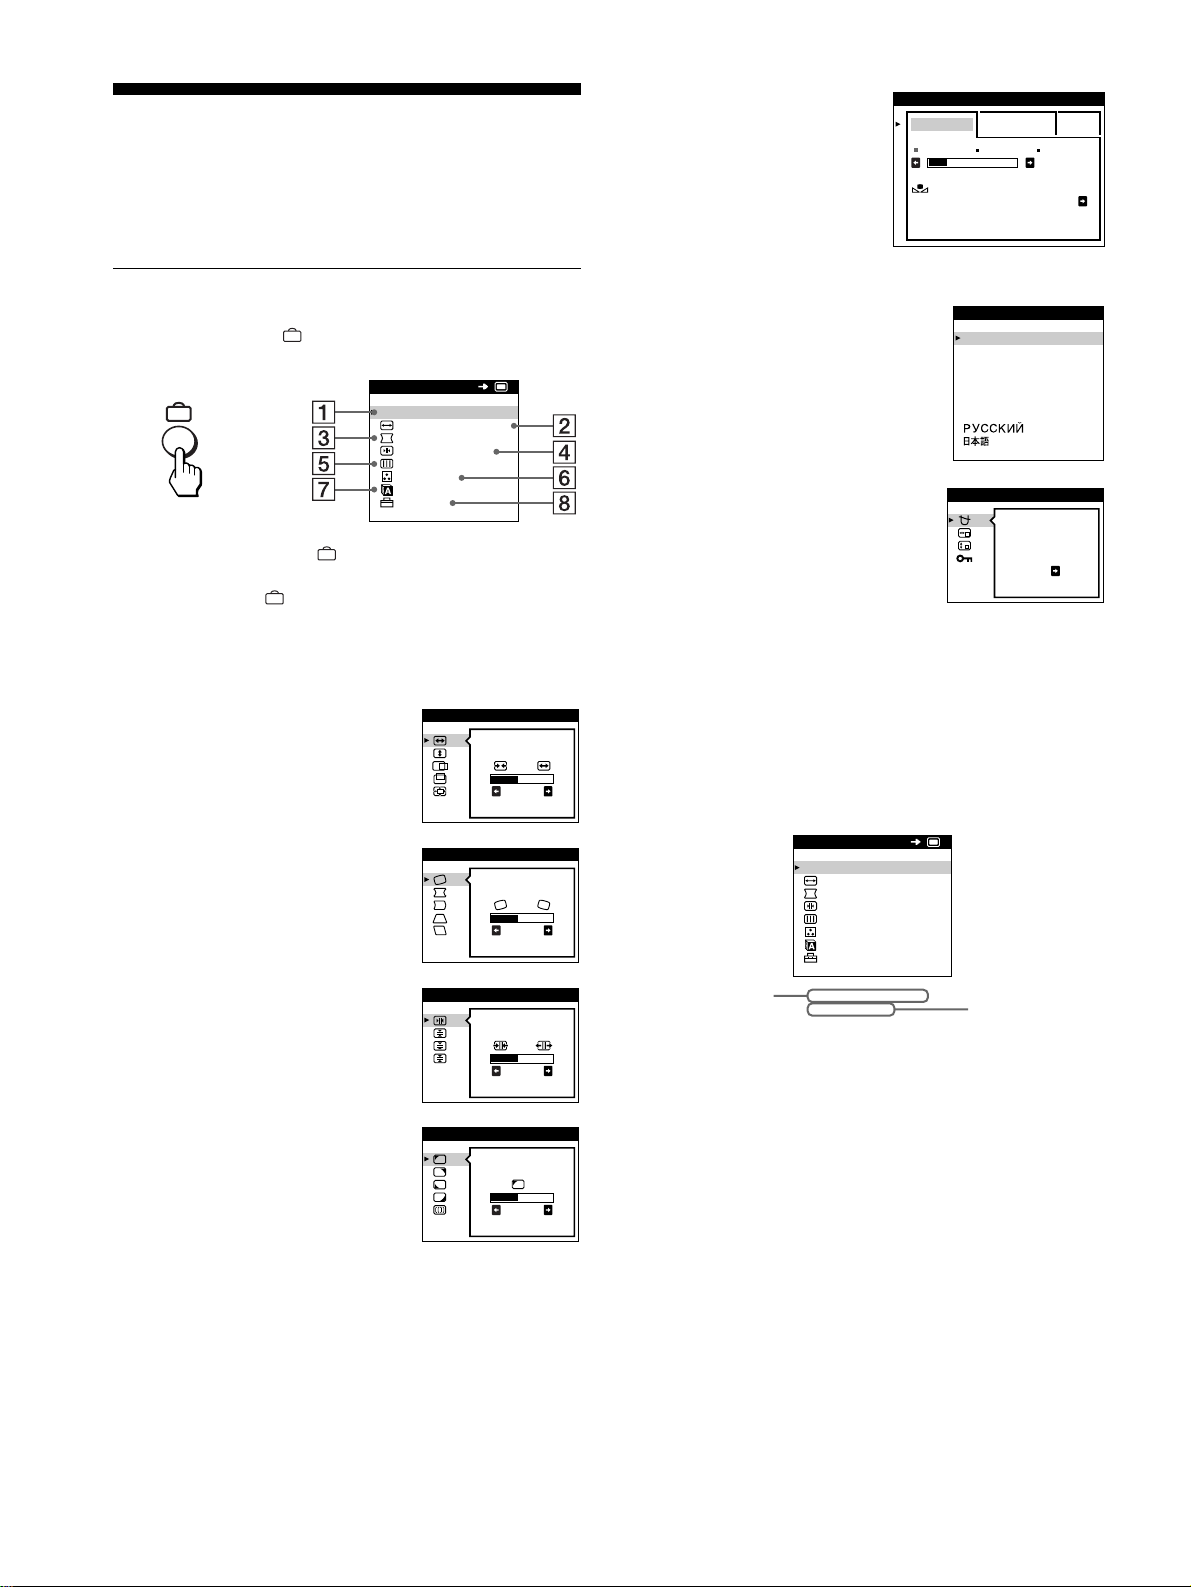
24
Personnalisation de votre
moniteur
Vous pouvez effectuer de multiples réglages sur votre moniteur à
l’aide des écrans de menu.
Pilotage par menus
Appuyez sur la touche pour afficher le MENU principal sur
votre écran.
Utilisez les touches m/M et pour sélectionner l’un des menus
suivants. Voir page 25 pour plus d’informations sur l’utilisation
des touches m/M et .
x
Affichage du signal d’entrée en cours
Les fréquences horizontale et verticale du signal d’entrée en cours
sont affichées dans le MENU principal. Si le signal correspond à
l’un des modes présélectionnés de ce moniteur, la résolution est
également affichée.
1
11
1 SORTIR
Sélectionne SORTIR pour quitter le
menu.
2
22
2 TAILLE/CENTRE (page 26)
Sélectionne le menu TAILLE/
CENTRE pour régler la taille et le
centrage de l’image ainsi que le
zoom.
3
33
3 GEOMETRIE (page 26)
Sélectionne le menu GEOMETRIE
pour régler la rotation et la forme de
l’image.
4
44
4 CONVERGENCE (page 27)
Sélectionne le menu
CONVERGENCE pour régler la
convergence horizontale et verticale
de l’image.
5
55
5 ECRAN (page 27)
Sélectionne le menu ECRAN pour
ajuster la qualité de l’image. Vous
pouvez ajuster l’alignement et
l’effet de suppression du moiré.
SORT I R
TA I LLE /CENTRE
GEOMETR I E
CONVERGENCE
ECRAN
COULEUR
LANGUAGE
OPT ION
MENU
OK
b
26
TA I LLE/CENTRE
26
GEOMETR I E
TOP
BOT
26
CONVERGENCE
PURETE
COULEUR
26
ECRAN
6
66
6 COULEUR (page 28)
Sélectionne le menu
COULEUR pour régler la
température de couleur de
l’image. Vous pouvez
utiliser ce menu pour faire
correspondre les couleurs
du moniteur aux couleurs
d’une image imprimée.
7
77
7 LANGUAGE (page 23)
Sélectionne LANGUAGE pour
choisir la langue d’affichage des
menus.
8
88
8 OPTION (page 29)
Sélectionne OPTION pour régler
les options du moniteur. Les options
comprennent:
• démagnétisation de l’écran
• changement de la position des
écrans de menu
• verrouillage des commandes
SIMPLE EXPERT s BGR
5000K 6500K 930 K0
50 K00
RESTAURER
COULEUR ON
COULEUR
ENGL ISH
FRANÇA IS
DEUTSCH
ESPAÑOL
ITALIANO
NEDERLANDS
SVENSKA
LANGUAGE
DEGAUSS
ON
OPT ION
MENU
SORT I R
TA I LLE /CENTRE
GEOMETR I E
CONVERGENCE
ECRAN
COULEUR
LANGUAGE
OPT ION
68.7kHz/ 85Hz
1024x 768
OK
les fréquences
horizontale et
verticale du
signal d’entrée
en cours
la résolution du
signal d’entrée
en cours
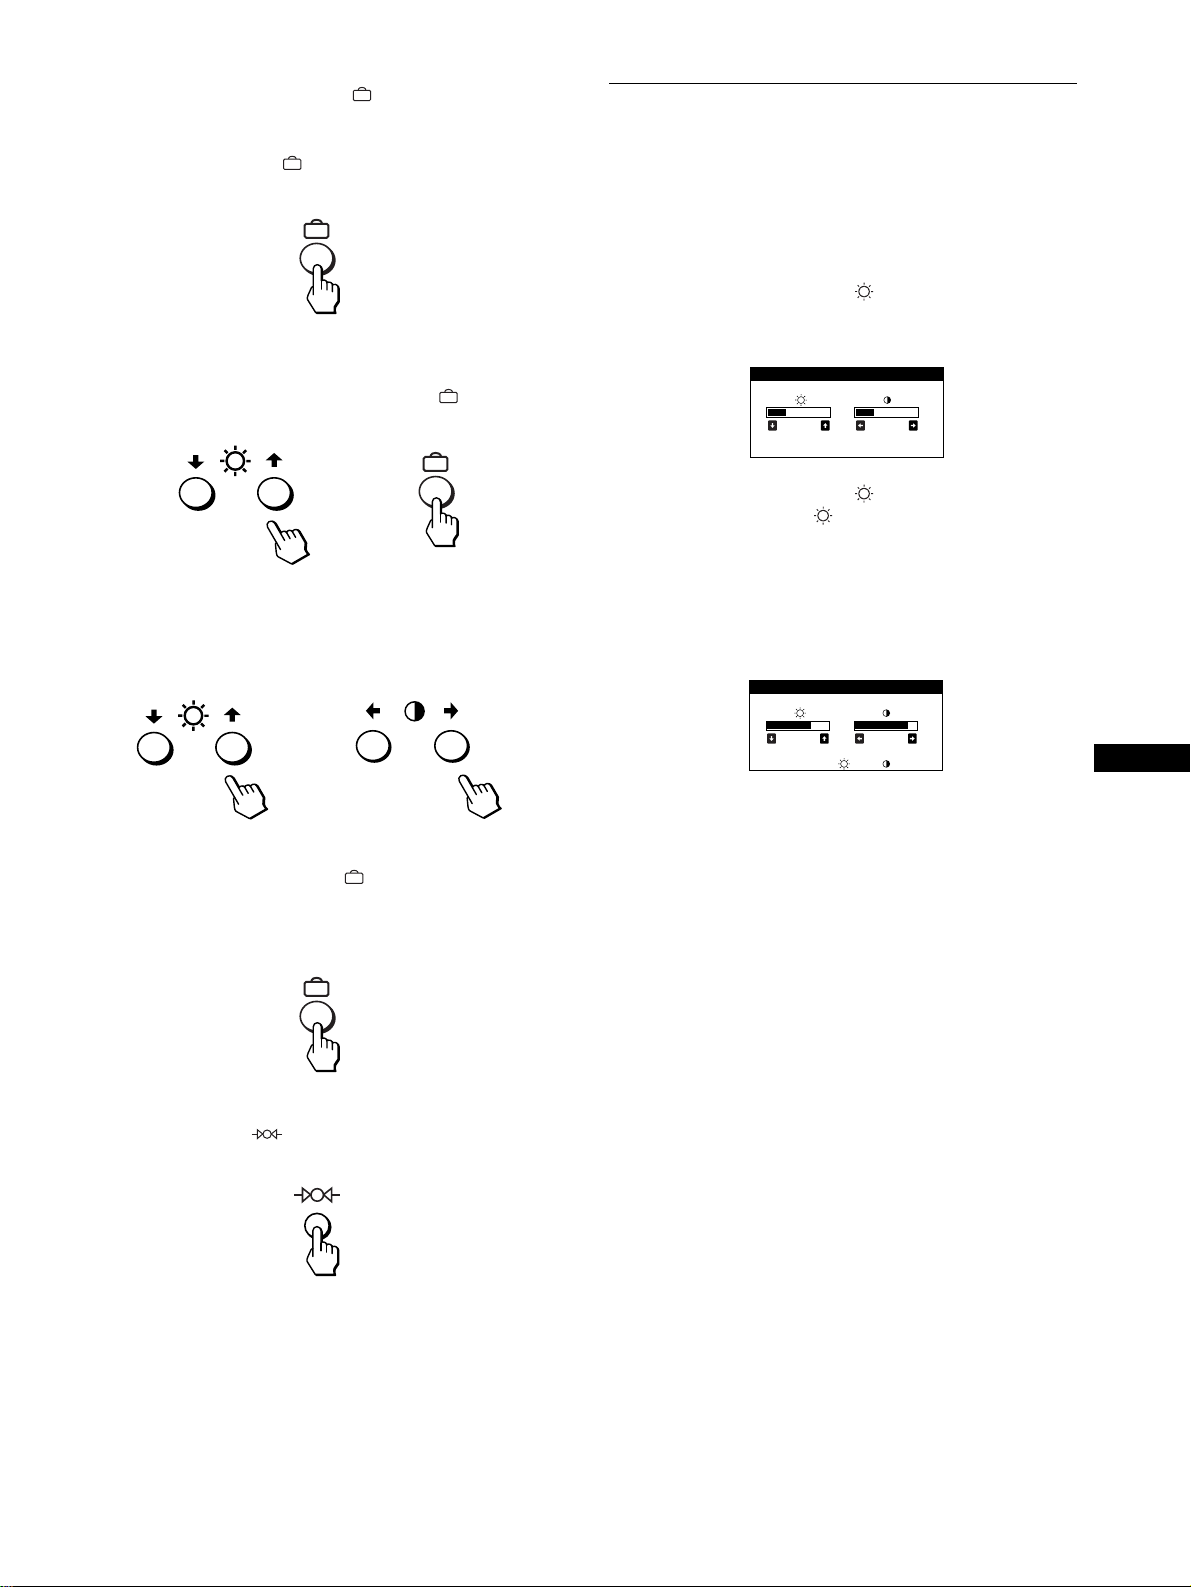
25
FR
x
Utilisation des touches , m/M, et </,
1
Affichez le MENU principal.
Appuyez sur la touche pour afficher le MENU principal
sur votre écran.
2
Sélectionnez le menu que vous voulez régler.
Appuyez sur les touches m/M pour mettre en évidence le
menu de votre choix. Appuyez sur la touche pour
sélectionner le paramètre de menu.
3
Réglez le menu.
Appuyez sur les touches m/M pour sélectionner le paramètre
de réglage voulu. Appuyez sur les touches </, pour
procéder au réglage.
4
Quittez le menu.
Appuyez une fois sur la touche pour revenir au MENU
principal et deux fois pour revenir à la visualisation normale.
Si vous n’actionnez aucune touche, le menu se referme
automatiquement au bout de 30 secondes environ.
x
Réinitialisation des réglages
Appuyez sur la touche (réinitialisation). Voir page 30 pour
plus d’informations sur la réinitialisation des réglages.
Réglage de la luminosité et du
contraste
Les réglages de la luminosité et du contraste sont effectués au
moyen d’un menu LUMINOSITE/CONTRASTE séparé.
Ces réglages sont enregistrés dans la mémoire pour les signaux
transmis via le connecteur d’entrée sélectionné.
1
Appuyez sur les touches (luminosité) m/M ou
6 (contraste) </,.
Le menu LUMINOSITE/CONTRASTE apparaît à l’écran.
2
Appuyez sur les touches (luminosité) m/M pour
régler la luminosité ( ) et sur les touches 6
(contraste) </, pour régler le contraste (6).
Si vous utilisez le mode sRGB
Si vous avez sélectionné le mode sRGB dans le menu
COULEUR, le menu LUMINOSITE/CONTRASTE apparaît à
l’écran.
Pour plus d’informations sur l’utilisation du mode sRGB, voir
“Réglage des couleurs de l’image (COULEUR)” à la page 28.
Le menu disparaît automatiquement au bout d’environ
3 secondes.
b
b
26 26
LUMINOSITE/CONTRASTE
56 76
sRGB : 56 76
LUMINOSITE/CONTRASTE
26
Réglage de la taille de l’image
(TAILLE/CENTRE)
Ce réglage est enregistré dans la mémoire pour le signal d’entrée
en cours.
1
Appuyez sur la touche .
Le MENU principal apparaît à l’écran.
2
Appuyez sur les touches m/M pour mettre
TAILLE/CENTRE en évidence et appuyez de
nouveau sur la touche .
Le menu TAILLE/CENTRE apparaît à l’écran.
3
Appuyez d’abord sur les touches m/M pour
sélectionner pour le réglage horizontal ou
pour le réglage vertical. Appuyez ensuite sur les
touches </, pour régler la taille.
Réglage du centrage de l’image
(TAILLE/CENTRE)
Ce réglage est enregistré dans la mémoire pour le signal d’entrée
en cours.
1
Appuyez sur la touche .
Le MENU principal apparaît à l’écran.
2
Appuyez sur les touches m/M pour mettre
TAILLE/CENTRE en évidence et appuyez de
nouveau sur la touche .
Le menu TAILLE/CENTRE apparaît à l’écran.
3
Appuyez d’abord sur les touches m/M pour
sélectionner pour le réglage horizontal ou
pour le réglage vertical. Appuyez ensuite sur les
touches </, pour régler le centrage.
Agrandir ou réduire l’image
(ZOOM)
Ce réglage est enregistré dans la mémoire pour le signal d’entrée
en cours.
1
Appuyez sur la touche .
Le MENU principal apparaît à l’écran.
2
Appuyez sur les touches m/M pour mettre
TAILLE/CENTRE en évidence et appuyez de
nouveau sur la touche .
Le menu TAILLE/CENTRE apparaît à l’écran.
3
Appuyez sur les touches m/M pour sélectionner
(zoom) et ensuite sur les touches </, pour
agrandir ou réduire l’image.
Remarque
Le réglage s’arrête lorsque la plage de réglage horizontal ou vertical
atteint sa valeur limite maximum ou minimum.
Réglage de la forme de l’image
(GEOMETRIE)
Les réglages GEOMETRIE vous permettent de régler la rotation
et la forme de l’image.
Le réglage de la rotation est enregistré dans la mémoire pour
tous les signaux d’entrée. Tous les autres réglages sont enregistrés
dans la mémoire pour le signal d’entrée en cours.
1
Appuyez sur la touche .
Le MENU principal apparaît à l’écran.
2
Appuyez sur les touches m/M pour mettre
GEOMETRIE en évidence et appuyez de
nouveau sur la touche .
Le menu GEOMETRIE apparaît à l’écran.
3
Appuyez d’abord sur les touches m/M pour
sélectionner le paramètre de réglage voulu.
Appuyez ensuite sur les touches </, pour
effectuer le réglage.
Sélectionnez Pour
faire pivoter l’image
élargir ou rétrécir les côtés de l’image
décaler les côtés de l’image vers la gauche ou
la droite
régler la largeur de l’image dans le haut de
l’écran
décaler l’image vers la gauche ou la droite
dans le haut de l’écran

27
FR
Réglage de la convergence
(CONVERGENCE)
Les réglages CONVERGENCE vous permettent de régler la
qualité de l’image en contrôlant la convergence. La convergence
est l’alignement des signaux de couleur rouge, vert et bleu.
Si vous voyez des ombres rouges ou bleues autour des lettres ou
des lignes, réglez la convergence.
Ces réglages sont enregistrés dans la mémoire pour tous les
signaux d’entrée.
1
Appuyez sur la touche .
Le MENU principal apparaît à l’écran.
2
Appuyez sur les touches m/M pour mettre
CONVERGENCE en évidence et appuyez de
nouveau sur la touche .
Le menu CONVERGENCE apparaît à l’écran.
3
Appuyez d’abord sur les touches m/M pour
sélectionner le paramètre de réglage voulu.
Appuyez ensuite sur les touches </, pour
effectuer le réglage.
Réglage de la qualité de l’image
(ECRAN)
Les réglages ECRAN vous permettent de régler la qualité de
l’image en contrôlant le moiré et l’alignement.
• Si les couleurs sont irrégulières dans les angles de l’écran,
réglez l’alignement.
• Si des motifs elliptiques ou ondulatoires apparaissent à l’écran,
supprimez le moiré.
Les réglages SUPPRIMER MOIRE et REGLAGE MOIRE sont
enregistrés dans la mémoire pour le signal d’entrée en cours. Tous
les autres réglages sont enregistrés dans la mémoire pour tous les
signaux d’entrée.
1
Appuyez sur la touche .
Le MENU principal apparaît à l’écran.
2
Appuyez sur les touches m/M pour mettre
ECRAN en évidence et appuyez de nouveau sur
la touche .
Le menu ECRAN apparaît à l’écran.
3
Appuyez d’abord sur les touches m/M pour
sélectionner le paramètre de réglage voulu.
Appuyez ensuite sur les touches </, pour
effectuer le réglage.
* Le moiré est comme une interférence naturelle qui produit des lignes
douces ondulatoires sur votre écran. Le moiré peut apparaître à la suite
d’interférences entre le motif de l’image à l’écran et le motif de
luminophores du moniteur.
Remarque
L’image peut devenir floue lorsque SUPPRIMER MOIRE est réglé sur
ON.
Sélectionnez Pour
décaler horizontalement les ombres
rouges ou bleues
décaler verticalement les ombres
rouges ou bleues
TOP
CONVER V HAUT
décaler verticalement les ombres
rouges ou bleues dans le haut de
l’écran
BOT
CONVER V BAS
décaler verticalement les ombres
rouges ou bleues dans le bas de
l’écran
Sélectionnez Pour
PURETE
COULEUR
réduire au minimum les irrégularités
des couleurs dans l’angle supérieur
gauche de l’écran.
PURETE
COULEUR
réduire au minimum les irrégularités
des couleurs dans l’angle supérieur
droit de l’écran.
PURETE
COULEUR
réduire au minimum les irrégularités
des couleurs dans l’angle inférieur
gauche de l’écran.
PURETE
COULEUR
réduire au minimum les irrégularités
des couleurs dans l’angle inférieur droit
de l’écran.
SUPPRIMER
MOIRE
*
activer (ON) ou désactiver (OFF) la
fonction de suppression du moiré.
(REGLAGE MOIRE) apparaît
dans le menu si vous sélectionnez ON.
REGLAGE MOIRE
régler le degré de suppression du moiré
jusqu’à ce que le moiré ait été réduit au
minimum.
Exemple de moiré
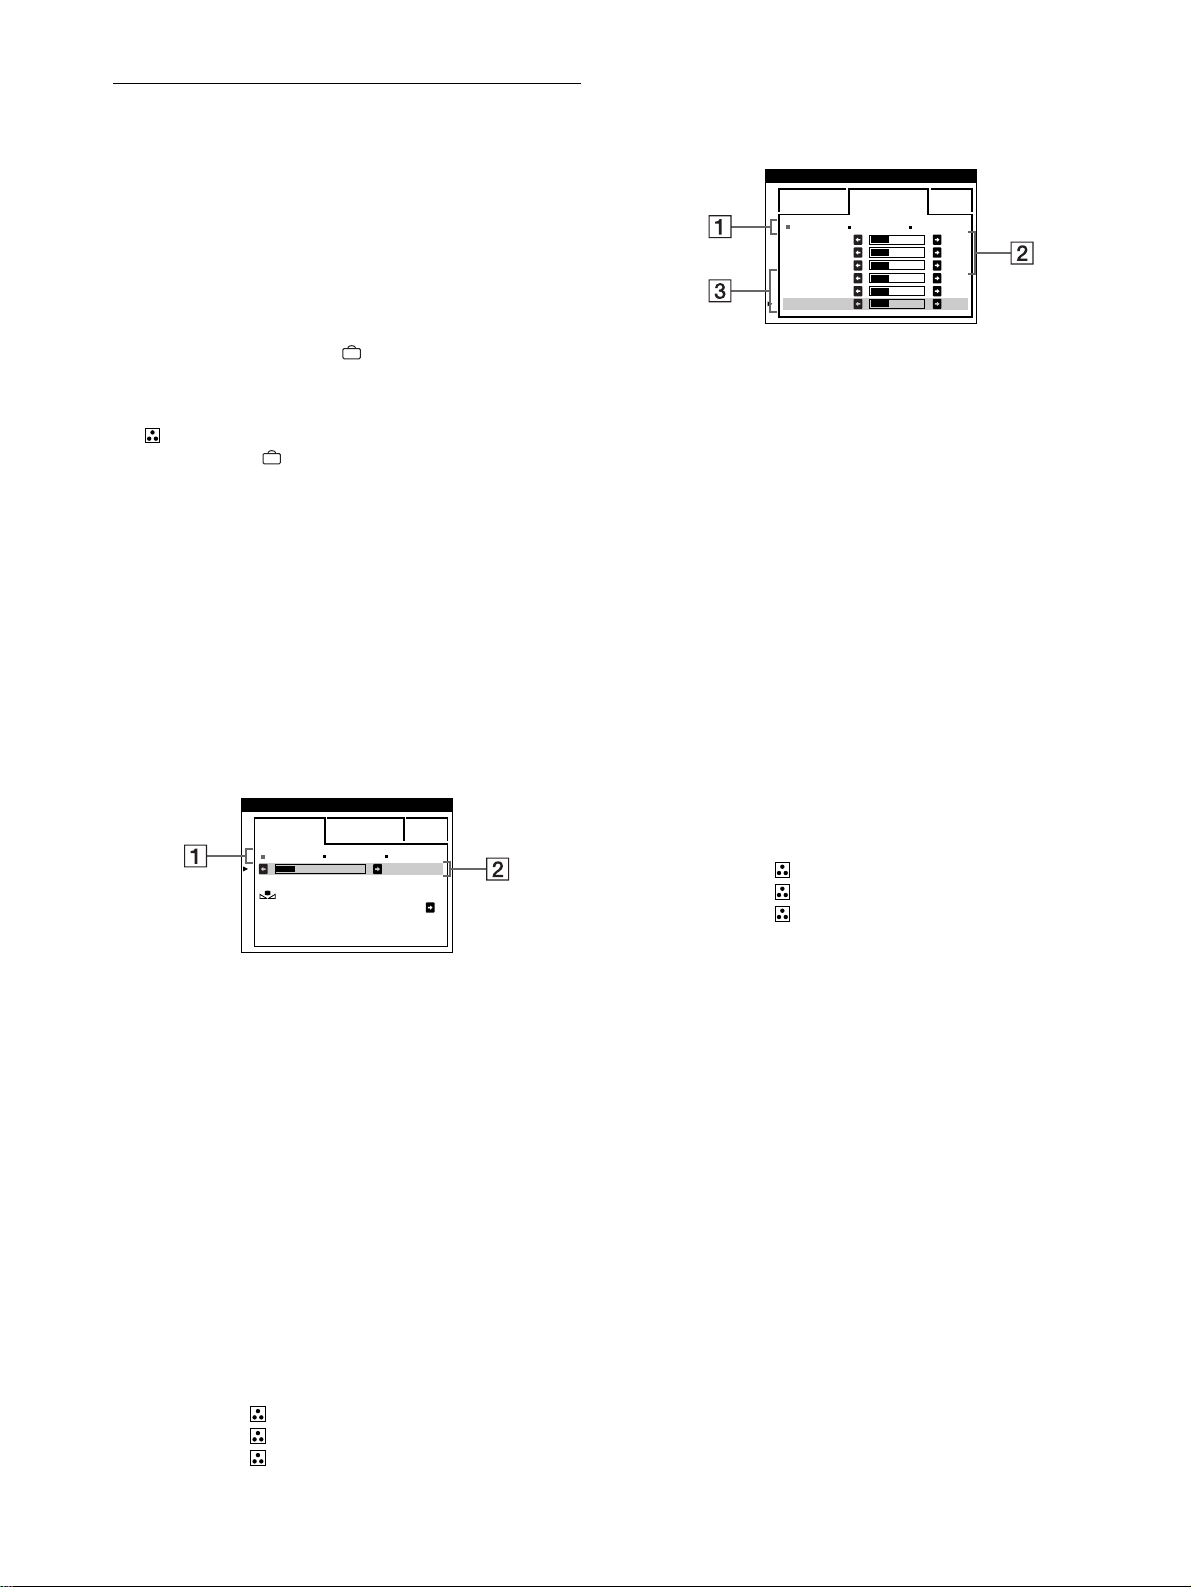
28
Réglage des couleurs de l’image
(COULEUR)
Les réglages COULEUR vous permettent d’ajuster la température
des couleurs de l’image en changeant le niveau des couleurs des
champs de couleur blanche. Les couleurs apparaissent rougeâtres
lorsque la température est basse et bleuâtres lorsque la
température est élevée. Ce réglage s’avère bien pratique pour faire
correspondre les couleurs du moniteur aux couleurs d’une image
imprimée.
1
Appuyez sur la touche .
Le MENU principal apparaît à l’écran.
2
Appuyez sur les touches m/M pour mettre
COULEUR en évidence et appuyez de nouveau
sur la touche .
Le menu COULEUR apparaît à l’écran.
3
Appuyez sur les touches </, pour sélectionner le
mode de réglage.
Il existe trois types de modes de réglage, SIMPLE, EXPERT
et sRGB.
4
Appuyez d’abord sur les touches m/M pour
sélectionner le paramètre de réglage voulu.
Appuyez ensuite sur les touches </, pour
effectuer le réglage.
Procédez au réglage du mode sélectionné en suivant les
instructions ci-dessous.
Mode SIMPLE
1
Appuyez d’abord sur les touches m/M pour
sélectionner la rangée de température de couleur 1
et appuyez ensuite sur les touches </, pour
sélectionner une température de couleur.
Les températures de couleur présélectionnées sont 5000K,
6500K et 9300K. Etant donné que le réglage par défaut est
9300K, les blancs passent d’une teinte bleuâtre à une nuance
rougeâtre lorsque la température est abaissée à 6500K et
5000K.
2
Si nécessaire, ajustez finement la température de
couleur.
Appuyez d’abord sur les touches m/M pour
sélectionner la rangée de température de couleur 2
et appuyez ensuite sur les touches </, pour
ajuster finement la température de couleur.
Si vous ajustez finement la température de couleur, les
nouveaux réglages de la couleur sont enregistrés dans la
mémoire pour chacune des trois températures de couleur et le
paramètre 1 du menu change selon la séquence suivante.
• [5000K]t[1]
• [6500K]t[2]
• [9300K]t[3]
Mode EXPERT
Vous pouvez effectuer des réglages additionnels plus détaillés des
couleurs en sélectionnant le mode EXPERT.
1
Appuyez sur les touches m/M pour sélectionner la
rangée de température de couleur 1 et appuyez
ensuite sur les touches </, pour sélectionner
une température de couleur.
2
Appuyez sur les touches m/M pour sélectionner le
paramètre de réglage 2
22
2, et appuyez ensuite sur les
touches </, pour ajuster BIAS (niveau de noir).
Ce paramètre ajuste les zones foncées d’une image.
3
Appuyez sur les touches m/M pour sélectionner le
réglage 3
33
3, et appuyez ensuite sur les touches
</, pour ajuster GAIN (niveau de blanc).
Ce paramètre ajuste les zones claires d’une image.
Vous pouvez régler les composantes R (rouge), V (verte) et B
(bleue) du signal d’entrée lorsque vous effectuez des
changements aux paramètres 2 et 3.
Si vous ajustez finement la température de couleur, les
nouveaux réglages de couleur sont enregistrés dans la
mémoire pour chacune des trois températures de couleur et le
paramètre 1 du menu change selon la séquence suivante.
• [5000K]t[1]
• [6500K]t[2]
• [9300K]t[3]
Réglage de la température de couleur pour
chacun des connecteurs d’entrée vidéo
Vous pouvez ajuster finement la température de couleur en mode
SIMPLE ou EXPERT pour chacun des connecteurs d’entrée
vidéo (ENTREE 1: 13W3 et ENTREE 2: HD15).
1
Sélectionnez le même mode de réglage et la même
température de couleur dans le menu COULEUR
pour les entrées ENTREE 1 et ENTREE 2.
2
Ajustez finement la température des couleurs dans
chaque menu pour ENTREE 1 et ENTREE 2.
Les réglages sont enregistrés dans la mémoire pour chacun
des connecteurs ENTREE 1 et ENTREE 2.
Pour plus d’informations sur la sélection du connecteur, voir
page 23.
5000K 6500K 930 K0
50 K00
SIMPLE EXPERT s BGR
RESTAURER
COULEUR ON
COULEUR
5000K 6500K 930 K0
R BIAS 05
V BIAS 05
B BIAS 05
RGAIN 05
VGAIN 05
BGAIN 05
SIMPLE EXPERT s BGR
COULEUR
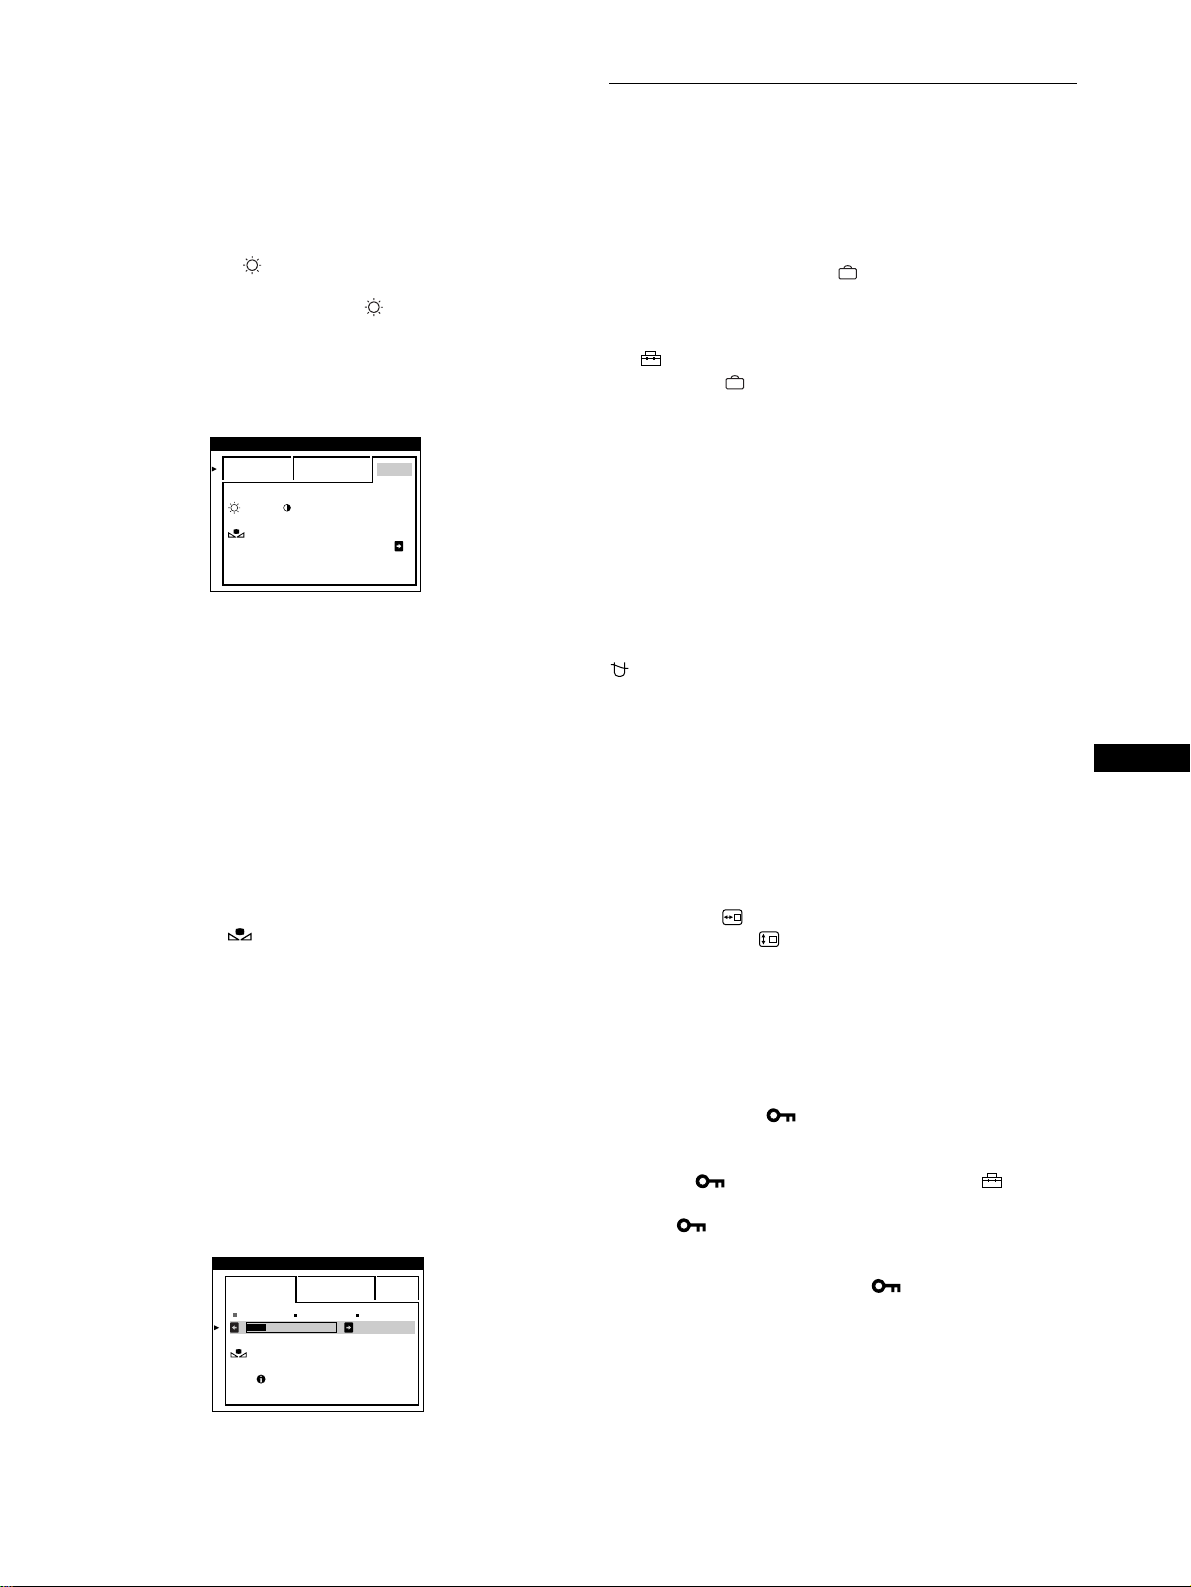
29
FR
Mode sRGB
Le réglage de couleur sRGB est un protocole d’espace couleur
standard conçu pour corréler les couleurs affichées et imprimées
des systèmes informatiques compatibles avec sRGB. Pour ajuster
les couleurs suivant le profil sRGB, sélectionnez simplement le
mode sRGB dans le menu COULEUR. Pour pouvoir afficher
correctement les couleurs sRGB (
γ
=2,2, 6500K), vous devez
cependant configurer votre ordinateur suivant le profil sRGB et
ajuster la luminosité ( ) et le contraste (6) suivant les numéros
affichés dans le menu. Pour plus d’informations sur la façon de
changer les réglages de la luminosité ( ) et du contraste (6),
voir page 25.
Remarque
Votre ordinateur et les autres appareils raccordés (une imprimante, par
exemple) doivent être compatibles avec sRGB.
Restaurer les couleurs via les menus SIMPLE ou
sRGB
Les couleurs de la plupart des moniteurs d’affichage tendent à
perdre graduellement leur éclat après plusieurs années
d’utilisation. La fonction RESTAURER COULEUR des menus
SIMPLE et sRGB vous permet de restaurer les couleurs aux
niveaux de qualité par défaut d’origine. Les explications ci-
dessous présentent comment restaurer les couleurs du moniteur
via le menu SIMPLE.
1
Appuyez sur les touches </, pour sélectionner le
mode SIMPLE ou sRGB.
2
Appuyez d’abord sur les touches m/M pour
sélectionner (RESTAURER COULEUR) et
appuyez ensuite sur la touche ,.
L’image disparaît tandis que les couleurs sont restaurées
(environ 2 secondes). Après que les couleurs ont été
restaurées, l’image réapparaît à l’écran.
Remarques
• Avant d’utiliser cette fonction, le moniteur doit se trouver en mode de
fonctionnement normal (indicateur d’alimentation vert allumé) depuis
au moins 30 minutes. Si le moniteur passe en mode d’économie
d’énergie, vous devez ramener le moniteur en mode de fonctionnement
normal et attendre 30 minutes pour que le moniteur soit prêt. Il se peut
que vous deviez ajuster les réglages d’économie d’énergie de votre
ordinateur de manière à garder le moniteur en mode de fonctionnement
normal pendant au moins 30 minutes. Si le moniteur n’est pas prêt, le
message suivant apparaît.
• Le moniteur peut progressivement perdre sa capacité à exécuter cette
fonction en raison du vieillissement naturel du tube image.
Réglages supplémentaires
(OPTION)
Vous pouvez démagnétiser (dégausser) manuellement le
moniteur, changer la position des menus et verrouiller les
commandes.
1
Appuyez sur la touche .
Le MENU principal apparaît à l’écran.
2
Appuyez sur les touches m/M pour mettre
OPTION en évidence et appuyez de nouveau sur
la touche .
Le menu OPTION apparaît à l’écran.
3
Appuyez sur les touches m/M pour sélectionner le
paramètre de réglage voulu.
Procédez au réglage du paramètre sélectionné en suivant les
instructions ci-dessous.
Démagnétisation de l’écran
L’écran du moniteur est automatiquement démagnétisé à la mise
sous tension.
Pour démagnétiser manuellement l’écran, appuyez
d’abord sur les touches m/M pour sélectionner
(DEGAUSS). Appuyez ensuite sur la touche ,.
L’écran est démagnétisé pendant environ 2 secondes. Si un
second cycle de démagnétisation s’avère nécessaire, laissez
s’écouler un intervalle de 20 minutes pour obtenir de meilleurs
résultats.
Changement de la position d’affichage des
écrans de menu
Changez la position du menu s’il bloque une image à l’écran.
Pour changer la position d’affichage des écrans de
menu, appuyez d’abord sur les touches m/M pour
sélectionner (POSITION H OSD) pour le réglage
horizontal ou sur (POSITION V OSD) pour le réglage
vertical. Appuyez ensuite sur les touches </, pour
déplacer les menus.
Verrouillage des commandes
Pour protéger les données de réglage en verrouillant
les commandes, appuyez d’abord sur les touches m/M
pour sélectionner (MENU VERROUILLE). Appuyez
ensuite sur la touche , pour sélectionner ON.
Seuls le commutateur 1 (alimentation), et les paramètres
SORTIR et (MENU VERROUILLE) du menu OPTION
restent opérationnels. Si d’autres paramètres sont sélectionnés, le
symbole apparaît à l’écran.
Pour désactiver le verrouillage des commandes
Répétez la procédure ci-dessus et réglez (MENU VERROUILLE)
sur OFF.
:56 :76 POUR s BGR
SIMPLE EXPERT s BGR
RESTAURER
COULEUR ON
COULEUR
5000K 6500K 930 K0
50 K00
EN MARCHE
APRES CHAUFFA EG
SIMPLE EXPERT s BGR
RESTAURER
COULEUR
COULEUR
30
Réinitialisation des réglages
Ce moniteur offre trois méthodes de réinitialisation. Utilisez la
touche (réinitialisation) pour réinitialiser les réglages.
Réinitialisation d’un seul paramètre de réglage
Utilisez les touches
, m/M pour sélectionner le paramètre de
réglage que vous voulez réinitialiser et appuyez ensuite sur la
touche (réinitialisation).
Réinitialisation de toutes les données de réglage
pour le signal d’entrée en cours
Appuyez sur la touche (réinitialisation) lorsqu’aucun menu
n’est affiché à l’écran.
Attention que les paramètres suivants ne sont pas réinitialisés par
cette méthode:
• langue d’affichage des menus (page 23)
• mode de réglage dans le menu COULEUR (SIMPLE,
EXPERT, sRGB) (page 28)
• position d’affichage des menus (page 29)
• verrouillage des commandes (page 29)
Réinitialisation de toutes les données de réglage
pour tous les signaux d’entrée
Maintenez la touche (réinitialisation) enfoncée pendant au
moins deux secondes.
Remarque
La touche (réinitialisation) ne fonctionne pas lorsque
(
MENU
VERROUILLE) est réglé sur ON
.
Caractéristiques
techniques
Fonction d’économie d’énergie
Ce moniteur satisfait aux critères d’économie d’énergie VESA,
E
NERGY
S
TAR et NUTEK. Si aucun signal n’est reçu par le
moniteur en provenance de l’ordinateur raccordé, le moniteur
réduira automatiquement sa consommation d’énergie comme
illustré ci-dessous.
* Lorsque votre ordinateur entre en mode “inactif”, le signal d’entrée
vers le moniteur est coupé et l’indication “PAS ENTREE VIDEO”
apparaît à l’écran. Au bout de quelques secondes, le moniteur passe en
mode d’économie d’énergie.
Mode
d’alimentation
Consommation
d’énergie
L’indicateur
1
(alimentation)
fonctionnement
normal
≤ 160 W vert
inactif* ≤ 3 W ambre
hors tension < 1 W désactivé
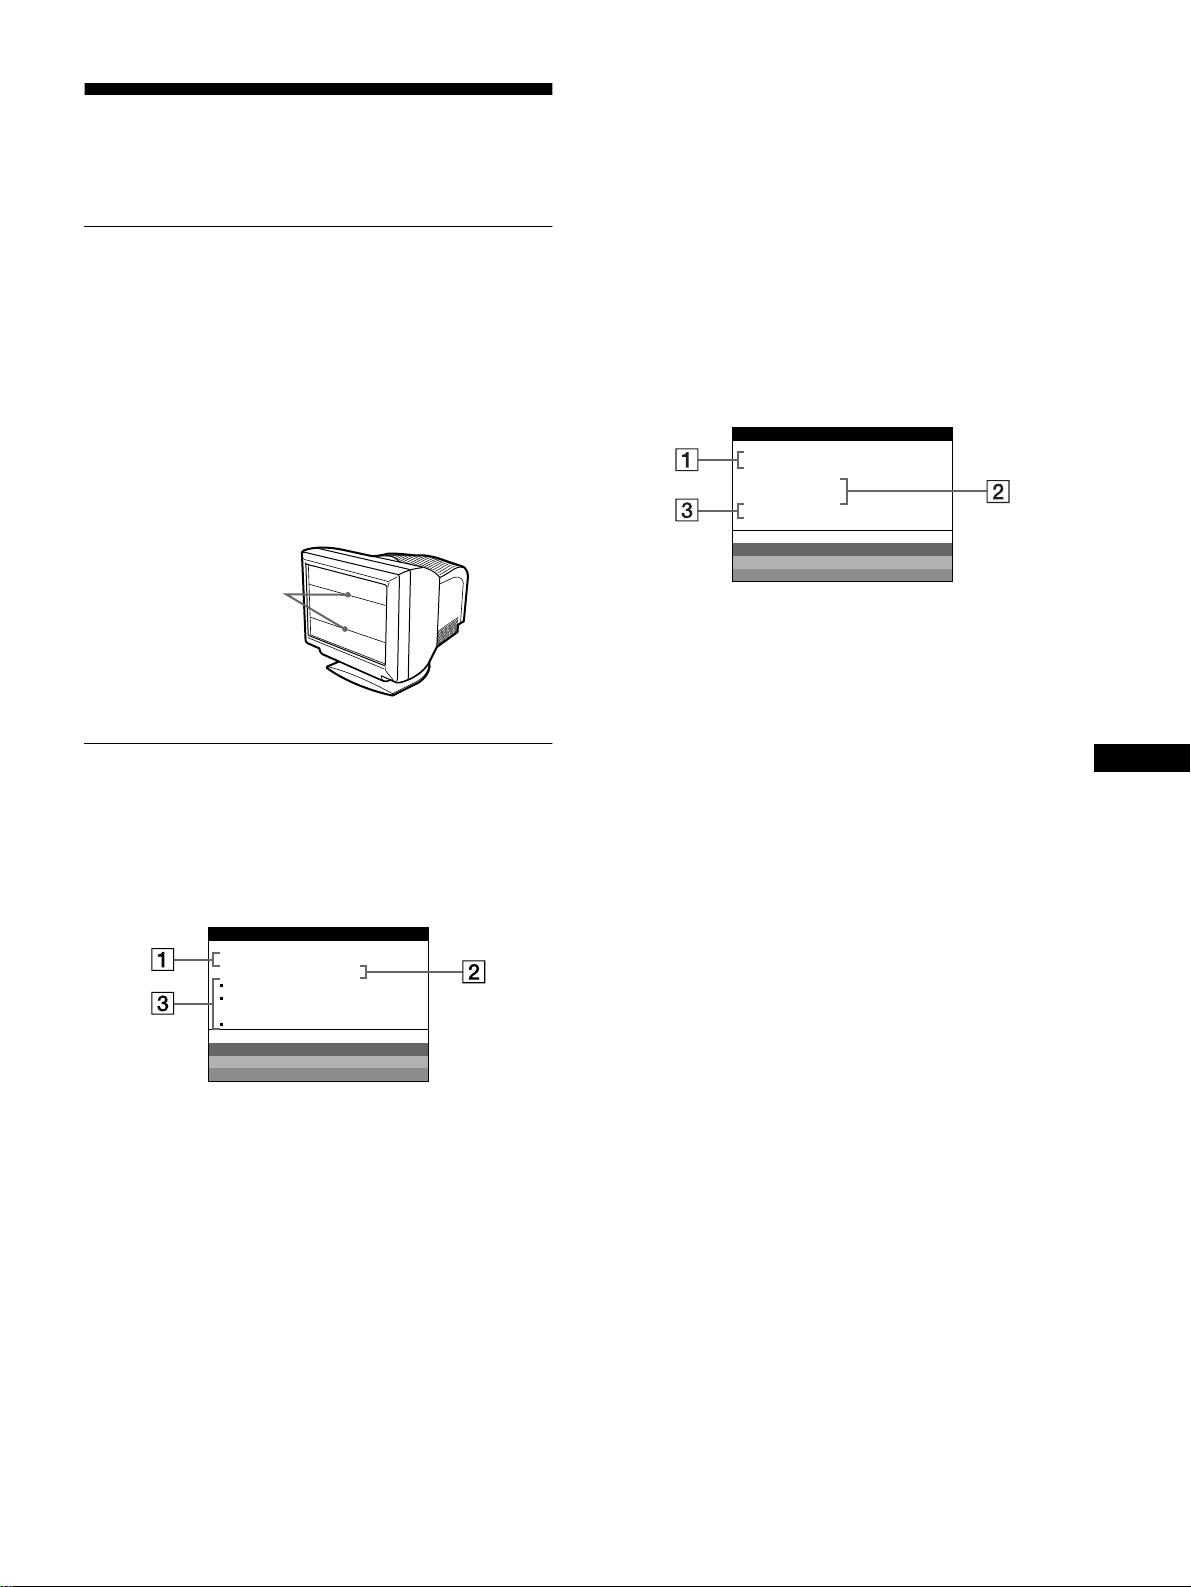
31
FR
Dépannage
Consultez cette section avant de faire appel au service
d’assistance technique.
Si de fines lignes apparaissent à
l’écran (fils d’amortissement)
Les lignes que vous apercevez sur votre écran sont une
caractéristique normale des moniteurs Trinitron et ne constituent
donc pas un dysfonctionnement. Il s’agit de l’ombre des fils
d’amortissement employés pour stabiliser la grille d’ouverture
qui sont le plus facilement visibles lorsque l’arrière-plan de
l’écran est clair (généralement blanc). La grille d’ouverture est
l’élément essentiel qui rend les tubes image Trinitron uniques en
permettant le passage d’une plus grande quantité de lumière vers
l’écran, ce qui garantit une image plus lumineuse et plus finement
détaillée.
Messages affichés à l’écran
Si le signal d’entrée présente une anomalie, l’un des messages
suivants apparaît à l’écran.
Si l’indication PAS ENTREE VIDEO apparaît à
l’écran
1
11
1 Le connecteur sélectionné
Ce message indique le connecteur sélectionné (ENTREE 1 ou
ENTREE 2).
2
22
2 La condition du signal d’entrée
PAS ENTREE VIDEO
Indique qu’aucun signal n’est entré, ou qu’aucun signal n’est
entré via le connecteur sélectionné.
3
33
3 Les remèdes
Un ou plusieurs des messages suivants peuvent apparaître sur
l’écran.
• Si ACTIVEZ-LE VIA LE PC apparaît à l’écran, appuyez
sur une touche quelconque du clavier de l’ordinateur et
vérifiez si la carte graphique de votre ordinateur est
complètement enfoncée dans la fente de bus correcte.
• Si VERIF SELECT ENTREE apparaît à l’écran, changez le
signal d’entrée (page 23).
• Si TESTER CABLES ECRAN apparaît à l’écran, vérifiez
si le moniteur est correctement raccordé à l’ordinateur
(page 22).
Si HORS PLAGE DE BALAYAGE apparaît à
l’écran
1
11
1 Le connecteur sélectionné et les fréquences du
signal d’entrée en cours
Ce message indique le connecteur sélectionné (ENTREE 1 ou
ENTREE 2). Si le moniteur reconnaît les fréquences du signal
d’entrée en cours, les fréquences horizontale et verticale sont
également affichées.
2
22
2 La condition du signal d’entrée
HORS PLAGE DE BALAYAGE
Indique que le signal entré n’est pas supporté par les
spécifications du moniteur.
3
33
3 Les remèdes
CHANGER SYNC SIGNAL apparaît à l’écran. Si vous
remplacez un ancien moniteur par ce moniteur, rebranchez
l’ancien moniteur. Ajustez ensuite la carte graphique de
l’ordinateur sur une fréquence horizontale comprise entre
30 et 121 kHz et une fréquence verticale entre 48 et 160 Hz.
Pour plus d’informations, voir “Symptômes et remèdes” à la
page 32.
Fils d’amortissement
ECRAN FONCT IONNE
ENTREE 1 :
PAS ENTREE VIDEO
ACTIVEZ-LE VIA LE CP
VERI F SELECT ENTREE
TESTER CABLES ECRAN
WH I T E
RED
GREEN
BLUE
INFORMAT IONS
1:130.0kHz/ H57z
HORS PLAGE
DE BALAYAGE
CHANGER SYNC SIGNAL
WH I T E
RED
GREEN
BLUE
ENTREE
ECRAN FONCT IONNE
INFORMAT IONS

32
Symptômes et remèdes
Si le problème est provoqué par l’ordinateur ou tout autre appareil raccordé, veuillez vous référer au mode d’emploi de l’appareil raccordé.
Utilisez la fonction d’autodiagnostic (page 34) si les recommandations suivantes ne vous permettent pas de résoudre le problème survenu.
Symptôme Vérifiez
Pas d’image
Si l’indicateur 1 (alimentation) ne
s’allume pas
• Vérifiez si le cordon d’alimentation est correctement branché.
• Vérifiez si le commutateur 1 (alimentation) est réglé sur la position “on”.
Si le message PAS ENTREE
VIDEO apparaît à l’écran ou si
l’indicateur 1 (alimentation) est
allumé en ambre ou alterne entre le
vert et l’ambre
• Vérifiez si le réglage de la touche est correct (page 23).
• Vérifiez si les broches du connecteur d’entrée vidéo ne sont pas pliées ou enfoncées.
xProblèmes causés par l’ordinateur ou tout autre appareil raccordé
• L’ordinateur se trouve en mode d’économie d’énergie. Appuyez sur une touche
quelconque du clavier de l’ordinateur.
• Vérifiez si l’ordinateur est sous tension (“on”).
• Vérifiez si la carte graphique est complètement enfoncée dans la fente de bus correcte.
Si les messages PAS ENTREE
VIDEO et TESTER CABLES
ECRAN apparaissent sur l’écran ou
si l’indicateur 1 (alimentation) est
allumé en ambre ou alterne entre le
vert et l’ambre
• Vérifiez si le câble de signal vidéo est correctement raccordé et si toutes les fiches sont
fermement enfichées sur leurs prises (page 22).
• Vérifiez si les broches du connecteur d’entrée vidéo ne sont pas pliées ou enfoncées.
• Vérifiez si le réglage de la touche est correct (page 23).
xProblèmes causés par l’ordinateur ou tout autre appareil raccordé
• Vérifiez si la carte graphique est complètement enfoncée dans la fente de bus correcte.
Si le message HORS PLAGE DE
BALAYAGE apparaît à l’écran
xProblèmes causés par l’ordinateur ou tout autre appareil raccordé
• Vérifiez si la plage de fréquence vidéo correspond aux spécifications du moniteur. Si vous
remplacez un ancien moniteur par ce moniteur, reconnectez l’ancien moniteur et ajustez la
plage de fréquence comme suit.
Horizontale: 30 à 121 kHz
Verticale: 48 à 160 Hz
Si aucun message ne s’affiche et si
l’indicateur 1 (alimentation) est vert
ou clignote en ambre
• Activez la fonction d’autodiagnostic (page 34).
L’image scintille, sautille, oscille
ou est brouillée
• Isolez et éliminez les sources potentielles de champs électriques ou magnétiques tels que
d’autres moniteurs, des imprimantes laser, des ventilateurs électriques, des lampes
fluorescentes ou des téléviseurs.
• Éloignez le moniteur des lignes à haute tension ou placez un blindage magnétique à
proximité du moniteur.
• Branchez le moniteur sur une autre prise secteur, de préférence raccordée à un autre
circuit.
• Faites pivoter le moniteur de 90° vers la gauche ou la droite.
xProblèmes causés par l’ordinateur ou tout autre appareil raccordé
• Vérifiez le réglage adéquat pour le moniteur dans le mode d’emploi de votre carte
graphique.
• Assurez-vous que le mode graphique et la fréquence du signal d’entrée sont supportés par
ce moniteur. Même si la fréquence est comprise dans la plage adéquate, il arrive que
certaines cartes vidéo présentent une impulsion de synchronisation trop étroite pour que le
moniteur puisse se synchroniser correctement.
• Ajustez le taux de régénération de l’ordinateur (fréquence verticale) de façon à obtenir la
meilleure image possible.
L’image est floue • Ajustez la luminosité et le contraste (page 25).
• Démagnétisez le moniteur* (page 29).
• Si SUPPRIMER MOIRE est réglé sur ON, il se peut que l’image devienne floue.
Réduisez l’effet de suppression du moiré ou réglez SUPPRIMER MOIRE sur OFF
(page 27).
Des images fantômes
apparaissent
• N’utilisez pas de prolongateurs de câble vidéo et/ou de boîtiers de commutation vidéo.
• Vérifiez si toutes les fiches sont fermement connectées dans leurs prises respectives.
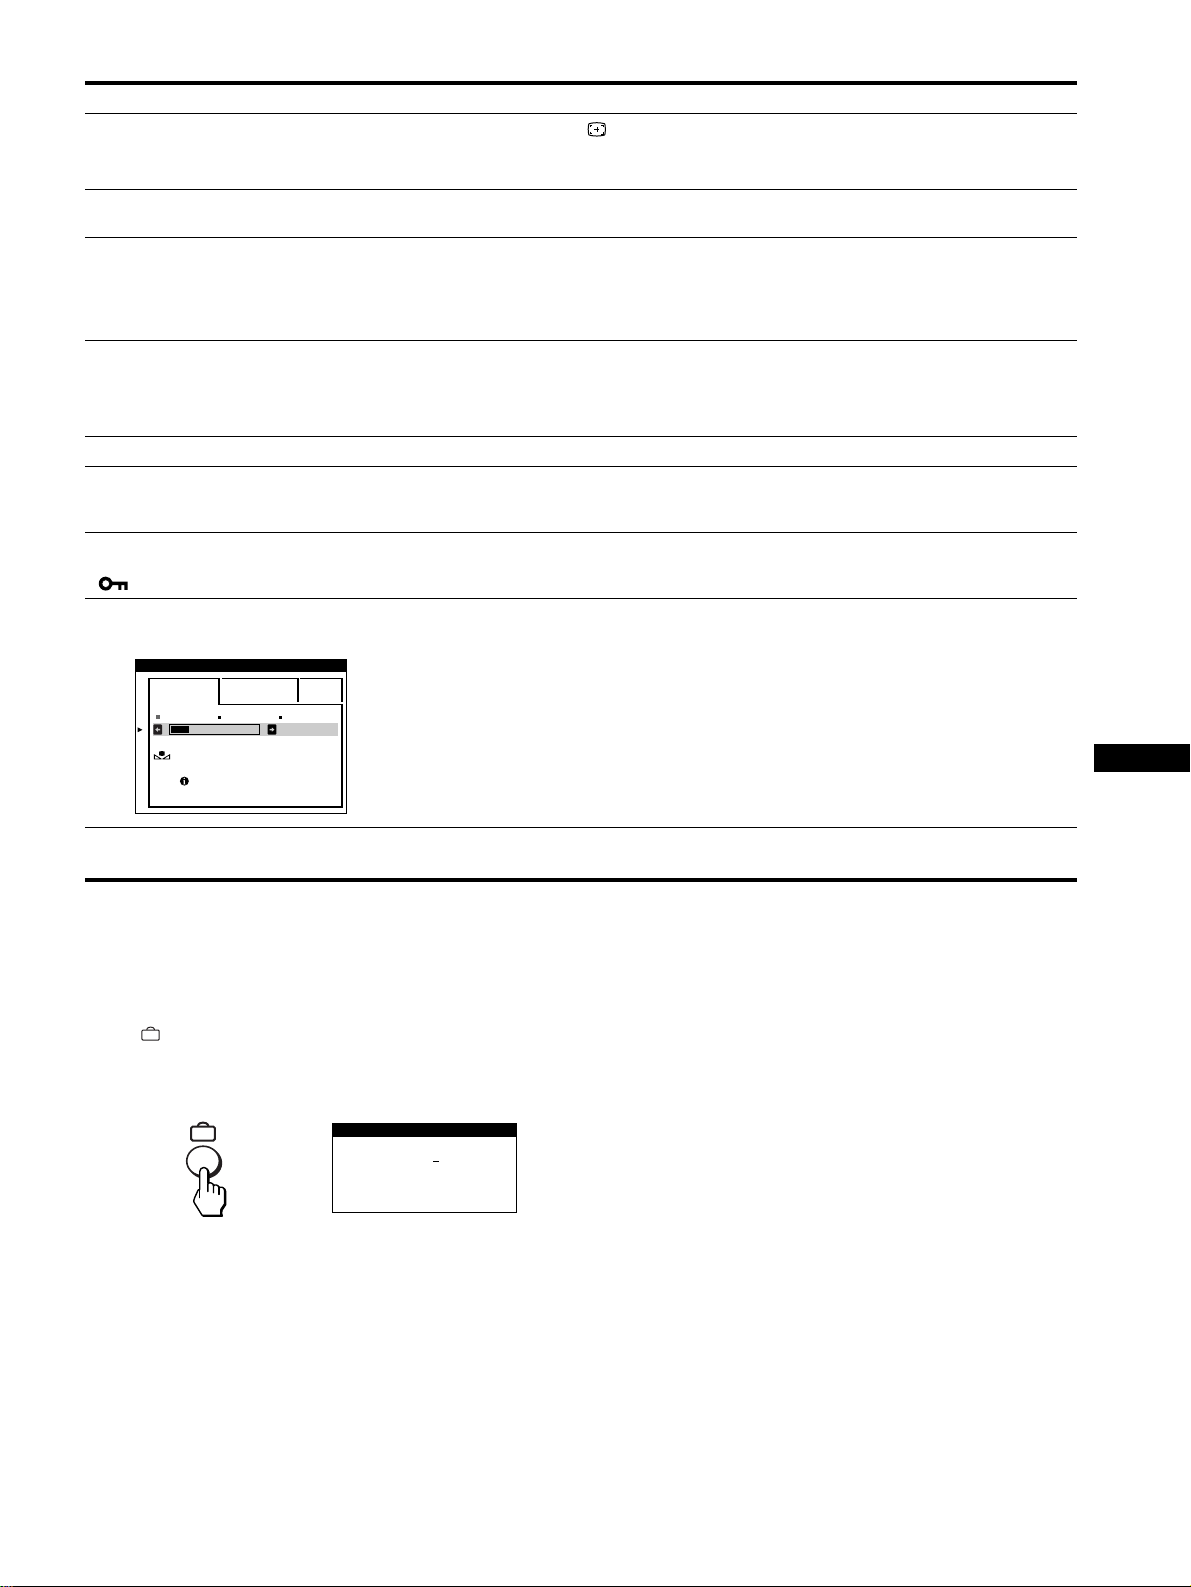
33
FR
* Si un second cycle de démagnétisation s’avère nécessaire, laissez s’écouler un intervalle de 20 minutes pour obtenir de meilleurs résultats. Un bruit de
souffle peut se faire entendre, mais il ne s’agit pas d’un dysfonctionnement.
Affichage de la désignation, du numéro de série et
de la date de fabrication de ce moniteur.
Pendant que le moniteur reçoit un signal vidéo, appuyez sur la
touche et maintenez-la enfoncée pendant au moins cinq
secondes pour afficher la case d’informations relatives à ce
moniteur.
Si le problème persiste, appelez votre technicien d’entretien et
communiquez-lui les informations suivantes.
• Désignation du modèle: GDM-5410
• Numéro de série
• Marque et spécifications de votre ordinateur et de votre carte
graphique.
L’image n’est pas centrée ou de
taille incorrecte
• Appuyez sur la touche (page 23).
• Ajustez la taille (page 26) ou le centrage (page 26) de l’image. Attention que certains
modes vidéo ne remplissent pas l’écran jusqu’aux bords.
Les bords de l’image sont
incurvés
• Ajustez la géométrie (page 26).
Un motif ondulatoire ou elliptique
(moiré) est visible
• Mettez SUPPRIMER MOIRE sur ON et ajustez le degré de suppression de moiré jusqu’à
ce que le moiré ait été réduit au minimum (page 27).
xProblèmes causés par l’ordinateur ou tout autre appareil raccordé
• Changez le motif de votre bureau.
Les couleurs ne sont pas
uniformes
• Démagnétisez le moniteur* (page 29). Si vous placez à côté du moniteur un appareil qui
génère un champ magnétique, comme un haut-parleur, ou si vous changez l’orientation du
moniteur, il se peut que les couleurs perdent leur uniformité.
• Ajustez l’alignement (page 27).
Le blanc n’est pas blanc • Ajustez la température de couleur (page 28).
Les lettres et les lignes sont
soulignées d’une ombre rouge ou
bleue
• Ajustez la convergence (page 27).
Les touches du moniteur sont
inopérantes
( apparaît sur l’écran)
• Si la fonction de verrouillage des commandes est réglée sur ON, réglez-la sur OFF
(page 29).
La fonction RESTAURER
COULEURS est inopérante
• Avant d’utiliser cette fonction, le moniteur doit se trouver en mode de fonctionnement
normal (indicateur d’alimentation vert allumé) depuis au moins 30 minutes. Pour plus
d’informations sur l’utilisation de la fonction RESTAURER COULEUR, voir page 29.
• Ajustez les réglages du mode d’économie d’énergie de l’ordinateur de façon à garder le
moniteur en mode de fonctionnement normal pendant plus de 30 minutes.
• Le moniteur peut progressivement perdre sa capacité à exécuter cette fonction en raison
du vieillissement naturel du tube image.
Un souffle est audible juste après
la mise sous tension
• C’est le son provoqué par le cycle de démagnétisation automatique. Lorsqu’il est mis sous
tension, le moniteur est automatiquement démagnétisé pendant deux secondes.
Symptôme Vérifiez
5000K 6500K 930 K0
50 K00
EN MARCHE
APRES CHAUFFA EG
SIMPLE EXPERT s BGR
RESTAURER
COULEUR
COULEUR
SER NO
:
1234567
MODEL
:
GDM 5410
MANUFACTURED
: 1999-52
INFORMATIONS
Exemple
b

34
Fonction d’autodiagnostic
Ce moniteur est équipé d’une fonction d’autodiagnostic. En cas
de problème avec votre moniteur ou votre (vos) ordinateur(s),
l’écran devient blanc et l’indicateur 1 (alimentation) s’allume en
vert ou clignote en ambre. Si l’indicateur 1 (alimentation)
s’allume en ambre, c’est que l’ordinateur se trouve en mode
d’économie d’énergie. Appuyez sur une touche quelconque du
clavier.
Si l’indicateur
1
(alimentation) est allumé en vert
1
Débranchez les fiches des connecteurs d’entrée
vidéo 1 et 2 ou mettez le(s) ordinateur(s)
connecté(s) hors tension.
2
Appuyez deux fois sur la touche 1 (alimentation)
pour mettre le moniteur hors et sous tension.
3
Appuyez sur la touche , pendant 2 secondes
avant que le moniteur passe en mode d’économie
d’énergie.
Si les quatre barres de couleur apparaissent (blanc, rouge, vert,
bleu), c’est que le moniteur fonctionne correctement.
Reconnectez les câbles d’entrée vidéo et vérifiez la condition de
votre (vos) ordinateur(s).
Si la barre de couleur n’apparaît pas, c’est probablement en raison
d’une défaillance du moniteur. Informez votre technicien
d’entretien de la condition du moniteur.
Si l’indicateur
1
(alimentation) clignote en ambre
Appuyez deux fois sur la touche 1 (alimentation) pour
mettre le moniteur hors et puis sous tension.
Si l’indicateur 1 (alimentation) s’allume en vert, c’est que le
moniteur fonctionne correctement.
Si l’indicateur 1 (alimentation) clignote toujours, c’est
probablement parce qu’il y a une anomalie au niveau du moniteur.
Comptez le nombre de secondes entre les clignotements ambres
de l’indicateur 1 (alimentation) et informez votre technicien
d’entretien de la condition du moniteur. Notez également la
désignation du modèle et le numéro de série de votre moniteur.
Notez également la marque et le modèle de votre ordinateur et de
votre carte vidéo.
Spécifications
Tube cathodique Pas d’ouverture de grille de 0,24 mm
21 pouces mesurés en diagonale
Déflexion de 90 degrés
Trinitron FD
Taille de l’image affichée Approx. 403,8
×
302,2 mm (l/h)
Zone de visualisation de 19,8"
Résolution recommandée Horizontale: 1280 points
Verticale: 1024 ligne
Zone d’image standard Approx. 388
×
291 mm (l/h)
ou
Approx. 364
×
291 mm (l/h)
Fréquence de déflexion* Horizontale: 30 à 121 kHz
Verticale: 48 à 160 Hz
Tension/courant d’entrée 100 à 240 V, 50 – 60 Hz,
2,0 – 1,0 A
Consommation électrique Approx. 145 W
Dimensions Approx
. 501
×
498
×
498 mm
(
l/h/p
)
Masse Approx. 32 kg (70 lb 9 oz)
Plug & Play DDC1/2B/2Bi, GTF**
* Condition de synchronisation horizontale et verticale
• La largeur de synchronisation horizontale doit être
supérieure à 4,8% de la durée horizontale totale ou 0,8 µs,
suivant la valeur la plus grande.
• La largeur de suppression horizontale doit être supérieure à
2,3 µsec.
• La largeur de suppression verticale doit être supérieure à
450 µsec.
** Si le signal d’entrée est compatible avec la Generalized
Timing Formula (GTF), la fonction GTF du moniteur fournit
automatiquement une image optimale pour l’écran.
La conception et les spécifications sont sujettes à modifications
sans préavis.
L’indicateur
1
(alimentation)
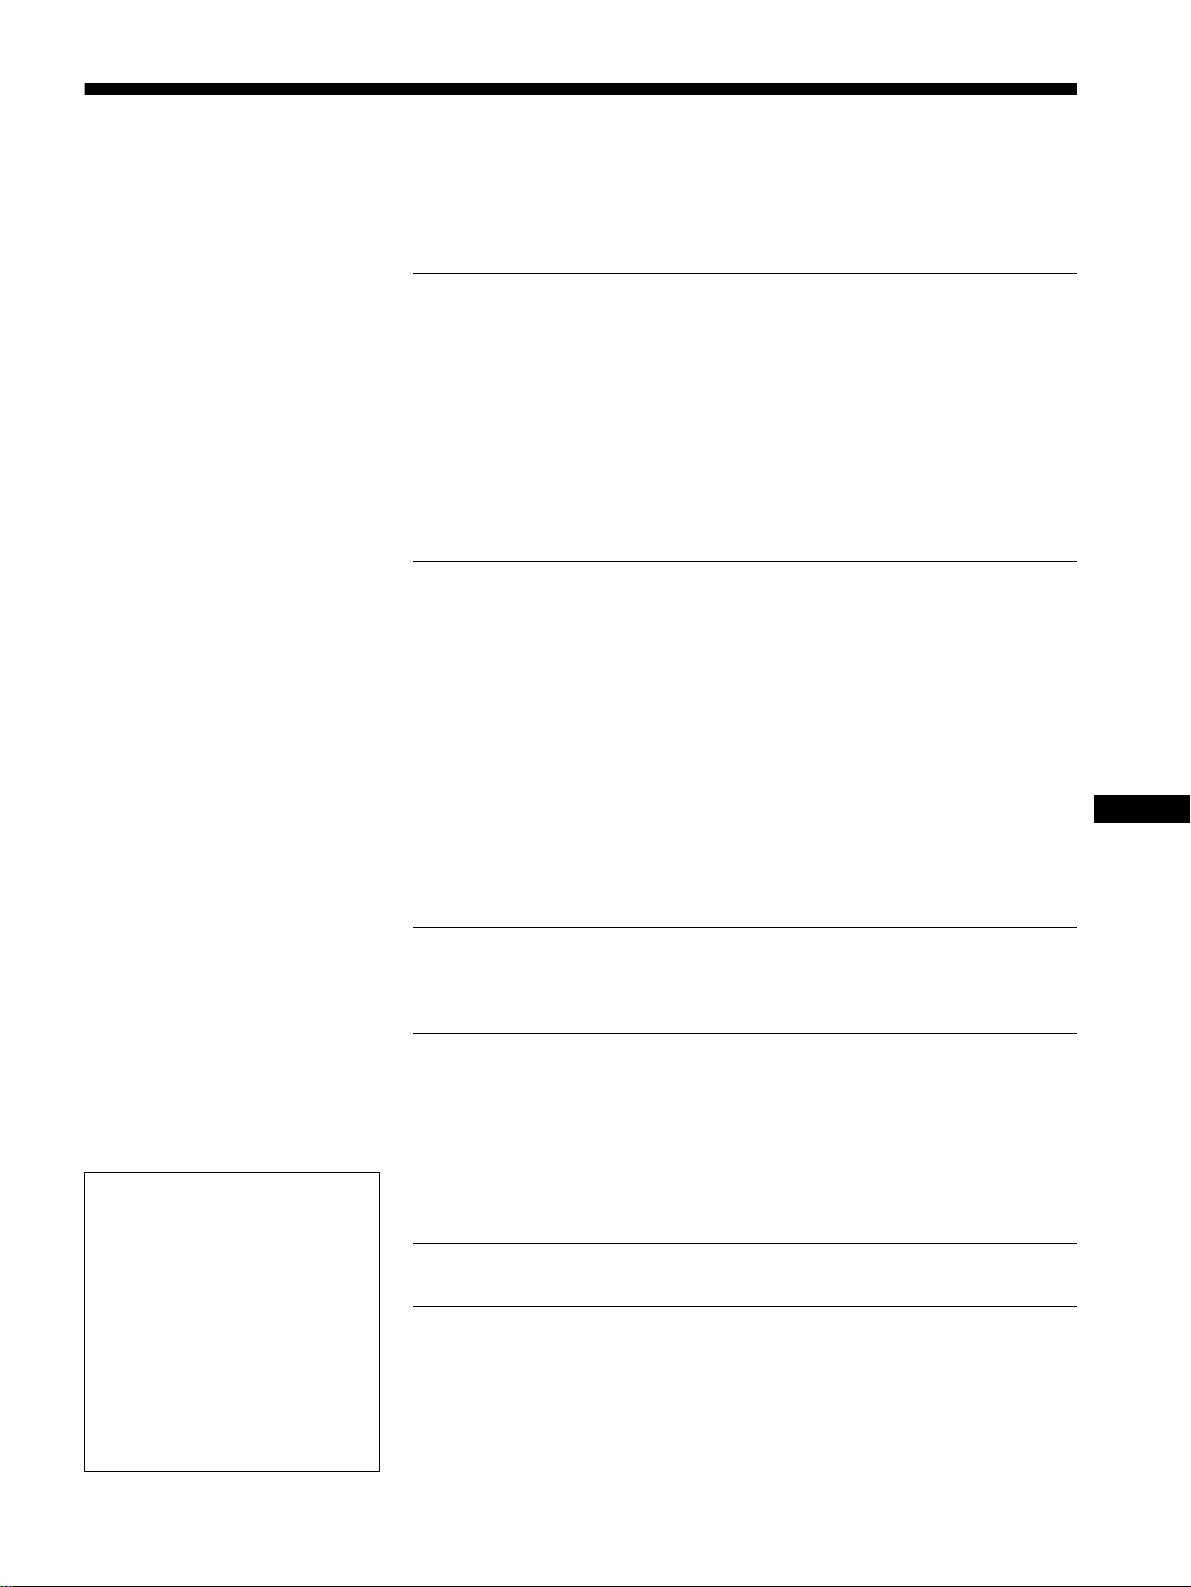
35
Inhalt
DE
• VESA und DDC
sind Warenzeichen
der Video Electronics Standard
Association.
•
E
NERGY
S
TAR ist ein eingetragenes
Warenzeichen in den USA.
• Alle anderen in diesem Handbuch
erwähnten Produktnamen können
Warenzeichen oder eingetragene
Warenzeichen der jeweiligen
Eigentümer sein.
• Im Handbuch sind die Warenzeichen
und eingetragenen Warenzeichen nicht
überall ausdrücklich durch „
“ und „
“
gekennzeichnet.
Sicherheitsmaßnahmen . . . . . . . . . . . . . . . . . . . . . . . . . . . . . . . . . 36
Lage und Funktion der Teile und Bedienelemente. . . . . . . . . . . . . 37
Anschließen des Geräts . . . . . . . . . . . . . . . . . . . . . . . . .38
Schritt 1:
Abnehmen der hinteren Abdeckung. . . . . . . . . . . . . . . . 38
Schritt 2:
Anschließen des Monitors an den Computer. . . . . . . . . 38
Schritt 3:
Anschließen des Netzkabels . . . . . . . . . . . . . . . . . . . . . 38
Schritt 4:
Anbringen der hinteren Abdeckung . . . . . . . . . . . . . . . . 38
Schritt 5:
Einschalten von Monitor und Computer. . . . . . . . . . . . . 38
Auswählen der Sprache für die Bildschirmmenüs (LANGUAGE). . 39
Auswählen des Eingangssignals . . . . . . . . . . . . . . . . . . . . . . . . . . 39
Automatisches Einstellen der Größe und Zentrierung des Bildes . 39
Einstellen des Monitors. . . . . . . . . . . . . . . . . . . . . . . . . .40
Navigieren in den Menüs . . . . . . . . . . . . . . . . . . . . . . . . . . . . . . . . 40
Einstellen von Helligkeit und Kontrast . . . . . . . . . . . . . . . . . . . . . . 41
Einstellen der Bildgröße (GRÖSSE/BILDLG). . . . . . . . . . . . . . . . . 42
Einstellen der Bildposition (GRÖSSE/BILDLG) . . . . . . . . . . . . . . . 42
Vergrößern oder Verkleinern des Bildes (ZOOM) . . . . . . . . . . . . . 42
Einstellen der Form des Bildes (GEOMETRIE) . . . . . . . . . . . . . . . 42
Einstellen der Konvergenz (KONVERGENZ) . . . . . . . . . . . . . . . . . 43
Einstellen der Bildqualität (BILD) . . . . . . . . . . . . . . . . . . . . . . . . . . 43
Einstellen der Farben des Bildes (FARBE). . . . . . . . . . . . . . . . . . . 44
Weitere Einstellungen (OPTION) . . . . . . . . . . . . . . . . . . . . . . . . . . 45
Zurücksetzen der Einstellungen . . . . . . . . . . . . . . . . . . . . . . . . . . . 46
Technische Merkmale . . . . . . . . . . . . . . . . . . . . . . . . . . .46
Die Energiesparfunktion . . . . . . . . . . . . . . . . . . . . . . . . . . . . . . . . . 46
Störungsbehebung . . . . . . . . . . . . . . . . . . . . . . . . . . . . .47
Wenn auf dem Bildschirm dünne Linien (Dämpfungsdrähte)
erscheinen . . . . . . . . . . . . . . . . . . . . . . . . . . . . . . . . . . . . . . . . . . . 47
Bildschirmmeldungen . . . . . . . . . . . . . . . . . . . . . . . . . . . . . . . . . . . 47
Symptome für Fehler und Abhilfemaßnahmen. . . . . . . . . . . . . . . . 48
Selbstdiagnosefunktion. . . . . . . . . . . . . . . . . . . . . . . . . . . . . . . . . . 50
Technische Daten . . . . . . . . . . . . . . . . . . . . . . . . . . . . . .50
Appendix. . . . . . . . . . . . . . . . . . . . . . . . . . . . . . . . . . . . . . . i
TCO’99 Eco-document . . . . . . . . . . . . . . . . . . . . . . . . . . . . . . . . . . . .i

36
Sicherheitsmaßnahmen
Warnhinweis zum Netzanschluß
Verwenden Sie das für die Stromversorgung in Ihrem Land
geeignete Netzkabel.
• Warten Sie nach dem Ausschalten des Geräts mindestens
30 Sekunden, bevor Sie das Netzkabel lösen. In dieser Zeit
kann sich die statische Elektrizität auf der Oberfläche des
Bildschirms entladen.
• Wenn Sie das Gerät einschalten, wird der Bildschirm etwa
2 Sekunden lang entmagnetisiert. Dadurch entsteht um den
Bildschirm ein starkes magnetisches Feld, das Daten auf
Magnetbändern, Disketten oder anderen Datenträgern in der
Nähe beschädigen kann. Legen Sie magnetische Datenträger
und Bänder/Disketten daher nicht zu nahe bei diesem Monitor
ab.
Aufstellung
Stellen Sie den Monitor nicht an folgenden Standorten auf:
• auf Oberflächen wie Teppichen oder Decken oder in der Nähe
von Materialien wie Gardinen und Wandbehängen, die die
Lüftungsöffnungen blockieren könnten
• in der Nähe von Wärmequellen wie Heizkörpern oder
Warmluftauslässen oder an einem Ort, an dem der Monitor
direktem Sonnenlicht ausgesetzt ist
• an einem Ort, an dem der Monitor starken
Temperaturschwankungen ausgesetzt ist
• an einem Ort, an dem der Monitor mechanischen Vibrationen
oder Stößen ausgesetzt ist
• auf einer instabilen Oberfläche
• in der Nähe anderer Geräte, die ein starkes Magnetfeld
generieren, wie zum Beispiel ein Transformator oder eine
Hochspannungsleitung
• in der Nähe von oder auf einer elektrisch geladenen Metallfläche
Wartung
• Reinigen Sie den Bildschirm mit einem weichen Tuch. Wenn Sie
ein Glasreinigungsmittel verwenden, achten Sie darauf, daß es
keine Antistatik-Lösung oder ähnliche Zusätze enthält, da diese zu
Kratzern auf der Beschichtung des Bildschirms führen könnten.
• Berühren Sie die Bildschirmoberfläche nicht mit scharfen,
rauhen oder spitzen Gegenständen wie zum Beispiel
Kugelschreibern oder Schraubenziehern. Andernfalls könnte
die Bildschirmoberfläche zerkratzt werden.
• Reinigen Sie Gehäuse, Bedienfeld und Bedienelemente mit
einem weichen Tuch, das Sie leicht mit einem milden
Reinigungsmittel angefeuchtet haben. Verwenden Sie keine
Scheuermittel, Scheuerschwämme oder Lösungsmittel wie
Alkohol oder Benzin.
Transport
Wenn Sie den Monitor zur Reparatur oder bei einem Umzug
transportieren müssen, verpacken Sie ihn mit Hilfe der
Originalverpackungsmaterialien wieder im Originalkarton.
Halten Sie den Monitor nicht an der hinteren Abdeckung wie in
der Abbildung unten dargestellt, da sich die hintere Abdeckung
dabei lösen könnte.
Der dreh- und neigbare Ständer
Mit dem dreh- und neigbaren Ständer können Sie den Monitor
innerhalb der unten abgebildeten Winkel nach Bedarf einstellen.
Wenn Sie den Monitor drehen oder neigen, stützen Sie ihn bitte
mit beiden Händen unten ab.
USA, Kanada,
Ta iw an ,
Korea, Japan
Kontinental-
europa
Großbritannien,
Irland
Australien,
Neuseeland
Steckertyp
NEMA S-15P
Steckertyp
CEE7/VII
(Schuko)
Steckertyp
B S 1363
Steckertyp
SAA AS 3112
Kabeltyp
SJT
Kabeltyp
HAR(HO5VV
-F3G1.0)
Kabeltyp
HAR(HO5VV
-F3G1.0)
Kabeltyp
CDB03PLP
Mindestwerte
(Kabel)
10 A/125 V
18/3AWG
Mindestwerte
(Kabel)
10 A/250 V
Mindestwerte
(Kabel)
10 A/250 V
Mindestwerte
(Kabel)
10 A/250 V
Kabellänge
(+/– 0,1 m)
2 m
Kabellänge
(+/– 0,1 m)
2,5 m
Kabellänge
(+/– 0,1 m)
2,5 m
Kabellänge
(+/– 0,1 m)
2,5 m
Sicherheits-
zertifizierung
UL/CSA
Sicherheits-
zertifizierung
HAR
Sicherheits-
zertifizierung
BSI, ASTA
Sicherheits-
zertifizierung
Energiebehörde
von
Neusüdwales
Universalstromversorgung mit automatischer Anpassung
arbeitet überall. Der Monitor paßt sich an, wenn ein für die
lokale Stromversorgung geeignetes Netzkabel und ein
entsprechender Stecker verwendet werden.
Die Netzsteckdose sollte sich in der Nähe des Geräts befinden
und leicht zugänglich sein.
115 Volt 230 Volt
(nicht bei
Standardkabel)
CEE-22-Kabel,
weiblicher Stecker
(alle Netzkabel)
90°
5°
90°
15°
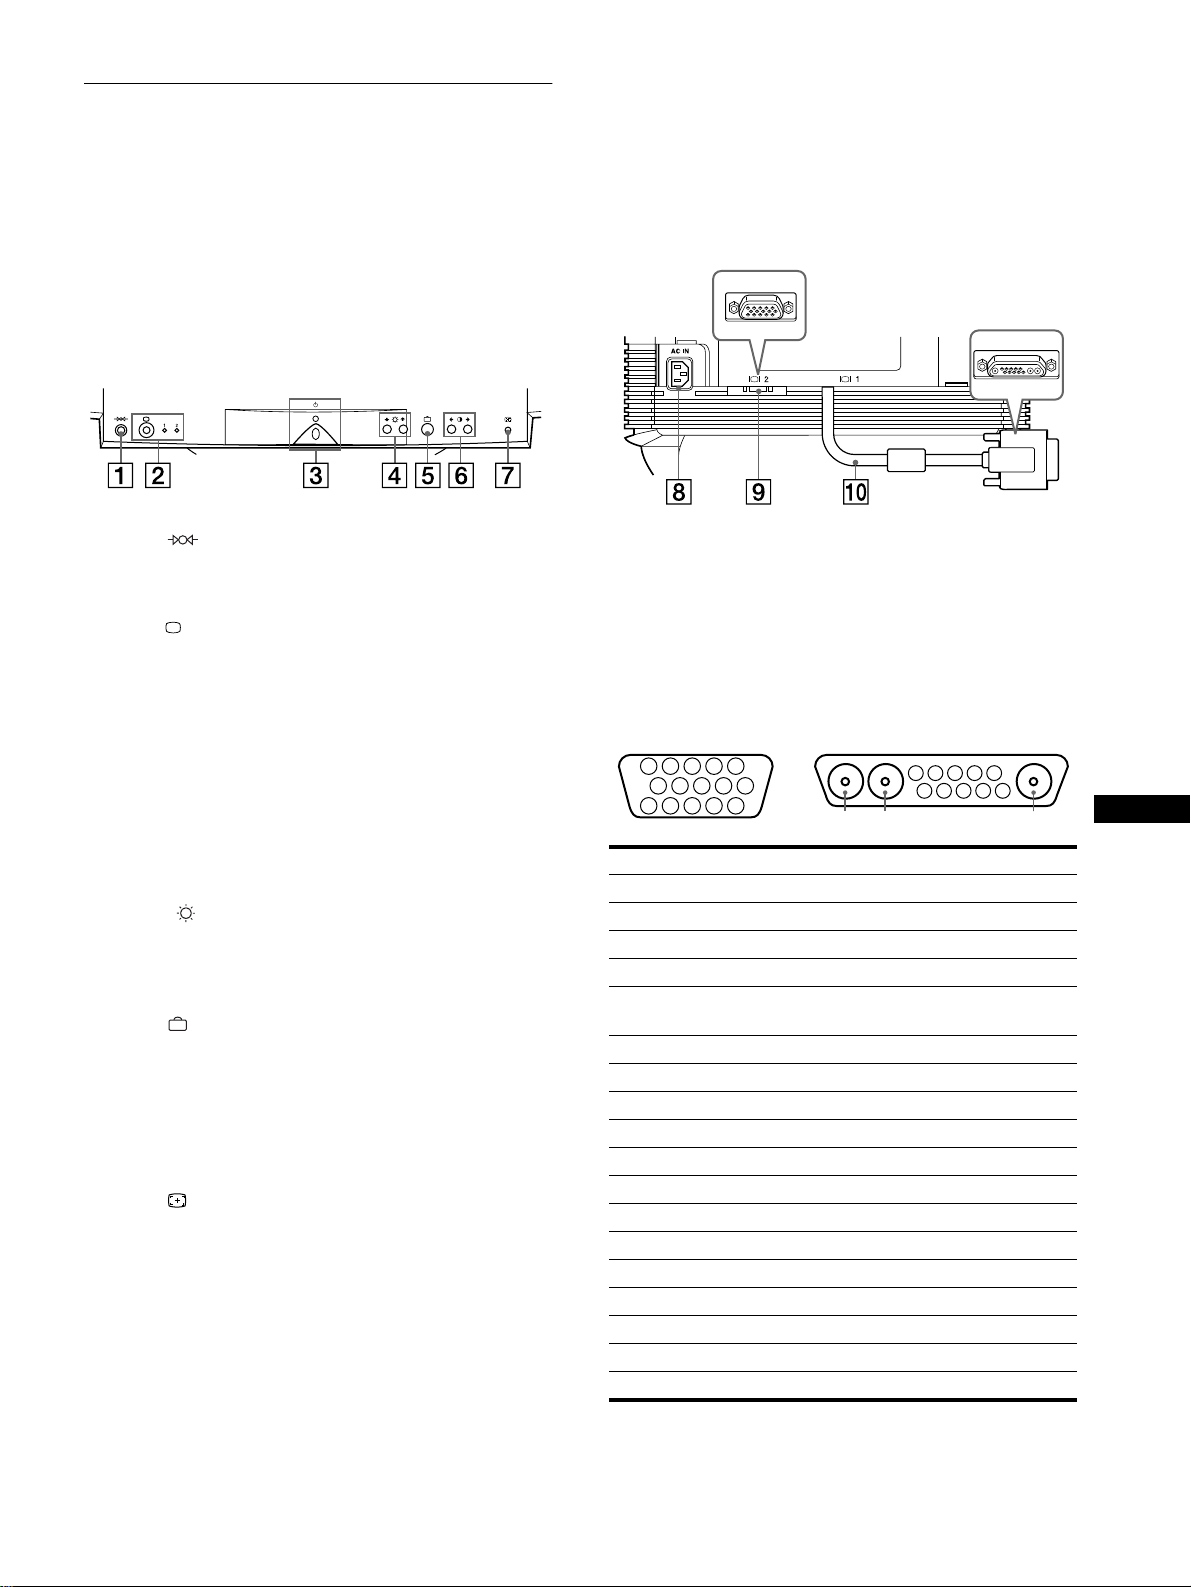
37
DE
Lage und Funktion der Teile und
Bedienelemente
Weitere Informationen finden Sie auf den in Klammern
angegebenen Seiten.
1
11
1 Taste (Zurücksetzen) (Seite 46)
Diese Taste dient zum Zurücksetzen der Werte auf die
werkseitigen Einstellungen.
2
22
2 Taste (Eingang) und Anzeigen 1 (13W3) / 2 (HD15)
(Seite 39)
Diese Taste dient zum Auswählen des Videoeingangssignals
von Eingang 1 (13W3) oder 2 (HD15).
Mit jedem Tastendruck wechseln das Eingangssignal und die
entsprechende Anzeige.
3
33
3 Netzschalter und -anzeige 1 (Seite 38, 46, 50)
Dieser Schalter dient zum Ein- und Ausschalten des
Monitors. Die Netzanzeige leuchtet grün, wenn der Monitor
eingeschaltet ist, und blinkt grün und gelb bzw. leuchtet gelb,
wenn sich der Monitor im Energiesparmodus befindet.
4
44
4 Tasten (Helligkeit) m/M (Seite 41)
Diese Tasten dienen zum Aufrufen des Menüs
HELLIGKEIT/KONTRAST und fungieren beim Auswählen
von Menüoptionen als Tasten mîM.
5
55
5 Taste (Menü) (Seite 41)
Diese Taste dient zum Aufrufen des Hauptmenüs.
6
66
6 Tasten 6 (Kontrast) </, (Seite 41)
Diese Tasten dienen zum Aufrufen des Menüs
HELLIGKEIT/KONTRAST und fungieren beim Einstellen
von Optionen als Tasten </,.
7
77
7 Taste ASC (Größe/Zentrierung automatisch
einstellen) (Seite 39)
Diese Taste dient zum automatischen Einstellen der Größe
und Zentrierung der Bilder.
8
88
8 Netzeingang AC IN (Seite 38)
Dieser Anschluß dient zur Stromversorgung des Monitors.
9
99
9 Videoeingang 2 (HD15) (Seite 38)
Dieser Anschluß dient zum Einspeisen von RGB-
Videosignalen (0,700 Vp-p, positiv) und
Synchronisationssignalen.
0
00
0 Videoeingang 1 (13W3) (Seite 38)
Dieser Anschluß dient zum Einspeisen von RGB-
Videosignalen (0,700 Vp-p, positiv) und
Synchronisationssignalen.
* DDC (Display Data Channel) ist ein Standard der VESA.
** Stifte haben eine Doppelfunktion als kombinierter Sync-Eingang und
als H. Sync-Eingang, wenn V. Sync an Stift Nr. 7 vorhanden ist.
Rückseite (bei geöffneter Abdeckung)Vorderseite
Nr. 9
99
9 Signal 0
00
0 Signal
A1 ––– Rot
A2 ––– Grün
A3 ––– Blau
1 Rot Datentakt (SCL)*
2Grün
(Grünsignal mit Synchronisation)
DDC + 5V*
3Blau –––
4 ID (Masse) DDC-Masse*
5 DDC-Masse* C.Sync**
6 Masse Rot
Bidirektionale Daten (SDA)*
7 Masse Grün V. Sync
8 Masse Blau ID (100
Ω
)
9 DDC + 5V* ID (100
Ω
)
10 Masse Masse
11 ID (Masse) –––
12
Bidirektionale Daten (SDA)*
–––
13 H. Sync –––
14 V. Sync –––
15 Datentakt (SCL)* –––
5 4 3 2
1
678910
11
A3
12131415
5 4 3 2
1
678910
A2 A1
9
HD15
0
13W3
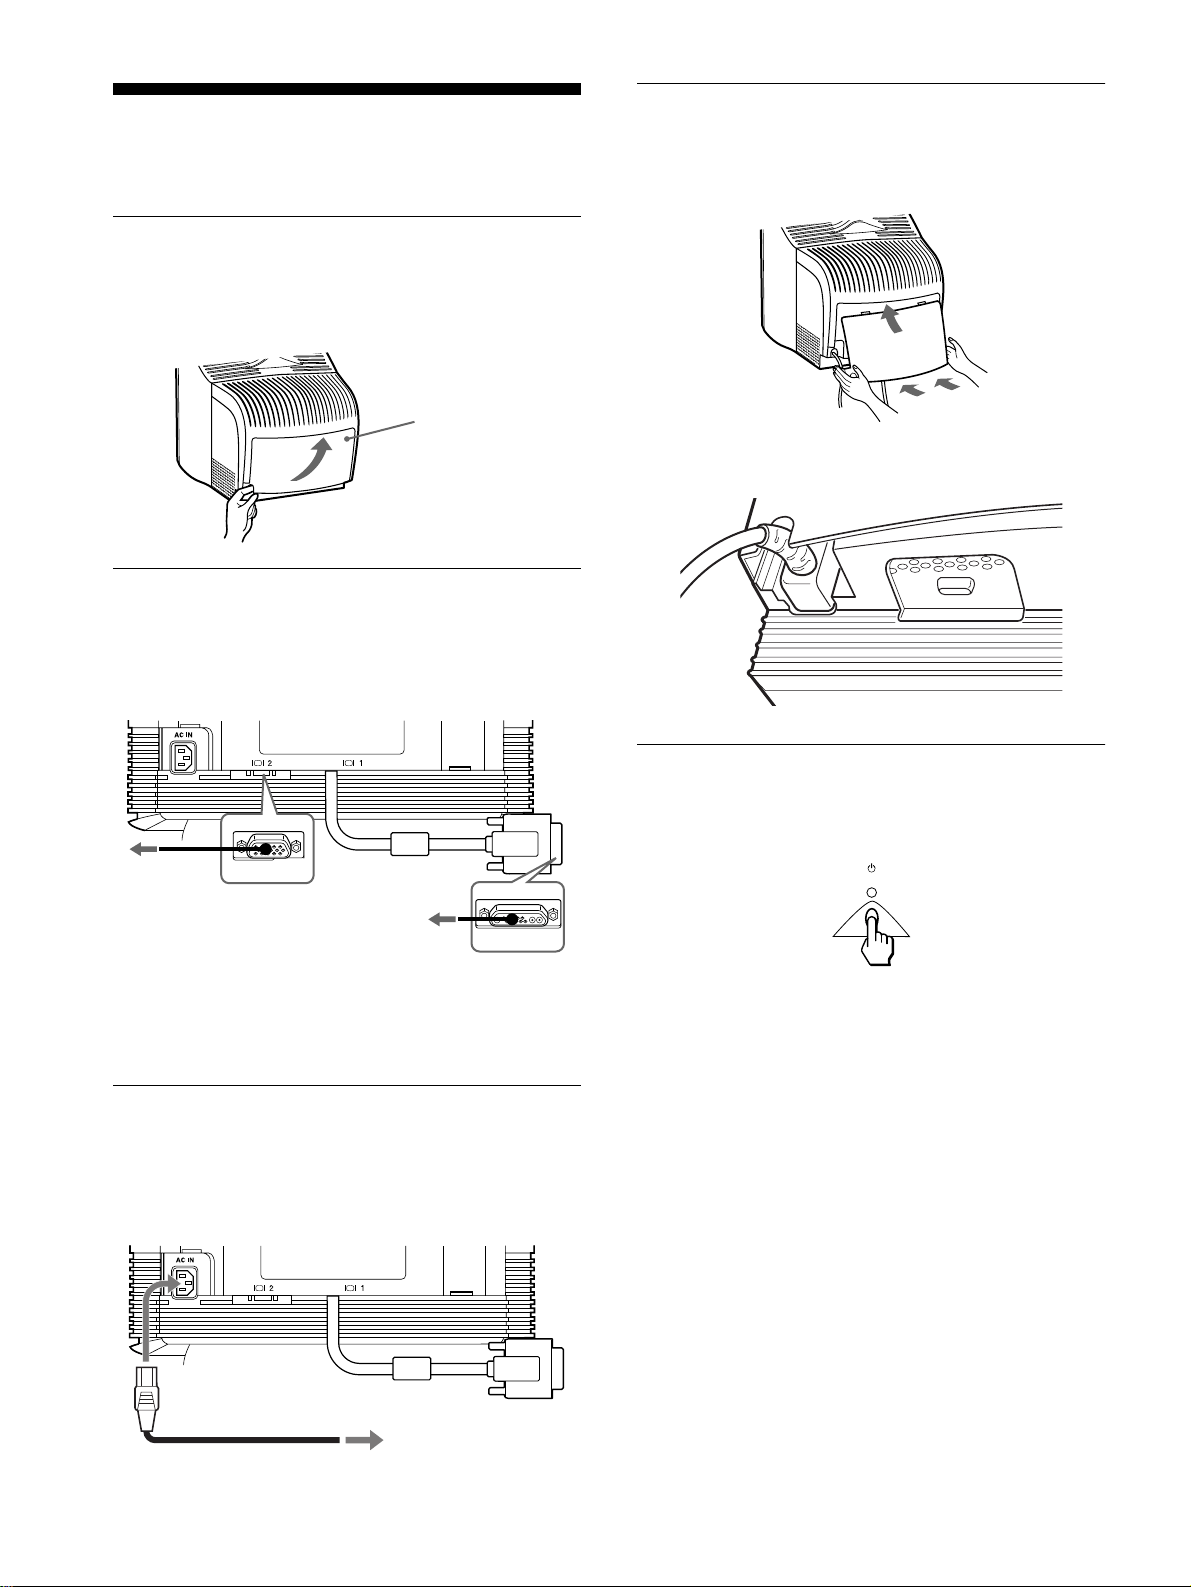
38
Anschließen des Geräts
Dieser Monitor kann mit Plattformen eingesetzt werden, die mit
Horizontalfrequenzen zwischen 30 und 121 kHz arbeiten.
Schritt 1:Abnehmen der hinteren
Abdeckung
Nehmen Sie vor dem Anschließen die hintere Abdeckung des
Monitors ab.
Schritt 2: Anschließen des Monitors
an den Computer
Schalten Sie Monitor und Computer aus, und schließen Sie das
Videosignalkabel an den Videoeingang des Monitors und an den
Videoausgang des Computers an.
Hinweise
• Berühren Sie die Stifte des Videosignalkabelanschlusses nicht. Sie
könnten die Stifte sonst möglicherweise verbiegen.
• Achten Sie beim Anschließen des Videosignalkabels auf die
Ausrichtung der Anschlüsse. Stecken Sie den Anschluß nicht mit
Gewalt falsch ein. Andernfalls könnten die Stifte verbiegen.
Schritt 3:Anschließen des
Netzkabels
Schließen Sie bei ausgeschaltetem Monitor und Computer das für
die lokale Stromversorgung geeignete Netzkabel zunächst an den
Monitor an, und stecken Sie den Netzstecker anschließend in eine
Netzsteckdose.
Schritt 4:Anbringen der hinteren
Abdeckung
Bringen Sie die hintere Abdeckung wieder am Monitor an.
Führen Sie das Netzkabel durch die Kabelaussparung an der
Unterseite der hinteren Abdeckung.
Schritt 5:Einschalten von Monitor
und Computer
Schalten Sie zunächst den Monitor und dann den Computer ein.
Die Installation des Monitors ist damit abgeschlossen.
Stellen Sie gegebenenfalls das Bild mit den Bedienelementen des
Monitors nach Ihren Wünschen ein.
Wenn auf dem Bildschirm kein Bild erscheint
• Überprüfen Sie, ob der Monitor korrekt an den Computer
angeschlossen ist.
• Wird KEIN EINGANGSSIGNAL auf dem Bildschirm
angezeigt, gehen Sie nach den Bildschirmmeldungen vor
(Seite 47).
• Wenn Sie einen älteren Monitor durch diesen Monitor ersetzt
haben und NICHT IM ABTASTBEREICH auf dem Bildschirm
erscheint, schließen Sie den alten Monitor wieder an. Stellen
Sie dann die Grafikkarte des Computers auf eine
Horizontalfrequenz zwischen 30 und 121 kHz und eine
Vertikalfrequenz zwischen 48 und 160 Hz ein.
Weitere Informationen über die Bildschirmmeldungen finden Sie
unter „Symptome für Fehler und Abhilfemaßnahmen“ auf Seite 48.
Abdeckung
Öffnen Sie die
Abdeckung an der
Unterseite, und ziehen
Sie sie zum Abnehmen
nach außen.
an einen Computer
mit einem HD15-
Videoausgang
an einen Computer
mit einem 13W3-
Videoausgang
an Netzsteckdose
Netzkabel
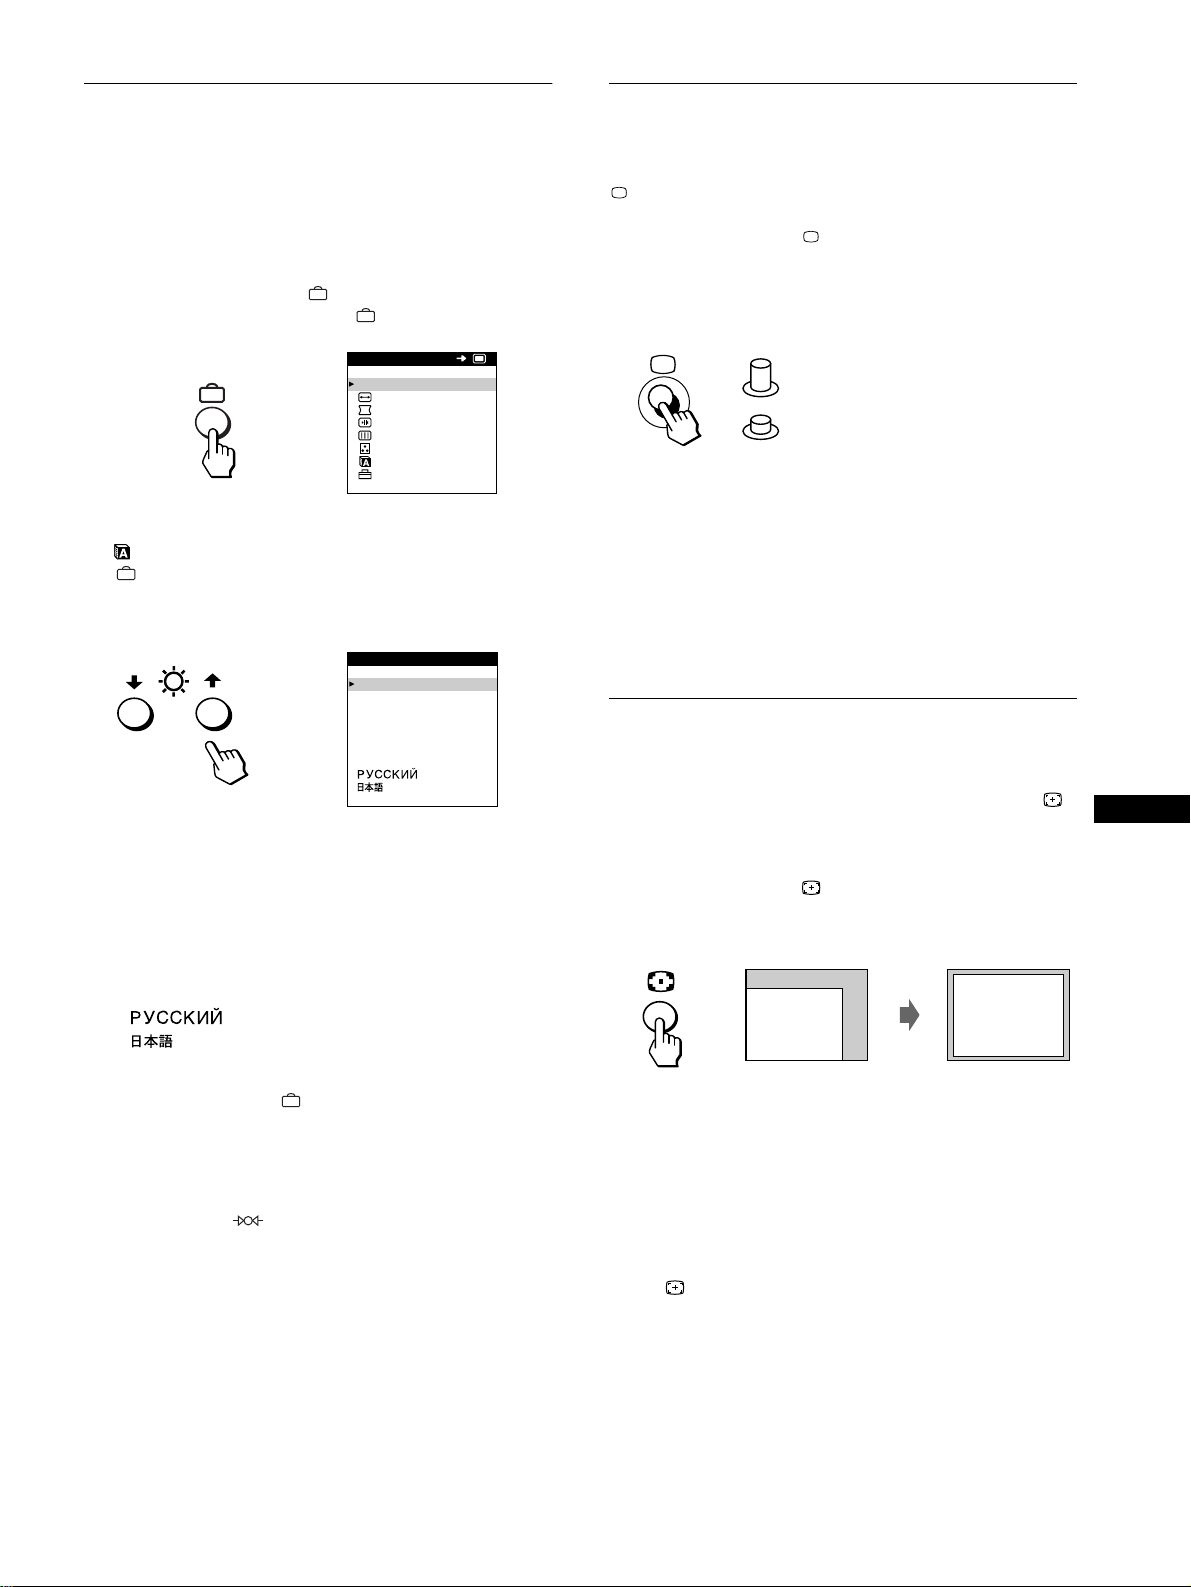
39
DE
Auswählen der Sprache für die
Bildschirmmenüs (LANGUAGE)
Für die Bildschirmmenüs stehen die Sprachen Englisch,
Französisch, Deutsch, Spanisch, Italienisch, Niederländisch,
Schwedisch, Russisch und Japanisch zur Verfügung. Die
Standardeinstellung ist Englisch.
1
Drücken Sie die Taste .
Weitere Informationen zur Taste finden Sie auf Seite 41.
2
Heben Sie mit den Tasten m/M die Option
LANGUAGE hervor, und drücken Sie die Taste
erneut.
Weitere Informationen zu den Tasten m
/
M finden Sie auf
Seite 41.
3
Wählen Sie mit den Tasten m/M die Sprache aus.
• ENGLISH: Englisch
• FRANÇAIS: Französisch
• DEUTSCH
• ESPAÑOL: Spanisch
• ITALIANO: Italienisch
• NEDERLANDS: Niederländisch
• SVENSKA: Schwedisch
•: Russisch
• : Japanisch
So schließen Sie das Menü
Drücken Sie einmal die Taste , um zum Hauptmenü MENU zu
wechseln. Wenn Sie zur normalen Anzeige wechseln wollen, drücken Sie
die Taste zweimal. Wenn Sie keine weitere Taste drücken, wird das
Bildschirmmenü nach etwa 30 Sekunden automatisch ausgeblendet.
So setzen Sie die Menüsprache auf Englisch zurück
Drücken Sie die Taste (Zurücksetzen), wenn das Menü
LANGUAGE auf dem Bildschirm angezeigt wird.
Auswählen des Eingangssignals
Über den Videoeingang 1 und den Videoeingang 2 können Sie
zwei Computer an diesen Monitor anschließen. Mit der Taste
schalten Sie zwischen den beiden Computern um.
Drücken Sie die Taste .
Mit jedem Tastendruck wechseln das Eingangssignal und die
entsprechende Anzeige.
Wenn die Taste gedrückt ist, ist EINGANG 2 ausgewählt, wenn
die Taste nicht gedrückt ist, ist EINGANG 1 ausgewählt.
Der ausgewählte Anschluß wird einige Sekunden lang auf dem
Bildschirm angezeigt.
„EINGANG 1“ (Videoeingang 1) oder „EINGANG 2“
(Videoeingang 2) erscheint auf dem Bildschirm.
Hinweis
Wenn am ausgewählten Eingang kein Signal eingespeist wird, erscheint
KEIN EINGANGSSIGNAL auf dem Bildschirm. Nach einigen Sekunden
schaltet der Monitor in den Energiesparmodus. Schalten Sie in diesem
Fall zum anderen Eingang um.
Automatisches Einstellen der
Größe und Zentrierung des Bildes
Sie können Größe und Zentrierung des Bildes mit der Taste
(Größe/Zentrierung automatisch einstellen) problemlos so
einstellen, daß das Bild den Bildschirm ausfüllt.
Drücken Sie die Taste .
Das Bild wird automatisch so eingestellt, daß es den Bildschirm
ausfüllt.
Hinweise
• Diese Funktion ist speziell für Computer konzipiert, bei denen das Bild
den ganzen Bildschirm ausfüllt. Sie arbeitet möglicherweise nicht
korrekt, wenn die Hintergrundfarbe dunkel ist oder das eingespeiste
Bild den Bildschirm nicht ganz ausfüllt.
• Bilder mit einem Bildseitenverhältnis von 5:4 (Auflösung: 1280
×
1024, 1600
×
1280) werden mit ihrer tatsächlichen Auflösung
angezeigt und füllen den Bildschirm nicht bis zu den Rändern aus.
• Das angezeigte Bild bewegt sich einige Sekunden lang, wenn Sie die
Taste drücken. Dies ist keine Fehlfunktion.
ENDE
GRÖSSE/BILDLG
GEOMETR I E
KONVERGENZ
BILD
FARBE
LANGUAGE
OPT ION
MENU
OK
b
ENGL ISH
FRANÇA IS
DEUTSCH
ESPAÑOL
ITALIANO
NEDERLANDS
SVENSKA
LANGUAGE
b
EINGANG 1 (Videoeingang 1)
EINGANG 2 (Videoeingang 2)
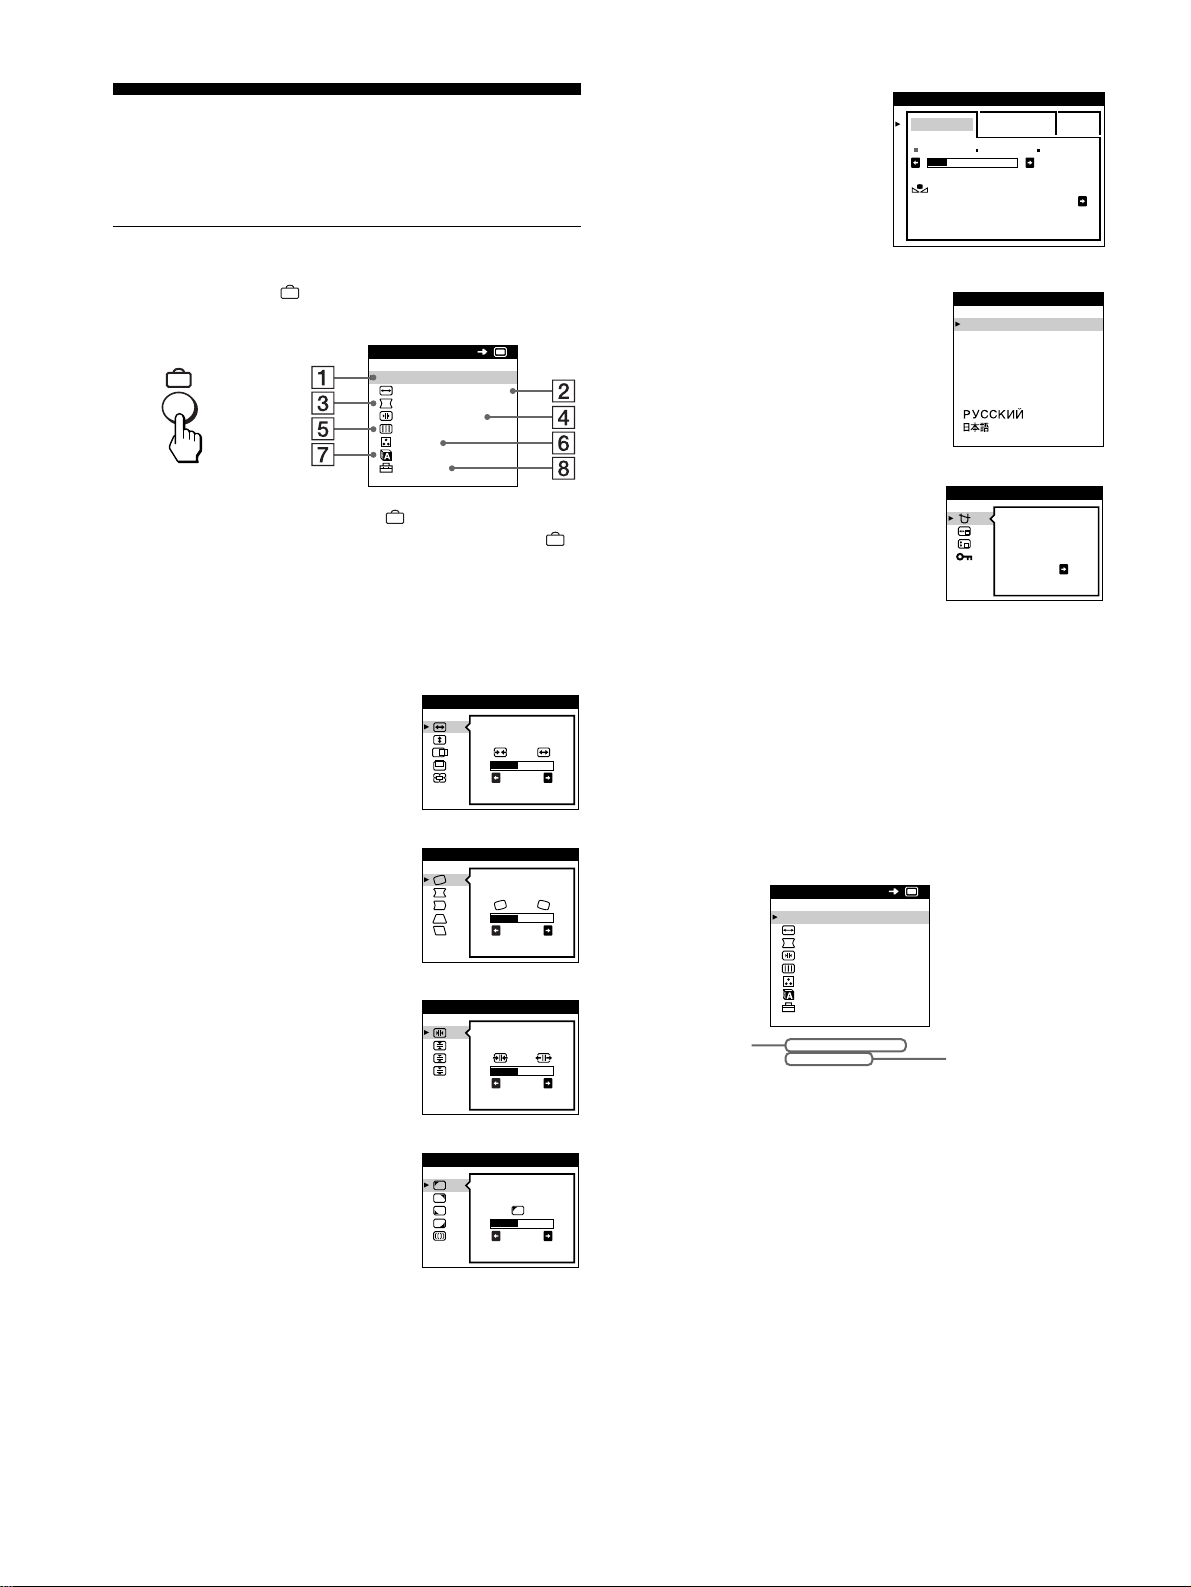
40
Einstellen des Monitors
Mit den Bildschirmmenüs können Sie eine Vielzahl von
Einstellungen vornehmen.
Navigieren in den Menüs
Drücken Sie die Taste , um das Hauptmenü MENU auf dem
Monitor aufzurufen.
Wählen Sie mit den Tasten m/M und eines der folgenden
Menüs aus. Weitere Informationen zu den Tasten m/M und
finden Sie auf Seite 41.
x
Anzeigen des aktuellen Eingangssignals
Die Horizontal- und die Vertikalfrequenz des aktuellen
Eingangssignals werden im Hauptmenü MENU angezeigt. Wenn
das Eingangssignal einem der werkseitig voreingestellten Modi
des Monitors entspricht, wird auch die Auflösung angezeigt.
1
11
1 ENDE
Wählen Sie ENDE, wenn Sie das
Hauptmenü schließen wollen.
2
22
2 GRÖSSE/BILDLG (Seite 42)
Wählen Sie GRÖSSE/BILDLG,
wenn Sie Größe, Position und Zoom
des Bildes einstellen wollen.
3
33
3 GEOMETRIE (Seite 42)
Wählen Sie GEOMETRIE, wenn
Sie die Bildrotation und die Form
des Bildes festlegen wollen.
4
44
4 KONVERGENZ (Seite 43)
Wählen Sie KONVERGENZ, wenn
Sie die horizontale und vertikale
Konvergenz des Bildes einstellen
wollen.
5
55
5 BILD (Seite 43)
Wählen Sie BILD, wenn Sie die
Bildqualität einstellen wollen. Als
Optionen stehen die Farbreinheit
und die Moiré-Korrektur zur
Verfügung.
ENDE
GRÖSSE/BILDLG
GEOMETR I E
KONVERGENZ
BILD
FARBE
LANGUAGE
OPT ION
MENU
OK
b
26
GRÖSSE/BILDLG
26
GEOMETR I E
TOP
BOT
26
KONVERGENZ
FARB -
RE INHEI T
26
BILD
6
66
6 FARBE (Seite 44)
Wählen Sie FARBE, wenn
Sie die Farbtemperatur des
Bildes einstellen wollen. Mit
Hilfe dieser Funktion können
Sie die Farben auf dem
Monitor an die Farben eines
gedruckten Bildes anpassen.
7
77
7 LANGUAGE (Seite 39)
Wählen Sie LANGUAGE, wenn
Sie für das Bildschirmmenü eine
andere Sprache wählen wollen.
8
88
8 OPTION (Seite 45)
Wählen Sie OPTION, wenn Sie die
sonstigen Optionen des Monitors
einstellen wollen. Zu den Optionen
gehören:
• Entmagnetisieren des
Bildschirms
• Ändern der Position des
Bildschirmmenüs
• Sperren der Bedienelemente
EINFACH KOMPLEX s BGR
5000K 6500K 930 K0
50 K00
FARBWI EDER-
HERSTELLUNG E IN
FARBE
ENGL ISH
FRANÇA IS
DEUTSCH
ESPAÑOL
ITALIANO
NEDERLANDS
SVENSKA
LANGUAGE
DEGAUSS
EIN
OPT ION
68.7kHz/ 85Hz
1024x 768
ENDE
GRÖSSE/BILDLG
GEOMETR I E
KONVERGENZ
BILD
FARBE
LANGUAGE
OPT ION
MENU
OK
Horizontal-
und
Vertikalfrequenz
des aktuellen
Eingangssignals
Auflösung des
aktuellen
Eingangssignals
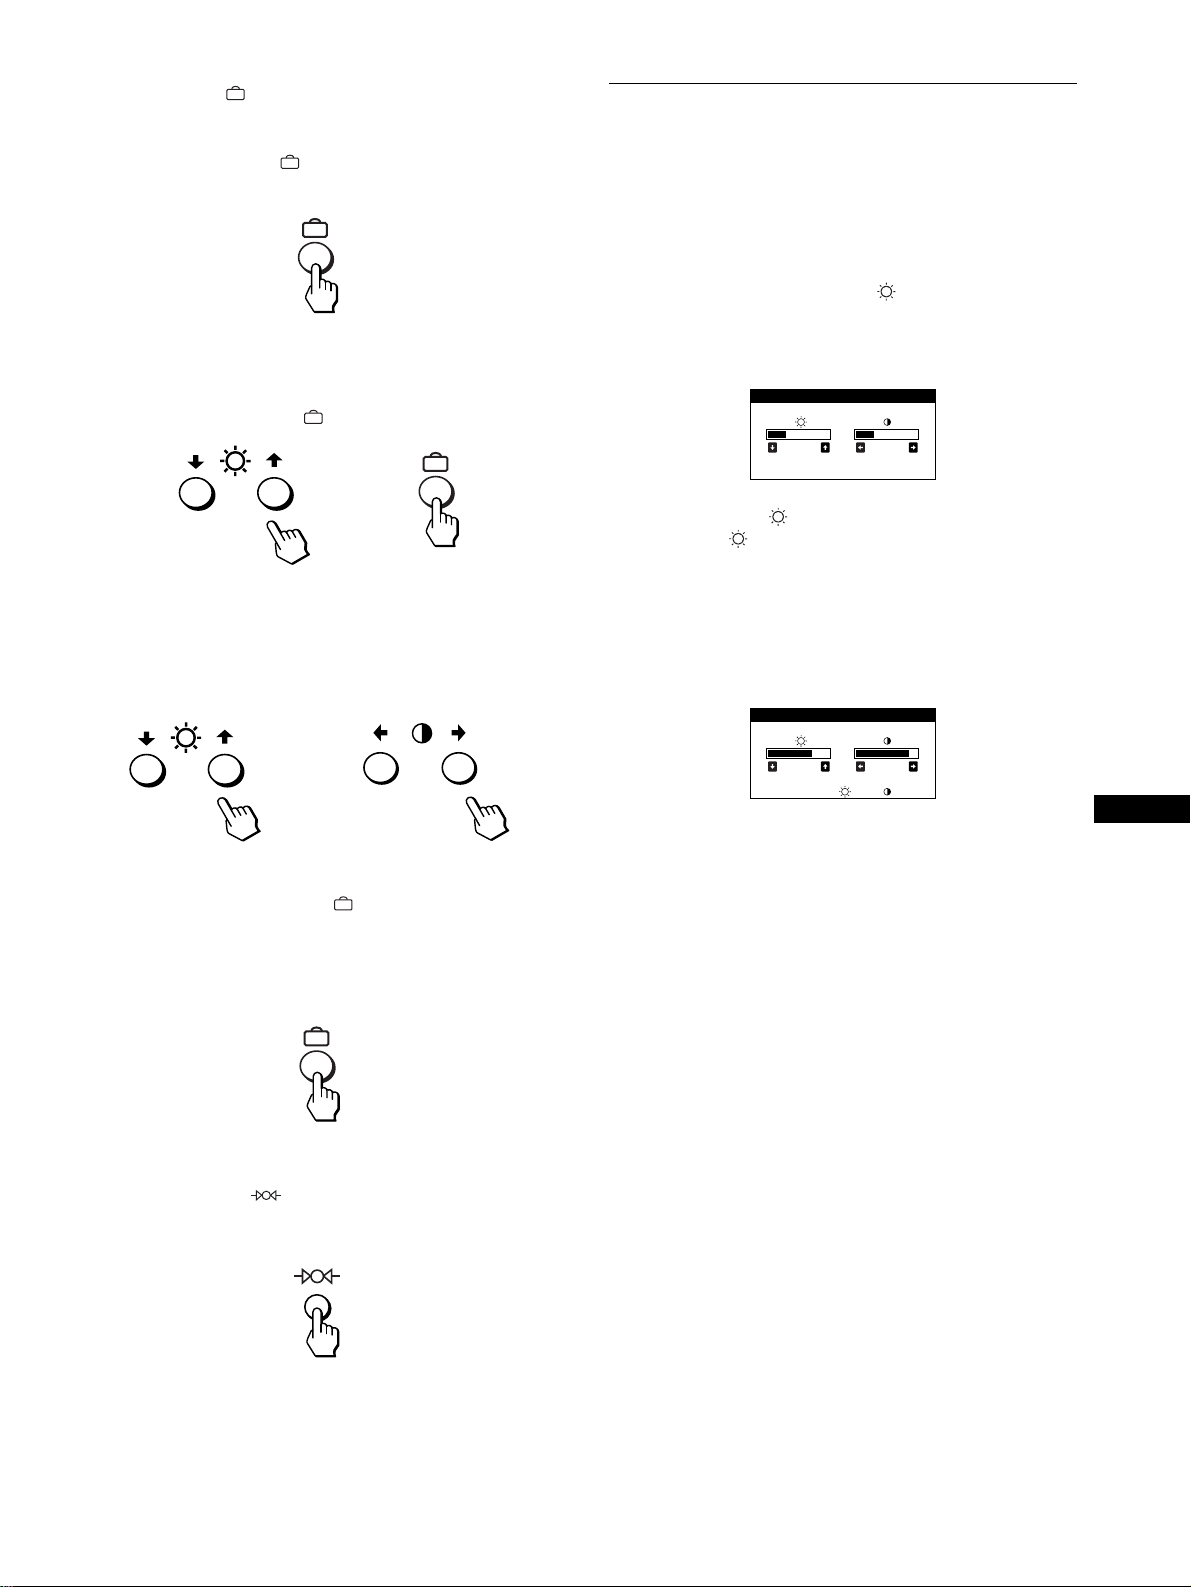
41
DE
x
Die Tasten , m/M und </,
1
Rufen Sie das Hauptmenü MENU auf.
Drücken Sie die Taste , um das Hauptmenü MENU auf
dem Monitor aufzurufen.
2
Wählen Sie das Menü aus, in dem Sie Einstellungen
vornehmen wollen.
Heben Sie mit den Tasten m/M das gewünschte Menü hervor.
Wählen Sie mit der Taste das Menü aus.
3
Nehmen Sie im Menü die gewünschten
Einstellungen vor.
Wählen Sie mit den Tasten m/M die gewünschte
Einstelloption. Nehmen Sie die Einstellung mit den Tasten
</, vor.
4
Schließen Sie das Menü.
Drücken Sie einmal die Taste , um zum Hauptmenü
MENU zu wechseln. Wenn Sie zur normalen Anzeige
wechseln wollen, drücken Sie die Taste zweimal. Wenn Sie
keine weitere Taste drücken, wird das Bildschirmmenü nach
etwa 30 Sekunden automatisch ausgeblendet.
x
Zurücksetzen der Einstellungen
Drücken Sie die Taste (Zurücksetzen). Weitere
Informationen zum Zurücksetzen der Einstellungen finden Sie
auf Seite 46.
Einstellen von Helligkeit und
Kontrast
Helligkeit und Kontrast können Sie über ein spezielles Menü,
HELLIGKEIT/KONTRAST, einstellen.
Diese Einstellungen werden gespeichert und gelten für die
Signale vom gerade ausgewählten Eingang.
1
Drücken Sie eine der Tasten (Helligkeit) m/M oder
6 (Kontrast) </,.
Das Menü HELLIGKEIT/KONTRAST wird auf dem
Bildschirm angezeigt.
2
Mit den Tasten (Helligkeit) m/M können Sie die
Helligkeit ( ) einstellen, mit den Tasten
6 (Kontrast) </, den Kontrast (6).
Wenn Sie im sRGB-Modus arbeiten
Wenn Sie im Menü FARBE den sRGB-Modus ausgewählt haben,
erscheint das folgende Menü HELLIGKEIT/KONTRAST auf
dem Bildschirm.
Weitere Informationen zum sRGB-Modus finden Sie unter
„Einstellen der Farben des Bildes (FARBE)“ auf Seite 44.
Nach etwa 3 Sekunden wird das Menü automatisch ausgeblendet.
b
b
26 26
HELL IGKEI T /KONTRAST
56 76
sRGB : 56 76
HELL IGKEI T /KONTRAST
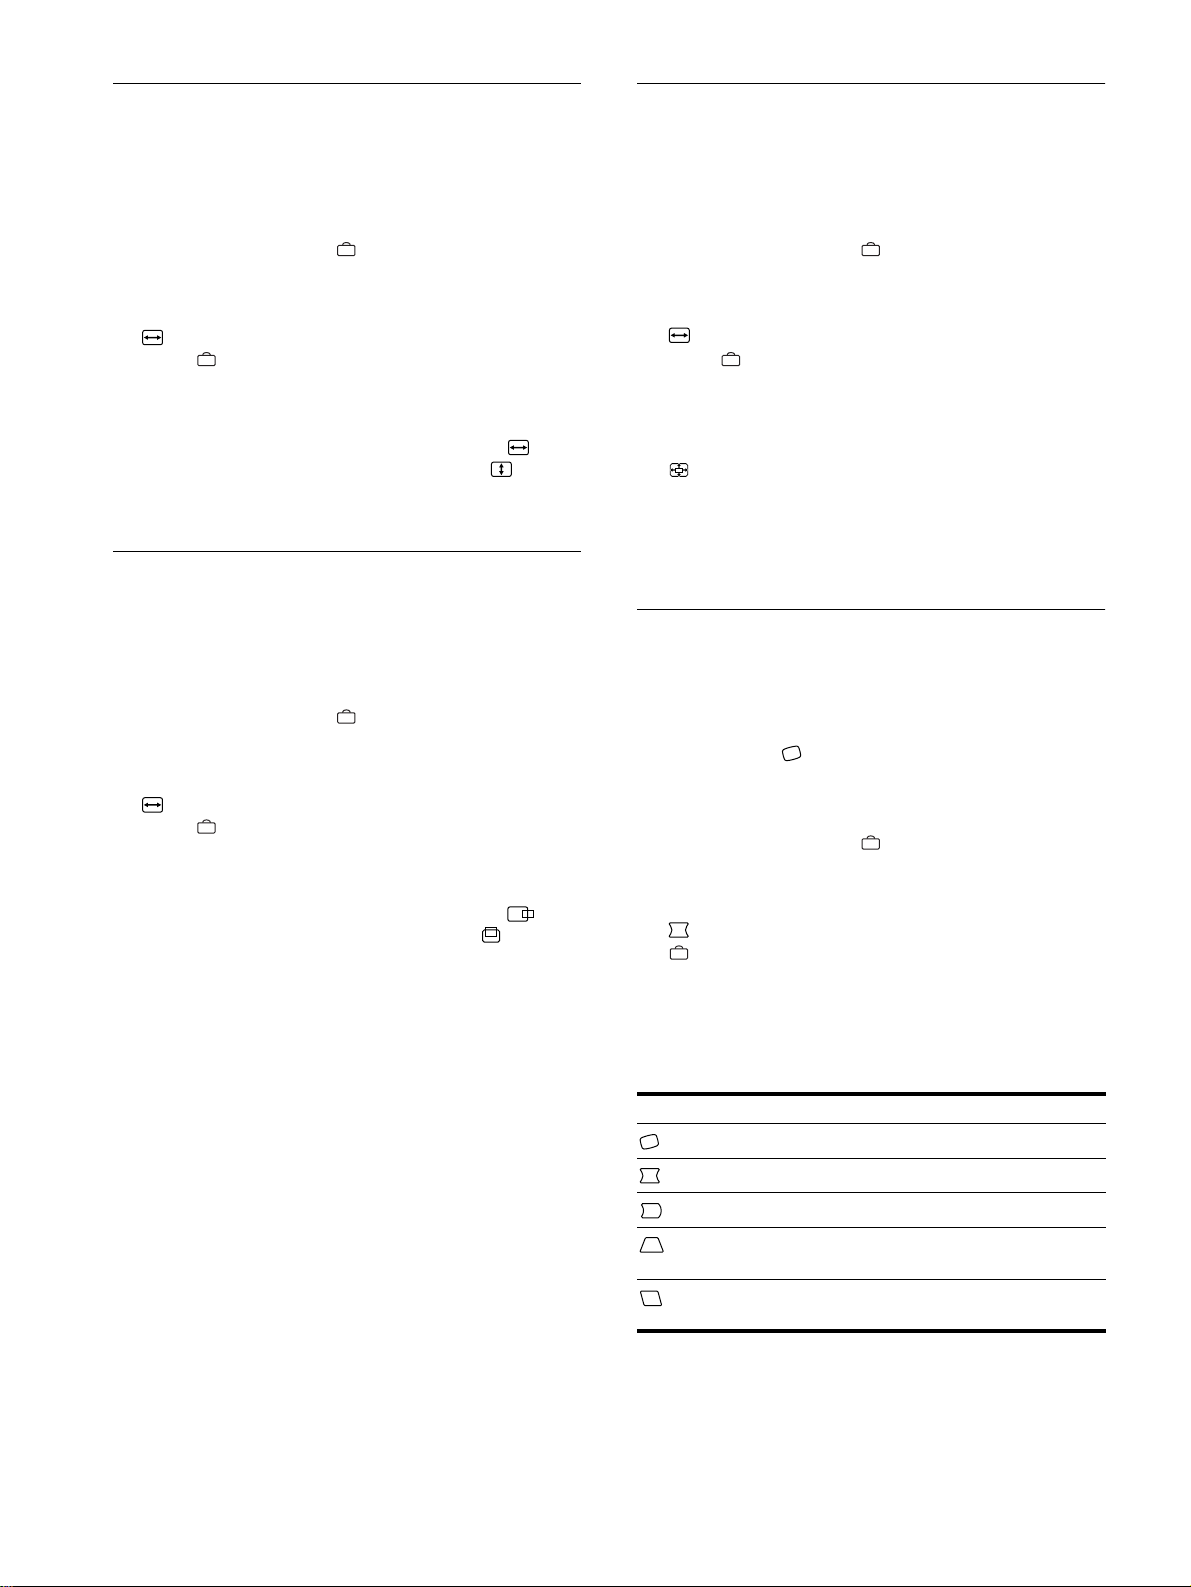
42
Einstellen der Bildgröße (GRÖSSE/
BILDLG)
Diese Einstellung wird gespeichert und gilt nur für das aktuelle
Eingangssignal.
1
Drücken Sie die Taste .
Das Hauptmenü MENU erscheint auf dem Bildschirm.
2
Heben Sie mit den Tasten m/M die Option
GRÖSSE/BILDLG hervor, und drücken Sie die
Taste erneut.
Das Menü GRÖSSE/BILDLG wird auf dem Bildschirm
angezeigt.
3
Wählen Sie mit den Tasten m/M die Option für
das Einstellen der Breite bzw. die Option für das
Einstellen der Höhe aus. Stellen Sie die Größe dann
mit den Tasten </, ein.
Einstellen der Bildposition
(GRÖSSE/BILDLG)
Diese Einstellung wird gespeichert und gilt nur für das aktuelle
Eingangssignal.
1
Drücken Sie die Taste .
Das Hauptmenü MENU erscheint auf dem Bildschirm.
2
Heben Sie mit den Tasten m/M die Option
GRÖSSE/BILDLG hervor, und drücken Sie die
Taste erneut.
Das Menü GRÖSSE/BILDLG wird auf dem Bildschirm
angezeigt.
3
Wählen Sie mit den Tasten m/M die Option für
horizontale Einstellung bzw. die Option für
vertikale Einstellung aus. Stellen Sie die
Bildposition dann mit den Tasten </, ein.
Vergrößern oder Verkleinern des
Bildes (ZOOM)
Diese Einstellung wird gespeichert und gilt nur für das aktuelle
Eingangssignal.
1
Drücken Sie die Taste .
Das Hauptmenü MENU erscheint auf dem Bildschirm.
2
Heben Sie mit den Tasten m/M die Option
GRÖSSE/BILDLG hervor, und drücken Sie die
Taste erneut.
Das Menü GRÖSSE/BILDLG wird auf dem Bildschirm
angezeigt.
3
Wählen Sie mit den Tasten m/M die Option
(Zoom) aus, und vergrößern oder verkleinern
Sie mit den Tasten </, das Bild.
Hinweis
Sobald die maximale bzw. minimale Höhe bzw. Breite des Bildes erreicht
ist, läßt sich der Zoom nicht weiter ändern.
Einstellen der Form des Bildes
(GEOMETRIE)
Mit den Optionen im Menü GEOMETRIE können Sie Rotation
und Form des Bildes festlegen.
Die Einstellung für (Rotation) wird für alle Eingangssignale
gespeichert. Alle anderen Einstellungen werden nur für das
gerade eingespeiste Eingangssignal gespeichert.
1
Drücken Sie die Taste .
Das Hauptmenü MENU erscheint auf dem Bildschirm.
2
Heben Sie mit den Tasten m/M die Option
GEOMETRIE hervor, und drücken Sie die Taste
erneut.
Das Menü GEOMETRIE wird auf dem Bildschirm angezeigt.
3
Wählen Sie zuerst mit den Tasten m/M die
gewünschte Einstelloption. Nehmen Sie danach die
Einstellung mit den Tasten </, vor.
Option Funktion
Festlegen der Bildrotation
Wölben der Bildränder nach außen oder innen
Verschieben der Bildränder nach links oder rechts
Einstellen der Bildbreite im oberen
Bildschirmbereich
Verschieben des Bildes nach links oder rechts im
oberen Bildschirmbereich
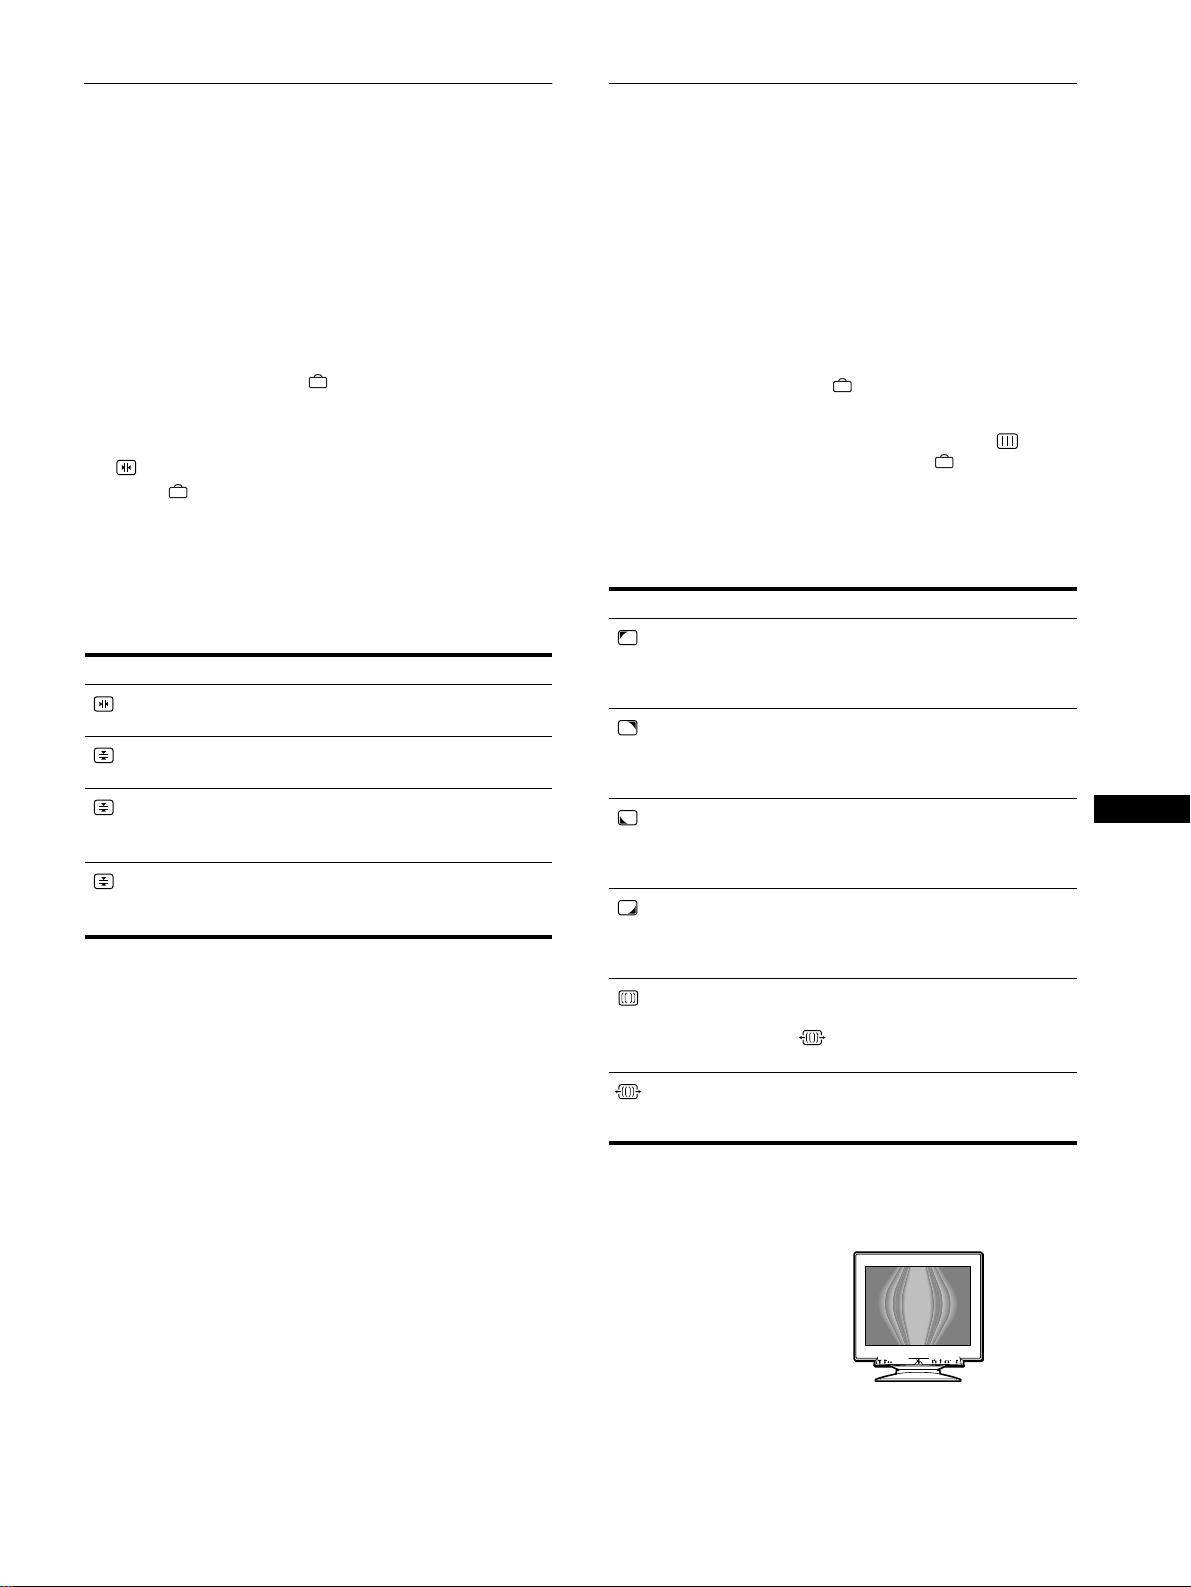
43
DE
Einstellen der Konvergenz
(KONVERGENZ)
Mit den Optionen im Menü KONVERGENZ können Sie die
Bildqualität steuern, indem Sie die Konvergenz einstellen. Die
Konvergenz bezieht sich auf die Ausrichtung der Farbsignale für
Rot, Grün und Blau.
Wenn Buchstaben oder Linien rote oder blaue Schatten
aufweisen, stellen Sie die Konvergenz ein.
Diese Einstellungen werden gespeichert und gelten für alle
Eingangssignale.
1
Drücken Sie die Taste .
Das Hauptmenü MENU erscheint auf dem Bildschirm.
2
Heben Sie mit den Tasten m/M die Option
KONVERGENZ hervor, und drücken Sie die
Taste erneut.
Das Menü KONVERGENZ wird auf dem Bildschirm
angezeigt.
3
Wählen Sie zuerst mit den Tasten m/M die
gewünschte Einstelloption. Nehmen Sie danach die
Einstellung mit den Tasten </, vor.
Einstellen der Bildqualität (BILD)
Mit den Optionen im Menü BILD können Sie die Bildqualität
steuern, indem Sie die Moiré-Korrektur und die Farbreinheit
einstellen.
• Wenn die Farbe an den Bildschirmecken ungleichmäßig
erscheint, stellen Sie die Farbreinheit ein.
• Wenn elliptische oder wellenförmige Muster auf dem
Bildschirm erscheinen, stellen Sie die Moiré-Korrektur ein.
Die Werte für MOIRE-KORREKTUR und MOIRE EINST, die
Sie hier einstellen, werden nur für das gerade eingespeiste
Eingangssignal gespeichert. Alle anderen Einstellungen werden
für alle Eingangssignale gespeichert.
1
Drücken Sie die Taste .
Das Hauptmenü MENU erscheint auf dem Bildschirm.
2
Heben Sie mit den Tasten m/M die Option BILD
hervor, und drücken Sie die Taste erneut.
Das Menü BILD wird auf dem Bildschirm angezeigt.
3
Wählen Sie zuerst mit den Tasten m/M die
gewünschte Einstelloption. Nehmen Sie danach die
Einstellung mit den Tasten </, vor.
* Moiré ist eine natürliche Interferenz, die weiche, wellenförmige Linien
auf dem Bildschirm verursacht. Diese Linien können durch die
Interferenz zwischen dem Muster des Bildes auf dem Bildschirm und
dem Phosphor-Pitch-Muster des Monitors entstehen.
Hinweis
Das Bild kann verschwommen sein, wenn MOIRE-KORREKTUR auf
EIN gesetzt ist.
Option Funktion
horizontales Verschieben roter oder
blauer Schatten
vertikales Verschieben roter oder
blauer Schatten
TOP
V KONVER OBEN
vertikales Verschieben roter oder
blauer Schatten im oberen
Bildschirmbereich
BOT
V KONVER UNTEN
vertikales Verschieben roter oder
blauer Schatten im unteren
Bildschirmbereich
Option Funktion
FARB-
REINHEIT
Reduzieren der
Farbungleichmäßigkeiten in der
linken oberen Bildschirmecke auf ein
Minimum.
FARB-
REINHEIT
Reduzieren der
Farbungleichmäßigkeiten in der
rechten oberen Bildschirmecke auf
ein Minimum.
FARB-
REINHEIT
Reduzieren der
Farbungleichmäßigkeiten in der
linken unteren Bildschirmecke auf
ein Minimum.
FARB-
REINHEIT
Reduzieren der
Farbungleichmäßigkeiten in der
rechten unteren Bildschirmecke auf
ein Minimum.
MOIRE-
KORREKTUR
*
Ein- bzw. Ausschalten der Moiré-
Korrektur (EIN/AUS).
(MOIRE EINST) erscheint im
Menü, wenn Sie EIN wählen.
MOIRE EINST
Einstellen des Grads der Moiré-
Korrektur, so daß der Moiré-Effekt
möglichst gering ausfällt.
Beispiel für den Moiré-Effekt

44
Einstellen der Farben des Bildes
(FARBE)
Mit den Optionen im Menü FARBE können Sie die
Farbtemperatur des Bildes einstellen. Dabei ändert sich der
Farbwert im weißen Farbfeld. Farben erscheinen bei einer
niedrigen Farbtemperatur rötlich, bei einer hohen Farbtemperatur
bläulich. Mit Hilfe dieser Funktion können Sie die Farben auf
dem Monitor an die Farben eines gedruckten Bildes anpassen.
1
Drücken Sie die Taste .
Das Hauptmenü MENU erscheint auf dem Bildschirm.
2
Heben Sie mit den Tasten m/M die Option FARBE
hervor, und drücken Sie die Taste erneut.
Das Menü FARBE wird auf dem Bildschirm angezeigt.
3
Wählen Sie mit den Tasten </, den
Einstellmodus aus.
Es gibt drei verschiedene Einstellmodi: EINFACH,
KOMPLEX und sRGB.
4
Wählen Sie zuerst mit den Tasten m/M die
gewünschte Einstelloption. Nehmen Sie danach die
Einstellung mit den Tasten </, vor.
Stellen Sie den ausgewählten Modus dann anhand der
folgenden Anweisungen ein.
Modus EINFACH
1
Wählen Sie mit den Tasten m/M zunächst die
Farbtemperaturzeile 1, aus, und wählen Sie
anschließend mit den Tasten </, eine
Farbtemperatur aus.
5000K, 6500K und 9300K sind die voreingestellten
Farbtemperaturen. Der Standardwert ist 9300K. Wenn Sie die
Farbtemperatur auf 6500K und 5000K senken, erscheinen
weiße Flächen nicht mehr bläulich, sondern rötlich.
2
Nehmen Sie bei Bedarf eine Feineinstellung der
Farbtemperatur vor.
Wählen Sie mit den Tasten m/M zunächst die
Farbtemperatureinstellzeile 2, aus, und stellen Sie
anschließend mit den Tasten </, die
Farbtemperatur fein ein.
Wenn Sie eine Feineinstellung der Farbtemperatur
vornehmen, werden die neuen Einstellungen für alle drei
Farbtemperaturoptionen gespeichert. Die Option 1 des
Menüs ändert sich wie folgt:
• [5000K]t[1]
• [6500K]t[2]
• [9300K]t[3]
Modus KOMPLEX
Sie können in größerem Detail weitere Farbeinstellungen
vornehmen, indem Sie den Modus KOMPLEX auswählen.
1
Wählen Sie mit den Tasten m/M die
Farbtemperaturzeile 1 aus, und wählen Sie
anschließend mit den Tasten </, eine
Farbtemperatur aus.
2
Wählen Sie mit den Tasten m/M die Einstelloption 2
22
2
aus, und stellen Sie anschließend mit den Tasten
</, den Schwarzwert (BIAS) ein.
Damit werden die dunklen Bildbereiche eingestellt.
3
Wählen Sie mit den Tasten m/M die Einstelloption 3
33
3
aus, und stellen Sie anschließend mit den Tasten
</, den Weißwert (GAIN) ein.
Damit werden die hellen Bildbereiche eingestellt.
Wenn Sie die Optionen 2 und 3 ändern, können Sie die R-
(Rot), G- (Grün) und B-Komponente (Blau) des
Eingangssignals getrennt einstellen.
Wenn Sie eine Feineinstellung der Farbtemperatur
vornehmen, werden die neuen Einstellungen für alle drei
Farbtemperaturoptionen gespeichert. Die Option 1 des
Menüs ändert sich wie folgt:
• [5000K]t[1]
• [6500K]t[2]
• [9300K]t[3]
Einstellen der Farbtemperatur für die einzelnen
Videoeingänge
Sie können eine Feineinstellung der Farbtemperatur im Modus
EINFACH oder KOMPLEX für beide Videoeingänge vornehmen
(EINGANG 1: 13W3 und EINGANG 2: HD15).
1
Wählen Sie im Menü FARBE für EINGANG 1 und
EINGANG 2 denselben Einstellmodus und dieselbe
Farbtemperatur aus.
2
Nehmen Sie eine Feineinstellung der
Farbtemperatur in den einzelnen Menüs für
EINGANG 1 und EINGANG 2 vor.
Die Einstellungen werden für EINGANG 1 und für
EINGANG 2 gespeichert.
Informationen dazu, wie Sie den Eingang auswählen, finden Sie
auf Seite 39.
5000K 6500K 930 K0
50 K00
EINFACH KOMPLEX s BGR
FARBWI EDER-
HERSTELLUNG E IN
FARBE
5000K 6500K 930 K0
R BIAS 05
G BIAS 05
B BIAS 05
RGAIN 05
GGAIN 05
BGAIN 05
EINFACH KOMPLEX s BGR
FARBE
45
DE
Modus sRGB
Die sRGB-Farbeinstellung ist ein Farbraumprotokoll nach
Industriestandard, mit dem die angezeigten und die gedruckten
Farben sRGB-kompatibler Computer-Produkte in
Übereinstimmung gebracht werden sollen. Zum Einstellen der
Farben für das sRGB-Profil wählen Sie einfach den Modus sRGB
im Menü FARBE aus. Damit die sRGB-Farben allerdings korrekt
angezeigt werden (
γ
=2,2, 6500K), müssen Sie an Ihrem Computer
das sRGB-Profil einstellen und Helligkeit ( ) und Kontrast (6)
auf die im Menü gezeigten Zahlen einstellen. Informationen zum
Ändern von Helligkeit ( ) und Kontrast (6) finden Sie auf
Seite 41.
Hinweis
Der Computer und andere angeschlossene Geräte (z. B. ein Drucker)
müssen sRGB-kompatibel sein.
Wiederherstellen der Farben in den Menüs
EINFACH und sRGB
Bei den meisten Bildschirmen zeigt sich nach einer Anzahl von
Jahren ein allmähliches Nachlassen der Farbbrillanz. Mit der
Option FARBWIEDER-HERSTELLUNG in den Menüs
EINFACH und sRGB können Sie die Farben in der werkseitigen
Qualität wiederherstellen. In den Schritten unten wird erläutert,
wie Sie die Farben des Monitors im Menü EINFACH
wiederherstellen.
1
Wählen Sie mit den Tasten </, den Modus
EINFACH oder sRGB aus.
2
Wählen Sie mit den Tasten m/M die Option
(FARBWIEDER-HERSTELLUNG) aus, und
drücken Sie dann die Taste ,.
Das Bild wird ausgeblendet, während die Farben
wiederhergestellt werden (etwa 2 Sekunden lang). Wenn die
Farben wiederhergestellt sind, erscheint das Bild wieder auf
dem Bildschirm.
Hinweise
• Bevor Sie diese Funktion verwenden können, muß sich der Monitor
mindestens 30 Minuten lang im normalen Betriebsmodus befinden
(Netzanzeige leuchtet grün). Wenn der Monitor in den
Energiesparmodus wechselt, müssen Sie ihn wieder in den normalen
Betriebsmodus schalten und 30 Minuten lang abwarten. Unter
Umständen müssen Sie die Energiespareinstellungen Ihres Computers
ändern, damit der Monitor die gesamten 30 Minuten im normalen
Betriebsmodus bleibt. Ist der Monitor nicht bereit, erscheint folgende
Nachricht.
• Aufgrund des natürlichen Alterungsprozesses der Bildröhre läßt sich
diese Funktion nach längerer Zeit unter Umständen nicht mehr
ausführen.
Weitere Einstellungen (OPTION)
Sie können den Monitor von Hand entmagnetisieren, die
Menüposition ändern und die Bedienelemente sperren.
1
Drücken Sie die Taste .
Das Hauptmenü MENU erscheint auf dem Bildschirm.
2
Heben Sie mit den Tasten m/M die Option
OPTION hervor, und drücken Sie die Taste
erneut.
Das Menü OPTION wird auf dem Bildschirm angezeigt.
3
Wählen Sie mit den Tasten m/M die gewünschte
Einstelloption.
Stellen Sie die ausgewählte Option dann anhand der
folgenden Anweisungen ein.
Entmagnetisieren des Bildschirms
Der Monitor wird automatisch entmagnetisiert, wenn das Gerät
eingeschaltet wird.
Wenn Sie den Monitor von Hand entmagnetisieren
wollen, wählen Sie zunächst mit den Tasten m/M die
Option (DEGAUSS) aus. Drücken Sie anschließend
die Taste ,.
Der Bildschirm wird etwa 2 Sekunden lang entmagnetisiert. Ist
ein zweiter Entmagnetisierungszyklus erforderlich, warten Sie
nach dem ersten Zyklus mindestens 20 Minuten. Auf diese Weise
erzielen Sie die besten Ergebnisse.
Ändern der Menüposition
Sie können das Menü verschieben, wenn es das Bild auf dem
Bildschirm verdeckt.
Wenn Sie die Position des Bildschirmmenüs ändern
wollen, wählen Sie zunächst mit den Tasten m/M die
Option (POSITION H OSD) für horizontale
Einstellung oder (POSITION V OSD) für vertikale
Einstellung aus. Verschieben Sie dann mit den Tasten
</, das Menü auf dem Bildschirm.
Sperren der Bedienelemente
Wenn Sie verhindern wollen, daß die Einstellungen
geändert werden, können Sie die Bedienelemente
sperren. Wählen Sie dazu zunächst mit den Tasten m/M
die Option (TASTATUR-SPERRE) aus. Wählen Sie
dann mit der Taste , die Einstellung EIN aus.
Jetzt können Sie nur noch den Netzschalter 1, die Option ENDE
sowie die Option (TASTATUR-SPERRE) im Menü
OPTION benutzen. Wenn Sie ein anderes Bedienelement
betätigen oder ein anderes Menü auswählen, erscheint die
Markierung auf dem Bildschirm.
So heben Sie die Sperrung der Bedienelemente wieder auf
Gehen Sie wie oben erläutert vor, und setzen Sie (TASTATUR-
SPERRE) auf AUS.
:56 :76 FÜR s BGR
EINFACH KOMPLEX s BGR
FARBWI EDER-
HERSTELLUNG E IN
FARBE
5000K 6500K 930 K0
50 K00
ERST NACH/WAR -M
UP /VERFÜGBAR
EINFACH KOMPLEX s BGR
FARBWI EDER-
HERSTELLUNG
FARBE

46
Zurücksetzen der Einstellungen
Bei diesem Monitor haben Sie drei Möglichkeiten, die
Einstellungen zurückzusetzen. Drücken Sie die Taste
(Zurücksetzen), um die Einstellungen zurückzusetzen.
Zurücksetzen einer einzelnen Option
Wählen Sie mit den Tasten , m/M die Einstelloption aus, die
Sie zurücksetzen wollen, und drücken Sie die Taste
(Zurücksetzen).
Zurücksetzen aller Einstellungen für das aktuelle
Eingangssignal
Drücken Sie die Taste (Zurücksetzen), wenn kein Menü auf
dem Bildschirm angezeigt wird.
Beachten Sie, daß die folgenden Einstellungen bei diesem
Verfahren nicht zurückgesetzt werden:
• Sprache der Bildschirmmenüs (Seite 39)
• Einstellmodus im Menü FARBE (EINFACH, KOMPLEX,
sRGB) (Seite 44)
• Position der Bildschirmmenüs (Seite 45)
• Sperrung der Bedienelemente (Seite 45)
Zurücksetzen aller Einstellungen für alle
Eingangssignale
Halten Sie die Taste (Zurücksetzen) mehr als zwei
Sekunden lang gedrückt.
Hinweis
Die Taste (Zurücksetzen) funktioniert nicht, wenn
(TASTATUR-SPERRE) auf EIN gesetzt ist.
Technische Merkmale
Die Energiesparfunktion
Dieser Monitor erfüllt die Energiesparrichtlinien der VESA, des
E
NERGY
S
TAR
-Programms und des NUTEK-Standards. Wenn
am Monitor kein Signal vom angeschlossenen Computer eingeht,
wird der Stromverbrauch des Monitors automatisch wie unten
erläutert reduziert.
* Wenn der Computer in den Modus „Deaktiviert“ wechselt, geht kein
Eingangssignal mehr am Monitor ein, und „KEIN
EINGANGSSIGNAL“ erscheint auf dem Bildschirm. Nach einigen
Sekunden schaltet der Monitor in den Energiesparmodus.
Betriebsmodus Leistungsaufnahme Netzanzeige
1
Normalbetrieb ≤ 160 W grün
Deaktiviert* ≤ 3 W gelb
Ausgeschaltet < 1 W aus
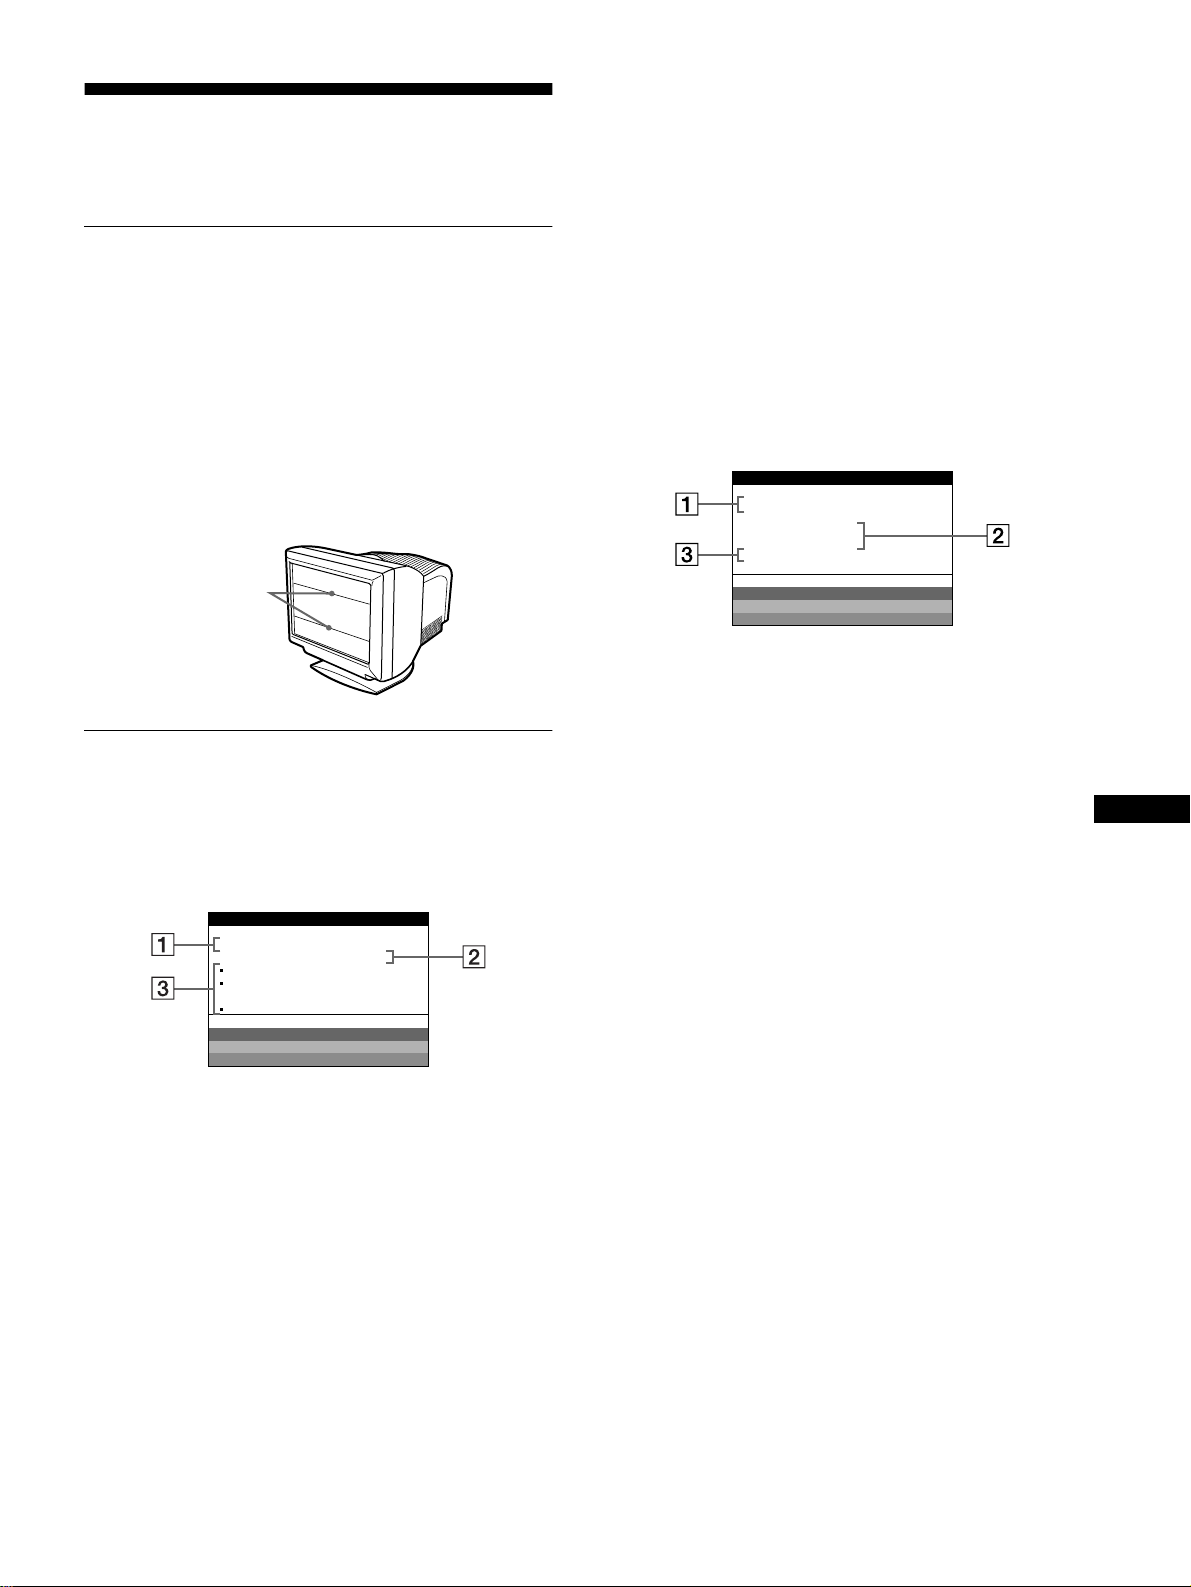
47
DE
Störungsbehebung
Lesen Sie bitte im folgenden Abschnitt nach, bevor Sie sich an
den Kundendienst wenden.
Wenn auf dem Bildschirm dünne
Linien (Dämpfungsdrähte)
erscheinen
Diese Linien sind bei einem Trinitron-Monitor normal und stellen
keine Fehlfunktion dar. Es handelt sich dabei um Schatten der
Dämpfungsdrähte, mit denen die Streifenmaske stabilisiert wird.
Besonders deutlich sind sie bei einem hellen (normalerweise
weißen) Bildschirmhintergrund zu sehen. Die Streifenmaske ist
ein wichtiges Merkmal der Trinitron-Bildröhre. Sie bewirkt, daß
mehr Licht auf den Bildschirm gelangt, und ermöglicht eine
höhere Farbintensität und Detailgenauigkeit.
Bildschirmmeldungen
Wenn am Eingangssignal ein Fehler vorliegt, erscheint eine der
folgenden Warnmeldungen auf dem Bildschirm.
Die Meldung KEIN EINGANGSSIGNAL erscheint
auf dem Bildschirm
1
11
1 Der ausgewählte Eingang
Diese Meldung gibt den ausgewählten Anschluß
(EINGANG 1 oder EINGANG 2) an.
2
22
2 Status des Eingangssignals
KEIN EINGANGSSIGNAL
Gibt an, daß kein Signal eingespeist wird oder daß am
ausgewählten Eingang kein Eingangssignal eingeht.
3
33
3 Abhilfemaßnahmen
Eine oder mehrere der folgenden Meldungen erscheinen
möglicherweise auf dem Bildschirm.
• Wird MIT PC AKTIVIEREN auf dem Bildschirm
angezeigt, drücken Sie eine beliebige Taste auf der
Computertastatur. Überprüfen Sie gegebenenfalls, ob die
Grafikkarte des Computers korrekt in den richtigen
Steckplatz eingebaut ist.
• Wenn WÄHLSCHALTER INPUT DRÜCKEN auf dem
Bildschirm erscheint, ändern Sie das Eingangssignal
(Seite 39).
• Wenn SIGNALKABEL PRÜFEN auf dem Bildschirm
erscheint, überprüfen Sie, ob der Monitor korrekt an den
Computer angeschlossen ist (Seite 38).
Die Meldung NICHT IM ABTASTBEREICH
erscheint auf dem Bildschirm
1
11
1 Ausgewählter Anschluß und Frequenzen des
aktuellen Eingangssignals
Diese Meldung gibt den ausgewählten Anschluß
(EINGANG 1 oder EINGANG 2) an. Wenn der Monitor die
Frequenzen des aktuellen Eingangssignals erkennt, werden
die Horizontal- und die Vertikalfrequenz ebenfalls angezeigt.
2
22
2 Status des Eingangssignals
NICHT IM ABTASTBEREICH
Gibt an, daß das Eingangssignal nicht den technischen Daten
des Monitors entspricht.
3
33
3 Abhilfemaßnahmen
SIGNAL-TIMING ÄNDERN erscheint auf dem Bildschirm.
Wenn Sie einen älteren Monitor durch diesen Monitor
ersetzen, schließen Sie den alten Monitor wieder an. Stellen
Sie dann die Grafikkarte des Computers auf eine
Horizontalfrequenz zwischen 30 und 121 kHz und eine
Vertikalfrequenz zwischen 48 und 160 Hz ein.
Weitere Informationen finden Sie unter „Symptome für Fehler
und Abhilfemaßnahmen“ auf Seite 48.
Dämpfungsdrähte
MONITOR FUNKTIONIERT
EINGANG 1:
KEIN EINGANGSSIGNAL
MI T PC AKT I V IEREN
WÄHLSCHALTER INPUT
DRÜCKEN
SIGNALKABEL PRÜFEN
WH I T E
RED
GREEN
BLUE
INFORMATION
MONITOR FUNKTIONIERT
EINGANG 1:130.0kHz/ H57
NICHT IM
ABTASTBEREICH
S IGNAL - T IMING ÄNDERN
WH I T E
RED
GREEN
BLUE
INFORMATION
z

48
Symptome für Fehler und Abhilfemaßnahmen
Wenn ein Problem auf den angeschlossenen Computer oder andere Geräte zurückzuführen ist, schlagen Sie bitte in der Dokumentation zu
dem angeschlossenen Gerät nach.
Führen Sie die Selbstdiagnosefunktion (Seite 50) aus, wenn sich ein Problem mit den im folgenden empfohlenen Maßnahmen nicht beheben
läßt.
Symptom Überprüfen Sie bitte folgendes:
Kein Bild
Die Netzanzeige 1 leuchtet nicht • Das Netzkabel muß korrekt angeschlossen sein.
• Der Monitor muß am Netzschalter 1 eingeschaltet sein.
Die Meldung KEIN
EINGANGSSIGNAL erscheint auf
dem Bildschirm, oder die
Netzanzeige 1 leuchtet gelb oder
wechselt zwischen grün und gelb
• Die Taste muß korrekt gedrückt sein (Seite 39).
• Achten Sie darauf, daß am Videoeingangsanschluß keine Stifte verbogen oder eingedrückt
sind.
xDurch den angeschlossenen Computer oder andere Geräte verursachte
Probleme
• Der Computer befindet sich im Energiesparmodus. Drücken Sie eine beliebige Taste auf
der Computertastatur.
• Überprüfen Sie, ob der Computer eingeschaltet ist.
• Die Grafikkarte muß korrekt im richtigen Bus-Steckplatz sitzen.
Die Meldungen KEIN
EINGANGSSIGNAL und
SIGNALKABEL PRÜFEN
erscheinen auf dem Bildschirm, oder
die Netzanzeige 1 leuchtet gelb
oder wechselt zwischen grün und
gelb
• Das Videosignalkabel muß korrekt angeschlossen sein, und alle Stecker müssen fest in
den Buchsen sitzen (Seite 38).
• Achten Sie darauf, daß am Videoeingangsanschluß keine Stifte verbogen oder
eingedrückt sind.
• Die Taste muß korrekt gedrückt sein (Seite 39).
xDurch den angeschlossenen Computer oder andere Geräte verursachte
Probleme
• Die Grafikkarte muß korrekt im richtigen Bus-Steckplatz sitzen.
Die Meldung NICHT IM
ABTASTBEREICH erscheint auf
dem Bildschirm
xDurch den angeschlossenen Computer oder andere Geräte verursachte
Probleme
• Die Videofrequenz muß im für den Monitor angegebenen Bereich liegen. Wenn Sie einen
älteren Monitor durch diesen Monitor ersetzt haben, schließen Sie den alten Monitor
wieder an und stellen eine Frequenz im folgenden Bereich ein:
Horizontal: 30 – 121 kHz
Vertikal: 48 – 160 Hz
Es wird keine Meldung angezeigt,
und die Netzanzeige 1 leuchtet grün
oder blinkt gelb
• Verwenden Sie die Selbstdiagnosefunktion (Seite 50).
Das Bild flimmert, springt,
oszilliert oder ist gestört
• Entfernen Sie alle möglichen Quellen elektrischer oder magnetischer Felder wie andere
Monitore, Laserdrucker, Ventilatoren, Leuchtstoffröhren oder Fernsehgeräte aus der Nähe
des Monitors.
• Halten Sie den Monitor von Stromleitungen fern, oder schützen Sie den Monitor durch
eine Magnetabschirmung.
• Schließen Sie das Netzkabel des Monitors an eine andere Steckdose, möglichst an einem
anderen Stromkreis, an.
• Versuchen Sie, den Monitor um 90 Grad nach links oder rechts zu drehen.
xDurch den angeschlossenen Computer oder andere Geräte verursachte
Probleme
• Schlagen Sie in der Anleitung zur Grafikkarte die korrekte Monitoreinstellung nach.
• Überprüfen Sie, ob der Grafikmodus und die Frequenz des Eingangssignals von diesem
Monitor unterstützt werden. Auch wenn die Frequenz innerhalb des unterstützten
Bereichs liegt, arbeiten einige Grafikkarten möglicherweise mit einem
Synchronisationsimpuls, der für eine korrekte Synchronisation des Monitors zu kurz ist.
• Stellen Sie die Auffrischungsrate am Computer (Vertikalfrequenz) auf den Wert ein, mit
dem Sie die besten Bilder erzielen.
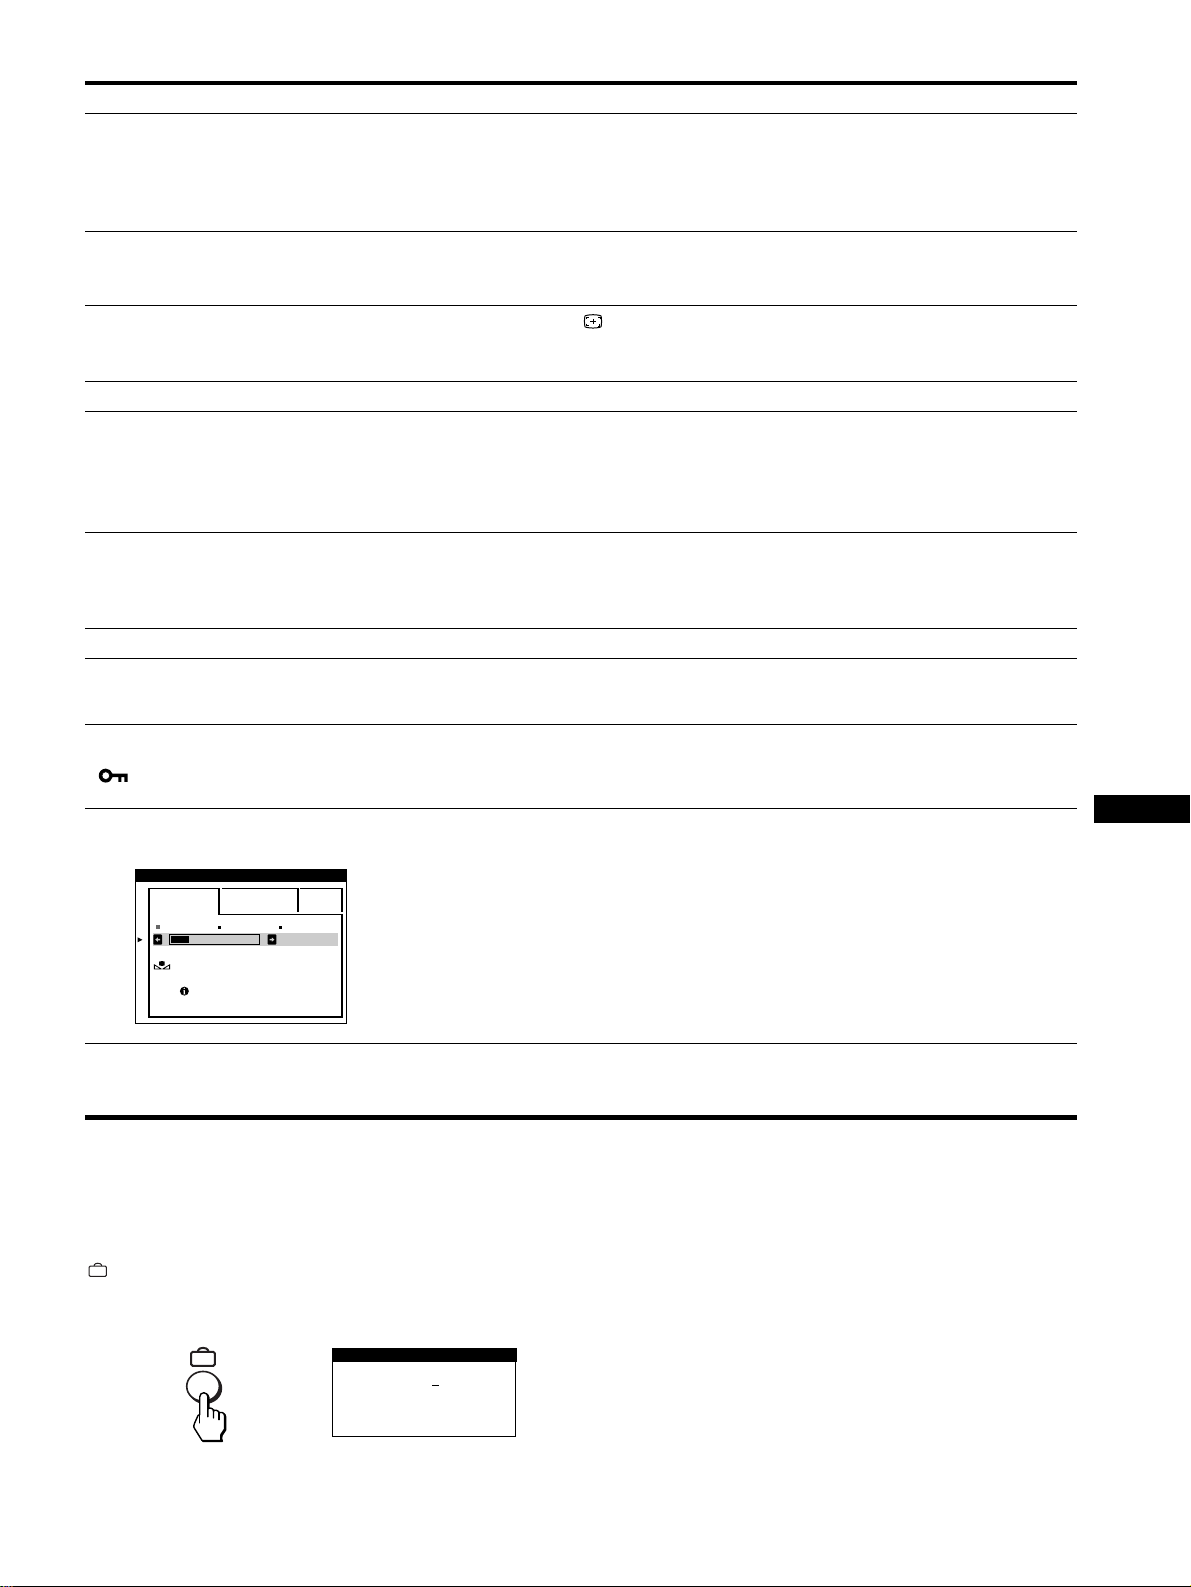
49
DE
* Ist ein zweiter Entmagnetisierungszyklus erforderlich, warten Sie nach dem ersten Zyklus mindestens 20 Minuten. Auf diese Weise erzielen Sie die besten
Ergebnisse. Dabei ist möglicherweise ein Summgeräusch zu hören, aber dies ist keine Fehlfunktion.
Anzeigen des Namens, der Seriennummer und
des Herstellungsdatums des Monitors
Während Videosignale am Monitor eingehen, halten Sie die Taste
mehr als fünf Sekunden lang gedrückt, um ein Feld mit
Informationen zum Monitor anzuzeigen.
Bleibt das Problem bestehen, wenden Sie sich an Ihren
Kundendienst. Halten Sie die folgenden Informationen bereit:
• Modellbezeichnung: GDM-5410
• Seriennummer
• Modellbezeichnung und technische Daten des Computers und
der Grafikkarte
Das Bild ist verschwommen • Stellen Sie Helligkeit und Kontrast ein (Seite 41).
• Entmagnetisieren Sie den Monitor* (Seite 45).
• Wenn Sie MOIRE-KORREKTUR auf EIN gesetzt haben, kann das Bild verschwommen
sein. Schwächen Sie in diesem Fall die Moiré-Korrektur ab, oder setzen Sie MOIRE-
KORREKTUR auf AUS (Seite 43).
Doppelbilder sind zu sehen • Verwenden Sie keine Bildschirmverlängerungskabel und/oder Videoschaltboxen, wenn
dieses Phänomen auftritt.
• Überprüfen Sie, ob alle Stecker fest in den jeweiligen Buchsen sitzen.
Das Bild ist nicht zentriert, oder
die Bildgröße ist nicht korrekt
• Drücken Sie die Taste (Seite 39).
• Stellen Sie die Bildgröße (Seite 42) bzw. die Position (Seite 42) ein. Beachten Sie, daß bei
bestimmten Videomodi die Anzeige nicht den gesamten Bildschirm füllt.
Die Bildränder sind gekrümmt • Stellen Sie die Geometrie ein (Seite 42).
Wellenförmige oder elliptische
Moiré-Effekte sind sichtbar
• Setzen Sie MOIRE-KORREKTUR auf EIN, und regulieren Sie den Grad der Moiré-
Korrektur, bis der Moiré-Effekt auf ein Minimum reduziert ist (Seite 43).
xDurch den angeschlossenen Computer oder andere Geräte verursachte
Probleme
• Wählen Sie ein anderes Muster für Ihren Desktop.
Die Farbe ist nicht gleichmäßig • Entmagnetisieren Sie den Monitor* (Seite 45). Wenn Sie ein Gerät, das ein Magnetfeld
erzeugt (z. B. einen Lautsprecher), in der Nähe des Monitors aufstellen oder wenn Sie die
Richtung des Monitors ändern, sind die Farben möglicherweise nicht mehr gleichmäßig.
• Stellen Sie die Farbreinheit ein (Seite 43).
Weiß sieht nicht weiß aus • Stellen Sie die Farbtemperatur ein (Seite 44).
An den Rändern von Buchstaben
und Linien sind rote oder blaue
Schatten zu sehen
• Stellen Sie die Konvergenz ein (Seite 43).
Die Bedienelemente am Monitor
funktionieren nicht
( erscheint auf dem
Bildschirm.)
• Wenn die Tastatursperre auf EIN gesetzt ist, setzen Sie sie auf AUS (Seite 45).
Die Funktion FARBWIEDER-
HERSTELLUNG funktioniert nicht
• Bevor Sie diese Funktion verwenden können, muß sich der Monitor mindestens 30
Minuten lang im normalen Betriebsmodus befinden (Netzanzeige leuchtet grün). Weitere
Informationen zur Funktion FARBWIEDER-HERSTELLUNG finden Sie auf Seite 45.
• Ändern Sie die Energiespareinstellungen Ihres Computers, damit der Monitor länger als
30 Minuten im normalen Betriebsmodus bleibt.
• Aufgrund des natürlichen Alterungsprozesses der Bildröhre läßt sich diese Funktion nach
längerer Zeit unter Umständen nicht mehr ausführen.
Unmittelbar nach dem Einschalten
ist ein Summgeräusch zu hören
• Dieses Geräusch wird vom automatischen Entmagnetisierungszyklus verursacht. Wenn
Sie das Gerät einschalten, wird der Monitor automatisch etwa zwei Sekunden lang
entmagnetisiert.
Symptom Überprüfen Sie bitte folgendes:
5000K 6500K 930 K0
50 K00
ERST NACH/WAR -M
UP /VERFÜGBAR
EINFACH KOMPLEX s BGR
FARBWI EDER-
HERSTELLUNG
FARBE
SER NO
:
1234567
MODEL
:
GDM 5410
MANUFACTURED
: 1999-52
INFORMATION
Beispiel
b

50
Selbstdiagnosefunktion
Dieser Monitor verfügt über eine Selbstdiagnosefunktion. Wenn
an dem Monitor oder am Computer ein Problem auftritt, erscheint
ein leerer Bildschirm, und die Netzanzeige 1 leuchtet grün auf
oder blinkt gelb. Wenn die Netzanzeige 1 gelb leuchtet, befindet
sich der Computer im Energiesparmodus. Drücken Sie eine
beliebige Taste auf der Tastatur.
Wenn die Netzanzeige
1
grün leuchtet
1
Lösen Sie alle Stecker aus den
Videoeingangsbuchsen 1 und 2, oder schalten Sie
den/die angeschlossenen Computer aus.
2
Schalten Sie den Monitor am Netzschalter 1 aus
und dann wieder ein.
3
Halten Sie die Taste , 2 Sekunden lang gedrückt,
bevor der Monitor in den Energiesparmodus
wechselt.
Wenn alle vier Farbbalken (weiß, rot, grün, blau) angezeigt
werden, funktioniert der Monitor ordnungsgemäß. Schließen Sie
die Videoeingangskabel wieder an, und überprüfen Sie den
Zustand des/der Computer(s).
Wenn die Farbbalken nicht erscheinen, liegt möglicherweise ein
Fehler am Monitor vor. Wenden Sie sich mit der Beschreibung
des Problems an Ihren Kundendienst.
Wenn die Netzanzeige
1
gelb blinkt
Schalten Sie den Monitor am Netzschalter 1 aus und
dann wieder ein.
Wenn die Netzanzeige 1 jetzt grün leuchtet, funktioniert der
Monitor ordnungsgemäß.
Wenn die Netzanzeige 1 immer noch blinkt, liegt
möglicherweise ein Fehler am Monitor vor. Ermitteln Sie das
Intervall, in dem die Netzanzeige 1 blinkt (in Sekunden), und
wenden Sie sich mit der Beschreibung des Problems an Ihren
Kundendienst. Notieren Sie sich unbedingt die
Modellbezeichnung und die Seriennummer des Monitors.
Notieren Sie sich außerdem das Fabrikat und Modell Ihres
Computers und der Grafikkarte.
Technische Daten
Kathodenstrahlröhre Streifenabstand 0,24 mm
Bildschirmdiagonale 21 Zoll
Ablenkung 90 Grad
FD-Trinitron
Effektive Bildgröße ca. 403,8
×
302,2 mm (B/H)
Anzeigegröße 19,8 Zoll
Empfohlene Auflösung Horizontal: 1280 Punkte
Vertikal: 1024 Zeilen
Standardanzeigegröße ca. 388
×
291 mm (B/H)
oder
ca. 364
×
291 mm (B/H)
Ablenkfrequenz* Horizontal: 30 bis 121 kHz
Vertikal: 48 bis 160 Hz
Betriebsspannung 100 bis 240 V Wechselstrom,
50 – 60 Hz, 2,0 – 1,0 A
Leistungsaufnahme ca. 145 W
Abmessungen ca. 501
×
498
×
498 mm (B/H/T)
Gewicht ca. 32 kg
Plug and Play DDC1/2B/2Bi, GTF**
* Empfohlene Werte für das horizontale und vertikale Timing
• Das horizontale Synchronbreitenverhältnis sollte bei mehr
als 4,8% des horizontalen Gesamt-Timing oder bei 0,8 µSek.
liegen, je nachdem, welcher Wert höher ist.
• Die horizontale Austastbreite sollte über 2,3 µSek. liegen.
• Die vertikale Austastbreite sollte über 450 µSek. liegen.
** Wenn das Eingangssignal GTF-kompatibel ist
(GTF = Generalized Timing Formula), stellt die GTF-
Funktion des Monitors das Bild automatisch optimal ein.
Änderungen, die dem technischen Fortschritt dienen, bleiben
vorbehalten.
Netzanzeige
1
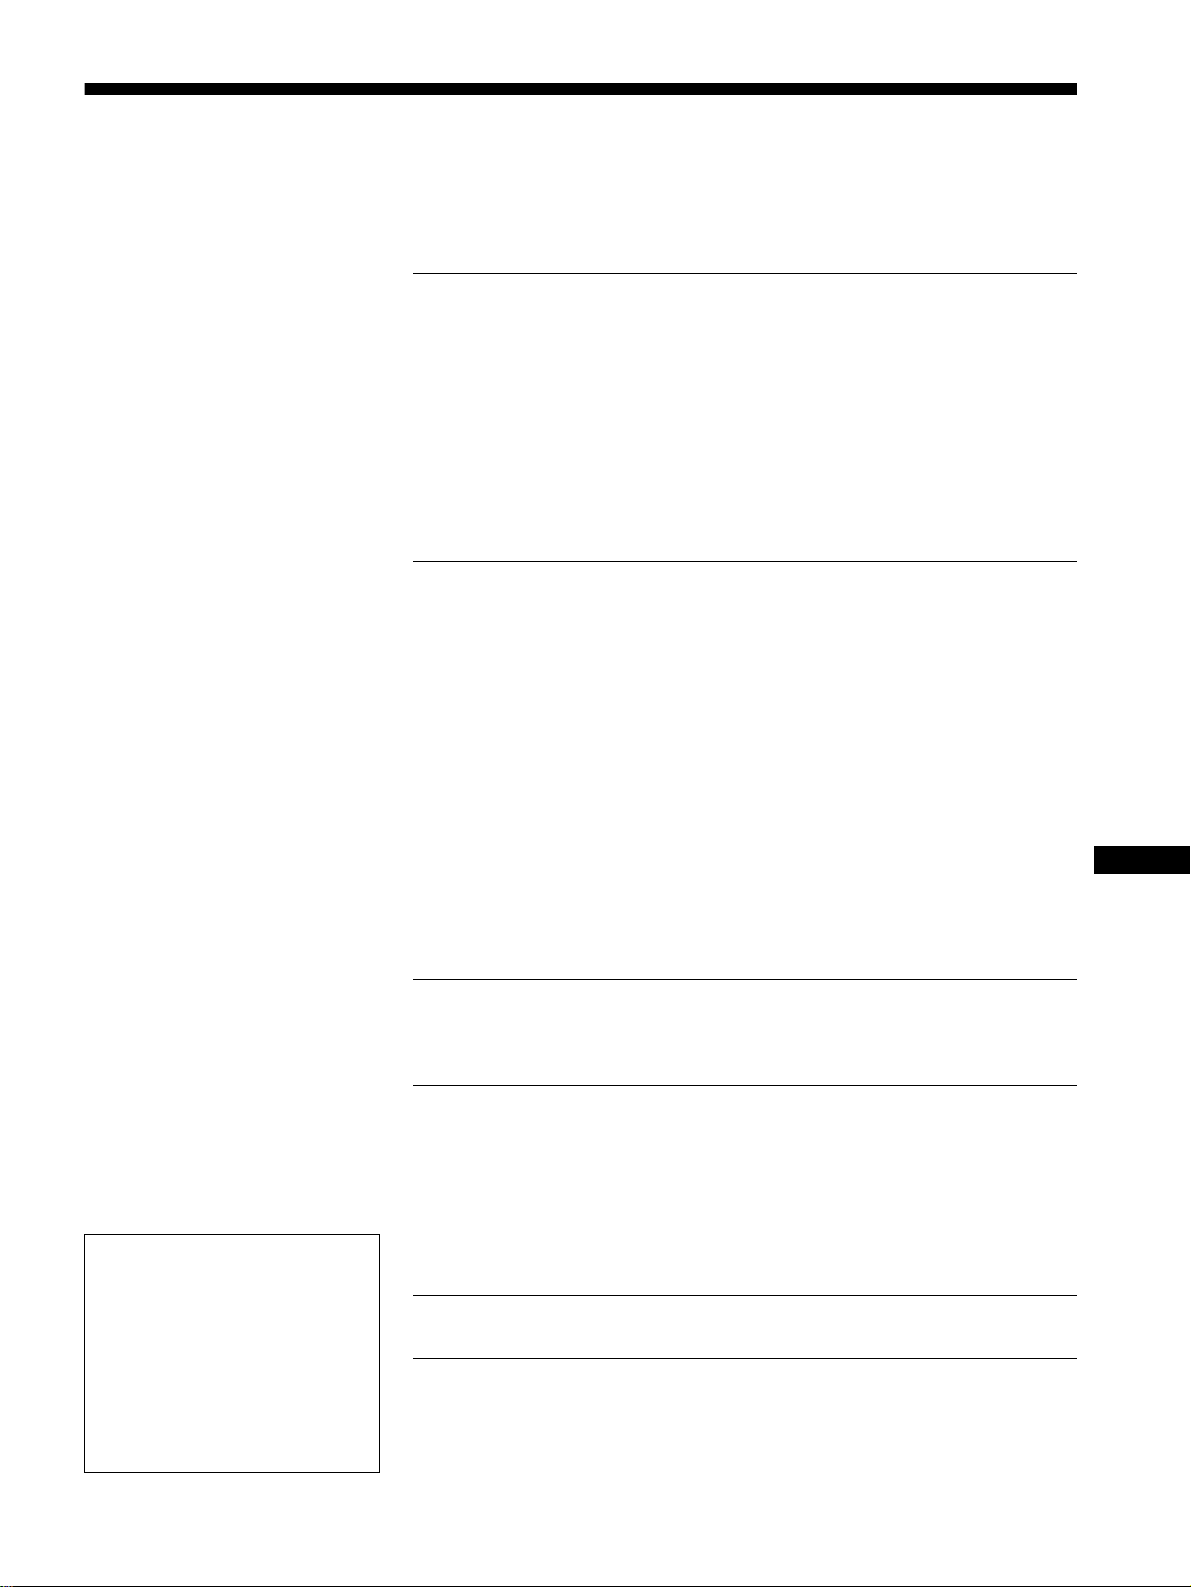
51
Indice
IT
• VESA e DDC
sono marchi di fabbrica
di Video Electronics Standard
Association.
•
E
NERGY
S
TAR è un marchio
registrato negli U.S.A.
• Tutti i nomi degli altri prodotti citati in
questo manuale potrebbero essere
marchi di fabbrica o marchi di fabbrica
registrati delle rispettive compagnie.
• Inoltre, “
” e “
” non sempre vengono
riportati nel manuale.
Precauzioni. . . . . . . . . . . . . . . . . . . . . . . . . . . . . . . . . . . . . . . . . . . 52
Identificazione dei componenti e dei comandi . . . . . . . . . . . . . . . . 53
Installazione . . . . . . . . . . . . . . . . . . . . . . . . . . . . . . . . . . .54
Punto 1:
Rimozione del coperchio posteriore . . . . . . . . . . . . . . . . 54
Punto 2:
Collegamento del monitor al computer . . . . . . . . . . . . . . 54
Punto 3:
Collegamento del cavo di alimentazione. . . . . . . . . . . . . 54
Punto 4:
Applicazione del coperchio posteriore. . . . . . . . . . . . . . . 54
Punto 5:
Accensione del monitor e del computer . . . . . . . . . . . . . 54
Selezione della lingua dei menu a schermo (LANGUAGE) . . . . . . 55
Selezione del segnale di ingresso . . . . . . . . . . . . . . . . . . . . . . . . . 55
Ridimensionamento e centratura automatici dell’immagine . . . . . . 55
Personalizzazione del monitor . . . . . . . . . . . . . . . . . . . .56
Come spostarsi all’interno del menu. . . . . . . . . . . . . . . . . . . . . . . . 56
Regolazione della luminosità e del contrasto . . . . . . . . . . . . . . . . . 57
Regolazione delle dimensioni dell’immagine
(DIMENS/CENTRO) . . . . . . . . . . . . . . . . . . . . . . . . . . . . . . . . . . . . 58
Regolazione della centratura dell’immagine
(DIMENS/CENTRO) . . . . . . . . . . . . . . . . . . . . . . . . . . . . . . . . . . . . 58
Ingrandimento o riduzione dell’immagine (ZOOM). . . . . . . . . . . . . 58
Regolazione della forma dell’immagine (GEOMETRIA). . . . . . . . . 58
Regolazione della convergenza (CONVERGENZA) . . . . . . . . . . . 59
Regolazione della qualità dell’immagine (SCHERMO). . . . . . . . . . 59
Regolazione del colore dell’immagine (COLORE) . . . . . . . . . . . . . 60
Impostazioni aggiuntive (OPZIONI) . . . . . . . . . . . . . . . . . . . . . . . . 61
Ripristino delle regolazioni . . . . . . . . . . . . . . . . . . . . . . . . . . . . . . . 62
Caratteristiche . . . . . . . . . . . . . . . . . . . . . . . . . . . . . . . . .62
Funzione di risparmio energetico . . . . . . . . . . . . . . . . . . . . . . . . . . 62
Guida alla soluzione dei problemi . . . . . . . . . . . . . . . . .63
Se sullo schermo appaiono delle linee sottili
(cavi di smorzamento) . . . . . . . . . . . . . . . . . . . . . . . . . . . . . . . . . . 63
Messaggi a schermo. . . . . . . . . . . . . . . . . . . . . . . . . . . . . . . . . . . . 63
Sintomi e soluzioni dei problemi . . . . . . . . . . . . . . . . . . . . . . . . . . . 64
Funzione di autodiagnostica. . . . . . . . . . . . . . . . . . . . . . . . . . . . . . 66
Caratteristiche tecniche . . . . . . . . . . . . . . . . . . . . . . . . .66
Appendix. . . . . . . . . . . . . . . . . . . . . . . . . . . . . . . . . . . . . . . i
TCO’99 Eco-document . . . . . . . . . . . . . . . . . . . . . . . . . . . . . . . . . . . .i
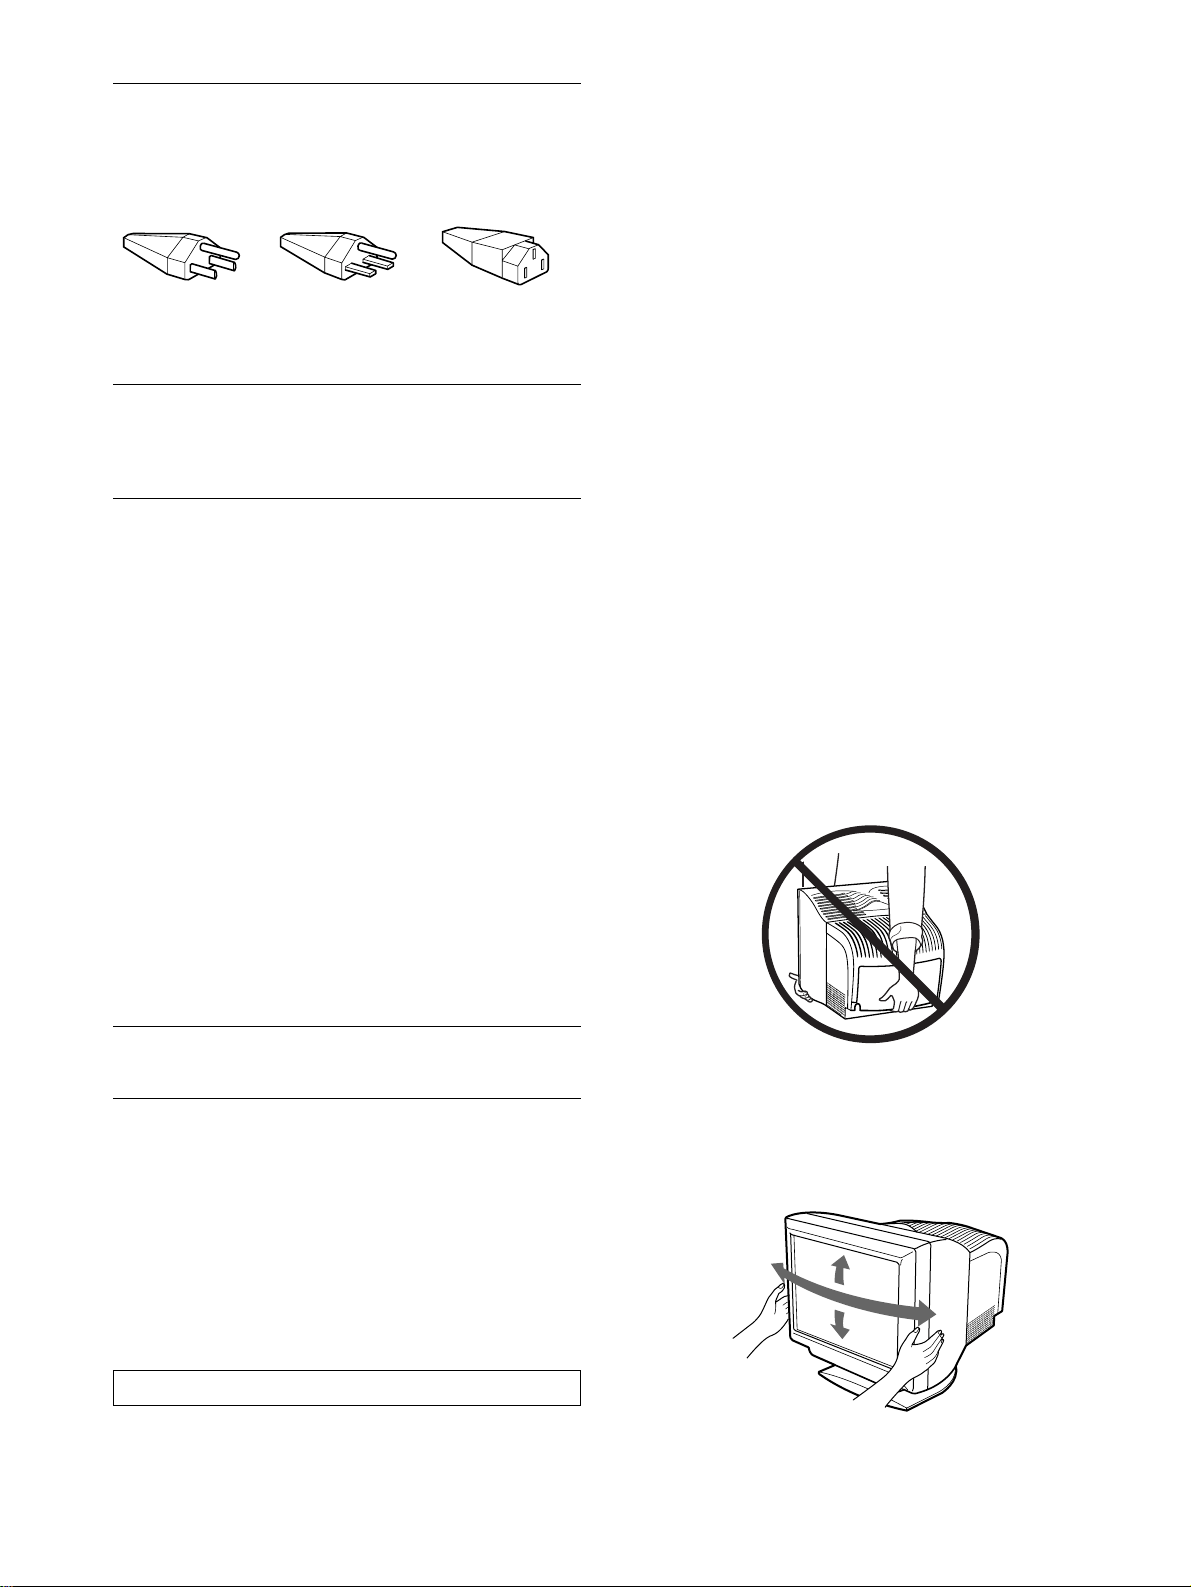
52
Precauzioni
Avvertenze per i collegamenti dell’alimentazione
Utilizzare un cavo di alimentazione compatibile con la tensione
operativa locale.
• Prima di scollegare il cavo di alimentazione, attendere almeno
30 secondi dallo spegnimento dell’unità per permettere la
dispersione dell’elettricità statica sulla superficie dello
schermo.
• Non appena si accende l’apparecchio, lo schermo viene
smagnetizzato per circa 2 secondi. Questa operazione crea un
forte campo magnetico attorno allo schermo che potrebbe
danneggiare i dati memorizzati su nastri magnetici o dischi
situati vicino al monitor. Collocare eventuali apparecchiature
per la registrazione magnetica, nastri e dischi lontano dal
monitor.
Installazione
Non collocare il monitor nei seguenti luoghi:
• su superfici (tappeti, coperte, ecc.) né vicino a materiali (tende,
tessuti, ecc.) che potrebbero bloccarne le prese di ventilazione
• vicino a fonti di calore come radiatori o condotti d’aria calda,
né in luoghi soggetti alla luce diretta del sole
• in luoghi soggetti a forti escursioni termiche
• in luoghi soggetti a scosse o vibrazioni meccaniche
• su superfici instabili
• vicino ad apparecchiature che generano campi magnetici, come
un trasformatore o linee ad alta tensione
• vicino a o su superfici metalliche con carica elettrica
Manutenzione
• Pulire lo schermo con un panno morbido. Se si utilizza un
detergente liquido per vetri, assicurarsi che non contenga
soluzioni antistatiche o additivi simili, onde evitare di graffiare
il rivestimento dello schermo.
• Non strofinare, toccare o tamburellare sulla superficie dello
schermo con oggetti appuntiti o abrasivi, come la punta di una
penna o un cacciavite, onde evitare di graffiare il cinescopio a
colori.
• Pulire il rivestimento esterno, il pannello e i comandi con un
panno morbido leggermente inumidito con un soluzione
detergente neutra. Non utilizzare alcun tipo di spugnette o
polveri abrasive o solventi, come alcool o benzene.
Trasporto
Per trasportare il monitor o inviarlo in riparazione, utilizzare il
materiale di imballaggio originario.
Non sollevare il monitor afferrandone il coperchio posteriore
come illustrato sotto, poiché il coperchio potrebbe fuoriuscire.
Uso del sistema orientabile
È possibile regolare il monitor entro l’angolazione illustrata qui
sotto. Per ruotare il monitor verticalmente o orizzontalmente,
afferrarlo alla base con entrambe le mani.
Stati Uniti,
Canada,
Taiwan,
Corea,
Giappone
Europa
continentale
Gran
Bretagna,
Irlanda
Australia,
Nuova
Zelanda
Tipo di spina
NEMA S-15P
Tipo di spina
CEE7/VII
(Schuko)
Tipo di spina
B S 1363
Tipo di spina
SAA AS 3112
Tipo di cavo
SJT
Tipo di cavo
HAR(HO5VV
-F3G1.0)
Tipo di cavo
HAR(HO5VV
-F3G1.0)
Tipo di cavo
CDB03PLP
Potenza
nominale
minima del set
di cavi
10 A/125 V
18/3AWG
Potenza
nominale min.
set cavi
10 A/250 V
Potenza
nominale min.
set cavi
10 A/250 V
Potenza
nominale min.
set cavi
10 A/250 V
Lunghezza del
cavo
(+/– 0,1 m)
2 m
Lunghezza del
cavo
(+/– 0,1 m)
2,5 m
Lunghezza del
cavo
(+/– 0,1 m)
2,5 m
Lunghezza del
cavo
(+/– 0,1 m)
2,5 m
Approvazione
delle norme di
sicurezza
UL/CSA
Approvazione
delle norme di
sicurezza
HAR
Approvazione
delle norme di
sicurezza
BSI, ASTA
Approvazione
delle norme di
sicurezza
Dept. of
Energy of
New South
Wales
La modalità di alimentazione universale è valida ovunque; il
monitor viene regolato automaticamente se si utilizzano un
cavo di alimentazione e una spina adatti alla tensione locale.
Installare l’unità vicino ad una presa facilmente accessibile.
115 V 230 V
(non in dotazione nel
set di cavi standard)
Set di cavi CEE-22,
terminale femmina
(con tutti i set di cavi
di alimentazione)
90°
5°
90°
15°
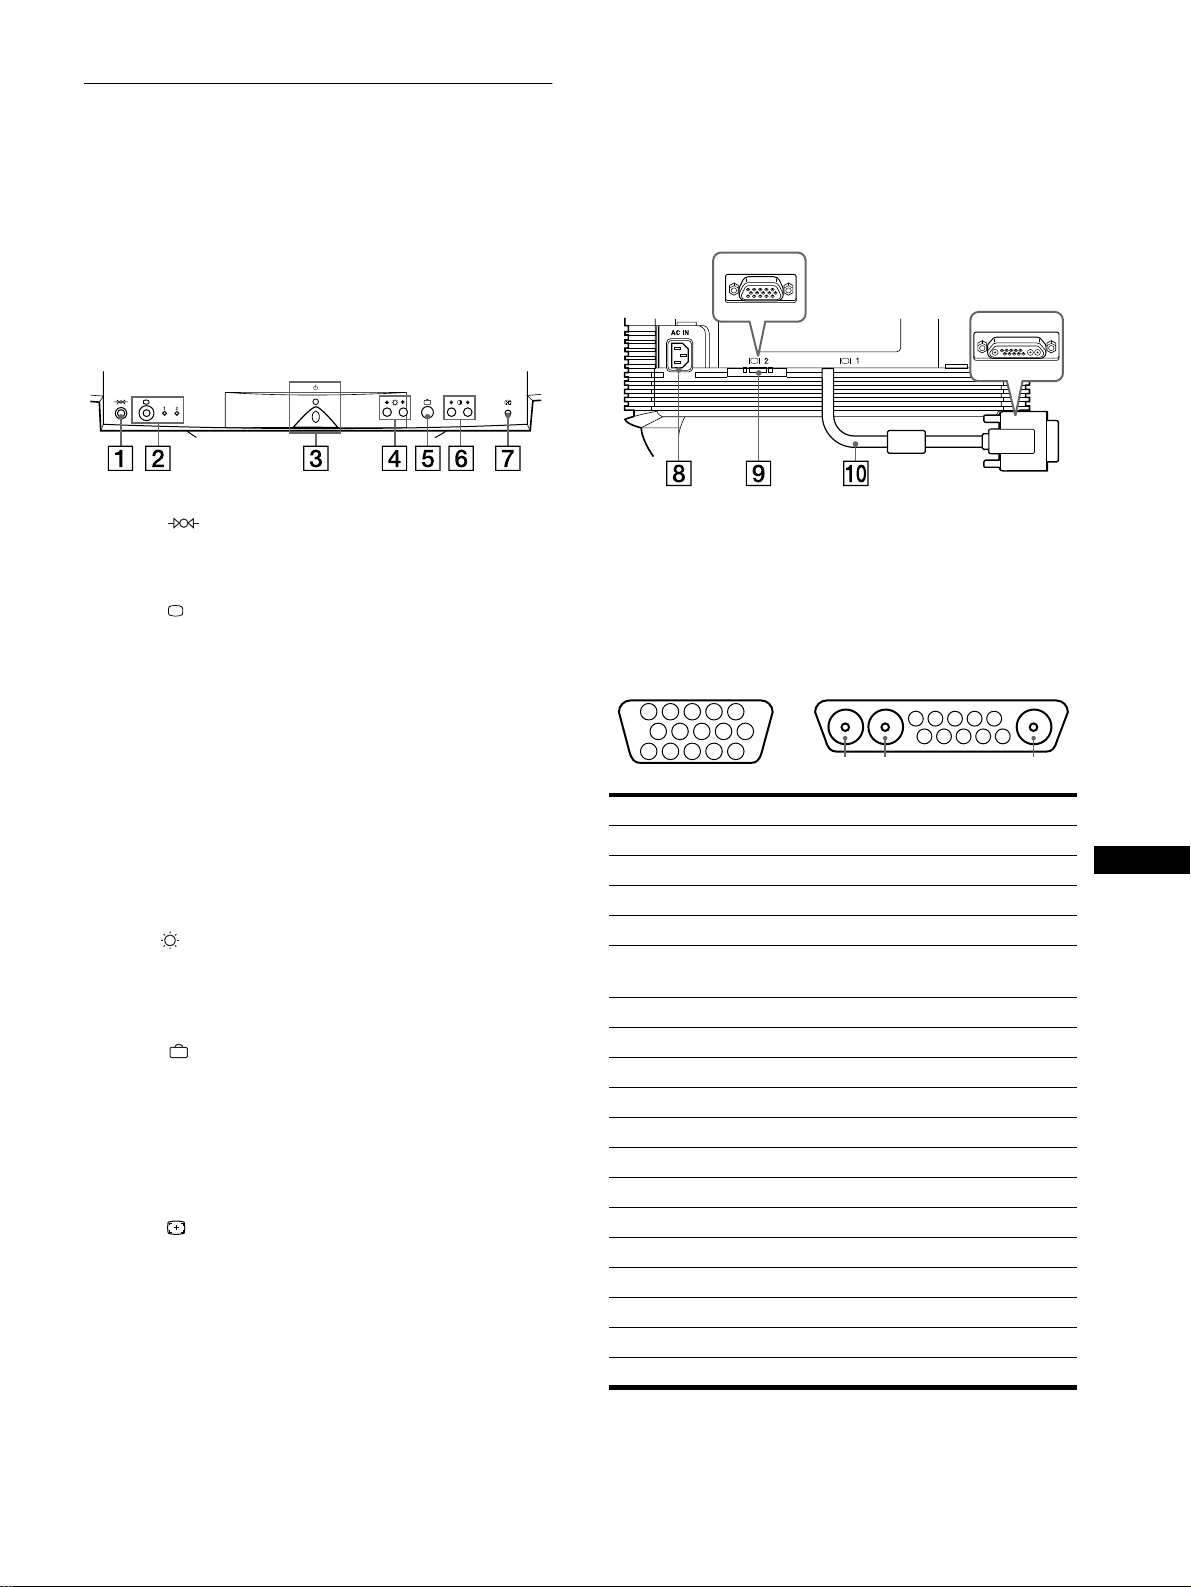
53
IT
Identificazione dei componenti e
dei comandi
Per ulteriori informazioni, vedere le pagine tra parentesi.
1
11
1 Tasto (ripristina) (pagina 62)
Utilizzare questo tasto per ripristinare le impostazioni di
fabbrica.
2
22
2 Tasto (ingresso) e indicatori 1 (13W3) / 2 (HD15)
(pagina 55)
Utilizzare questo tasto per selezionare il segnale d’ingresso
video 1 (13W3) o 2 (HD15).
Ogni volta che si preme questo tasto, viene selezionato uno
dei due segnali e il relativo indicatore si illumina.
3
33
3 Interruttore e indicatore di accensione
1 (alimentazione) (pagine 54, 62, 66)
Utilizzare questo tasto per accendere e spegnere il monitor.
Quando il monitor viene acceso, l’indicatore di accensione si
illumina in verde, quindi lampeggia in verde o in ambra; si
illumina in ambra quando il monitor entra nel modo di
risparmio energetico.
4
44
4 Tasti (luminosità) m/M (pagina 57)
Utilizzare questi tasti per visualizzare il menu
LUMINOSITA/CONTRASTO, questi tasti funzionano come
i tastiýmîMýýutilizzati durante la selezione delle voci dei menuï
5
55
5 Tasto (menu) (pagina 57)
Utilizzare questo tasto per visualizzare il menu principale.
6
66
6 Tasti 6 (contrasto) </, (pagina 57)
Utilizzare questi tasti per visualizzare il menu
LUMINOSITA/CONTRASTO, questi tasti funzionano come
i tasti </, utilizzati per le operazioni di regolazione.
7
77
7 Tasto ASC (ridimensionamento e centratura
automatici) (pagina 55)
Utilizzare questo tasto per regolare automaticamente le
dimensioni e la centratura dell’immagine.
8
88
8 Connettore AC IN (pagina 54)
Utilizzare questo connettore per alimentare il monitor con
corrente alternata.
9
99
9 Connettore 2 di ingresso video (HD15) (pagina 54)
Utilizzare questo connettore per immettere i segnali video
RGB (0,700 Vp-p, positivo) e i segnali sincronici.
0
00
0 Connettore 1 d’ingresso video (13W3) (pagina 54)
Utilizzare questo connettore per immettere segnali video
RGB (0,700 Vp-p, positivo) e segnali sincronici.
* DDC (Display Data Channel) è uno standard di VESA.
** I piedini fungono da ingresso sincronico combinato e da ingresso
sincronico orizzontale se sul piedino n. 7 è presente la sincronia
verticale.
Fronte Retro (con coperchio aperto)
N. 9
99
9 Segnale 0
00
0 Segnale
A1 ––– Rosso
A2 ––– Verde
A3 ––– Blu
1 Rosso Orologio Dati (SCL)*
2Verde
(Sincronismo su verde)
DDC + 5 V*
3Blu –––
4 ID (Terra) Terra DDC*
5 Terra DDC* C Sync**
6 Terra Rosso Dati bidirezionali (SDA)*
7 Terra Verde Sincronia V
8 Terra Blu ID (100
Ω
)
9 DDC + 5V* ID (100
Ω
)
10 Terra Terra
11 ID (Terra) –––
12 Dati bidirezionali (SDA)* –––
13 Sincronia O –––
14 Sincronia V –––
15 Orologio Dati (SCL)* –––
5 4 3 2
1
678910
11
A3
12131415
5 4 3 2
1
678910
A2 A1
9
HD15
0
13W3
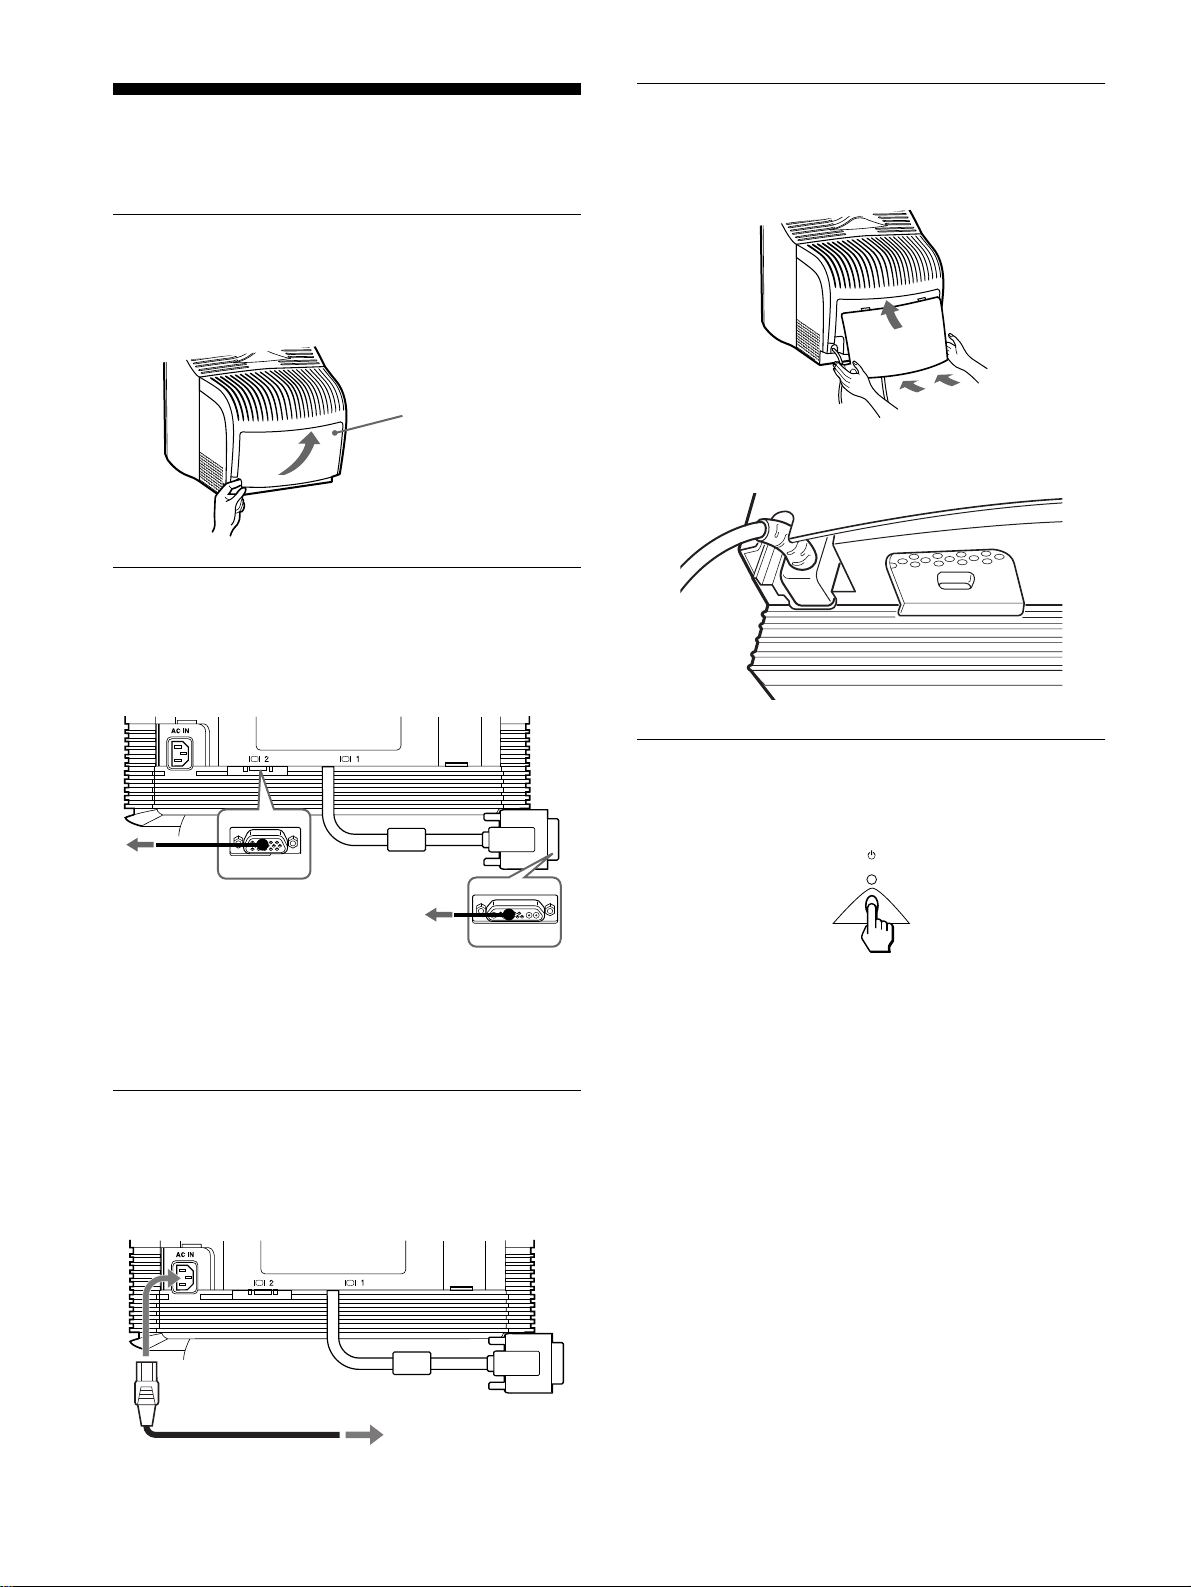
54
Installazione
Questo monitor funziona con sistemi di piattaforme che utilizzano
frequenze orizzontali comprese tra 30 e 121 kHz.
Punto 1:Rimozione del coperchio
posteriore
Prima di effettuare i collegamenti, rimuovere il coperchio
posteriore del monitor.
Punto 2:Collegamento del monitor
al computer
Assicurarsi che il monitor e il computer siano spenti, quindi
collegare il cavo del segnale video al connettore di ingresso video
del monitor e all’uscita video del computer.
Note
• Non toccare i piedini del connettore del cavo del segnale video onde
evitare di piegarli.
• Durante il collegamento del cavo del segnale video, controllare
l’allineamento dei connettori. Non inserire forzatamente il cavo nel
connettore in modo errato onde evitare di piegare i piedini.
Punto 3:Collegamento del cavo di
alimentazione
Con il monitor e il computer spenti, collegare prima il cavo di
alimentazione adeguato all’alimentazione locale al monitor,
quindi collegare il cavo ad una presa di corrente.
Punto 4:Applicazione del
coperchio posteriore
Applicare il coperchio posteriore al monitor.
Far passare il cavo CA nell’apertura del cavo nella parte inferiore
del coperchio posteriore.
Punto 5:Accensione del monitor e
del computer
Accendere prima il monitor, quindi accendere il computer.
L’installazione del monitor è ora terminata.
Se necessario, utilizzare i comandi del monitor per regolare
l’immagine.
Se sullo schermo non appaiono le immagini
• Controllare che il monitor sia stato collegato correttamente al
computer.
• Se sullo schermo appare il messaggio NO
SEGNALESINGRESSO, seguire i messaggi a schermo
(pagina 63).
• Se si sostituisce un monitor vecchio con questo modello e sullo
schermo appare il messaggio FUORI GAMMA SCANS,
ricollegare il vecchio monitor. Quindi regolare la scheda
grafica del computer in modo che la frequenza orizzontale sia
compresa tra 30 e 121 kHz e la frequenza verticale sia compresa
tra 48 e 160 Hz.
Per ulteriori informazione sui messaggi a schermo, vedere la
sezione “Sintomi e soluzioni dei problemi” del monitor a
pagina 64.
Coperchio
Per rimuovere il
coperchio, aprire la parte
inferiore e farla uscire.
ad un computer
con uscita video
HD15
ad un computer con
uscita video 13W3
alla presa a muro CA
cavo di alimentazione
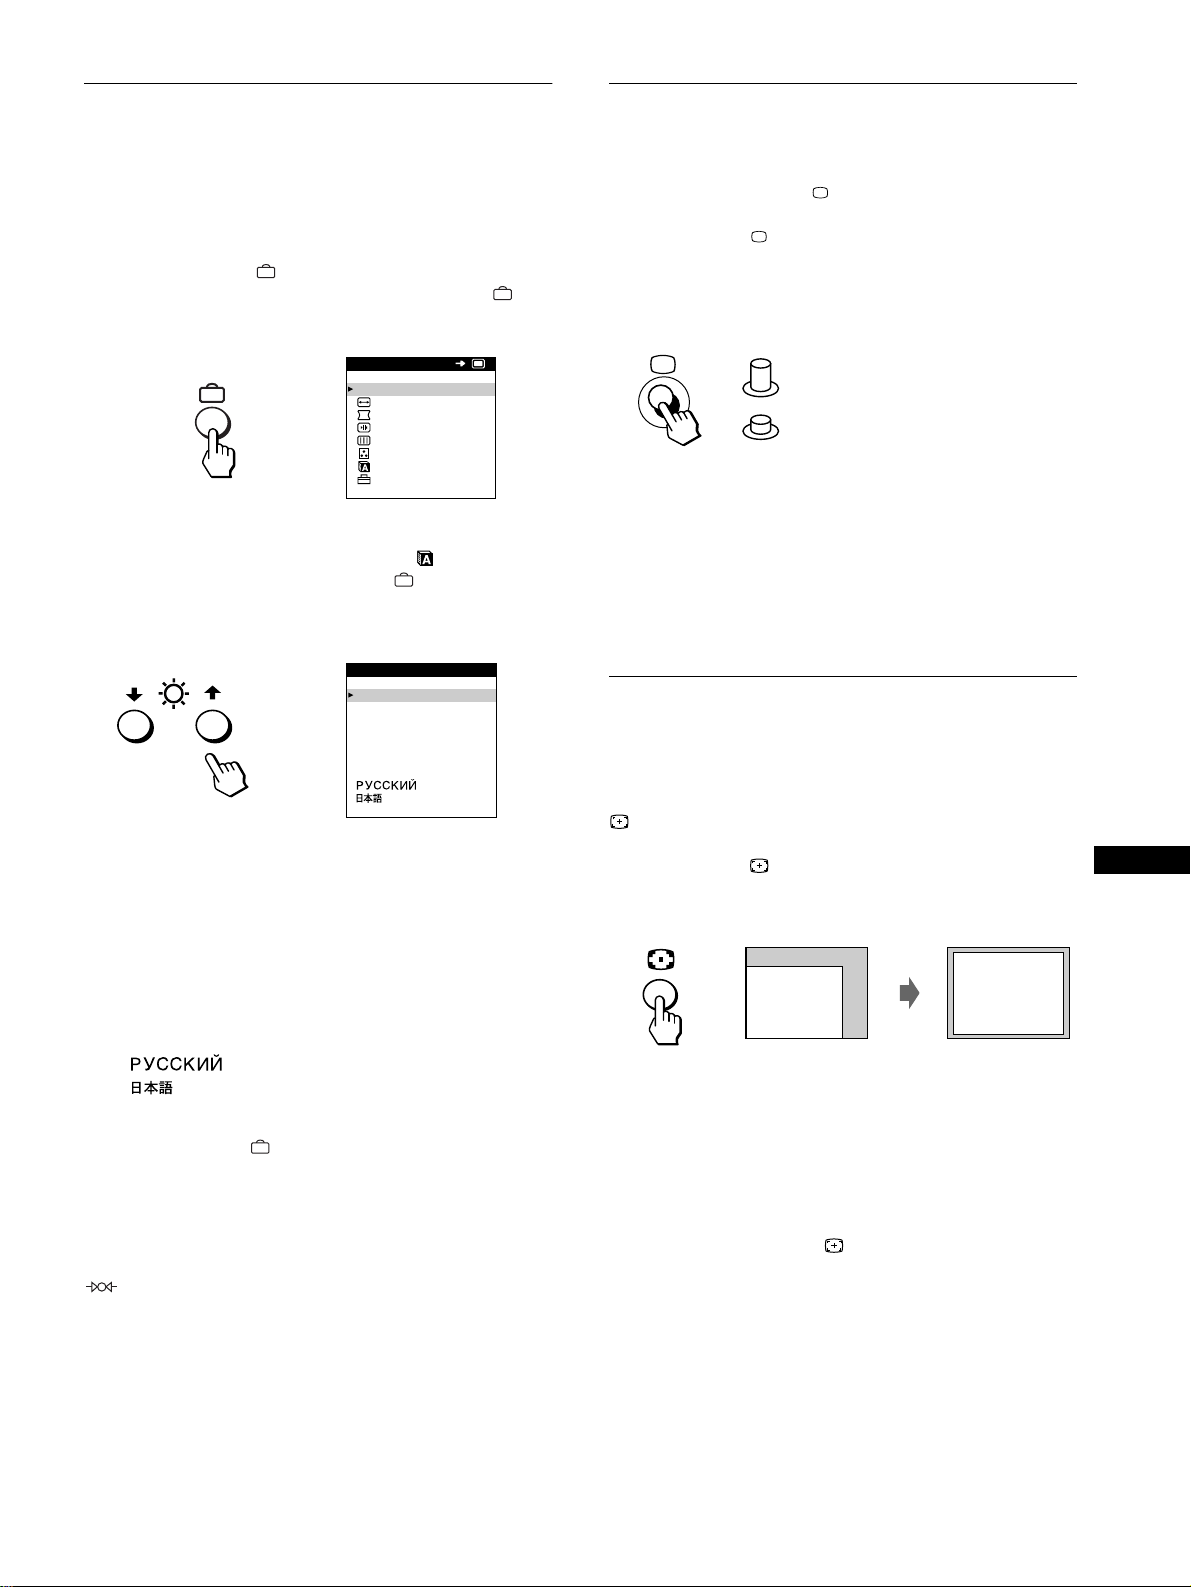
55
IT
Selezione della lingua dei menu a
schermo (LANGUAGE)
I menu a schermo sono disponibili nelle seguenti lingue: inglese,
francese, tedesco, spagnolo, italiano, olandese, svedese, russo e
giapponese. L’impostazione predefinita è la lingua inglese.
1
Premere il tasto .
Per ulteriori informazioni su come utilizzare il tasto ,
vedere a pagina 57.
2
Premere i tasti m/M per evidenziare LANGUAGE,
quindi premere di nuovo il tasto .
Per ulteriori informazioni su come utilizzare i tasti m/M,
vedere a pagina 57.
3
Per selezionare la lingua desiderata, premere i tasti
m/M.
• ENGLISH: Inglese
• FRANÇAIS: Francese
• DEUTSCH: Tedesco
• ESPAÑOL: Spagnolo
• ITALIANO
• NEDERLANDS: Olandese
• SVENSKA: Svedese
• : Russo
• : Giapponese
Per chiudere il menu
Premere una volta il tasto per ritornare al MENU principale, premerlo
due volte per ritornare al modo di visualizzazione normale. Se non si
preme alcun tasto, il menu verrà chiuso automaticamente dopo circa
30 secondi.
Per reimpostare la lingua inglese
Durante la visualizzazione del menu LANGUAGE, premere il tasto
(
ripristina
).
Selezione del segnale di ingresso
È possibile collegare due computer al monitor utilizzando i
connettori di ingresso video 1 e 2. Per selezionare uno dei due
computer, utilizzare il tasto .
Premere il tasto .
Ogni volta che si preme questo tasto, viene selezionato uno dei
due segnali d’ingresso e il relativo indicatore si illumina.
Quando viene premuto il tasto, INPUT 2 viene selezionato, se il
tasto non viene premuto, viene selezionato INPUT 1.
Il connettore selezionato appare nello schermo per due secondi.
Sullo schermo appare “INPUT 1” (connettore 1 di ingresso video)
o “INPUT 2” (connettore 2 di ingresso video).
Nota
Se nessun segnale viene inviato al connettore selezionato, sullo schermo
appare il messaggio NO SEGNALESINGRESSO. Dopo alcuni secondi,
il monitor entra nel modo di risparmio energetico. In tal caso, selezionare
l’altro connettore.
Ridimensionamento e centratura
automatici dell’immagine
È possibile regolare l’immagine in modo che venga visualizzata
sullo schermo intero in modo facile premendo il tasto
(ridimensionamento e centratura automatici).
Premere il tasto .
L’immagine viene visualizzata automaticamente sullo schermo
intero.
Note
• Utilizzare questa funzione con computer su cui è possibile visualizzare
le immagine con le stesse dimensioni dello schermo. Questa funzione
potrebbe non funzionare correttamente se il colore di sfondo è scuro o
se l’immagine di ingresso non riempie lo schermo fino ai bordi.
• Le immagini con rapporto di formato di 5:4 (risoluzione: 1280
×
1024,
1600
×
1280) vengono visualizzate nella loro risoluzione reale senza
riempire lo schermo fino ai bordi.
• Quando viene premuto il tasto , l’immagine visualizzata si muove
per alcuni secondi. Non si tratta di un guasto al monitor.
USCI TA
DIMENS /CENTRO
GEOMETR I A
CONVERGENZA
SCHERMO
COLORE
LANGUAGE
OPZ IONI
MENU
OK
b
ENGL ISH
FRANÇA IS
DEUTSCH
ESPAÑOL
ITALIANO
NEDERLANDS
SVENSKA
LANGUAGE
b
INPUT 1 (connettore 1 d’ingresso video)
INPUT 2 (connettore 2 d’ingresso video)
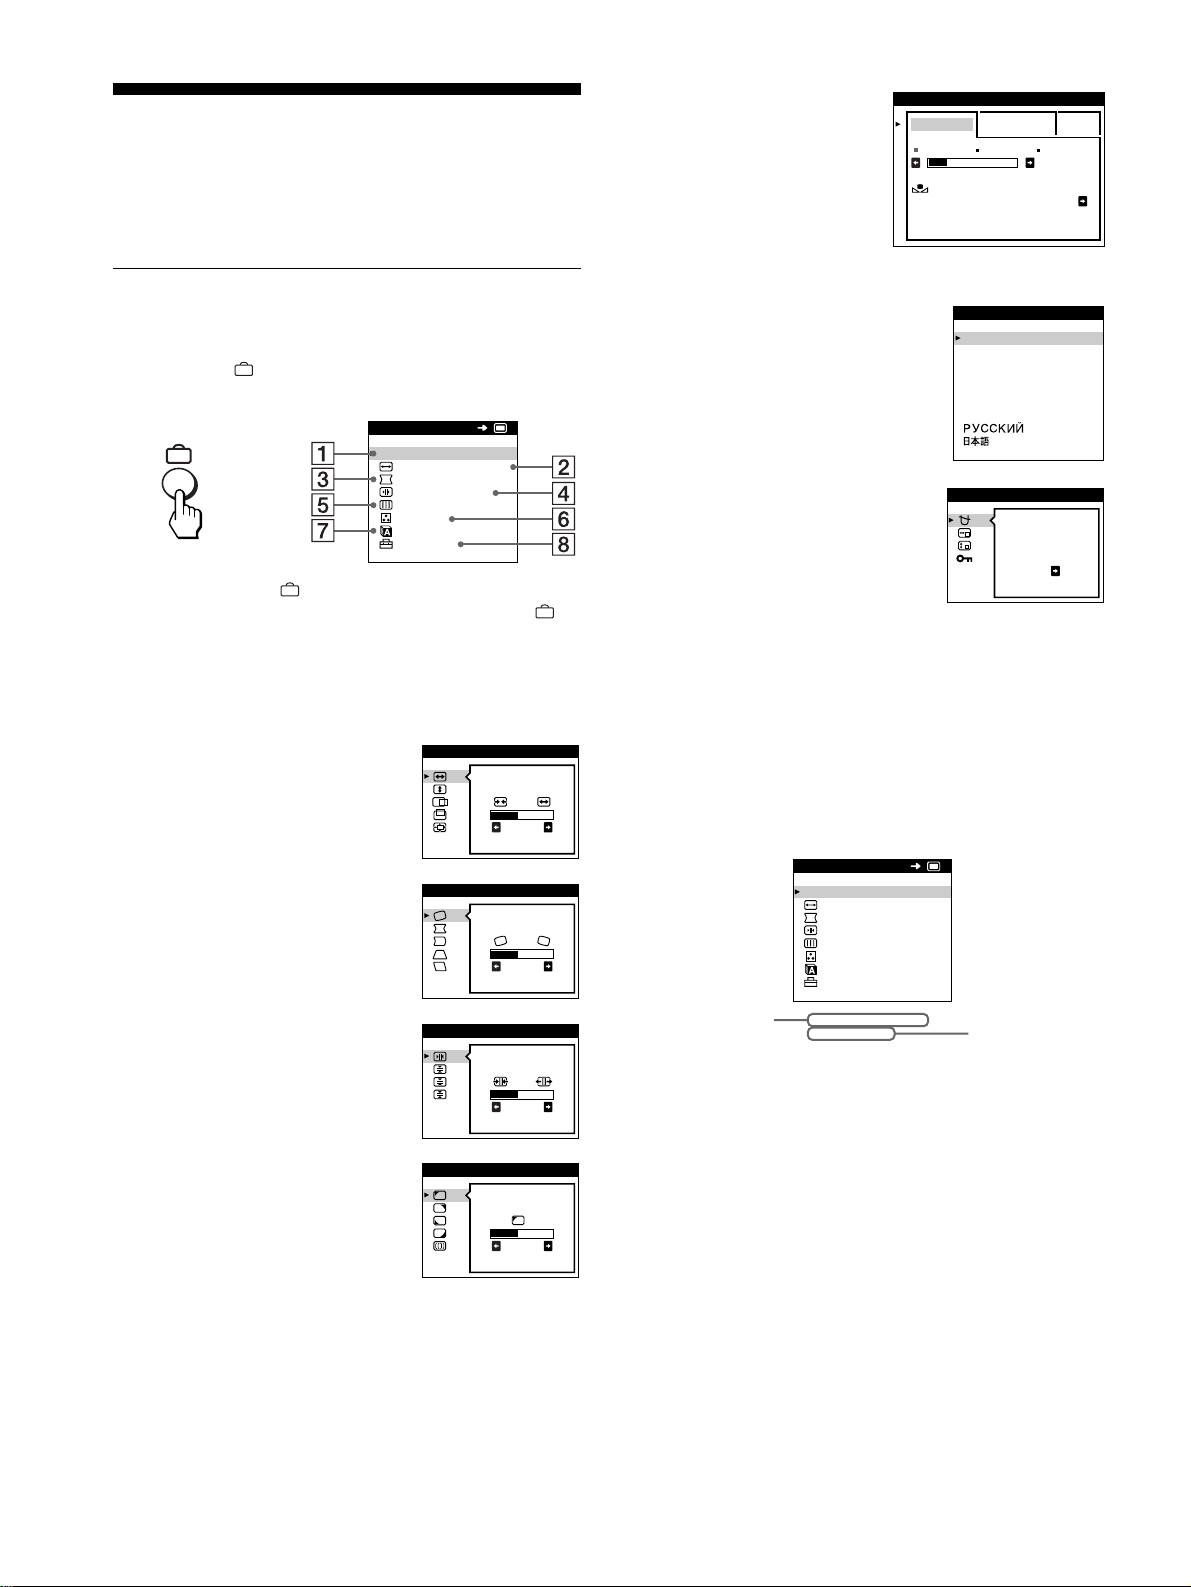
56
Personalizzazione del
monitor
È possibile effettuare numerose regolazioni relative al monitor
utilizzando i menu a schermo.
Come spostarsi all’interno del
menu
Premere il tasto per visualizzare sullo schermo il MENU
principale.
Utilizzare i tasti m/M e per selezionare uno dei seguenti menu.
Per ulteriori informazioni su come utilizzare i tasti m/M e ,
vedere a pagina 57.
x
xx
x
Visualizzazione del segnale di ingresso
corrente
Le frequenze verticali e orizzontali del segnale di ingresso
corrente vengono visualizzate nel MENU principale. Se il segnale
corrisponde ad uno dei modi preimpostati in fabbrica del monitor,
viene visualizzata anche la risoluzione.
1
11
1 USCITA
Selezionare USCITA per chiudere il
menu.
2
22
2 DIMENS/CENTRO (pagina 58)
Selezionare il menu
DIMENS/CENTRO per regolare le
dimensioni, la centratura o lo zoom
dell’immagine.
3
33
3 GEOMETRIA (pagina 58)
Selezionare il menu GEOMETRIA
per regolare la rotazione e la forma
dell’immagine.
4
44
4 CONVERGENZA (pagina 59)
Selezionare il menu
CONVERGENZA per regolare la
convergenza orizzontale e verticale
dell’immagine.
5
55
5 SCHERMO (pagina 59)
Selezionare il menu SCHERMO per
regolare la qualità dell’immagine.
È possibile regolare la purezza del
colore e l’effetto di cancellazione
moiré.
USCI TA
DIMENS /CENTRO
GEOMETR I A
CONVERGENZA
SCHERMO
COLORE
LANGUAGE
OPZ ION I
MENU
OK
b
26
DIMENS/ CENTRO
26
GEOMETR I A
TOP
BOT
26
CONVERGENZA
LANDING
26
SCHERMO
6
66
6 COLORE (pagina 60)
Selezionare il menu
COLORE per regolare la
temperatura di colore
dell’immagine. Utilizzare
questo menu per fare
corrispondere i colori del
monitor ai colori di
un’immagine stampata.
7
77
7 LANGUAGE (pagina 55)
Selezionare il menu LANGUAGE
per selezionare la lingua del menu a
schermo.
8
88
8 OPZIONI (pagina 61)
Selezionare il menu OPZIONI per
regolare le seguenti opzioni del
monitor:
• smagnetizzazione dello schermo
• modifica della posizione del
menu a schermo
• bloccaggio dei comandi
FACI LE ESPERTO s BGR
5000K 6500K 930 K0
50 K00
RIPR IST I NO
COLORE SI
COLORE
ENGL ISH
FRANÇA IS
DEUTSCH
ESPAÑOL
ITALIANO
NEDERLANDS
SVENSKA
LANGUAGE
SMAGNET.
SI
OPZ IONI
MENU
USCI TA
DIMENS /CENTRO
GEOMETR I A
CONVERGENZA
SCHERMO
COLORE
LANGUAGE
OPZ ION I
68.7kHz/ 85Hz
1024x 768
OK
frequenze verticali
e orizzontali del
segnale di
ingresso corrente
risoluzione del
segnale di
ingresso corrente
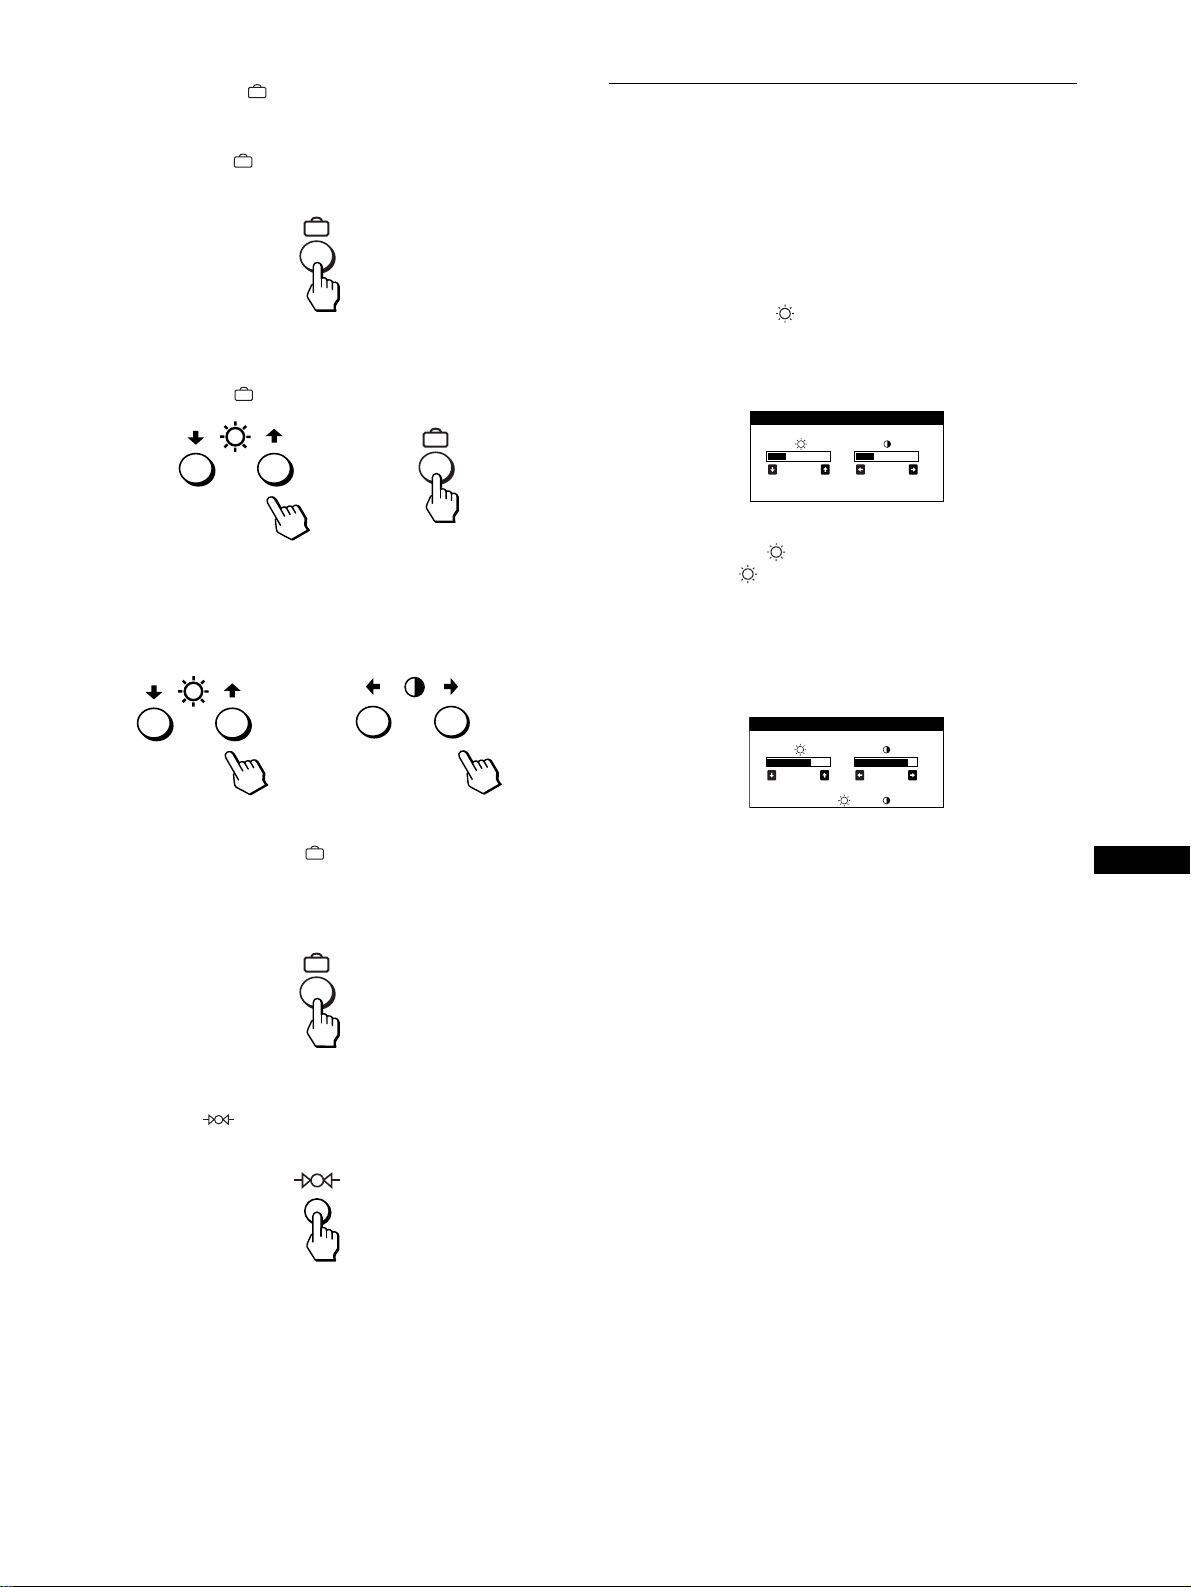
57
IT
x
Uso dei tasti , m/M e </,
1
Per visualizzare il MENU principale.
Premere il tasto per visualizzare sullo schermo il MENU
principale.
2
Per selezionare il menu da regolare.
Premere i tasti m/M per evidenziare il menu desiderato.
Premere il tasto per selezionare le voci del menu.
3
Per regolare il menu.
Premere i tasti m/M per selezionare la voce di regolazione
desiderata. Premere i tasti </, per effettuare le
regolazioni.
4
Per chiudere il menu.
Premere una volta il tasto per ritornare al MENU
principale, premerlo due volte per ritornare al modo di
visualizzazione normale. Se non si preme alcun tasto, il menu
verrà chiuso automaticamente dopo circa 30 secondi.
x
xx
x
Ripristino delle regolazioni
Premere il tasto (ripristina). Per ulteriori informazioni sul
ripristino delle regolazioni, vedere a pagina 62.
Regolazione della luminosità e del
contrasto
È possibile regolare la luminosità e il contrasto tramite il menu
LUMINOSITA/CONTRASTO.
Queste impostazioni vengono memorizzate nella memoria per i
segnali inviati dal connettore di ingresso correntemente
selezionato.
1
Premere il tasto (luminosità) m/M o 6 (contrasto)
</,.
Sullo schermo appare il menu
LUMINOSITA/CONTRASTO.
2
Premere i tasti (luminosità) m/M per regolare la
luminosità ( ); premere i tasti 6
66
6 (contrasto) </,
per regolare il contrasto (6
66
6).
Se si utilizza il modo sRGB
Se si seleziona il modo sRGB tramite il menu COLORE, sullo
schermo appare il seguente menu LUMINOSITA/CONTRASTO.
Per ulteriori informazioni su come utilizzare il modo sRGB,
vedere la sezione “Regolazione del colore dell’immagine
(COLORE)” a pagina 60.
Il menu scompare automaticamente dopo circa 3 secondi.
b
b
26 26
LUMINOSI TA/CONTRASTO
56 76
sRGB : 56 76
LUMINOSI TA/CONTRASTO
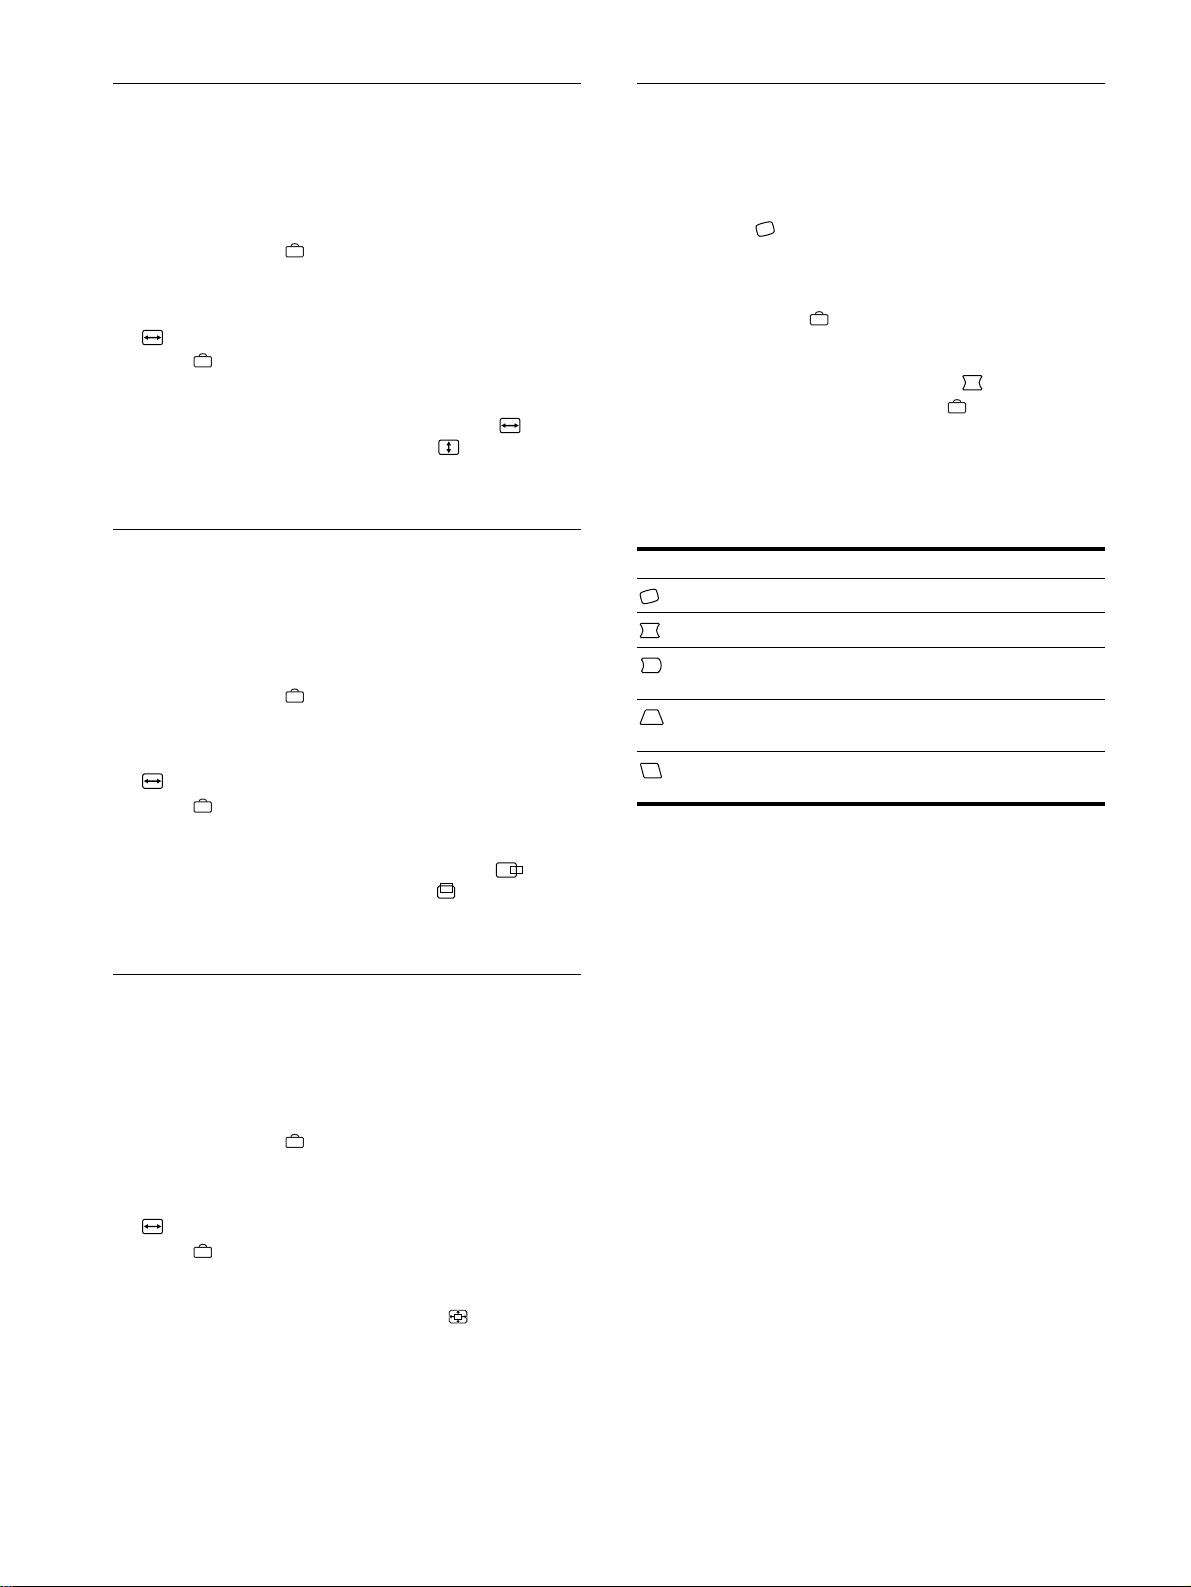
58
Regolazione delle dimensioni
dell’immagine (DIMENS/CENTRO)
Questa impostazione è memorizzata nella memoria per il segnale
di ingresso corrente.
1
Premere il tasto .
Sullo schermo appare il MENU principale.
2
Premere i tasti m/M per evidenziare
DIMENS/CENTRO, quindi premere di nuovo il
tasto .
Sullo schermo appare il menu DIMENS/CENTRO.
3
Premere prima i tasti m/M per selezionare per la
regolazione orizzontale o premere per la
regolazione verticale. Quindi premere i tasti </,
per regolare le dimensioni.
Regolazione della centratura
dell’immagine (DIMENS/CENTRO)
Questa impostazione è memorizzata nella memoria per il segnale
di ingresso corrente.
1
Premere il tasto .
Sullo schermo appare il MENU principale.
2
Premere i tasti m/M per evidenziare
DIMENS/CENTRO, quindi premere di nuovo il
tasto .
Sullo schermo appare il menu DIMENS/CENTRO.
3
Premere prima i tasti m/M per selezionare per la
regolazione orizzontale o premere per la
regolazione verticale. Quindi premere i tasti </,
per regolare la centratura.
Ingrandimento o riduzione
dell’immagine (ZOOM)
Questa impostazione è memorizzata nella memoria per il segnale
di ingresso corrente.
1
Premere il tasto .
Sullo schermo appare il MENU principale.
2
Premere i tasti m/M per evidenziare
DIMENS/CENTRO, quindi premere di nuovo il
tasto .
Sullo schermo appare il menu DIMENS/CENTRO.
3
Premere i tasti m/M per selezionare (zoom),
quindi premere i tasti </, per ingrandire o ridurre
l’immagine.
Nota
Quando le dimensioni verticali o orizzontali raggiungono i valori
massimi, non è possibile regolarle ulteriormente.
Regolazione della forma
dell’immagine (GEOMETRIA)
Le impostazioni del menu GEOMETRIA consentono di regolare
la rotazione e la forma dell’immagine.
L’impostazione (rotazione) è memorizzata nella memoria per
tutti i segnali di ingresso. Tutte le altre impostazioni sono
memorizzate nella memoria per il segnale di ingresso corrente.
1
Premere il tasto .
Sullo schermo appare il MENU principale.
2
Premere i tasti m/M per evidenziare GEOMETRIA,
quindi premere di nuovo il tasto .
Sullo schermo appare il menu GEOMETRIA.
3
Premere prima i tasti m/M per selezionare la voce di
regolazione desiderata. Quindi premere i tasti </,
per effettuare le regolazioni.
Selezionare Per
ruotare l’immagine
espandere o contrarre i bordi dell’immagine
spostare i bordi dell’immagine verso sinistra o
verso destra
regolare la larghezza dell’immagine nella parte
superiore dello schermo
spostare l’immagine verso sinistra o verso
destra nella parte superiore dello schermo

59
IT
Regolazione della convergenza
(CONVERGENZA)
Le impostazioni del menu CONVERGENZA consentono di
regolare la qualità dell’immagine tramite il controllo della
convergenza. La convergenza riguarda l’allineamento dei segnali
dei colori rosso, verde e blu.
Se vengono visualizzate ombre rosse o blu attorno ai caratteri o
alle linee, regolare la convergenza.
Queste impostazioni vengono memorizzate nella memoria per
tutti i segnali di ingresso.
1
Premere il tasto .
Sullo schermo appare il MENU principale.
2
Premere i tasti m/M per evidenziare
CONVERGENZA, quindi premere di nuovo il
tasto .
Sullo schermo appare il menu CONVERGENZA.
3
Premere prima i tasti m/M per selezionare la voce di
regolazione desiderata. Quindi premere i tasti </,
per effettuare le regolazioni.
Regolazione della qualità
dell’immagine (SCHERMO)
Le impostazioni del menu SCHERMO consentono di regolare la
qualità dell’immagine tramite il controllo dell’effetto moiré e
della purezza del colore.
• Se il colore appare irregolare negli angoli dello schermo,
regolare la purezza del colore.
• Se sullo schermo appaiono disturbi ellittici o ondulati,
annullare l’effetto moiré.
Le impostazioni ELIMINA MOIRE e REGOLAZ. MOIRE
vengono memorizzate nella memoria per il segnale di ingresso
corrente. Tutte le altre impostazioni vengono memorizzate nella
memoria per tutti i segnali di ingresso.
1
Premere il tasto .
Sullo schermo appare il MENU principale.
2
Premere i tasti m/M per evidenziare SCHERMO,
quindi premere di nuovo il tasto .
Sullo schermo appare il menu SCHERMO.
3
Premere prima i tasti m/M per selezionare la voce di
regolazione desiderata. Quindi premere i tasti </,
per effettuare le regolazioni.
* L’effetto moiré è un tipo di interferenza naturale che produce leggere
linee ondulate sullo schermo. Questo effetto può verificarsi a causa
dell’interferenza tra il motivo dell’immagine sullo schermo e il motivo
a punti di fosforo sul monitor.
Nota
L’immagine potrebbe diventare sfocata se ELIMINA MOIRE è impostato
su SI.
Selezionare Per
spostare le ombre blu o rosse in senso
orizzontale
spostare le ombre blu o rosse in senso
verticale
TOP
CONV VERT SUP
spostare le ombre blu o rosse in senso
verticale nella parte superiore dello
schermo
BOT
CONV VERT INF
spostare le ombre blu o rosse in senso
verticale nella parte inferiore dello
schermo
Selezionare Per
LANDING
ridurre al minimo le irregolarità del
colore nella parte superiore sinistra
dello schermo.
LANDING
ridurre al minimo le irregolarità del
colore nella parte superiore destra
dello schermo.
LANDING
ridurre al minimo le irregolarità del
colore nella parte inferiore sinistra
dello schermo.
LANDING
ridurre al minimo le irregolarità del
colore nella parte inferiore destra
dello schermo.
ELIMINA MOIRE
*
impostare la funzione di eliminazione
dell’effetto moiré su SI o NO.
(REGOLAZ. MOIRE) appare nel
menu se si seleziona SI.
REGOLAZ. MOIRE
regolare il grado di eliminazione
dell’effetto moiré fino a ridurlo al
minimo.
Esempio di effetto moiré
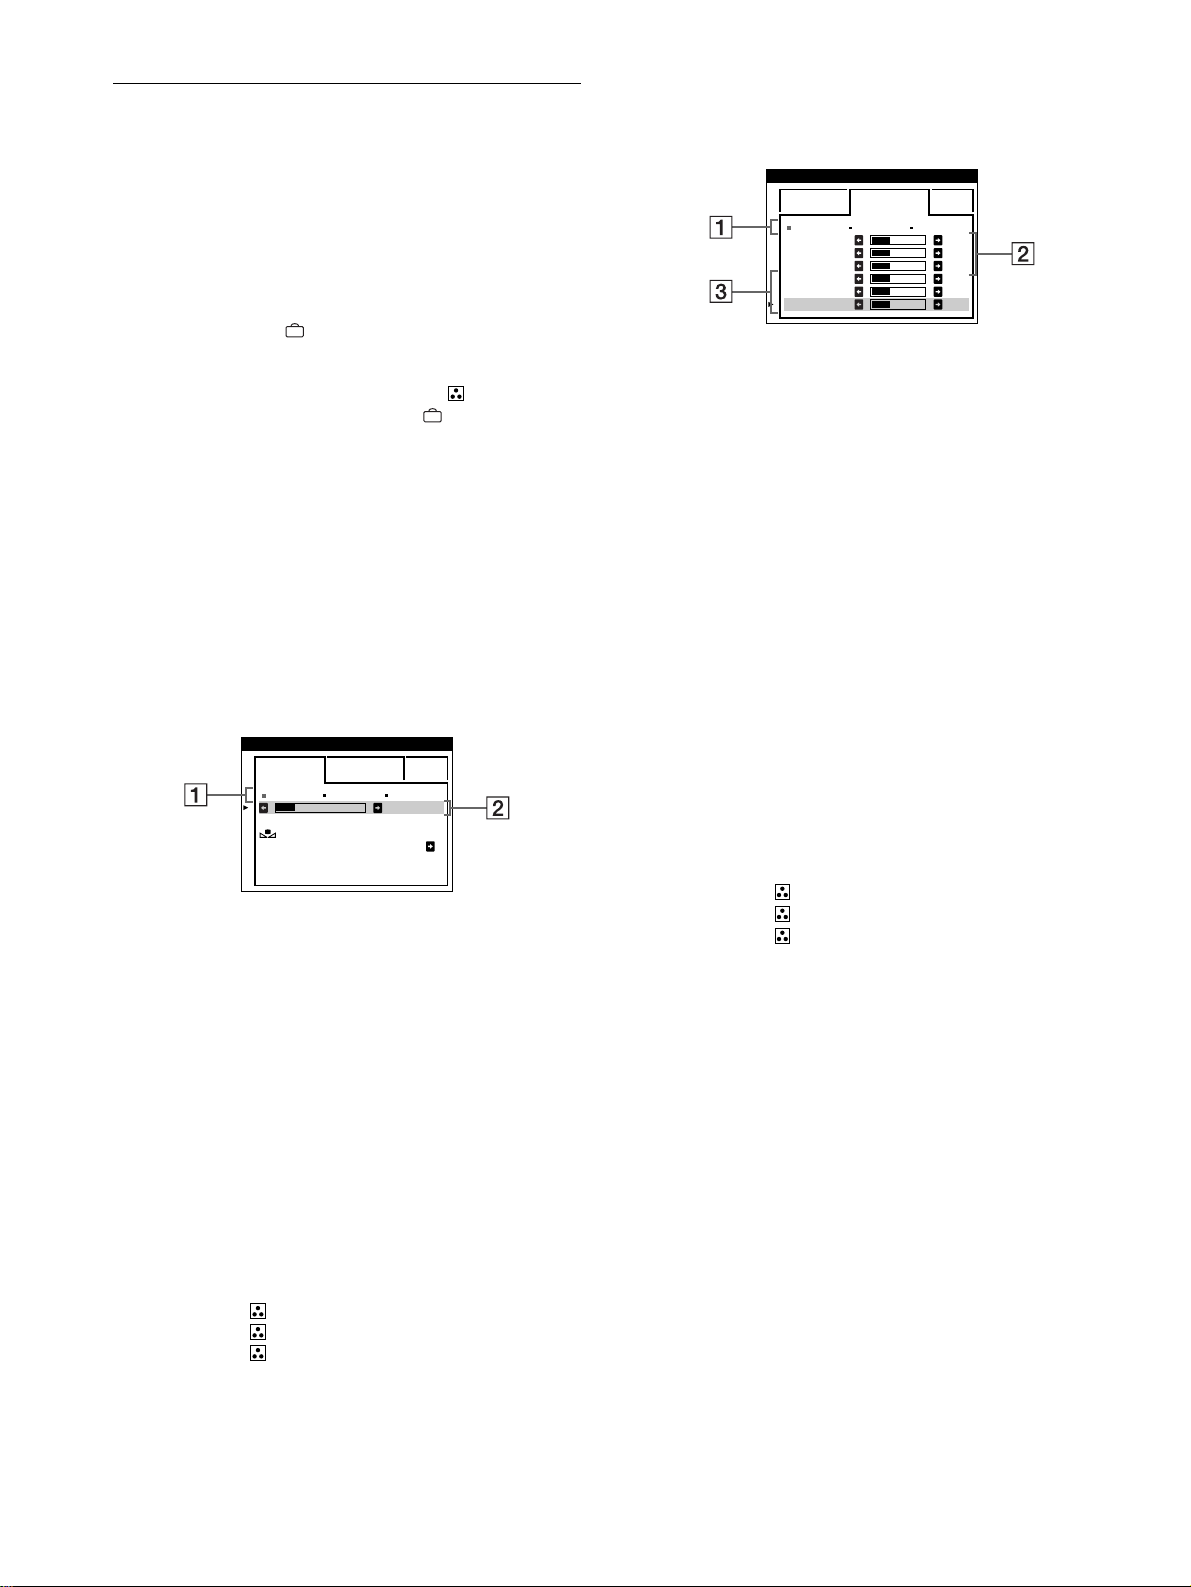
60
Regolazione del colore
dell’immagine (COLORE)
Le impostazioni del menu COLORE consentono di regolare la
temperatura di colore dell’immagine modificando il livello del
colore del campo del colore bianco. I colori appaiono rossastri se
la temperatura è bassa e bluastri se la temperatura è alta. Questa
regolazione risulta utile per far corrispondere i colori del monitor
ai colori di un’immagine stampata.
1
Premere il tasto .
Sullo schermo appare il MENU principale.
2
Premere i tasti m/M per evidenziare COLORE,
quindi premere di nuovo il tasto .
Sullo schermo appare il menu COLORE.
3
Premere i tasti </, per selezionare il modo di
regolazione.
I modi di regolazione disponibili sono i seguenti: FACILE,
ESPERTO e sRGB.
4
Premere prima i tasti m/M per selezionare la voce di
regolazione desiderata. Quindi premere i tasti
</, per effettuare le regolazioni.
Per regolare il modo selezionato, eseguire le istruzioni
riportate di seguito.
Modo FACILE
1
Premere prima i tasti m/M per selezionare la riga
della temperatura di 1, quindi premere i tasti </,
per selezionare la temperatura di colore.
Le temperature di colore predefinite sono 5000K, 6500K e
9300K. Poiché l’impostazione predefinita è 9300K, i bianchi
cambieranno da una tinta bluastra ad una tinta rossastra
abbassando la temperatura a 6500K e 5000K.
2
Se necessario, effettuare la sintonia fine della
temperatura di colore.
Premere prima i tasti m/M per selezionare la riga di
regolazione della temperatura di colore 2, quindi
premere i tasti </, per effettuare la sintonia fine
della temperatura di colore.
Se si effettua la sintonia fine della temperatura di colore, le
nuove impostazioni del colore vengono memorizzate nella
memoria per ciascuna delle tre temperature di colore e la voce
1 del menu a schermo cambia come descritto di seguito.
• [5000K]t[1]
• [6500K]t[2]
• [9300K]t[3]
Modo ESPERTO
È possibile effettuare ulteriori e più precise regolazioni del colore
selezionando il modo ESPERTO.
1
Premere i tasti m/M per selezionare la riga della
temperatura di colore 1, quindi premere i tasti
</, per selezionare la temperatura di colore.
2
Premere i tasti m/M per selezionare la voce di
regolazione 2
22
2, quindi premere i tasti </, per
regolare la voce BIAS (livello del nero).
In questo modo vengono regolate le aree scure di
un’immagine.
3
Premere i tasti m/M per selezionare la voce di
regolazione 3
33
3, quindi premere i tasti </, per
regolare la voce GAIN (livello del bianco).
In questo modo vengono regolate le aree chiare di
un’immagine.
È possibile regolare il componente R (rosso), V (verde),
B (blu) del segnale di ingresso quando si modificano le voci
2 e 3.
Se si effettua la sintonia fine della temperatura di colore, le
nuove impostazioni del colore vengono memorizzate nella
memoria per ciascuna delle tre temperature di colore e la voce
1 del menu a schermo cambia come descritto di seguito.
• [5000K]t[1]
• [6500K]t[2]
• [9300K]t[3]
Impostazione della temperatura di colore per
ciascun connettore di ingresso video
È possibile impostare la sintonia fine della temperatura di colore
nel modo FACILE o ESPERTO per ciascun connettore di
ingresso video (INPUT 1: 13W3 e INPUT 2: HD15).
1
Selezionare lo stesso modo di regolazione e la
stessa temperatura di colore nel menu COLORE sia
per INPUT 1 che per INPUT 2.
2
Effettuare la sintonia fine della temperatura di
colore in ciascun menu per INPUT 1 e INPUT 2.
Le impostazioni vengono memorizzate in memoria per
ciascun connettore di INPUT 1 e INPUT 2.
Per informazioni su come selezionare il connettore, vedere a
pagina 55.
5000K 6500K 930 K0
50 K00
FACI LE ESPERTO s BGR
RIPR IST I NO
COLORE SI
COLORE
5000K 6500K 930 K0
R BIAS 05
V BIAS 05
B BIAS 05
RGAIN 05
VGAIN 05
BGAIN 05
FACI LE ESPERTO s BGR
COLORE
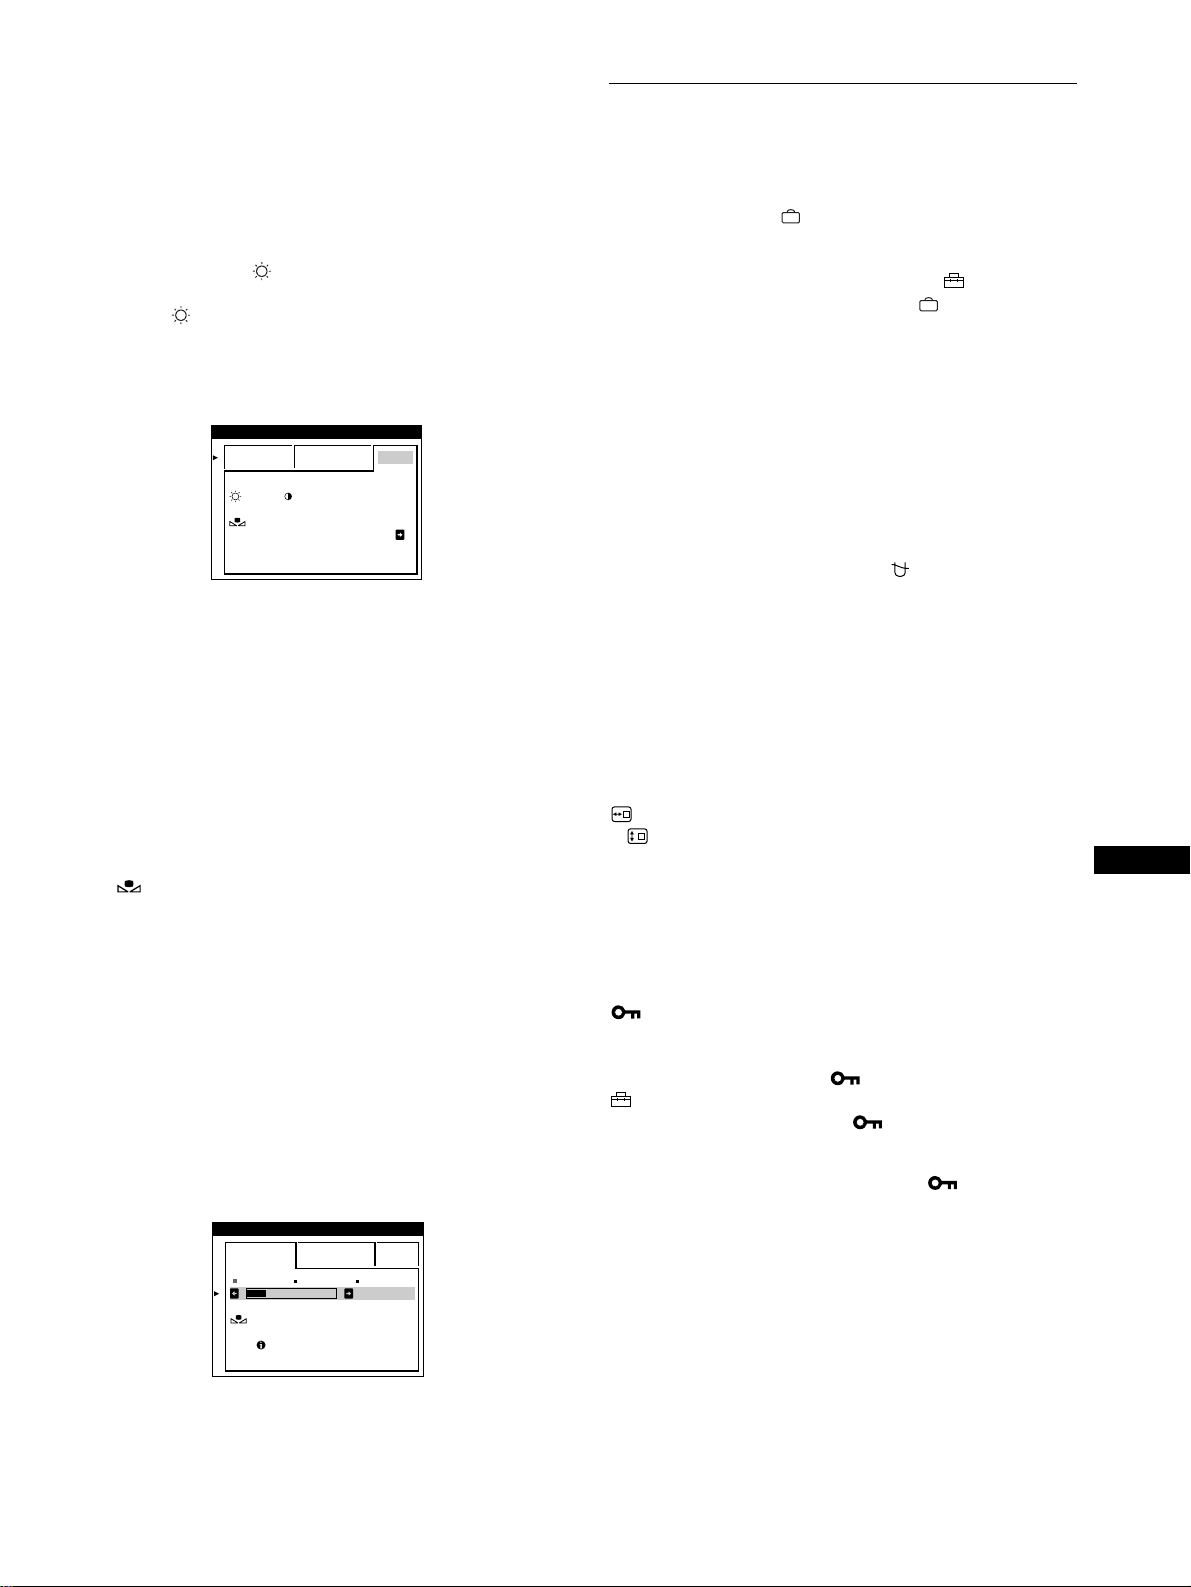
61
IT
Modo sRGB
L’impostazione del colore sRGB è un protocollo del colore
standard industriale progettato per mettere in correlazione i colori
stampati e i colori visualizzati delle apparecchiature per computer
sRGB compatibili. Per regolare i colori in base al profilo sRGB,
selezionare semplicemente il modo sRGB nel menu COLORE.
Tuttavia, per visualizzare correttamente i colori sRGB (
γ
=2,2,
6500K), è necessario impostare il computer sul profilo sRGB e
regolare la luminosità ( ) e il contrasto (6) sui valori
visualizzati nel menu. Per informazioni su come modificare la
luminosità ( ) e il contrasto (6), vedere a pagina 57.
Nota
Assicurarsi che il computer e gli altri dispositivi collegati (ad esempio una
stampante) siano sRGB compatibili.
Ripristino dei colori tramite i menu FACILE o sRGB
I colori della maggior parte dei monitor tendono a diventare
gradualmente opachi nel corso degli anni. La funzione
RIPRISTINO COLORE contenuta nei menu FACILE e sRGB
consente di ripristinare il livello di qualità di fabbrica originale dei
colori. La sezione seguente spiega come ripristinare i colori del
monitor tramite il menu FACILE.
1
Premere i tasti </, per selezionare il modo
FACILE o sRGB.
2
Premere prima i tasti m/M per selezionare
(RIPRISTINO COLORE), quindi premere il tasto
,.
Durante il processo di ripristino dei colori (circa 2 secondi),
l’immagine scompare. Una volta che il colore è stato
ripristinato, l’immagine appare di nuovo sullo schermo.
Note
• Prima di utilizzare questa funzione, il monitor deve rimanere nel modo
di funzionamento normale (l’indicatore di alimentazione è illuminato
in verde) per almeno 30 minuti. Se il monitor entra nel modo di
risparmio energetico, riportare il monitor nel modo di funzionamento
normale e attendere 30 minuti finché il monitor non è pronto. Per
mantenere il monitor nel modo di funzionamento normale per
30 minuti senza interruzioni, è necessario regolare le impostazioni del
modo di risparmio energetico del computer. Se il monitor non è pronto,
appare il seguente messaggio.
• L’efficacia di questa funzione diminuisce gradualmente con l’usura del
cinescopio a colori del monitor.
Impostazioni aggiuntive (OPZIONI)
È possibile effettuare manualmente la smagnetizzazione del
monitor, modificare la posizione del menu e bloccare i comandi.
1
Premere il tasto .
Sullo schermo appare il MENU principale.
2
Premere i tasti m/M per evidenziare OPZIONI,
quindi premere di nuovo il tasto .
Sullo schermo appare il menu OPZIONI.
3
Premere i tasti m/M per selezionare la voce di
regolazione desiderata.
Per regolare la voce selezionata, eseguire le istruzioni
riportate di seguito.
Smagnetizzazione dello schermo
Il monitor viene smagnetizzato automaticamente quando viene
attivata l’alimentazione.
Per smagnetizzare il monitor manualmente, premere
prima i tasti m/M per selezionare (SMAGNET.).
Quindi premere il tasto ,.
Lo schermo viene smagnetizzato per circa 2 secondi. Nel caso in
cui sia necessario un secondo ciclo di smagnetizzazione,
attendere almeno 20 minuti per ottenere un risultato migliore.
Modifica della posizione del menu
Modificare la posizione del menu quando copre un’immagine
sullo schermo.
Per modificare la posizione del menu a schermo,
premere prima i tasti m/M per selezionare
(POSIZ MENU ORIZZ) per la regolazione orizzontale
o (POSIZ MENU VERT) per la regolazione verticale.
Quindi premere i tasti </, per spostare i menu a
schermo.
Bloccaggio dei comandi
Per proteggere i dati di regolazione bloccando i
comandi, premere prima i tasti m/M per selezionare
(BLOCCO MENU). Quindi premere i tasto , per
selezionare SI.
Funzioneranno solo l’interruttore di accensione
1 (alimentazione), USCITA e (BLOCCO MENU) del menu
OPZIONI. Qualsiasi altra voce venga selezionata, sullo
schermo apparirà il contrassegno .
Per sbloccare i comandi
Ripetere la procedura sopra descritta e impostare (BLOCCO
MENU) su NO.
:56 :76 PER s BGR
FACI LE ESPERTO s BGR
RIPR IST I NO
COLORE SI
COLORE
5000K 6500K 930 K0
50 K00
PRONTO
DOPO R I SCALD .
FACI LE ESPERTO s BGR
RIPRISTINO
COLORE
COLORE
62
Ripristino delle regolazioni
Questo monitor dispone dei tre metodi di ripristino descritti di
seguito. Per ripristinare le regolazioni, usare il tasto
(ripristina).
Ripristino di una sola voce di regolazione
Usare i tasti e m/M per selezionare la voce di regolazione che
si desidera ripristinare, quindi premere il tasto (ripristina).
Ripristino di tutti i dati di regolazione per il
segnale di ingresso corrente
Premere il tasto (ripristina) quando sullo schermo non è
visualizzato alcun menu.
Si noti che con questo metodo non vengono ripristinati:
• la lingua per il menu a schermo (pagina 55)
• il modo di regolazione nel menu COLORE (FACILE,
ESPERTO, sRGB) (pagina 60)
• la posizione del menu a schermo (pagina 61)
• il blocco dei comandi (pagina 61)
Ripristino di tutti i dati di regolazione per tutti i
segnali di ingresso
Premere e mantenere premuto il tasto (ripristina) per più di
due secondi.
Nota
Il tasto (ripristina) non funziona se (BLOCCO MENU) è
impostato su SI
.
Caratteristiche
Funzione di risparmio energetico
Questo monitor è conforme alle direttive sul risparmio energetico
di VESA,
E
NERGY
S
TAR e NUTEK. Se il monitor non riceve
alcun segnale dal computer collegato, il consumo energetico
viene automaticamente ridotto come indicato di seguito.
* Quando il computer entra nel modo “attivo spento”, il segnale di
ingresso viene interrotto e sullo schermo appare il messaggio “NO
SEGNALESINGRESSO”. Dopo un breve intervallo, il monitor entra
nel modo di risparmio energetico.
Modo di
alimentazione
Consumo
energetico
Indicatore di
accensione
1
(alimentazione)
Funzionamento
normale
≤ 160 W verde
attivo spento* ≤ 3 W ambra
spento < 1 W spento
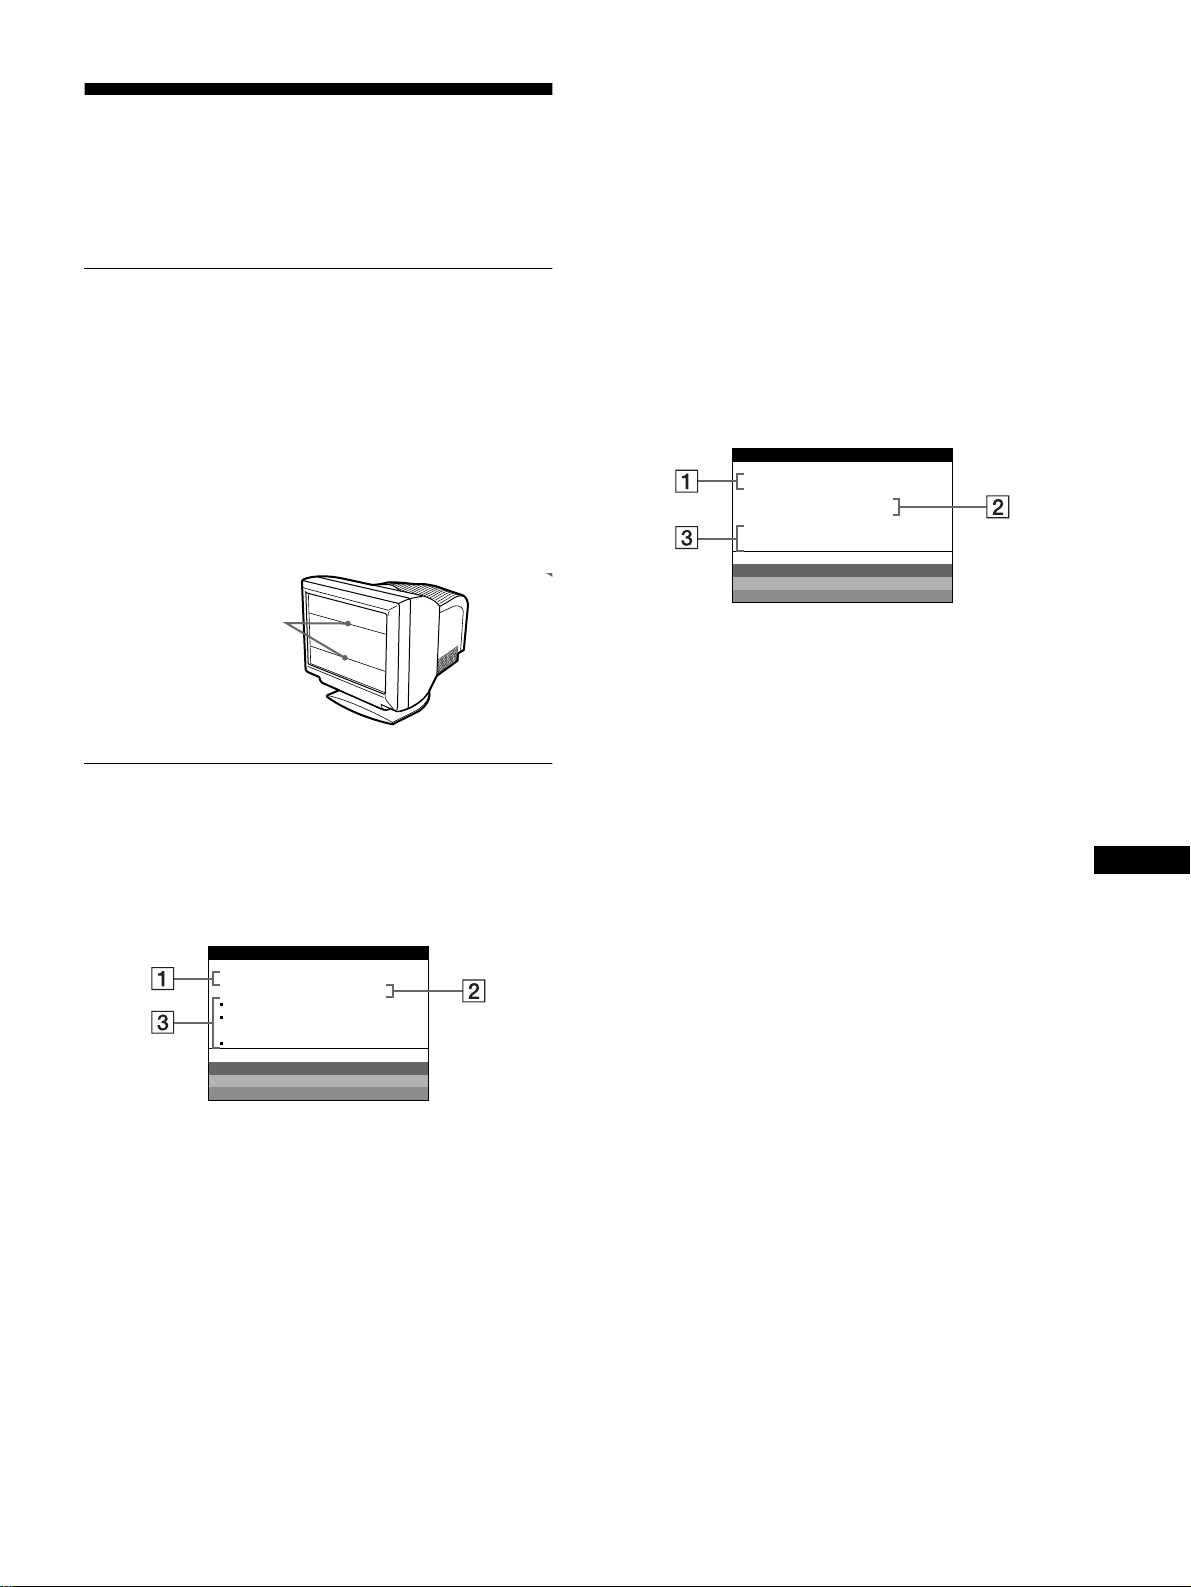
63
IT
Guida alla soluzione dei
problemi
Prima di rivolgersi al servizio di assistenza tecnica, leggere la
seguente sezione.
Se sullo schermo appaiono delle
linee sottili (cavi di smorzamento)
Questo tipo di linee sullo schermo sono normali per il monitor
Trinitron e non rappresentano un problema di funzionamento.
Queste righe sono l’ombra dei cavi di smorzamento usati per
stabilizzare la griglia di apertura, visibili maggiormente quando lo
sfondo dello schermo è chiaro (solitamente bianco). La griglia di
apertura è l’elemento essenziale che caratterizza il cinescopio a
colori Trinitron, consentendo una maggiore illuminazione dello
schermo con il risultato di un’immagine più luminosa e
dettagliata.
Messaggi a schermo
In caso di problemi con il segnale di ingresso, sullo schermo
appare uno dei seguenti messaggi.
Se sullo schermo appare il messaggio NO
SEGNALESINGRESSO
1
11
1 Connettore selezionato
Questo messaggio indica il connettore correntemente
selezionato (INPUT 1 o INPUT 2).
2
22
2 Condizione del segnale di ingresso
NO SEGNALESINGRESSO
Questo messaggio indica che non viene immesso alcun
segnale oppure che non viene immesso alcun segnale dal
connettore selezionato.
3 Rimedi
Sullo schermo potrebbero apparire uno o più dei seguenti
messaggi.
• Se sullo schermo appare il messaggio ACTIVARE CON IL
PC, premere un tasto qualsiasi del computer e verificare che
la scheda grafica del computer sia inserita saldamente
nell’alloggiamento per bus corretto.
• Se sullo schermo appare il messaggio CONTROLLAR
SELETTORE DI INGRESSO, modificare il segnale di
ingresso (pagina 55).
• Se sullo schermo appare il messaggio CONTROLLARE
SEGNALE, controllare che il monitor sia correttamente
collegato al computer (pagina 54).
Se sullo schermo appare il messaggio FUORI
GAMMA SCANS
1
11
1 Connettore selezionato e frequenze del segnale di
ingresso corrente
Questo messaggio indica il connettore correntemente
selezionato (INPUT 1 o INPUT 2). Se il monitor riconosce le
frequenze del segnale di ingresso corrente, vengono anche
visualizzate le frequenze orizzontali e verticali.
2
22
2 Condizione del segnale di ingresso
FUORI GAMMA SCANS
Questo messaggio indica che il segnale di ingresso non è
supportato tra le caratteristiche tecniche del monitor.
3
33
3 Rimedi
Sullo schermo appare il messaggio MODIFICARE TEMP.
SEGN. Se si è sostituito un monitor vecchio con questo
monitor, ricollegare il monitor vecchio. Quindi regolare la
scheda grafica del computer in modo che la frequenza
orizzontale sia compresa tra 30 e 121 kHz e la frequenza
verticale sia compresa tra 48 e 160 Hz.
Per ulteriori informazioni, vedere la sezione “Sintomi e soluzioni
dei problemi” del monitor a pagina 64.
Cavi di smorzamento
MONI TOR ESEGUE
INPUT 1 :
NO SEGNALES I NGRESSO
ACT IVARE CON I L PC
CONTROLLAR SELETTO ER
DI INGRESSO
CONTROLLARE SEGNALE
WH I T E
RED
GREEN
BLUE
INFORMAZIONI
INPUT 1:130.0kHz/ H57z
FUOR I GAMMA SCANS
MODI F ICARE TEMP .
SEGN.
WH I T E
RED
GREEN
BLUE
MONI TOR ESEGUE
INFORMAZIONI

64
Sintomi e soluzioni dei problemi
Se il problema è causato dal computer o da altre apparecchiature collegate, consultare le istruzioni per l’uso di queste apparecchiature.
Se il problema non viene risolto con le indicazioni descritte di seguito, usare la funzione di autodiagnostica (pagina 66).
Sintomo Controllare quanto segue
Assenza d’immagine
Se l’indicatore di accensione
1 (alimentazione) non è illuminato
• Controllare che il cavo di alimentazione sia collegato correttamente.
• Controllare che l’interruttore 1 (alimentazione) sia nella posizione di accensione.
Se sullo schermo appare il
messaggio NO
SEGNALESINGRESSO o se
l’indicatore di accensione
1 (alimentazione) è di colore ambra
o si alterna tra il verde e l’ambra
• Controllare che il tasto sia impostato correttamente (pagina 55).
• Controllare che i piedini del connettore di ingresso video HD15 non siano piegati o
danneggiati.
xProblemi causati dal computer o da altre apparecchiature collegate
• Il computer è nel modo di risparmio energetico. Premere un tasto qualsiasi sulla tastiera
del computer.
• Controllare che l’alimentazione del computer sia attivata.
• Controllare che la scheda grafica sia completamente inserita nell’alloggiamento del bus
corretto.
Se sullo schermo appaiono i
messaggi NO
SEGNALESINGRESSO e
CONTROLLARE SEGNALE o se
l’indicatore di accensione
1 (alimentazione) è di colore ambra
o si alterna tra il verde e l’ambra
• Controllare che il cavo del segnale video sia collegato correttamente e che tutte le spine
siano saldamente inserite nelle apposite prese (pagina 54).
• Controllare che i piedini del connettore d’ingresso video non siano piegati o danneggiati.
• Controllare che il tasto sia impostato correttamente (pagina 55).
xProblemi causati dal computer o da altre apparecchiature collegate
• Controllare che la scheda grafica sia completamente inserita nell’alloggiamento del bus
corretto.
Se sullo schermo appare il
messaggio FUORI GAMMA
SCANS
xProblemi causati dal computer o da altre apparecchiature collegate
• Controllare che la gamma di frequenza video rientri in quella specificata per il monitor. Se
con questo monitor è stato sostituito un vecchio monitor, ricollegare il vecchio monitor e
regolare la gamma di frequenza come descritto di seguito.
Orizzontale: 30 – 121 kHz
Verticale: 48
–
160 Hz
Se non viene visualizzato alcun
messaggio e l’indicatore di
accensione 1 (alimentazione) è
illuminato in verde o lampeggia in
ambra
• Utilizzare la funzione di autodiagnostica (pagina 66).
L’immagine è tremolante, salta,
oscilla oppure è confusa
• Isolare ed eliminare le potenziali sorgenti di campi elettrici o magnetici, quali altri
monitor, stampanti laser, ventilatori elettrici, illuminazioni fluorescenti o televisori.
• Spostare il monitor lontano dalle linee di alimentazione oppure collocare uno schermo
magnetico vicino al monitor.
• Provare a collegare il monitor ad un’altra presa di rete CA, preferibilmente su un circuito
differente.
• Provare a girare il monitor di 90° verso sinistra o verso destra.
xProblemi causati dal computer o da altre apparecchiature collegate
• Controllare il manuale della scheda grafica per le corrette impostazioni del monitor.
• Verificare che il modo grafico e la frequenza del segnale di ingresso siano supportati da
questo monitor. Anche se la frequenza rientra nella gamma prevista, alcune schede video
potrebbero avere un impulso sincronico troppo piccolo per permettere al monitor di
sincronizzarsi correttamente.
• Regolare la frequenza di refresh del computer (frequenza verticale) per ottenere
l’immagine migliore.
L’immagine è sfocata • Regolare la luminosità e il contrasto (pagina 57).
• Smagnetizzare il monitor* (pagina 61).
• Se ELIMINA MOIRE è impostato su SI, l’immagine potrebbe diventare sfocata.
Diminuire il livello di eliminazione dell’effetto moiré o impostare ELIMINA MOIRE su
NO (pagina 59).
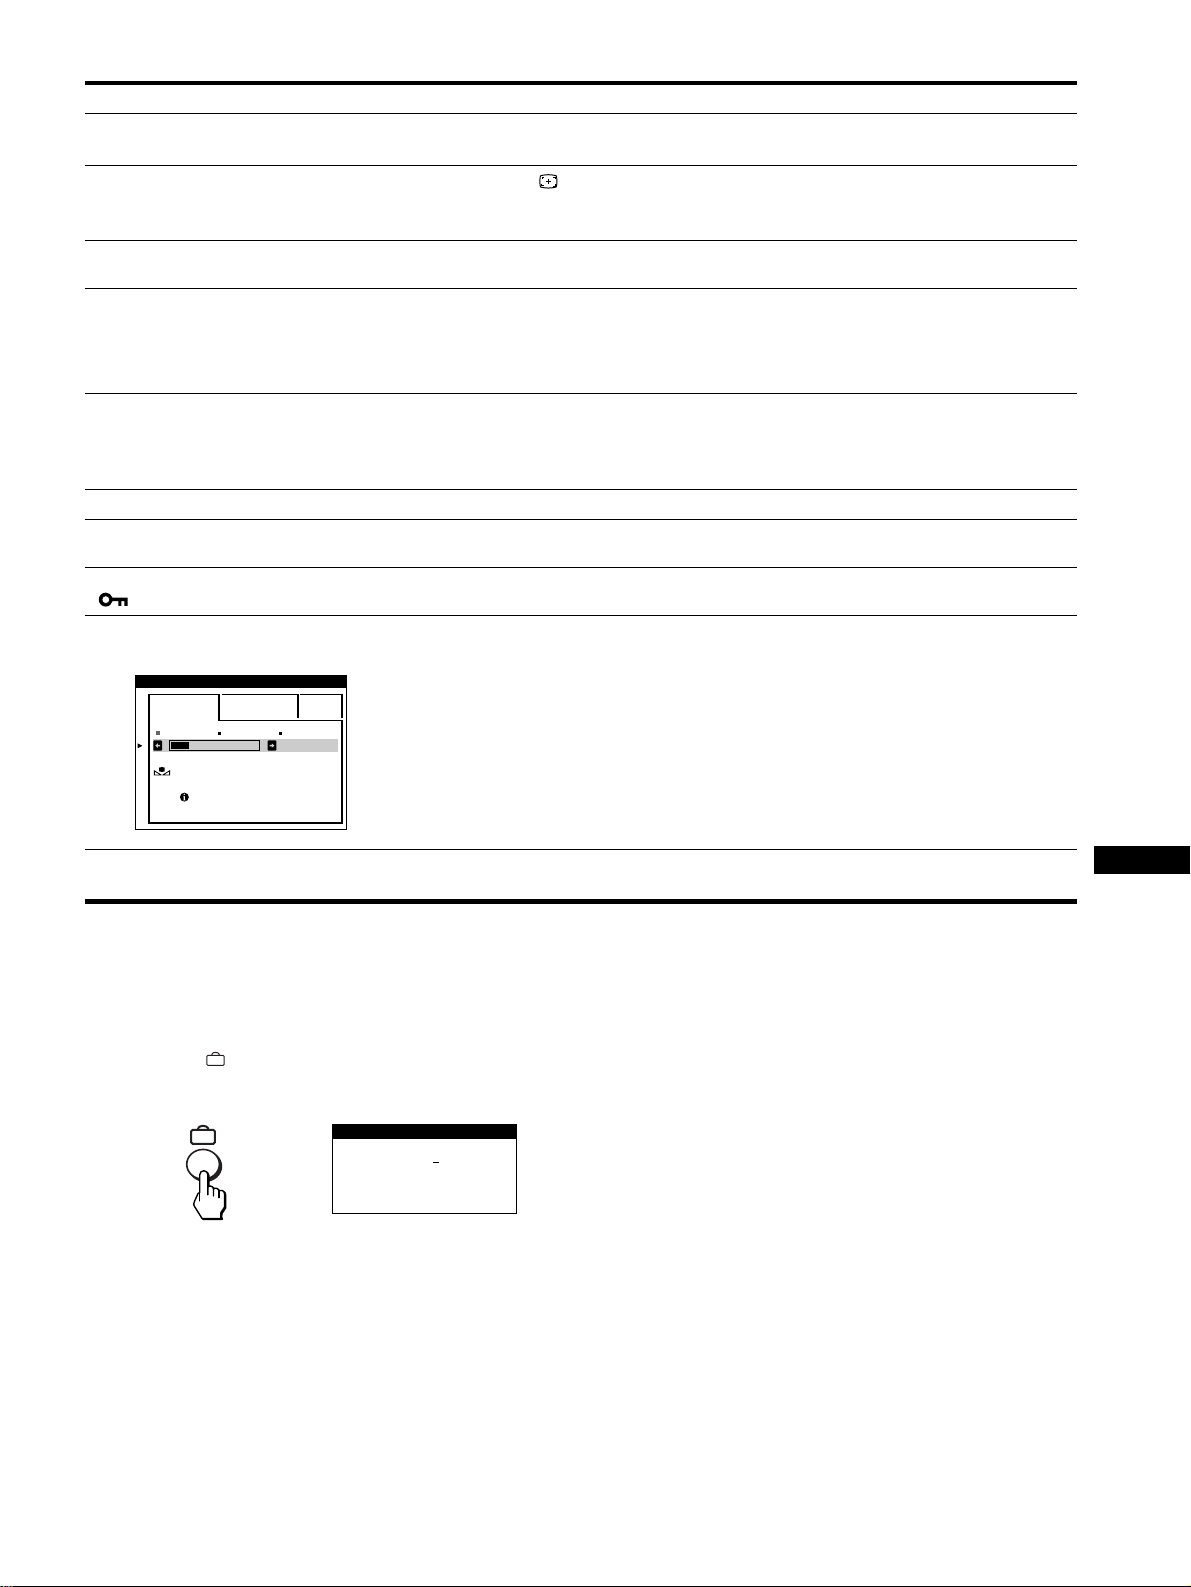
65
IT
* Nel caso in cui sia necessario un secondo ciclo di smagnetizzazione, attendere almeno 20 minuti per ottenere un risultato migliore. Potrebbe venire udito
un ronzio che non indica però un problema di funzionamento.
Visualizzazione del nome del monitor, del numero
di serie e della data di produzione.
Quando il monitor riceve un segnale video, premere e mantenere
premuto il tasto per più di cinque secondi per visualizzare la
finestra con le informazioni sul monitor.
Se il problema persiste, rivolgersi al servizio di assistenza tecnica
fornendo le seguenti informazioni.
• Nome del modello: GDM-5410
• Numero di serie
• Nome e caratteristiche tecniche del computer e della scheda
grafica.
L’immagine è sdoppiata • Eliminare l’uso di prolunghe del cavo video e/o di cassette per l’interruttore video.
• Controllare che tutte le spine siano saldamente inserite nelle apposite prese.
L’immagine non è centrata o non è
delle dimensioni corrette
• Premere il tasto (pagina 55).
• Regolare la dimensione (pagina 58) o la centratura (pagina 58). Si noti che alcuni modi
video non riempiono lo schermo fino ai bordi.
I bordi dell’immagine sono
incurvati
• Regolare la geometria (pagina 58).
Sono visibili disturbi ondulati o
ellittici (effetto moiré)
• Impostare ELIMINA MOIRE su SI e regolare l’eliminazione dell’effetto moiré finché tale
effetto non viene ridotto al minimo (pagina 59).
xProblemi causati dal computer o da altre apparecchiature collegate
• Modificare il motivo del desktop.
Il colore non è uniforme • Smagnetizzare il monitor* (pagina 61). Se si colloca vicino al monitor un’apparecchiatura
che genera un campo magnetico, quale un diffusore, oppure se si modifica la direzione del
monitor, il colore potrebbe perdere uniformità.
• Regolare la purezza del colore (pagina 59).
Il bianco non è perfetto • Regolare la temperatura di colore (pagina 60).
Lettere e linee presentano ombre
rosse o blu sui bordi
• Regolare la convergenza (pagina 59).
I tasti sul monitor non funzionano
( appare sullo schermo)
• Se la funzione di blocco dei comandi è impostata su SI, impostarla su NO (pagina 61).
La funzione RIPRISTINO COLORE
non funziona
• Prima di utilizzare questa funzione, il monitor deve rimanere nel modo di funzionamento
normale (l’indicatore di accensione è illuminato in verde) per almeno 30 minuti. Per
ulteriori informazioni sull’uso della funzione RIPRISTINO COLORE, vedere a
pagina 61.
• Regolare le impostazioni del risparmio energetico del computer per mantenere il monitor
nel modo di funzionamento normale per più di 30 minuti.
• L’efficacia di questa funzione diminuisce gradualmente con l’usura del cinescopio a
colori del monitor.
Non appena si accende
l’apparecchio si sente un ronzio
• È il rumore del ciclo di smagnetizzazione automatica. Quando si attiva l’alimentazione, il
monitor viene automaticamente smagnetizzato per due secondi.
Sintomo Controllare quanto segue
5000K 6500K 930 K0
50 K00
PRONTO
DOPO R I SCALD .
FACI LE ESPERTO s BGR
RIPRISTINO
COLORE
COLORE
SER NO
:
1234567
MODEL
:
GDM 5410
MANUFACTURED
: 1999-52
INFORMAZIONI
Esempio
b

66
Funzione di autodiagnostica
Questo monitor dispone di una funzione di autodiagnostica. Se si
presentano problemi al monitor o ai computer collegati, lo
schermo si oscura e l’indicatore di accensione 1 (alimentazione)
si illumina in verde o lampeggia in ambra. Se l’indicatore di
accensione 1 (alimentazione) si illumina in ambra, significa che
il computer si trova nel modo di risparmio energetico. Provare a
premere un tasto qualsiasi sulla tastiera.
Se l’indicatore di accensione
1
(alimentazione) è
verde
1
Rimuovere tutte le spine dai connettori di ingresso
video 1 e 2 oppure disattivare i computer collegati.
2
Premere due volte il tasto di accensione
1 (alimentazione) per spegnere e accendere il
monitor.
3
Premere il tasto , per 2 secondi per far entrare il
monitor nel modo di risparmio energetico.
Se vengono visualizzate le quattro barre di colore (bianco, rosso,
verde e blu), significa che il monitor funziona correttamente.
Ricollegare i cavi di ingresso video e controllare le condizioni dei
computer.
Se le barre di colore non vengono visualizzate, significa che vi è
un problema di funzionamento del monitor. Informare il servizio
di assistenza tecnica sulle condizioni del monitor.
Se l’indicatore di accensione
1
(alimentazione)
lampeggia in ambra
Premere due volte il tasto di accensione
1 (alimentazione) per spegnere e accendere il monitor.
Se l’indicatore di accensione 1 (alimentazione) si illumina in
verde, significa che il monitor funziona correttamente.
Se l’indicatore di accensione 1 (alimentazione) continua a
lampeggiare, significa che vi è un problema di funzionamento del
monitor. Contare ogni quanti secondi l’indicatore di accensione
1 (alimentazione) lampeggia, quindi informare il servizio di
assistenza tecnica sulle condizioni del monitor, comunicando il
nome del modello e il numero di serie del monitor, oltre alla
marca e al modello del computer e della scheda grafica.
Caratteristiche tecniche
Tubo a raggi catodici (CRT)
passo della griglia di apertura
0,24 mm
21 pollici misurati in diagonale
Deflessione di 90 gradi
FD Trinitron
Dimensioni dell’immagine visibile
Circa 403,8
×
302,2 mm (l/a)
Immagine visibile 19,8"
Risoluzioni consigliate Orizzontale: 1280 punti
Verticale: 1024 linee
Area dell’immagine standard
Circa 388
×
291 mm (l/a)
o
Circa 364
×
291 mm (l/a)
Frequenza di deflessione* Orizzontale: da 30 a 121 kHz
Verticale: da 48 a 160 Hz
Tensione/corrente di ingresso CA
da 100 a 240 V, 50 – 60 Hz,
2,0 – 1,0 A
Consumo energetico Circa 145 W
Dimensioni Circa 501
×
498
×
498 mm (l/a/p)
Peso Circa 32 kg
Plug and Play DDC1/2B/2Bi, GTF**
* Condizione di sincronizzazione verticale e orizzontale
consigliata
• L’ampiezza della sincronizzazione orizzontale dovrebbe
essere superiore del 4,8% rispetto al tempo orizzontale
complessivo o 0,8 µs, a seconda di quale è più ampio.
• L’ampiezza di oscuramento orizzontale dovrebbe essere più
di 2,3 µsec.
• L’ampiezza di oscuramento verticale dovrebbe essere più di
450 µsec.
** Se il segnale di ingresso è conforme a Generalized Timing
Formula (GTF), la funzione GTF del monitor fornisce
automaticamente l’immagine migliore per lo schermo.
Il design e le caratteristiche tecniche sono soggetti a modifiche
senza preavviso.
Indicatore di accensione
1
(alimentazione)
67
Índice
• VESA y DDC
son marcas comerciales
de Video Electronics Standard
Association.
•
E
NERGY
S
TAR es una marca
registrada de EE.UU.
• El resto de los nombres de productos
mencionados en este manual pueden ser
marcas comerciales o marcas
comerciales registradas de sus
respectivas compañías.
•Además, “
” y “
” no se mencionan en
cada caso en este manual.
ES
Precauciones . . . . . . . . . . . . . . . . . . . . . . . . . . . . . . . . . . . . . . . . . 68
Identificación de los componentes y los controles . . . . . . . . . . . . . 69
Instalación . . . . . . . . . . . . . . . . . . . . . . . . . . . . . . . . . . . .70
Paso 1:
Extracción de la cubierta posterior . . . . . . . . . . . . . . . . . . 70
Paso 2:
Conexión del monitor al ordenador. . . . . . . . . . . . . . . . . . 70
Paso 3:
Conexión del cable de alimentación . . . . . . . . . . . . . . . . . 70
Paso 4:
Fijación de la cubierta posterior . . . . . . . . . . . . . . . . . . . . 70
Paso 5:
Encendido del monitor y del ordenador . . . . . . . . . . . . . . 70
Selección del idioma de los menús en pantalla (LANGUAGE) . . . 71
Selección de la señal de entrada . . . . . . . . . . . . . . . . . . . . . . . . . . 71
Tamaño y centrado automáticos de la imagen. . . . . . . . . . . . . . . . 71
Personalización del monitor. . . . . . . . . . . . . . . . . . . . . .72
Navegación por el menú. . . . . . . . . . . . . . . . . . . . . . . . . . . . . . . . . 72
Ajuste del brillo y del contraste. . . . . . . . . . . . . . . . . . . . . . . . . . . . 73
Ajuste del tamaño de la imagen (TAMAÑO/CENTRO) . . . . . . . . . 74
Ajuste del centrado de la imagen (TAMAÑO/CENTRO) . . . . . . . . 74
Ampliación o reducción de la imagen (ZOOM). . . . . . . . . . . . . . . . 74
Ajuste de la forma de la imagen (GEOMETRIA) . . . . . . . . . . . . . . 74
Ajuste de la convergencia (CONVERGENCIA) . . . . . . . . . . . . . . . 75
Ajuste de la calidad de la imagen (PANTALLA) . . . . . . . . . . . . . . . 75
Ajuste del color de la imagen (COLOR) . . . . . . . . . . . . . . . . . . . . . 76
Ajustes complementarios (OPCION) . . . . . . . . . . . . . . . . . . . . . . . 77
Restauración de los ajustes . . . . . . . . . . . . . . . . . . . . . . . . . . . . . . 78
Características técnicas . . . . . . . . . . . . . . . . . . . . . . . . .78
Función de ahorro de energía . . . . . . . . . . . . . . . . . . . . . . . . . . . . 78
Solución de problemas . . . . . . . . . . . . . . . . . . . . . . . . . .79
Si aparecen líneas finas en pantalla (hilos de amortiguación) . . . . 79
Mensajes en pantalla . . . . . . . . . . . . . . . . . . . . . . . . . . . . . . . . . . . 79
Problemas y soluciones . . . . . . . . . . . . . . . . . . . . . . . . . . . . . . . . . 80
Función de autodiagnóstico . . . . . . . . . . . . . . . . . . . . . . . . . . . . . . 82
Especificaciones . . . . . . . . . . . . . . . . . . . . . . . . . . . . . . .82
Appendix. . . . . . . . . . . . . . . . . . . . . . . . . . . . . . . . . . . . . . . i
TCO’99 Eco-document . . . . . . . . . . . . . . . . . . . . . . . . . . . . . . . . . . . .i
68
Precauciones
Advertencia sobre las conexiones de
alimentación
Utilice un cable de alimentación apropiado para el suministro
eléctrico local.
• Antes de desconectar el cable de alimentación, espere al menos
30 segundos después de desactivar la alimentación para que se
descargue la electricidad estática de la superficie de la pantalla.
• Una vez activada la alimentación, la pantalla se desmagnetiza
durante unos 2 segundos. Esto genera un intenso campo
magnético alrededor de la pantalla que puede afectar a los datos
almacenados en discos y cintas magnéticas situados cerca del
monitor. Asegúrese de mantener discos, cintas y equipos de
grabación magnéticos alejados del monitor.
Instalación
No instale el monitor en los siguientes lugares:
• sobre superficies (mantas, colchas, etc.) ni cerca de materiales
(cortinas, tapices, etc.) que puedan bloquear los orificios de
ventilación
• cerca de fuentes de calor, como radiadores o conductos de aire
caliente, ni en lugares sujetos a la luz solar directa
• en lugares sujetos a cambios bruscos de temperatura
• en lugares sujetos a golpes o vibraciones mecánicas
• sobre superficies inestables
• cerca de equipos que generen magnetismo, como
transformadores o líneas eléctricas de alta tensión
• cerca o sobre una superficie metálica con carga eléctrica
Mantenimiento
• Limpie la pantalla con un paño suave. Si utiliza algún líquido
limpiador de cristales, no emplee ningún tipo de producto de
limpieza que contenga soluciones antiestáticas o aditivos
similares, ya que pueden rayar la superficie de la pantalla.
• No frote, toque ni manipule la superficie de la pantalla con
objetos afilados o abrasivos, como un bolígrafo o un
destornillador. Este tipo de contacto puede rayar el tubo de
imagen.
• Limpie el exterior, el panel y los controles con un paño suave
ligeramente humedecido con una solución detergente poco
concentrada. No utilice estropajos abrasivos, detergente en
polvo ni disolventes, como alcohol o bencina.
Transporte
Cuando transporte este monitor para su reparación o traslado,
utilice la caja y materiales de embalaje originales.
No levante este monitor agarrándolo por la cubierta posterior
como se muestra más abajo, ya que dicha cubierta podría
desprenderse.
Uso del soporte basculante giratorio
Este monitor puede ajustarse en los ángulos mostrados a
continuación. Para girarlo vertical u horizontalmente, agárrelo
por la parte inferior con ambas manos.
Estados
Unidos,
Canadá,
Taiwan,
Corea, Japón
Europa
Continental
Reino Unido,
Irlanda
Australia,
Nueva
Zelanda
Tipo de
enchufe
NEMA S-15P
Tipo de
enchufe
CEE7/VII
(Schuko)
Tipo de
enchufe
B S 1363
Tipo de
enchufe
SAA AS 3112
Tipo de cable
SJT
Tipo de cable
HAR(HO5VV
-F3G1.0)
Tipo de cable
HAR(HO5VV
-F3G1.0)
Tipo de cable
CDB03PLP
Valor nominal
mín. del juego
de cables
10 A/125 V
18/3AWG
Valor nominal
mín. del juego
de cables
10 A/250 V
Valor nominal
mín. del juego
de cables
10 A/250 V
Valor nominal
mín. del juego
de cables
10 A/250 V
Longitud del
cable 2 m
(+/– 0,1 m)
Longitud del
cable 2,5 m
(+/– 0,1 m)
Longitud del
cable 2,5 m
(+/– 0,1 m)
Longitud del
cable 2,5 m
(+/– 0,1 m)
Aprobación
de seguridad
UL/CSA
Aprobación
de seguridad
HAR
Aprobación
de seguridad
BSI, ASTA
Aprobación
de seguridad
Departamento
de Energía de
Nueva Gales
del Sur
El suministro de alimentación universal de rango automático
funciona en cualquier lugar; el monitor se autoajustará si se
emplean el enchufe y el cable de alimentación apropiados para
la tensión local.
El equipo debe instalarse cerca de una toma de fácil acceso.
115 voltios 230 voltios
(no suministrado
con el juego de
cables estándar)
Juego de cables
CEE-22, extremo
hembra (todos los
juegos de cables de
alimentación)
90°
5°
90°
15°
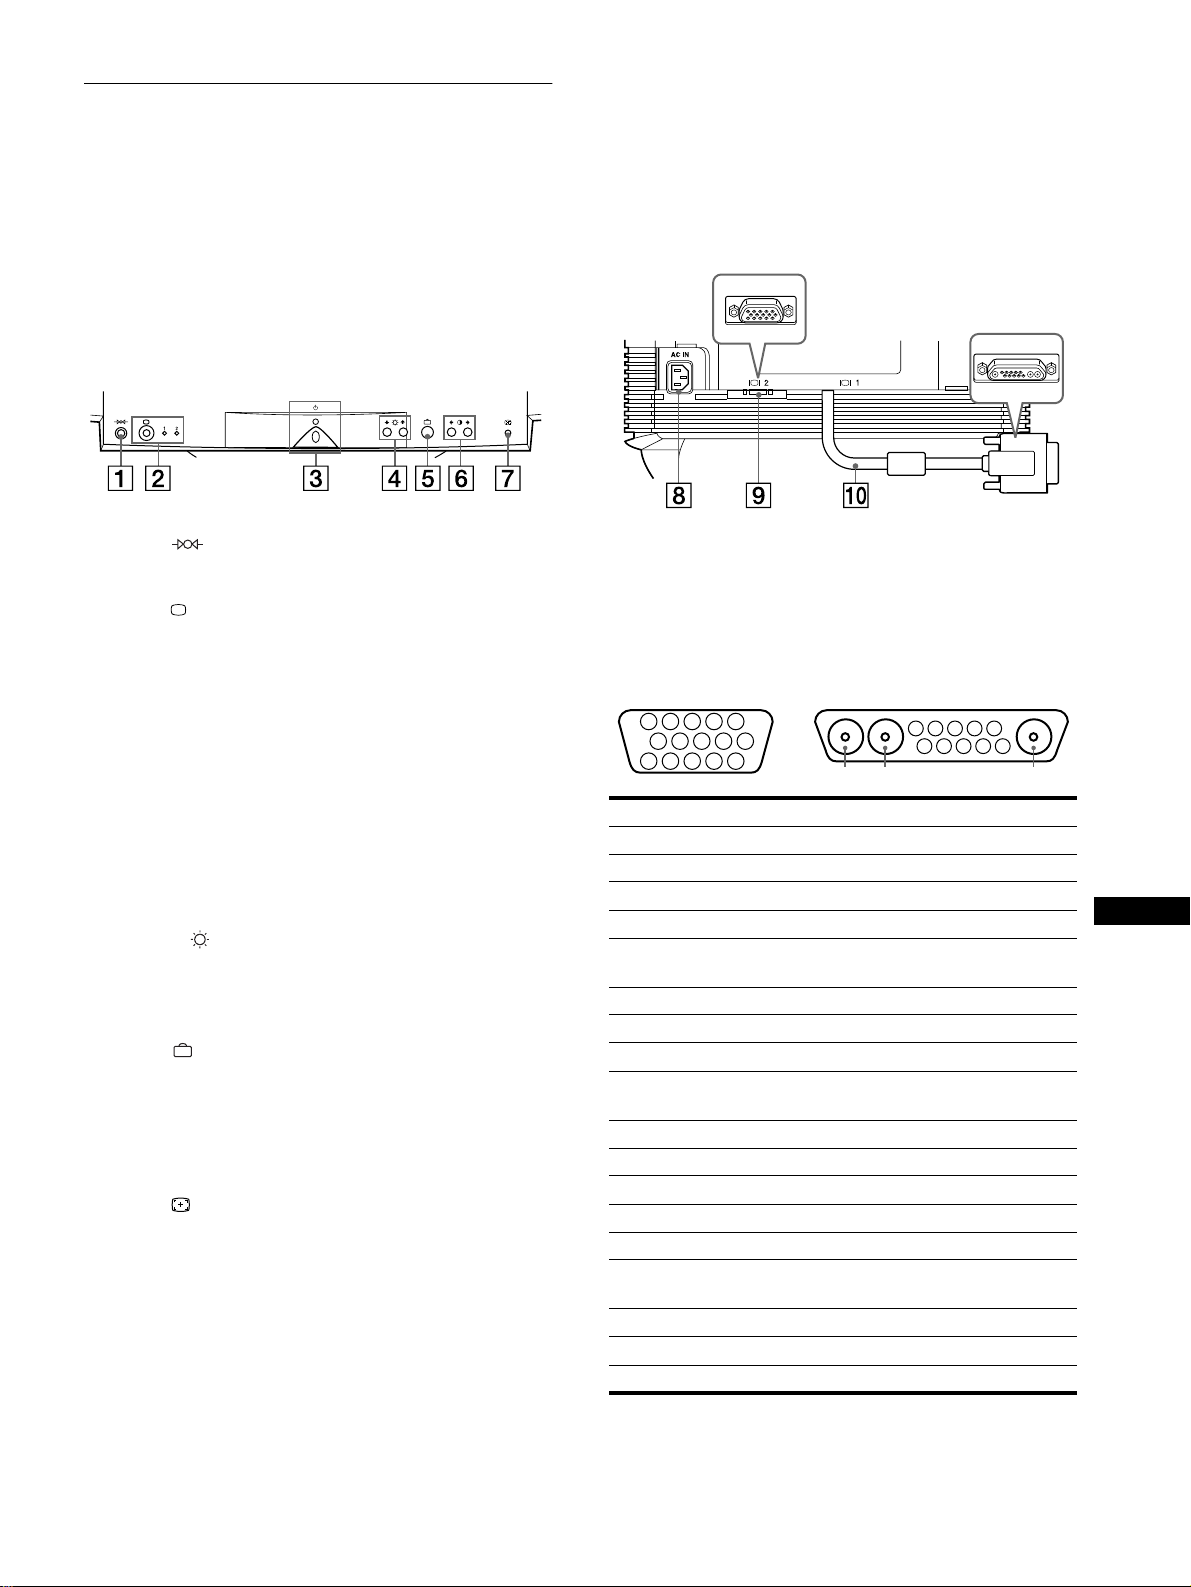
69
ES
Identificación de los componentes
y los controles
Consulte las páginas indicadas entre paréntesis para obtener más
información.
1
11
1 Botón (restauración) (página 78)
Este botón recupera los valores de fábrica.
2
22
2 Botón (entrada) e indicadores 1 (13W3) / 2 (HD15)
(página 71)
Este botón selecciona la señal de entrada de vídeo 1 (13W3)
o 2 (HD15).
Cada vez que pulse este botón, se alternarán la señal de
entrada y el indicador correspondiente.
3
33
3 Interruptor e indicador 1 (alimentación)
(páginas 70, 78, 82)
Este botón enciende y apaga el monitor. El indicador de
alimentación se ilumina en verde cuando el monitor está
encendido, y parpadea en verde y en ámbar, o se ilumina en
ámbar cuando dicho monitor se encuentra en el modo de
ahorro de energía.
4
44
4 Botones (brillo) m/M (página 73)
Estos botones muestran el menú BRILLO/CONTRASTE y
funcionan como los botones m/M al seleccionar opciones de
menúï
5
55
5 Botón (menú) (página 73)
Este botón muestra el menú principal.
6
66
6 Botones 6 (contraste) </, (página 73)
Estos botones muestran el menú BRILLO/CONTRASTE y
funcionan como los botones </, al realizar ajustes.
7
77
7 Botón ASC (tamaño y centrado automáticos)
(página 71)
Este botón ajusta automáticamente el tamaño y el centrado de
la imagen.
8 Conector AC IN (página 70)
Este conector proporciona alimentación CA al monitor.
9
99
9 Conector 2 de entrada de vídeo (HD15) (página 70)
Este conector introduce las señales de vídeo RVA
(0,700 Vp-p, positivas) y de sincronización.
0
00
0 Conector 1 de entrada de vídeo (13W3) (página 70)
Este conector introduce las señales de vídeo RVA
(0,700 Vp-p, positivas) y las de sincronización.
* DDC (Display Data Channel) es un estándar de VESA.
** Los terminales tienen dos finalidades: entrada de sincronización
combinada y entrada de sincronización H. cuando la sincronización V.
está presente en el terminal nº 7.
Parte posterior (con la cubierta abierta)Parte frontal
Nº Señal 9
99
9 Señal 0
00
0
A1 ––– Roja
A2 ––– Verde
A3 ––– Azul
1 Roja Reloj de datos (SCL)*
2Verde
(Sincronización en verde)
DDC + 5V*
3Azul –––
4 Identificación (Masa) Masa DDC*
5 Masa DDC* Sincronización C.**
6 Masa roja Datos bidireccionales
(SDA)*
7 Masa verde Sincronización V.
8 Masa azul Identificación (100
Ω
)
9 DDC + 5V* Identificación (100
Ω
)
10 Masa Masa
11 Identificación (Masa) –––
12 Datos bidireccionales
(SDA)*
–––
13 Sincronización H. –––
14 Sincronización V. –––
15 Reloj de datos (SCL)* –––
5 4 3 2
1
678910
11
A3
12131415
5 4 3 2
1
678910
A2 A1
9
HD15
0
13W3

70
Instalación
Este monitor funciona con plataformas que empleen frecuencias
horizontales comprendidas entre 30 y 121 kHz.
Paso 1:Extracción de la cubierta
posterior
Antes de realizar la conexión, extraiga la cubierta posterior del
monitor.
Paso 2:Conexión del monitor al
ordenador
Con el monitor y el ordenador apagados, conecte el cable de señal
de vídeo al conector de entrada de vídeo del monitor y a la salida
de vídeo del ordenador.
Notas
• No toque los terminales del conector del cable de señal de vídeo, ya que
dichos terminales podrían doblarse.
• Cuando conecte el cable de señal de vídeo, compruebe la alineación de
los conectores. No fuerce el conector en el sentido incorrecto, ya que
los terminales podrían doblarse.
Paso 3:Conexión del cable de
alimentación
Con el monitor y el ordenador apagados, conecte primero el cable
de alimentación adecuado al suministro eléctrico local al monitor
y, a continuación, a una toma de corriente.
Paso 4:Fijación de la cubierta
posterior
Fije la cubierta posterior al monitor.
Pase el cable de CA por la abertura para el mismo situada en la
parte inferior de la cubierta posterior.
Paso 5:Encendido del monitor y
del ordenador
Primero encienda el monitor y, a continuación, el ordenador.
La instalación del monitor ha finalizado.
Si fuese necesario, utilice los controles del monitor para ajustar la
imagen.
Si las imágenes no aparecen en pantalla
• Compruebe que el monitor esté correctamente conectado al
ordenador.
• Si la pantalla muestra el mensaje SIN SEÑAL DE ENTRADA
siga los mensajes en pantalla (página 79).
• Si sustituye un monitor antiguo por este modelo y el mensaje
FUERA DEL RANGO DE AJUSTE aparece en pantalla,
vuelva a conectar el monitor antiguo. A continuación, ajuste la
tarjeta gráfica del ordenador de forma que la frecuencia
horizontal se encuentre entre 30 – 121 kHz, y la vertical entre
48 – 160 Hz.
Para obtener más información sobre los mensajes en pantalla,
consulte “Problemas y soluciones” en la página 80.
Cubierta
Gire la parte inferior de la
cubierta para abrirla y tire
hacia fuera para
extraerla.
a un ordenador
con salida de
vídeo HD15
a un ordenador con
salida de vídeo 13W3
a una toma de CA
cable de alimentación
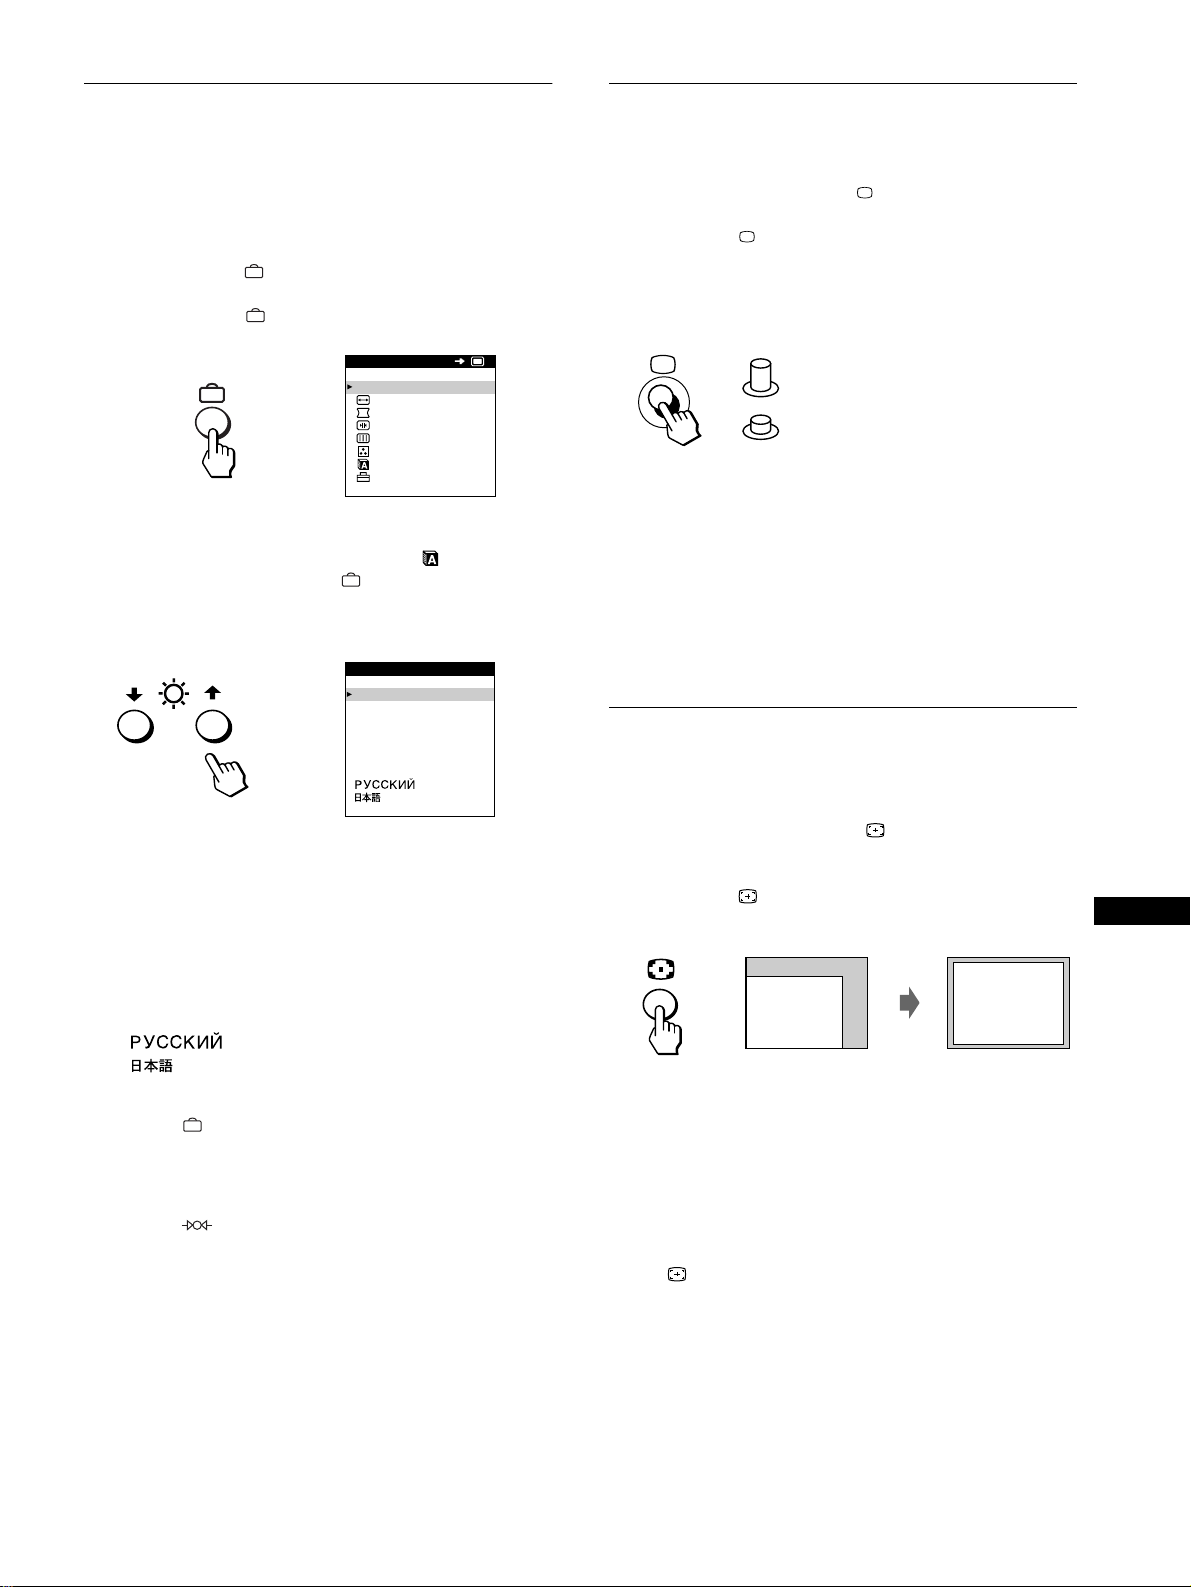
71
ES
Selección del idioma de los menús
en pantalla (LANGUAGE)
Los idiomas disponibles para los menús en pantalla son inglés,
francés, alemán, español, italiano, holandés, sueco, ruso y
japonés. El ajuste por omisión es el idioma inglés.
1
Pulse el botón .
Consulte la página 73 para obtener más información sobre el
empleo del botón .
2
Pulse los botones m/M para resaltar LANGUAGE
y vuelva a pulsar el botón .
Consulte la página 73 para obtener más información sobre el
empleo de los botones m/M.
3
Pulse los botones m/M para seleccionar el idioma.
• ENGLISH: Inglés
• FRANÇAIS: Francés
• DEUTSCH: Alemán
• ESPAÑOL
• ITALIANO: Italiano
• NEDERLANDS: Holandés
• SVENSKA: Sueco
•: Ruso
• : Japonés
Para cerrar el menú
Pulse el botón una vez para volver al MENU principal, y dos para
volver a la visualización normal. Si no pulsa ningún botón, el menú se
cerrará automáticamente transcurridos unos 30 segundos.
Para restaurar el idioma inglés
Pulse el botón (restauración) mientras la pantalla muestra el menú
LANGUAGE.
Selección de la señal de entrada
Es posible conectar dos ordenadores a este monitor mediante los
conectores 1 y 2 de entrada de vídeo. Para seleccionar uno de los
dos ordenadores, emplee el botón .
Pulse el botón .
Cada vez que pulse este botón, se alternarán la señal de entrada y
el indicador correspondiente.
Al pulsar el botón, se seleccionará ENTRADA 2. Si no se pulsa,
se seleccionará ENTRADA 1.
El conector seleccionado aparece en pantalla durante unos
segundos.
La pantalla muestra “ENTRADA 1” (conector 1 de entrada de
vídeo) o “ENTRADA 2” (conector 2 de entrada de vídeo).
Nota
Si el conector seleccionado no recibe ninguna señal, la pantalla mostrará
el mensaje SIN SEÑAL DE ENTRADA. Transcurridos unos segundos, el
monitor entra en el modo de ahorro de energía. Si esto ocurre, cambie al
otro conector.
Tamaño y centrado automáticos de
la imagen
Es posible ajustar la imagen fácilmente para que llene la pantalla.
Para ello, basta con pulsar el botón (tamaño y centrado
automáticos).
Pulse el botón .
La imagen llenará automáticamente la pantalla.
Notas
• Esta función está destinada a emplearse con un ordenador que
proporcione imágenes de pantalla completa. Puede no funcionar
correctamente si el color de fondo es oscuro o si la imagen de entrada
no llena la pantalla hasta los bordes.
• Las imágenes con una relación de aspecto de 5:4 (resolución: 1280
×
1024, 1600
×
1280) aparecen con su resolución real y no llenan la
pantalla hasta los bordes.
• La imagen mostrada se desplaza durante unos segundos al pulsar el
botón . Esto no es un fallo de funcionamiento.
SAL IR
TAMAÑO /CENTRO
GEOMETR I A
CONVERGENC I A
PANTALLA
COLOR
LANGUAGE
OPC ION
MENU
OK
b
ENGL ISH
FRANÇA IS
DEUTSCH
ESPAÑOL
ITALIANO
NEDERLANDS
SVENSKA
LANGUAGE
b
ENTRADA 1
(conector 1 de entrada de vídeo)
ENTRADA 2
(conector 2 de entrada de vídeo)
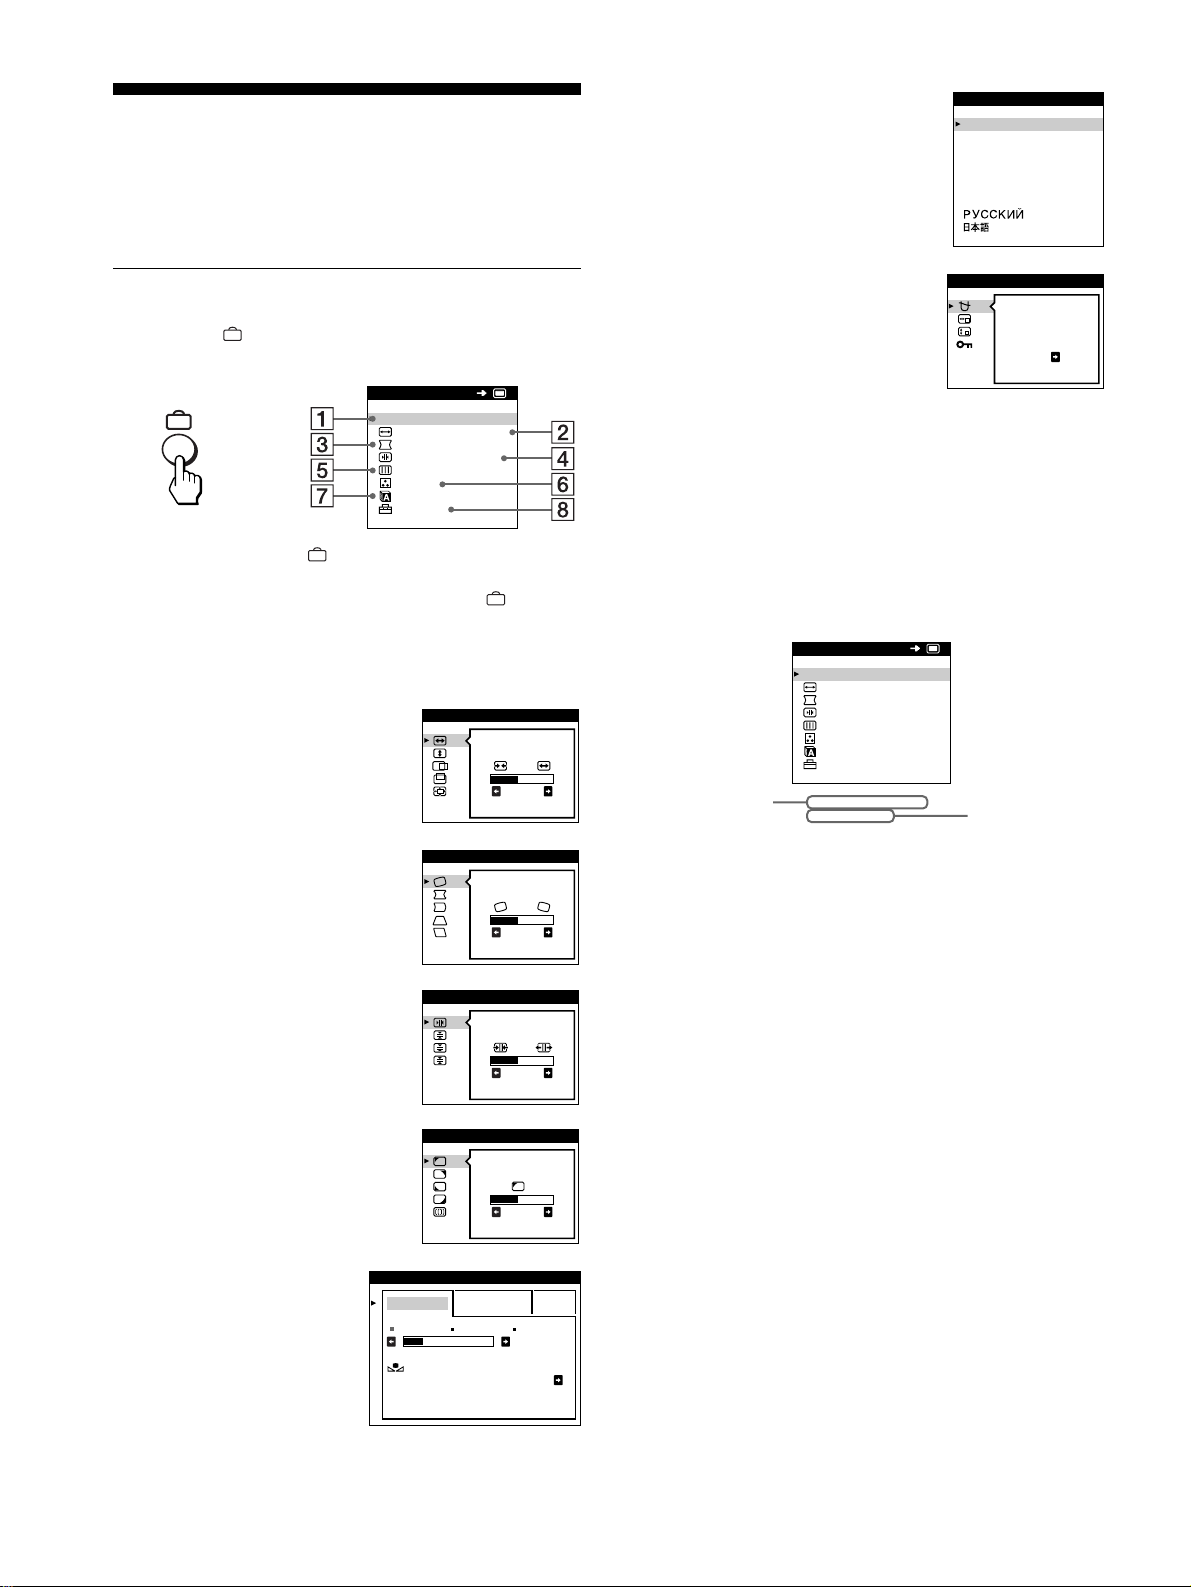
72
Personalización del
monitor
Es posible realizar diversos ajustes del monitor mediante el menú
en pantalla.
Navegación por el menú
Pulse el botón para que la pantalla muestre el MENU
principal.
Utilice los botones m/M y para seleccionar uno de los
siguientes menús. Consulte la página 73 para obtener más
información sobre el empleo de los botones m/M y .
x
Visualización de la señal de entrada actual
Las frecuencias horizontal y vertical de la señal de entrada actual
aparecen en el MENU principal. Si la señal se corresponde con
uno de los modos predefinidos en fábrica de este monitor, también
aparecerá la resolución.
1
11
1 SALIR
Seleccione SALIR para cerrar el
menú.
2
22
2 TAMAÑO/CENTRO
(página 74)
Seleccione el menú TAMAÑO/
CENTRO para ajustar el tamaño, el
centrado o el zoom de la imagen.
3
33
3 GEOMETRIA (página 74)
Seleccione el menú GEOMETRIA
para ajustar la rotación y forma de la
imagen.
4
44
4 CONVERGENCIA (página 75)
Seleccione el menú
CONVERGENCIA para ajustar la
convergencia horizontal y vertical
de la imagen.
5
55
5 PANTALLA (página 75)
Seleccione el menú PANTALLA
para ajustar la calidad de la imagen.
Es posible ajustar la pureza y el
efecto de cancelación del muaré.
6
66
6 COLOR (página 76)
Seleccione el menú
COLOR para ajustar la
temperatura del color de la
imagen. Puede utilizarlo
para hacer coincidir los
colores del monitor con los
de una imagen impresa.
SAL IR
TAMAÑO / CENTRO
GEOMETR I A
CONVERGENC I A
PANTALLA
COLOR
LANGUAGE
OPC ION
MENU
OK
b
26
TAMAÑO / CENTRO
26
GEOMETR I A
TOP
BOT
26
CONVERGENC I A
PUREZA
26
PANTALLA
FACI L EXPERTO s BGR
5000K 6500K 930 K0
50 K00
REAJUSTE
DE COLOR SI
COLOR
7
77
7 LANGUAGE (página 71)
Seleccione LANGUAGE para
elegir el idioma de los menús en
pantalla.
8
88
8 OPCION (página 77)
Seleccione OPCION para ajustar las
opciones del monitor. Éstas
incluyen:
• la desmagnetización de la
pantalla
• el cambio de la posición del menú
en pantalla
• el bloqueo de los controles
ENGL ISH
FRANÇA IS
DEUTSCH
ESPAÑOL
ITALIANO
NEDERLANDS
SVENSKA
LANGUAGE
DESMAGNET
SI
OPCION
68.7kHz/ 85Hz
1024x 768
MENU
SAL IR
TAMAÑO / CENTRO
GEOMETR I A
CONVERGENC I A
PANTALLA
COLOR
LANGUAGE
OPC ION
OK
frecuencias
horizontal y
vertical de la
señal de
entrada actual
resolución de
la señal de
entrada actual
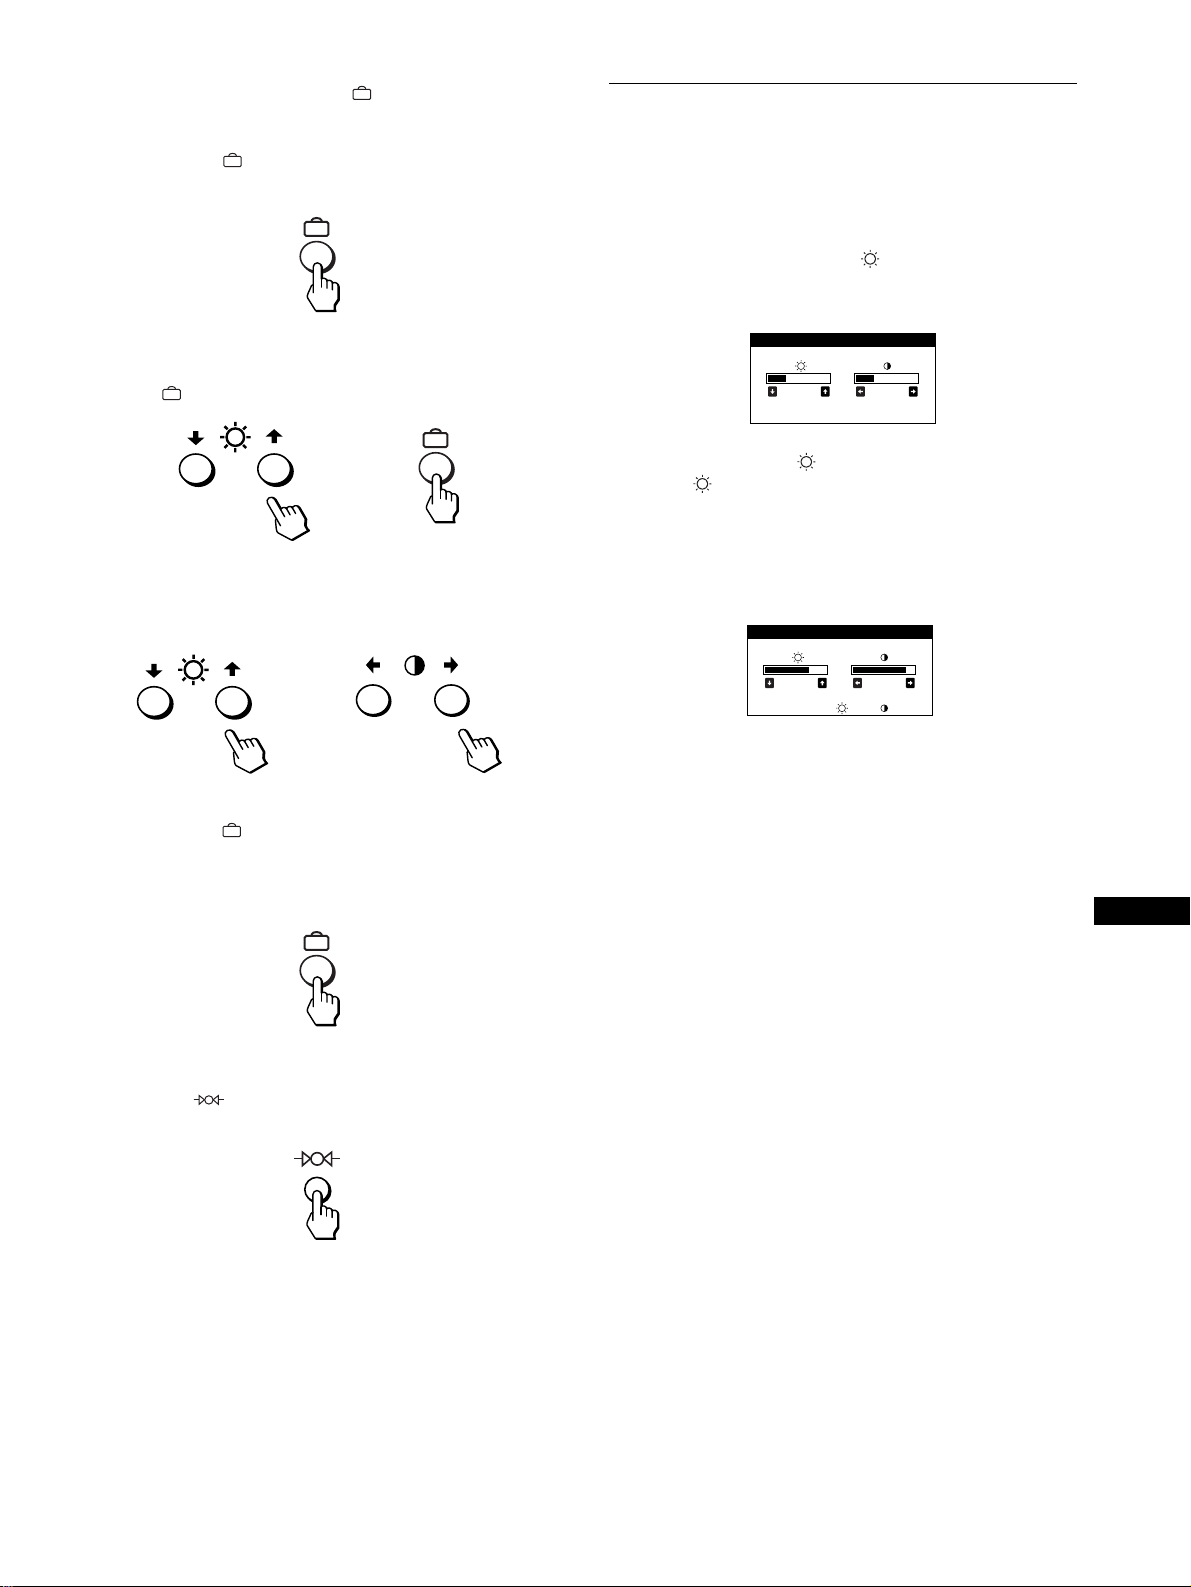
73
ES
x
Empleo de los botones , m/M y </,
1
Muestre el MENU principal.
Pulse el botón para que el MENU principal aparezca en
pantalla.
2
Seleccione el menú que desee ajustar.
Pulse los botones m/M para resaltar el menú deseado. Pulse el
botón para seleccionar la opción de menú.
3
Ajuste el menú.
Pulse los botones m/M para seleccionar la opción de ajuste
deseada. Pulse los botones </, para realizar el ajuste.
4
Cierre el menú.
Pulse el botón una vez para volver al MENU principal, y
dos para volver a la visualización normal. Si no pulsa ningún
botón, el menú se cerrará automáticamente transcurridos unos
30 segundos.
x
Restauración de los ajustes
Pulse el botón (restauración). Consulte la página 78 para
obtener más información sobre la restauración de los ajustes.
Ajuste del brillo y del contraste
Los ajustes de brillo y contraste se realizan mediante un menú de
BRILLO/CONTRASTE independiente.
Estos ajustes se almacenan en la memoria para las señales
procedentes del conector de entrada actualmente seleccionado.
1
Pulse uno de los botones (brillo) m/M o
6 (contraste) </,.
El menú de BRILLO/CONTRASTE aparece en pantalla.
2
Pulse los botones (brillo) m/M para ajustar el
brillo ( ), y los botones 6
66
6 (contraste) </, para
ajustar el contraste (6
66
6).
Si emplea el modo sRGB
Si ha seleccionado el modo sRGB en el menú COLOR, la pantalla
mostrará el siguiente menú BRILLO/CONTRASTE.
Para obtener más información sobre el empleo del modo sRGB,
consulte “Ajuste del color de la imagen (COLOR)” en la
página 76.
El menú desaparece automáticamente transcurridos unos
3 segundos.
b
b
26 26
BRI LLO/CONTRASTE
56 76
sRGB : 56 76
BRI LLO/CONTRASTE
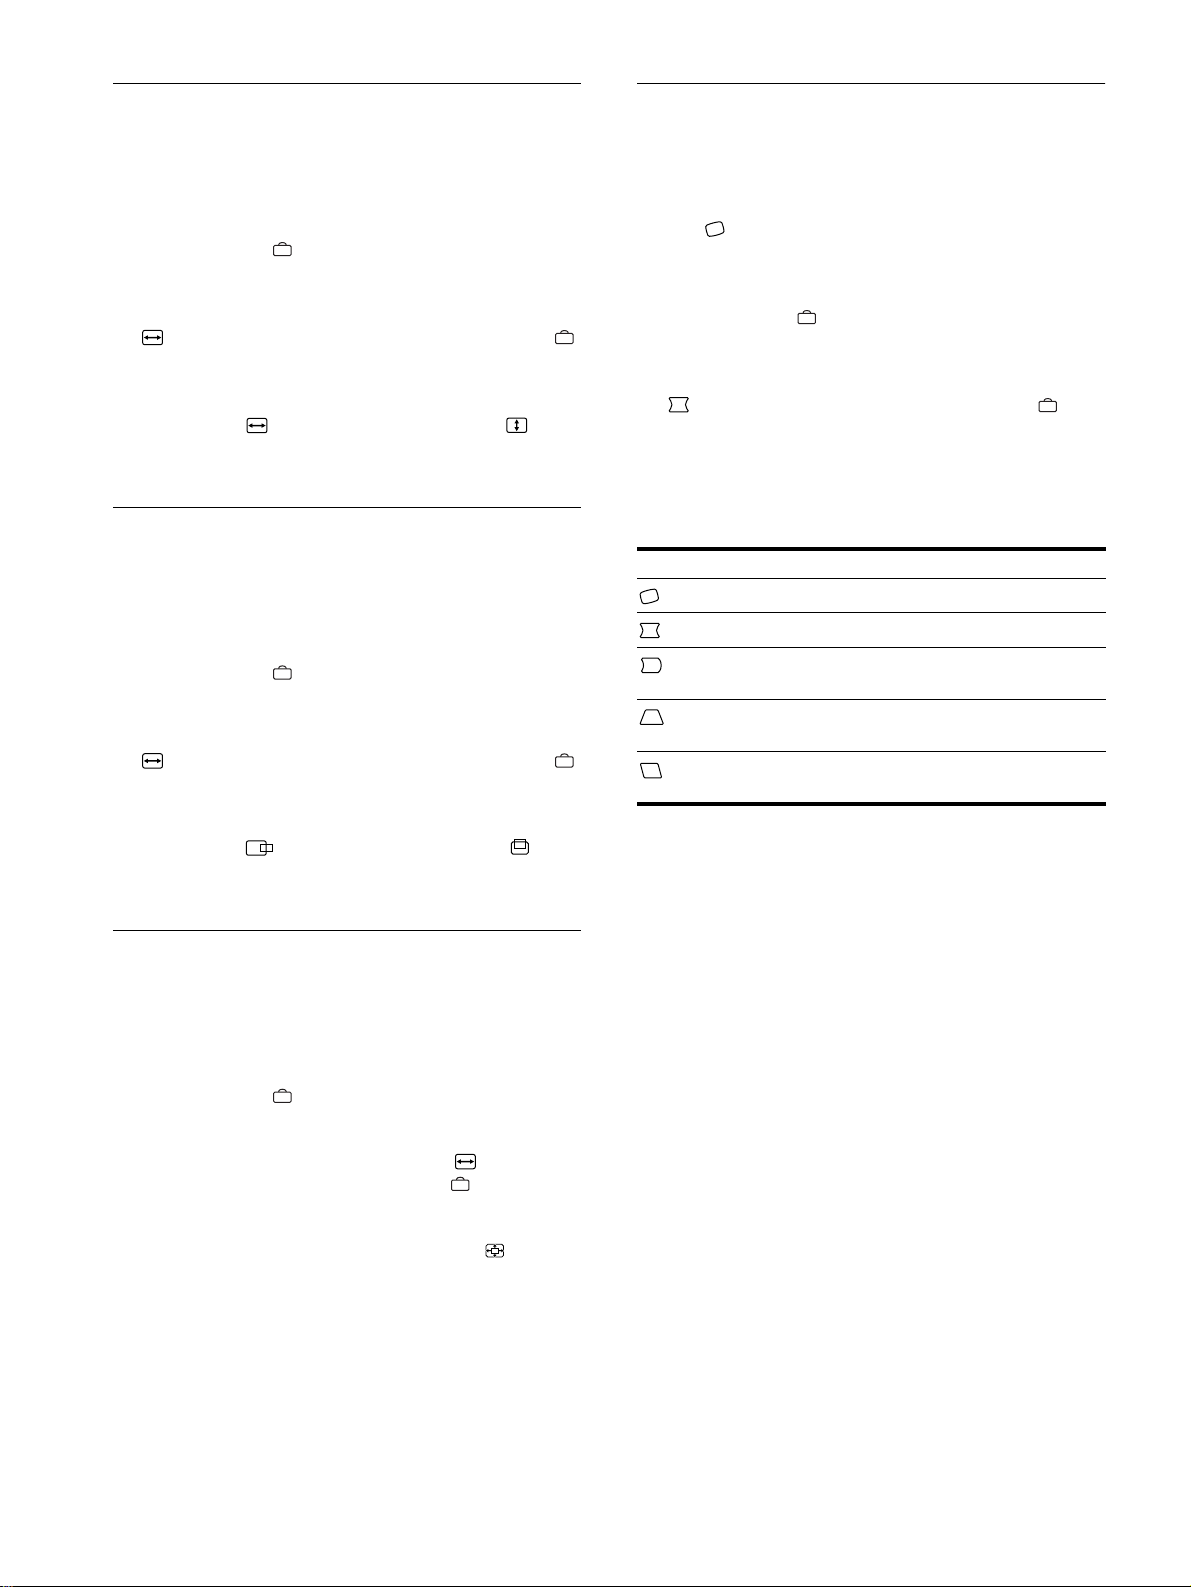
74
Ajuste del tamaño de la imagen
(TAMAÑO/CENTRO)
Este ajuste se almacena en la memoria para la señal de entrada
actual.
1
Pulse el botón .
El MENU principal aparece en pantalla.
2
Pulse los botones m/M para resaltar
TAMAÑO/CENTRO y vuelva a pulsar el botón .
El menú TAMAÑO/CENTRO aparece en pantalla.
3
Primero pulse los botones m/M con el fin de
seleccionar para el ajuste horizontal, o para
el vertical. A continuación, pulse los botones </,
para ajustar el tamaño.
Ajuste del centrado de la imagen
(TAMAÑO/CENTRO)
Este ajuste se almacena en la memoria para la señal de entrada
actual.
1
Pulse el botón .
El MENU principal aparece en pantalla.
2
Pulse los botones m/M para resaltar
TAMAÑO/CENTRO y vuelva a pulsar el botón .
El menú TAMAÑO/CENTRO aparece en pantalla.
3
Primero pulse los botones m/M con el fin de
seleccionar para el ajuste horizontal, o para
el vertical. A continuación, pulse los botones </,
para ajustar el centrado.
Ampliación o reducción de la
imagen (ZOOM)
Este ajuste se almacena en la memoria para la señal de entrada
actual.
1
Pulse el botón .
El MENU principal aparece en pantalla.
2
Pulse los botones m/M para resaltar TAMAÑO/
CENTRO y vuelva a pulsar el botón .
El menú TAMAÑO/CENTRO aparece en pantalla.
3
Pulse los botones m/M para seleccionar (zoom),
y pulse los botones </, para ampliar o reducir la
imagen.
Nota
El ajuste se detiene cuando el tamaño horizontal o el vertical alcanza su
valor máximo o mínimo.
Ajuste de la forma de la imagen
(GEOMETRIA)
Los ajustes de GEOMETRIA permiten ajustar la rotación y la
forma de la imagen.
El ajuste (rotación) se almacena en la memoria para todas las
señales de entrada. El resto de ajustes se almacenan en la memoria
para la señal de entrada actual.
1
Pulse el botón .
El MENU principal aparece en pantalla.
2
Pulse los botones m/M para resaltar
GEOMETRIA y vuelva a pulsar el botón .
El menú GEOMETRIA aparece en pantalla.
3
Primero pulse los botones m/M para seleccionar la
opción de ajuste que desee. A continuación, pulse
los botones </, para realizar el ajuste.
Seleccione Para
girar la imagen
expandir o contraer los lados de la imagen
desplazar los lados de la imagen hacia la
izquierda o la derecha
ajustar la anchura de la imagen en la parte
superior de la pantalla
desplazar la imagen hacia la izquierda o la
derecha en la parte superior de la pantalla
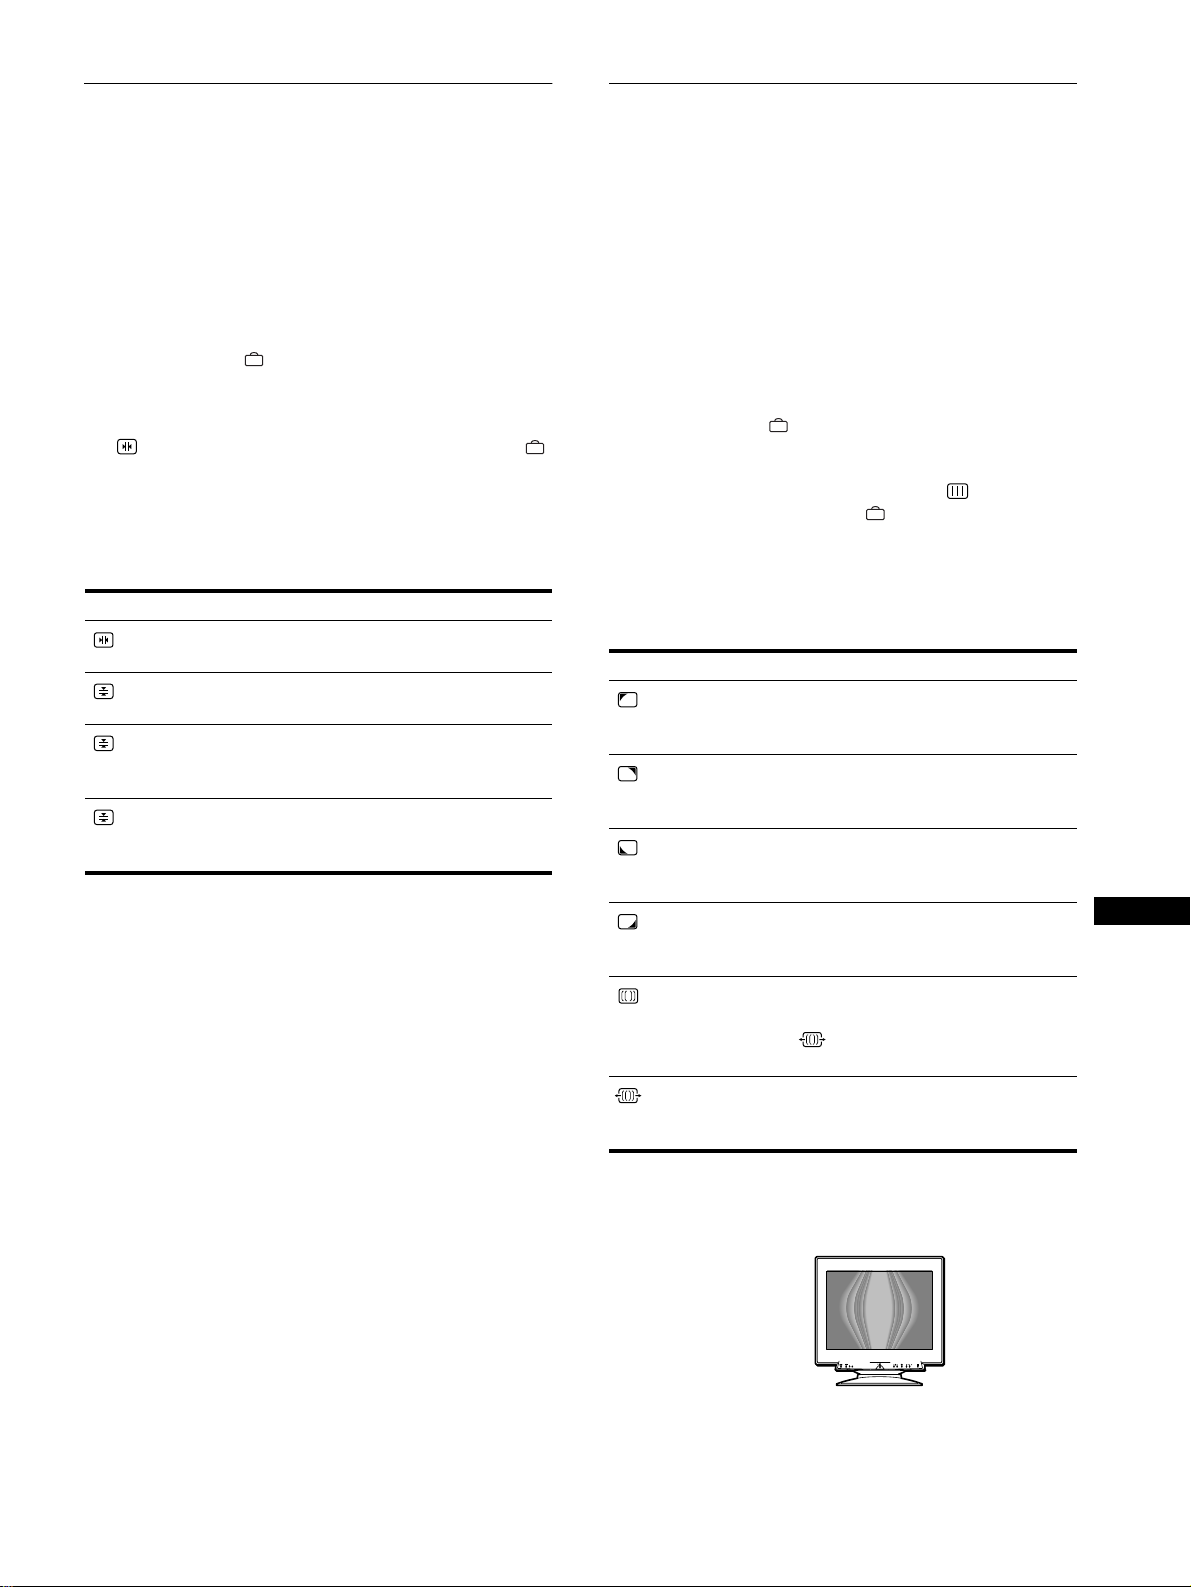
75
ES
Ajuste de la convergencia
(CONVERGENCIA)
Los ajustes de CONVERGENCIA permiten ajustar la calidad de
la imagen mediante el control de la convergencia. Ésta se refiere
al alineamiento de las señales de color rojo, verde y azul.
Si se aprecian sombras rojas o azules alrededor de las letras o de
las líneas, ajuste la convergencia.
Estos ajustes se almacenan en la memoria para todas las señales
de entrada.
1
Pulse el botón .
El MENU principal aparece en pantalla.
2
Pulse los botones m/M para resaltar
CONVERGENCIA y vuelva a pulsar el botón .
El menú CONVERGENCIA aparece en pantalla.
3
Primero pulse los botones m/M para seleccionar la
opción de ajuste que desee. A continuación, pulse
los botones </, para realizar el ajuste.
Ajuste de la calidad de la imagen
(PANTALLA)
Los ajustes de PANTALLA permiten ajustar la calidad de la
imagen controlando el muaré y la pureza.
• Si el color es irregular en las esquinas de la pantalla, ajuste la
pureza.
• Si aparecen patrones elípticos u ondulados en pantalla, cancele
el muaré.
Los ajustes de ELIMINAR MUARE y AJUSTE MUARE se
almacenan en la memoria para la señal de entrada actual. Los
demás ajustes se almacenan en la memoria para todas las señales
de entrada.
1
Pulse el botón .
La pantalla muestra el MENU principal.
2
Pulse los botones m/M para resaltar PANTALLA
y vuelva a pulsar el botón .
El menú PANTALLA aparece en pantalla.
3
Primero pulse los botones m/M para seleccionar la
opción de ajuste deseada. A continuación, pulse los
botones </, para realizar el ajuste.
* El muaré es un tipo de interferencia natural que produce líneas suaves
y onduladas en la pantalla. Puede aparecer debido a la interferencia
entre el patrón de la imagen en pantalla y el de paso de fósforo del
monitor.
Nota
Es posible que la imagen se aprecie con borrosidad si
ELIMINAR MUARE se ajusta en SI.
Seleccione Para
que las sombras rojas o azules se
desplacen en sentido horizontal
que las sombras rojas o azules se
desplacen en sentido vertical
TOP
CONVER V SUP
que las sombras rojas o azules de la
parte superior de la pantalla se
desplacen en sentido vertical
BOT
CONVER V INF
que las sombras rojas o azules de la
parte inferior de la pantalla se
desplacen en sentido vertical
Seleccione Para
PUREZA
reducir al mínimo las irregularidades
del color del ángulo superior
izquierdo de la pantalla.
PUREZA
reducir al mínimo las irregularidades
del color del ángulo superior derecho
de la pantalla.
PUREZA
reducir al mínimo las irregularidades
del color del ángulo inferior izquierdo
de la pantalla.
PUREZA
reducir al mínimo las irregularidades
del color del ángulo inferior derecho
de la pantalla.
ELIMINAR MUARE
*
activar (SI) o desactivar (NO) la
función de cancelación de muaré.
(AJUSTE MUARE) aparece en
el menú al seleccionar SI.
AJUSTE MUARE
ajustar el grado de cancelación de
muaré hasta que éste se encuentre al
mínimo.
Ejemplo de muaré
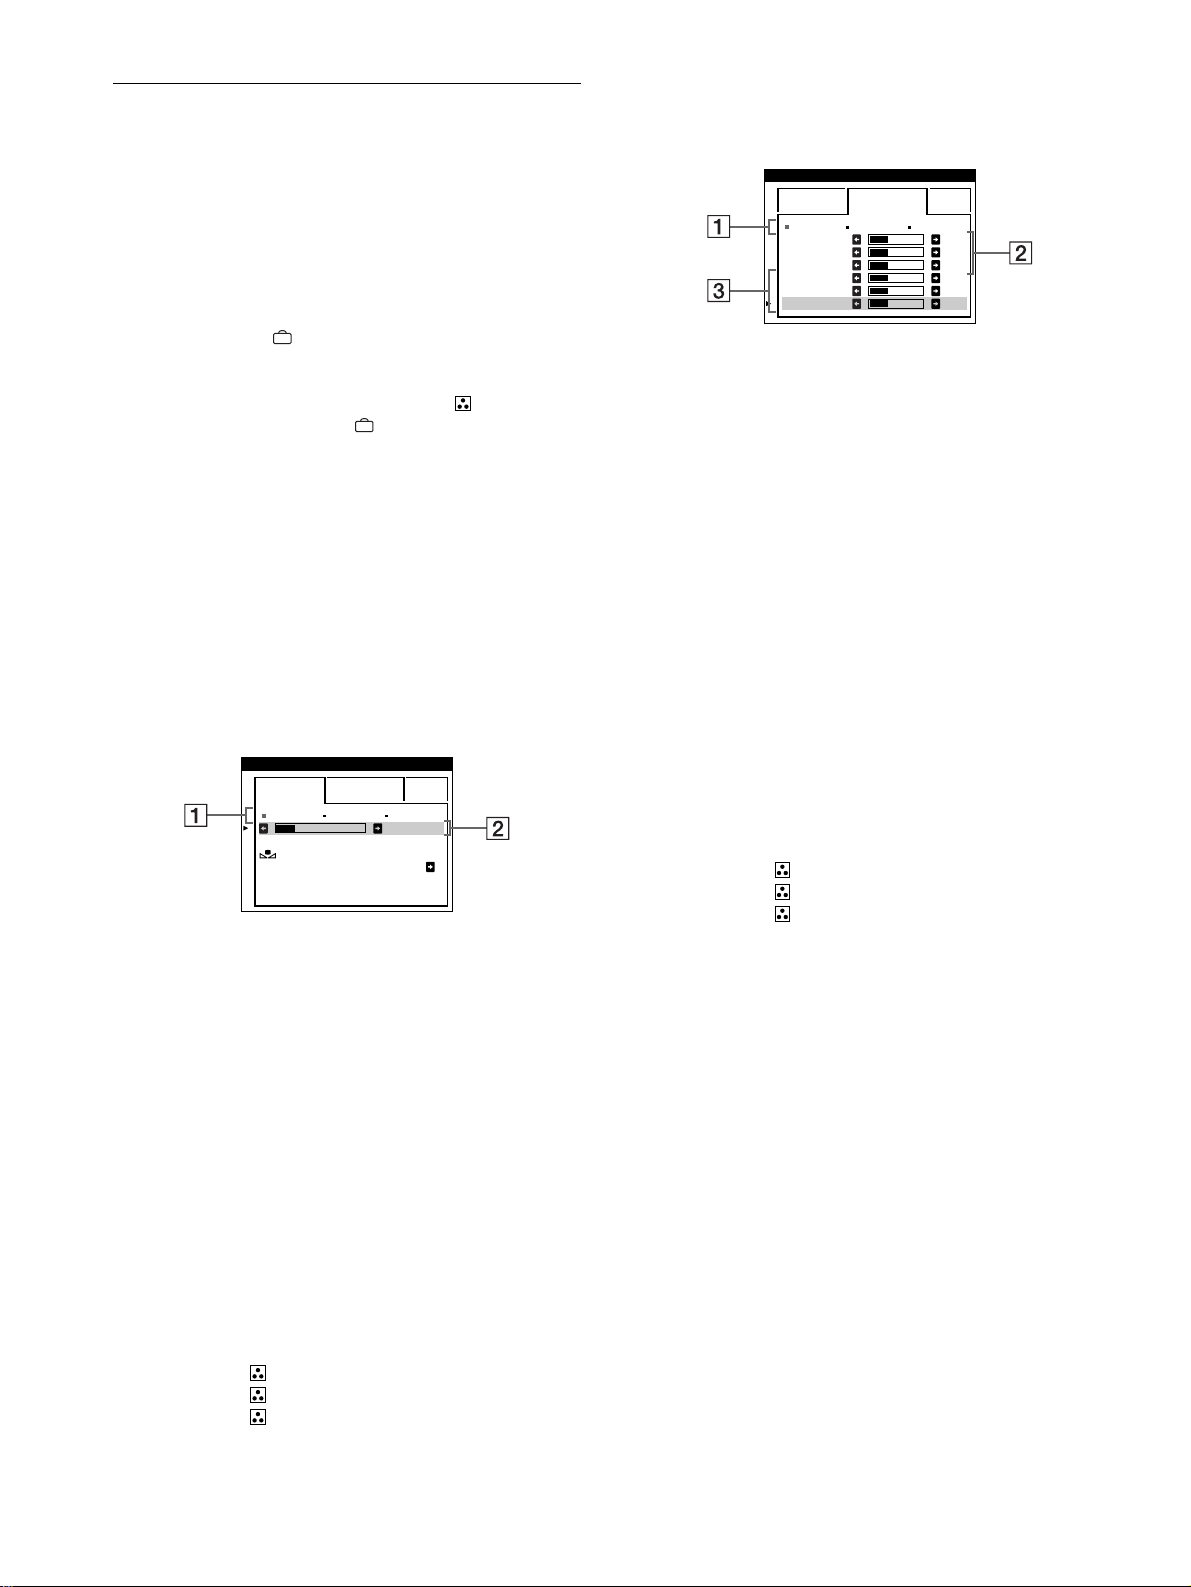
76
Ajuste del color de la imagen
(COLOR)
Los ajustes de COLOR permiten ajustar la temperatura del color
de la imagen mediante la modificación del nivel de color del
campo de color blanco. Los colores aparecen con un tono rojizo
si la temperatura es baja, y azulado si ésta es alta. Este ajuste
resulta útil para hacer coincidir el color del monitor con los
colores de una imagen impresa.
1
Pulse el botón .
El MENU principal aparece en pantalla.
2
Pulse los botones m/M para resaltar COLOR y
vuelva a pulsar el botón .
El menú COLOR aparece en pantalla.
3
Pulse los botones </, para seleccionar el modo
de ajuste.
Hay tres tipos de modo de ajuste: FACIL, EXPERTO y
sRGB.
4
Primero pulse los botones m/M para seleccionar la
opción de ajuste que desee. A continuación, pulse
los botones </, para realizar el ajuste.
Ajuste el modo seleccionado de acuerdo con las siguientes
instrucciones.
Modo FACIL
1
Primero pulse los botones m/M para seleccionar la
fila 1
11
1 de temperatura del color y, a continuación,
pulse los botones </, para seleccionar una
temperatura del color.
Las temperaturas del color predefinidas son 5000K, 6500K y
9300K. Puesto que el ajuste por omisión es 9300K, el tono de
los blancos cambiará de azulado a rojizo al disminuir la
temperatura hasta 6500K y 5000K.
2
Si es necesario, ajuste la temperatura del color con
precisión.
Primero, pulse los botones m/M para seleccionar la
fila 2 de ajuste de la temperatura del color y, a
continuación, pulse los botones </, para ajustar
la temperatura del color con precisión.
Si ajusta la temperatura del color con precisión, los nuevos
ajustes del color se almacenarán en la memoria para cada una
de las tres temperaturas del color y la opción 1 del menú en
pantalla cambiará de la siguiente forma.
• [5000K]t[1]
• [6500K]t[2]
• [9300K]t[3]
Modo EXPERTO
Es posible realizar ajustes adicionales en el color en mayor detalle
seleccionando el modo EXPERTO.
1
Pulse los botones m/M para seleccionar la fila 1
11
1 de
temperatura del color y, a continuación, pulse los
botones </, para seleccionar una temperatura
del color.
2
Pulse los botones m/M para seleccionar la opción
2
22
2 de ajuste, y después pulse los botones </,
para ajustar BIAS (nivel de negro)
De esta forma se ajustan las partes oscuras de la imagen.
3
Pulse los botones m/M para seleccionar la opción
3
33
3 de ajuste, y después pulse los botones </,
para ajustar GAIN (nivel de blanco).
De esta forma se ajustan las partes luminosas de la imagen.
Es posible ajustar el componente R (rojo), V (verde), A (azul)
de la señal de entrada al realizar cambios en las opciones 2
y 3.
Si ajusta la temperatura del color con precisión, los nuevos
ajustes del color se almacenarán en la memoria para cada una
de las tres temperaturas del color y la opción 1 del menú en
pantalla cambiará de la siguiente forma.
• [5000K]t[1]
• [6500K]t[2]
• [9300K]t[3]
Ajuste de la temperatura del color para cada uno
de los conectores de entrada de vídeo
Es posible ajustar la temperatura del color con precisión en el
modo FACIL o EXPERTO para cada uno de los conectores de
entrada de vídeo (ENTRADA 1: 13W3 y ENTRADA 2: HD15).
1
Seleccione el mismo modo de ajuste y temperatura
del color en el menú COLOR para ENTRADA 1 y
ENTRADA 2.
2
Ajuste la temperatura del color con precisión en
cada menú de ENTRADA 1 y ENTRADA 2.
Los ajustes se almacenan en la memoria para los conectores
ENTRADA 1 y ENTRADA 2.
Para obtener información sobre cómo seleccionar el conector,
consulte la página 71.
5000K 6500K 930 K0
50 K00
FACI L EXPERTO s BGR
REAJUSTE
DE COLOR SI
COLOR
5000K 6500K 930 K0
R BIAS 05
V BIAS 05
A BIAS 05
RGAIN 05
VGAIN 05
AGAIN 05
FACI L EXPERTO s BGR
COLOR
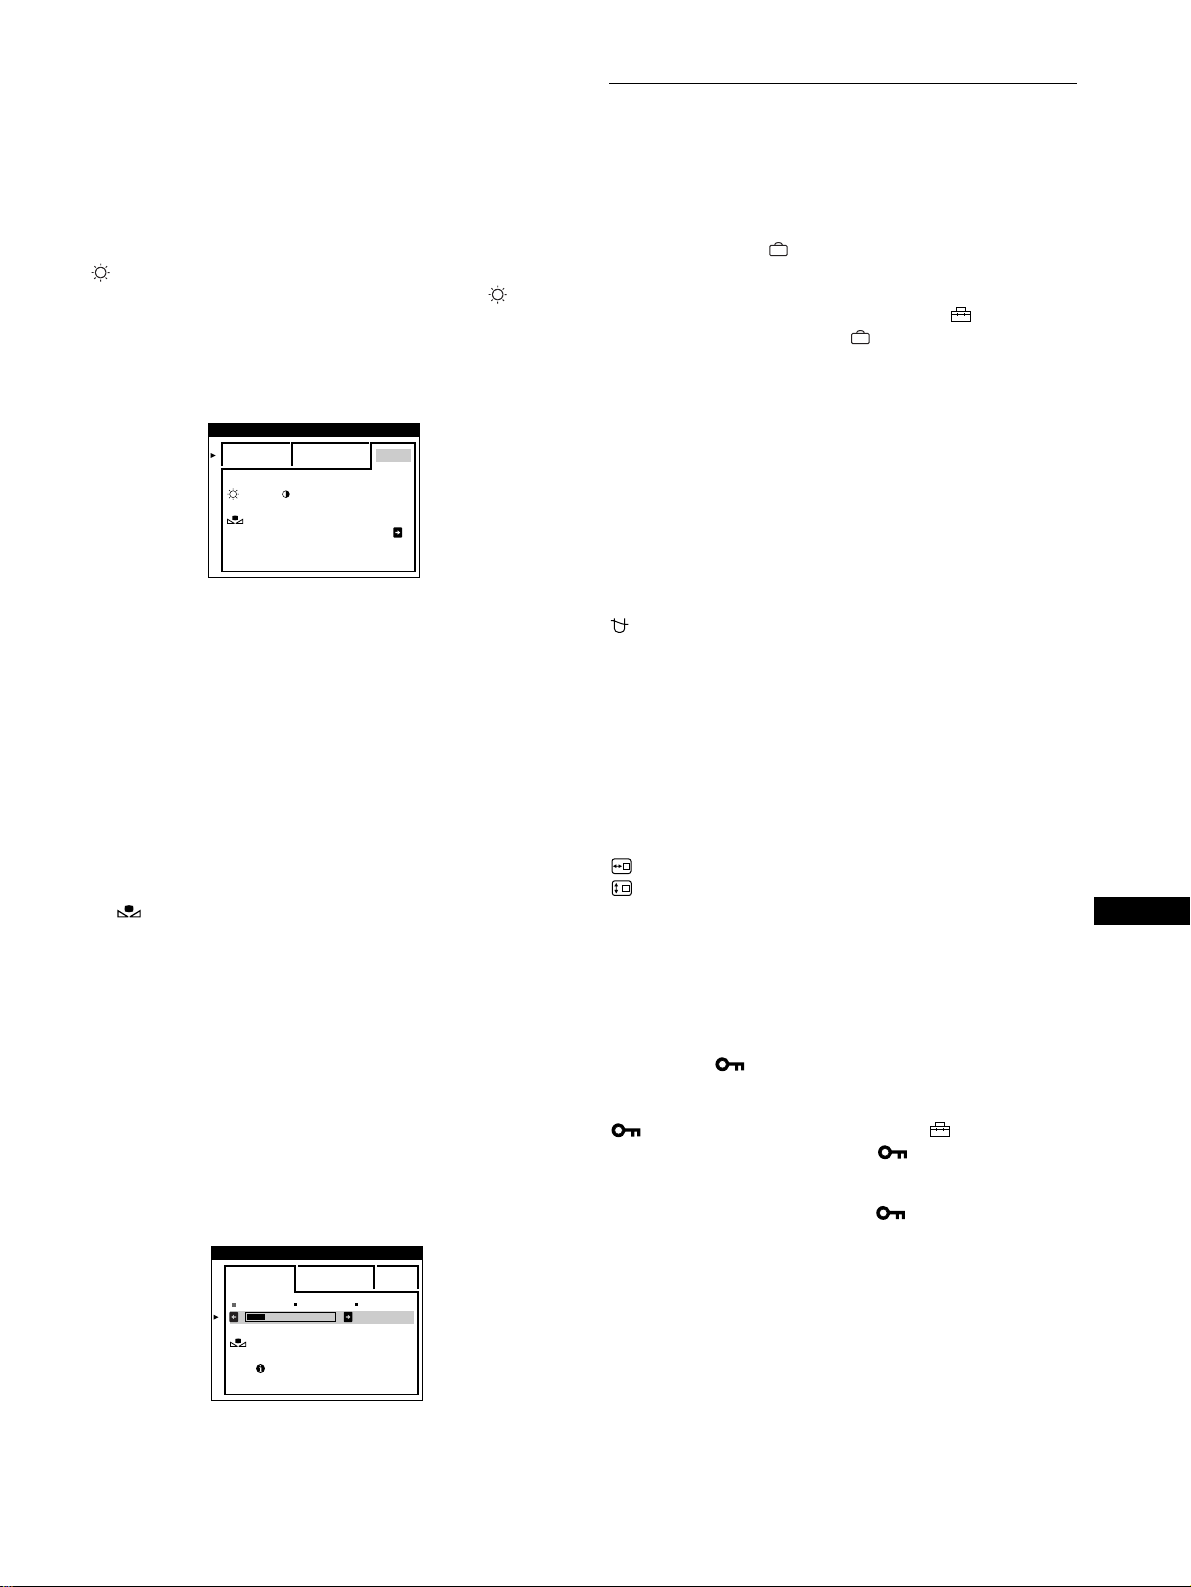
77
ES
Modo sRGB
El ajuste de color sRGB es un protocolo de espacio de color del
sector estándar diseñado para correlacionar los colores mostrados
e impresos de productos informáticos que cumplan con sRGB.
Para ajustar los colores al perfil sRGB, basta con seleccionar el
modo sRGB en el menú COLOR. No obstante, con el fin de
mostrar correctamente los colores sRGB (
γ
=2,2, 6500K), es
preciso definir el ordenador en el perfil sRGB y ajustar el brillo
( ) y el contraste (6) en los números mostrados en el menú.
Para obtener información sobre cómo cambiar el brillo ( ) y el
contraste (6), consulte la página 73.
Nota
El ordenador y otros productos conectados (como una impresora) deben
admitir el modo sRGB.
Restauración del color mediante los menús FACIL
o sRGB
Los colores de la mayoría de los monitores tienden a perder brillo
gradualmente después de varios años de empleo. La función
REAJUSTE DE COLOR de los menús FACIL y sRGB permite
recuperar los niveles originales de fábrica del color. A
continuación se describe cómo restaurar el color del monitor
mediante el menú FACIL.
1
Pulse los botones </, para seleccionar el modo
FACIL o sRGB.
2
Primero pulse los botones m/M para seleccionar
(REAJUSTE DE COLOR) y, a continuación,
pulse el botón ,.
La imagen desaparece mientras el color se restaura
(aproximadamente 2 segundos). Una vez restaurado el color,
la imagen vuelve a aparecer en pantalla.
Notas
• Antes de emplear esta función, el monitor debe encontrarse en el modo
de funcionamiento normal (indicador de alimentación iluminado en
verde) durante al menos 30 minutos. Si el monitor entra en el modo de
ahorro de energía, deberá ajustar dicho monitor en el modo de
funcionamiento normal y esperar unos 30 minutos para que esté
preparado. Es posible que sea necesario definir los ajustes de ahorro de
energía del ordenador para que el monitor se mantenga en el modo de
funcionamiento normal durante 30 minutos completos. Si el monitor no
está preparado, aparecerá el siguiente mensaje.
• El monitor puede perder gradualmente la capacidad para realizar esta
función debido al desgaste natural del tubo de imagen.
Ajustes complementarios
(OPCION)
Es posible desmagnetizar el monitor, cambiar la posición del
menú y bloquear los controles manualmente.
1
Pulse el botón .
El MENU principal aparece en pantalla.
2
Pulse los botones m/M para resaltar OPCION y
vuelva a pulsar el botón .
El menú OPCION aparece en pantalla.
3
Pulse los botones m/M para seleccionar la opción de
ajuste que desee.
Ajuste la opción seleccionada de acuerdo con las siguientes
instrucciones.
Desmagnetización de la pantalla
El monitor se desmagnetiza automáticamente al activar la
alimentación.
Para desmagnetizar el monitor manualmente, primero
pulse los botones m/M para seleccionar
(DESMAGNET). A continuación, pulse el botón ,.
La pantalla se desmagnetiza durante unos 2 segundos. Si es
preciso aplicar un segundo ciclo de desmagnetización, espere al
menos 20 minutos antes de aplicarlo para obtener los mejores
resultados posibles.
Cambio de la posición del menú
Cambie la posición del menú si bloquea la imagen en pantalla.
Para cambiar la posición del menú en pantalla, primero
pulse los botones m/M con el fin de seleccionar
(POSICION MENU H) para el ajuste horizontal, o
(POSICION MENU V) para el vertical. A
continuación, pulse los botones </, para desplazar
el menú en pantalla.
Bloqueo de los controles
Para proteger los datos de ajuste mediante el bloqueo
de los controles, primero pulse los botones m/M para
seleccionar (BLOQUEO DE AJUSTES). A
continuación, pulse el botón , para seleccionar SI.
Sólo funcionarán el interruptor 1 (alimentación), SALIR y
(BLOQUEO DE AJUSTES) del menú OPCION. Si se
seleccionan otras opciones, la marca aparecerá en pantalla.
Para cancelar el bloqueo de los controles
Repita el anterior procedimiento y ajuste (BLOQUEO DE
AJUSTES) en NO.
: 56 : 76 PARA s BGR
FACI L EXPERTO s BGR
REAJUSTE
DE COLOR SI
COLOR
5000K 6500K 930 K0
50 K00
PREPARADO UNA
VEZ CALENTADO
FACI L EXPERTO s BGR
REAJUSTE
DE COLOR
COLOR
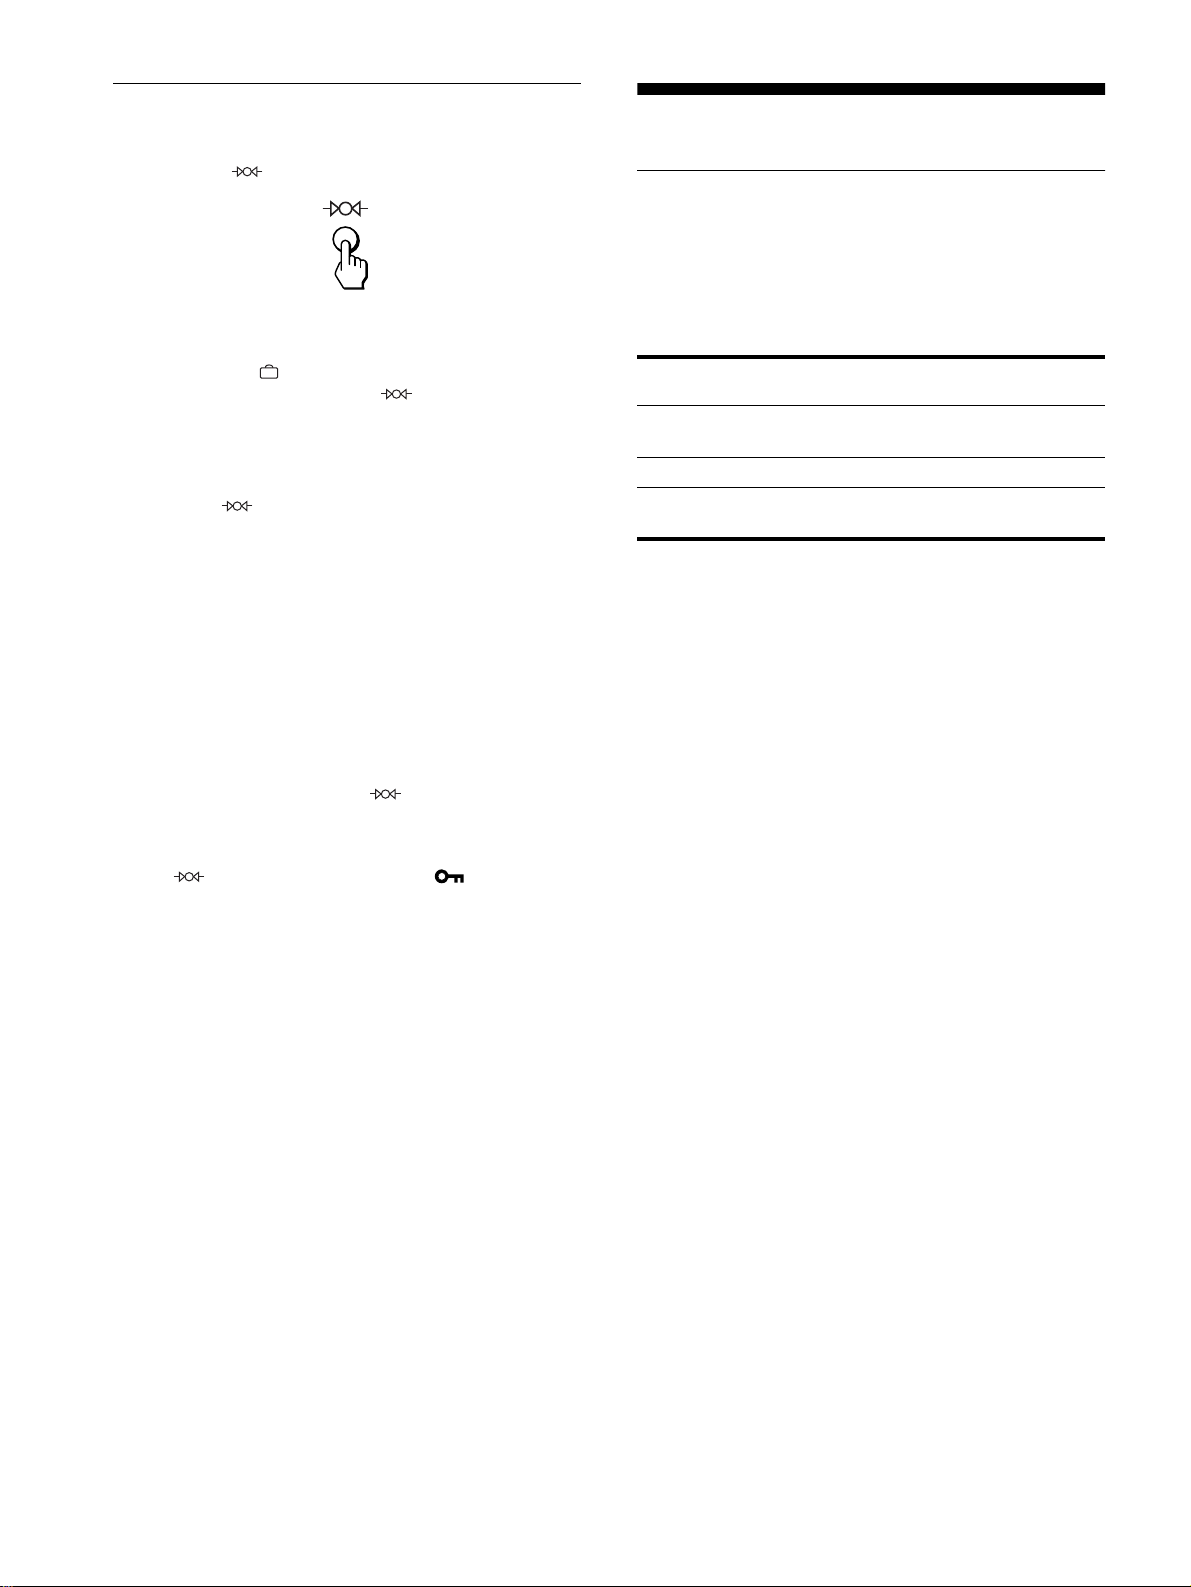
78
Restauración de los ajustes
Este monitor dispone de los siguientes métodos de restauración.
Utilice el botón (restauración) para restaurar los ajustes.
Restauración de una sola opción de ajuste
Emplee los botones , m/M para seleccionar la opción de ajuste
que desee restaurar, y pulse el botón (restauración).
Restauración de todos los datos de ajuste para la
señal de entrada actual
Pulse el botón (restauración) cuando no haya ningún menú
en pantalla.
Tenga en cuenta que las siguientes opciones no se restauran
mediante este método:
• idioma de los menús en pantalla (página 71)
• modo de ajuste del menú COLOR (FACIL, EXPERTO, sRGB)
(página 76)
• posición de los menús en pantalla (página 77)
• bloqueo de los controles (página 77)
Restauración de todos los datos de ajuste para
todas las señales de entrada
Pulse y mantenga pulsado el botón (restauración) durante
más de dos segundos.
Nota
El botón
(restauración) no funciona cuando
(
BLOQUEO DE
AJUSTES) está ajustado en SI
.
Características técnicas
Función de ahorro de energía
Este monitor cumple las directrices de ahorro de energía
establecidas por VESA,
E
NERGY
S
TAR y NUTEK. Si no se
recibe ninguna señal mediante el monitor desde el ordenador
conectado, dicho monitor reducirá automáticamente el consumo
de energía como se muestra a continuación.
* Cuando el ordenador entra en el modo “activo inactivo”, la señal de
entrada al monitor se interrumpe y “SIN SEÑAL DE ENTRADA”
aparece en pantalla. Transcurridos unos instantes, el monitor entra en el
modo de ahorro de energía.
Modo de
alimentación
Consumo de
energía
Indicador
1
(alimentación)
funcionamiento
normal
≤ 160 W verde
activo inactivo* ≤ 3 W ámbar
alimentación
desactivada
< 1 W apagado

79
ES
Solución de problemas
Antes de ponerse en contacto con personal de servicio técnico,
consulte esta sección.
Si aparecen líneas finas en pantalla
(hilos de amortiguación)
Las líneas que se aprecian en la pantalla son normales en el
monitor Trinitron y no son ningún fallo de funcionamiento. Son
las sombras de los hilos de amortiguación utilizados para
estabilizar la rejilla de apertura y se aprecian en mayor medida
cuando el fondo de la pantalla es luminoso (normalmente blanco).
La rejilla de apertura es el elemento esencial por el que el tubo de
imagen Trinitron es único, permitiendo que la pantalla reciba más
iluminación, por lo que las imágenes aparecen con más brillo y
más detalle.
Mensajes en pantalla
Si la señal de entrada presenta algún problema, la pantalla
mostrará alguno de los siguientes mensajes.
Si el mensaje SIN SEÑAL DE ENTRADA apparece
en pantalla
1
11
1 Conector seleccionado
Este mensaje muestra qué conector se encuentra actualmente
seleccionado (ENTRADA 1 o ENTRADA 2).
2
22
2 Condición de la señal de entrada
SIN SEÑAL DE ENTRADA
Esto indica que no se introduce ninguna señal, o que no se
recibe ninguna señal mediante el conector seleccionado.
3 Soluciones
Es posible que uno o más de los siguientes mensajes aparezca
en pantalla.
• Si el mensaje ACTIVELO CON PC aparece en pantalla,
pulse cualquier tecla del teclado del ordenador y
compruebe que la tarjeta gráfica de esté completamente
insertada en la ranura bus correcta.
• Si el mensaje COMPROBAR SELECTOR DE ENTRADA
aparece en pantalla, cambie la señal de entrada (página 71).
• Si el mensaje CHEQUEE CABLE SEÑAL aparece en
pantalla, compruebe que el monitor esté correctamente
conectado al ordenador (página 70).
Si el mensaje FUERA DEL RANGO DE AJUSTE
aparece en pantalla
1
11
1 Conector seleccionado y las frecuencias de la señal
de entrada actual
Este mensaje muestra qué conector se encuentra actualmente
seleccionado (ENTRADA 1 o ENTRADA 2). Si el monitor
reconoce las frecuencias de la señal de entrada actual, las
frecuencias horizontal y vertical también aparecerán.
2
22
2 Condición de la señal de entrada
FUERA DEL RANGO DE AJUSTE
Esto indica que las especificaciones del monitor no admiten la
señal de entrada.
3
33
3 Soluciones
CAMBIE SINCRO DE SEÑAL aparece en pantalla. Si
sustituye un monitor antiguo por este, vuelva a conectar el
monitor antiguo. A continuación, ajuste la tarjeta gráfica del
ordenador de forma que la frecuencia horizontal se encuentre
entre 30 – 121 kHz, y la vertical entre 48 – 160 Hz.
Para más información, consulte “Problemas y soluciones” en la
página 80.
Hilos de
amortiguación
MONI TOR FUNCIONA
ENTRADA 1 :
S IN SEÑAL DE ENTRADA
ACTI VELO CON PC
COMPROBAR SELECTOR
DE ENTRADA
CHEQUEE CABLE SEÑAL
WH I T E
RED
GREEN
BLUE
INFORMACION
1:130.0kHz/ H57z
FUERA DEL
RANGO DE AJUSTE
CAMBIE SINCRO
DE SEÑAL
WH I T E
RED
GREEN
BLUE
ENTRADA
MONI TOR FUNCIONA
INFORMACION

80
Problemas y soluciones
Si el problema lo causa el ordenador conectado u otro equipo, consulte el manual de instrucciones del equipo conectado.
Utilice la función de autodiagnóstico (página 82) si las siguientes recomendaciones no ayudan a solucionar el problema.
Problema Compruebe lo siguiente
Ausencia de imagen
Si el indicador 1 (alimentación) no
está iluminado
• Compruebe que el cable de alimentación esté correctamente conectado.
• Compruebe que el interruptor 1 (alimentación) esté en la posición de “activado”.
Si el mensaje SIN SEÑAL DE
ENTRADA aparece en pantalla, o si
el indicador 1 (alimentación) está
iluminado en ámbar o alterna entre
verde y ámbar
• Compruebe que el ajuste del botón sea correcto (página 71).
• Compruebe que los terminales del conector de entrada de vídeo no estén doblados ni
arrancados.
xProblemas causados por el ordenador u otro equipo conectado
• El ordenador se encuentra en el modo de ahorro de energía. Pulse cualquier tecla del
teclado del ordenador.
• Compruebe que la alimentación del ordenador esté activada.
• Compruebe que la tarjeta gráfica esté completamente insertada en la ranura bus adecuada.
Si los mensajes SIN SEÑAL DE
ENTRADA y CHEQUEE CABLE
SEÑAL aparecen en pantalla, o si el
indicador 1 (alimentación) está
iluminado en ámbar o alterna entre
verde y ámbar
• Compruebe que el cable de señal de vídeo esté correctamente conectado y que todos los
enchufes estén firmemente insertados en las tomas (página 70).
• Compruebe que los terminales del conector de entrada de vídeo no estén doblados ni
aplastados.
• Compruebe que el ajuste del botón sea correcto (página 71).
xProblemas causados por el ordenador u otro equipo conectado
• Asegúrese de que la tarjeta gráfica está completamente insertada en la ranura bus
adecuada.
Si el mensaje FUERA DEL RANGO
DE AJUSTE aparece en pantalla
xProblemas causados por el ordenador u otro equipo conectado
• Compruebe que el margen de frecuencia de vídeo se encuentre dentro del especificado
para el monitor. Si ha sustituido un monitor antiguo por este, vuelva a conectar el antiguo
y ajuste el margen de frecuencia de acuerdo con lo siguiente.
Horizontal: 30 – 121 kHz
Vertical: 48 – 160 Hz
Si no aparece ningún mensaje y el
indicador 1 (alimentación) se
ilumina en verde o parpadea en
ámbar
• Utilice la función de autodiagnóstico (página 82).
La imagen parpadea, se ondula,
oscila o aparece codificada
• Aísle y elimine las fuentes potenciales de campos eléctricos o magnéticos, como otros
monitores, impresoras láser, ventiladores eléctricos, lámparas fluorescentes o televisores.
• Aleje el monitor de líneas eléctricas o instale una protección magnética cerca del monitor.
• Enchufe el monitor en una toma de CA diferente, preferiblemente de otro circuito.
• Gire el monitor 90
°
hacia la izquierda o la derecha.
xProblemas causados por el ordenador u otro equipo conectado
• Consulte el manual de la tarjeta gráfica para obtener información sobre el ajuste adecuado
al monitor.
• Confirme que este monitor admite el modo gráfico y la frecuencia de la señal de entrada.
Aunque la frecuencia se encuentre dentro del margen adecuado, ciertas tarjetas de vídeo
pueden presentar un impulso de sincronización demasiado estrecho para que el monitor se
sincronice correctamente.
• Ajuste la frecuencia de barrido del ordenador (frecuencia vertical) para que la imagen
presente la mejor calidad posible.
La imagen aparece borrosa • Ajuste el brillo y el contraste (página 73).
• Desmagnetice el monitor* (página 77).
• Si ELIMINAR MUARE está activada (SI), la imagen puede aparecer borrosa. Disminuya
el efecto de cancelación de muaré o ajuste ELIMINAR MUARE en NO (página 75).
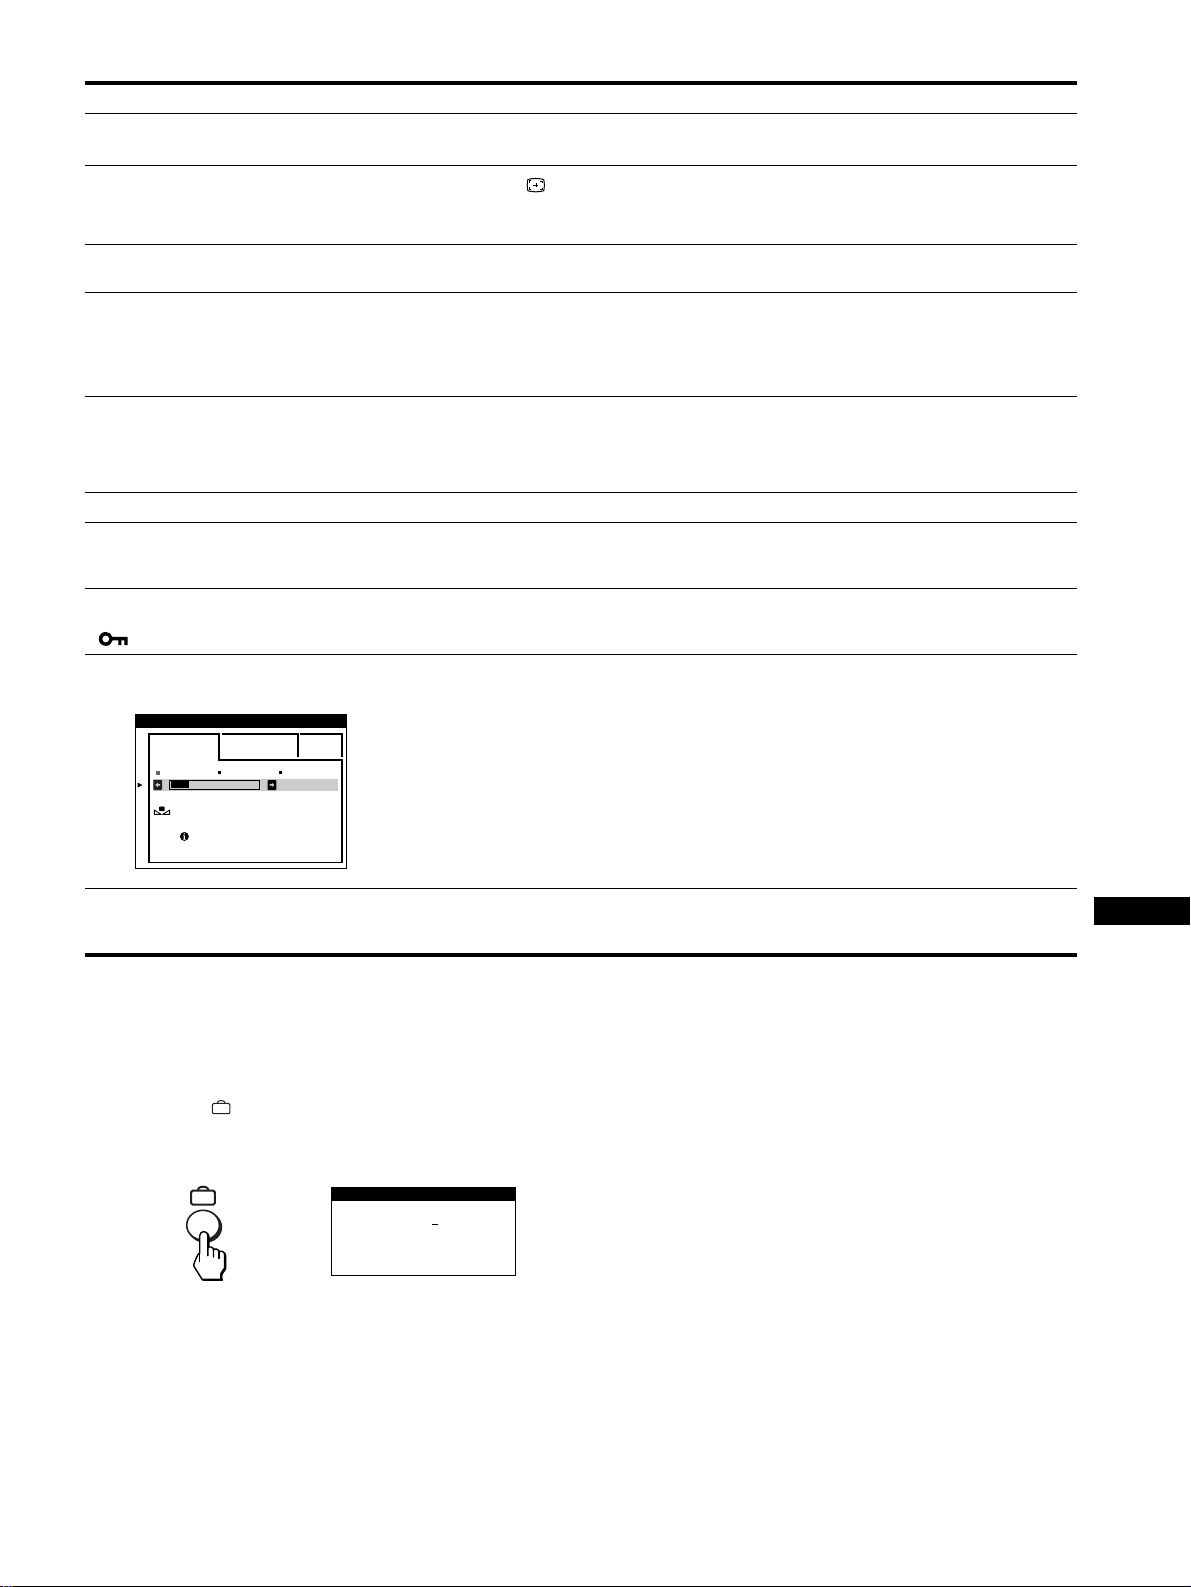
81
ES
* Si es necesario aplicar un segundo ciclo de desmagnetización, deje que transcurran al menos 20 minutos antes de volver a aplicarlo para obtener el mejor
resultado posible. Es posible que se oiga un zumbido, pero no es un fallo de funcionamiento.
Visualización del nombre, número de serie y
fecha de fabricación de este monitor.
Mientras el monitor recibe una señal de vídeo, pulse y mantenga
pulsado el botón durante más de cinco segundos para que
aparezca el cuadro de información de este monitor.
Si el problema persiste, llame al representante de servicio técnico
y proporciónele la siguiente información.
• Nombre del modelo: GDM-5410
• Número de serie
• Nombre y especificaciones del ordenador y de la tarjeta gráfica.
Aparecen imágenes fantasma • No utilice cables prolongadores de vídeo ni dispositivos de conmutación de vídeo.
• Compruebe que todos los enchufes estén firmemente insertados en sus tomas.
La imagen aparece descentrada o
con un tamaño incorrecto
• Pulse el botón (página 71).
• Ajuste el tamaño (página 74) o el centrado (página 74). Tenga en cuenta que ciertos
modos de vídeo no llenan la pantalla hasta los bordes.
Los bordes de la imagen aparecen
curvos
• Ajuste la geometría (página 74).
Se aprecian patrones ondulados o
elípticos (muaré)
• Ajuste ELIMINAR MUARE en SI y defina el grado de cancelación de muaré hasta que
éste sea mínimo (página 75).
xProblemas causados por el ordenador u otro equipo conectado
• Cambie el patrón de escritorio.
El color no es uniforme • Desmagnetice el monitor* (página 77). Si coloca equipos que generen campos
magnéticos, como altavoces, cerca del monitor, o si cambia la orientación del monitor, el
color puede perder uniformidad.
• Ajuste la pureza (página 75).
El blanco no parece blanco • Ajuste la temperatura del color (página 76).
Las letras y las líneas muestran
sombras rojas o azules en los
bordes
• Ajuste la convergencia (página 75).
Los botones del monitor no
funcionan
( aparece en pantalla)
• Si la función de bloqueo de los controles está ajustada en SI, ajústela en NO (página 77).
La función REAJUSTE DE COLOR
no se activa
• Antes de emplear esta función, el monitor debe encontrarse en el modo de funcionamiento
normal (indicador de alimentación iluminado en verde) durante al menos 30 minutos. Para
obtener más información sobre el empleo de la función REAJUSTE DE COLOR, consulte
la página 77.
• Defina los ajustes de ahorro de energía del ordenador para mantener el monitor en el modo
de funcionamiento normal durante más de 30 minutos.
• El monitor puede perder gradualmente su capacidad para realizar esta función debido al
desgaste natural del tubo de imagen.
Se oye un zumbido
inmediatamente después de
activar la alimentación
• Se trata del sonido producido por el ciclo de desmagnetización automática. Al activar la
alimentación, el monitor se desmagnetiza automáticamente durante 2 segundos.
Problema Compruebe lo siguiente
5000K 6500K 930 K0
50 K00
PREPARADO UNA
VEZ CALENTADO
FACI L EXPERTO s BGR
REAJUSTE
DE COLOR
COLOR
SER NO
:
1234567
MODEL
:
GDM 5410
MANUFACTURED
: 1999-52
INFORMACION
Ejemplo
b
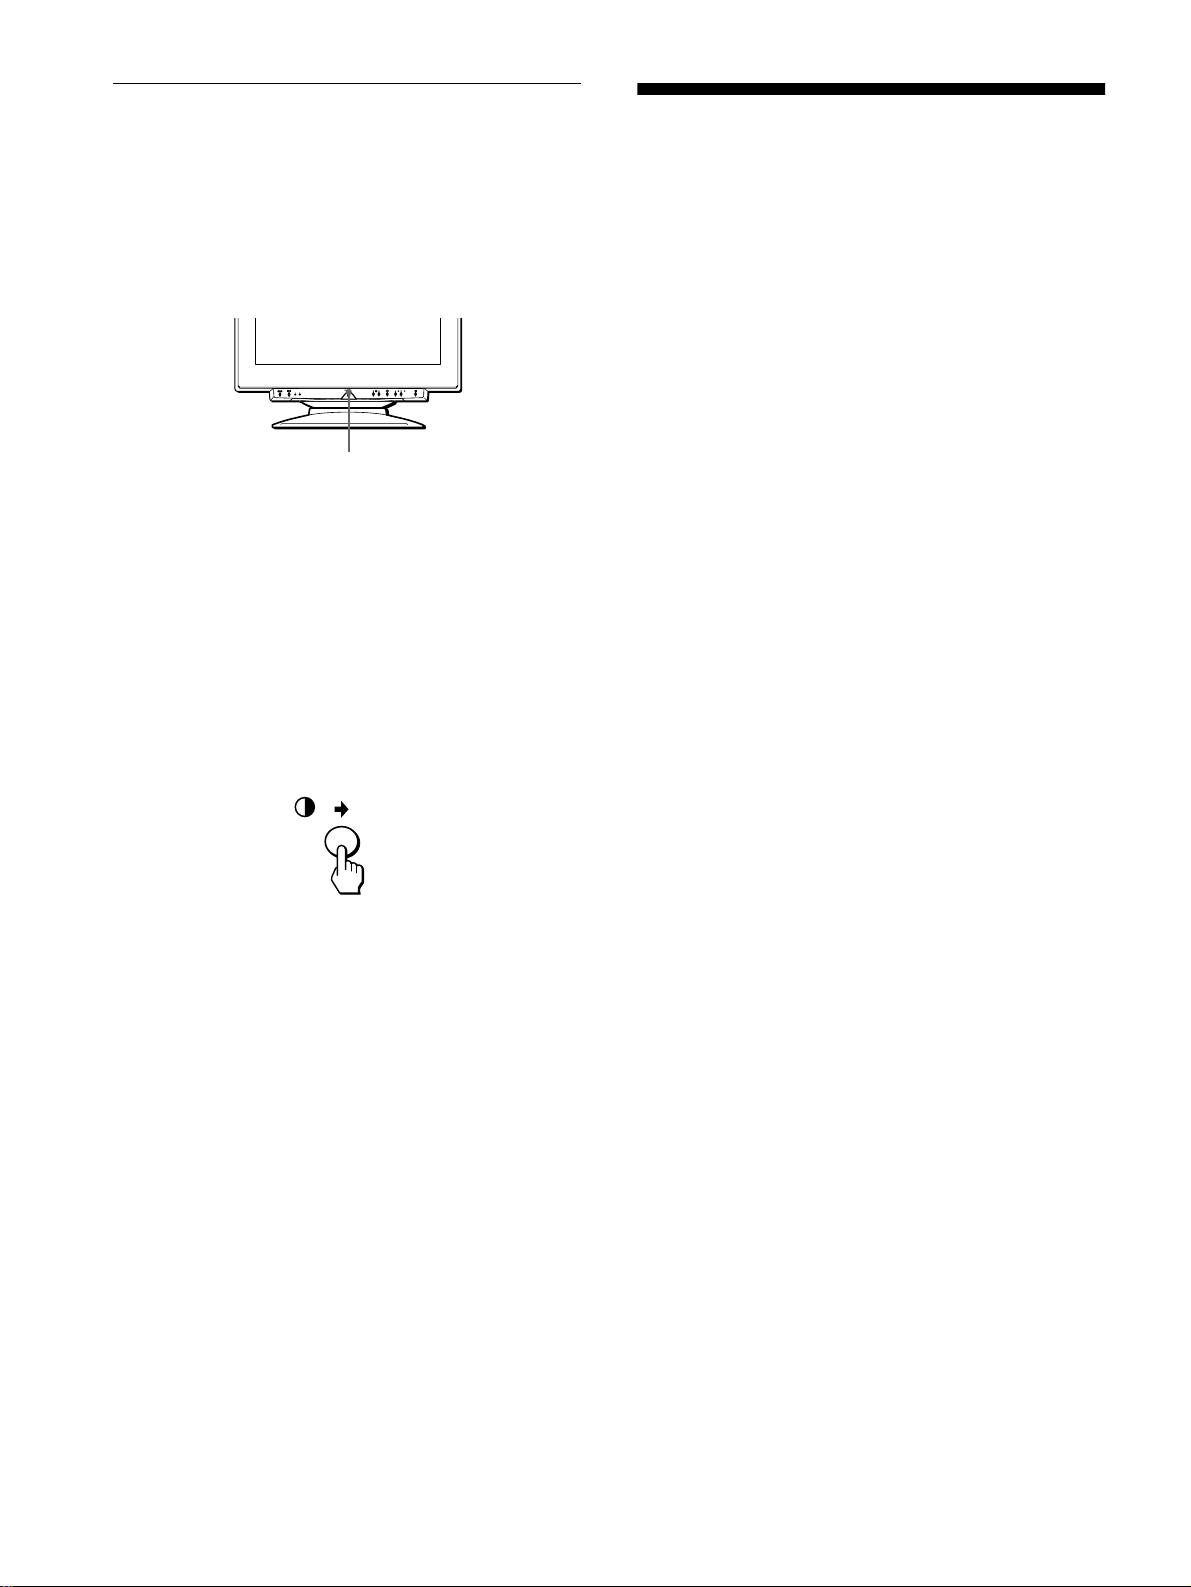
82
Función de autodiagnóstico
Este monitor está equipado con una función de autodiagnóstico.
Si el monitor u ordenador u ordenadores presentan algún
problema, la pantalla se mostrará en blanco y el indicador
1 (alimentación) se iluminará en verde o parpadeará en ámbar. Si
el indicador 1 (alimentación) está iluminado en ámbar, significa
que el ordenador se encuentra en el modo de ahorro de energía.
Pulse cualquier tecla del teclado.
Si el indicador
1
(alimentación) está iluminado en
verde
1
Desconecte todos los enchufes de los conectores 1
y 2 de entrada de vídeo, o apague el ordenador u
ordenadores conectados.
2
Pulse el botón 1 (alimentación) dos veces para
apagar el monitor y, a continuación, encenderlo.
3
Pulse el botón , durante 2 segundos antes de que
el monitor entre en el modo de ahorro de energía.
Si aparecen las cuatro barras de color (blanco, rojo, verde, azul),
significa que el monitor funciona correctamente. Vuelva a
conectar los cables de entrada de vídeo y compruebe el estado del
ordenador u ordenadores.
Si las barras de color no aparecen, significa que existe un fallo
potencial del monitor. Informe al representante de servicio
técnico del estado del monitor.
Si el indicador
1
(alimentación) parpadea en
ámbar
Pulse el botón 1 (alimentación) dos veces para apagar
el monitor y, a continuación, encenderlo.
Si el indicador 1 (alimentación) se ilumina en verde, significa
que el monitor funciona correctamente.
Si el indicador 1 (alimentación) sigue parpadeando, significa que
hay un fallo potencial del monitor. Cuente el número de segundos
entre los parpadeos en ámbar del indicador 1 (alimentación) e
informe al representante de servicio técnico del estado del
monitor. Asegúrese de anotar el nombre del modelo y el número
de serie de dicho monitor. Tome nota también del fabricante y del
modelo del ordenador y de la tarjeta de vídeo.
Especificaciones
TRC paso de la rejilla de apertura de
0,24 mm
21 pulgadas, medida diagonal
90 grados de deflexión
FD Trinitron
Tamaño de imagen visualizable
Aprox. 403,8
×
302,2 mm (an/al)
Imagen de visualización de 19,8"
Resolución recomendada Horizontal: 1280 puntos
Vertical: 1024 líneas
Área de imagen estándar Aprox. 388
×
291 mm (an/al)
o
Aprox. 364
×
291 mm (an/al)
Frecuencia de deflexión* Horizontal: 30 a 121 kHz
Vertical: 48 a 160 Hz
Corriente/tensión de entrada de CA
100 a 240 V, 50 – 60 Hz, 2,0 – 1,0 A
Consumo de energía Aprox. 145 W
Dimensiones Aprox. 501
×
498
×
498 mm
(an/al/prf)
Peso Aprox. 32 kg
Plug and Play DDC1/2B/2Bi, GTF**
* Condición de sincronización horizontal y vertical recomendada
• La anchura de sincronización horizontal debe ser superior al
4,8% del tiempo total horizontal o a 0,8 µs, según el que sea
superior.
• La anchura de supresión horizontal debe ser superior a
2,3 µseg.
• La anchura de supresión vertical debe ser superior a
450 µseg.
** Si la señal de entrada cumple con la GTF (Fórmula de
sincronización generalizada), la función GTF del monitor
proporcionará automáticamente una imagen óptima para la
pantalla.
Diseño y especificaciones sujetos a cambios sin previo aviso.
Indicador
1
(alimentación)

83
Innehåll
• VESA och DDC
är varumärken som
tillhör Video Electronics Standard
Association.
•
E
NERGY
S
TAR är ett varumärke
registrerat i USA.
• Alla andra produktnamn som nämns här
kan vara varumärken eller registrerade
varumärken som tillhör respektive
företag.
• Dessutom finns inte “
” och “
”
angivna i varje förekommande fall i
denna manual.
SE
Försiktighetsåtgärder . . . . . . . . . . . . . . . . . . . . . . . . . . . . . . . . . . . 84
Delar och kontroller. . . . . . . . . . . . . . . . . . . . . . . . . . . . . . . . . . . . . 85
Installation . . . . . . . . . . . . . . . . . . . . . . . . . . . . . . . . . . . .86
Steg 1:
Ta bort skyddet på baksidan . . . . . . . . . . . . . . . . . . . . . . . 86
Steg 2:
Anslut bildskärmen till datorn. . . . . . . . . . . . . . . . . . . . . . . 86
Steg 3:
Anslut nätkabeln . . . . . . . . . . . . . . . . . . . . . . . . . . . . . . . . 86
Steg 4:
Sätt tillbaka skyddet. . . . . . . . . . . . . . . . . . . . . . . . . . . . . . 86
Steg 5:
Slå på bildskärm och dator . . . . . . . . . . . . . . . . . . . . . . . . 86
Välja språk för bildskärmsmenyerna (LANGUAGE) . . . . . . . . . . . . 87
Välja insignal. . . . . . . . . . . . . . . . . . . . . . . . . . . . . . . . . . . . . . . . . . 87
Automatisk ändring av storlek och centrering av bilden . . . . . . . . . 87
Anpassa bildskärmen . . . . . . . . . . . . . . . . . . . . . . . . . . .88
Bläddra i menyerna. . . . . . . . . . . . . . . . . . . . . . . . . . . . . . . . . . . . . 88
Justera ljusstyrka och kontrast . . . . . . . . . . . . . . . . . . . . . . . . . . . . 89
Justera storleken på bilden (STORL./CENTER). . . . . . . . . . . . . . . 90
Justera centreringen av bilden (STORL./CENTER) . . . . . . . . . . . . 90
Förstora eller förminska bilden (ZOOM) . . . . . . . . . . . . . . . . . . . . . 90
Justera bildens form (GEOMETRI). . . . . . . . . . . . . . . . . . . . . . . . . 90
Justera konvergensen (KONVERGENS) . . . . . . . . . . . . . . . . . . . . 91
Justera bildkvaliteten (BILD). . . . . . . . . . . . . . . . . . . . . . . . . . . . . . 91
Justera bildfärgen (FÄRG) . . . . . . . . . . . . . . . . . . . . . . . . . . . . . . . 92
Ytterligare inställningar (OPTION) . . . . . . . . . . . . . . . . . . . . . . . . . 93
Återställa justeringarna. . . . . . . . . . . . . . . . . . . . . . . . . . . . . . . . . . 94
Tekniska data. . . . . . . . . . . . . . . . . . . . . . . . . . . . . . . . . .94
Energisparfunktion . . . . . . . . . . . . . . . . . . . . . . . . . . . . . . . . . . . . . 94
Felsökning . . . . . . . . . . . . . . . . . . . . . . . . . . . . . . . . . . . .95
Om tunna linjer syns på skärmen (dämpningstrådar). . . . . . . . . . . 95
Bildskärmsmeddelanden . . . . . . . . . . . . . . . . . . . . . . . . . . . . . . . . 95
Felsymptom och åtgärder. . . . . . . . . . . . . . . . . . . . . . . . . . . . . . . . 96
Självdiagnosfunktion. . . . . . . . . . . . . . . . . . . . . . . . . . . . . . . . . . . . 98
Specifikationer. . . . . . . . . . . . . . . . . . . . . . . . . . . . . . . . .98
Appendix. . . . . . . . . . . . . . . . . . . . . . . . . . . . . . . . . . . . . . . i
TCO’99 Eco-document . . . . . . . . . . . . . . . . . . . . . . . . . . . . . . . . . . . .i
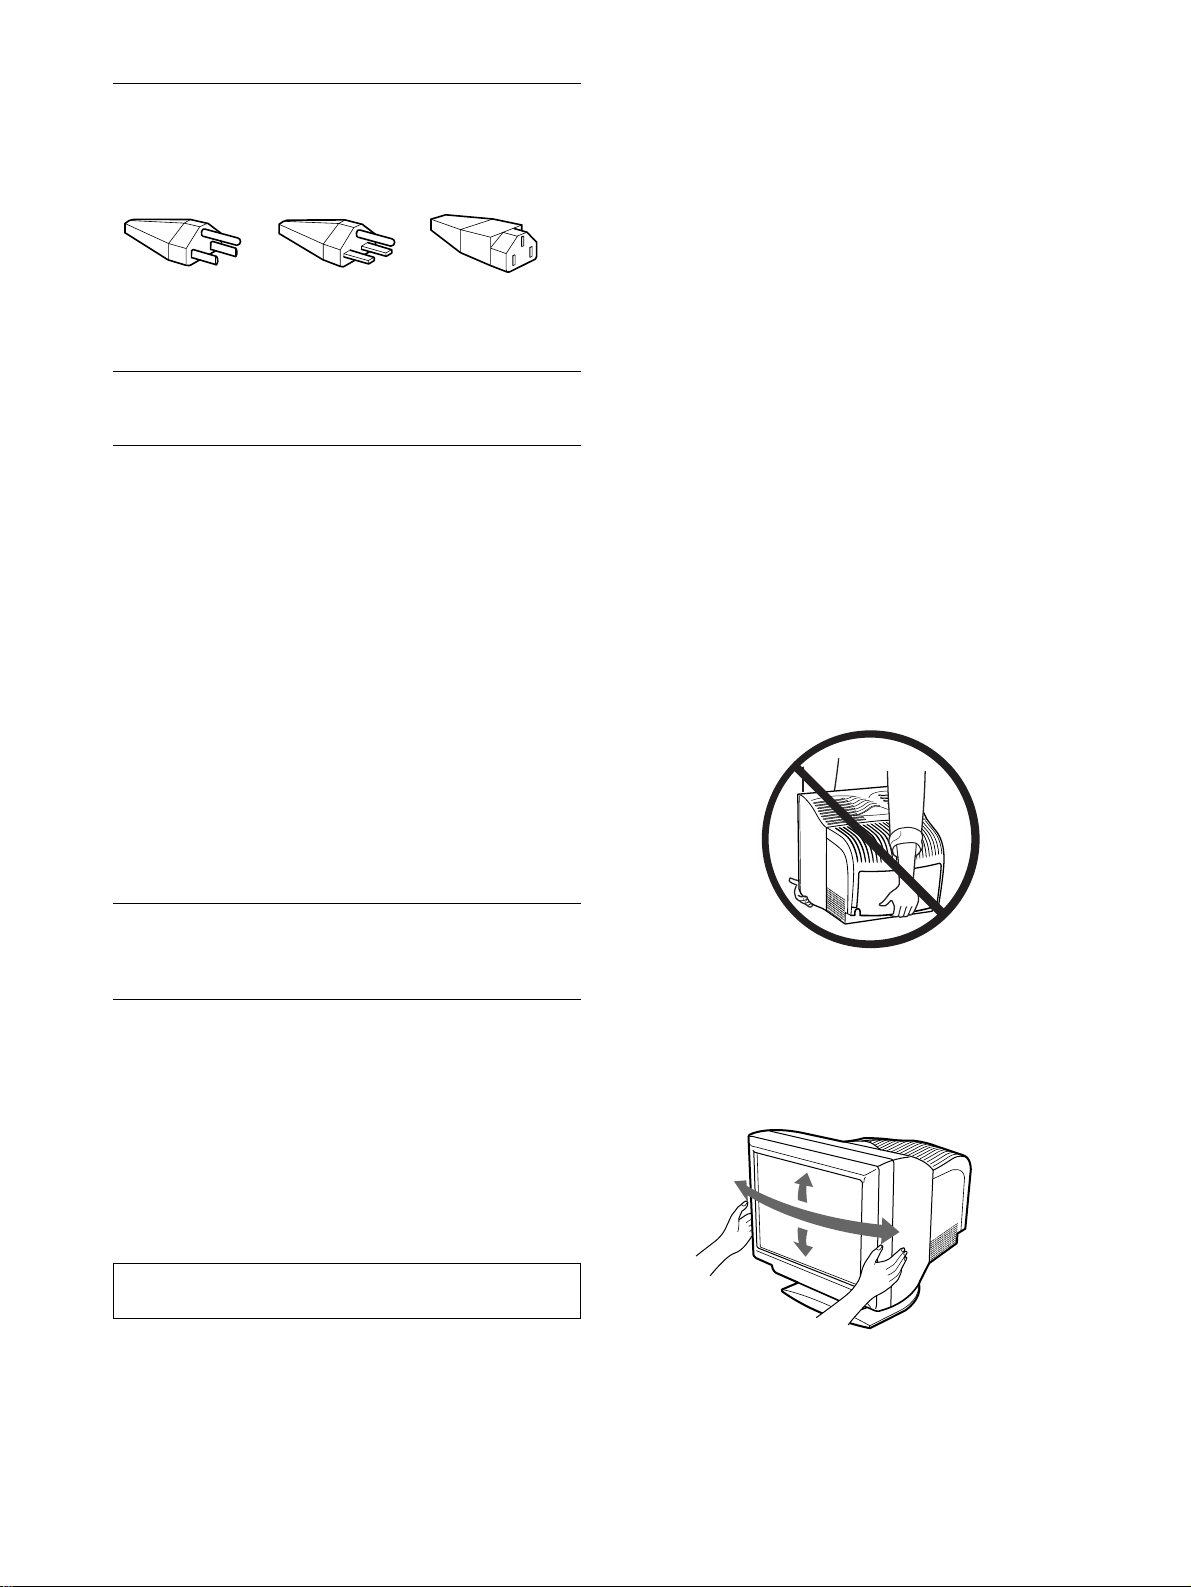
84
Försiktighetsåtgärder
Varning angående nätanslutning
Använd en nätkabel som passar de lokala förhållandena.
• Innan du kopplar bort nätkabeln bör du vänta åtminstone 30
sekunder efter det att du stängt av strömmen så att den statiska
elektriciteten på bildskärmens yta får tid att laddas ur.
• När du slår på strömmen avmagnetiseras skärmen automatiskt
under ca 2 sekunder. Det starka magnetfält som då alstras runt
skärmen kan påverka informationen som finns lagrad på
magnetiska band och skivor som befinner sig i skärmens
närhet. Placera därför inte inspelningsutrustning som använder
magnetiska medier i närheten av bildskärmen, inte heller media
med magnetiskt lagrad information (t.ex. band och disketter).
Installation
Placera inte bildskärmen på följande ställen:
• på ytor (mattor, täcken eller liknande) eller i närheten av
material (gardiner, draperier eller liknande) som kan blockera
ventilationsöppningarna
• nära värmekällor (element eller värmekanaler) eller på en plats
i direkt solljus
• på en plats där stora temperaturskillnader kan uppstå
• på en plats där den kan utsättas för mekaniska vibrationer eller
stötar
• på ostadiga ytor
• nära utrustning som genererar magnetism (transformatorer eller
högspänningskablar)
• på eller i närheten av elektriskt laddade metallytor
Underhåll
• Rengör bildskärmen med en mjuk duk. Om du använder ett
rengöringsmedel för glas ska du aldrig använda ett medel som
innehåller antistatiska medel eller liknande tillsatser eftersom
det kan skada bildskärmsbeläggningen.
• Se till att bildskärmens yta inte utsätts för kontakt med vassa
föremål (t.ex. kulspetspennor och skruvmejslar). Detta kan repa
bildröret.
• Rengör chassit, panelen och kontrollerna med en mjuk duk lätt
fuktad med ett milt rengöringsmedel. Använd inte någon form
av slippasta, skurpulver eller lösningsmedel som t.ex. alkohol
eller bensen.
Transport
När du transporterar bildskärmen bör du använda
originalkartongen med det ursprungliga packningsmaterialet.
Lyft inte bildskärmen genom att greppa om baksidan som bilden
nedan visar, eftersom den kan lossna.
Hur du använder vridplattan (den justerbara
bildskärmsfoten)
Den här skärmen kan justeras inom de vinklar som visas nedan.
Om du vill ställa in skärmen horisontellt eller vertikalt tar du tag
om dess underdel med båda händerna.
USA, Kanada,
Ta iw an ,
Korea, Japan
Europeiska
kontinenten
Storbritannien,
Irland
Australien,
Nya Zeeland
Kontakttyp
NEMA S-15P
Kontakttyp
CEE7/VII
(Schuko)
Kontakttyp
B S 1363
Kontakttyp
SAA AS 3112
Kabeltyp
SJT
Kabeltyp
HAR
(HO5VV-
F3G1.0)
Kabeltyp
HAR
(HO5VV-
F3G1.0)
Kabeltyp
CDB03PLP
Minimivärden
för kabelsetet
10 A/125 V
18/3AWG
Minimivärden
för kabelsetet
10 A/250 V
Minimivärden
för kabelsetet
10 A/250 V
Minimivärden
för kabelsetet
10 A/250 V
Kabellängd
(+/– 0,1 m)
2 m
Kabellängd
(+/– 0,1 m)
2,5 m
Kabellängd
(+/– 0,1 m)
2,5 m
Kabellängd
(+/– 0,1 m)
2,5 m
Säkerhetsnorm
UL/CSA
Säkerhetsnorm
HAR
Säkerhetsnorm
BSI, ASTA
Säkerhetsnorm
Dept. of
Energy of
New South
Wales
Automatisk inställning av strömförsörjningen fungerar överallt;
bildskärmen anpassar sig automatiskt under förutsättningen att
den för de lokala förhållandena rätta nätkabeln och rätta
nätkontakten används.
Utrustningen bör placeras i närheten av ett lättåtkomligt
vägguttag.
115 Volt 230 Volt
(finns ej med i
standardkabelsetet)
CEE-22 kabelset,
honände (lika för
alla kabelset)
90°
5°
90°
15°
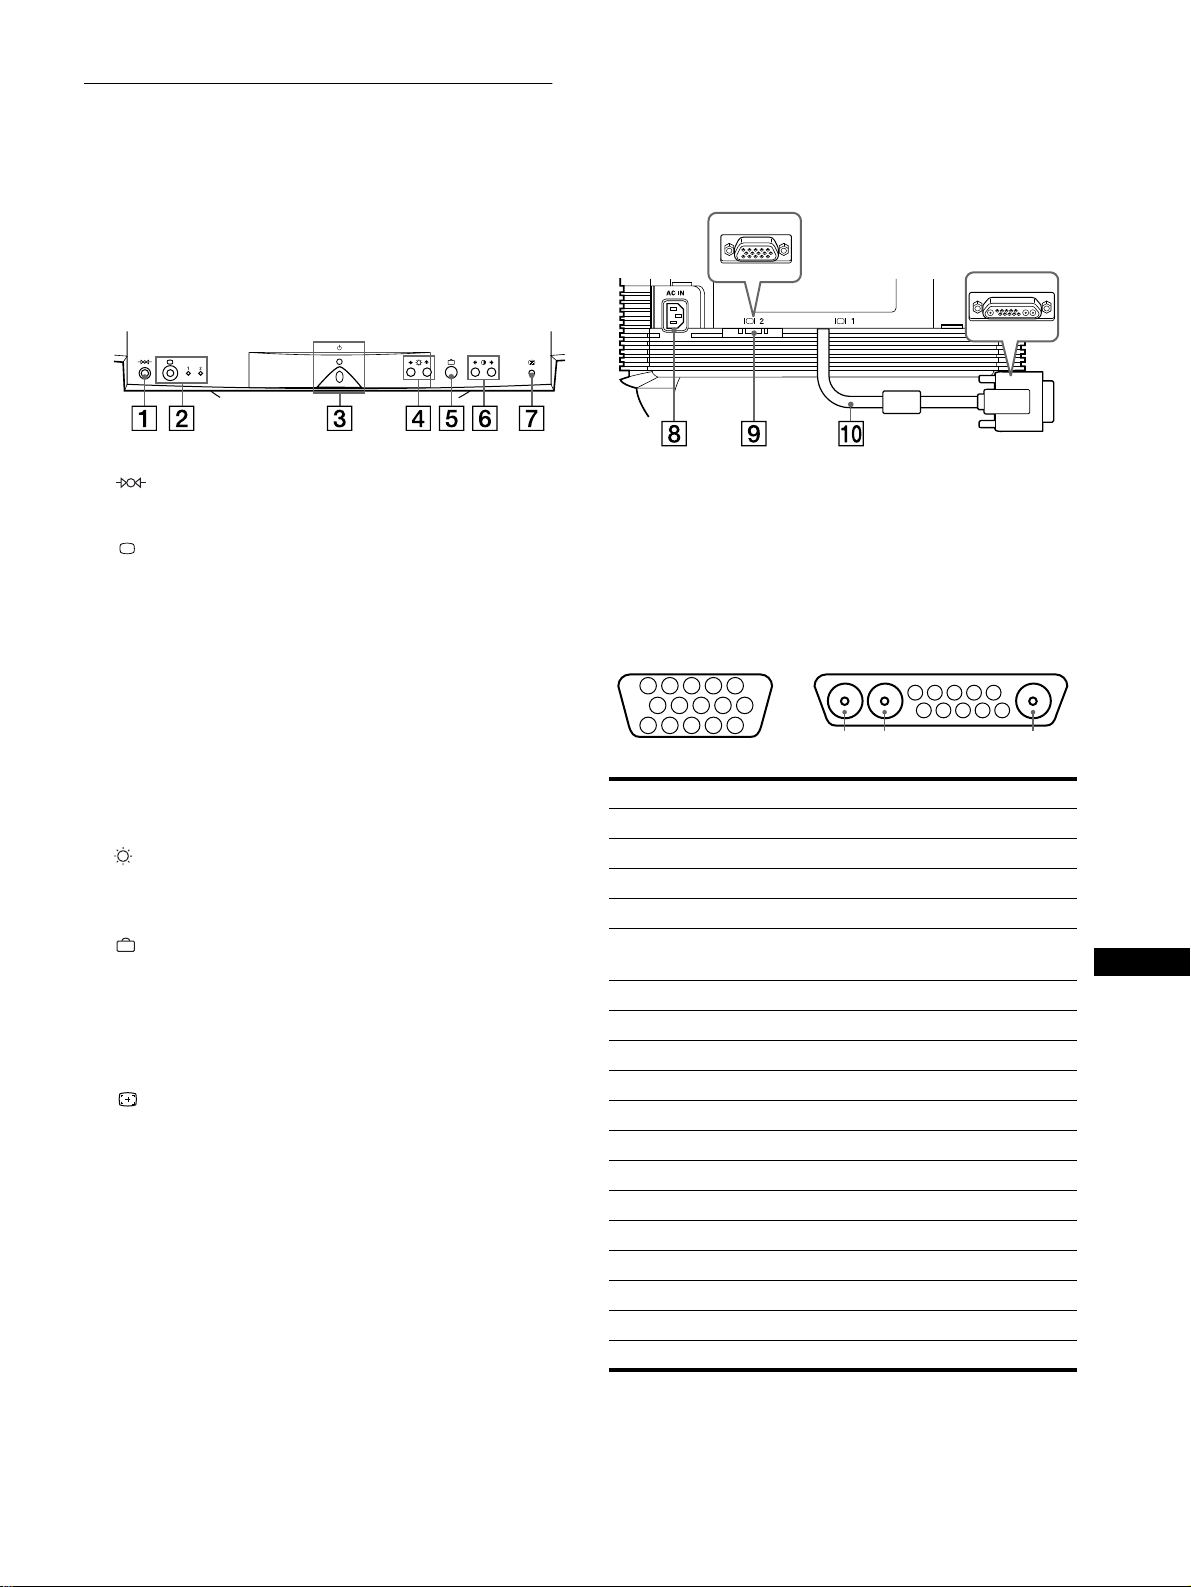
85
SE
Delar och kontroller
Mer information finns på sidorna inom parentes
1
11
1 (återställnings) knapp (sida 94)
Med den här knappen återställer du fabriksinställningarna.
2
22
2 (ingång) knapp och 1 (13W3) / 2 (HD15)-
indikatorer (sida 87)
Med den här knappen väljer du ingångssignal för video,
1 (13W3) eller 2 (HD15).
Varje gång du trycker på den här knappen skiftas
ingångssignalen tillsammans med motsvarande indikator.
3
33
3 1 (ström) omkopplare och indikator
(sidor 86, 94, 98)
Med den här knappen slår du på och av skärmen.
Strömindikatorn lyser grönt när bildskärmen är påslagen. Den
blinkar antingen grönt eller rödbrun, eller lyser rödbrun när
skärmen befinner sig i energisparläge.
4
44
4 (ljusstyrka) m/M knappar (sida 89)
0HGýGHýKlUýNQDSSDUQDýYLVDUýGXý/-86î.2175$67ðPHQ\Qý
RFKýIXQJHUDUýVRPýmîMý ýNQDSSDUýQlUýGXýYlOMHUýPHQ\DOWHUQDWLYï
5
55
5 (meny) knapp (sida 89)
Med den här knappen visar du huvudmenyn.
6
66
6 6
66
6 (kontrast) </, knappar (sida 89)
De här knapparna visar /-86î.2175$67-menyn och
fungerar som </, knappar när du utför justeringar.
7
77
7 ASC (automatisk storleksanpassning och
centrering) knapp (sida 87)
Med den här knappen justerar du automatiskt storlek och
centrering av bilden.
8
88
8 AC IN-anslutning (sida 86)
Den här anslutningen försörjer bildskärmen med nätström.
9
99
9 Anslutning för videoingång 2 (HD15) (sida 86)
Den här anslutningen tar emot RGB-videosignaler
(0,700 Vp-p, positiv) och synksignaler.
q;
q;q;
q; Anslutning för videoingång 1 (13W3) (sida 86)
Den här anslutningen tar emot RGB-videosignaler
(0,700 Vp-p, positiv) och synksignaler.
* DDC (Display Data Channel) är en VESA-standard.
** Stiften har två funktioner: som kombinerad synkingång och som en
H.synk-ingång när V.synk finns lagd på stift 7.
Framsida
Baksida (med skyddet borttaget)
Nej. 9
99
9 Signal 0
00
0 Signal
A1 ––– Röd
A2 ––– Grön
A3 ––– Blå
1 Röd Dataklocka (SCL)*
2 Grön
(Synk på grön)
DDC + 5V*
3Blå –––
4 ID (Jord) DDC jord*
5 DDC jord* C synk**
6 Röd jord Dubbelriktade data (SDA)*
7 Grön jord V.synk
8 Blå jord ID (100
Ω
)
9 DDC + 5V* ID (100
Ω
)
10 Jord Jord
11 ID (Jord) –––
12 Dubbelriktade data (SDA)* –––
13 H.synk –––
14 V.synk –––
15 Dataklocka (SCL)* –––
5 4 3 2
1
678910
11
A3
12131415
5 4 3 2
1
678910
A2 A1
9
HD15
0
13W3
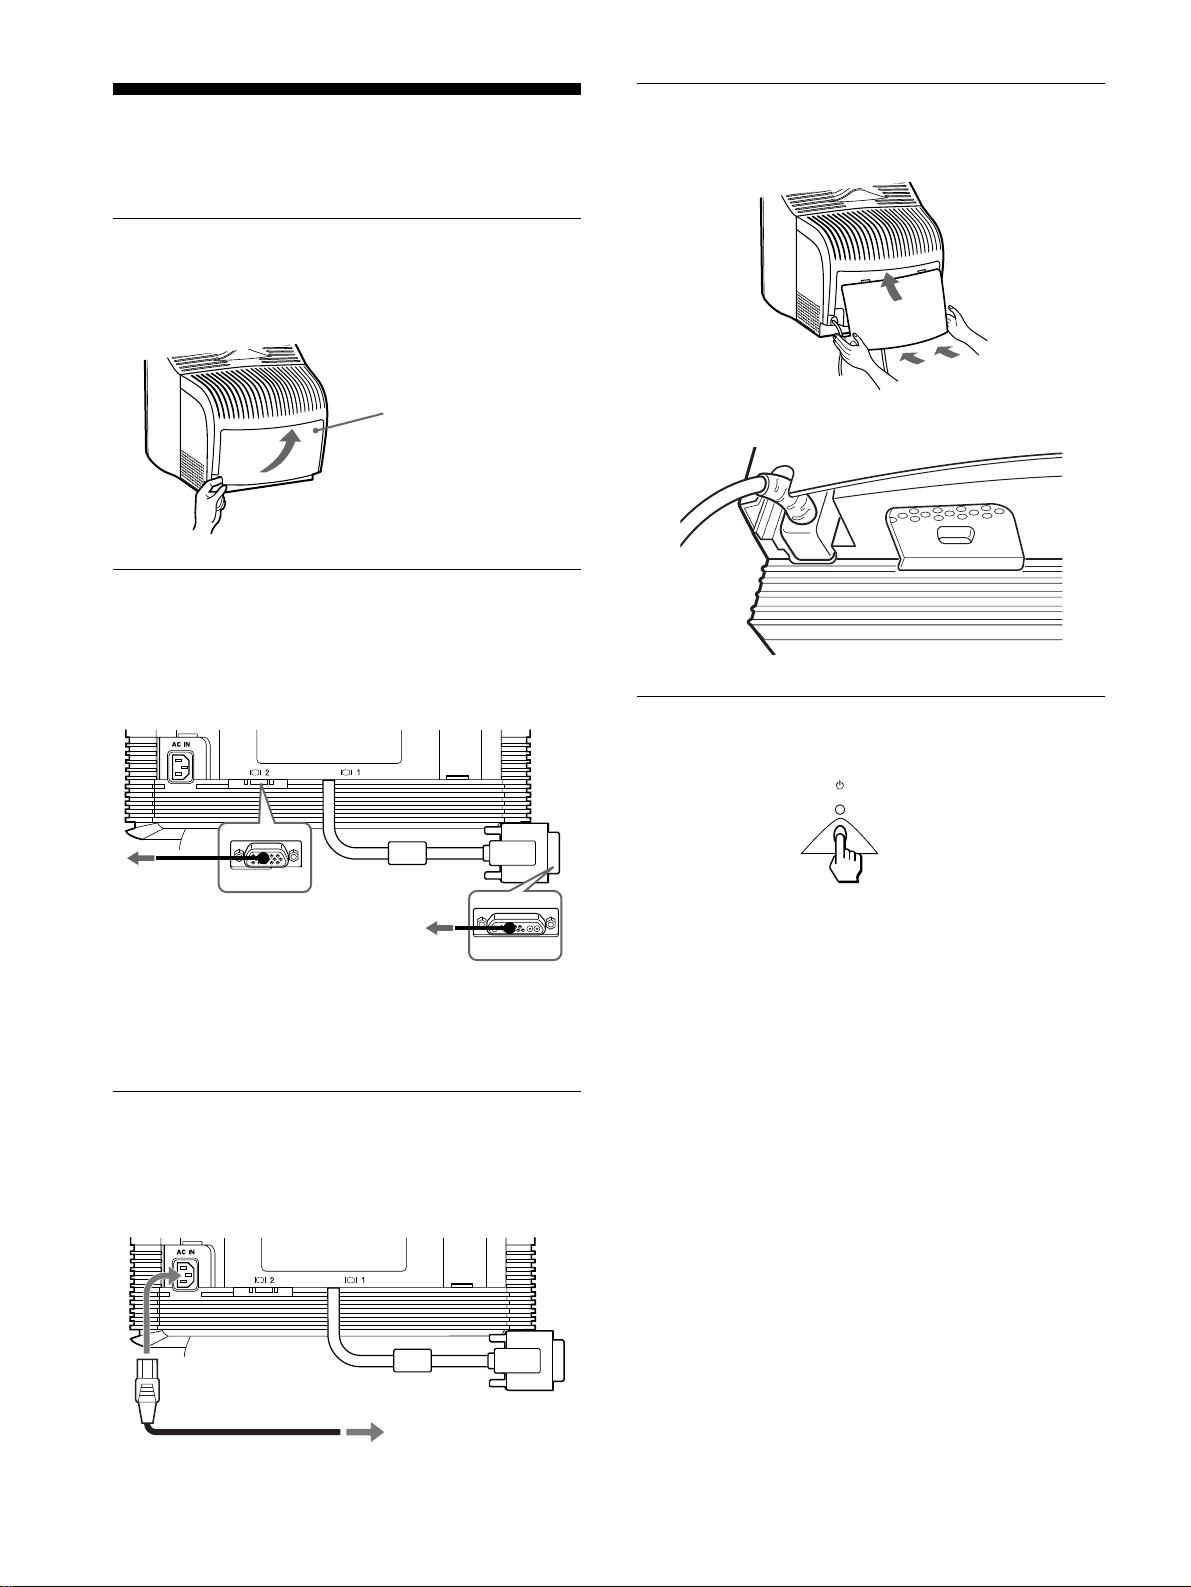
86
Installation
Den här skärmen fungerar med system som använder horisontella
frekvenser mellan 30 och 121 kHz.
Steg 1:Ta bort skyddet på
baksidan
Innan du gör några anslutningar tar du bort skyddet på baksidan.
Steg 2:Anslut bildskärmen till
datorn
Se till att både dator och bildskärm är avstängda och anslut sedan
videosignalkabeln mellan videoingången på skärmen och
videoutgången på datorn.
Obs!
• Rör inte kontaktstiften eftersom de lätt kan böjas.
• Kontrollera passningen mellan kontakterna innan du skjuter samman
dem. Använd inte våld eftersom det är mycket lätt att skada stiften om
passningen är felaktig.
Steg 3:Anslut nätkabeln
Medan skärmen och datorn fortfarande är avstängda ansluter du
den nätkabel, som är korrekt med tanke på de lokala
förhållandena, till skärmen och sedan den andra änden till
vägguttaget.
Steg 4:Sätt tillbaka skyddet
Sätt tillbaka skyddet över anslutningarna.
Dra nätkabeln genom kabelskåran i skyddsluckans underkant.
Steg 5:Slå på bildskärm och dator
Slå först på skärmen och sedan datorn.
Installationen av skärmen är klar.
Om du behöver justera bilden använder du bildskärmens
kontroller.
Om ingen bild visas på skärmen
• Kontrollera att skärmen är korrekt ansluten till datorn.
• Om INGEN SIGNAL visas på skärmen följer du
instruktionerna som du får via meddelandena på skärmen
(sida 95).
• Om du byter ut en gammal skärm mot denna modell och EJ I
FREKVENSOMFÅNG visas på skärmen ansluter du den
gamla skärmen igen. Justera sedan datorns grafikkort så att den
horisontella frekvensen ligger mellan 30 – 121 kHz och den
vertikala frekvensen mellan 48 – 160 Hz.
För mer information om meddelandena på skärmen, se
“Felsymptom och åtgärder” på sidan 96.
Skydd
Öppna baksidan av höljet
och sväng den utåt för att
ta bort den.
Till en dator med
en HD15-
videoutgång
Till en dator med en
13W3- videoutgång
strömkabel
till ett vägguttag
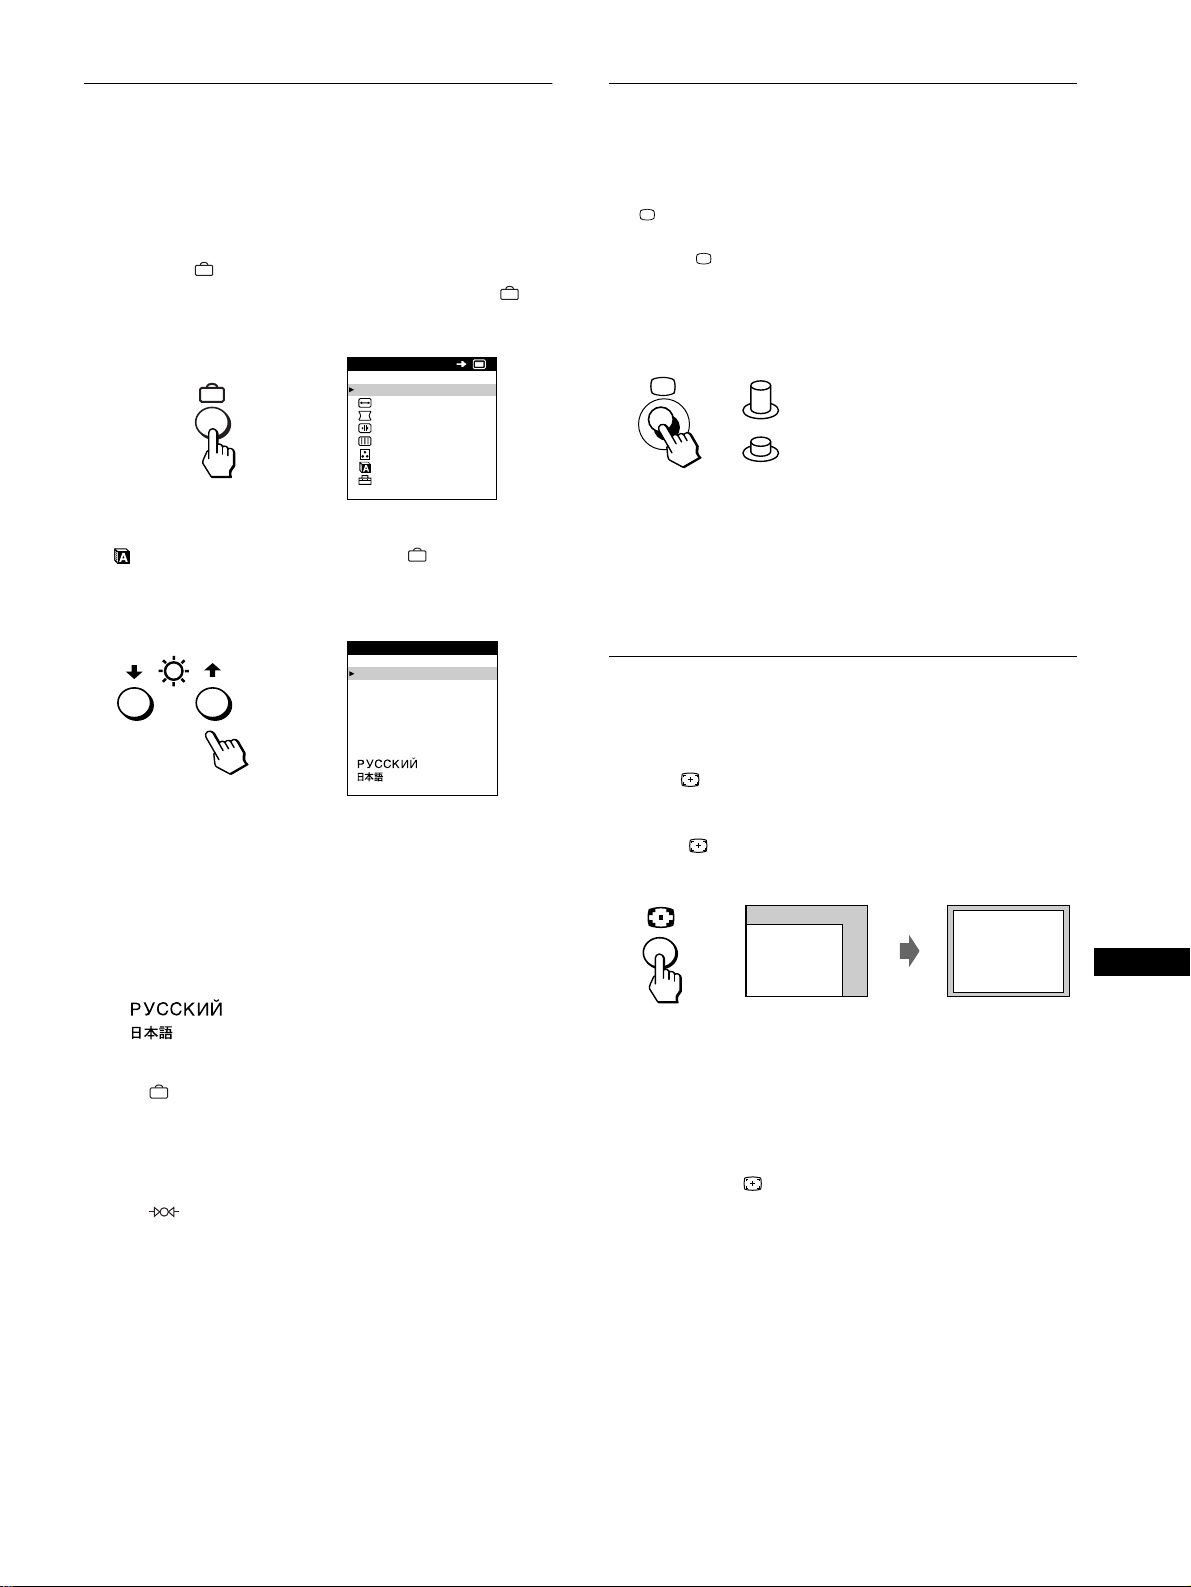
87
SE
Välja språk för
bildskärmsmenyerna (LANGUAGE)
Du kan välja mellan engelska, franska, tyska, spanska,italienska,
holländska, svenska, ryska och japanska. Engelska är
standardinställningen.
1
Tryck på knappen.
Se sidan 89 för mer information om hur du använder
knappen.
2
Tryck på m/M knapparna för att markera
LANGUAGE och tryck sedan på knappen igen.
Se sidan 89 för mer information om hur du använder m/M
knapparna.
3
Välj språk genom att trycka på m/M knapparna.
• ENGLISH
• FRANÇAIS: Franska
• DEUTSCH: Tyska
• ESPAÑOL: Spanska
• ITALIANO: Italienska
• NEDERLANDS: Holländska
• SVENSKA: Svenska
• : Ryska
• : Japanska
Stänga menyn
Tryck på knappen en gång om du vill återvända till huvudmenyn
(MENU); två gånger om du vill återgå till normal visning. Om du inte
trycker på några knappar stängs menyn automatiskt efter ungefär 30
sekunder.
Återställa till engelska
Tryck på (återställning) knappen medan språkmenyn
(LANGUAGE) visas på skärmen.
Välja insignal
Du kan ansluta två datorer till den här skärmen genom att använda
båda videoanslutningarna (video input 1 och video input 2). För
att välja vilken dator som skärmen ska visa bilden från använder
du knappen.
Tryck på knappen.
Varje gång du trycker på den här knappen skiftar du insignalkälla
vilket visas genom att indikatorn ändras.
När du trycker in knappen väljs INSIGNAL 2, när knappen släpps
upp väljs INSIGNAL 1.
Den anslutning som du valt, “INSIGNAL 1” respektive
“INSIGNAL 2” visas under några sekunder på skärmen.
Obs!
Om du väljer en ingång som inte har någon signal visas INGEN SIGNAL
på skärmen, därefter växlas skärmen över till energisparläge. Växla i så
fall över till den andra ingången.
Automatisk ändring av storlek och
centrering av bilden
Du kan lätt justera bilden så att den fyller skärmen genom att
trycka på (knappen för automatisk storleksanpassning och
centrering).
Tryck på knappen.
Bilden fyller automatiskt ut bildskärmen.
Obs!
• Den här funktionen är anpassad för en dator som genererar en
fullskärmsbild. Det kan hända att den inte fungerar som den ska om
bakgrundsbilden är mörk eller om den genererade bilden inte fyller
skärmen ända ut i kanterna.
• Bilder med proportionen 5:4 (upplösningarna 1280
×
1024 och 1600
×
1280) visas med sin verkliga upplösning och fyller inte hela skärmen.
• När du trycker på knappen rör sig bilden över skärmytan under
några sekunder. Detta är helt normalt.
EXI T
SIZE/CENTER
GEOMETRY
CONVERGENCE
SCREEN
COLOR
LANGUAGE
OPT ION
MENU
OK
b
ENGL ISH
FRANÇA IS
DEUTSCH
ESPAÑOL
ITALIANO
NEDERLANDS
SVENSKA
LANGUAGE
b
INSIGNAL 1
(anslutning för videoingång 1)
INSIGNAL 2
(anslutning för videoingång 2)
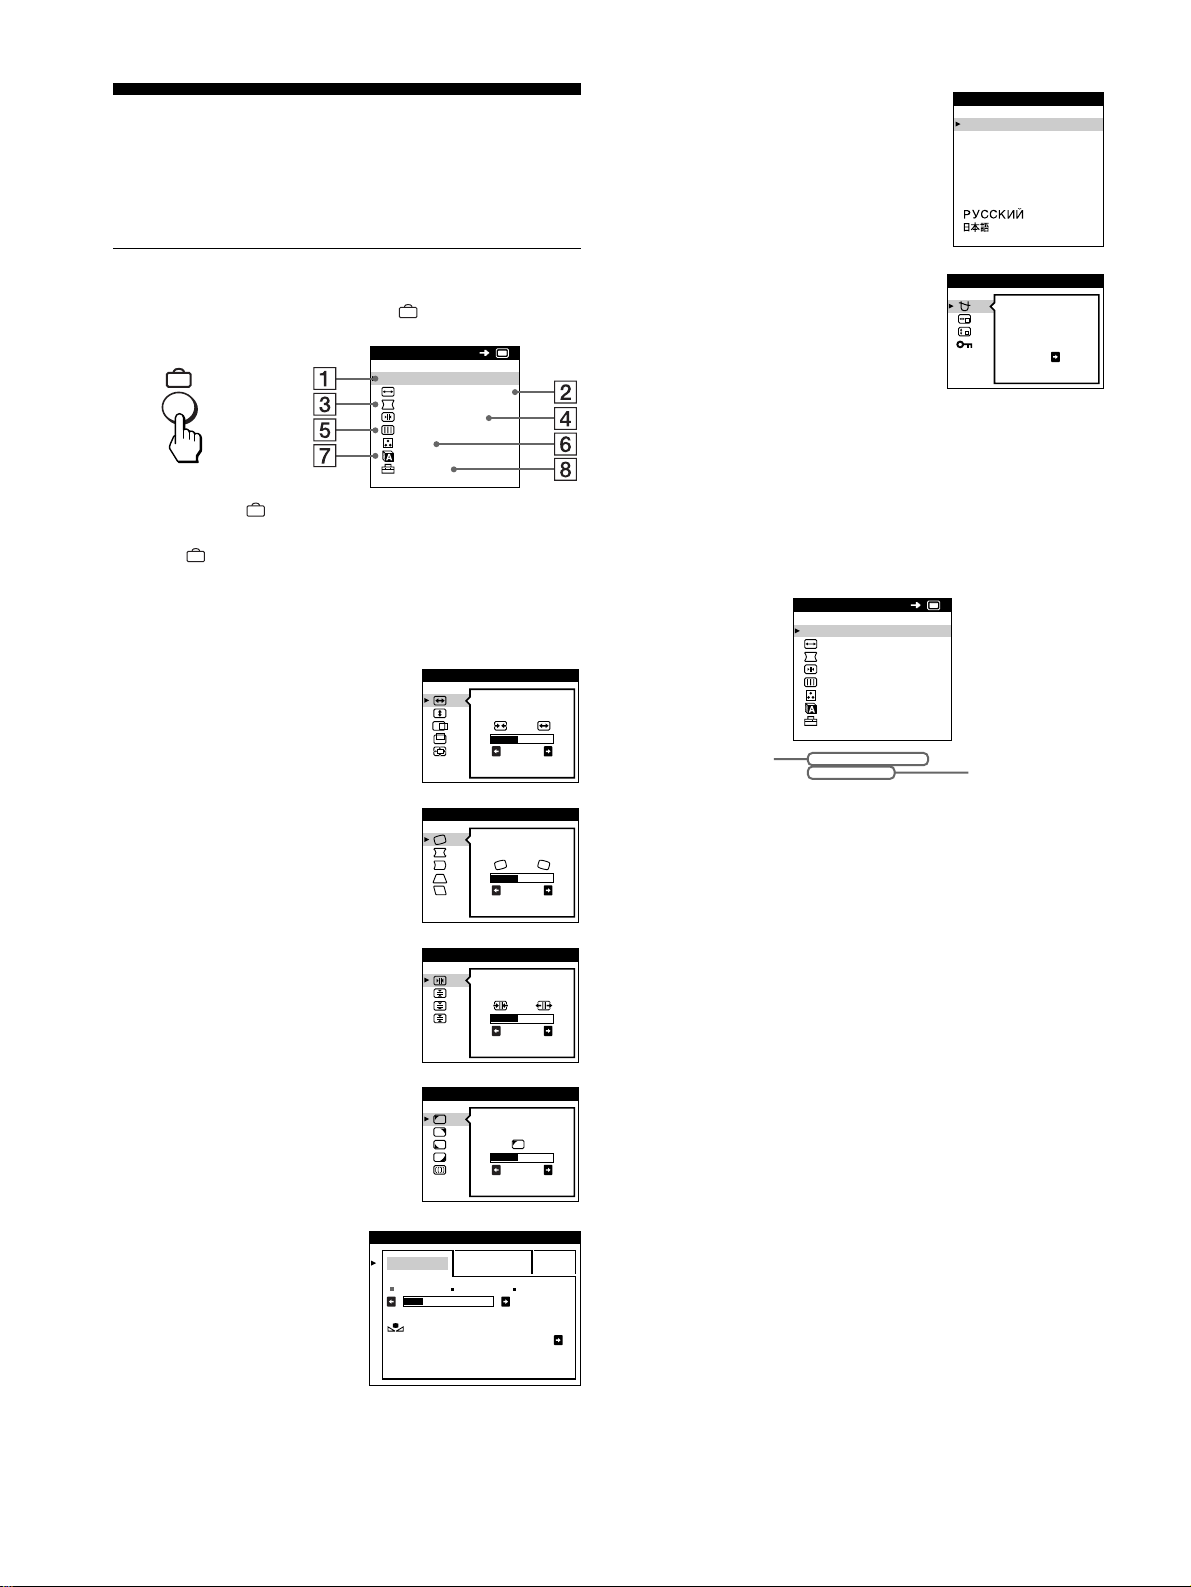
88
Anpassa bildskärmen
Det finns flera justeringar som du kan göra för att anpassa bilden
som du vill ha den. Du gör inställningarna med hjälp av menyerna
på bildskärmen.
Bläddra i menyerna
Visa huvudmenyn genom att trycka på knappen.
Använd m/M och knapparna för att välja någon av följande
menyer. Se sidan 89 för mer information om hur du använder
m/M och knapparna.
x
xx
x
Visa uppgifter om den aktuella insignalen
De horisontella och vertikala frekvenserna för den aktuella
insignalen visas i huvudmenyn (MENU). Om signalen stämmer
överens med någon av skärmens fabriksinställda lägen visas
också uppgift om upplösningen.
1
11
1 SLUTA
När du vill stänga menyn väljer du
SLUTA.
2
22
2 STORL./CENTER (sida 90)
Välj STORL./CENTER-menyn när
du vill justera bildstorlek, centrering
och zoomningsgrad.
3
33
3 GEOMETRI (sida 90)
Välj GEOMETRI-menyn när du vill
justera bildens vridning (rotation)
och form.
4
44
4 KONVERGENS (sida 91)
Välj KONVERGENS-menyn när
du vill justera bildens horisontella
och vertikala konvergens.
5
55
5 BILD (sida 91)
Välj BILD-menyn när du vill justera
bildens kvalitet. Du kan justera
färgavvikelser i hörnen och
moaréundertryckningen.
6
66
6 FÄRG (sida 92)
Välj FÄRG-menyn när du
vill justera bildens
färgtemperatur. Du kan
använda den här funktionen
för att kalibrera färgerna på
bildskärmen till färgerna på
utskrifterna.
SLUTA
STORL . /CENTER
GEOMETR I
KONVERGENS+
BILD
FÄRG
LANGUAGE
OPT ION
MENU
OK
b
26
STORL . /CENTER
26
GEOMETR I
TOP
BOT
26
KONVERGENS
HÖRNFÄRG
26
BILD
ENKEL EXPERT s BGR
5000K 6500K 930 K0
50 K00
FÄRGRESET
PÅ
FÄRG
7
77
7 LANGUAGE (sida 87)
Välj LANGUAGE för att välja
vilket språk som ska användas för
menyerna.
8
88
8 OPTION (sida 93)
Välj OPTION när du vill ställa in
något av följande alternativ:
• avmagnetisering av skärmen
• ändra positionen för
bildskärmsmenyerna
• låsa kontrollerna
ENGL ISH
FRANÇA IS
DEUTSCH
ESPAÑOL
ITALIANO
NEDERLANDS
SVENSKA
LANGUAGE
DEGAUSS
PÅ
OPT ION
MENU
SLUTA
STORL . /CENTER
GEOMETR I
KONVERGENS
BILD
FÄRG
LANGUAGE
OPT ION
68.7kHz/ 85Hz
1024x 768
OK
horisontell och
vertikal
frekvens för
den aktuella
insignalen
upplösning för
den aktuella
insignalen
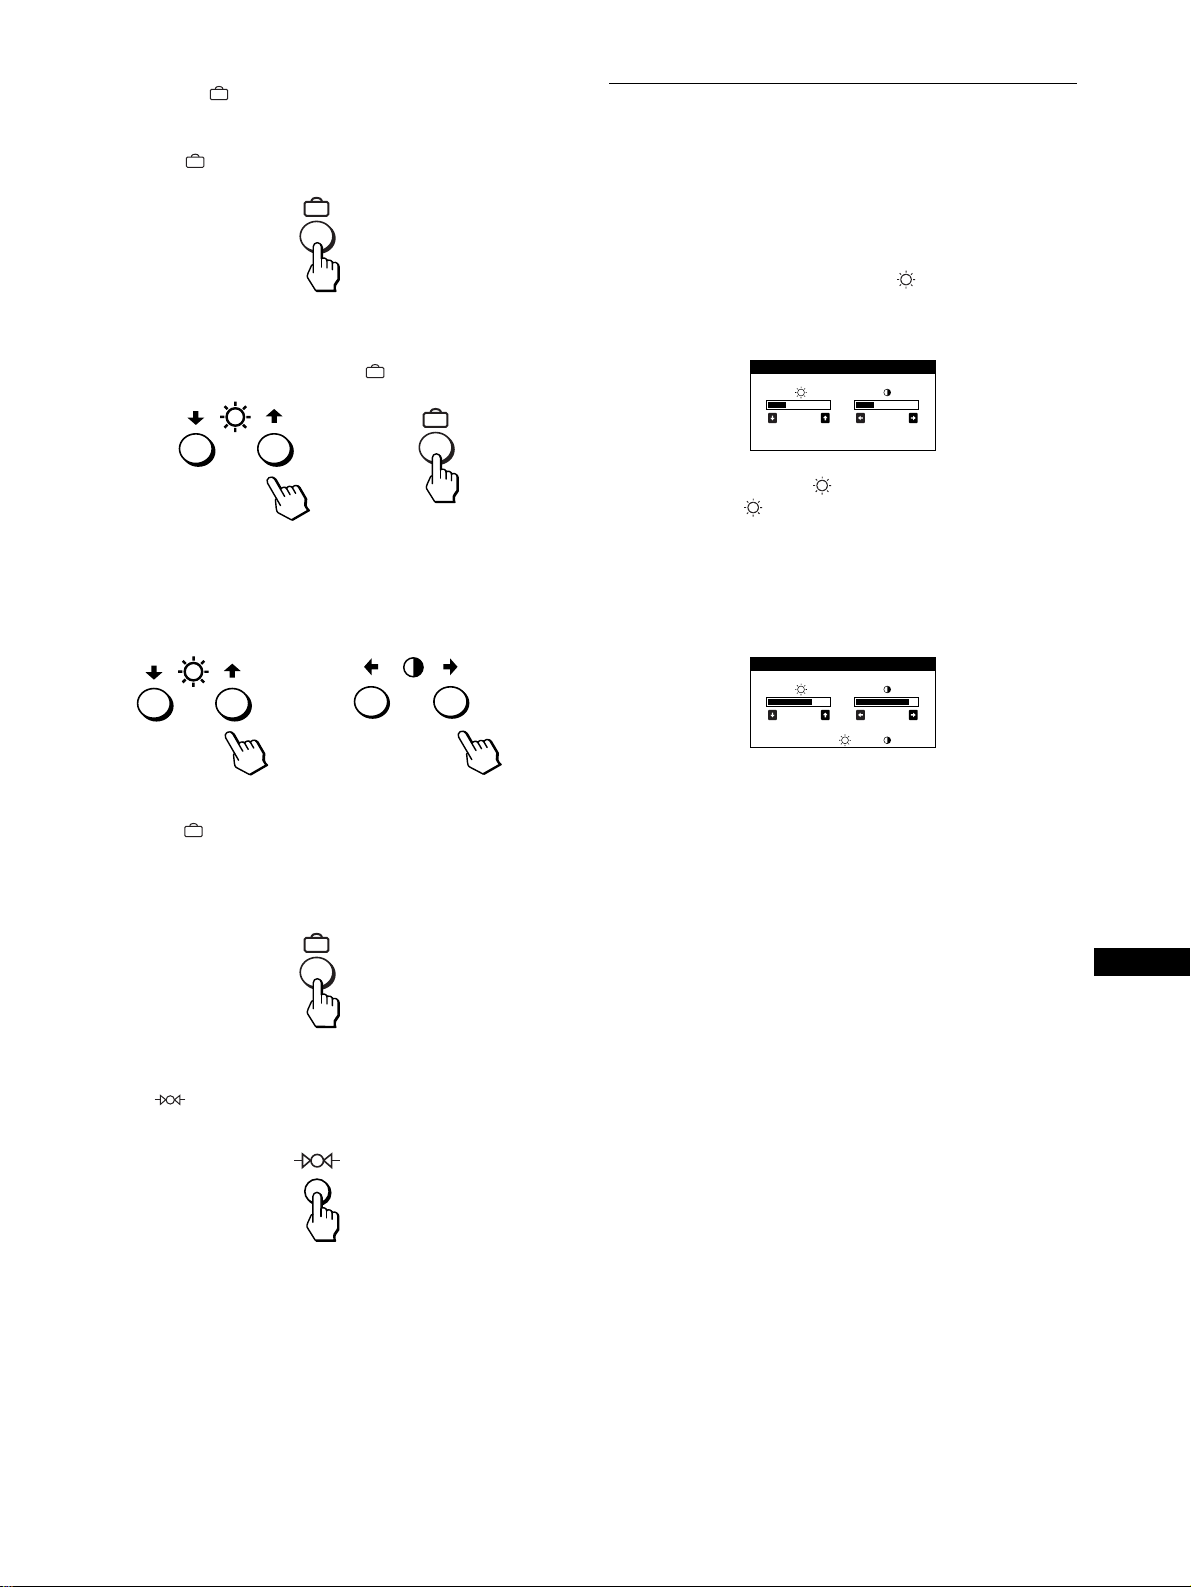
89
SE
x
xx
x
Använda , m/M och </, knapparna
1
Visa huvudmenyn (MENU).
Tryck på knappen så att huvudmenyn visas.
2
Välj den meny som du tänker justera.
Tryck på m/M knapparna för att markera önskad meny och
bekräfta valet genom att trycka på knappen.
3
Utför justeringarna.
Välj önskat justeringsalternativ genom att trycka på m/M
knapparna. Utför justeringarna genom att trycka på </,
knapparna.
4
Stäng menyn.
Tryck på knappen en gång för att återgå till huvudmenyn
(MENU); tryck två gånger om du vill återgå till det normala
visningsläget. Om du inte trycker på någon knapp stängs
menyn automatiskt efter ungefär 30 sekunder.
x
xx
x
Återställa inställningarna
Tryck på (reset) knappen. Se sidan 94 för mer information
om återställning av justeringarna.
Justera ljusstyrka och kontrast
Justering av ljusstyka och kontrast görs med en separat LJUS/
KONTRAST-meny.
Dessa inställningar lagras för de signaler som kommer från den
signalingång som du gör inställningarna för (den ingång som är
aktiv när du gör inställningarna).
1
Tryck på någon av knapparna (ljusstyrka) m/M
eller 6
66
6 (kontrast) </,.
LJUS/KONTRAST-menyn visas på skärmen.
2
Tryck på knapparna (ljusstyka) m/M om det är
ljusstyrkan ( ) som du vill justera och på
6
66
6 (kontrast) </, om det är kontrasten (6
66
6).
Om du använder sRGB-läget
Om du valt sRGB-läget i FÄRG-menyn visas följande LJUS/
KONTRAST-meny på skärmen.
För mer information om hur du använder sRGB-läget, se “Justera
bildfärgen (FÄRG)” på sidan 92.
Menyn stängs automatiskt efter ungefär 3 sekunder.
b
b
26 26
LJUS/KONTRAST
56 76
sRGB : 56 76
LJUS/KONTRAST
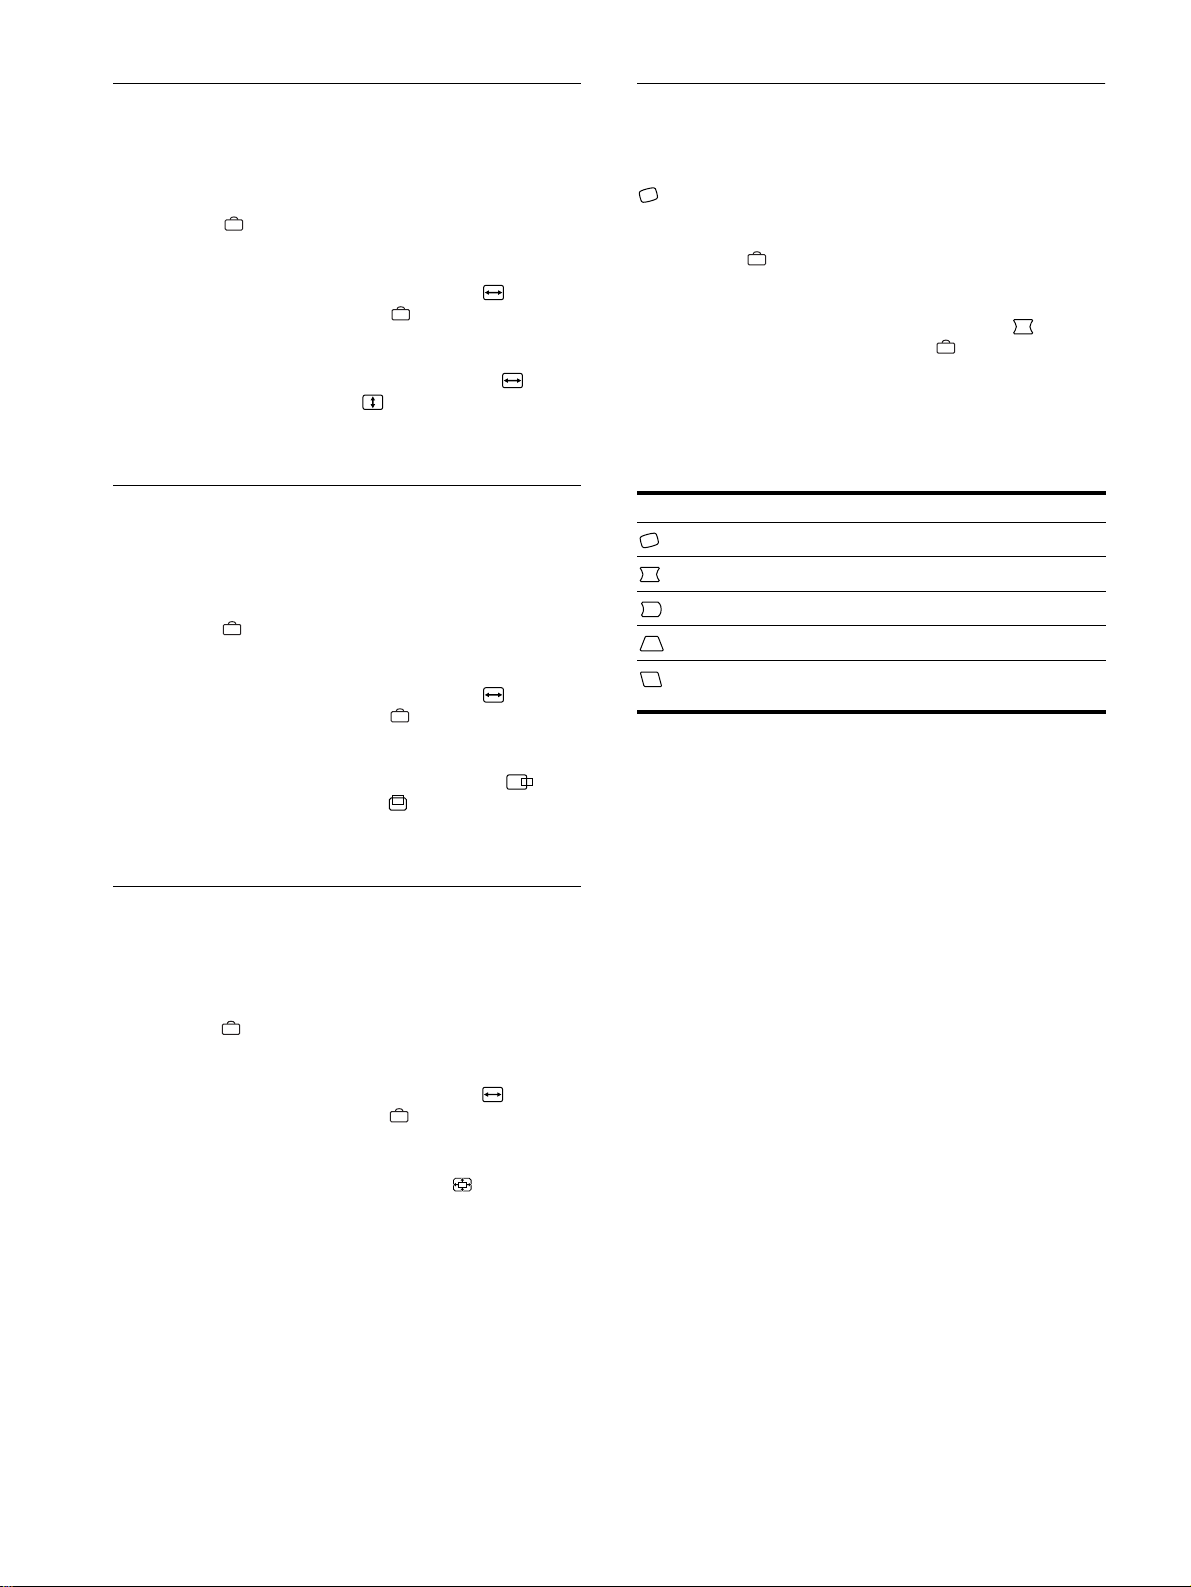
90
Justera storleken på bilden
(STORL./CENTER)
Den här inställningen lagras i minnet för den aktuella insignalen.
1
Tryck på knappen.
Huvudmenyn (MENU) visas på skärmen.
2
Tryck på m/M knapparna för att markera STORL./
CENTER och tryck sedan på knappen igen.
STORL./CENTER-menyn visas på skärmen.
3
Tryck först på m/M knapparna för att välja för
horisontell justering eller för vertikal justering.
Justera sedan storleken genom att trycka på </,
knapparna.
Justera centreringen av bilden
(STORL./CENTER)
Den här inställningen lagras i minnet för den aktuella insignalen.
1
Tryck på knappen.
Huvudmenyn (MENU) visas på skärmen.
2
Tryck på m/M knapparna för att markera STORL./
CENTER och tryck sedan på knappen igen.
STORL./CENTER-menyn visas på skärmen.
3
Tryck först på m/M knapparna för att välja för
horisontell justering eller på för vertikal
justering. Tryck sedan på </, knapparna för att
justera centreringen.
Förstora eller förminska bilden
(ZOOM)
Den här inställningen lagras i minnet för den aktuella insignalen.
1
Tryck på knappen.
Huvudmenyn (MENU) visas på skärmen.
2
Tryck på m/M knapparna för att markera STORL./
CENTER och tryck sedan på knappen igen.
STORL./CENTER-menyn visas på skärmen.
3
Tryck på m/M knapparna för att välja (zoomning)
och tryck sedan på </, knapparna för att förstora
eller förminska bilden.
Obs!
Justeringen avbryts automatiskt när den horisontella eller den vertikala
storleken når sitt maximum eller minimum.
Justera bildens form (GEOMETRI)
Med inställningarna på GEOMETRI-menyn kan du rotera bilden
och justera dess form.
(rotation) inställningen lagras i minnet för alla insignaler. Alla
de andra inställningarna lagras för den aktuella insignalen.
1
Tryck på knappen.
Huvudmenyn (MENU) visas på skärmen.
2
Tryck på m/M knapparna för att markera
GEOMETRI och tryck sedan på knappen igen.
GEOMETRI-menyn visas på skärmen.
3
Tryck först på m/M knapparna för att välja önskat
justeringsalternativ och utför sedan justeringen
med hjälp av </, knapparna.
Välj För att
rotera bilden
expandera eller dra samman bildens sidor
förskjut bildens sidor åt höger eller vänster
justera bildbredden vid skärmens överkant
justera bilden åt vänster eller höger vid skärmens
överkant
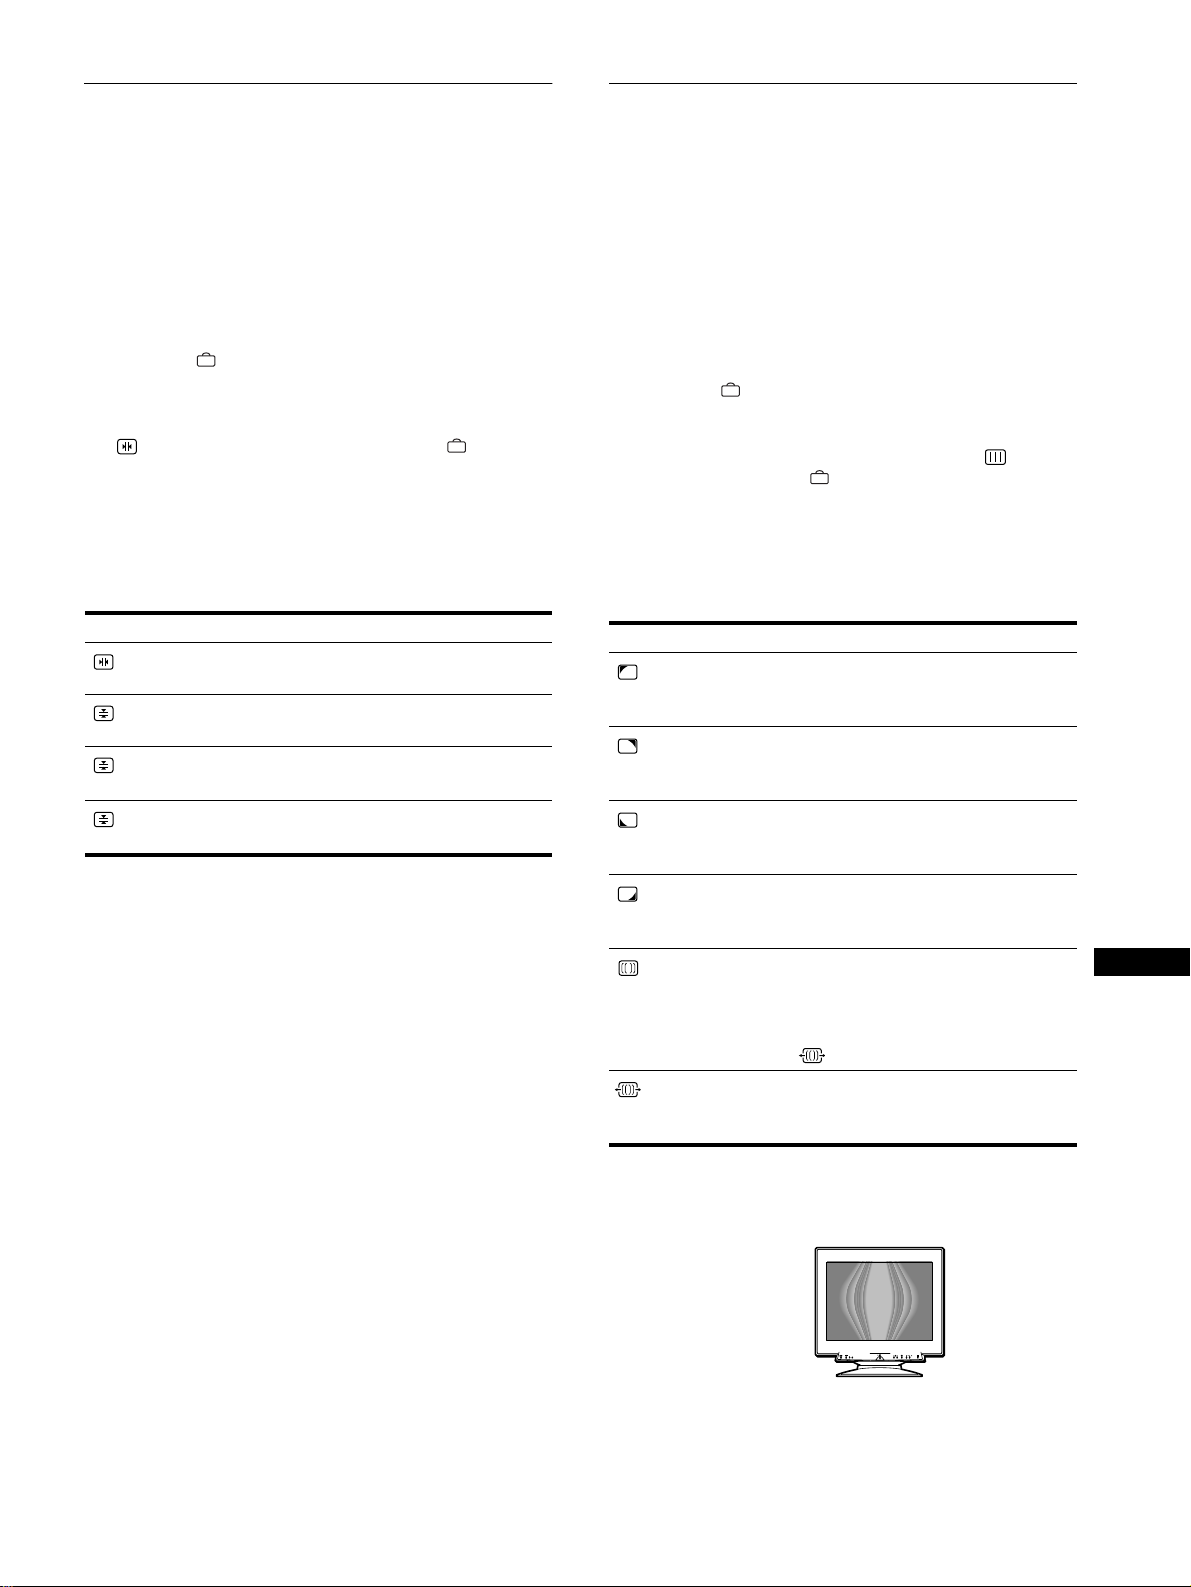
91
SE
Justera konvergensen
(KONVERGENS)
Med inställningarna på KONVERGENS-menyn kan du justera
bildkvaliteten genom att ställa in konvergensen, dvs. hur den
röda, gröna och blåa signalen är justerade i förhållande till
varandra.
Om du upptäcker röda eller blå skuggor runt bokstäver och linjer
kan du behöva justera konvergensen.
De här inställningarna lagras i minnet för alla insignaler.
1
Tryck på knappen.
Huvudmenyn (MENU) visas på skärmen.
2
Tryck på m/M knapparna för att markera
KONVERGENS och tryck sedan på knappen
igen.
KONVERGENS-menyn visas på skärmen.
3
Tryck först på m/M knapparna för att välja önskat
justeringsalternativ och utför sedan justeringen
med hjälp av </, knapparna.
Justera bildkvaliteten (BILD)
Med BILD-inställningarna kan du förbättra bildkvalitén genom
att ställa in moaréundertryckning och färgavvikelserna i hörnen
av bilden (landing).
• Du kan justera färgoregelbundenheter som kan uppstå i
bildskärmens hörn.
• Om eliptiska eller vågiga mönster visas på skärmen bör du
stänga av moarén.
ELIMINERA MOARE- och JUSTERA MOARE-inställningarna
lagras i minnet för den aktuella insignalen. Alla andra
inställningar lagras i minnet för alla insignaler.
1
Tryck på knappen.
Huvudmenyn MENU visas på skärmen.
2
Tryck på m/M knapparna för att markera BILD
och tryck sedan på knappen igen.
BILD-menyn visas på skärmen.
3
Välj önskat justeringsalternativ genom att trycka på
m/M knapparna. Utför justeringarna genom att
trycka på </, knapparna.
• Moaré är en typ av naturlig störning som skapar mjuka vågmönster på
skärmen. De kan uppstå som en följd av interferens mellan skärmbilden
och bildskärmens fosforpunktmönster.
Obs!
Bilden kan bli suddig när ELIMINERA MOARE är ställd på PÅ.
Välj För att
horisontell förskjutning av röda eller
blå skuggor
vertikal förskjutning av röda eller blå
skuggor
TOP
V KONV. TOPP
vertikal förskjutning av röda eller blå
skuggor upptill på skärmen
BOT
V KONV. BOTTEN
vertikal förskjutning av röda eller blå
skuggor undertill på skärmen
Välj För att
HÖRNFÄRG
reducera färgoregelbundenheter i
skärmens övre vänstra hörn till ett
minimum.
HÖRNFÄRG
reducera färgoregelbundenheter i
skärmens övre högra hörn till ett
minimum.
HÖRNFÄRG
reducera färgoregelbundenheter i
skärmens undre vänstra hörn till ett
minimum.
HÖRNFÄRG
reducera färgoregelbundenheter i
skärmens undre högra hörn till ett
minimum.
ELIMINERA
MOARE
*
ställa
moaréundertryckningsfunktionen på
PÅ eller AV.
Om du väljer PÅ visas
(JUSTERA MOARE) i menyn.
JUSTERA MOARE
justera graden av
moaréundertryckning tills
moaréeffekterna nått en minimum.
Exempel på moaré

92
Justera bildfärgen (FÄRG)
Med FÄRG-inställningarna kan du justera bildens färgtemperatur
genom att ändra färgnivån på de vita färgfälten. Låg
färgtemperatur gör att färgerna framstår som rödaktiga och en hög
färgtemperatur gör bilden blåtonad. Du kan använda den här
funktionen för att kalibrera färgerna på bildskärmen till färgerna
på utskrifterna.
1
Tryck på knappen.
Huvudmenyn (MENU) visas på skärmen.
2
Tryck på m/M knapparna för att markera FÄRG
och tryck sedan på knappen igen.
FÄRG-menyn visas på skärmen.
3
Tryck på </, knapparna för att välja
justeringsläge.
Det finns tre justeringslägen: ENKEL, EXPERT och sRGB.
4
Tryck först på m/M knapparna för att välja önskat
justeringsläge. Utför sedan justeringen genom att
trycka på </, knapparna.
Följande instruktioner visar hur du utför justeringarna för de
olika lägena.
ENKEL-läge
EXPERT-läge
Om du vill ha större kontroll över färgjusteringarna kan du välja
EXPERT-läget.
Ställa in färgtemperaturen för de olika
videoingångarna
Du kan fininställa färgtemperaturen för de olika videoingångarna
(INSIGNAL 1: 13W3 och INSIGNAL 2: HD15) i både ENKEL-
och EXPERT-läget.
1
Välj samma justeringsläge och färgtemperatur i
FÄRG-menyn för både INSIGNAL 1 och INSIGNAL 2.
2
Fininställ färgtemperaturen i varje meny för
INSIGNAL 1 och INSIGNAL 2.
Inställningarna lagras i minnet för INSIGNAL 1- respektive
INSIGNAL 2-anslutningen.
För mer information om hur du väljer videoingång, se sidan 87.
1
Tryck först på m/M knapparna för att välja raden för
färgtemperaturen 1
11
1 och välj sedan färgtemperatur
genom att trycka på </, knapparna.
De förinställda färgtemperaturerna är 5000K, 6500K och
9300K. Eftersom den ursprungliga inställningen är 9300K
kommer det vita fältet att skifta från blåtonade nyanser till
rödaktiga vartefter du sänker färgtemperaturen till 6500K och
5000K.
2
Du kan finjustera färgtemperaturen om det skulle
visa sig nödvändigt.
Tryck först på m/M knapparna för att välja raden för
färgtemperaturen 2
22
2 och tryck sedan på </,
knapparna för att fininställa färgtemperaturen.
Om du fininställer färgtemperaturen lagras de nya
färginställningarna i minnet för var och en av de tre
färgtemperaturerna samtidigt som rad 1 på
bildskärmsmenyn ändras på följande sätt.
• [5000K]t[1]
• [6500K]t[2]
• [9300K]t[3]
ENKEL EXPERT s BGR
5000K 6500K 930 K0
50 K00
FÄRGRESET
PÅ
FÄRG
1
Tryck först på m/M knapparna för att välja raden för
färgtemperaturen 1
11
1 och välj sedan en
färgtemperatur genom att trycka på </,
knapparna.
2
Tryck på m/M knapparna för att välja
justeringsalternativ 2
22
2 och tryck sedan på </,
knapparna för att justera BIAS (svartnivå).
På detta vis justerar du de mörka partierna av bilden.
3
Tryck på m/M knapparna för att välja
justeringsalternativ 3
33
3 och tryck sedan på </,
knapparna för att justera GAIN (vitnivån).
På detta vis justerar du de ljusa partierna av bilden.
Du kan justera insignalens röda (R), gröna (G) och blå (B)
komponenter med de olika alternativen för 2 och 3 (se
ovanstående figur).
Om du fininställer färgtemperaturen lagras de nya
färginställningarna i minnet för de tre färgtemperaturerna och
samtidigt som rad 1 på bildskärmsmenyn ändras på följande
sätt.
• [5000K]t[1]
• [6500K]t[2]
• [9300K]t[3]
ENKEL EXPERT s BGR
5000K 6500K 930 K0
R BIAS 05
G BIAS 05
B BIAS 05
RGAIN 05
GGAIN 05
BGAIN 05
FÄRG
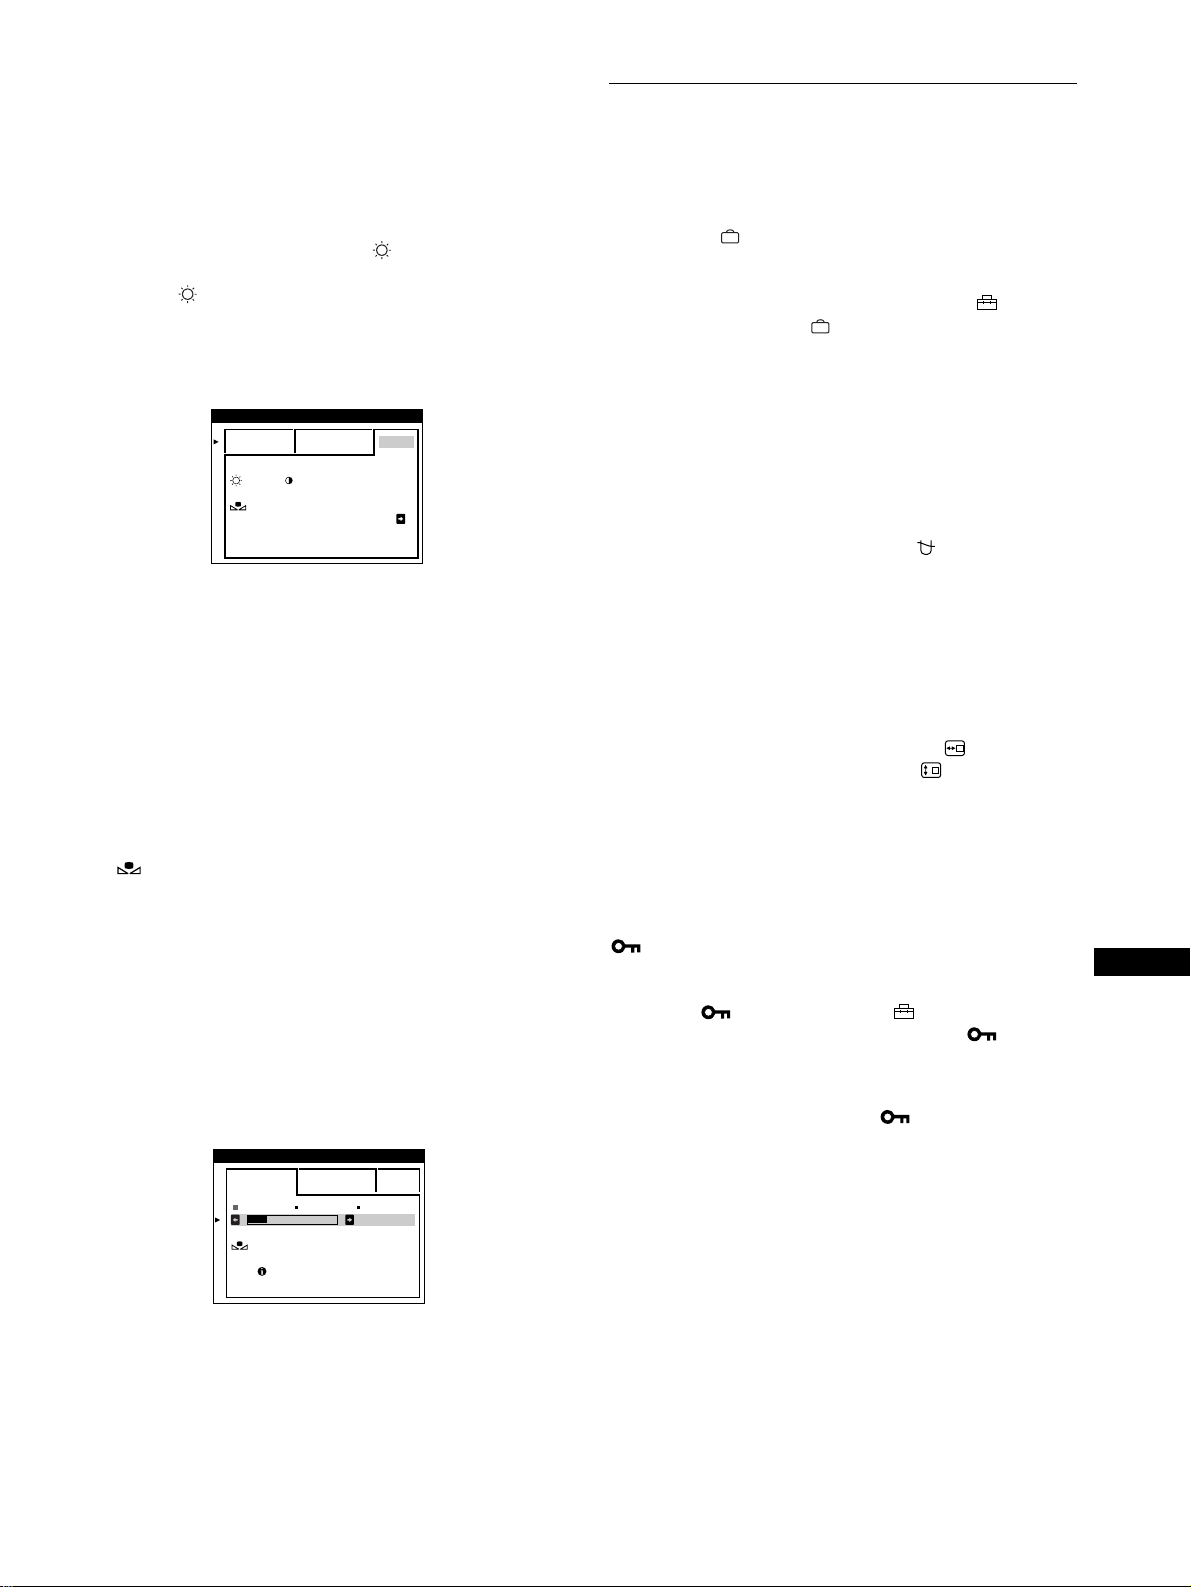
93
SE
sRGB-läge
Färginställningen sRGB är en industristandard för
färgrymdsprotokoll som har utvecklats för att kalibrera de visade
färgerna mot de utskrivna för datorutrustning som följer sRGB-
standarden. Du justerar färgerna till sRGB-profilen genom att helt
enkelt välja sRGB-läget i FÄRG-menyn. För att sRGB-färgerna
ska visas korrekt (
γ
=2,2; 6500K) måste du ställa in datorn på
sRGB-profilen och justera ljusstyrkan ( ) och kontrasten (6)
på de värden som visas i menyn. Information om hur du ställer in
ljusstyrkan ( ) och kontrasten (6) finns på sidan 89.
Obs!
Datorn och andra anslutna produkter (som t.ex. skrivare) måste vara
sRGB-kompatibla.
Återställa färgen från ENKEL- eller sRGB-
menyerna
Efter flera års användning brukar färgerna hos de flesta bildskärmar
mattas av. FÄRGRESET-funktionen, som du hittar i ENKEL- och
sRGB-menyerna, gör att du kan återställa färgerna till den
kvalitetsnivå de hade när skärmen lämnade fabriken. I det följande
beskrivs hur du återställer skärmens färger från ENKEL-menyn.
1
Tryck på </, knapparna för att välja ENKEL- eller
sRGB-läge.
2
Tryck först på m/M knapparna för att välja
(FÄRGRESET) och sedan på , knappen.
Bilden försvinner medan färgen återställs (tar ungefär 2
sekunder). När färgen har återställts visas bilden återigen på
skärmen.
Obs!
• Innan du använder den här funktionen måste skärmen först ha varit
påslagen i normalt läge (den gröna strömindikatorn lyser) under
åtminstone 30 minuter. Om skärmen går in i energisparläge måste du
först återställa skärmen till normalt läge och vänta 30 minuter innan
skärmen är redo för färgåterställning. Du kan behöva justera datorns
energisparfunktion för att skärmen ska hålla sig kvar i normalt läge
under 30 minuter. Om skärmen inte är redo visas följande meddelande.
• Det kan hända att skärmen gradvis förlorar egenskapen att utföra den
här funktionen på grund av att bildröret helt naturligt åldras.
Ytterligare inställningar (OPTION)
Du kan utföra manuell avmagnetisering (degauss) av
bildskärmen. Du kan också ändra menyernas placering och låsa
bildskärmskontrollerna.
1
Tryck på knappen.
Huvudmenyn (MENU) visas på skärmen.
2
Tryck på m/M knapparna för att markera OPTION
och tryck sedan på knappen igen.
OPTION-menyn visas på skärmen.
3
Välj önskat justeringsalternativ genom att trycka på
m/M knapparna.
Justera det valda alternativet enligt följande instruktioner.
Avmagnetisera skärmen
Skärmen avmagnetiseras automatiskt när strömmen slås på.
Om du vill avmagnetisera skärmen manuellt trycker du
först på m/M knapparna för att välja (DEGAUSS).
Tryck sedan på , knappen.
Skärmen avmagnetiseras under ungefär 2 sekunder. Om du
behöver göra om avmagnetiseringen bör du först vänta 20 minuter
för att få bäst resultat.
Ändra menynpositionen
Du kan placera om menyn om den skymmer en bild på skärmen.
För att ändra menypositionen på bildskärmen trycker
du först på m/M knapparna för att välja (H POS
MENY) för horisontell justering eller (V POS MENY)
för vertikal justering. Tryck sedan på </, knapparna
för att flytta bildskärmsmenyn.
Låsa kontrollerna
Du kan skydda dina inställningar genom att låsa
kontrollerna. Tryck först på m/M knapparna för att välja
(KONTROLL LÅS) och tryck sedan på , knappen
för att välja PÅ.
När kontrollerna är låsta fungerar bara 1 (strömbrytaren),
SLUTA och (KONTROLL LÅS) i OPTION-menyn. Om
du försöker använda några andra kontroller visas på
skärmen.
Låsa upp kontrollerna
Upprepa ovanstående procedur, men ställ (KONTROLL LÅS) på
AV.
ENKEL EXPERT s BGR
:56 :76 FÖR s BGR
FÄRGRESET
PÅ
FÄRG
ENKEL EXPERT s BGR
5000K 6500K 930 K0
50 K00
FÄRGRESET
TILLGÅNG
EFTER UPPVÄRMN
FÄRG
94
Återställa justeringarna
Den här bildskärmen erbjuder tre sätt att återställa. Använd
(återställning) knappen för att återställa justeringarna.
Återställa ett enskilt justeringsalternativ
Använd
, m/M knapparna för att välja det justeringsalternativ
som du vill återställa och tryck sedan på (återställning)
knappen.
Återställa alla justeringsdata för den aktuella
insignalen
Tryck på (återställning) knappen när ingen meny visas på
skärmen.
Observera att följande alternativ inte återställs med den här
metoden:
• språk för bildskärmsmenyerna (sida 87)
• justeringläget i FÄRG-menyn (ENKEL, EXPERT, sRGB)
(sida 92)
• menypositionerna på bildskärmen (sida 93)
• kontrollåset (sida 93)
Återställa alla justeringsdata för alla insignaler
Tryck in och håll (återställning) knappen nedtryckt under
mer än två sekunder.
Obs!
(återställning) knappen fungerar inte när
(
KONTROLL LÅS
)
är ställd på PÅ.
Tekniska data
Energisparfunktion
Den här bildskärmen följer de riktlinjer för energisparfunktioner
som fastställts av VESA,
E
NERGY
S
TAR och NUTEK.
Om
bildskärmen inte tar emot någon signal från den dator den är
ansluten till, minskas energiförbrukningen automatiskt enligt
följande.
* När datorn övergår till “avstängt” läge stängs insignalen från
bildskärmen av och “INGEN SIGNAL” visas på skärmen. Efter ett kort
ögonblick växlar bildskärmen över till energisparläge.
Energiläge Strömförbrukning
1
(ström)
indikator
normalläge ≤ 160 W grön
active off*
(avstängd)
≤ 3 W orange
strömmen
avslagen
< 1 W av
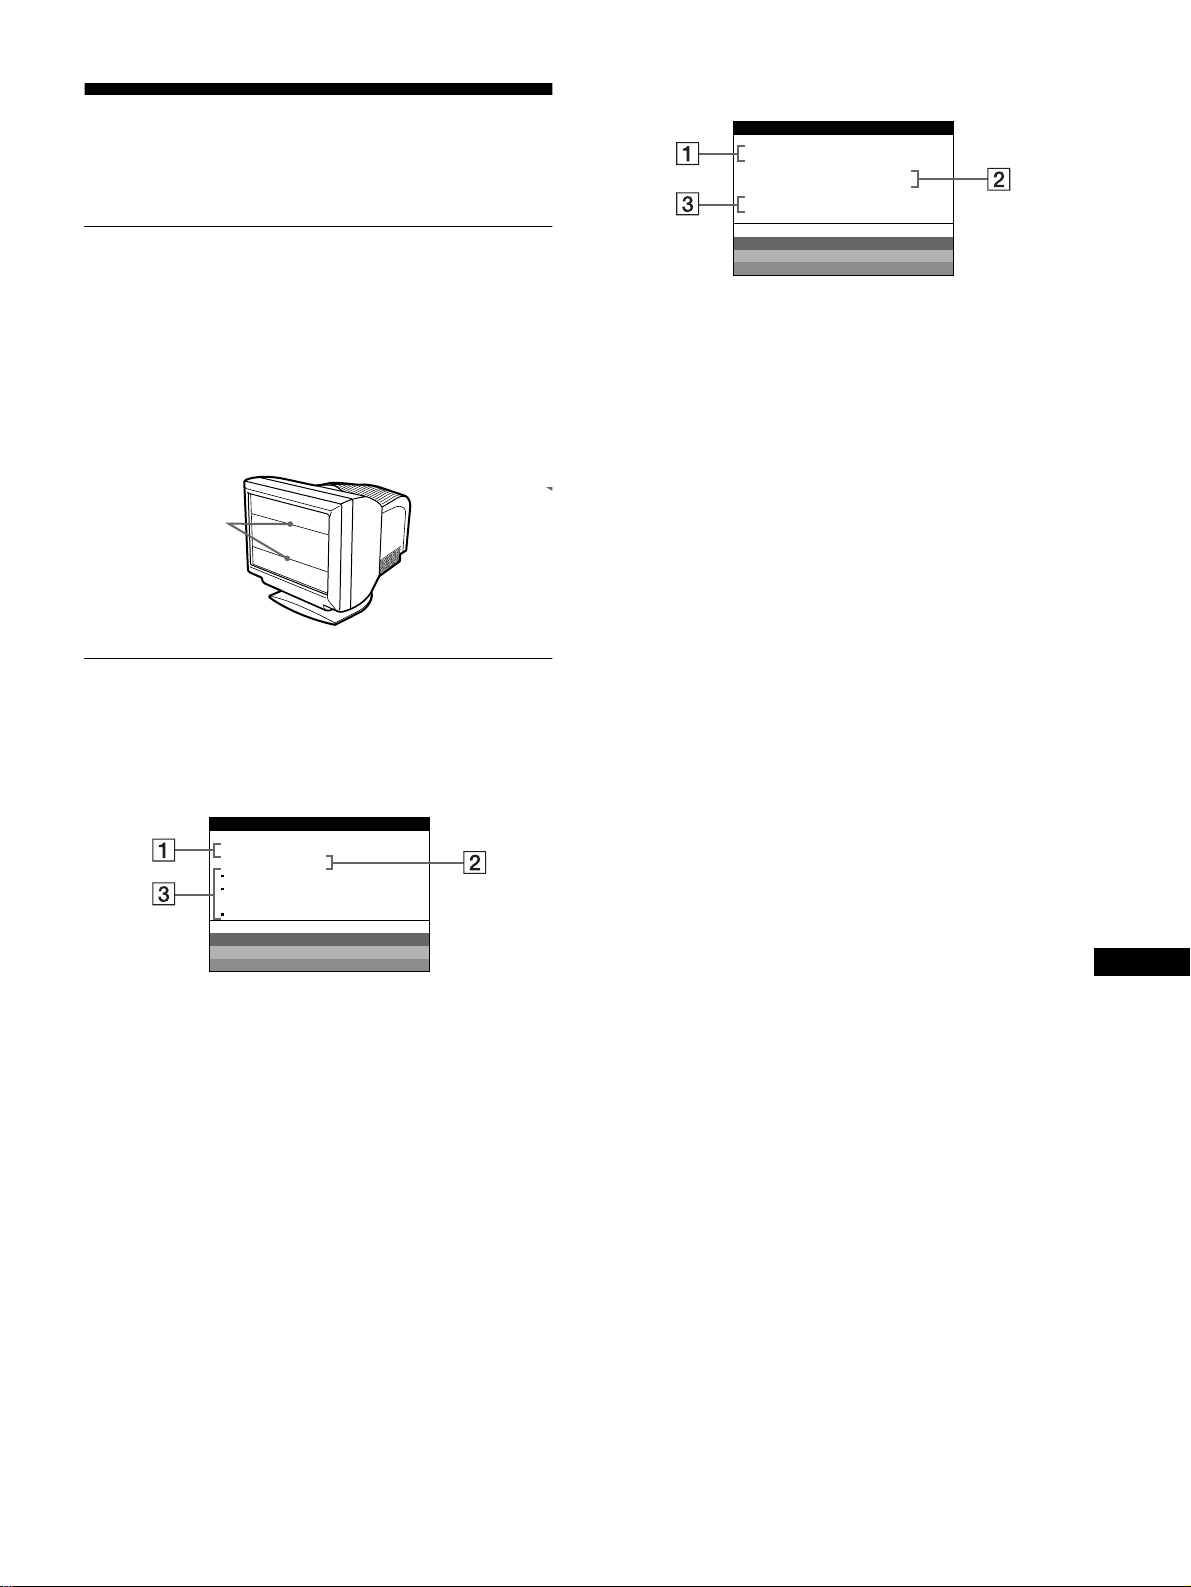
95
SE
Felsökning
Innan du kontaktar teknisk support bör du först läsa igenom detta
avsnitt.
Om tunna linjer syns på skärmen
(dämpningstrådar)
Linjerna du ser på skärmen är normala för Trinitron-skärmar och
innebär inget fel. De är skuggor från dämptrådarna som har som
uppgift att stabilisera skärmgallret. De märks mest mot ljus
bakgrund (t.ex. mot vitt). Skrämgallret är ett tekniskt mycket
viktigt element och gör Trinitron-bildrören unika genom att det
släpper fram mer ljus med klarare och mer detaljrika bilder som
resultat.
Bildskärmsmeddelanden
Om det är något fel på insignalen visas något av följande
meddelanden på skärmen.
Om INGEN SIGNAL visas på skärmen
Om EJ I FREKVENSOMFÅNG visas på skärmen
För mer information, se “Felsymptom och åtgärder” på sidan 96.
1
11
1 Den valda anslutningen
Detta meddelande visar vilken videoingång som för tillfället
är vald (INSIGNAL 1 eller INSIGNAL 2).
2
22
2 Insignalens status
INGEN SIGNAL
Visar att skärmen inte får någon insignal eller att ingen signal
skickas vidare från den valda anslutningen.
3
33
3 Åtgärder
Ett eller fler av följande meddelanden kan visas på skärmen.
• Om DEN VIA DATORN visas på skärmen kan du pröva att
trycka på någon tangent på datorn. Kontrollera också att
datorns grafikkort sitter säkert förankrat på sin rätta
kortplats.
• Om KONTROLLERA INGÅNG visas på skärmen kan du
försöka byta insignal (sida 87).
• Om SE OM KABELSIGNAL visas på skärmen
kontrollerar du att skärmen är korrekt ansluten till datorn
(sida 86).
Dämptrådar
SKÄRMEN ÄR PÅ
INSIGNAL1:
INGEN SIGNAL
DEN VI A DATORN
KONTROLLERA INGÅNG
SE OM KABELS IGNAL
WH I T E
RED
GREEN
BLUE
INFORMATION
1
11
1 Vald anslutning och den aktuella insignalens
frekvenser
Detta meddelande visar den aktuella anslutningen
(INSIGNAL 1 eller INSIGNAL 2). Om skärmen kan
identifiera frekvenserna från den aktuella insignalen visas
också de horisontella och vertikala frekvenserna.
2
22
2 Insignalens status
EJ I FREKVENSOMFÅNG
Detta indikerar att insignalen inte har stöd av bildskärmens
specifikationer.
3
33
3 Åtgärder
ÄNDRA BILDFREKVENSEN visas på skärmen. Om du har
bytt ut en gammal skärm mot den här, byter du tillbaka till den
gamla och justerar sedan datorns grafikkort så att den
horisontella frekvensen ligger mellan 30 – 121 kHz och den
vertikala mellan 48 – 160 Hz.
SKÄRMEN ÄR PÅ
INSIGNAL1:130.0kHz/ H57
EJ I FREKVENSOMFÅNG
ÄNDRA BI LDFREKVENSEN
WH I T E
RED
GREEN
BLUE
INFORMATION
z

96
Felsymptom och åtgärder
Om problemet orsakas av den anslutna datorn eller annan utrustning finns mer information i bruksanvisningen till den anslutna utrustningen.
Använd självdiagnostikfunktionen (sida 98) om följande åtgärder inte löser problemet.
Symptom Kontrollera dessa alternativ
Ingen bild
Om 1 (ström) indikatorn inte tänds • Kontrollera att nätkabeln är korrekt ansluten.
• Kontrollera att 1 (ström) omkopplaren är ställd på “on”.
Om meddelandet INGEN SIGNAL
visas på skärmen eller om 1 (ström)
indikatorn lyser rödbrun eller växlar
mellan grönt och rödbrun
• Kontrollera att inställningarna för knappen är korrekta (sida 87).
• Kontrollera att inte några stift på anslutningskontakten är böjda eller har tryckts in.
xProblem orsakade av den anslutna datorn eller annan utrustning
• Datorn är i energisparläge. Pröva med att trycka på någon tangent på datorns tangentbord.
• Kontrollera att datorn är påslagen.
• Kontrollera att datorns grafikkort sitter säkert förankrat på sin rätta kortplats.
Om meddelandet INGEN SIGNAL
och SE OM KABELSIGNAL visas
på skärmen eller om 1 (ström)
indikatorn antingen lyser rödbrun
eller växlar mellan grönt och
rödbrun
• Kontrollera att signalkabeln är korrekt ansluten och att alla kontakter sitter stadigt i sina
anslutningar (sida 86).
• Kontrollera att inte några stift på anslutningskontakten är böjda eller har tryckts in.
• Kontrollera att knapp inställningen är korrekt (sida 87).
xProblem orsakade av den anslutna datorn eller annan utrustning
• Kontrollera att datorns grafikkort sitter säkert förankrat på sin rätta kortplats.
Om meddelandet EJ I
FREKVENSOMFÅNG visas på
skärmen
xProblem orsakade av den anslutna datorn eller annan utrustning
• Kontrollera att frekvenserna för videosignalerna ligger inom det område som specificerats
för skärmen. Om du har bytt ut en gammal skärm mot den här, byter du tillbaka till den
gamla och justerar sedan frekvensomfånget enligt följande.
Horisontell: 30 – 121 kHz
Vertikal: 48
–
160 Hz
Om inget meddelande visas och 1
(ström) indikatorn lyser grönt eller
blinkar rödbrun
• Använd självdiagnosfunktionen (sida 98).
Bilden fladdrar, hoppar, skälver
eller är förvrängd
• Undersök om det kan finnas störningskällor i närheten av bildskärmen. Störande
magnetiska fält kan orsakas av andra skärmar, laserskrivare, elektriska fläktar,
fluorescenslampor och tv-apparater.
• Flytta skärmen bort från strömförande kablar eller placera en magnetisk avskärmning nära
skärmen.
• Försök ansluta skärmen till ett annat vägguttag, helst ett uttag som är anslutet till en annan
gruppsäkring.
• Pröva att vrida skärmen 90
°
åt vänster eller höger.
xProblem orsakade av den anslutna datorn eller annan utrustning
• Rådfråga manualen till det installerade grafikkortet om hur du ställer in det så att det
passar bildskärmen.
• Kontrollera att grafiklägena och frekvensen för insignalen stödjs av den här skärmen.
Även om frekvensen verkar vara korrekt har vissa grafikkort en alltför snäv synkpuls för
att den ska synkronisera bildskärmen korrekt.
• Justera datorns uppdateringsfrekvens (den vertikala frekvensen) tills du får bästa möjliga
bild.
Bilden är suddig • Justera ljusstyrkan och kontrasten (sida 89).
• Avmagnetisera skärmen* (sida 93).
• Bilden kan i vissa fall bli suddig när ELIMINERA MOARE står på PÅ. Minska
moaréundertryckningen eller ställ ELIMINERA MOARE på AV (sida 91).
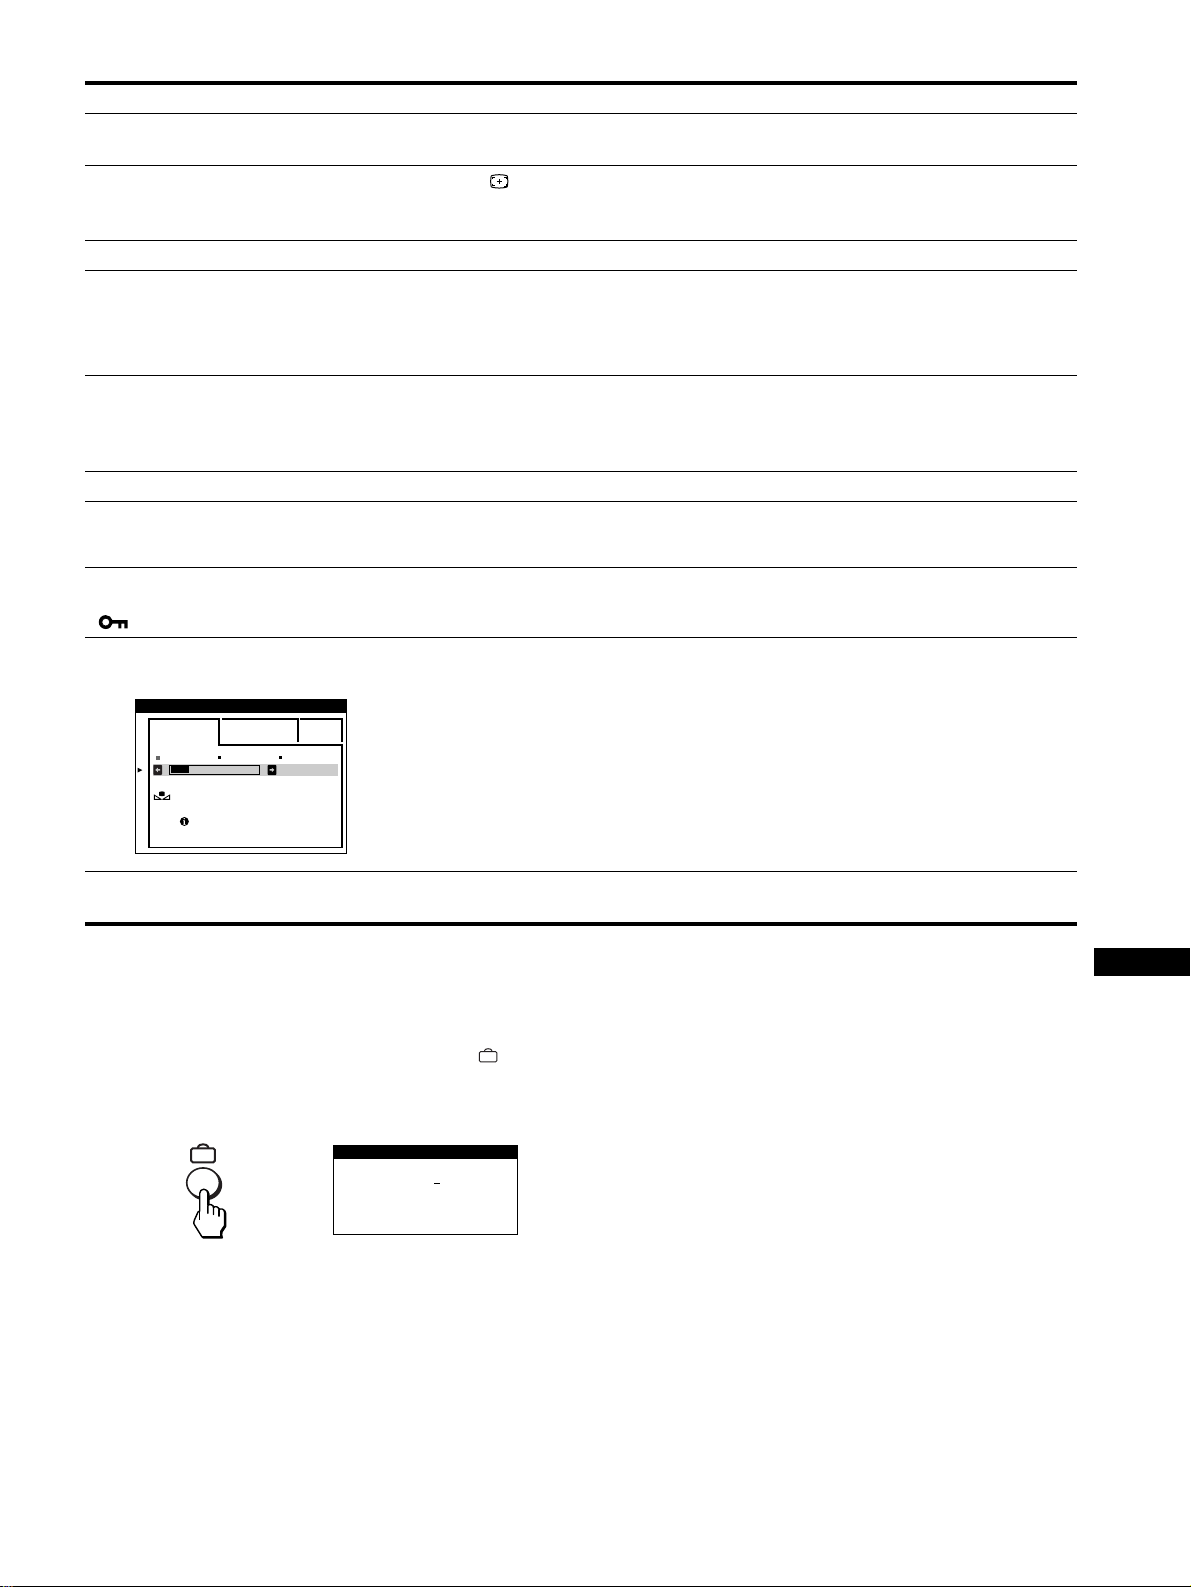
97
SE
* Om en andra avmagnetiseringscykel behövs bör du först vänta 20 minuter; då får du bästa resultatet. Du kanske här ett brummande ljud, men det helt
normalt.
Visa den här skärmens namn, serienummer och
tillverkningsdatum.
Medan skärmen tar emot en videosignal trycker du på
knappen och håller den nedtryckt under mer än fem sekunder. Då
visas skärmens informationsruta.
Om du inte lyckas lösa problemet kontaktar du din
serviceverkstad och ger dem följande information.
• Modellbeteckning: GDM-5410
• Serienummer
• Namn och specifikationer för dator och grafikkort.
Bilden uppvisar skuggor • Undvik att använda förlängda videokablar och/eller videoswitchboxar.
• Kontrollera att alla kontakter sitter stadigt i sina anslutningar.
Bilden är inte centrerad eller har
fel storlek
• Tryck på knappen (sida 87).
• Justera storlek (sida 90) eller centrering (sida 90). Tänk på att vissa videolägen inte fyller
skärmen ända ut i kanterna.
Bildens kanter är krökta • Justera geometrin (sida 90).
Ett vågformat elliptiskt mönster
(moaré) syns
• Ställ ELIMINERA MOARE på PÅ och justera graden av moaréundertryckning tills
moaréeffekten minimerats (sida 91).
xProblem orsakade av den anslutna datorn eller annan utrustning
• Ändra skrivbordsmönstret.
Färgen är inte likformig • Avmagnetisera skärmen* (sida 93). Om du placerar utrustning som genererar magnetiska
fält, t.ex. högtalare, nära skärmen eller om du ändrar skärmriktingen, kan det hända att
färgerna förlorar sin likformighet.
• Justera färgavvikelserna i hörnen (landing) (sida 91).
Vitt ser inte ut som vitt • Justera färgtemperaturen (sida 92).
Bokstäver och linjer visas
omgivna av röda eller blå
skuggningar
• Justera konvergensen (sida 91).
Knapparna på skärmen fungerar
inte
( visas på skärmen)
• Om kontrollåset står på PÅ ställer du det på AV (sida 93).
FÄRGRESET-funktionen fungerar
inte
• Innan du använder den här funktionen måste skärmen vara i normalläge (den gröna
indikatorn lyser) under minst 30 minuter. För mer information om hur du använder
FÄRGRESET-funktionen, se sidan 93.
• Justera datorns inställningar för energisparläget så att skärmen står kvar i normalläget
under mer än 30 minuter.
• Skärmen förlorar gradvis sin möjlighet att utföra den här funktionen beroende på
bildrörets naturliga åldrande.
Ett brum hörs direkt efter det att
du slagit på strömmen
• Det du hör är ljudet från automatiska avmagnetiseringen. När skärmen slås på
avmagnetiseras skärmen automatiskt under 2 sekunder.
Symptom Kontrollera dessa alternativ
ENKEL EXPERT s BGR
5000K 6500K 930 K0
50 K00
FÄRGRESET
TILLGÅNG
EFTER UPPVÄRMN
FÄRG
SER NO
:
1234567
MODEL
:
GDM 5410
MANUFACTURED
: 1999-52
INFORMATION
Exempel
b
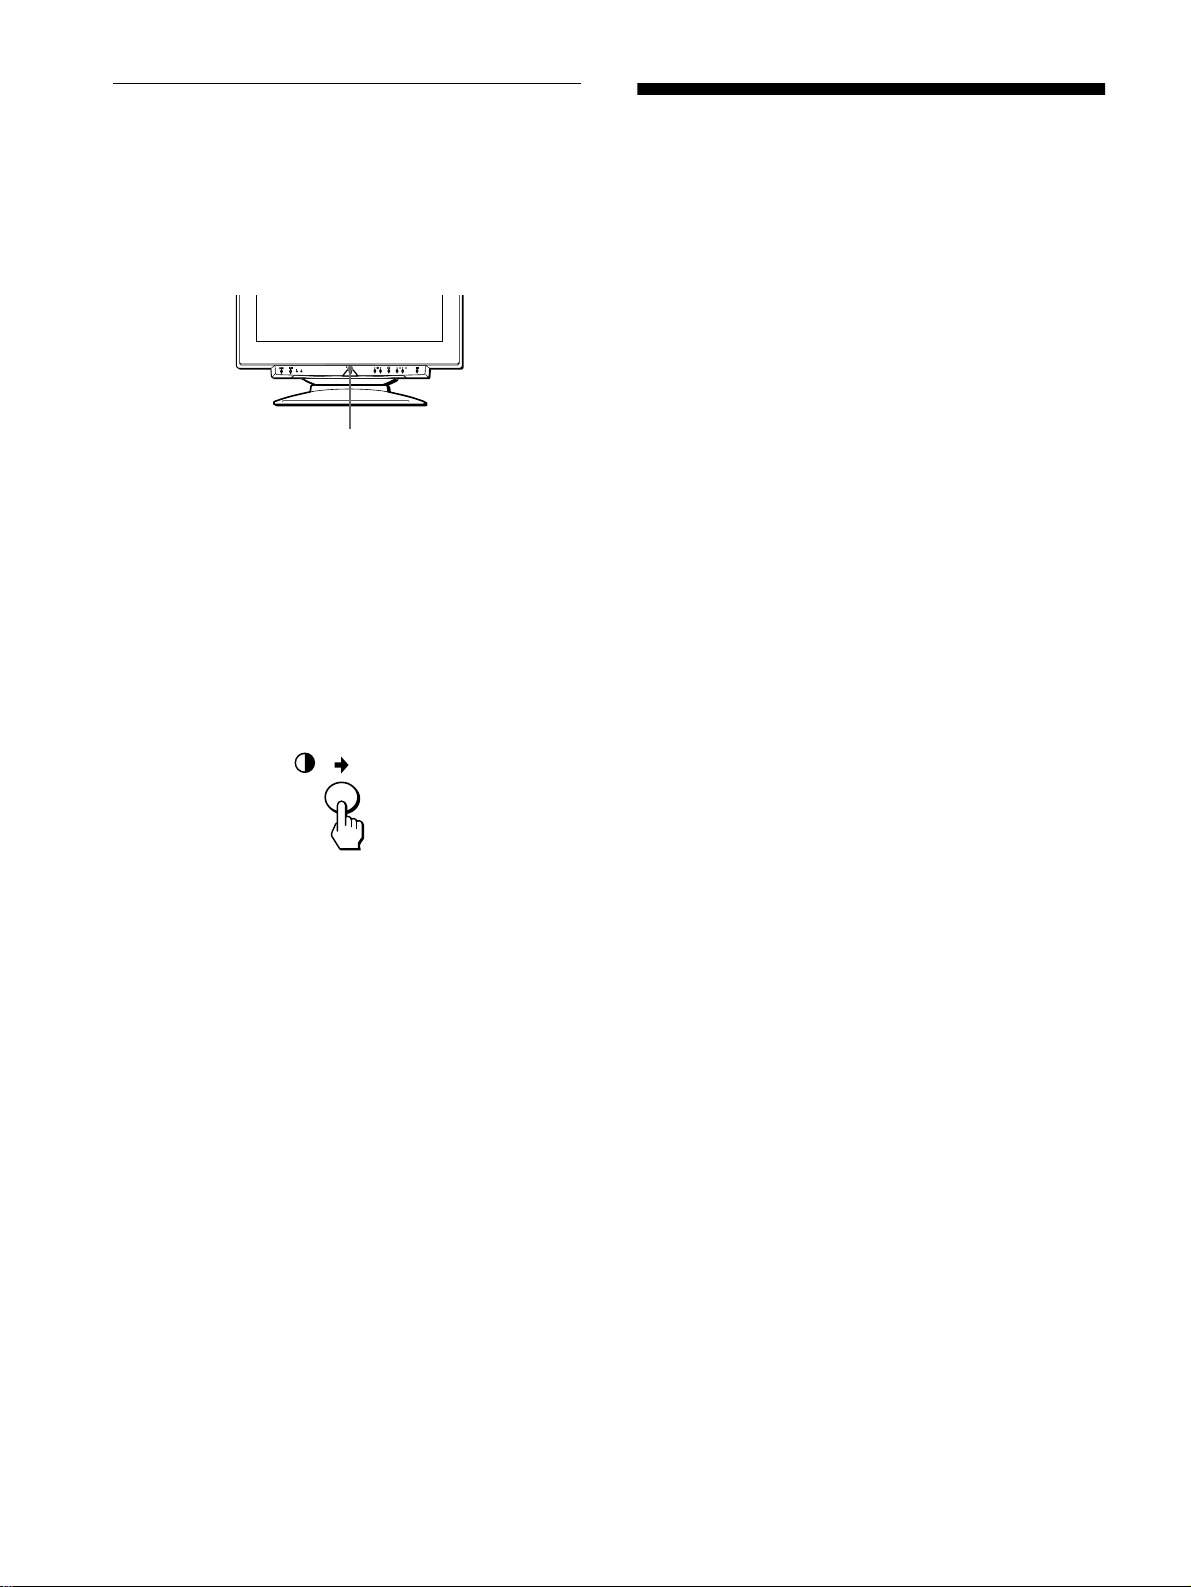
98
Självdiagnosfunktion
Den här skärmen är utrustad med en självdiagnosfunktion. Om du
har problem med skärmen eller datorn (datorerna) slocknar
skärmen och 1 (ström) indikatorn lyser antingen grönt eller
blinkar rödbrun. Om 1 (ström) indikatorn lyser rödbrun indikerar
det att datorn intagit energisparläge. Tryck på en valfri tangent på
tangentbordet.
Om
1
(ström) indikatorn lyser grönt
1
Koppla bort kontakterna från video input 1- och 2-
anslutningarna, eller stäng av den anslutna datorn
(datorerna).
2
Tryck på 1
11
1 (ström) knappen två gånger för att först
slå av monitorn och sedan på den igen.
3
Tryck på , knappen under 2 sekunder innan
skärmen går in i energisparläge.
Om alla fyra färgfälten (vitt, rött, grönt och blått) visas fungerar
skärmen som den ska. Anslut i så fall videokablarna igen och
kontrollera datorns (datorernas) status.
Om färgfälten inte visas finns det risk för att det är något fel på
bildskärmen. Kontakta service och informera om bildskärmens
tillstånd.
Om
1
(ström) indikatorn blinkar rödbrun
Tryck på 1 (power) knappen två gånger för att först slå
av bildskärmen och sedan slå på den igen.
Om 1 (ström) indikatorn lyser grönt betyder det att skärmen
fungerar som den ska.
Om 1 (ström) indikatorn fortfarande blinkar finns risk för att det
är något fel på skärmen. Räkna hur många sekunder det är mellan
1 (ström) indikatorns rödbrun-blinkningar och informera
serviceverkstaden om bildskärmens tillstånd. Se till att du har
information om skärmens modellbeteckning serienummer
tillgänglig, likaså information om dator och grafikkort (märken
och modeller).
Specifikationer
Bildrör (CRT) 0,24 mm öppning i hålgallret
21 tum uppmätt diagonalt
90-graders avböjning
FD Trinitron
Bildrutans storlek Ca. 403,8
×
302,2 mm (b/h)
19,8" bildyta
Rekommenderad upplösning
horisontellt: 1280 punkter
vertikalt: 1024 linjer
Standardbildyta Ca. 388
×
291 mm (b/h)
eller
Ca. 364
×
291 mm (b/h)
Avböjningsfrekvens* horisontellt: 30 till 121 kHz
vertikalt: 48 till 160 Hz
Nätspänning/strömstyrka 100 till 240 V, 50 – 60 Hz, 2,0 – 1,0 A
Strömförbrukning Ca. 145 W
Mått
Ca. 501
×
498
×
498 mm (b/h/d)
Vikt Ca. 32 kg
Plug and Play DDC1/2B/2Bi, GTF**
* Rekommenderade horisontella och vertikala synkförhållanden
• Horisontell synkbreddeffekt ska vara större än 4,8% av den
totala horisontella tiden eller 0,8 µs (det största av dessa båda
värden).
• Horisontellt svepavstånd (blanking width) bör överstiga
2,3 µs.
• Vertikalt svepavstånd (blanking width) bör överstiga
450 µs.
** Om insignalen är GTF-kompatibel (Generalized Timing
Formula), kommer bildskärmens GTF-funktion att
automatiskt skapa en optimal bild för skärmen.
Rätt till ändringar av utförande och specifikationer förbehålles.
1
(ström) indikator
99
RF
JP
• VESA
と
DDC
は、
Video
Electronics Standard Association
の商標です。
•
この取扱説明書に表記されている上
記以外の製品名は、それぞれの会社
の商標または登録商標です。
•
この取扱説明書では、「」と「」につ
いては一部表記を省略しています。
目次
安全のために .............................................................................
100
使用上のご注意 .........................................................................
104
各部の名称とはたらき...............................................................
105
接続と設定.................................................................................
106
手順
1
:リアカバーをはずす.......................................................
106
手順
2
:コンピューターにつなぐ................................................
106
手順
3
:電源コードをつなぐ.......................................................
106
手順
4
:リアカバーを取り付ける................................................
106
手順
5
:電源を入れる..................................................................
106
メニュー言語を変える(
LANGUAGE
)....................................
107
入力を切り換える......................................................................
107
画像の位置と大きさを自動的に合わせる..................................
107
調整する ....................................................................................
108
メニュー操作のしかた...............................................................
108
明るさとコントラストを調整する ............................................
109
画像の大きさを調整する(サイズ調整
/
位置調整)......................
110
画面の位置を調整する(サイズ調整
/
位置調整).........................
110
画像を拡大
/
縮小する(ズーム)...................................................
110
画像の傾きや歪みを調整する (画歪調整)..............................
110
コンバージェンスを調整する(コンバージェンス)...................
111
画質を調整する(画調整)...........................................................
111
色温度を調整する(色温度調整)................................................
112
その他の調整をする(オプション)............................................
113
お買い上げ時の設定に戻す .......................................................
114
機能解説 ....................................................................................
114
省電力(パワーセービング)機能 ................................................
114
故障かな?と思ったら...............................................................
115
画面に細い横線が出たら(ダンパーワイヤー)..........................
115
表示メッセージについて ...........................................................
115
本機の症状と対処のしかた .......................................................
116
自己診断表示機能......................................................................
118
主な仕様 ....................................................................................
118
Appendix
.......................................................................................
i
TCO’99 Eco-document
..............................................................
i
100
安全のための注意事項を守る
この取扱説明書の注意事項をよくお読みください。
故障したら使わない
すぐにお買い上げ店に修理をご依頼ください。
万一、異常が起きたら
モニターは正しく使用すれば事故がおきないように、安全には十
分配慮して設計されています。しかし、内部に約
3
万ボルトの高
い電圧を使用しているので、まちがった使いかたをすると、火災
などにより死亡など人身事故になることがあり危険です。事故を
防ぐために次のことを必ずお守りください。
・煙が出たら
・変なにおいや音がしたら
・内部に水などが入ったら
・内部に異物が入ったら
・ディスプレイを落とした
り、キャビネットを破損
したときは
b
1電源を切る
2電源プラグをコンセン
トから抜く
3お買い上げ店に修理を
依頼する
安全のために
警告表示の意味
取扱説明書および製品で
は、次のような表示をして
います。表示の内容をよく
理解してから本文をお読み
ください。
この表示の注意事項を守ら
ないと、火災・感電などに
より死亡や大けがなど人身
事故の原因となります。
この表示の注意事項を守ら
ないと、感電やその他の事
故によりけがをしたり周辺
の家財に損害を与えたりす
ることがあります。
注意を促す記号
行為を禁止する記号
行為を指示する記号
v
水場での
使用禁止
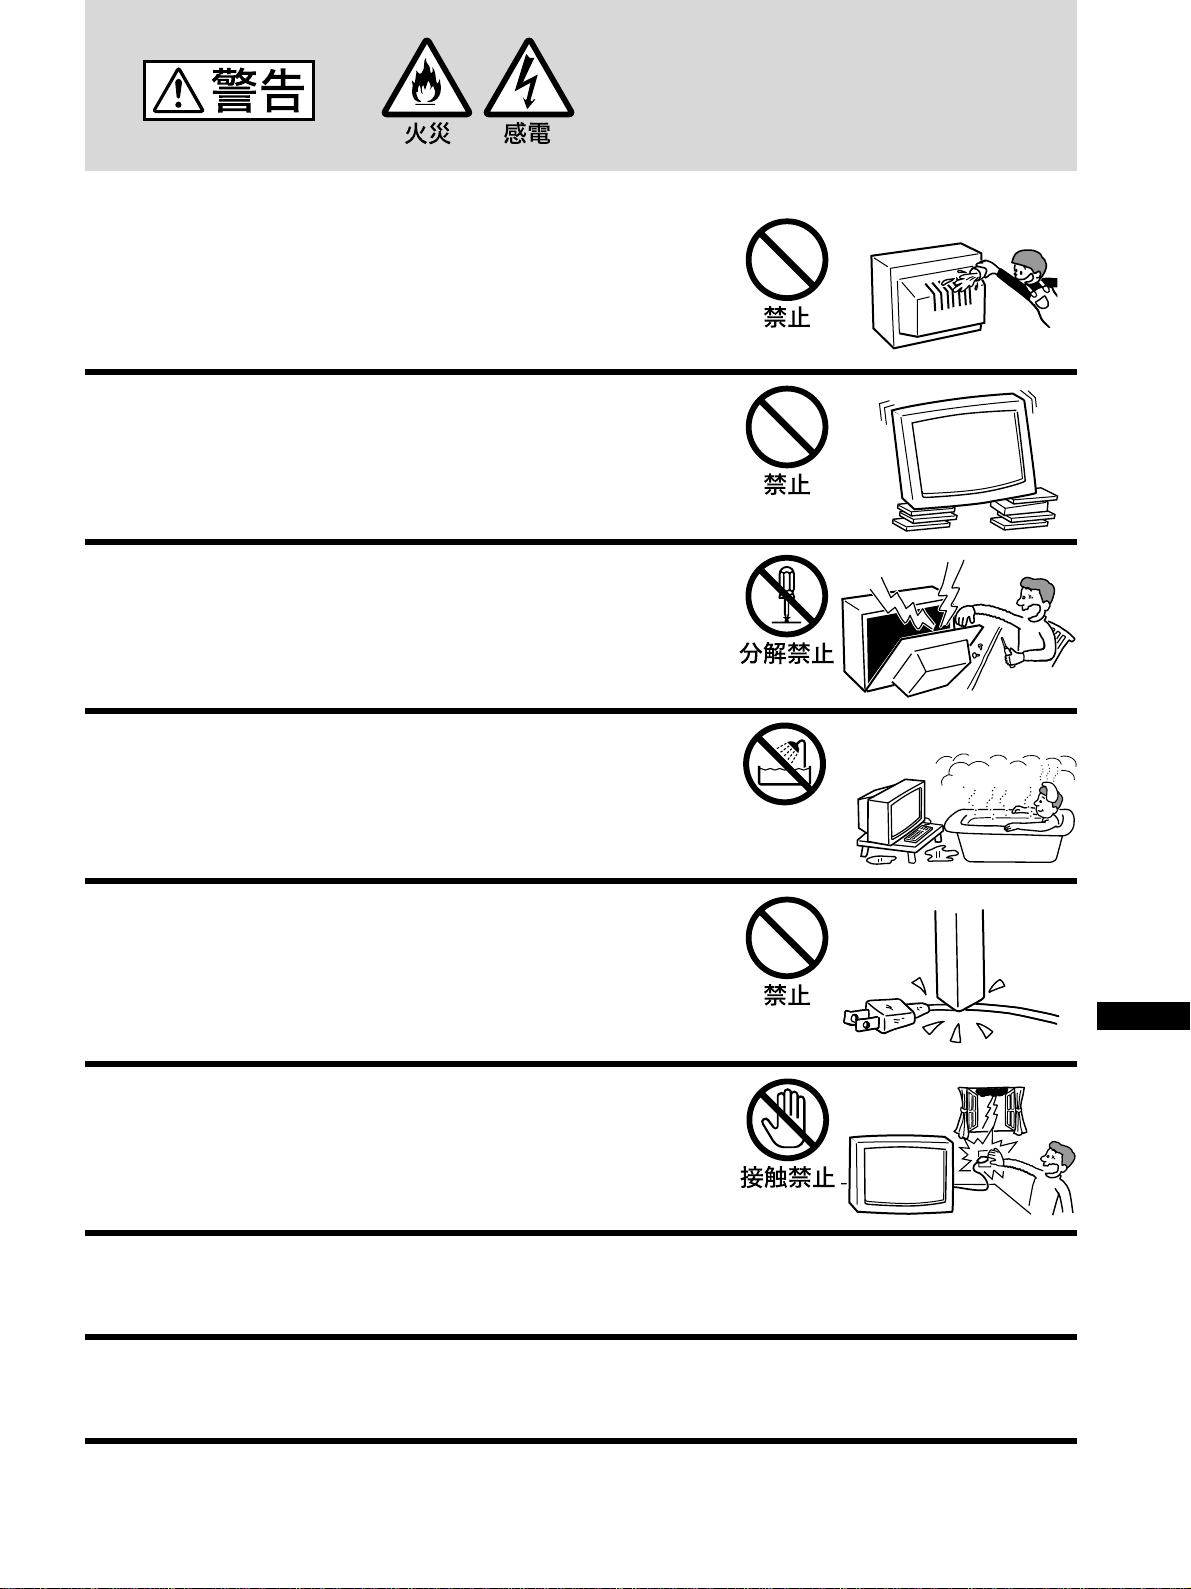
101
RF
JP
水場での
使用禁止
内部に水や異物を落とさない、入れない
水や異物が入ると火災の原因となります。万一、水や異物が
入った場合は、すぐに本体の電源スイッチを切り、電源プラグ
をコンセントから抜いて、お買い上げ店にご相談ください。
不安定な場所に置かない
ぐらついた台の上や傾いたところなどに置くと、モニターが落
ちたり倒れたりしてけがの要因となります。
平らで十分に強度があり、落下しない所に置いてください。
内部を開けない
内部には電圧の高い部分があり、裏ぶたを開けたり改造したり
すると、火災や感電の原因となります。
内部の点検や修理はお買い上げ店にご依頼ください。
水のある場所に置かない
水が入ったり、濡れたり、風呂場で使うと、火災や感電の原因
となります。雨天や降雪中の窓際でのご使用には特にご注意く
ださい。
電源コードを傷つけない
電源コードを傷つけると、火災や感電の原因となります。
万一電源コードが傷んだ場合は、お買い上げ店にご相談くださ
い。
雷が鳴りだしたら、電源プラグに触れない
感電の原因となります。
付属の電源コードを使用する
それ以外の電源コードを使用すると、火災や感電の原因となります。
ガス管にアース線をつながない
火災や爆発の原因となります。
下記の注意を守らないと
火災・感電により死亡や
大けがの原因となります。
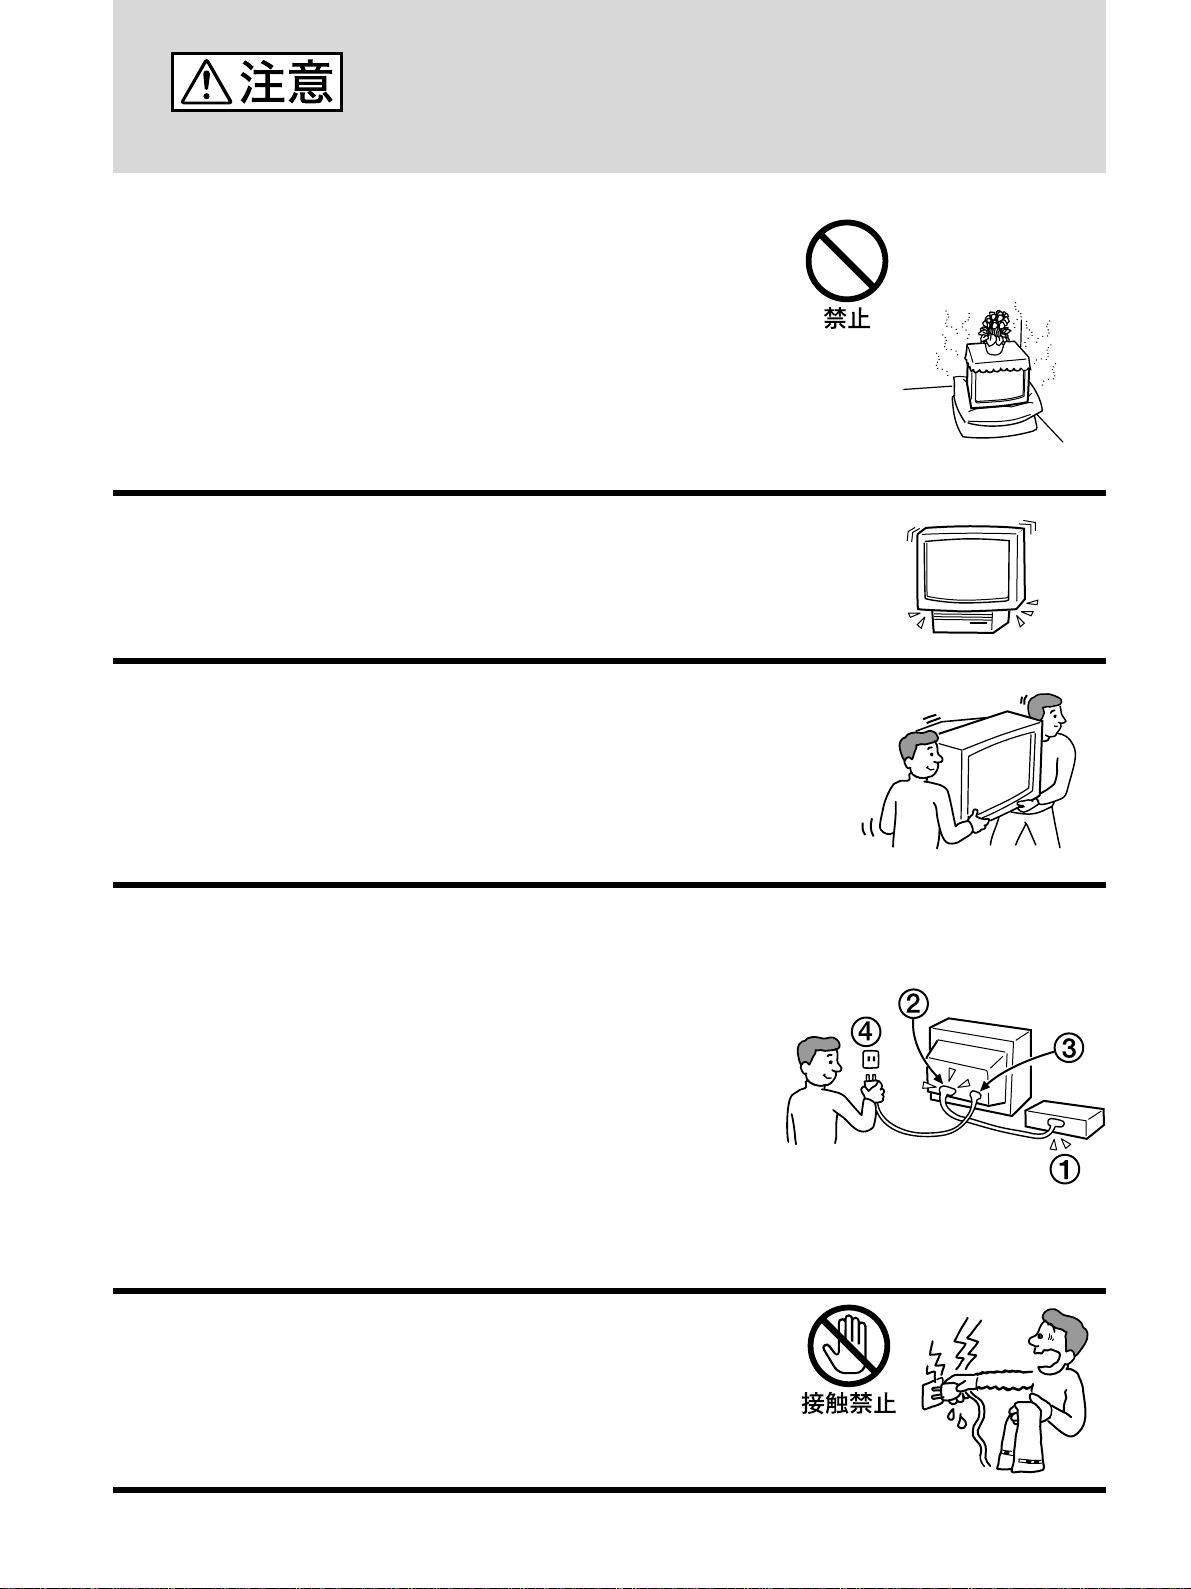
102
下記の注意を守らないとけがをしたり周辺の家財
に損害を与えたりすることがあります。
通風孔をふさがない
通風孔をふさぐと内部に熱がこもり、火災の原因となることが
あります。風通しをよくするために、壁から
10cm
以上離して
置いてください。
・ あお向けや横倒し、逆さまにしない。
・ 棚や押入の中に置かない。
・ じゅうたんや布団の上に置かない。
・ 布をかけない。
コンピューター機器の上にモニターをのせたいときは
必ずコンピューター機器の取扱説明書などで確認を
コンピューター機器の通風孔をふさいだり、モニターの重みで
その機器が変形したり破損したりすることがあります。
移動させるときは、電源プラグを抜く
電源プラグを差し込んだまま移動させると、電源コードが傷つき、火
災や感電の原因となることがあります。
モニターは重いので、開梱や持ち運びは
2
人以上で行ってください。
運ぶときは、衝撃を与えないようにしてください。特にブラウン管に
は気をつけてください。
電源プラグをつなぐのは、コンピューター機器との
接続が終わってから
電源プラグをコンセントに差し込んだまま接続すると、感電の原
因となることがあります。
また、コンピューター機器との接続が終わったあとは、モニター
の電源コードをモニター本体につないでから、壁のコンセントに
差してください。(右図の順参照)
電源コードを抜くときは壁側コンセントから抜く
壁側コンセントからではなく、ディスプレイ側から先に抜くと感
電することがあります。抜くときは右図の4321の順です。抜
くときは必ずコードでなくプラグをもって抜いてください。
濡れた手で電源プラグにさわらない
濡れた手で電源プラグの抜き差しをすると、感電の原因となる
ことがあります。
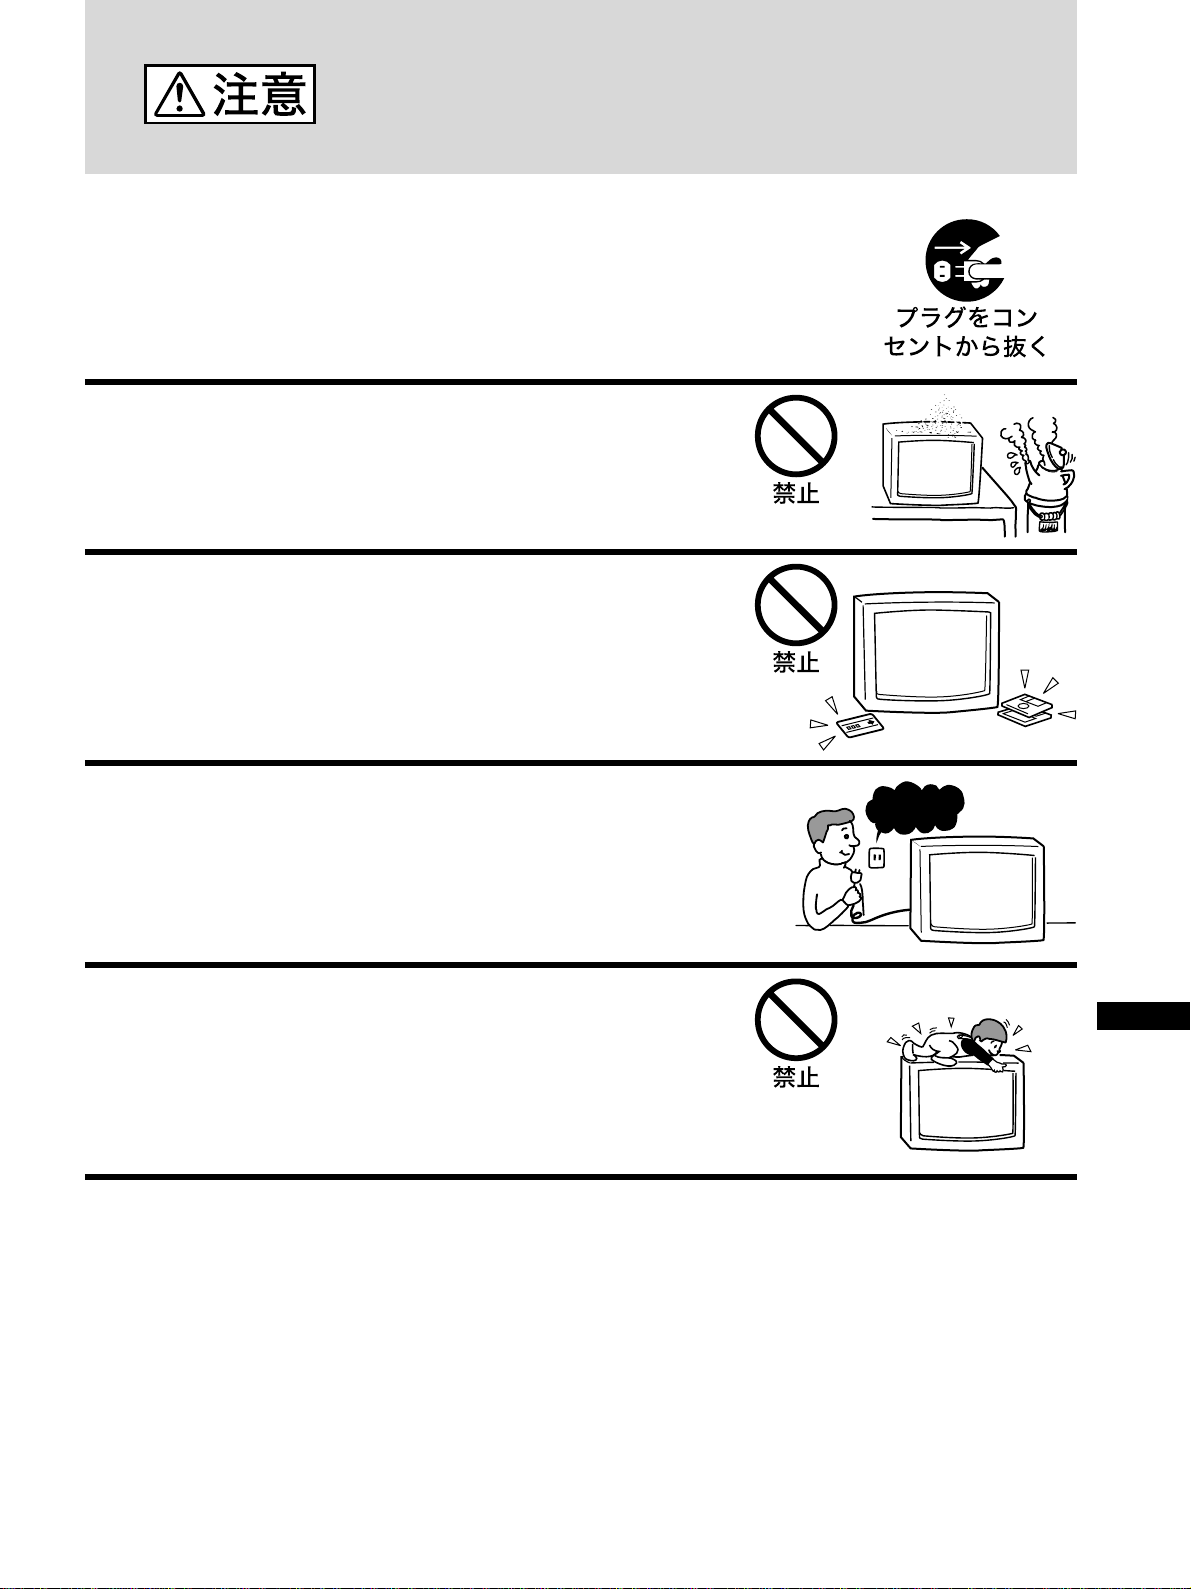
103
RF
JP
下記の注意を守らないとけがをしたり周辺の家財
に損害を与えたりすることがあります。
旅行などで長期間、ご使用にならないときは、電源
プラグを抜く
安全のため、必ず電源プラグをコンセントから抜いてください。
油煙、湯気、湿気、ほこりの多い場所には置かない
上記のような場所に置くと、火災や感電の原因となることがあ
ります。
モニターの近くにフロッピーディスク、クレジット
カードなど磁気記録のものを置かない
モニターから出る電磁界により内容が消えてしまうことがあり
ます。
本機は国内専用です
交流
100V
の電源電圧でお使いください。海外などで、異なる
電源電圧で使用すると、火災・感電の原因となることがありま
す。
モニターの上に乗らない、モニターの上に重いもの
を置かない
倒れたり、落ちたり、こわれたりして、けがの原因となること
があります。
交流100V
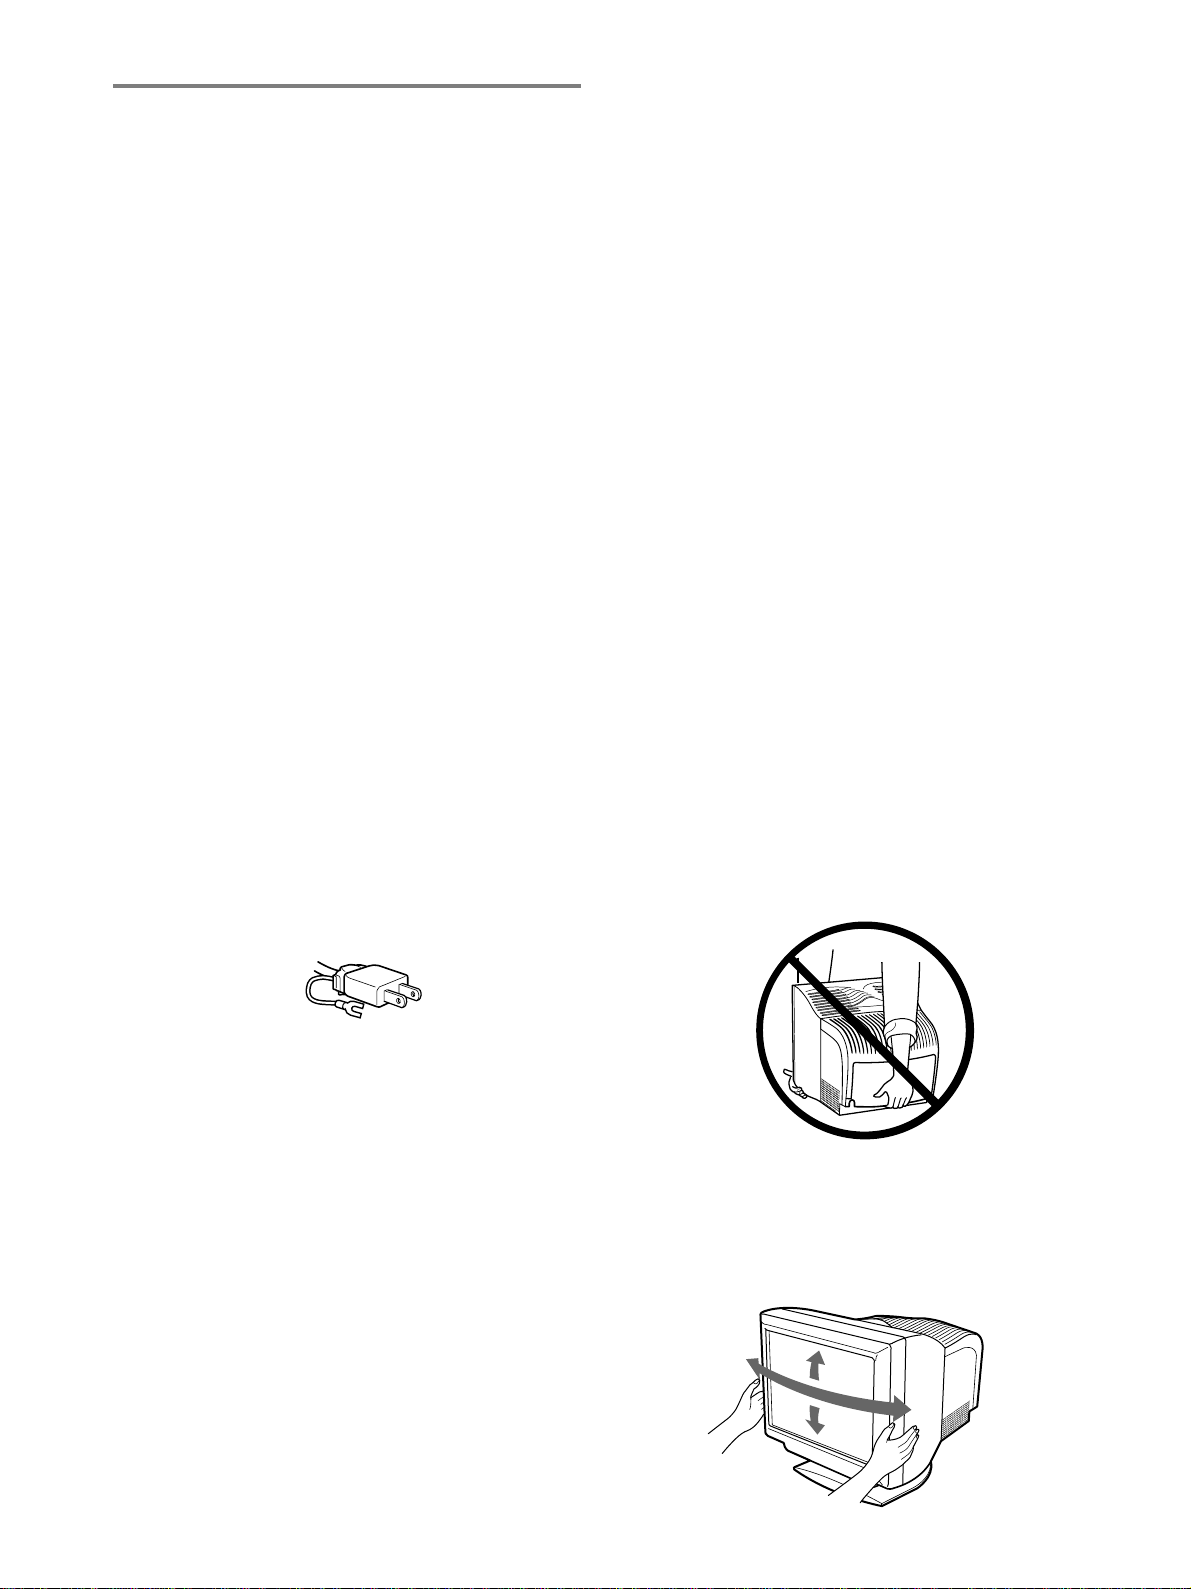
104
使用上のご注意
磁気に対するご注意
•
磁石、電気時計、スピーカー、磁石を使用した機器やお
もちゃ、磁気応用健康器具など、磁気をもっているもの
を近づけないでください。磁気の影響を受けて色が乱れ
たり、画面が揺れたりすることがあります。
•
モニターに外部スピーカーを接続する場合は、画面が影
響を受けるおそれがあります。近くにスピーカーを設置
する場合は防磁スピーカーをご使用ください。
見る場所について
•
暗すぎる部屋は目を疲れさせるのでよくありません。適
度の明るさの中でご使用ください。また、連続して長い
時間、画面を見ていることも目を疲れさせます。
•
設置状況や環境によって画像が揺れるときは、使用しな
いでください。視力の低下の原因となります。
ブラウン管について
•
ブラウン管の表面はほこりが付きやすいので、ときどき
柔らかい布でふいてください。また、表面は傷つきやす
いので、硬いものでこすったり、たたいたり、ものをぶ
つけたりしないでください。
•
ブラウン管の表面に手を触れると弱い電気を感じること
がありますが、これはブラウン管表面に静電気を帯びて
いるためで、人体に影響はありません。
電源についてのご注意
•
お使いになる電源に合った電源コードをお使いくださ
い。
•
電源コードを抜く場合は、電源スイッチを切ったあと
30
秒以上たってから抜いてください。管面に帯電した
静電気を放電させるためです。
•
本機は電源を入れると、約
2
秒間自動的に消磁します。
このとき、周辺に強い磁界が発生しますので、磁気テー
プや磁気ディスクなどは本機から離しておいてくださ
い。データが破損するおそれがあります。
設置上のご注意
次のような場所には置かないでください。
•
じゅうたんや毛布などの上やカーテンの近くなど、通風
口をふさぐおそれのある場所
•
直射日光のあたるところや熱器具の近くなど、温度の高
い場所
•
温度変化の激しい場所
•
振動の多い場所
•
不安定な台の上
•
高圧送電線や変圧器など、強い磁界を発生する機器の近
く
•
鉄板など帯電しやすい金属の上や近く
お手入れについてのご注意
•
管面は柔らかい布で軽くふきます。ガラスクリーナーを
使うときは、管面を傷める原因となる帯電防止剤などの
薬品が入っていないものをお使いください。
•
ボールペンやドライバーなど、先の尖ったもので管面に
触れたり、こすったりしないでください。
•
キャビネットなどの汚れは、中性洗剤溶液を少し含ませ
た柔らかい布などでふいてください。シンナー、ベンジ
ン、アルコールなどは表面を傷めますので、使わないで
ください。
搬送時のご注意
修理や引っ越しなどで本機を運ぶ場合は、お買い上げ時に
本機が入っていた箱と、クッション材を使ってください。
本機を持ち上げるときは、下図のようにリアカバーを持っ
て持ち上げないでください。リアカバーがはずれることが
あります。
ディスプレイの向きを変えるときのご注意
本機にはディスプレイスタンドがついているので、下図の
範囲で向きを変えられます。向きを変えるときは、下図の
ようにディスプレイ両側の下部を持ってください。
プラグ形状例
AC100V
用
90
゜
15
゜
90
゜
5
゜
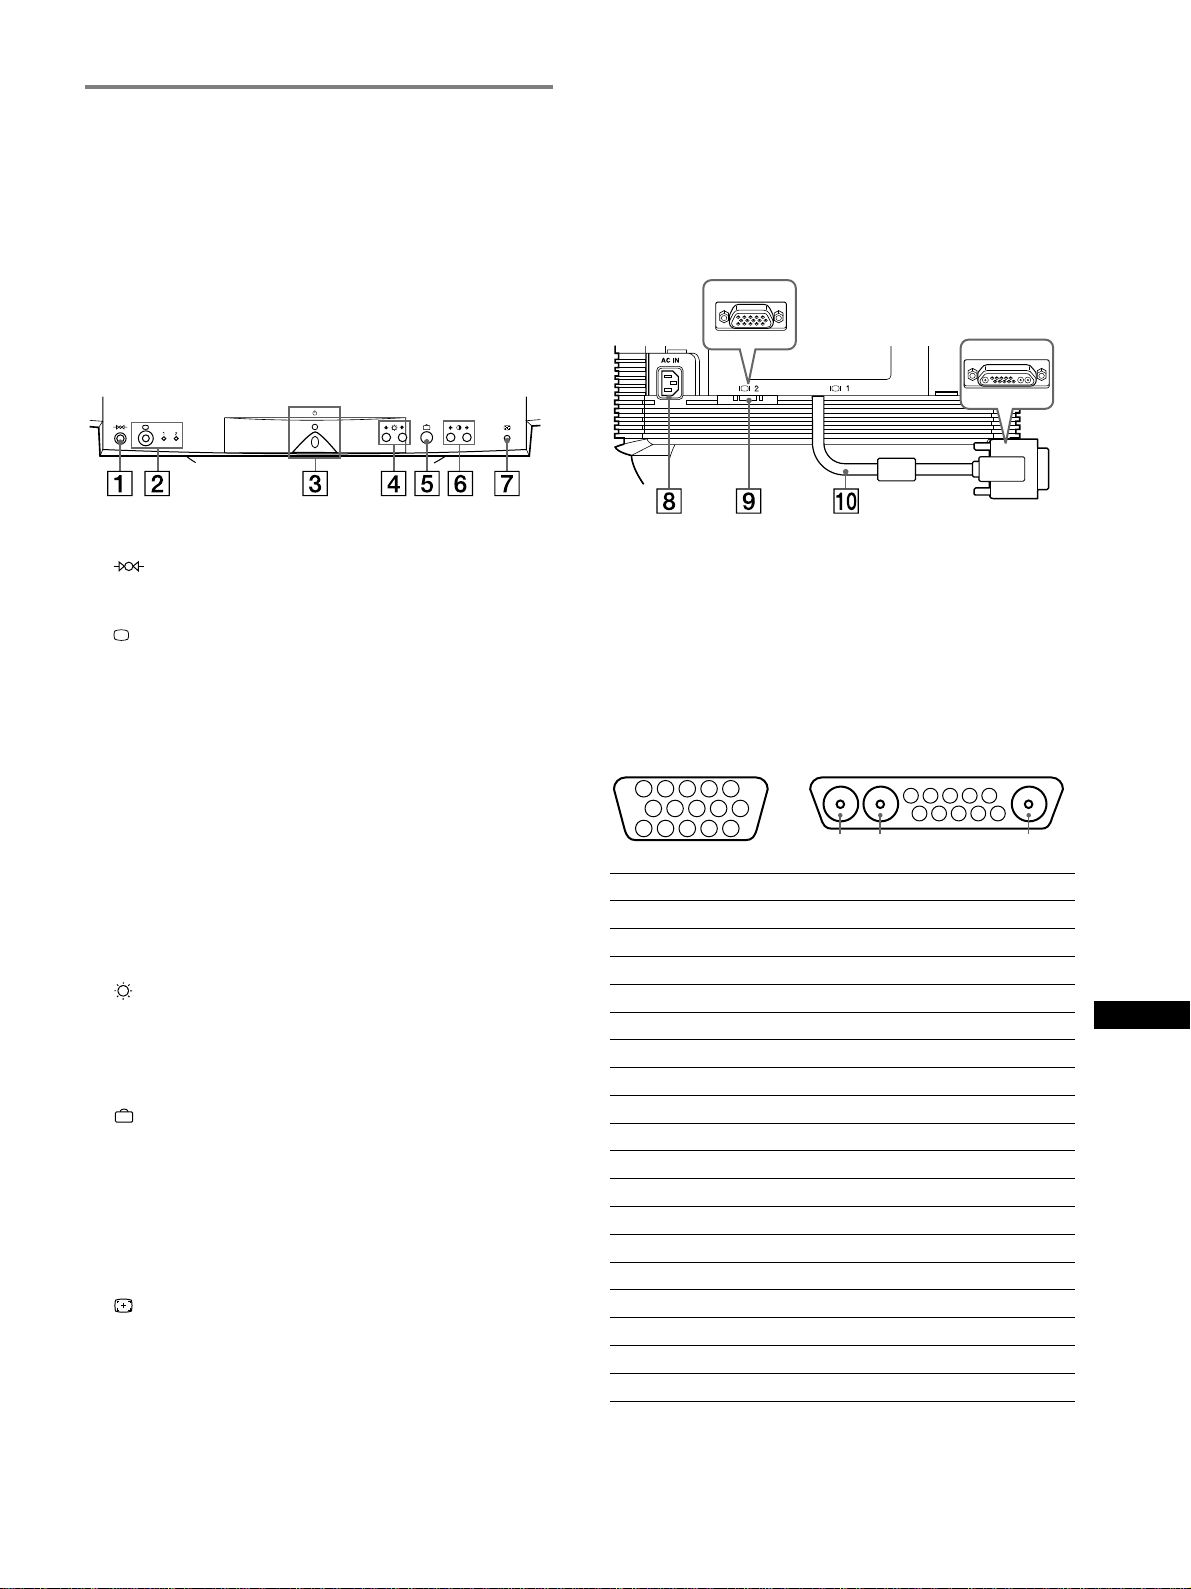
105
RF
JP
各部の名称とはたらき
使いかたについてのくわしい説明は( )内のページをご覧
ください。
前面
1
(リセット)ボタン(
114
ページ)
調整した設定を、お買い上げ時の設定に戻します。
2
(入力切り換え)ボタンと
1
(
13W3
)
/ 2
(
HD15
)
インジケーター(
107
ページ)
ビデオ入力端子(ビデオ入力端子
1
:
13W3
またはビデ
オ入力端子
2
:
HD15
)からの入力を選びます。ボタン
を押すたびに入力が切り換わり、インジケーターが点灯
します。
3 1(電源)スイッチとインジケーター(
106
、
114
、
118
ページ)
電源を入
/
切します。
電源が入るとインジケーターが緑色に点灯します。
省電力状態のときは、緑色とオレンジ色が交互に点滅す
るか、オレンジ色に点灯します。
4
(ブライトネス)m
/
Mボタン(
109
ページ)
画像の明るさを調整するときに押します。
また、m
/
Mボタンとして、他の項目を選ぶときに使いま
す。
5
(メニュー)ボタン(
109
ページ)
MENU
画面を表示するときに押します。
6 6
(コントラスト)<
/
,ボタン(
109
ページ)
コントラストを調整するときに押します。
また、<
/
,ボタンとして、他の項目を調整するときに
使います。
7
(オートサイズセンター)ボタン
(107
ページ
)
画像の位置と大きさを自動的に画面に合わせます。
8 電源入力端子(
106
ページ)
電源コードをつなぎます。
後面(リアカバーをはずした状態)
9 ビデオ入力端子
2
(
HD15
)(
106
ページ)
RGB
の映像信号(
0.700 Vp-p
、正極性)と同期信号を
入力します。
0 ビデオ入力端子
1
(
13W3
)(
106
ページ)
RGB
の映像信号(
0.700 Vp-p
、正極性)と同期信号を
入力します。
番号 9
信号名 0
信号名
A1 ––– R
(赤)
A2 ––– G
(緑)(
Sync on Green)
A3 ––– B
(青)
1R
(赤) クロックライン(
SCL
)
*
2
G
(緑)(
Sync on Green)
DDC + 5V *
3B
(青)
–––
4ID
(アース)
DDC
アース
*
5 DDC
アース
*C
同期
**
6R
(赤)アース データライン(
SDA
)
*
7G
(緑)アース 垂直同期
8B
(青)アース
ID
(
100
Ω)
9 DDC + 5V * ID
(
100
Ω)
10
アース アース
11 ID
(アース)
–––
12
データライン(
SDA
)
* –––
13
水平同期
–––
14
垂直同期
–––
15
クロックライン(
SCL
)
* –––
* VESA
による
Display Data Channel
(
DDC
)規格
**7
番ピンが垂直同期用に使用されている場合、水平同期用として
使用されます。
9
HD15
0
13W3
5 4 3 2
1
678910
11
A3
12131415
5 4 3 2
1
678910
A2 A1
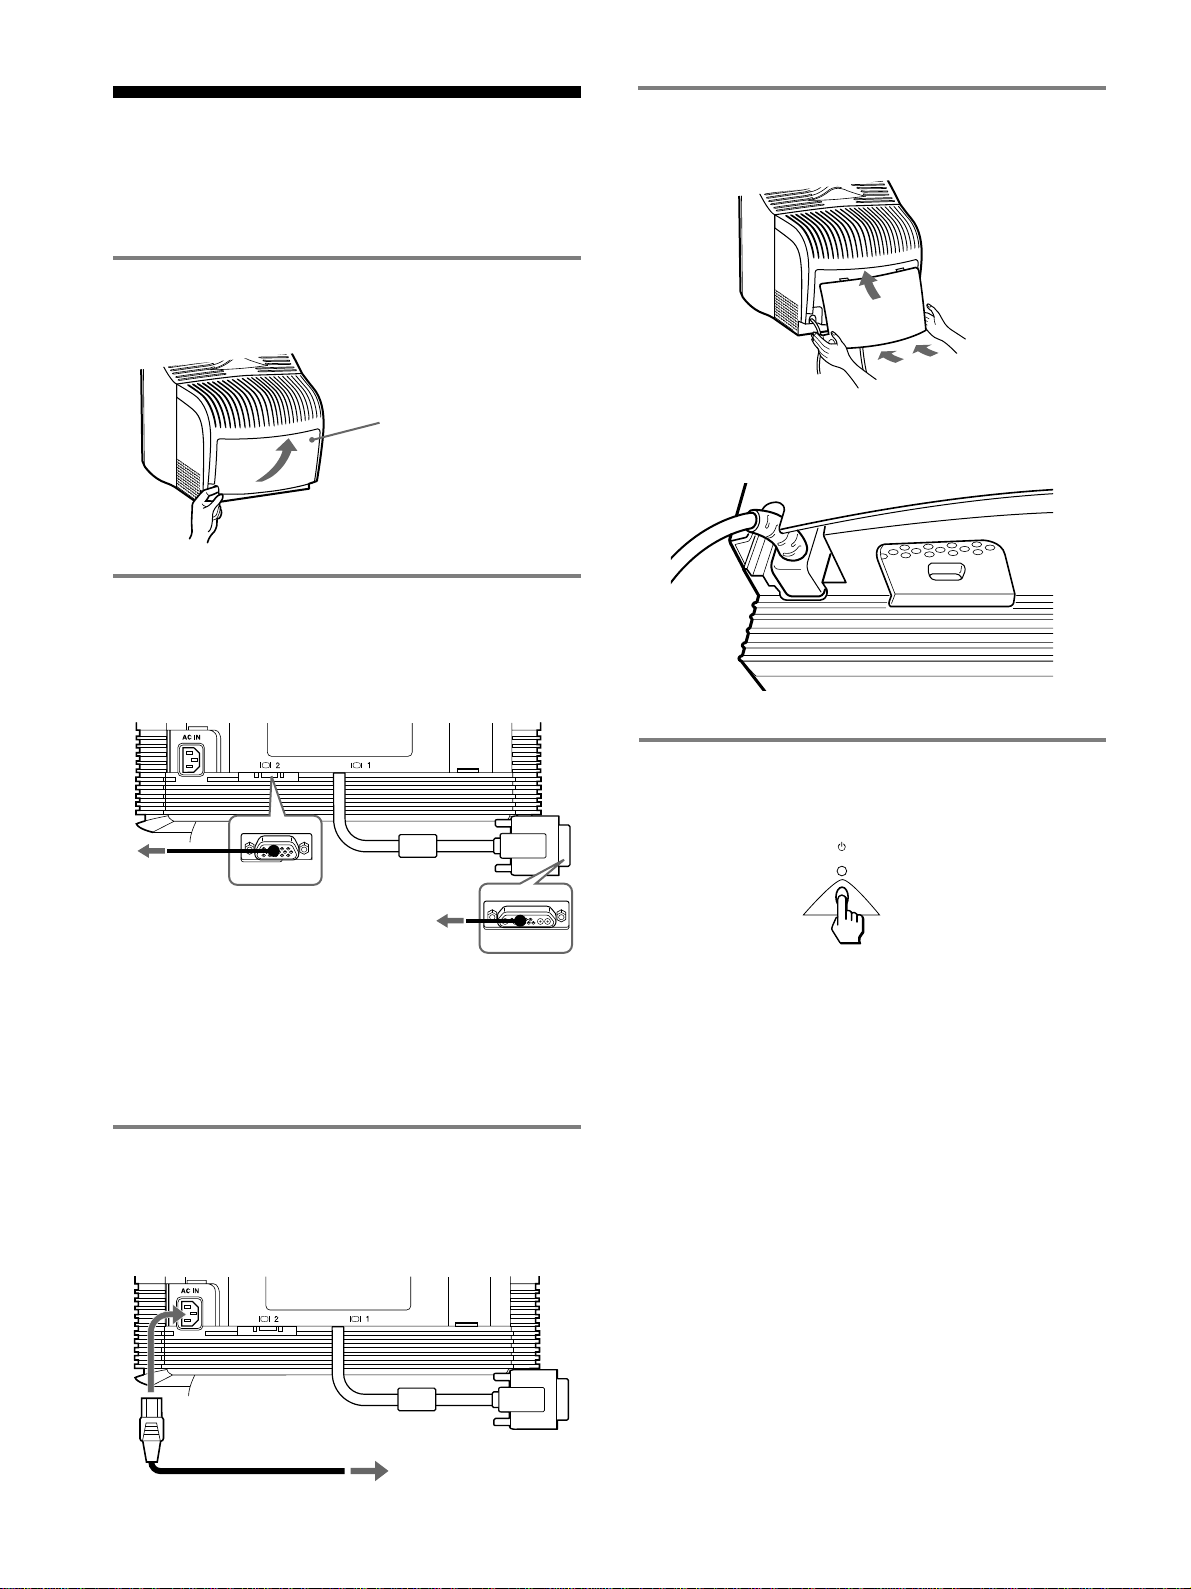
106
電源コード
電源コンセントへ
接続と設定
本機は、水平周波数
30
〜
121kHz
のコンピューターに接続
できます。くわしくは、お買い上げ店にご相談ください。
手順
1
:リアカバーをはずす
接続を行う前に後ろにあるカバーをはずしてください。
手順
2
:コンピューターにつなぐ
本機とコンピューターの電源を切った状態で、ビデオ信号
ケーブルを本機のビデオ入力端子とコンピューターのビデ
オ出力につないでください。
ご注意
•
ビデオ信号ケーブルのピンに、直接手を触れないでください。
•
ビデオ信号ケーブルをつなぐときは、端子の向きをご確認くださ
い。向きが違うと、ビデオ信号ケーブルのピンが曲がってしまう
ことがあります。
手順
3
:電源コードをつなぐ
本機とコンピューターの電源を切った状態でつないでくだ
さい。お使いになる電源に合った電源コードを本機につな
いでから、電源コンセントへ差し込みます。
13W3
ビデオ出力のあ
るコンピューターへ
HD15
ビデオ出力
のあるコンピュー
ターへ
下のすき間に手を入れ
て手前に引きます。
リアカバー
手順
5
:電源を入れる
本機の電源を入れてから、コンピューターの電源を入れま
す。
これで、本機を使用できる状態になりました。必要に応じ
て、次ページからの設定や調整などを行ってください。
電源を入れても画面に画像が出ないときは
•
正しく接続されているか確認する。
•
「
NO INPUT SIGNAL
」と表示されている場合、画面
の指示にしたがってください(
115
ページ)。
•
「
OUT OF SCAN RANGE
」と表示されている場合、
本機をつなぐ前につないでいたディスプレイがあると
きは、それにつなぎ換えてみる。画像が出たら、コン
ピューターで水平周波数:
30
〜
121kHz
、垂直周波
数:
48
〜
160Hz
の範囲に設定する。
くわしくは、「本機の症状と対処のしかた」(
116
ページ)を
ご覧ください。
手順
4
:リアカバーを取り付ける
手順1ではずしたリアカバーを取り付けてください。
電源コードは、リアカバー左下の電源コード用の切り欠き
に合わせて出してください。
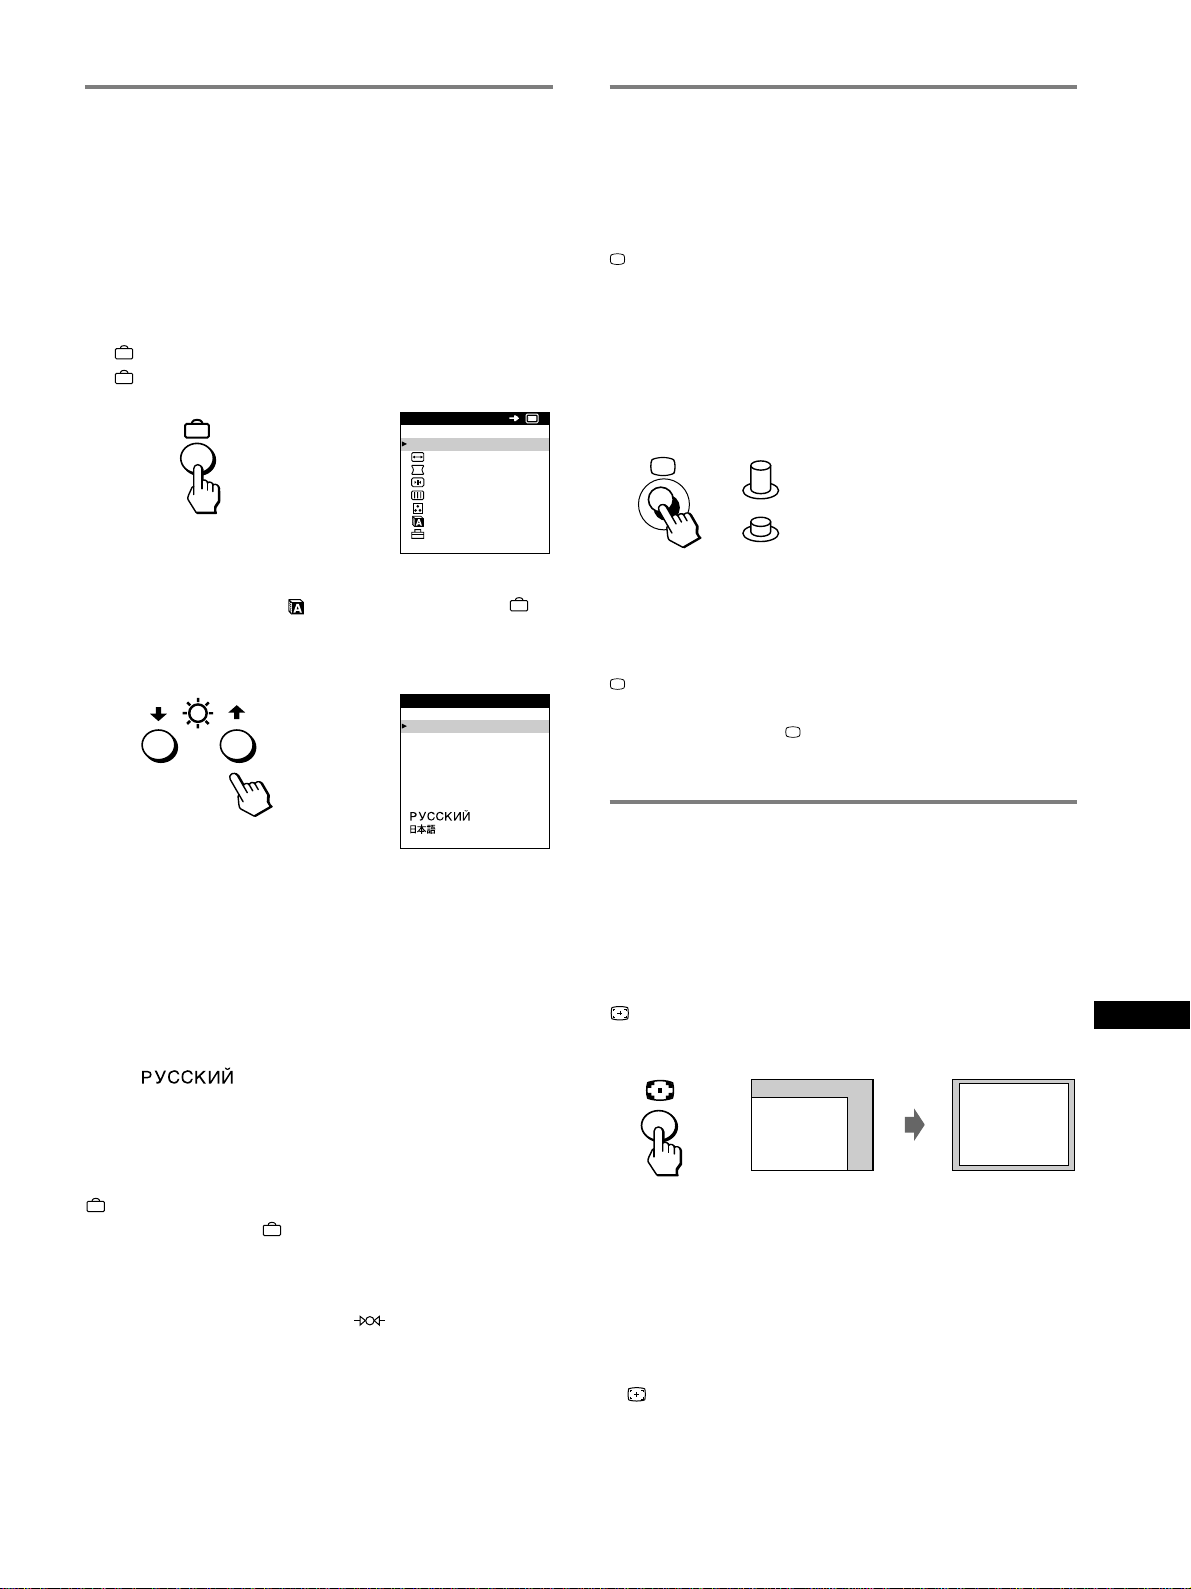
107
RF
JP
メニュー言語を変える
(
LANGUAGE
)
お買い上げ時は、メニューに表示する言語は英語になって
います。他に、フランス語、ドイツ語、スペイン語、イタ
リア語、オランダ語、スウェーデン語、ロシア語、日本語
に変えられます。
1
ボタンを押す。
ボタンの使いかたは、
109
ページをご覧ください。
2
m
/
Mボタンを押して「
LANGUAGE
」を選び、
ボ
タンを押す。
m
/
Mボタンの使いかたは、
109
ページをご覧ください。
3
m
/
Mボタンを押して言語を選ぶ。
•
ENGLISH:英語
•
FRANÇAIS:フランス語
•
DEUTSCH:ドイツ語
•
ESPAÑOL:スペイン語
•
ITALIANO:イタリア語
•
NEDERLANDS:オランダ語
•
SVENSKA:スウェーデン語
•
:ロシア語
•
日本語
メニューを消すには
ボタンを
1
回押すと、
MENU
画面に戻ります。もう
1
回押すと、
MENU
画面が消えます。
ボタンを押さなくても、選択後、約
30
秒たつと自動的に消えます。
英語に戻すには
LANGUAGE
画面が出ているときに
(リセット)ボタンを押
します。
LANGUAGE
MENU
OK
終了
サイズ調整
/
位置調整
画歪調整
コンバージェンス
画調整
色温度調整
オプション
,
ENGL ISH
FRANÇAIS
DEUTSCH
ESPAÑOL
ITALIANO
NEDERLANDS
SVENSKA
LANGUAGE
,
入力を切り換える
本機には
2
つのビデオ入力端子(
13W3
および
HD15
)があ
るので、同時に
2
台のコンピューターをつなぎ、切り換えて
使うことができます。
ボタンを押す。
押すたびに入力が切り換わり、「
1
」(ビデオ入力端子
1
:
13W3
)または「
2
」(ビデオ入力端子
2
:
HD15
)インジケー
ターが点灯します。
ボタンが押されていないときは
INPUT1
(
13W3
)が、ボ
タンが押されているときは
INPUT2
(
HD15
)が選ばれて
います。
現在選んでいる入力端子(「
INPUT1
」または「
INPUT2
」)
が、画面に数秒間表示されます。
ご注意
ボタンで切り換えた端子からの入力がないと、「
NO INPUT
SIGNAL
」と画面に表示されます。そのあと、本機は省電力状態に
なります。このときは、
ボタンで入力を選び直してください。
画像の位置と大きさを自動的に
合わせる
画像が画面のまん中に出なかったり小さいとき、自動的に
画面のまん中に出すことができます。
ボタンを押す。
画像が画面のまん中に出ます。
ご注意
•
この機能は、表示可能エリア全体に画像が表示される場合に正し
く動作します。画面の一部にしか画像が表示されない場合や、背
景が黒の場合には正しく動作しないことがあります。
•
画像の大きさの比率が
5:4
(解像度:
1280
×
1024
、
1600
×
1280
)のときは、画面いっぱいに広がりません。これは、
5:4
の
比率を信号どおりに表示しているためです。
•
ボタンを押したあと数秒間画像が動きますが、故障ではあり
ません。
INPUT 1
(
13W3
)
INPUT 2
(
HD15
)
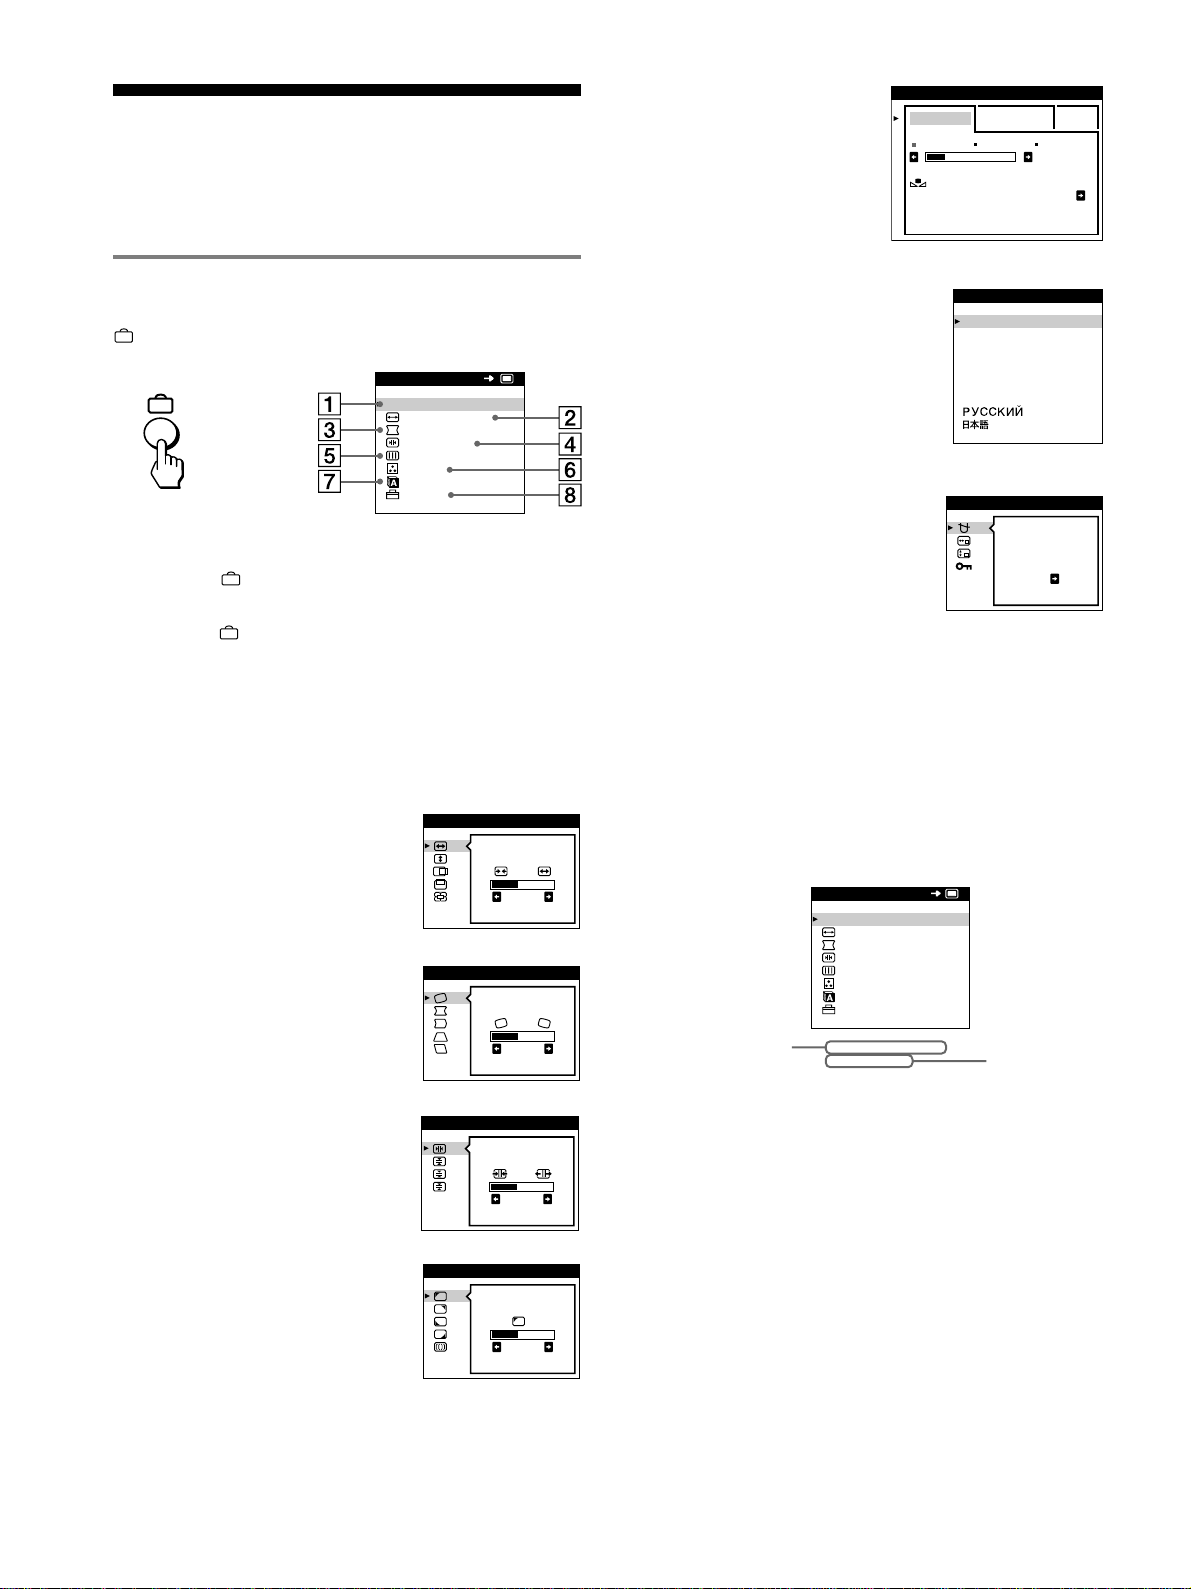
108
調整する
メニューを使って、いろいろな調整や設定ができます。
メニュー操作のしかた
ボタンを押して、
MENU
画面を出します。
m
/
Mボタンと
ボタンで1〜8を選ぶと、次のメニュー
が出ます。
m
/
Mボタンと
ボタンの使いかたは、次のページをご覧く
ださい。
1 終了
メニューを消します。
2 サイズ調整
/
位置調整
(
110
ページ)
画像の位置や大きさの調整
や、拡大、縮小をします。
3
画歪調整(
110
ページ)
画像の傾きや歪みを調整しま
す。
4
コンバージェンス(
111
ページ)
コンバージェンス(色ずれ)を
調整します。
5 画調整(
111
ページ)
以下の画質を調整します。
•
色むら
•
波模様や点状の模様
(モアレ)
6 色温度調整(
112
ページ)
色温度を調整します。画
面の色を、印刷時の色に
近づけたいときなどに使
います。
7
LANGUAGE
(
107
ページ)
メニューに表示する言語を選
びます。
8 オプション(
113
ページ)
以下のオプション項目を設定
します。
•
消磁
•
メニューの表示位置
•
調整に使うボタンのロック
(操作できないようにする)
■ 現在入力中の信号の表示
現在入力中の信号の水平
/
垂直周波数が
MENU
画面の下
に表示されます。また、本機に設定されている表示モー
ドの信号のときは、解像度も表示されます。
LANGUAGE
MENU
OK
終了
サイズ調整
/
位置調整
画歪調整
コンバージェンス
画調整
色温度調整
オプション
,
26
サイズ調整
/
位置調整
26
画歪調整
TOP
BOT
26
コンバージェンス
26
画調整
ランディング
EASY EXPERT s BGR
5000K 6500K 930 K0
50 K00
色温度調整
色温度補正
オン
ENGL ISH
FRANÇAIS
DEUTSCH
ESPAÑOL
ITALIANO
NEDERLANDS
SVENSKA
LANGUAGE
オプション
デガウス
オン
現在入力中の
信号の解像度
現在入力中の信号の
水平
/
垂直周波数
LANGUAGE
68.7kHz/ 85Hz
1024x 768
MENU
OK
終了
サイズ調整
/
位置調整
画歪調整
コンバージェンス
画調整
色温度調整
オプション
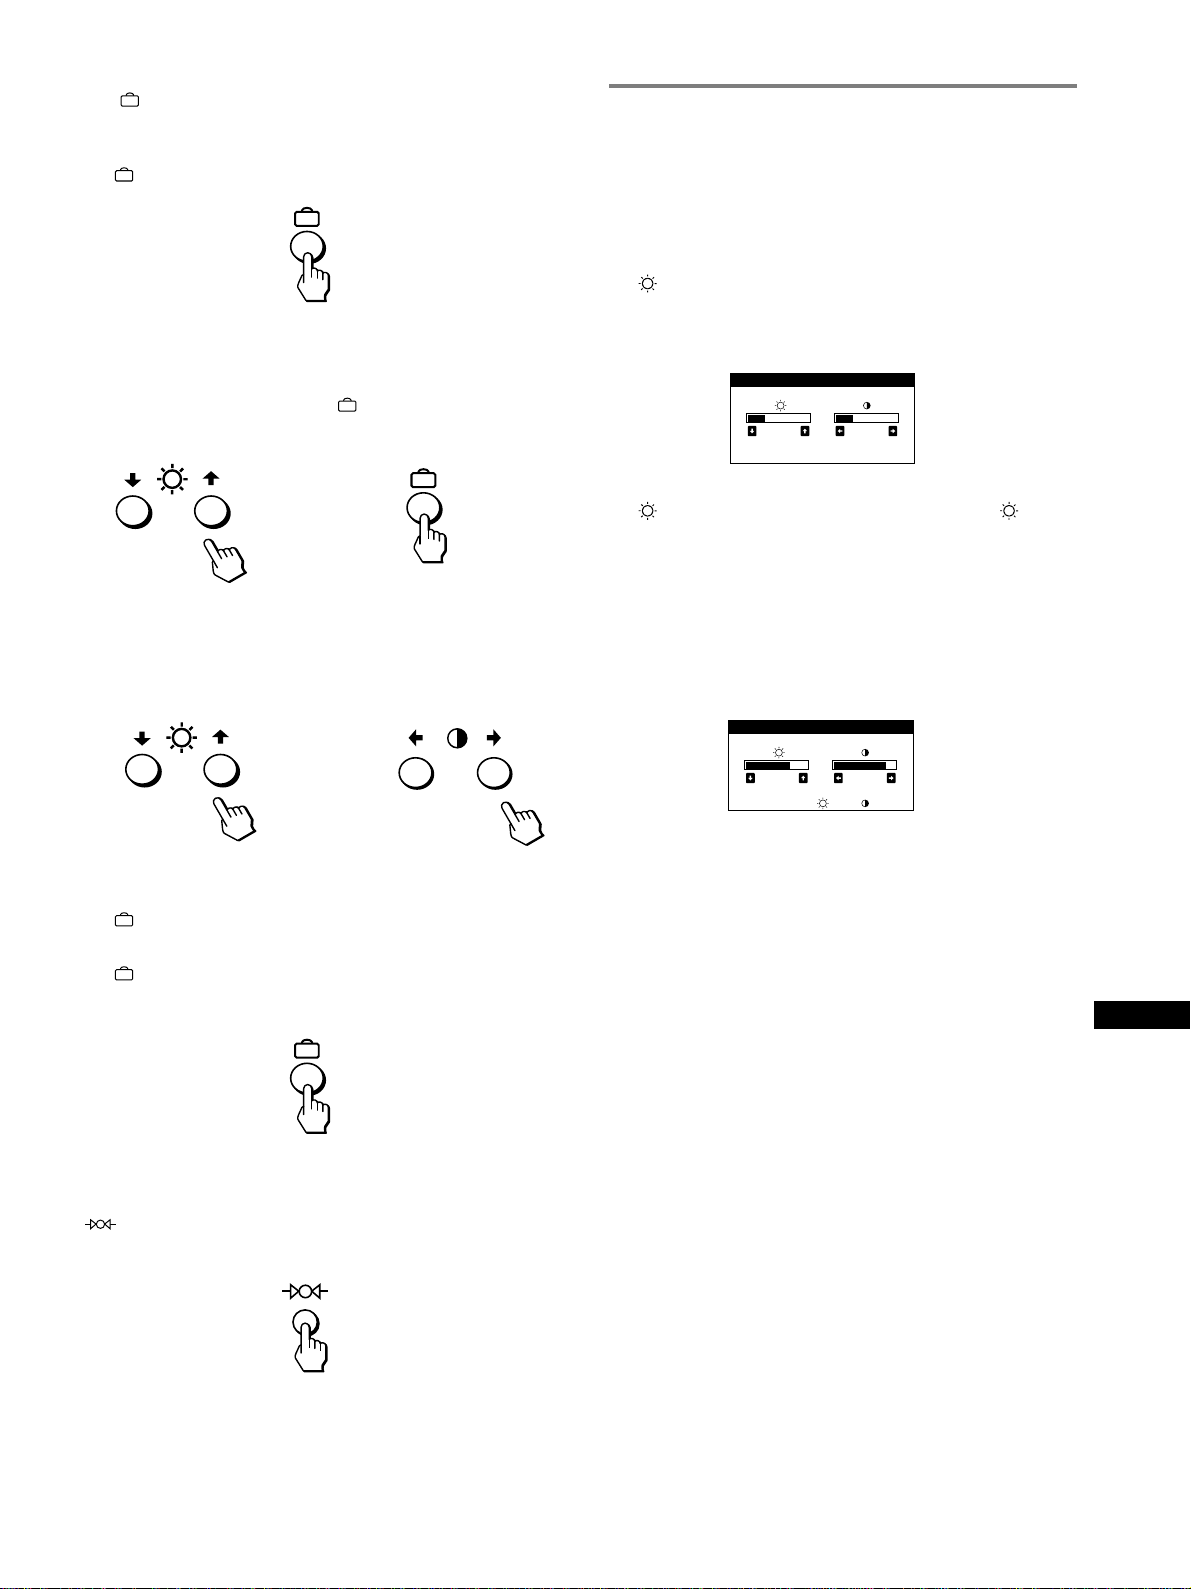
109
RF
JP
明るさとコントラストを調整する
MENU
画面(
110
ページ)とは別のブライトネス
/
コントラ
スト画面で調整します。
この調整は、現在選んでいる入力端子からの入力信号に対
して有効です。
1
(ブライトネス)m
/
Mボタンまたは6(コントラスト)
<
/
,ボタンを押す。
ブライトネス
/
コントラスト画面が出ます。
2
(ブライトネス)m
/
Mボタンを押して明るさ( )を、6
(コントラスト)<
/
,ボタンを押してコントラスト(6)
を調整する。
sRGB
モードをお使いのときは
色温度調整画面で
sRGB
モードに設定しているときは、下
記のブライトネス
/
コントラスト画面が出ます。
sRGB
モードについてのくわしい説明は、
112
ページの「色
温度を調整する(色温度調整)」をご覧ください。
調整画面は、約
3
秒後に自動的に消えます。
■
ボタンとm
/
Mボタン、<
/
,ボタンの使いかた
1 MENU
画面を出す
ボタンを押す。
2
調整したいメニューや項目を選ぶ
m
/
Mボタンを押して選び、
ボタンを押して決定す
る。
3
調整する。
m
/
Mボタンを押して選び、<
/
,ボタンを押して調整す
る。
4
メニューを消す
ボタンを1回押すと、
MENU
画面に戻る。もう1回
押すと、
MENU
画面が消える。
ボタンを押さなくても、調整後、約
30
秒たつと自動
的に消えます。
■ お買い上げ時の状態に戻す
(リセット)ボタンを使います。くわしくは、
114
ペー
ジをご覧ください。
,
26 26
ブライトネス
/
コントラスト
56 76
sRGB : 56 76
ブライトネス
/
コントラスト
,
110
画像の大きさを調整する(サイズ
調整
/
位置調整)
この調整は、現在入力中の信号に対して有効です。
1
ボタンを押す。
MENU
画面が出ます。
2
m
/
Mボタンを押して「
サイズ調整
/
位置調整」を選び、
ボタンを押す。
サイズ調整
/
位置調整画面が出ます。
3
水平方向は、m
/
Mボタンを押して
を選び、<
/
,ボ
タンを押して調整する。
垂直方向は、m
/
Mボタンを押して
を選び、<
/
,ボ
タンを押して調整する。
画面の位置を調整する(サイズ調
整
/
位置調整)
この調整は、現在入力中の信号に対して有効です。
1
ボタンを押す。
MENU
画面が出ます。
2
m
/
Mボタンを押して「
サイズ調整
/
位置調整」を選び、
ボタンを押す。
サイズ調整
/
位置調整画面が出ます。
3
水平方向は、m
/
Mボタンを押して
を選び、<
/
,
ボタンを押して調整する。
垂直方向は、m
/
Mボタンを押して
を選び、<
/
,ボ
タンを押して調整する。
画像を拡大
/
縮小する(ズーム)
この調整は、現在入力中の信号に対して有効です。
1
ボタンを押す。
MENU
画面が出ます。
2
m
/
Mボタンを押して「
サイズ調整
/
位置調整」を選び、
ボタンを押す。
サイズ調整
/
位置調整画面が出ます。
3
m
/
Mボタンを押して
(ズーム)を選び、<
/
,ボタン
を押して調整する。
ご注意
(ズーム)の調整は、水平または垂直サイズが最大または最小に
なると止まります。
画像の傾きや歪みを調整する
(画歪調整)
(傾き)の調整は、すべての入力信号に対して有効です。
その他は、現在入力中の信号に対して有効です。
1
ボタンを押す。
MENU
画面が出ます。
2
m
/
Mボタンを押して「
画歪調整」を選び、
ボタン
を押す。
画歪調整画面が出ます。
3
m
/
Mボタンを押して項目を選び、<
/
,ボタンを押して
調整する。
項目 調整する内容
画像の傾き
画像側面のふくらみ
/
へこみ
画像側面のふくらみ
/
へこみの左
右バランス
画像上部と下部の幅のずれ
画像上部の位置のずれ
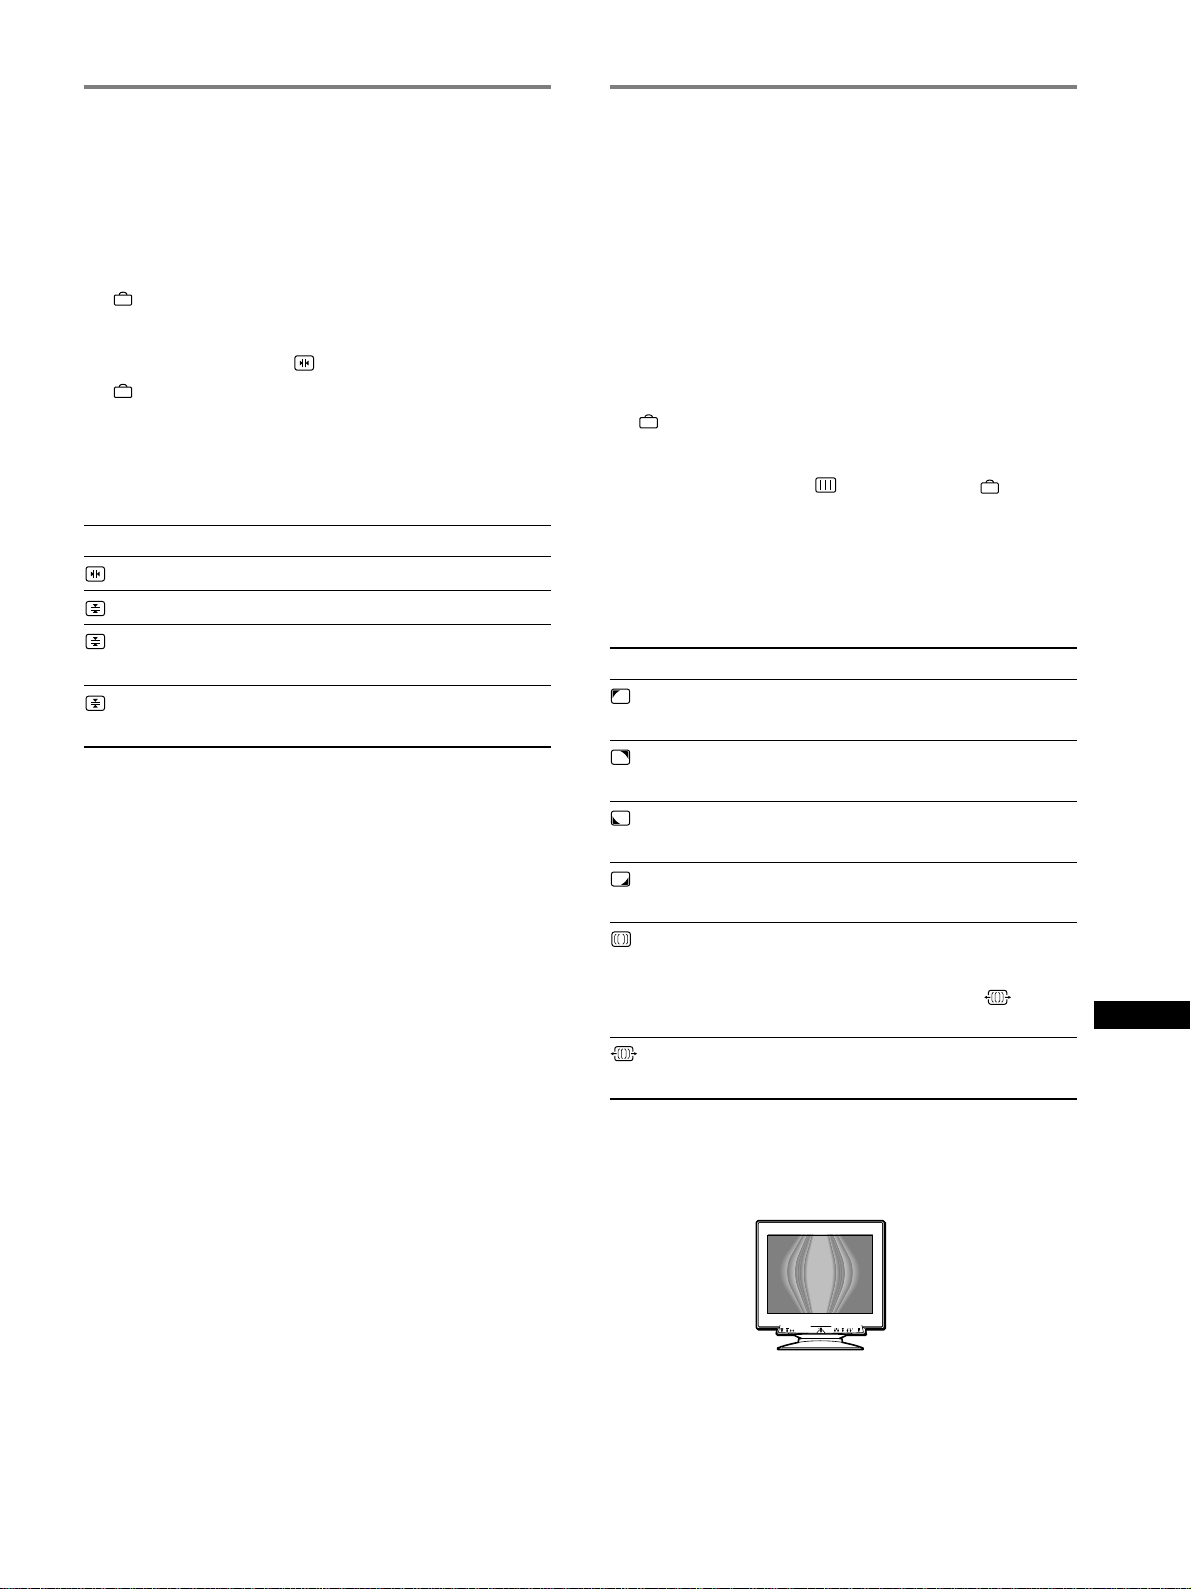
111
RF
JP
*
モアレとは、画面に出るうすい波模様や点状の模様のことです。
入力信号によっては、本機のブラウン管の蛍光体と干渉し合い、
モアレが発生することがあります。故障ではありません。
モアレの例
ご注意
「モアレキャンセル」を「オン」にすると、画像がくっきりしないこと
があります。
画質を調整する(画調整)
ランディング、またはモアレを調整することによって、画
質をより鮮明にします。
•
ランディング:画面の四すみに出る地磁気による色む
らを目立たなくします。
•
モアレ:波模様や点状の模様(モアレ)を目立たなくし
ます。
「モアレキャンセル」および「モアレ調整」は、現在入力中
の信号に対して有効です。その他は、すべての入力信号に
対して有効です。
1
ボタンを押す。
MENU
画面が出ます。
2
m
/
Mボタンを押して「
画調整」を選び、
ボタンを
押す。
画調整画面が出ます。
3
m
/
Mボタンを押して項目を選び、<
/
,ボタンを押して
調整
/
選択する。
項目 調整
/
選択する内容
ランディング
ランディング
ランディング
ランディング
モアレ
*
キャンセル
モアレ調整
左上部の色むらが最も目立た
なくなるように調整します。
右上部の色むらが最も目立た
なくなるように調整します。
左下部の色むらが最も目立た
なくなるように調整します。
右下部の色むらが最も目立た
なくなるように調整します。
「モアレキャンセル」の「オン」
または「オフ」を選択します。
「オン」にすると、「
(モアレ
調整)」の項目が出ます。
モアレが最も目立たなくなる
ように調整します。
コンバージェンスを調整する
(コンバージェンス)
文字や線のまわりに赤や青の線が見えるときなどには、コ
ンバージェンスを調整します。
この調整は、すべての入力信号に対して有効です。
1
ボタンを押す。
MENU
画面が出ます。
2
m
/
Mボタンを押して「
コンバージェンス」を選び、
ボタンを押す。
コンバージェンス画面が出ます。
3
m
/
Mボタンを押して項目を選び、<
/
,ボタンを押して
調整する。
項目 調整する内容
TOP
V
コンバージェンス
TOP
BOT
V
コンバージェンス
BOTTOM
水平方向の色ずれ
垂直方向の色ずれ
画像上部の垂直方向の色ずれ
画像下部の垂直方向の色ずれ
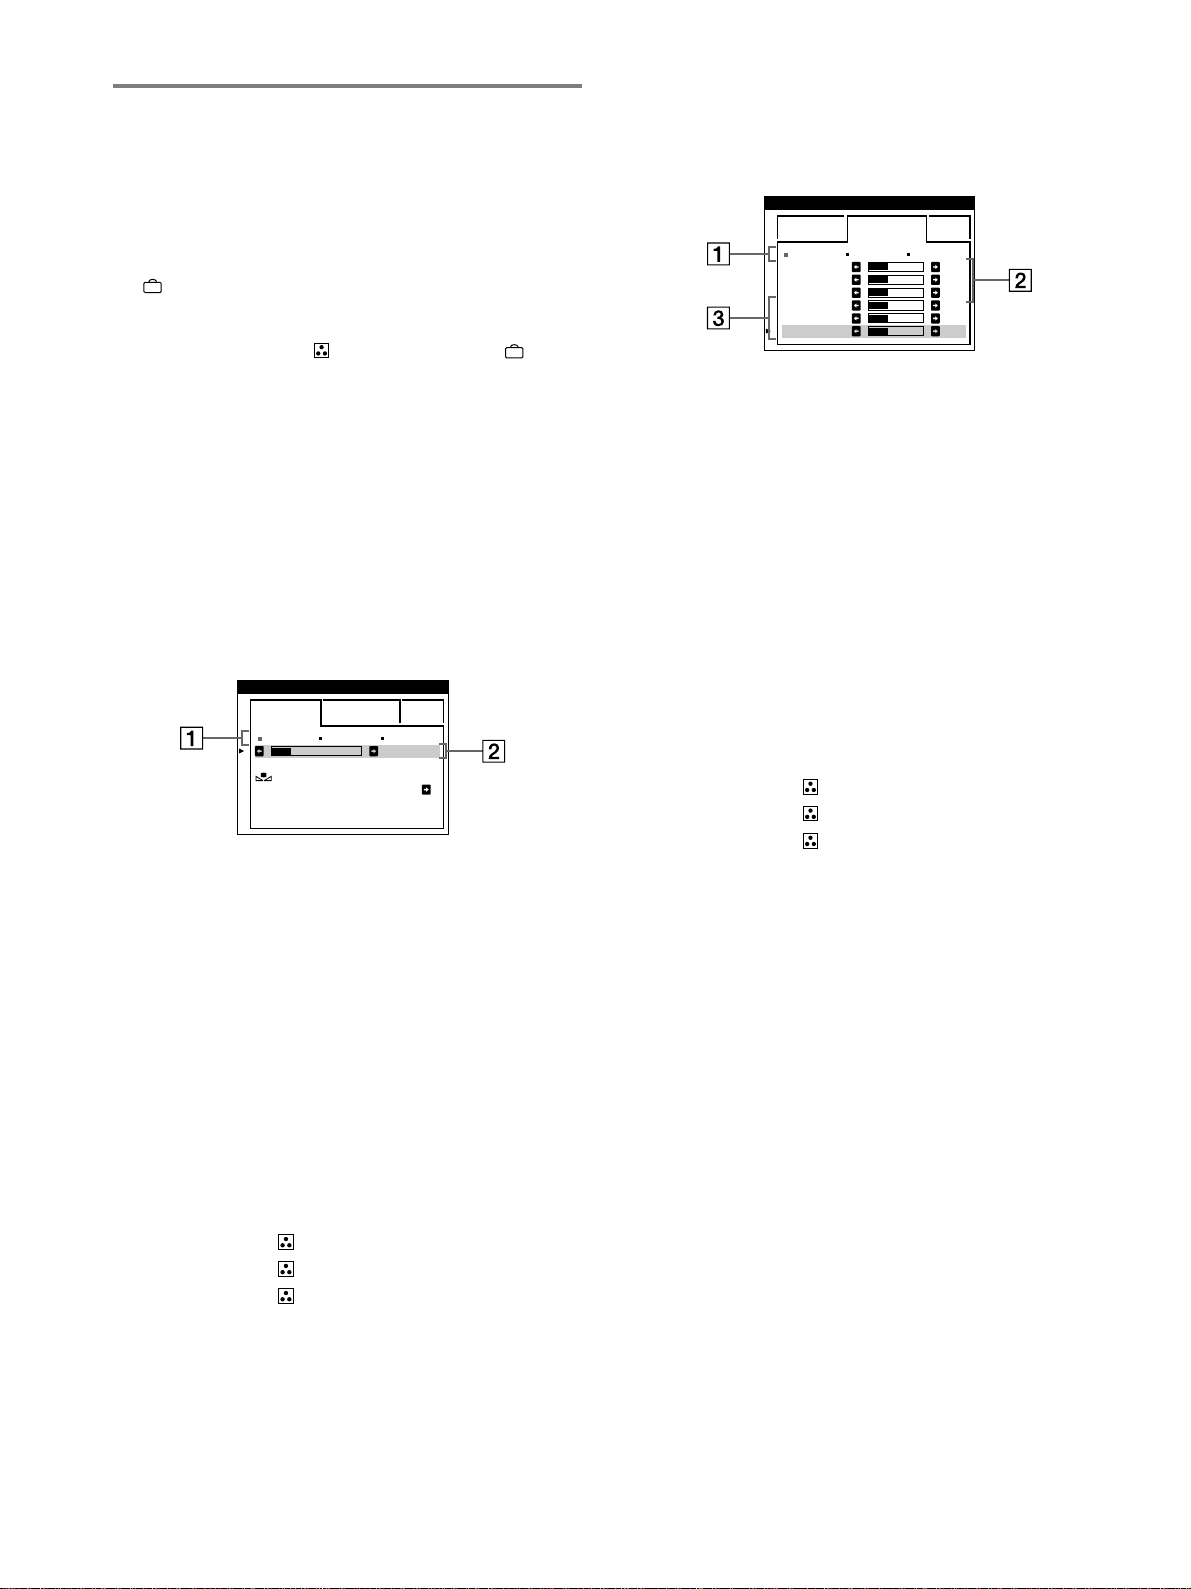
112
EXPERT
モード
EXPERT
モードを選ぶと、さらに細かい色温度調整をする
ことができます。
1
m
/
Mボタンを押して1を選び、<
/
,ボタンを押して
5000K
、
6500K
、
9300K
の
3
種類の色温度から選ぶ
2
m
/
Mボタンを押して2を選び、<
/
,ボタンを押して
BIAS
(黒レベル)を調整する。
画面の暗い部分を調整します。
3
m
/
Mボタンを押して3を選び、<
/
,ボタンを押して
GAIN
(白レベル)を調整する。
画面の明るい部分を調整します。
2 、3 とも、
R
(
Red
:赤)、
G
(
Green
:緑)、
B
(
Blue
:青)のどれかを選んで調整します。
微調整すると1の位置に表示される色温度は次のよう
に変わり、新しい色温度設定になります。
•
「
5000K
」t「
1
」
•
「
6500K
」t「
2
」
•
「
9300K
」t「
3
」
入力端子ごとに色温度を設定する
EASY
、
EXPERT
モードの色温度の微調整を、入力端子ご
とに設定することができます。
1 INPUT1
(
13W3
)と
INPUT2
(
HD15
)の両方の画面
で、同じ調整モード(
EASY
または
EXPERT
)と同じ色
温度を選ぶ。
2
それぞれの画面で、色温度を微調整する。
入力端子ごとに色温度が設定されます。
入力切換のしかたは、
107
ページをご覧ください。
色温度を調整する(色温度調整)
色温度は白色の度合いで表され、これを変えることによっ
て画面の色を調整します。温度が低いと画面が赤みがかっ
た白色になり、高いと青みがかった白色になります。画面
の色を、印刷時の色に近づけたいときなどに使います。
1
ボタンを押す。
MENU
画面が出ます。
2
m
/
Mボタンを押して「
色温度調整」を選び、
ボタン
を押す。
色温度調整画面が出ます。
3
<
/
,ボタンを押して、調整モードを選ぶ。
EASY
、
EXPERT
、
sRGB
の
3
種類のモードを選ぶこと
ができます。
4
m
/
Mボタンを押して項目を選び、<
/
,ボタンを押して
調整
/
選択する。
各モードは以下のように調整
/
設定します。
EASY
モード
1
m
/
Mボタンを押して1を選び、<
/
,ボタンを押して
5000K
、
6500K
、
9300K
の
3
種類の色温度から選ぶ。
5000K
、
6500K
、
9300K
の
3
種類の色温度があらかじ
め設定されています。お買い上げ時は
9300K
になって
います。
9300K
t
6500K
t
5000K
となるにつれて、
青みがかった白色から赤みがかった白色へと画面の色が
変わります。
2
m
/
Mボタンを押して2を選び、<
/
,ボタンを押して必
要に応じて色温度を微調整する。
微調整すると1の位置に表示される色温度は次のように
変わり、新しい色温度設定になります。
•
「
5000K
」t「
1
」
•
「
6500K
」t「
2
」
•
「
9300K
」t「
3
」
EASY EXPERT s BGR
5000K 6500K 930 K0
50 K00
色温度調整
色温度補正
オン
EASY EXPERT s BGR
5000K 6500K 930 K0
R BIAS 05
G BIAS 05
B BIAS 05
RGAIN 05
GGAIN 05
BGAIN 05
色温度調整
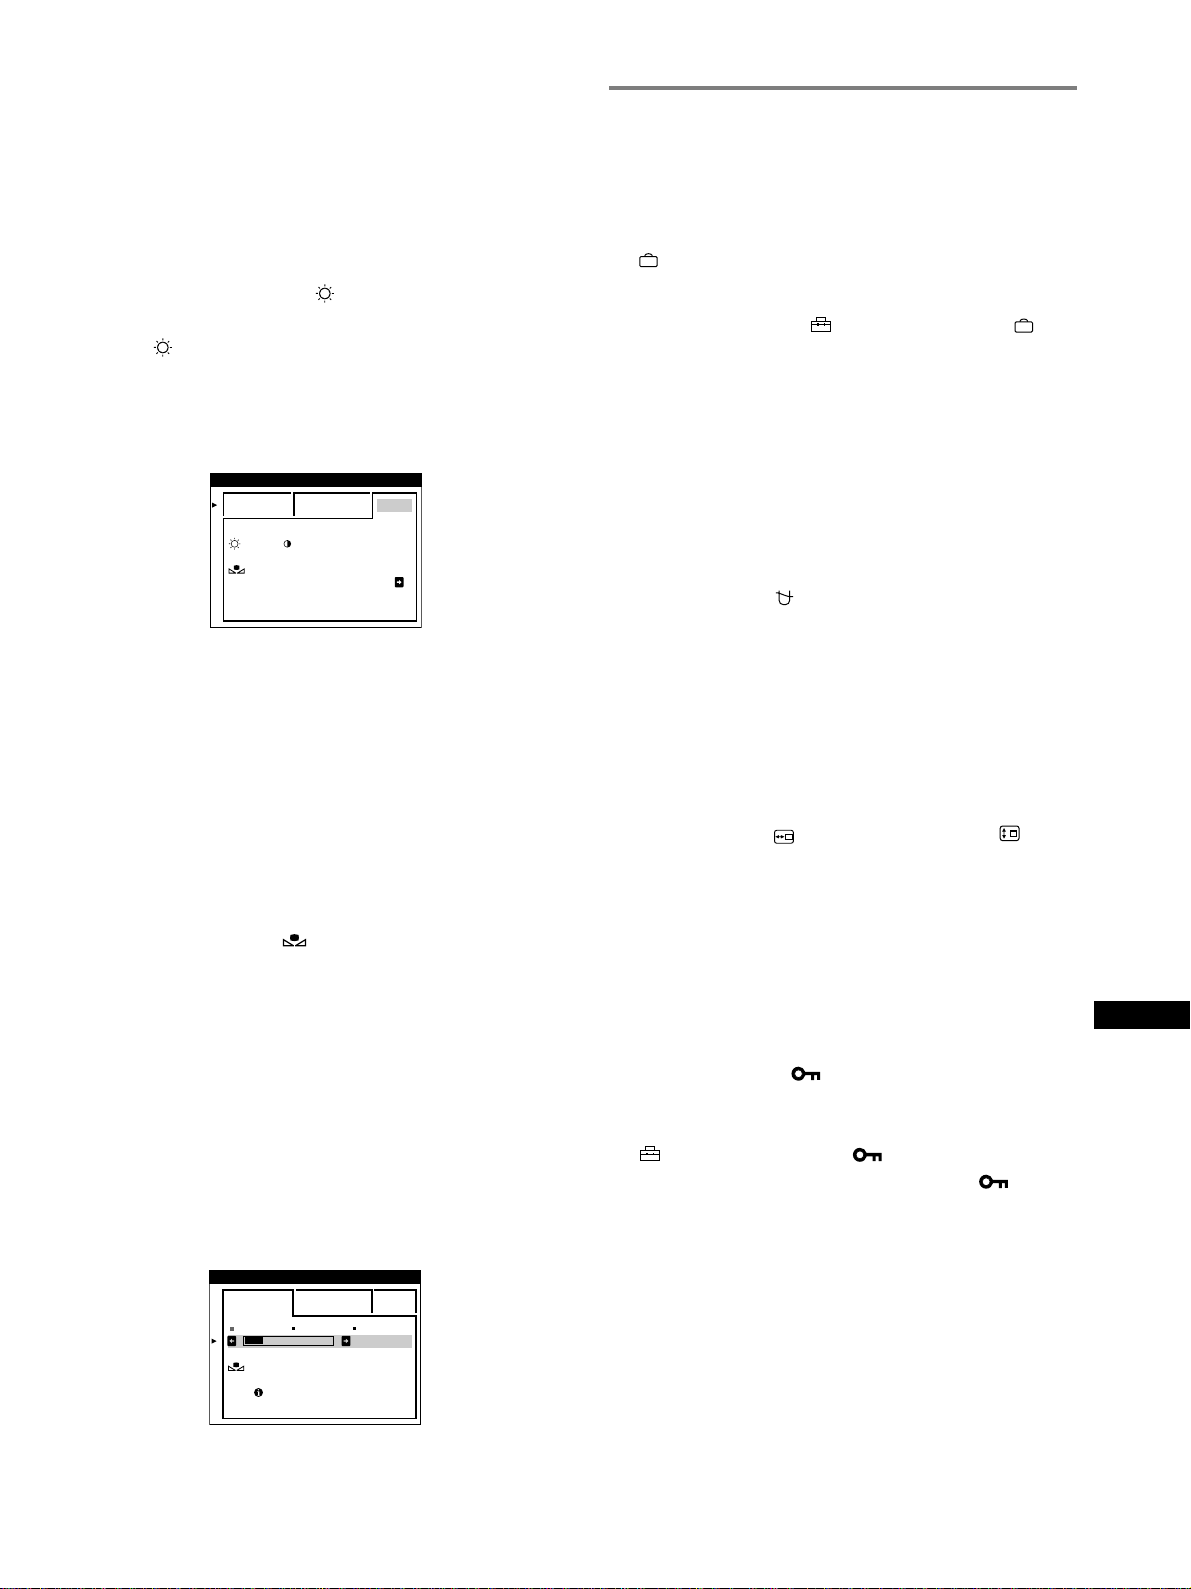
113
RF
JP
sRGB
モード
sRGB
とは、コンピューター機器同士の表示や、出力する
色を近づけるためのカラースペースの業界標準のひとつで
す。
sRGB
モードを色温度調整画面で選ぶだけで、簡単に
sRGB
プロファイルに設定することができます。
sRGB
カ
ラー(γ
=2.2
、
6500K
)を画面に正しく表示するには、お使
いのコンピューターが
sRGB
プロファイルに設定されてい
るとともに、本機の明るさ(
)とコントラスト(6)を 画
面に表示される数字に設定してください。
明るさ( )とコントラスト(6)の調整のしかたについて
は、
109
ページをご覧ください。
注意
コンピューター機器は、
sRGB
に対応している必要があります。
画面の色合いを回復する(色温度補正)
EASY
モードと
sRGB
モードでは、「色温度補正」をするこ
とができます。
お買い上げいただいて何年かたつと、ディスプレイの色合
いは明るさを徐々に失っていく傾向があります。この機能
を使うことによって、お買い上げ時の色合いを回復するこ
とができます。
1
<
/
,ボタンを押して、
EASY
モードまたは
sRGB
モードを選ぶ。
2
m
/
Mボタンを押して「 (色温度補正)」を選び、,ボタ
ンを押す。
画面の色合いを回復している間、画像が表示されなくな
ります。終了すると、また画像が表示されます。
ご注意
•
この機能をお使いになる前に、本機が
30
分以上通常動作状態(電
源インジケーターが緑色に点灯している状態)であることをご確
認ください。本機が省電力状態のときは、通常動作状態に戻した
あと
30
分以上たってからお使いください。
本機を
30
分以上通常動作状態に保つために、お使いのコン
ピューターの省電力機能の設定を調整してください。本機の準備
ができていないと、画面に以下のようにメッセージが表示されま
す。
•
トリニトロン管の自然な劣化のため、この機能が充分に働かない
ことがあります。
その他の調整をする(オプション)
画面を消磁したり、メニューの表示位置を変えたり、調整
値を変えられないようにすることができます。
1
ボタンを押す。
MENU
画面が出ます。
2
m
/
Mボタンを押して「
オプション」を選び、
ボタ
ンを押す。
オプション画面が出ます。
3
m
/
Mボタンを押して調整したい項目を選ぶ。
各項目は以下のように調整します。
画面を消磁する
本機は、電源を入れると自動的に消磁します。手動で消磁
するときは、次のようにします。
m
/
Mボタンを押して「
(デガウス)」を選び、,ボタンを押
す。
約
2
秒間、消磁します。続けて消磁するときは、
20
分以上
間隔をあけてください。
メニューの表示位置を変える
メニュー画面に隠れた部分を調整したいときなどに、メ
ニューの表示位置を変えられます。
m
/
Mボタンを押して「 (
OSD
水平位置)」または「
(
OSD
垂直位置)」を選び、<
/
,ボタンを押して希望の位置に動
かす。
調整値を変えられないようにする(コントロール
ロック機能)
調整値を他の人が勝手に変えないように、調整に使うボタ
ンを操作できないようにします。
m
/
Mボタンを押して、「
(コントロールロック)」を選び、
<
/
,ボタンを押して「オン」を選ぶ。
「オン」にしても、1電源スイッチ、
MENU
画面の「終了」
と「
(オプション)」の中の「
(コントロールロック)」
は操作できます。これ以外の操作をすると、「
」マーク
が出て操作できません。
コントロールロック機能を解除するには
上記の手順で「オフ」を選びます。
EASY EXPERT s BGR
:56 :76 FOR s BGR
色温度調整
色温度補正
オン
EASY EXPERT s BGR
5000K 6500K 930 K0
50 K00
色温度調整
色温度補正
ウォームアップ中
114
お買い上げ時の設定に戻す
いったん調整した設定を元に戻すには、次の
3
つの方法があ
ります。リセットには、
(リセット)ボタンを使いま
す。
調整した項目ごとにリセットする
ボタンとm
/
Mボタンを使ってお買い上げ時の設定に戻し
たい調整項目を画面に表示し、
(リセット)ボタンを押
す。
入力中の信号の調整値をすべてリセットする
調整画面が出ていないときに、
(リセット)ボタンを押
す。
ただし以下の調整値は、この操作をしてもリセットされま
せん。
•
メニュー言語(
107
ページ)
•
色温度調整画面で選んでいる色温度モード(
EASY
、
EXPERT
、
sRGB
)(
112
ページ)
•
メニューの表示位置(
113
ページ)
•
調整値を変えられないようにする設定(コントロール
ロック機能)(
113
ページ)
すべての調整値をリセットする
(リセット)ボタンを
2
秒以上押したままにする。
ご注意
コントロールロック機能を「オン」にしているときは、リセットでき
ません。
機能解説
省電力(パワーセービング)機能
本機は、
VESA
、
NUTEK
および
ENERGY STAR
のパワー
セービングガイドラインに対応しています。コンピュー
ターからの入力信号がなくなると、自動的に次のような省
電力状態になります。
本機の状態
通常動作時
アクティブオフ
*
電源:切
消費電力
160W
以下
3W
以下
<
1W
1(電源)
インジケーター
緑点灯
オレンジ点灯
消灯
*
コンピューターがアクティブオフ状態になると、信号が入力され
ないため、「
NO INPUT SIGNAL
」表示が出ます。そのあと、
本機も省電力状態になります。
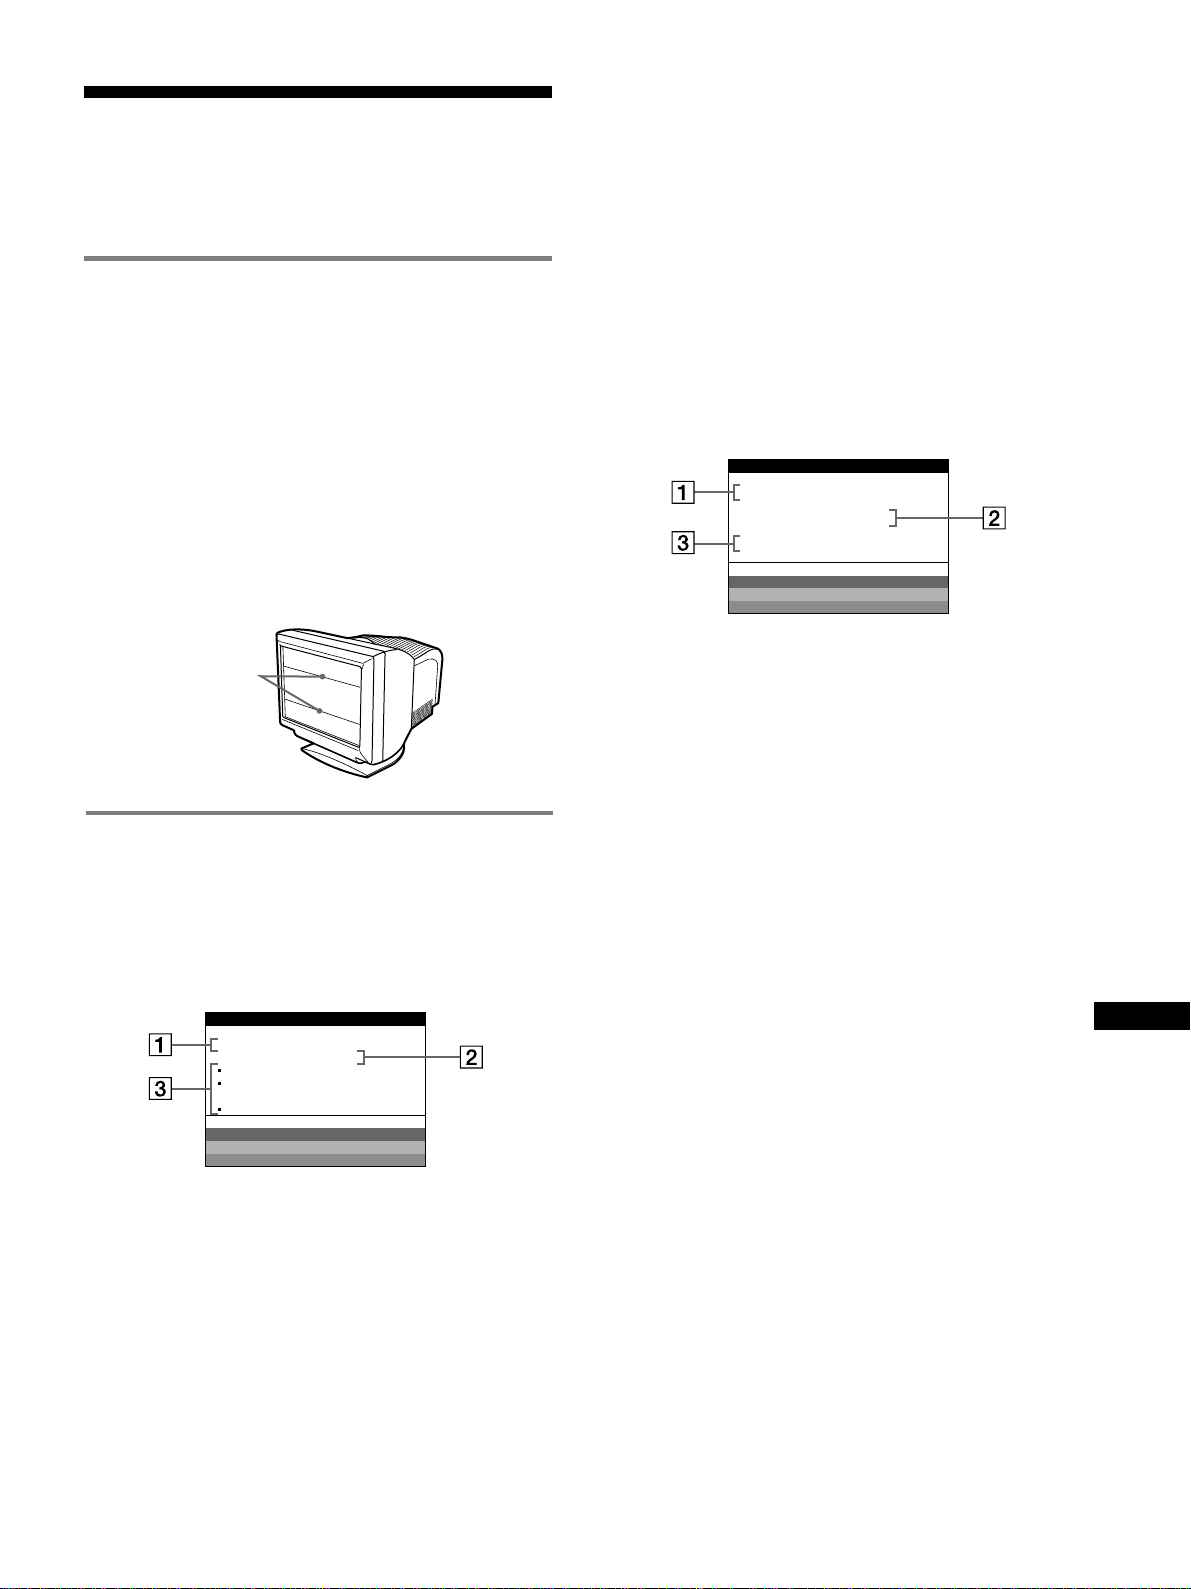
115
RF
JP
故障かな?と思ったら
お買い上げ店などにご相談いただく前に、次の事項をご確
認ください。
画面に細い横線が出たら
(ダンパーワイヤー)
本機で使用しているトリニトロン管では、画面に細い水平
の線が見えることがありますが、故障ではありません。
この線は、トリニトロン管内部のアパチャーグリルに取り
付けられたダンパーワイヤーの影です。ダンパーワイヤー
が最も目立つのは、白色のような明るい背景のときです。
ダンパーワイヤーはアパチャーグリルの振動を抑える働き
をしています。アパチャーグリルはトリニトロン管特有の
構造で、鮮明できめ細かな画質のために欠かせない役割を
果たしています。
ダンパーワイヤー
表示メッセージについて
入力信号が正しくないときは、画面に次のような表示メッ
セージが出ます。
「
NO INPUT SIGNAL
」と表示されている場合
1 入力端子を表示する
現在選んでいる入力端子(
INPUT1
または
INPUT2
)が
表示されます。
2 入力信号の状態を表示する
NO INPUT SIGNAL
入力信号がない。または、選んでいる入力端子からの入
力信号がない。
MON I TOR I S WORK I NG
INPUT 1 :
NO INPUT S IGNAL
ACT I VATE COMPUTER
CHECK INPUT SELECT RO
CHECK SIGNAL CABLE
WH I T E
RED
GREEN
BLUE
INFORMATION
3 対処のしかたを表示する
下記のメッセージの中から表示します。
•
「
ACTIVATE COMPUTER
」と表示されている場
合、コンピューターのキーボードのキーどれかを押
してみる。または、コンピューターのグラフィック
ボードを正しいバススロットに差し込む。
•
「
CHECK INPUT SELECTOR
」と表示されている
場合、入力切り換えを確認する(
107
ページ)。
•
「
CHECK SIGNAL CABLE
」と表示されている場
合、ビデオ信号ケーブルが正しく接続されているか
確認する(
106
ページ)。
「
OUT OF SCAN RANGE
」と表示されている場合
1 入力端子と入力信号の周波数を表示する
現在選んでいる入力端子(
INPUT1
または
INPUT2
)が
表示されます。また、本機が入力信号の周波数を確認し
たときは、水平
/
垂直周波数も表示されます。
2 入力信号の状態を表示する
OUT OF SCAN RANGE
入力信号の周波数が、本機の仕様に合っていない。
3 対処のしかたを表示する
「
CHANGE SIGNAL TIMING
」と表示されます。
本機をつなぐ前につないでいたディスプレイがあるとき
は、それにつなぎ換えてみる。画像が出たら、コン
ピューターで水平周波数:
30
〜
121kHz
、垂直周波
数:
48
〜
160Hz
の範囲に設定する。
くわしくは、次ページの「本機の症状と対処のしかた」をご
覧ください。
MON I TOR I S WORK I NG
INPUT 1:130.0kHz/ H57
OUT OF SCAN RANGE
CHANGE S I GNAL T IM I NG
WH I T E
RED
GREEN
BLUE
INFORMATION
z

116
本機の症状と対処のしかた
コンピューターなど本機に接続している機器が原因の場合は、接続機器の取扱説明書をご覧ください。
下記のように対処しても正常にならない場合は、「自己診断表示機能」をご覧ください(
118
ページ)。
こんなときは 原因と対処のしかた
画像が出ない。
1(電源)インジケーターが
点灯していない。
「
NO INPUT SIGNAL
」と
いう警告表示が出ている。
または、1(電源)インジ
ケーターがオレンジ色に点
灯、または緑色とオレンジ
色に点滅している。
「
NO INPUT SIGNAL
」と
「
CHECK SIGNAL
CABLE
」という警告表示が
出ている。または、1(電
源)インジケーターがオレ
ンジ色に点灯、または緑色
とオレンジ色に点滅してい
る。
「
OUT OF SCAN RANGE
」
という警告表示が出てい
る。
1(電源)インジケーターが
緑色に点灯、またはオレン
ジ色で点滅している。
画像が乱れる、ゆれる、ちらつ
く。
画像がくっきりしていない。
•
電源コードを接続し直す。
•
1(電源)スイッチを入れる。
•
入力切換を正しく設定する(
107
ページ)。
•
ビデオ信号ケーブルのピンが曲がっている。まっすぐに直すか、別のケーブルを使う。
■コンピューターなど本機につないでいる機器が原因の場合
•
コンピューターが省電力状態になっている。キーボードのキーのどれかを押してみる。
•
コンピューターの電源を入れる。
•
コンピューターのグラフィックボードを正しいバススロットに差し込む。
•
ビデオ信号ケーブルを正しくつなぐ(
106
ページ)。
•
ビデオ信号ケーブルのピンが曲がっている。まっすぐに直すか、別のケーブルを使う。
•
入力切換を正しく設定する(
107
ページ)。
■コンピューターなど本機につないでいる機器が原因の場合
•
コンピューターのグラフィックボードを正しいバススロットに差し込む。
■コンピューターなど本機につないでいる機器が原因の場合
•
入力信号の周波数が、本機の仕様に合っていない。本機をつなぐ前につないでいたディスプレイがある
ときは、それにつなぎ換えてみる。画像が出たら、周波数を以下の範囲に設定する。
水平周波数:
30
〜
121kHz
垂直周波数:
48
〜
160Hz
•
「自己診断表示機能」で確認する(
118
ページ)。
•
他のモニター、レーザープリンター、蛍光灯、テレビチューナー、扇風機など、電磁波を発して干渉す
る可能性のあるものから本機を離して置く。
•
近くに送電線がある場合は、本機を離して置くか、シールド板を本機の近くに置く。
•
離れたところにある他の電源につないでみる。
•
モニターの向きを
90
度変えてみる。
■コンピューターなど本機につないでいる機器が原因の場合
•
コンピューターのグラフィックボードで、本機が正しく設定されているかを確認する。
•
入力信号のグラフィックモードと周波数が本機で使用できる範囲かを確認する。ただし本機で使用でき
る範囲でも、グラフィックボードによっては同期パルス幅が合わないため、きれいに画像を映せない場
合があります。
•
コンピューターのリフレッシュレート(垂直周波数)を、最適な画面になるように設定する。
•
コントラストや明るさを調整する(
109
ページ)。
•
画面を消磁する
*
(
113
ページ)。
•
「モアレキャンセル」が「オン」になっている場合は、「モアレ調整」をする。または、「モアレキャンセル」
を「オフ」にする(
111
ページ)。
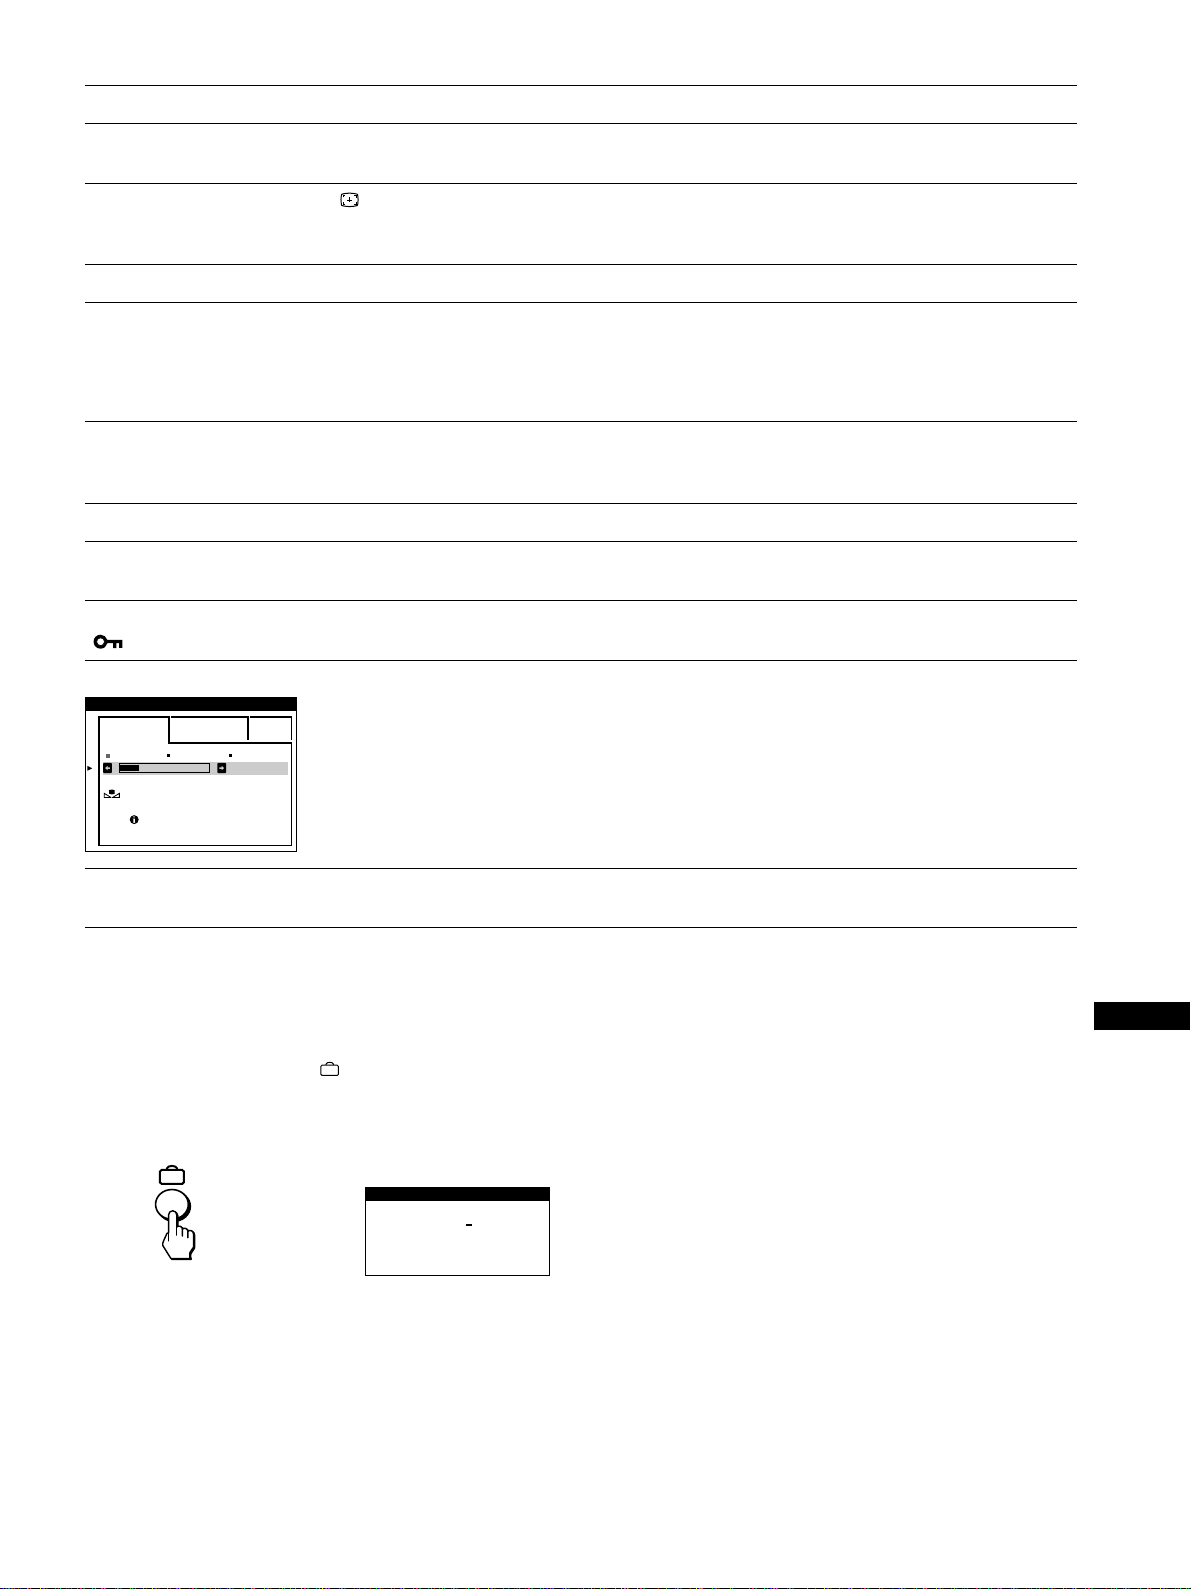
117
RF
JP
例:
EASY EXPERT s BGR
5000K 6500K 930 K0
50 K00
色温度調整
色温度補正
ウォームアップ中
本機の型名、製造番号、製造年と週を表示する
信号を入力しているときに、
ボタンを
5
秒以上押したま
まにする。
INFORMATION
画面が出ます。
故障のときは、お買い上げ店にご連絡ください。また、お問い合せ
のときは次のことをお知らせください。
•
型名:
GDM-5410
•
製造番号
•
接続しているコンピューター、およびグラフィックボードの仕様
と名称
,
こんなときは 原因と対処のしかた
画像が二重、三重になる。
画像の位置がずれている、また
は画像の大きさが正しくない。
画像の両端が曲がっている。
画面に波模様や点状の模様(モ
アレ)が出る。
色むらがある。
白色が白く見えない。
文字や線の端に赤や青の影が見
える。
本機のボタンが働かない。
(
マークが画面に出る)
色温度補正機能が働かない。
電源を入れた直後に「ブーン」と
いう音がする。
•
ビデオ信号ケーブルの延長コードやインプットセレクターの使用をやめる。
•
接続ケーブルを端子にしっかりと差し込む。
•
ボタンを押す(
107
ページ)。
•
画像の位置や大きさを調整する(
110
ページ)。入力信号やグラフィックボードによっては、画像が画面
全体に広がらない場合があります。
•
画像の歪みを調整する(
110
ページ)。
•
「モアレキャンセル」を「オン」にして、「モアレ調整」でモアレが最も目立たなくなるように調整します
(
111
ページ)。
■コンピューターなど本機につないでいる機器が原因の場合
•
コンピューターでデスクトップパターンを変える。
•
画面を消磁する
*
(
113
ページ)。本機にスピーカーなどの磁気を発するものを近づけたり、電源を入れ
たまま向きを変えたりすると起こることがあります。
•
「ランディング」を調整する(
111
ページ)。
•
色温度を調整する(
112
ページ)。
•
「コンバージェンス」を調整する(
111
ページ)。
•
コントロールロック機能が「オン」になっている。「オフ」にする(
113
ページ)。
•
色温度補正機能は、本機が通常動作状態(電源インジケーターが緑色に点灯している状態)になってから
30
分以上たたないと動作しません。色温度補正機能についてのくわしい説明は
113
ページをご覧くだ
さい。
•
本機を
30
分以上通常動作状態に保つために、お使いのコンピューターの省電力機能の設定を調整して
ください。
•
トリニトロン管が老化していると、色温度補正機能が充分に働かないことがあります。
•
自動消磁機能が働いている。本機は電源を入れると、約
2
秒間自動的に消磁します。
*
何度も消磁するときは、
20
分以上間隔をあけてください。また、消磁すると「ブーン」という音がしますが、故障ではありません。
SER NO
:
1234567
MODEL
:
GDM 5410
MANUFACTURED
: 1999-52
INFORMATION
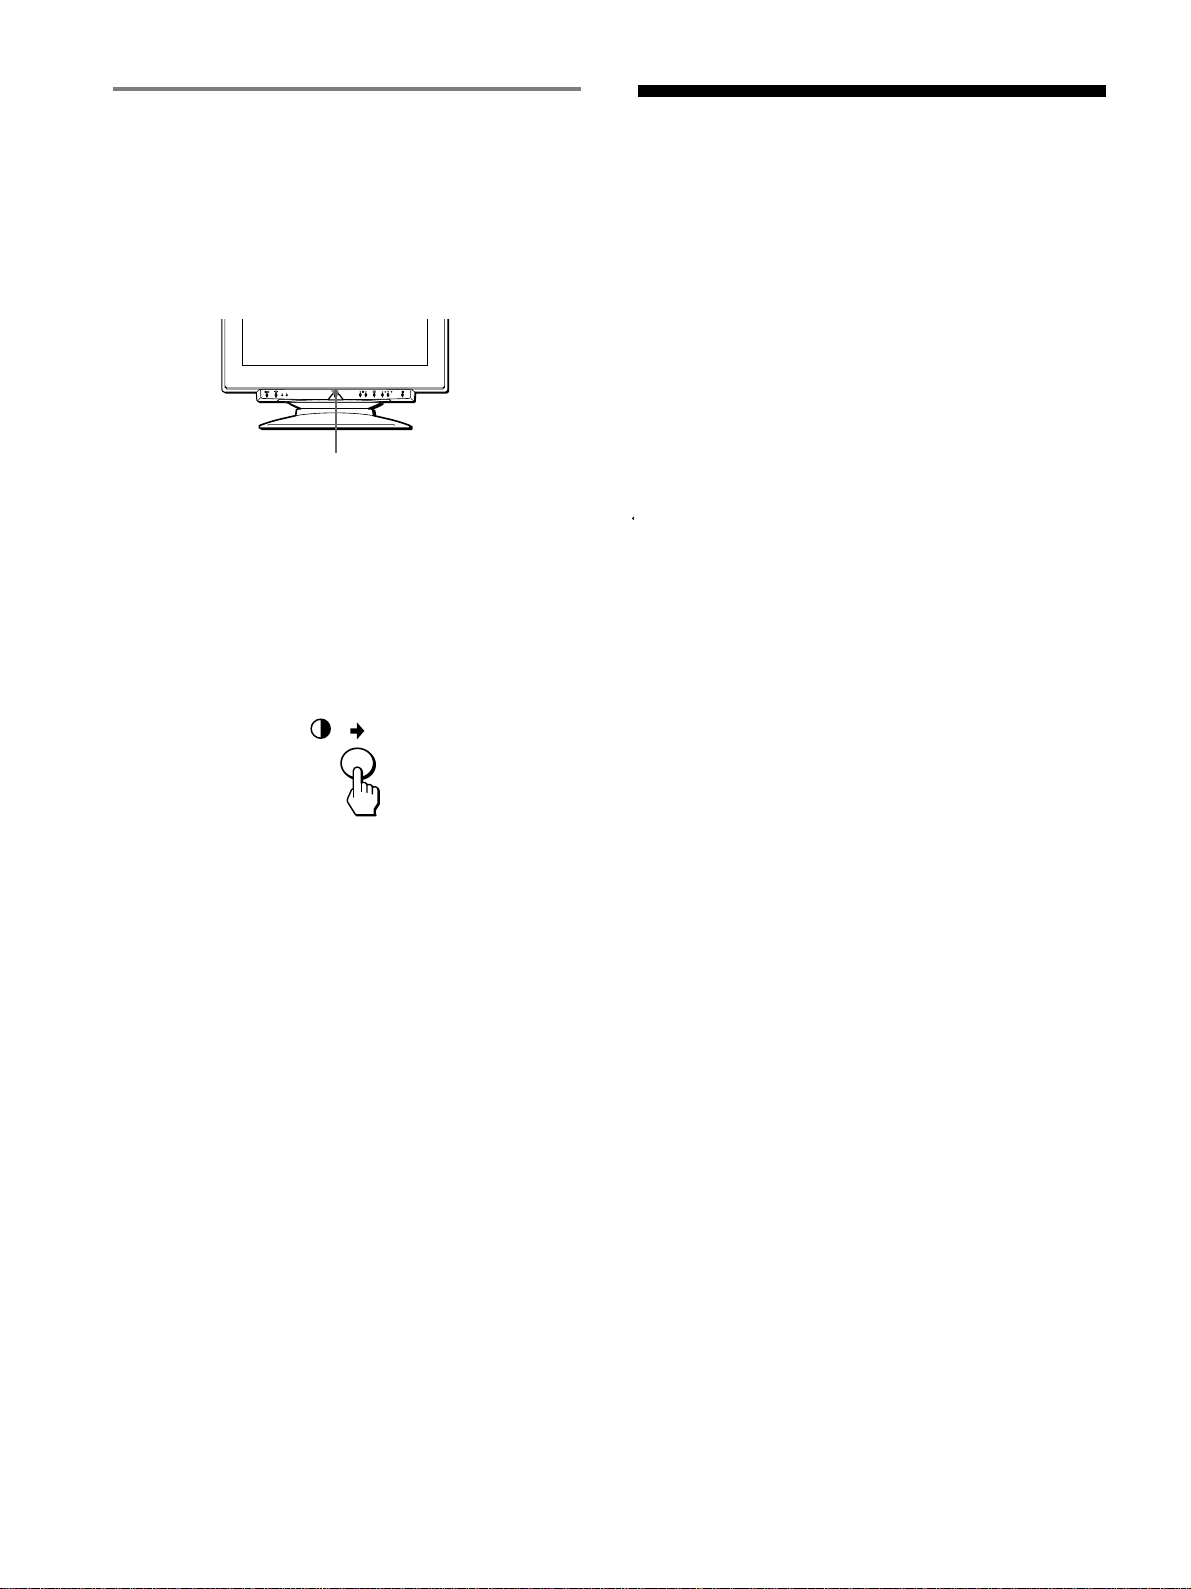
118
主な仕様
CRT 0.24mm
アパチャーグリルピッチ
90
°偏向
21
インチ
FD
トリニトロン
有効表示画面 約
403.8
×
302.2mm
(幅
/
高さ)
推奨解像度 水平:
1280
ドット
垂直:
1024
ライン
表示画面 約
388
×
291mm
(幅
/
高さ)
または
約
364
×
291mm
(幅
/
高さ)
偏向周波数
*
水平:
30
〜
121kHz
垂直:
48
〜
160Hz
入力電圧/電流
100
〜
240V
、
50
〜
60Hz
、
2.0
〜
1.0A
消費電力量 約
145W
最大外形寸法 約
501
×
498
×
498mm
(幅
/
高さ
/
奥行き)
質量 約
32kg
プラグ&プレイ機能
DDC1/2B/2Bi
、
GTF**
*
推奨周波数タイミング
•
水平同期幅率:水平周波数のタイミングの合計の
4.8%
以上、
または
0.8
µ
s
のどちらか大きい方
•
水平ブランキング幅:
2.3
µ
s
以上
•
垂直ブランキング幅:
450
µ
s
以上
**
入力信号が
GTF
(
Generalized Timing Formula
)対応の信号
であれば、
GTF
機能の働きで自動的に最適な画像が画面に表示
されます。
本機の仕様および外観は、改良のため予告なく変更するこ
とがありますが、ご了承ください。
自己診断表示機能
本機には自己診断表示機能がついています。本機またはコ
ンピューターに異常が起きたときには、画像が消えて、1
(電源)インジケーターが緑色に点灯するか、オレンジ色に
点滅します。1(電源)インジケーターがオレンジ色に点灯
しているときは、コンピューターが省電力状態になってい
ます。キーボードのキーのどれかを押してみてください。
1(電源)インジケーターが緑色に点灯しているとき
1
両方のビデオ信号ケーブルを抜くか、接続しているコン
ピューターの電源を切る。
2
1(電源)スイッチを押して、本機の電源を入れ直す。
3
本機が省電力状態になる前に、,ボタンを
2
秒間押した
ままにする。
4
本のカラーバー(白、赤、緑、青)が出れば、本機は正常
な状態です。ビデオ信号ケーブルを接続し直して、コン
ピューターの状態を確認してください。
カラーバーが出ないときは、本機が故障している可能性が
あります。お買い上げ店にご相談ください。
1(電源)インジケーターがオレンジ色に点滅してい
るとき
1(電源)スイッチを押して、本機の電源を入れ直す。
1(電源)インジケーターが緑色に点灯すれば、本機は正常
な状態です。
1(電源)インジケーターが点滅したままのときは、本機が
故障している可能性があります。1(電源)インジケーター
が何秒おきにオレンジ色に点滅するかを数えて、お買い上
げ店にご相談ください。お問い合わせのときは、本機の型
名と製造番号、接続しているコンピューターとグラフィッ
クボードの仕様および名称をお知らせください。
1(電源)インジケーター