Loading ...
Loading ...
Loading ...
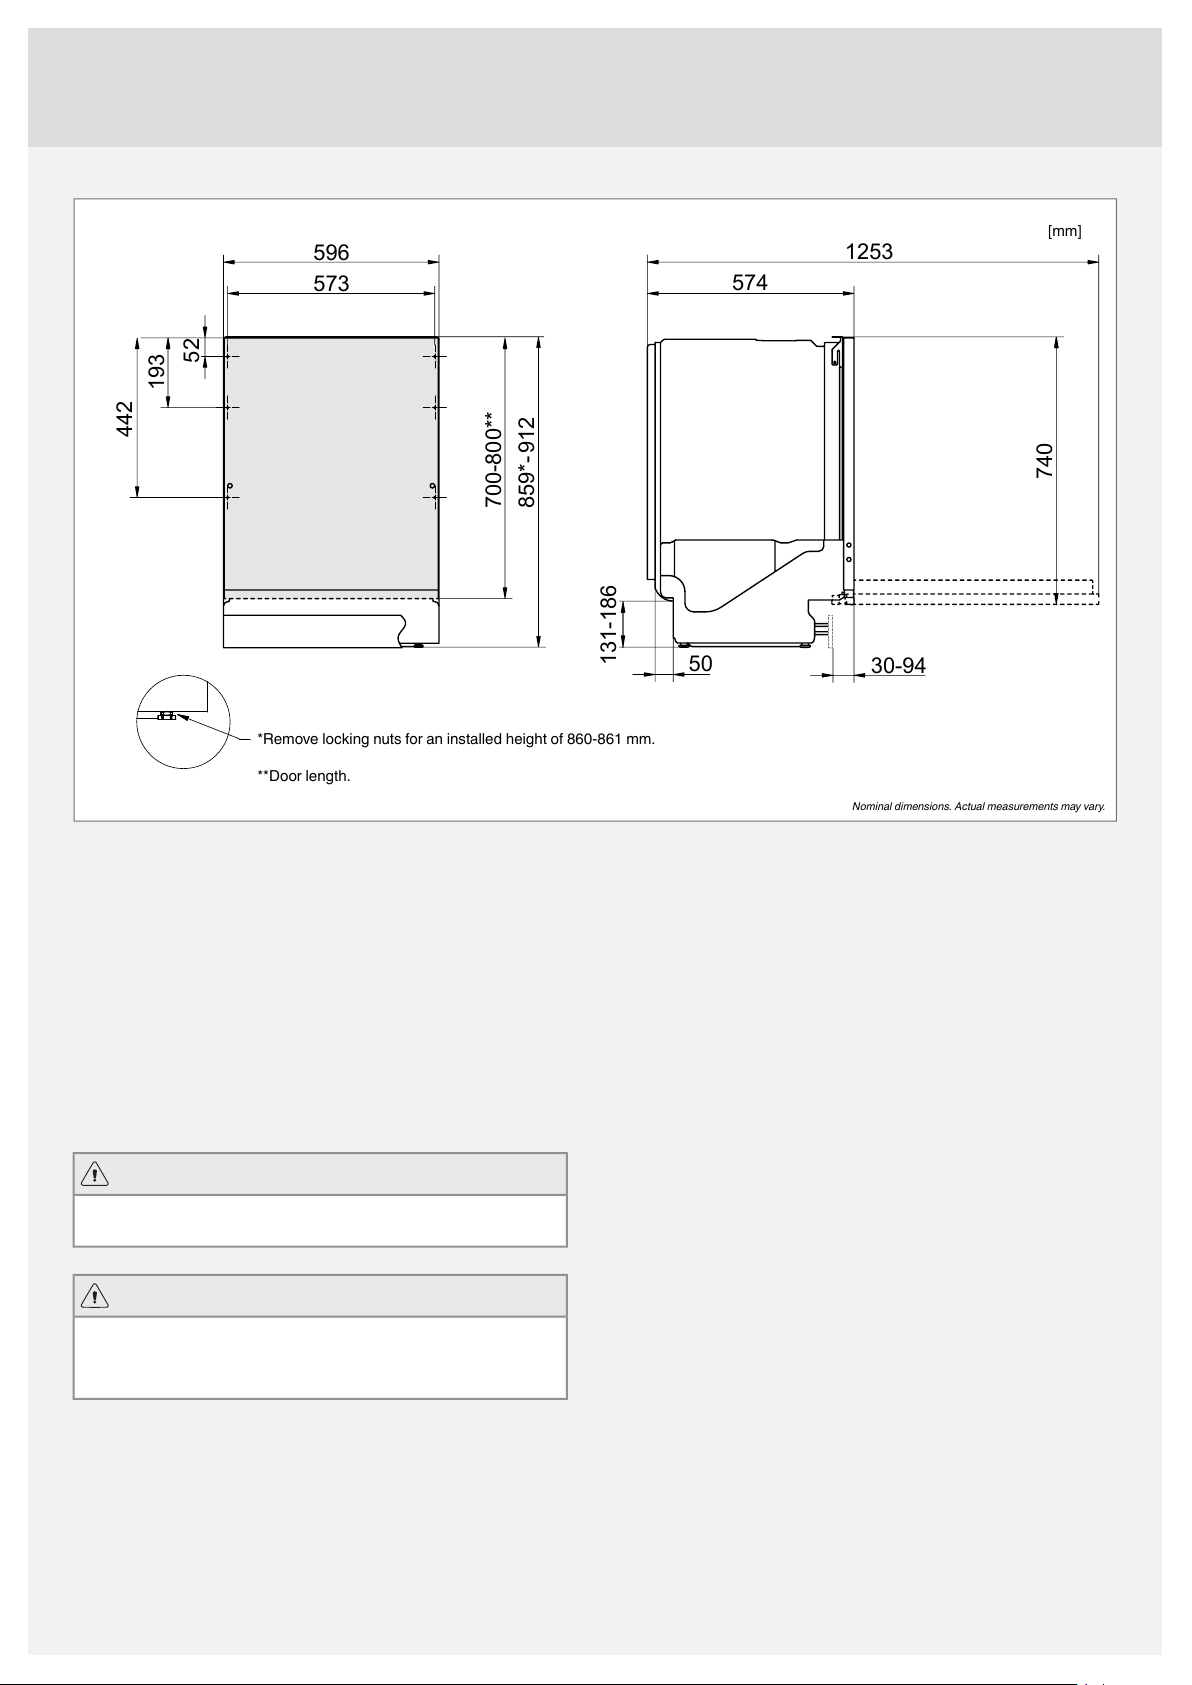
Installation
859*- 912
559
700-800**
52
193
442
573
596
131-186
50
30-94
1238
740
1253
574
[mm]
Nominal dimensions. Actual measurements may vary.
*Remove locking nuts for an installed height of 860-861 mm.
**Door length.
It is important that you read through and follow the instructions and
directions below. Conduct installation and connection in accordance
with the separate installation instructions.
Safety instructions
• Connections to electricity, water and drainage must be performed
by a qualified professional.
• Always follow applicable regulations for water, drainage and elec-
tricity.
• Take care during installation! Wear protective gloves! There must
always be two people!
• Before screwing the dishwasher into place, test the dishwasher by
running the Rinse and hold program. Check that the dishwasher
fills with water and drains. Check also that none of the connections
leak.
WARNING!
The ventilation opening in the lower part of the door must not be
blocked by a rug, carpet or similar furnishing.
WARNING!
Turn off the water supply when installing the dishwasher!
The plug must be disconnected or power to the socket turned off
while the work is carried out!
Setup
• The dimensions and connection information are included in the
separate installation instructions. Check that all dimensions and
connections are correct before commencing the installation. Note
that the height of the exterior panel can be adjusted to match other
fittings.
• Make sure the area on which the dishwasher is to be installed is
firm. Adjust the adjustable feet so that the dishwasher is level.
Tighten the lock nuts.
Drainage connection
See the separate installation instructions for necessary information.
This dishwasher is suitable for installing in a raised recess (to attain
an ergonomic working height). This means that the dishwasher can be
placed so that the drainage hose runs to a lower level than the bottom
of the dishwasher, such as by routing it directly to a floor drain. The
dishwasher is fitted with an integrated anti-siphon device to prevent
the machine from being emptied of water during the wash cycle.
The drainage hose can also be connected to a connection nipple on
the sink unit’s water trap. The connection nipple must have an internal
diameter of at least 14 mm.
The drainage hose may be extended by a maximum of 2.5 m (the total
length of the drainage hose must not exceed 4.5 m). Any joins and
connecting pipes must have an internal diameter of at least 14 mm.
However, the drainage hose should ideally be replaced with a new
hose without joins.
No part of the drainage hose may be more than 950 mm above the
bottom of the dishwasher.
Ensure that the drainage hose has no kinks.
Connection to water supply
Use only the inlet hose supplied with the dishwasher. Do not re-use
old or other spare hoses.
The supply pipe must be fitted with a water tap (stopcock). The water
tap must be easily accessible, so that the water can be shut off if the
dishwasher has to be moved.
Once the installation is complete, turn on the water tap and allow the
pressure to settle for a while. Check that all connections are watertight.
Connection to cold water supply
Connect the dishwasher to the cold water supply if the building is
heated using oil, electricity or gas.
Connection to hot water supply
Connect the dishwasher to the hot water supply (max. 70 °C) if the
building is heated using an energy-efficient means such as district
20
Loading ...
Loading ...
Loading ...