Loading ...
Loading ...
Loading ...
7
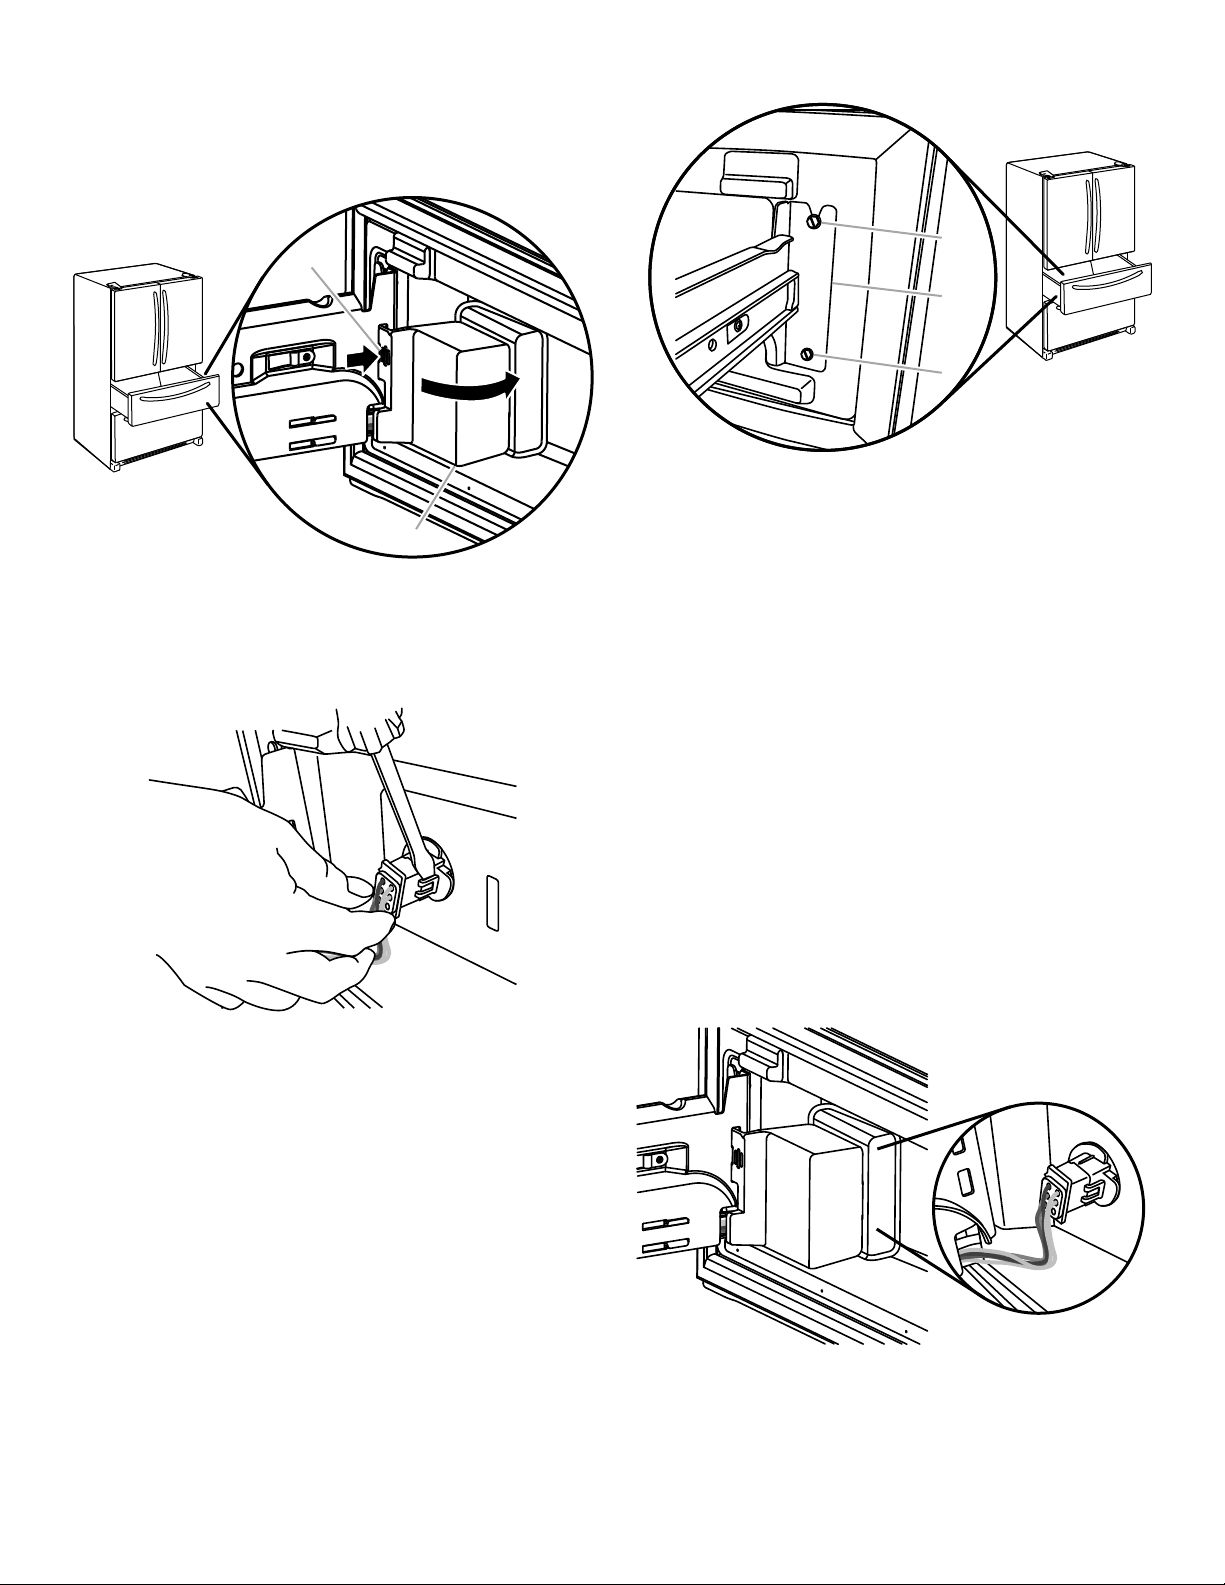
1. Open the drawer to its full extension, and remove the large
interior bin.
2. Locate the wiring cover on the backside of the drawer front.
Press tab on the cover to release the snaps, and pull off cover
to reveal the wiring connection.
3. On one side of the wiring connector, insert the screwdriver
blade between the connector tab and the connector to
release. Repeat for the opposite side. Pull the wiring
connector apart.
Remove Drawer Front
1. Using a ¹⁄₄" hex head nut driver, remove the two bottom
screws (one on each side) attaching the drawer front to the
drawer glides.
2. Using ¹⁄₄" hex head nut driver, loosen the two top screws (one
on each side) attaching the drawer front to the drawer glides.
NOTE: Loosen the screws three to four turns. Keep the
screws in the drawer front.
3. Lift the drawer front up and off the drawer glide brackets.
4. Slide the drawer glides back into the refrigerator.
Replace Drawer Front
1. Pull out the drawer glides until they are fully extended.
2. Lower the loosened screws in the top of the drawer front into
the upper notches in the drawer glides.
NOTE: It helps if one person holds the drawer glides steady
while another person aligns the drawer front and inserts the
screws into the notches.
3. Align the holes in the bottom of the drawer front with the
holes in the bottom of the drawer glides and fasten with the
screws removed earlier.
4. Tighten the two top screws.
Reconnect Wiring
1. Align the two ends of the wiring connector and push them
together until you hear a “click” sound and feel the tabs snap
into place on the connector.
2. Gently pull on the wiring connection to ensure the wiring
connection is completely seated. Replace the wiring cover.
NOTE: The wiring connection must be complete for the
drawer temperature control to operate.
3. Replace the interior bin.
A. Press tab B. Wiring connection cover
B
A
A. Loosen top screws
B. Drawer glide bracket
C. Remove bottom screws
A
C
B
Loading ...
Loading ...
Loading ...