Loading ...
Loading ...
Loading ...
13
Final Steps
Electrical Shock Hazard
Plug into a grounded 3 prong outlet.
Do not remove ground prong.
Do not use an adapter.
Do not use an extension cord.
Failure to follow these instructions can result in death,
fire, or electrical shock.
WARNING
1. Plug into a grounded 3 prong outlet.
2. Reset the controls. See the “Using the Controls” section.
3. Return all removable parts and food to the drawers.
Electrical Requirements
Electrical Shock Hazard
Plug into a grounded 3 prong outlet.
Do not remove ground prong.
Do not use an adapter.
Do not use an extension cord.
Failure to follow these instructions can result in death,
fire, or electrical shock.
WARNING
Before you move your refrigerator into its nal location, it
is important to make sure you have the proper electrical
connection.
If the supply cord is damaged, it must be replaced by the
manufacturer or its service agent or a similarly qualied person.
Do not use a cord that shows cracks or abrasion damage along
its length or at either the plug or connector end.
Recommended Grounding Method
A 115 V, 60 Hz, AC only 15 or 20 A fused, grounded electrical
supply is required. It is recommended that a separate circuit
serving only your refrigerator and approved accessories
be provided. Use an outlet that cannot be turned off by a switch.
Do not use an extension cord.
IMPORTANT: If this product is connected to a GFCI (Ground
Fault Circuit Interrupter) protected outlet, nuisance tripping of the
power supply may occur, resulting in loss of cooling. Food quality
and avor may be affected. If nuisance tripping has occurred, and
if the condition of the food appears poor, dispose of the food.
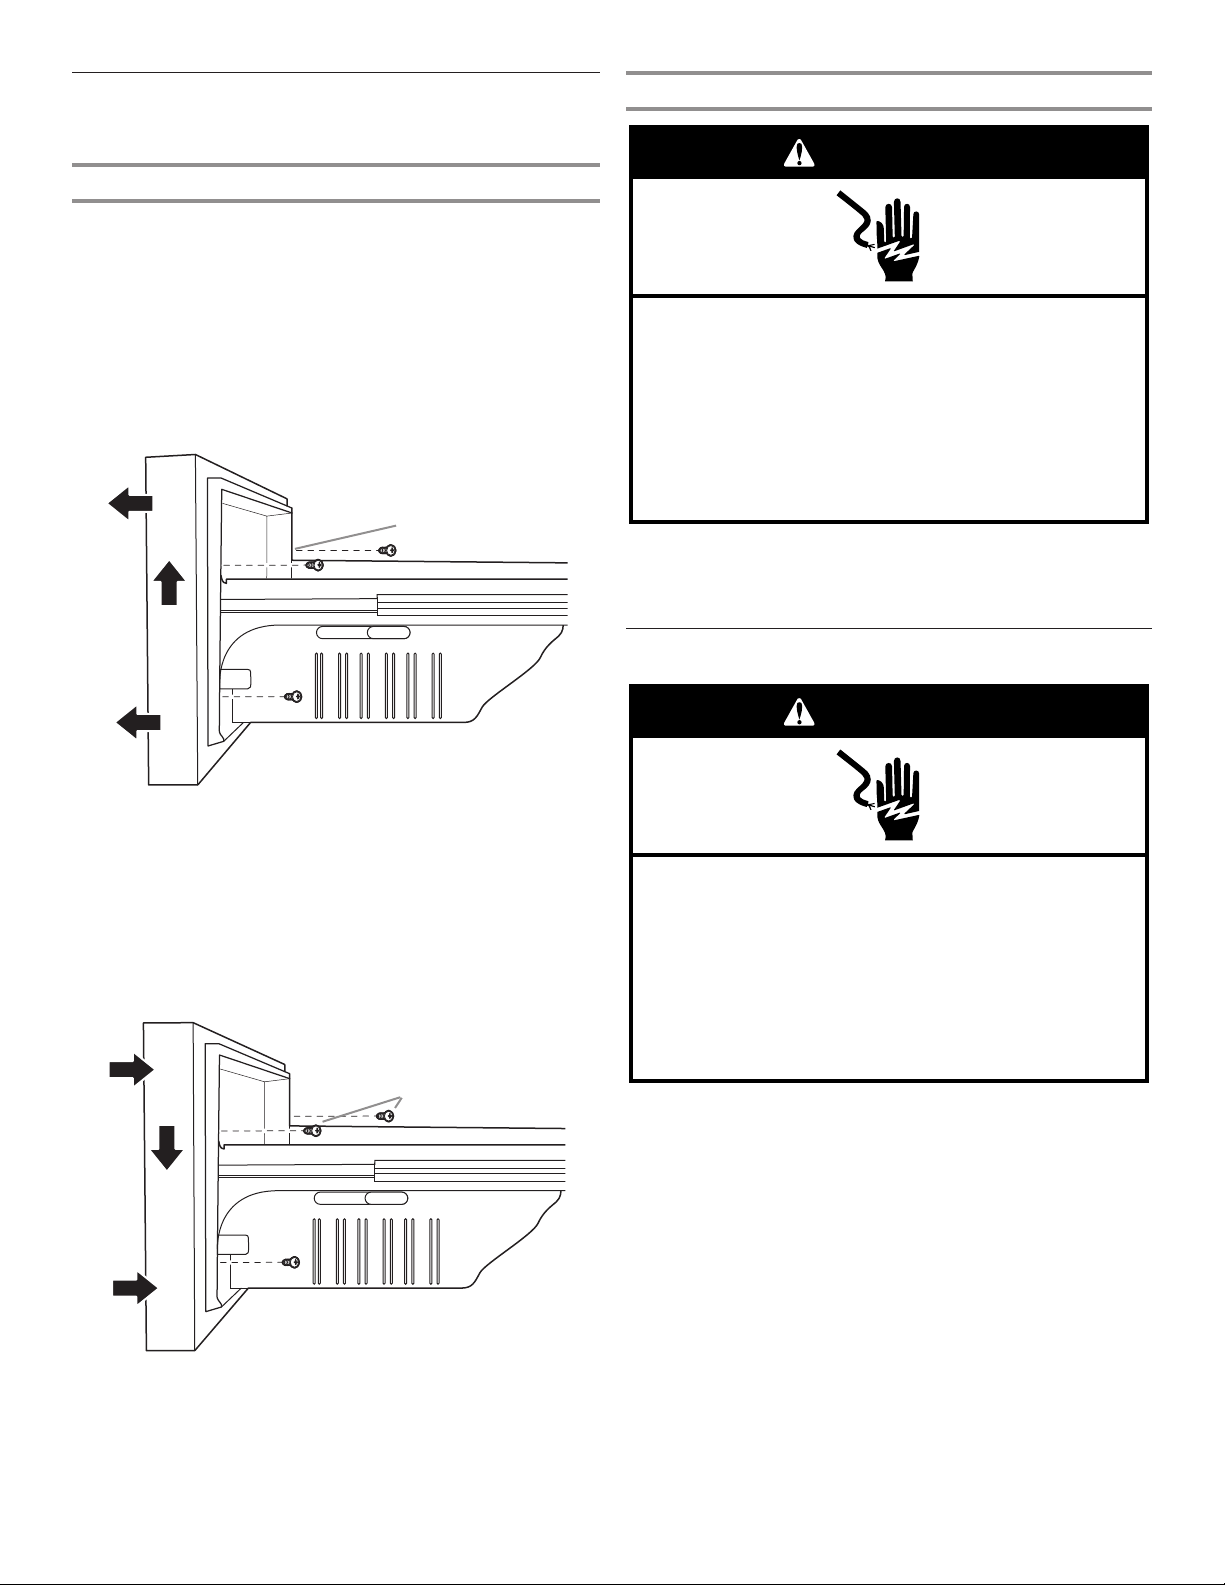
Remove and Replace
Freezer Drawer Fronts
Freezer Drawer
Remove Drawer Front
1. Open the freezer drawer to its full extension.
2. Loosen the two top screws that fasten the drawer front to the
drawer glides. The two screws (one on the left-hand side and
one on the right-hand side) are located inside the drawer
front.
3. Remove the two screws at the bottom, inside the drawer front
that fasten the drawer front to the drawer glides.
4. Lift up on the drawer front to release the screws from the
drawer glide bracket slot.
A. Drawer glide bracket slots
Replace Drawer Front
1. Pull out the freezer drawer glides to their full extension.
2. Holding the drawer front by its sides, align the top screws on
the inside of the drawer front with the bracket slots on the
drawer glide.
NOTE: It helps if one person holds the drawer glides steady
while another person aligns the drawer front and inserts the
screws into the slots.
A. Drawer front screws
A
3. Tighten the top two screws of the drawer front and then
reinstall the bottom two screws.
A
Loading ...
Loading ...
Loading ...