10
SOME NOTIONS ON
HUMIDITY
Air always contains a certain amount of water in
the form of vapour. This determines the level of
humidity in an atmosphere.
The capacity of the air to hold water vapour
increases with temperature.
This is why in our homes, as soon as the tempe-
rature decreases, the vapour contained in the air
condenses, as is evident on the colder surfaces
in the room, such as the windows, walls etc.
The purpose of a dehumidifier is to remove the
excess moisture from the air, avoiding the dama-
ge caused by condensation.
Experts have established that the optimum envi-
ronmental conditions for our well being and for
the home are obtained between 40% and 60%
relative humidity.
With very low temperatures, you are recommen-
ded to heat the room even minimally.
This considerably increases the dehumidifying
power of the appliance.
With heating, the condensation formed by the
water vapour on windows and other cold surfa-
ces evaporates into the air to be collected by the
dehumidifier. Air leaving the dehumidifier is
usually warmer than room temperature.
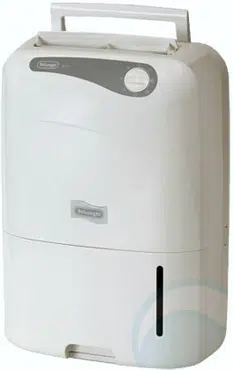
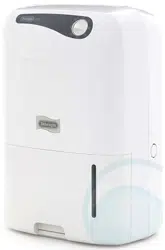
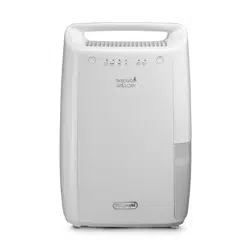
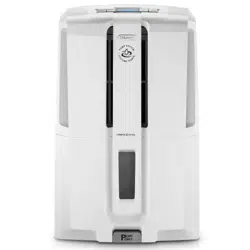
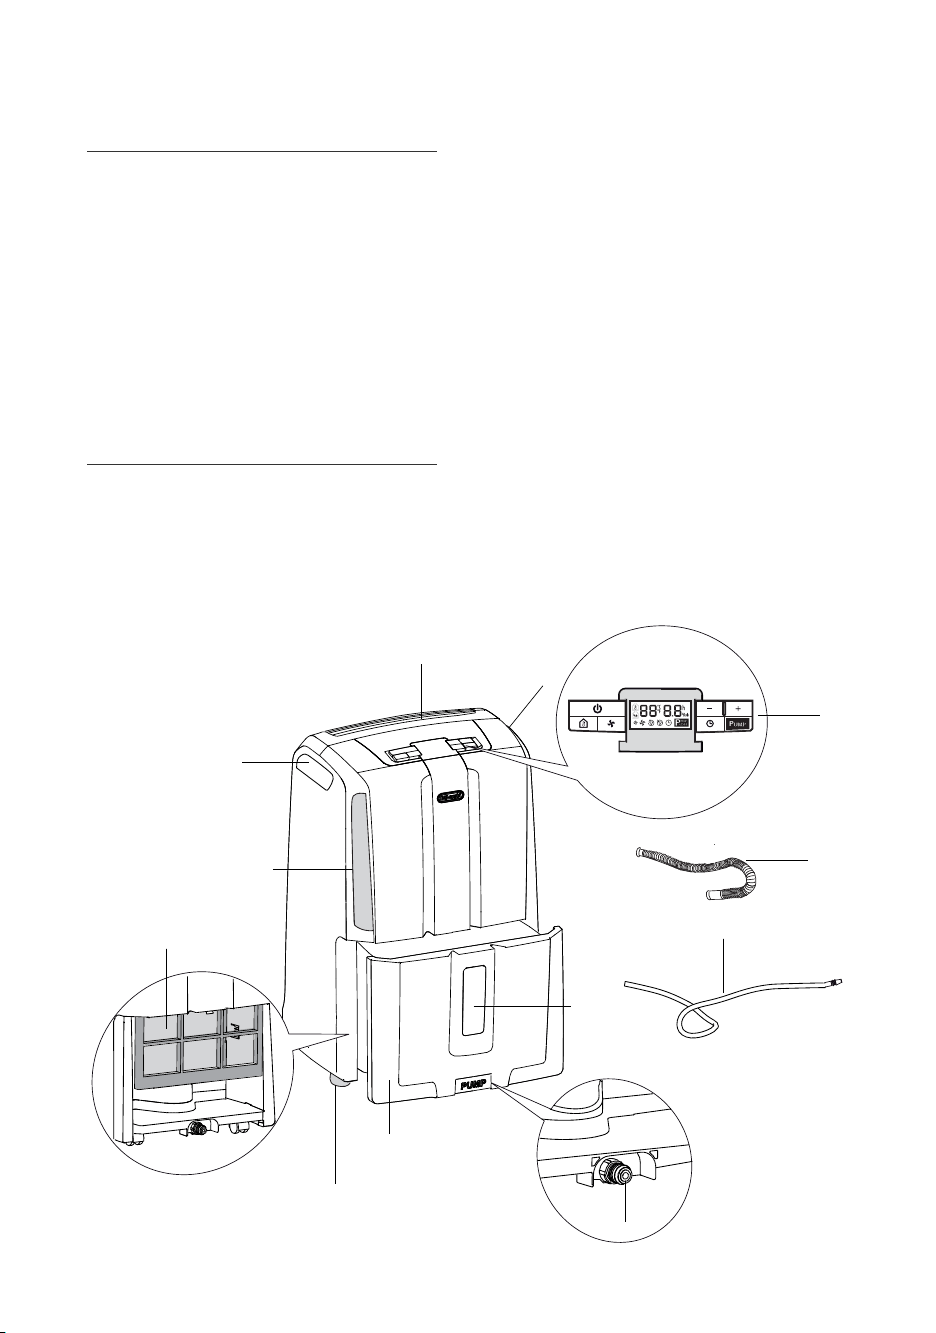
DESCRIPTION/ACCESSORIES
1. Control panel
2. Water level viewing window
3. Condensate collection tank
4. Lifting handles
5. Air intake grille
6. Air filter
1
3
7
2
4
4
5
8
11
10
9
6
7. Air outlet grille
8. Condensate drain hose to be inserted in the
back of the appliance
9. Pump condensate drain hose to be inserted
in the front of the appliance
10. Pump connector (remove cap before use)
11. Castors
11
INTRODUCTION
Thank you for choosing a De'Longhi product.
Take a couple of minutes to read these instruc-
tions.
This will avoid danger or damage to the appliance.
Symbols used in these instructions
The symbols below draw your attention to impor-
tant warnings.
It is vital to respect these warnings.
Failure to do so may result in electric shock, serious
injury, burns, fire or damage to the appliance.
Danger!
Failure to observe the warning may result in life
threatening injury by electric shock.
Important!
Failure to observe the warning may result in injury
or damage to the appliance.
N.B.:
This symbol draws your attention to important
recommendations and information.
Problems and repairs
In the event of problems, first try and resolve
them by reading the information given in the
"Troubleshooting" section on page 17.
If the appliance requires repair, always contact a
Service Centre authorised by the manufacturer.
Always insist on original spare parts. Repairs car-
ried out by unauthorised personnel may be dan-
gerous and invalidate the guarantee.
IMPORTANT
WARNINGS
Fundamental safety warnings
Danger!
This is an electrical appliance, it
is therefore important to respect the following
safety warnings:
• Do not touch the appliance with wet hands.
• Do not touch the plug with wet hands.
• Make sure the mains socket used is always
accessible, enabling you to unplug the
appliance when necessary.
• Always unplug the appliance using the plug
itself. Never pull the cable as it might be
damaged.
• To disconnect the appliance completely from
the electricity supply, you must unplug it from
the mains socket.
• If the appliance malfunctions, do not attempt
to repair it. Turn the appliance off, unplug
from the mains socket and contact a Service
Centre.
• Do not move the appliance by pulling the
power cable.
• It is dangerous to modify or alter the charac-
teristics of the appliance in any way.
• If the power cable is damaged, it must be
replaced by the manufacturer or an authorised
technical service centre in order to avoid all
risk.
• Do not use extension leads.
• The appliance must be installed in accordance
with the rules on household appliances in
force in the country concerned.
• The appliance must be connected to an effi-
cient earth installation. Have your electrical
circuit checked by a qualified electrician.
• This appliance is not intended for use in the
reclamation of commercial or residential pro-
perty damaged by water.
Danger!
Keep packaging materials
(plastic bags, polystyrene foam) out of reach of
children.
Danger!
The appliance is not intended for
use by persons (including children) with reduced
physical, sensory or mental capabilities, or lack of
experience and knowledge, unless they have been
given supervision or instruction concerning use of
the appliance by a person responsible for their
safety. Always supervise children. Make sure they
do not play with the appliance.
KEEP THESE
INSTRUCTIONS
FOR DOMESTIC USE ONLY
EN

12
Appropriate use
The appliance is designed and produced for
domestic use only.
Use this appliance only as described in this
instruction manual.
As with all electrical equipment, whilst the instruc-
tions aim to cover as many eventualities as possi-
ble.
caution and common sense should be applied
when operating and installing this appliance.
General safeguards
• Do not install the appliance in rooms contai-
ning gas, oil or sulphur. Do not install near
sources of heat.
• Do not use the appliance on sloping surfaces.
• Keep the appliance at least 50 cm away from
flammable substances (alcohol etc) or pres-
surised containers (e.g. aerosol cans).
• Do not rest heavy or hot objects on top of the
appliance.
• Always transport the appliance upright or
resting on one side.
Remember to drain the condensate tank befo-
re moving the appliance.
Wait at least 1 hour after transporting the
appliance before starting it.
• The refrigerant gas R410A conforms to EC
environmental regulations. Avoid perforating
the refrigerant circuit of the appliance. ENVI-
RONMENTAL INFORMATION: This unit con-
tains fluorinated greenhouse gases covered
by the Kyoto Protocol.
Maintenance and disposal must be carried out
by qualified personnel only (R410A,
GWP=1975).
* Verify the type of refrigerant gas used in
your appliance on the rating plate.
• The materials used for packaging can be recy-
cled. You are therefore recommended to dis-
pose of them in special differentiated waste
collection containers.
• Do not use the appliance outdoors.
• Do not obstruct the air intake or outlet.
• Do not use the appliance in laundry rooms.
Instructions
Read these instructions carefully before installing
and/or using the appliance.
• Keep these instructions carefully.
If the appliance is transferred to other owners,
they should also be given these instructions.
• Failure to respect the instructions may result
in injury or damage to the appliance.
The manufacturer is not liable for damage
deriving from failure to follow these instruc-
tions.
• Keep the list of Service Centres and identify
the Centre nearest you.
Electrical connections
After moving the appliance, wait at least an hour
before turning it on again.
Before plugging the appliance into the mains soc-
ket, check that:
• The mains power supply corresponds to the
working voltage indicated on the rating plate.
• The power socket and electrical circuit are
adequate for the appliance.
• The power socket matches the plug. If this is
not the case, have the plug replaced by a qua-
lified electrician;
• The mains socket is adequately earthed.
INSTALLATION
Position the appliance in the room to be dehumi-
dified.
A free space of at least 50 cm must be left at the
front of the dehumidifier, so as not to block the air
outlet.
For efficient ventilation a space of about 5-10 cm
should be left at the back of the appliance.
The condensate can be drained in three ways:
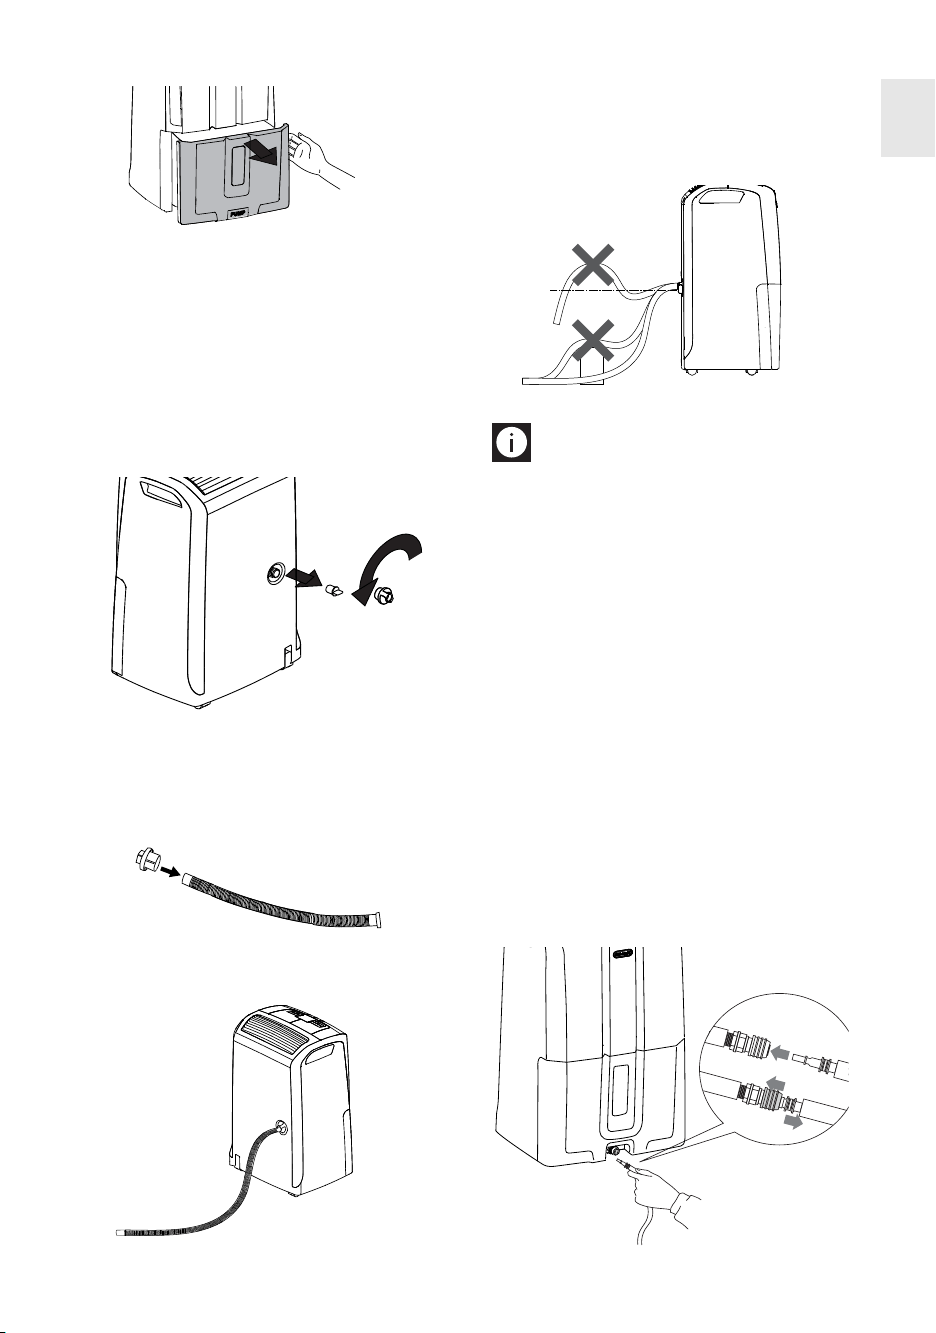
A) Draining into the tank
The condensate can be drained directly into the
tank.
The tank can be easily removed (fig.1).
When the tank is full, remove and empty into a
sink or bath, then put back correctly.
Please note: The tank must be positioned cor-
rectly. An intermittent beep means the tank is not
correctly positioned.
13
B) Continuous external draining
If the appliance is to be operated for long periods
but you are unable to empty the tank regularly,
you are recommended to use the continuous
drain facility.
1) Remove the protective cap 1 by turning it anti-
clockwise then remove the rubber cap 2 from
the spout (fig. 2).
2) Insert the protective cap 1 on the condensate
drain hose (8) as far as it will go (fig. 3), then
screw the protective cap back onto the spout
(fig. 4).
3) Make sure the end of the hose is no higher
than the spout (fig. 5) or water could remain
in the tank. Make sure there are no kinks in
the hose.
Please note:
Keep the rubber cap to close
the spout when the continuous drain function is
not in use.
C) Continuous drain with pump (cer-
tain models only)
Thanks to the exclusive condensate drain system,
the hose (9) can be used to drain condensate with
a difference in level of up to 4 m between the end
of the hose and the outlet.
For pump assisted drainage, connect the hose
provided (9) to the connection on the bottom of
the appliance (fig. 6). Select the dehumidifying
function and press the pump button.
Please note: If the condensate hose is not in
place and the pump is enabled, the message
PUMP will flash. To eliminate the problem:
• Check that the hose is correctly positioned
• Unplug the appliance from the mains and plug
in again
fig. 4
1
2
fig. 2
fig. 3
1
PUSH
2
fig. 6
EN
fig. 1
NO
NO
YES
fig. 5
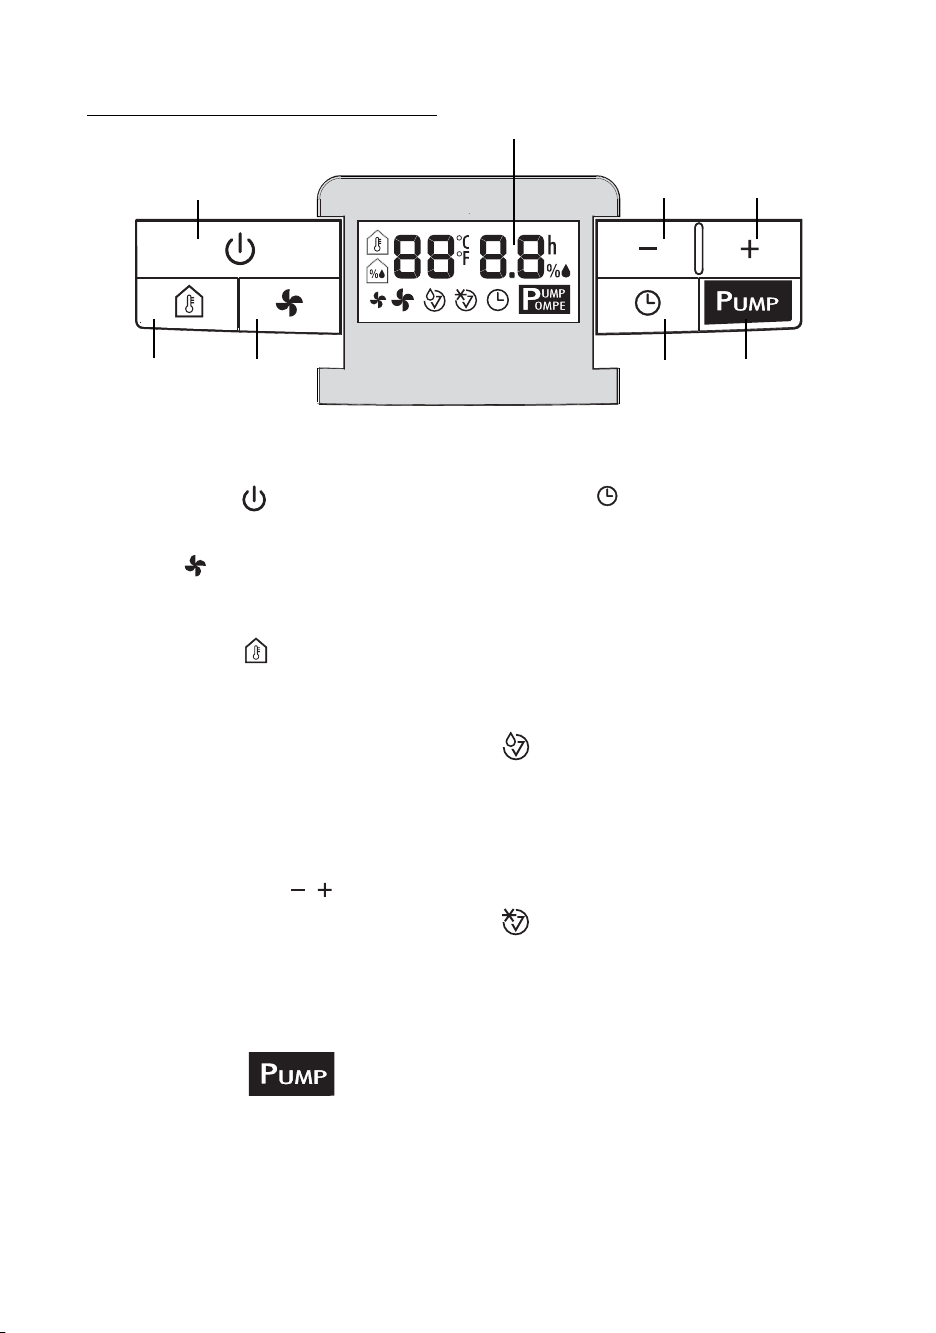
Description of the control panel
"ON/Standby" button
Turns the appliance on and off.
"Fan" button
Selects fan speed (MIN/MAX)
Thermometer button
Temporarily displays the room temperature mea-
sured by the appliance.
Press once to display the temperature in °F. Press
twice, to display °C. After a few seconds, the level
of humidity measured in the room is displayed
again.
N.B.: the measurements displayed are indicative
only.
Increase/decrease buttons
Set the percentage of humidity required in the
room, increasing or reducing it in steps of 5%.
These buttons are also used to set the timer. From
0 - 10 the time varies in steps of 30 minutes, from
10 - 24 in steps of an hour.
Pump button
(certain models only)
When the pump button is pressed, the message
PUMP is displayed.
If PUMP flashes, the pump is not functioning cor-
rectly.
Timer button
Sets the timer to delay when the machine comes
on or goes off.
Display
Meaning of the codes or symbols which may be
displayed:
-- --
Indicates that the appliance is in standby
mode.
Tank alarm
If this symbol flashes, the tank is full, absent or
incorrectly positioned.
The alarm continues until the tank is correctly
positioned.
Defrost alarm
With an ambient temperature of less than 15°C,
(59°F) the appliance performs frequent defrosting
cycles. While the appliance is defrosting, this
symbol comes on and remains on until defrosting
is completed. It also comes on when the applian-
ce pauses for about 3 minutes after start-up.
14
CONTROL PANEL
Display
Increase
humidity
button
Pump
button
Timer
button
ON/Stand-by
button
Fan
button
Room
temperatu-
re button
Decrease
humidity
button

MODE SELECTION
1) Plug the appliance into a mains socket.
2) "
-- --
" is displayed to indicate that the applian-
ce is in standby and therefore ready for ope-
ration.
If " " is displayed, you must empty the tank
or position it correctly.
3) Press the ON/Standby button.
Dehumidifying mode
The display shows the level of humidity measured
in the room (e.g.:
63), on the left and the requi-
red level of humidity (e.g.
55 ) on the right.
Press the "+" or "-" button to set the desired humi-
dity (30% means a dry environment, 80% a
humid environment).
Press the " " button to modify fan speed
(MIN/MAX).
When MAX speed is selected, the appliance ope-
rates at maximum dehumidifying power.
When MIN speed is selected, the appliance opera-
tes at low power and the noise will also be less.
To display the temperature measured in the room,
press the button.
In sequence, the temperature in °F, then in °C, is
shown on the left of the display. After a few
seconds, the level of humidity measured in the
room is displayed again.
When the appliance has reached the required level
of humidity, the compressor stops and the fan
continues operating at minimum speed. As soon
as the humidity increases above the set point, the
appliance will automatically begin dehumidifying
again.
Continuous dehumidifying
To set continuous dehumidifying, press the - but-
ton until "--" is displayed.
This function is ideal for particularly damp rooms
or to dry washing rapidly. In this mode, the
appliance operates irrespective of the humidity
measured in the room.
TIMER FUNCTION
How to programme delay ON
1) With the appliance in stand-by, press the
button. The symbol appears on the right
of the display, together with the number of
hours delay before the appliance comes on.
2) Use the + and - buttons to set the number of
hours required (0.5 - 24). Wait for a few
seconds for the setting to be saved.
The symbol and the time remaining are
displayed.
3) When the set time is reached, the appliance
will start working.
How to programme delay OFF
1) While the appliance is on, press the but-
ton. The symbol appears on the right of
the display, together with the number of hours
delay before the appliance goes off.
2) Use the + and - buttons to set the number of
hours required (0.5 - 24). Wait for a few
seconds for the setting to be saved.
The symbol and a countdown of the time
remaining are displayed.
3) When the selected time is reached, the
appliance will stop working.
Changing or disabling the timer
function
To change the timer settings, press the timer but-
ton once, then use the + and - buttons. To disable
the timer function, press the timer button twice.
Please note: when started up, or when power is
restored, the appliance operates in the mode
selected before it shut down.
15
EN
CLEANING AND
MAINTENANCE
Always unplug the appliance from the power soc-
ket before performing any cleaning or maintenan-
ce operations.
For safety reasons, never wash the dehumidifier
using a jet of water.
Cleaning the cabinet
• Clean the appliance using a slightly damp
cloth then dry with a dry cloth.
• Do not use petrol, alcohol or solvents to clean
the appliance.
• Do not spray liquid insecticide or similar pro-
ducts as they may deform the plastic.
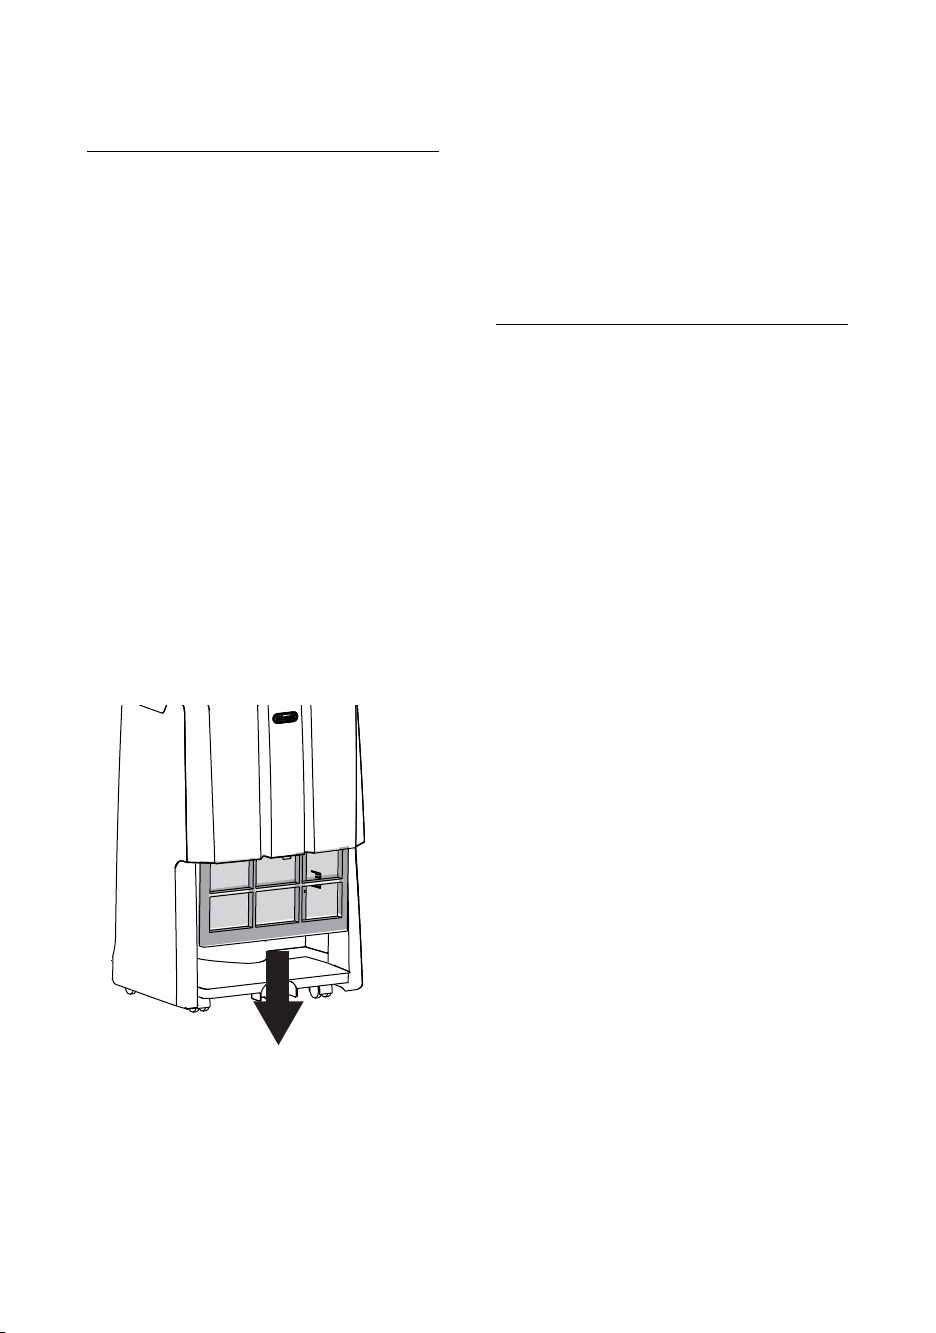
Cleaning the air filter
If the filter is dirty, air circulation is compromised
and the efficiency of the dehumidifying and air
purifying functions decreases.
It is therefore good practice to clean the filter at
regular intervals.
The frequency depends on the duration and con-
ditions of operation.
If the unit is used constantly or frequently, you are
recommended to clean the filter once a week.
• Remove the air filter by pulling downwards
(Fig. 7).
• Use a vacuum cleaner to remove dust accu-
mulations from the filter. If the filter is very
dirty, rinse well in warm water. The tempera-
ture of the water must not exceed 40°C. After
washing the filter, allow it to dry completely
before repositioning it.
If the appliance is not used for long
periods
• After unplugging the appliance from the
power socket, empty the tank.
• Clean and reposition the filter.
• Cover the appliance with a plastic bag to pro-
tect it from dust.
TECHNICAL SPECIFICATIONS
Power supply voltage See rating plate
Absorbed power “
Maximum power input “
Freeze protection device Yes
Hygrometer Yes
Fan speeds 2
Air filter Yes
Operating limits:
temperature (5°C - 32°C)
relative humidity 30-90%
16
fig. 7
17
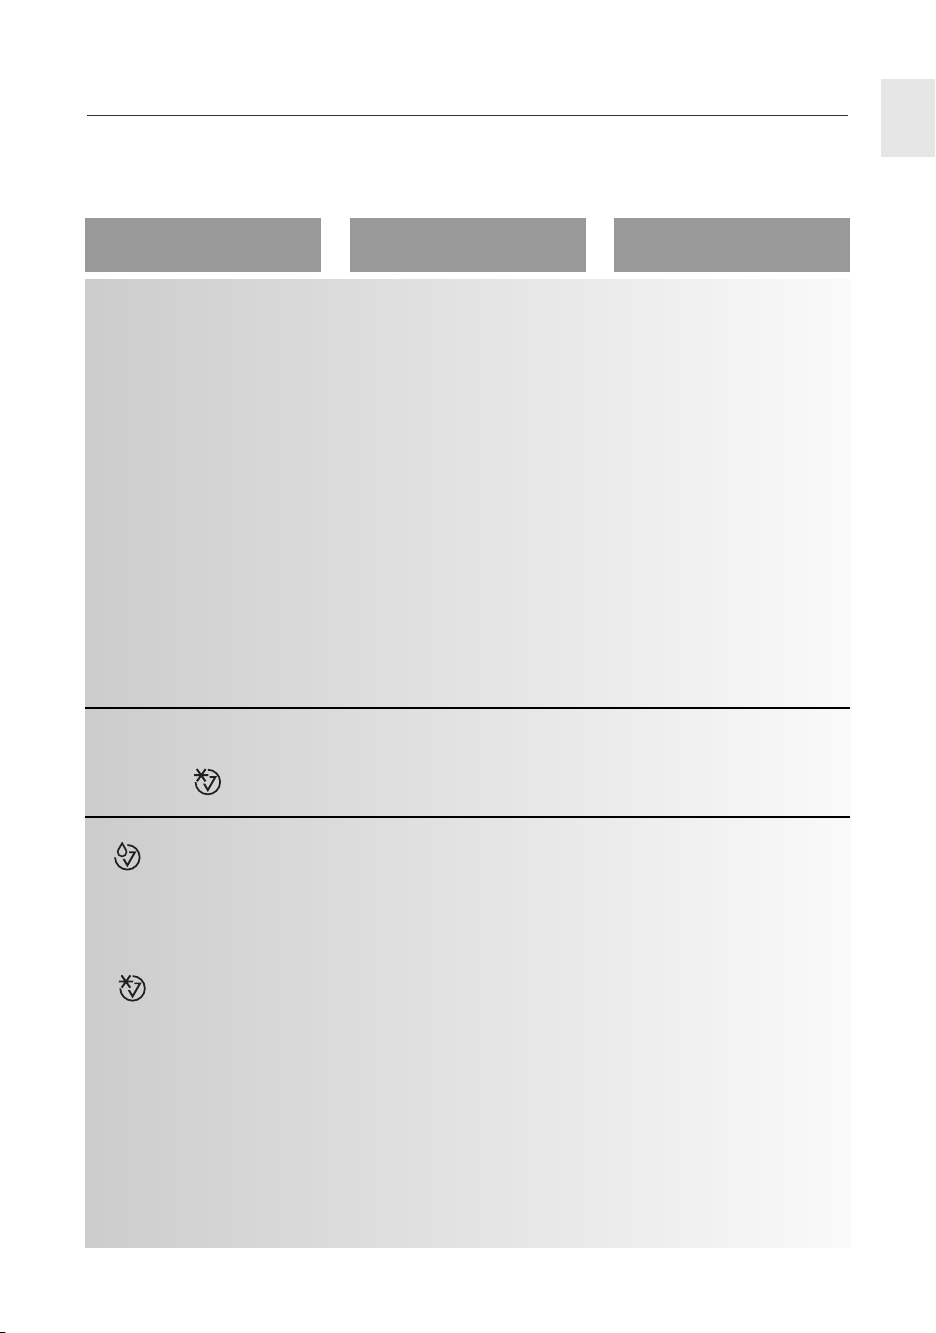
TROUBLESHOOTING
Check the following points before calling your local authorised Service Centre.
PROBLEMS CAUSE SOLUTION
The filter is blocked.
The temperature or humidity
in the room are too low.
The room is too big for the
dehumidifying power of the
appliance.
Too many sources of humidity
in the room (pots of boiling
water, etc.)
Humidity set too high.
Clean the filter
In certain conditions, it is nor-
mal for the appliance not to
dehumidify (in certain cases,
it is recommended to heat the
environment)
Decrease the humidity set
point
The safety device has tripped
correctly.
Wait for 3 minutes to pass
The tank is missing
The tank is full
The tank is incorrectly positioned
The temperature in the room is
very low
One of the sensors on the
appliance is faulty or the humi-
dity in the room is too low or
too high to be measured cor-
rectly
Replace the tank
Empty the tank
Position the tank correctly
Increase room temperature
See if the appliance starts
working again when moved
into another room with a level
of humidity within the opera-
ting limits indicated in the
"Technical Specifications" sec-
tion. If the problem persists,
call the Service Centre
The appliance is operating in
dehumidifying mode, but the
humidity does not decrease
The appliance does not ope-
rate for 3 minutes after
start-up and is displa-
yed
“ “ is displayed
“ ” is displayed
“E2”/”E3” is displayed
EN