Loading ...
Loading ...
Loading ...
TEMPERATURE SELECTION
The temperature of the appliance can be adjusted
by turning the thermostat dial on the inner ceiling of
the appliance.
• Lower numbers on the thermostat dial indicate
warmer temperatures.
• Higher numbers on the thermostat dial indicate
colder temperatures.
• The temperature range of the appliance
is approximately -12°C (10.4°F) to -24°C
(-11.2°F).
• The temperature inside the appliance can
vary based on ambient room temperature,
the frequency that the door is opened and the
amount of fresh food that has recently been
added to the unit.
• To stop the cooling function, turn the control
knob to the “0” position.
Tips when storing fresh food
• The freezing capacity of this appliance is
approximately 9 Kg (20 Lbs.) in 24 hours.
• Do not overload the appliance as this can affect
performance.
• Do not freeze large quantities of fresh food at
the same time.
4
OPERATING INSTRUCTIONS
LEVELING INSTRUCTIONS
There are two adjustable legs on the bottom of the
appliance that can be turned up or down to ensure
that the appliance is level.
1. Turn the leveling leg counter-clockwise as far as
it will go, until the top of the foot is touching the
bottom of the chassis.
2. Slowly turn the leveling leg clockwise until the
appliance is level.
DOOR REVERSAL INSTRUCTIONS
If the appliance is placed on its back or side for any
length of time during this process, it must be allowed
to remain upright for 6 hours before plugging it in
to avoid damage to the internal components.
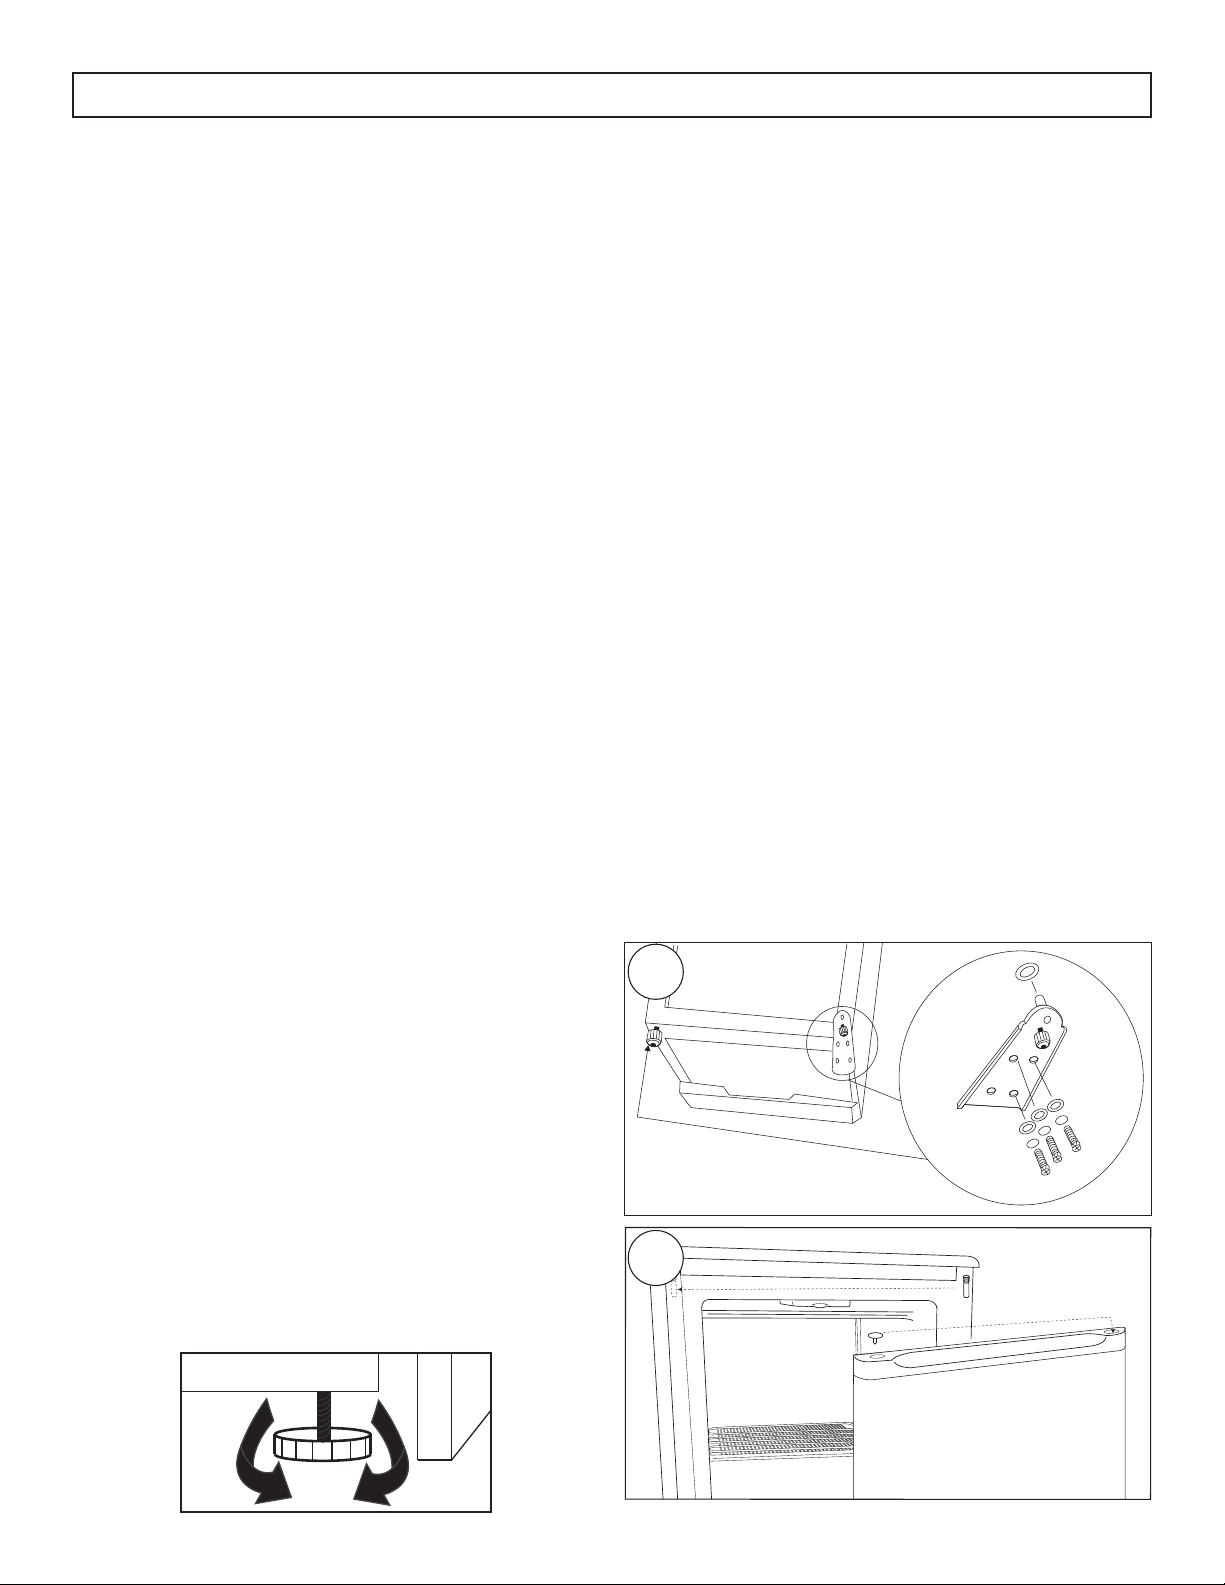
1. Remove both leveling legs located at the front of
the cabinet. See fi gure A.
2. Remove the screws holding the lower hinge
assembly to the cabinet. See fi gure A.
3. Remove the door from the cabinet by lifting the
door slightly and then pulling downward.
4. Using a fl at head screwdriver, remove the upper
hinge pin from the worktop and install it on the
opposite side of the cabinet. See fi gure B.
5. Remove the hole plug from the top left side of the
door and the bushing from the top right side of
the door and swap their positions. Do the same
with the hole plug and bushing on the bottom of
the door. See fi gure B.
6. Install the door on the cabinet. Ensure that the
top of the door is level with the top of the cabinet
and that the rubber gasket makes a good seal
with the cabinet all the way around.
7. Install the lower hinge assembly on the opposite
side and then install both leveling legs.
A
B
Loading ...
Loading ...
Loading ...