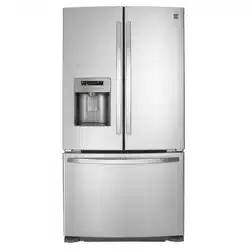
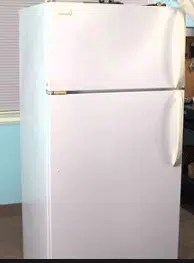
Installation Instructions for Top Mount
To avoid electric shock, which can cause death or severe personal injury, do not connect your
refrigerator to an electrical power source until you have completed Step 3 of these instructions,
These installation instructions
are provided only as a possible
customer option. We recommend
that you use a service or kitchen
contracting professional to install
your refrigerator.
Prepare The Installation Site ....
Include these minimum guidelines in your site
preparation:
• Choose a place near a grounded electrical
outlet. Information about cabinetry
• Do not use an extension cord or an adapter construction for your new appliance
plug. is available for contractors. Call
• Avoid direct sunlight and close proximity to a 1-877-435-3287.
range, dishwasher or other heat source.
o
Floor should be level and able to support a fully
loaded refrigerator.
Allow the following clearances for ease of installation,
proper air circulation, and plumbing and electrical Room temperatures below 55°F
connections: (13°C) or above ll0°F (43°C)
Sides & Top: 3/8 inch will impair cooling ability of your
refrigerator's compressor.
Rear: 1 inch
Transport Unpackaged Refrigerator To Site
By now, you have already removed your refrigerator's shipping carton.
You may still need to use a hand truck to move it through close spaces or
entrances. If the refrigerator is larger than an entrance, consider two options:
• Remove the entrance door if one exists.
• Remove the refrigerator doors (see how in your Use & Care Guide).
When using a hand truck:
• Load refrigerator from side of cabinet only.
• Do not run retaining straps over handles.
• Do not over-tighten retaining straps.
• Never use refrigerator handles to move the
refrigerator.
• Remove tape from doors only after unit is in place, side may damage flooring.
Connect Water Supply
What you will need:
Shifting the refrigerator from side to
• Access to a cold water f/_ 1_ t'_TL'_
line with pressure of
30-100 psi. To avoid property damage:
• Usecopper tubing for the wabersupply line
• Copper tubing with (plastictubing ismore likelyto leak).
1/4-inch (6.4mm) OD.
Length for this tubing is " Ensure water supply complies with local
plumbing codes.
the distance from the rear of the refrigerator
to your household water supply line plus 7 feet (2.1 meters).
• A shut-off valve for the connection between your household water line and the refrigerator
supply line. Do not use a self-piercing shut-off valve.
• A compression nut and ferrule (sleeve) for the water supply connection at the rear of your
refrigerator.
Not satisfied with the installation of your refrigerator?
Refrigerator
To conned: the water supply to the rear of your
refrigerator:
Plastic Water
1 Ensure that the refrigerator is not plugged in.
2 Flush the supply line until water is clear by placing the end
of the copper tube in a sink or bucket and opening the ...........
shut-off valve.
3 Remove the plastic cap from the water valve inlet at the
rear of your refrigerator. Discard the cap.
4 Slide the brass compression nut, then the ferrule (sleeve)
onto copper tube.
5 Push the copper tube into water valve inlet as far as it will
go (1/4inch).
6 Slide the ferrule (sleeve) into valve and finger-tighten the
compression nut onto valve. Tighten another half turn
with a wrench. Do not over-tighten.
7 Secure the copper tube to your refrigerator's rear panel
with a steel clamp and screw (see illustration).
8
from household ware! Supp!y
(Include enough tubing in loop to allow
mov!ng refrigemto[ ou! for dean!ng:)
Coil the excess copper tubing (about 21/2turns) behind your refrigerator as shown. Arrange
coiled tubing to avoid vibration or wear against other surfaces.
Open water supply shut-off valve and tighten any connections that leak.
>
• The Icemaker's fill valve may operate noisily if the household water supply is shut off.
• After ensuring no water leaks exist at any connection, be sure to check for leaks again in 24
hours.
, Place In Permanent Position
If possible, use a hand truck to position the refrigerator directly in front of its cabinet enclosure.
Be careful not to move the refrigerator beyond its water supply (copper tubing) connections.
Plug in the power cord, and push the refrigerator
straight back into place.
Shifting the refrigerator from side
to side may damage flooring.
If you are installing your refrigerator without • Do not block the toe grille on the
connecting it to a water supply, make sure the lower front of your refrigerator.
Icemaker's power switch is turned Off (see the Use Sufficient air circulation is essential
& Care Guide for more details), for proper operation.
5 Level Refrigerator & Adjust Doors (if necessary)
Guidelines for final positioning of your refrigerator:
• All four corners of the cabinet must rest firmly on the floor.
• The cabinet should be level at the front and rear.
• The sides should tilt 1/4-inch (6 mm) from front-to-back (to ensure
that doors close and seal properly).
• Doors should align with each other and be level.
To level the cabinet using the front rollers:
1
2
Remove the toe grille.
Use a flat-blade screwdriver or 3/8inch socket wrench to raise or
lower the front rollers. Use adjustable wrench to adjust leveling
screws.
Raise the front of the refrigerator enough so the doors close freely
when opened halfway. The refrigerator should slope 1/4inch to 1/2
inch from front-to-back. Then level the refrigerator from side-to-
side.
Toe Gdlle
Adjustable Front Roller
(some models)
Rabe
Stationary Front Roller
with Leveling Screw
(some models)
Please contact 1-800-4MY-HOME.
This document should only be removed by customer after installation.
Remove Internal Shipping Materials
We use packing foam and tape to secure the internal parts of your refrigerator for shipping.
Once the refrigerator is in position, you can remove this material.
and Tape
2 Pieces of Tape _
1 Piece of Tape j
2 Pieces of Tape_
2 Pieces of Tape _
2 Pieces of Tape /"_
4 Pieces of Tape /
_" 1 Piece of Tape
-_--I Piece of Tape
_2 Pieces of Tape
2 Pieces of Tape
_2 Pieces of Tape
_2 Pieces of Tape
Location of these materials may vary depending on your model,
Controls
When changing controls, wait 24 hours before making additional adjustments.
Humidity
/
/
/
Door Removal if necessar
If you need to remove the doors to get your refrigerator into the house )lease see "Door
Remova Instructons" n your Use & Care Gu de ir ) DOOr
Door Stop Sto
":"_-_cover _"\Ymf,/ _ Ii _'_/>\, I _ Hinge
To _ _ _JY4 _ H nge _ _" /_.._9:-_"_-Botto_
[] Installation Checkoff List "'
Doors Icemaker
[] Handles are secure and tight
[] Door is completely sealed to cabinet on all
sides
[] Freezer door is level across the top
Leveling
[] Refrigerator is level, side to side and is
tilted 1/4" (6mm) front to back
[] Toe grille is properly attached to
refrigerator
[] Cabinet is setting solid on all corners
Electrical Power
[] House power turned on
[] Refrigerator plugged in
[] House water supply connected to
refrigerator
[] No water leaks present at all connections
- recheck in 24 hours
[] Icemaker isturned ON.
Final Checks
[] Shipping material removed
[] Fresh Food and Freezer controls set
[] Crisper Humidity controls set
P/N:242117500

Instrucciones de instalaci6n pare el
Pare evitar cheques el_ctricos, los cuales pueden causer la muerte o lesiones graves, no conecte el
refrigeradoralsuministroel_ctricohastehabercompletadoelpaso3deestasinstrucdones.
Estas instrucciones de instalaci6n
se ofrecen s61ocomo una opci6n
adicional pare el consumidor. Le
recomendamos contratar a un
t_cnico profesional de servicio o de
instalaci6n de cocinas pare instalar el
refrigerador.
Prepare el lugar de instalaci6n
Incluya estas pautas m[nimas para la preparaci6n del sitio
de instalaci6n:
• Elija un lugar que se encuentre pr6ximo a un
tomacorriente con conexi6n a tierra.
• No use un cable de extensi6n ni un adaptador. La informaci6n sobre la fabricaci6n de
• Evite la luz solar directa y la proximidad a una estufa, armarios para su nuevo electrodom_stico
lavavajillas o cualquier otra fuente de calor, est_ disponible para los contratistas.
• El piso debe estar nivelado y debe poder soportar la Llame al 1-877-435-3287,
carga de un refrigerador Ileno.
Deje los siguientes espacios libres para facilitar la
instalaci6n del refrigerador, la circulaci6n adecuada del aire
y Ins conexiones el_ctricas y de plomer[a:
Costados y parte superior: 3/8" (0,95 cm)
Parte trasera: 1 pulgada (2,54 cm)
Temperaturas ambiente menores de 55°F
(13°C) o superiores a los 110°F (43°C)
impedirgn la capacidad de enfriamiento
del compresor del refligerador.
Transporte el refrigerador sin desempacar al lugar de
instalacibn
En este punto ya retir6 la caja de empaque del refrigerador. Es posible que aQn
necesite una carretilla para moverlo a trav_s de entradas o espacios estrechos. Si el
refrigerador es m_s grande que la entrada, considere dos opciones.
• Retire la puerta de la entrada (si existe).
• Retire Ins puertas del refrigerador (consulte Ins instrucciones en la
Gufa de use y cuidado).
Cuando use una carretilla:
• Levante el refrigerador per el costado solamente,
• No coloque los amarres de seguridad sobre las manijas.
• No apriete demasiado los amarres.
• Nunca use las manijas del reffigerador pare moverlo.
• Retire la cinta de Ins puertas s61odespu_s de que est_ Si mueve el refrigerador de lade a lade,
en su ubicaci6n final, puede dai_ar el revestimiento eel piso.
Conecte el suministro de ague
Qu_ neces[tar&:
Acceso a una tuber[a de _/_, _
suministro de agua frfa
que tenga una presi6n de A fin de evitar da_os materiales:
30 a 100 psi. • Use tuber[a de cobre para el suministro
Tuber[a de cobre de 1/4" de agua (la tuber[a de pl_stico tiene m_s
(6,4 mm) de diametro probabilidad de causar fugas de agua).
externo. La Iongitud de esta tuber[a es la distancia , AsegOrese de que el suministro de agua
desde la parte trasera del refrigerador hasta la cumpla con los c6digos de plomer[a locales.
tuber a de suministro de agua de a vivienda m&s
7 pies (2,1 m).
Una v_lvula de cierre para la conexi6n entre la tuber[a de suministro de agua de la vivienda y la
tuber[a de suministro de agua del refrigerador. No use una v_lvula autoperforante.
Una tuerca de compresi6n y una guarnici6n (manguito) para la conexi6n del suministro de agua a la
parte trasera del refrigerador.
LNo est saUsfecho con la instalaci6n del refrigerador?
refrigerador de instalaci6n superior
Pare conectar e_ sun_inistro de ague al panel trasero del \\ _aberi_depl_sti_pala
refrigerader: \\ o_gu_q_eoo_o_0®n
latuber/a de Ilenado
T0o,l_%to,
& AsegOrese de que el refrigerador no est6 enchufado. \_ d ,_
2 Coloque el extreme de la tuber[a de cobre en el fregadero o
en un balde, abra la v_lvula de cierre y limpie la tuber[a de
suministro hasta que el agua salga limpia.
3 Retire la tapa de pl_stico de la admisi6n de la v_lvula de agua en _
4
5
6
7
8
Abrazadela
Tuercade
compresi6n
delat6n
Guamic[6n
(man_u_to)
la parte trasera del refrigerador. Deseche la tapa.
Inserte la tuerca de compresi6n de lat6n y luego la guarnici6n
(manguito) en la tuber[a de cobre.
lnserte la tuber[a de cobre en la admisi6n de la v_lvula del agua _ _"_'_'_I_
tan adentro como sea posible (V4" o 6,35 ram).
Inserte la guarnici6n (manguito) en la v_lvula y apriete a mano
la tuerca de compresi6n en la v_lvula. Apriete media vuelta m_s
con una Ilave. No apriete demasiado. ,delavivienda
Asegure la tuberfa de cobre al panel trasero de su refrigerador
con una abrazadera de acero y un tornillo (vea la ilustraci6n). {_o_o_,_o_._,_o_o_t_._,_
perm]t_r sacar el lefdgerador para I}mpiado.)
Enrolle el exceso de tubeffa de cobre (aproximadamente 2 V2
vueltas) detras del refrigerador, come se muestra a continuaci6n.
Coloque la tuber[a enrollada de mode que no se produzca vibraci6n ni desgaste contra otras superficies.
Abra la v_lvula de cierre del suministro de agua y apriete cualquier conexi6n en la que haya fugas.
La v_lvula de Ilenado del fabricador de hielo puede generar ruido si el suministro de agua est_ cerrado.
Despu_s de asegurarse de que no existan escapes de agua en ninguna de las uniones, vuelva a realizar
esta verificaci6n a las 24 horas.
Cole ue el electrodom_stico en su ubicaci6n ermanente
De ser posible, use una carretilla pare colocar el refrigerador directamente delante de su alojamiento,
Tenga cuidado de no mover el refrigerador m_s all_ de las conexiones del suministro de agua (tuber[as de cobre).
Enchufe el cord6n y empuje el refrigerador derecho hacia arras
hasta que quede en su lugar.
Siva a instalar el refrigerador sin conectarlo al suministro
de agua, asegOrese de que el interruptor del fabricador de • No bloquee la rejilla inferior en la parte
hielo est_ apagado (consulte la Gu[a de uso y cuidado para delantera de la base del refrigerador.
obtener m_s detalles). Se necesita que la circulaci6n del
............................................................................................................................................................................................................................................................................funcionamientoairesea la suficiente para asegurar eladecuado.
5 Nivele el refrigerador y ajuste las puertas (de ser necesario)
Censejes pare la celocaci6n del refr[gerador en su ubicad6n final:
• Las cuatro esquinas de la unidad deben descansar firmemente sobre el piso.
• La unidad debe ester nivelada en la parte delantera y trasera.
• Los costados deben ester inclinados 1/4" (6 mm) de adelante hacia atr_s (pare
asegurarse de que las puertas cierren adecuadamente).
• Las puertas deben ester alineadas la una con la otra y ester niveladas.
Para nivelar el refrigerador usando las ruedas delanteras: Rejilla inferior
& Extraiga la rejilla inferior, Sub,_
2 Use un destornillador piano o una Ilave de cubo de _/8 de pulgada para subir o
bajar las ruedas delanteras. Use una Ilave ajustable para ajustar los tornillos
niveladores.
Si mueve el refrigerador de lado a lado,
puede da_ar el revestimiento del piso.
Eleve la parte delantera del reffigerador Io suficiente como para que las
puertas se cierren autom_ticamente cuando sean abiertas hasta la mitad. El
refrigerador debe tener una inclinaci6n de V4" a V_" (de medio cent[metro a
un centfmetro y medio, aproximadamente) desde el frente hacia arras. Luego
nivele el reffigerador de lado a lado.
Rueda ajustable delantera
(algunos modelos)
Sub_r
Rueda fija delantera con
tornillo nivelador
(algunos modelos)
L>P6ngase en contacto I=800=4Ny-HOME.
Este documento s61o debe ser retirado per el cliente despu_s de la instalaci6n.
Retire el material de empaque interne
Usamos cinta y espuma de empaque para fijar Ins piezas internas del refrigerador para su
transporte. Una vez que el refrigerador est_ instalado en su lugar, puede retirar este material.
espuma y cmta
2 pedazos de cinta /
1 pedazo de cinta --_
2 pedazos de cinta
2 pedazos de cJnta
2 pedazos de cinta --_
4 pedazos de cinta
R_illainfefio[
2 pedazos de cinta
2pedazosde /_
espuma
iiii
...................1 pedazo de cinta
2 pedazos de cinta
2 pedazos de cinta
2 pedazos de cinta
2 pedazos de cinta
La ubicaci6n de estos materiales puede verier segOn el medele,
Controles
Cuando cambie los controles, espere 24 horns antes de realizar cambios adicionales.
M_
Control de
/
/
/
Desinstalaci6n de la uerta de ser necesario
Si debe retirar las puertas para que el refrigerador quepa por la puerta, consulte las "Instrucciones de
desinstalaci6n de la _uerta" de la gu[a de uso y cuidado.
_, Cubierta CulSa
... _ dela Pasador
"" _ bisagra
_i Superior
_._. Bisagra
_i ;'superior
Rejilla int_riol
E]Lista de verificaci6n de ia instalaci6n ......
Puertas Fabricador de hielo
[] Las manijas est_n firmemente instaladas
[] La puerta se cierra bien contra el refrigerador en
todos los lados
_3 La puerta del congelador est_ nivelada en la
parte superior.
Nivelaci_n
[] El refrigerador est_ nivelado de lade a lade e
inclinado 1/4" (6 mm) de adelante hacia atr_s
[] La rejilla inferior est_ firmemente instalada en el
reffigerador
[] El reffigerador descansa firmemente sobre sus
cuatro esquinas
Suministre el_ctrice
[] El suministro de agua est_ conectado al
refrigerador
[] No hay goteos en ninguna de las conexiones -
vuelva a revisar despu_s de 24 horas
[] El fabricador de hielo est_ ENCENDIDO
Tnspecci6n final
[] Material de empaque removido
[] Controles del refrigerador y congelador
ajustados
[] Controles de humedad del caj6n para verduras
programados
[] El suministro el_ctrico del hogar est_ activado
[] El refrigerador est_ enchufado
P/N:242117500
Instructions d'installation pour r frig rateurs compartiments superposes
Pour 6viter des chocs 61ectriques susceptibles de causer de graves blessures ou la mort, ne branchez pas votre
r6frig_rateur _ une source d'alimentation en 61ectricit6 avant d'avoir terming I'_tape 3 de ces instructions.
_ Ces instructions d'installation ne sentfournies que pour vous donner la
Co_t,_ possibilit_ d'installer I'appareil vous-
m&me. Toutefois, nous recommandons
de faire appel _ un technicien qualifi6
Preparation de I'emplacement
Tenez compte des _l_ments suivants dans la preparation de
I'emplacement d'installation :
PlacezI'appareil pr&sd'une prise61ectriquemise _ laterre.
N'utilisez pas de rallonge 61ectrique ni de fiche
d'adaptation. De I'information sur la construction
Evitez d'exposer le r_frig6rateur aux rayons directs du d'armoires pouvant accueillir votre nouvel
soleil et ne I'installez pas pr&s d'une cuisini&re, d'un appareil est disponible pour les entrepreneurs
lave-vaisselle ou de toute autre source de chaleur, en t_16phonant au : 1 877 435-3287.
e Le plancher dolt @trede niveau et dolt pouvoir supporter .........................................................................................................................................................
un r6frig6rateur rempli _ pleine capacit6.
Pr6voyez les d_gagements suivants pour faciliter I'installation,
assurer une circulation d'air appropri6e et raccorder la
plomberie et les branchements 61ectriques :
C6t@s et dessus : ! cm (3/8 po)
!3 °C (55 °F) ou sup_rieures _ 43 °C (1!0 °F)
Arri&re : 2,5 cm (1 po) diminueront la capacit_de refroidissement du
compresseur de vetre r_frig_rateur.
Transport du r_frig_rateur d_ball_ vers son emplacement
d'installation
#,cette _tape, vous avez d_j_ enlev_ I'emballage d'exp_dition du r_frig_rateur. 11se peut que
vous ayez encore besoin d'un chariot manuel pour led_placer dans des passages ou des _ / " _.
espacesrestreints,S,lerefr,gerateurestpluslargequune entreevousavezdeuxopt,ons: ,_',_k_;_ _,
® Enlevez la porte d'entree, s'lly ena une. )'i__
. Enlevez lea portes du r_frig_rateur (reportez-vous au guide d'utilisation et _/_" _
d'entretienpourdesinstructionsd ta,l es). A!. /
Lorsque vous utilisez un chariot manuel : L___'_
Znstallez le r@frig@rateursur le chariot seulement du c6t@de
sea parois lat@rales.
Ne fares pas passer de courroie de retenue par-dessus les
poign@es.
Ne serrez pas trop les courroies de retenue.
Ne d@placezjamais le r@frig@rateur par ses poign@es. Le d@placement lateral du r@frig@rateur
. Enlevez le ruban des portes seulement apr@savoir mis peut endommager le rev&tement de sol.
I'appareil en place.
Des temperatures ambiantes inf_rieures &
Raccordement de ralimentation en eau
Pour 6viter les dommages mat6riels :
Utilisez une conduite en cuivre pour
I'alimentation en eau (un tube en plastique
risque davantage de fuir).
Assurez-vous que I'alimentation en eau est
conforme aux codes de plomberie Iocaux.
Le n6cessaire n° 53039117950, offert chez votre
d6taillant, contient tout le mat6riel requis pour
I'installation d'un raccordement 5 I'alimentation
en eau, y compris une conduite en cuivre de
7,6 m (25 pi) et des instructions compl&tes.
Vous aurez besoin de ceci :
Un acc_s & une canalisation
d'eau froide dot6e d'une _/ _4_,1_ _
pression situ6e entre
206,8 et 689,5 kPa
(de 30 5 !00 Ib/po2).
Une conduite en cuivre de
6,4 mm (Y_ po) de diam&tre
ext6rieur. Pour connattre la Iongueur de conduite dent
vous avez besoin, ajoutez 2,1 m (7 pi) 5 la distance
qui s6pare I'arri&re du r6frig6rateur &la canalisation
du syst&me d'arriv_e d'eau de la maison.
Un robinet d'arr&t pour le raccord situ6 entre la
conduite d'eau du syst&me de distribution domestique
et la conduite d'alimentation du r6frig6rateur.
N'utilisez pas de robinets d'arr&t auto-perceur.
Un 6crou 5 compression etune bague (un manchon)
pour le raccord de I'alimentation en eau situ_
I'arri&re du r_frig6rateur.
P.accordement de I'alimentation en eau _ I°arri&re de votre _o,_q_o,o_ Co_o_
de la machlne
1 Assurez-vous que le r_frig_rateur n'est pas branch,. _=o_on_
2 Placez I'extr_mit_ de la conduite en cuivre dana un _vier ou un _o,oo_
ceSeaU'qu'ellePUiSsoitOuvreZpropre.lerobinet d'arr&t pour laisser couler I'eau jusqu'_ /,,o,_o'_)_°_t°'_
3 Enlevez le capuchon en plastique du robinet d'arriv_e d'eau situ_ _ u_io_"
I'arri&re du r6frig6rateur. ]etez le capuchon. /P<4_ 1_1___ ......P°"'
I'aJh_entatbn
4 Faites glisser I'_crou _ compression en laiton sur la conduite en / _L_"x_._ _
cuivre, puis mettez la bague (le manchon). _s,_o_t_.
_ob_net d'eau
5 Poussez la conduite en cuivre dans le robinet d'arriv_e d'eau aussi il %b,_o_
loin que possible (6,4 mm [!/4 po]).
6 Faites glisser la bague (le manchon) dans le robinet et serrez I'_crou _ob_,,otd'o_,
&compression sur le robinet avec les doigts. Serrez d'un autre
demi-tour avec une cir. Ne serrez pas trop. Condulteenculvrepour
7 Fixez la conduite en cuivre au panneau arri&re du r_frig_rateur & r_,,,on_........ do_yo_mo
de db_rlbufJon dom_f_que
I'aide d'un collier en acier et d'une vis (reportez-vous &I'illustration).
8 Enroulez I'exc_dent de conduite en cuivre (deux tours et demi _,_oo,,o_®,poo_o_,_ ...... _,_.....
IoI_ du nettoyage )
environ) derri&re votre r&frig_rateur, comme illustr&. Placez la
conduite de faqon &_viter les vibrations ou le frottement centre
d'autres surfaces.
9 Ouvrez le robinet d'alimentation en eau et serrez tous les raccordements qui fuient.
• 11se peut que la soupape de remplissage de la machine & glagons fonctionne bruyamment si le syst&me de
distribution d'eau domestique est fermi.
• Apr&s vous &tre assur_ qu'il n'y air aucune fuite d'eau au niveau des raccords, v_rifiez _ nouveau I'absence
de fuite 24 heures plus tard.
, Installation _ I'em lacement ermanent
Si possible, utilisez un chariot manuel pour installer le r_frig_rateur directement devant I'espace pr_vu entre les
armoires.
Prenez soin de ne pas d@placer le r@frig@rateurau-del& de la Iongueur des raccords d'alimentation en eau
(conduite en cuivre).
Branchez le cordon d'alimentation, puis poussez le r_frig@rateur
tout droit en place.
Si vous installez votre r6frig6rateur sans le raccorder 5 une
conduite d'alimentation en eau, assurez-vous que I'interrupteur
de la machine 5 glaqons eat en position d'arr&t (Off) (reportez-
vous au guide d'utilisation et d'entretien pour plus de d_tails).
* Le d6placement lat6ral du r6frig6rateur
peut endommager le rev&tement de sol.
N'obstruez pas la grille de protection
situ6e _ I'avant de votre r6frig6rateur. Une
circulation d'air suffisante est essentielle
au ben fonctionnement de I'appareil.
Hise _ niveau du rdfrigdrateur et ajustement des portes
(si n_cessaire)
Directives pour la rnise en place finale de votre r_frig_rateur :
• Les quatre coins de la caisse doivent reposer fermement sur le plancher.
• Lacaisse dolt &tre de niveau &I'avant et _ I'arri&re.
• L'appareil dolt &tre inclin6 de 6 mm (!/4 po) vers I'arri&re pour que lea portes se
ferment herm6tiquement.
• Les portes doivent &tre align6es I'une sur I'autre et &tre de niveau.
Pour rnettre _ niveau la caisse au moyen des roulettes avant : Gdlle de protection
1 Enlevez la grille de protection.
Utilisez un tournevis &lame plate ou une cl6 _ douille de 3/8 po pour soulever ou
abaisser les roulettes avant. Utilisez une cl_ & molette pour ajuster les vis de mise
niveau.
Elevez I'avant du r_frig6rateur suffisamment pour que les portes se ferment
d'elles-m&mes Iorsqu'elles sent & moiti6 ouvertes. Le r6frig_rateur dolt &tre
inclin6 vers I'arri&re de 1/4 _ 1/2 po (de 6,4 & 12,7 mm). Ensuite, mettez les
c6t6s du r6frig6rateur de niveau.
Roulette avant r_glable
(certains rnodeles)
Roulette avant tixe avee
via de raise a niveau
(eertains rnod_lea)
Ce document ne devrait _tre enlev_ par le client qu'apr_s I'installation,
Enl_vement du matdriel d'expddition intdrieur
Nous utilisons de la mousse et du ruban d'emballage pour prot_ger les pi_ces internes de votre r_frig_rateur
durant I'exp6dition. Une fois que votre r6frig6rateur est install6, vous pouvez enlever le mat6riel d'exp6dition.
1 espaceur de clay°tie
Necessa_ de po_gn6e --
(1 moroeau de ruban)
2 morceaux de --_-
mousse e_ de ruban
/
2 morceaux de ruban
1 morceau de ruban --/
2 morceau× de ruban
2 rnorceaux de ruban
2 morceaux de ruban
4 morceau× de ruban
Grlle de protection
2 morceaux de ruban
2 morceau× de mousse
L'emplacement du mat@riel d'exp@dition peut varier selon le rnod_le.
Commandes
Lorsque vous modifiez les r_glages des commandes, attendez 24 heures avant d'effectuer d'autres changements.
7:,_:;__.
o o,ooooo
Ddpose de la porte (si ndcessaire)
Si vous devez enlever lesportes de votre r_frig_rateur pour le faire entrer dans votre demeure, veuillez vous
reporter & lasection <<_nstructions de d_pose de la porte >>qui se trouve dans le guide d'utilisation et d'entretien.
charni_re
ooo,,o,o } :::
[] Liste de v_rification de I'installation !
Portes Hachine ,_gla(_ons
/_ Les poign6es sent bien fix6es
/_ Les portes ferment herm_tiquement sur tousles
c6t6s de la caisse
/_ La porte du cong61ateur est de niveau tout le long
de la partie sup_rieure
Hise _ niveau
Le syst&me d'alimentation en eau est raccord_ au
r6frig6rateur
[] Zln'y a aucune fuite au niveau des raccords -
seconde v6rification 24 heures plus tard
La machine _ glaqons est en marche
V@rifications finales
[] Les c6t@sdu r@frig@rateursent de niveau. Le
r@frig@rateurest inclin@ vers I'arri@re de 6 mm
(1/4po)
/_ La grille de protection est correctement fix@eau
r@frig@rateur
/_ Les quatre coins de la caisse reposent fermement
sur le plancher
Alimentation en @lectricit@
Le materiel d'exp_dition est enlev_
Lea commandes des compartiments r_frig_rateur
et cong61ateur sent r6gl6es
Les commandes du contr61e d'humidit6 sent
r6gl6es
Le syst_me 61ectrique de la maison eat sous tension
/_ Le r_frig_rateur est branch_
Vous n' tes pas satisfait de I'installation de votre r frig rateur? [:>Veuillez communiquer 1-800-4MY-HOME. No DEPIt_CE: 242117500