Loading ...
Loading ...
Loading ...
21
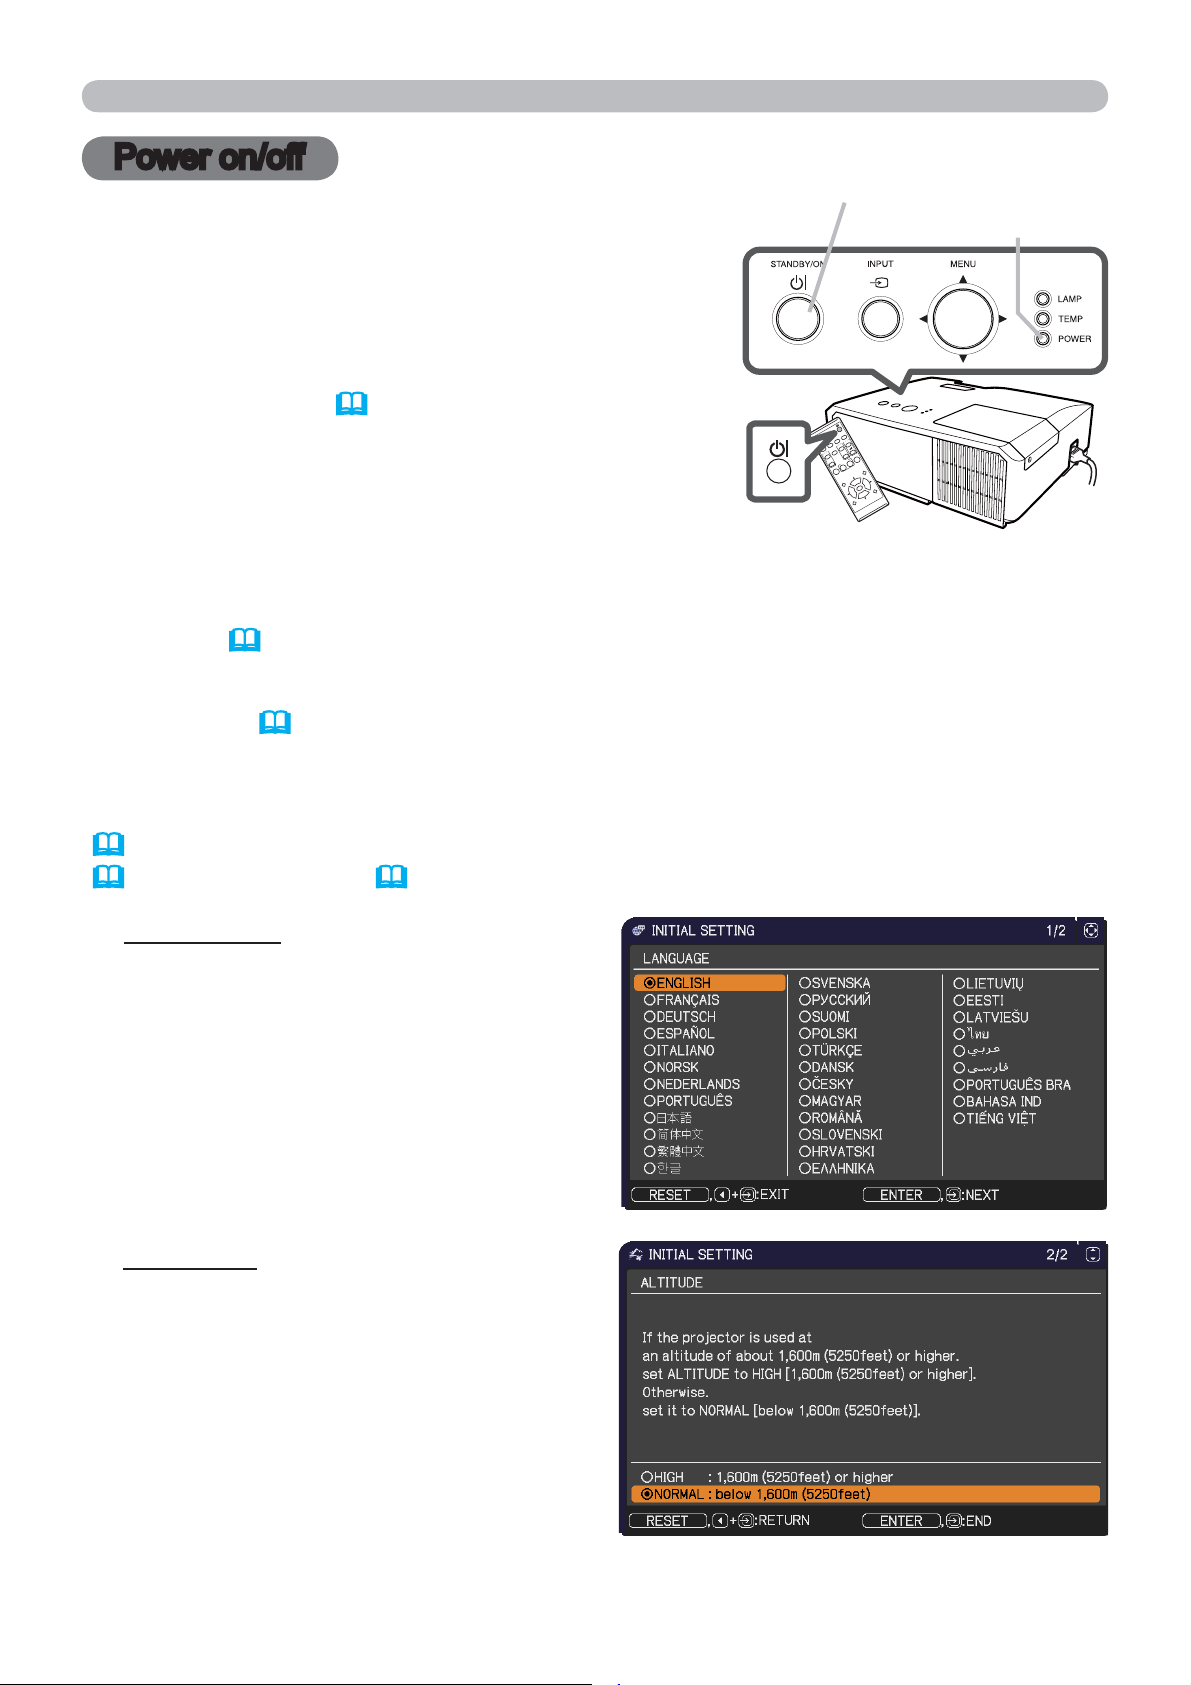
1.
Make sure that the power cord is firmly and
correctly connected to the projector and the
outlet.
Turning on the power
2.
Make sure that the POWER indicator is
steady orange (
115). Then remove the
lens cover.
3.
Press STANDBY/ON button on the
projector or the remote control.
The projection lamp will light up and POWER
indicator will begin blinking in green. When the
power is completely on, the indicator will stop blinking and light in steady
green (
115).
Power on/off
To display the picture, select an input signal according to the section Selecting an
input signal (
24).
Power on/off
The INITIAL SETTING Menu will be displayed by factory default upon startup.
Once the INITIAL SETTING Menu is set, it will not appear until FACTORY RESET
(
66) is executed. If you wish to change the settings, refer to the LANGUAGE
(
50) and ALTITUDE (59) menu.
(1) LANGUAGE: Use the ▲/▼/◄/►
buttons to select the desired language
and press the ENTER button of the
remote control or the INPUT button of
the projector to execute.
(2) ALTITUDE: Use the ▲/▼ buttons to
select NORMAL for altitude below
1600 m (5250 feet), otherwise select
HIGH and press the ENTER button of
the remote control or the INPUT button
of the projector to execute.
VIDE
O
DOC.CAMERA
KEYSTO
NE
ASPECT
SEARC
H
BLAN
K
MUT
E
MY BU
TTON
POSI
TIO
N
ES
C
MENU
RESET
COMPUTER
MY SO
URCE
/
AUTO
MAG
N
IFY
PAG
E
DOWN
ON
OF
F
FREEZE
UP
㧗
VOLUME
ENTER
STANDBY/ON button
POWER indicator
Loading ...
Loading ...
Loading ...