
www.whirlpool.com
www.whirlpool.ca
QUICK START GUIDE/
D
RYER USE............PG. 4
Para una versión en español, visite:
www.whirlpool.com
Número de pieza W102996186A
www.whirlpool.ca
GUIDE DE DÉMARRAGE RAPIDE/UTILISATION
DE LA SÉCHEUSE....PG. 12
®
TABLE OF CONTENTS
Page
DRYER SAFETY...........................................................................................2
QUICK START GUIDE /DRYER USE .........................................................4
Cycles ....................................................................................................... 5
Additional Features...................................................................................5
Changing Cycles and Settings .................................................................5
DRYER CARE...............................................................................................6
TROUBLESHOOTING ................................................................................. 7
WARRANTY .................................................................................................9
ASSISTANCE OR SERVICE..................................................BACK COVER
TABLE DES MATIÈRES
Page
SÉCURITÉ DE LA SÉCHEUSE................................................................. 10
GUIDE DE DÉMARRAGE RAPIDE/
UTILISATION DE LA SÉCHEUSE............................................................ .12
Programmes ........................................................................................... 14
Caractéristiques supplémentaires......
.................................................... 14
Modification des programmes et réglages
............................................ 14
ENTRETIEN DE LA SÉCHEUSE............................................................... 15
DÉPANNAGE ............................................................................................. 17
GARANTIE.................................................................................................. 19
ASSISTANCE OU SERVICE............................... COUVERTURE ARRIÈRE
ELECTRONIC DRYER
Use & Care Guide
For questions about features, operation/performance, parts,
accessories, or service, call: 1-800-253-1301
or visit our website at...
In Canada, call: 1-800-807-6777
or visit our website at...
SÉCHEUSE
ÉLECTRONIQUE
Guide d'utilisation et d'entretien
Pour assistance, installation, ou service, composez le : 1-800-807-6777
ou visitez notre site Internet à...
W10296184B
W10296186B - SP
2
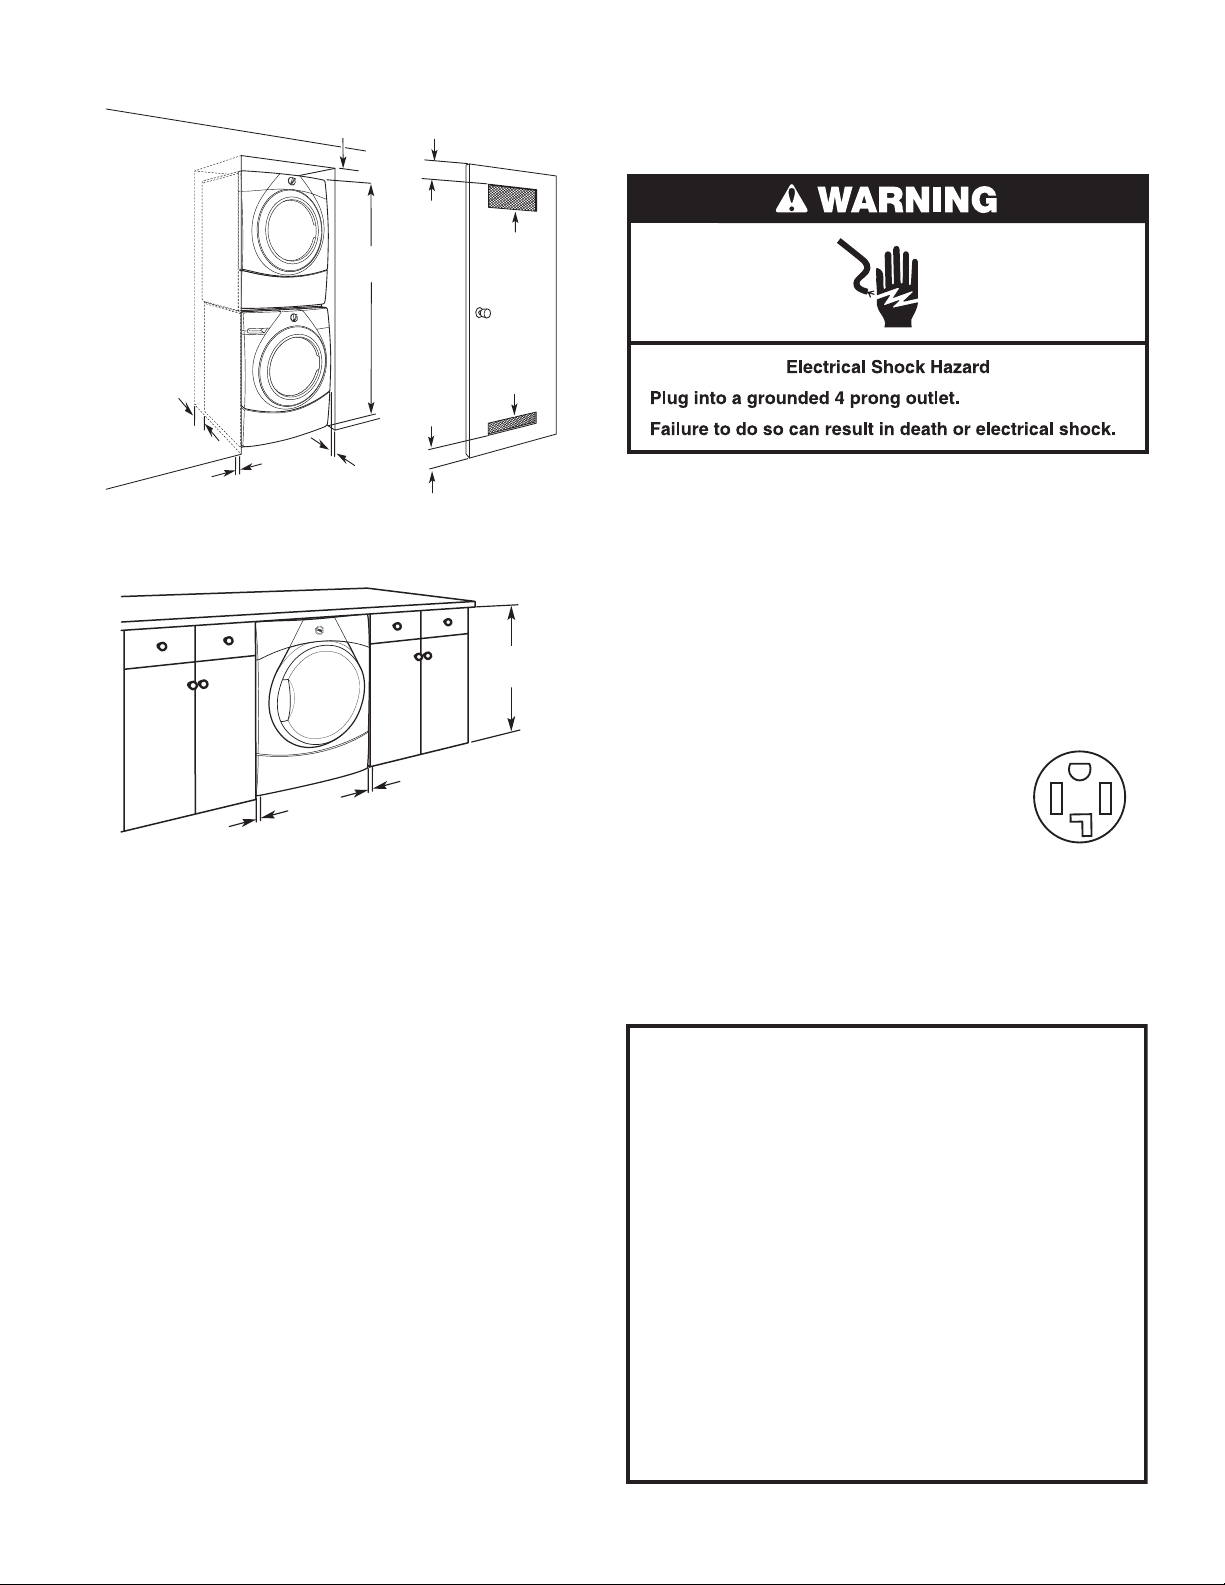
DRYER SAFETY
You
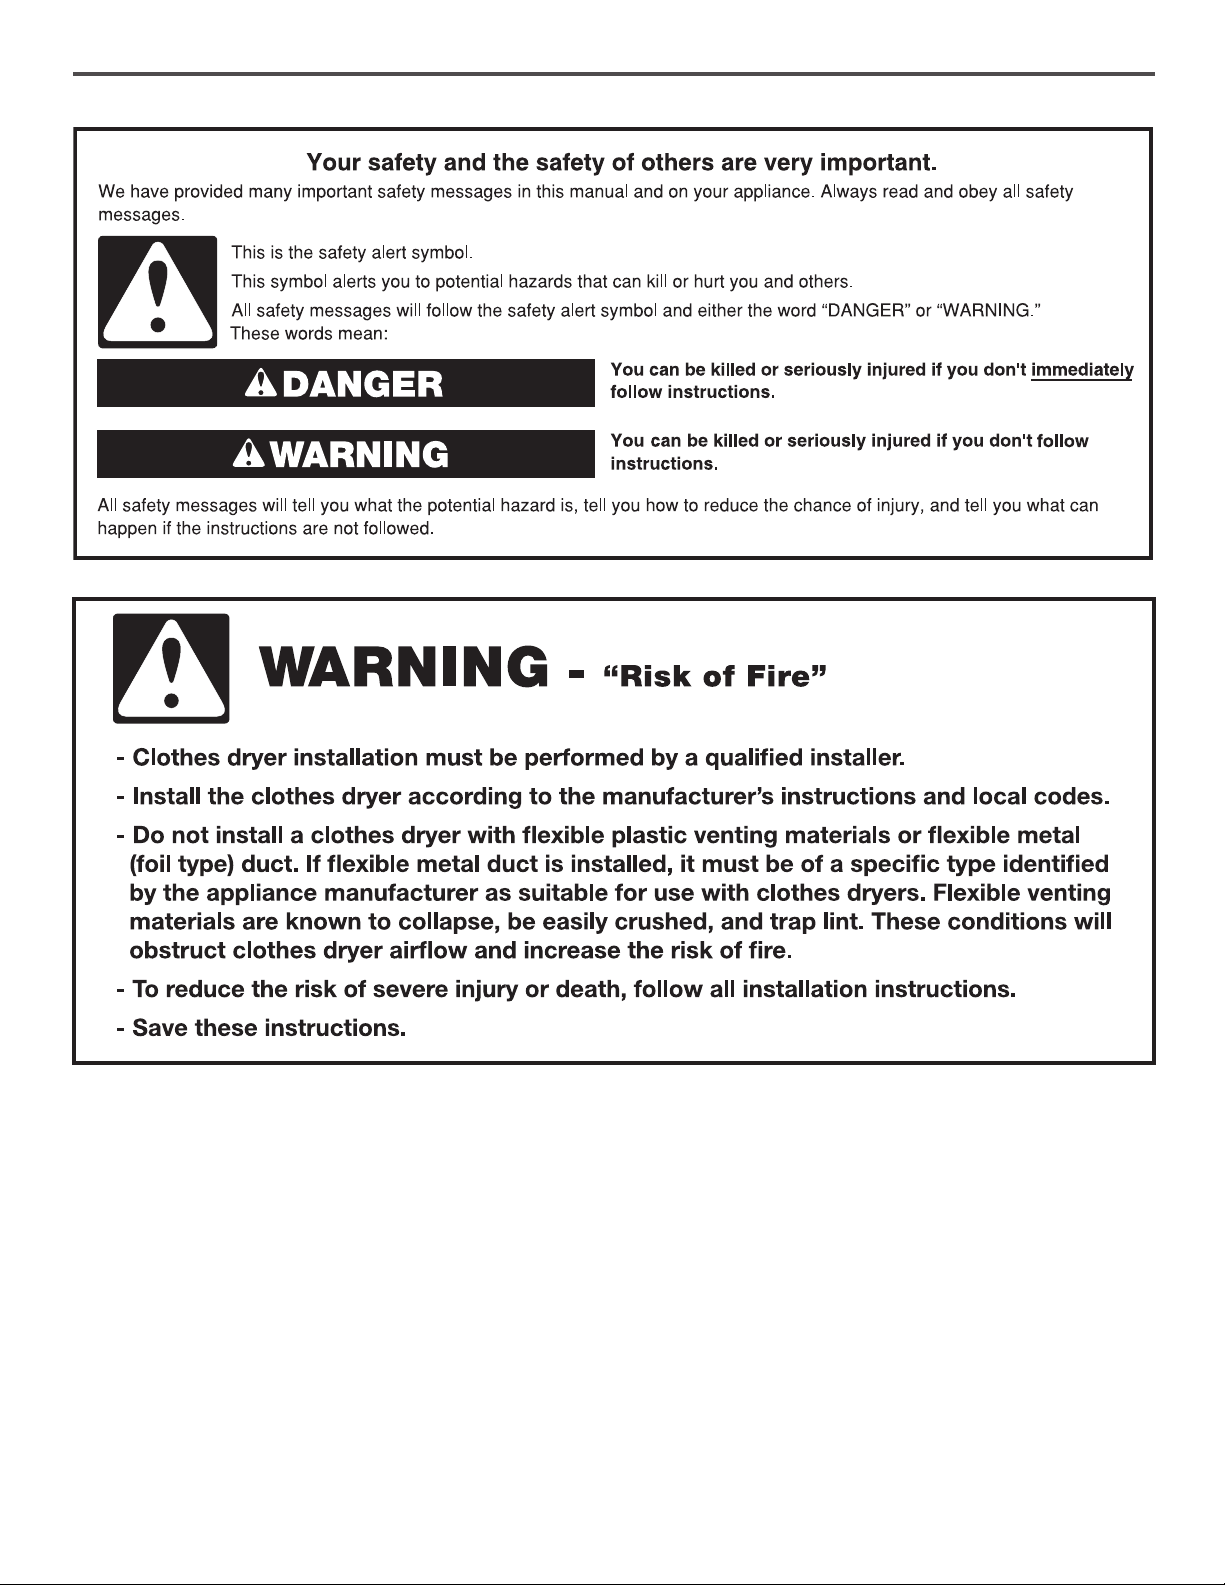
You can be killed or seriously injured if you don't immediately
can be killed or seriously injured if you don't
follow
All safety messages will tell you what the potential hazard is, tell you how to reduce the chance of injury, and tell you what can
happen if the instructions are not followed.
Your safety and the safety of others are very important.
We have provided many important safety messages in this manual and on your appliance. Always read and obey all safety
messages.
This is the safety alert symbol.
This symbol alerts you to potential hazards that can kill or hurt you and others.
All safety messages will follow the safety alert symbol and either the word “DANGER” or “WARNING.”
These words mean:
follow instructions.
instructions.
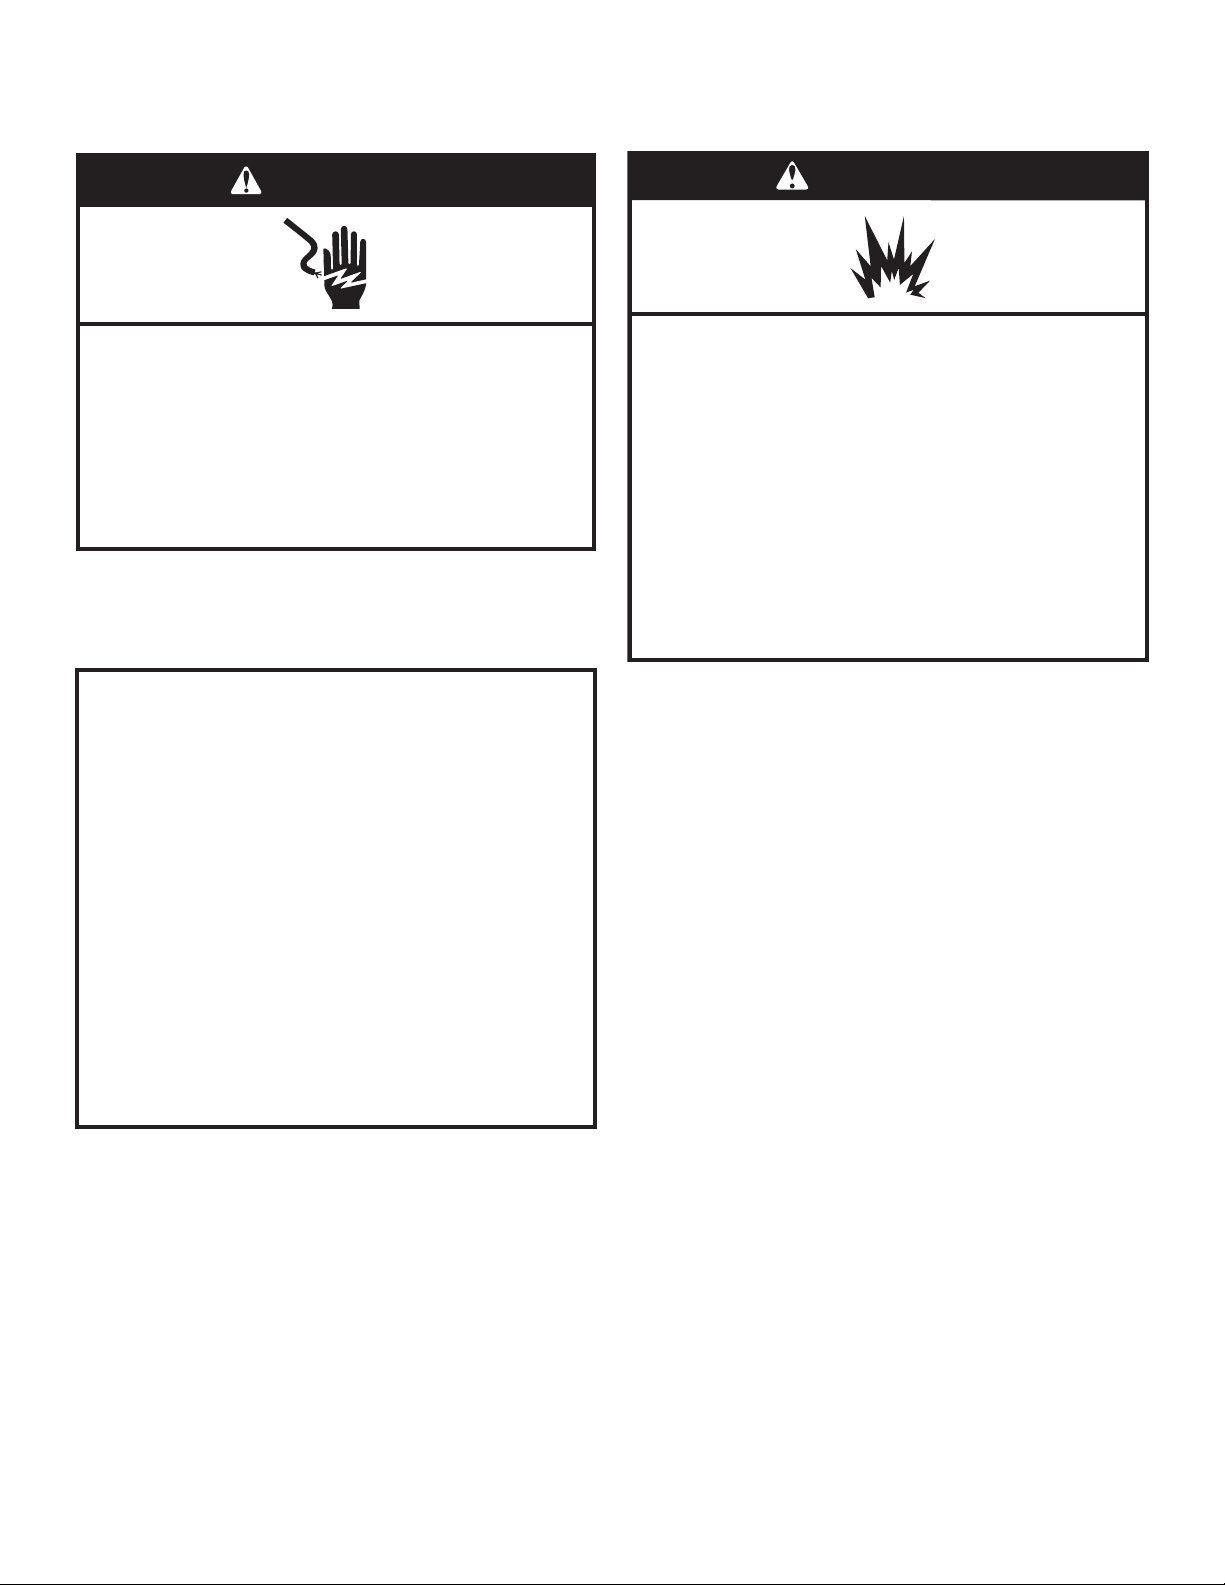
DANGER
WARNING
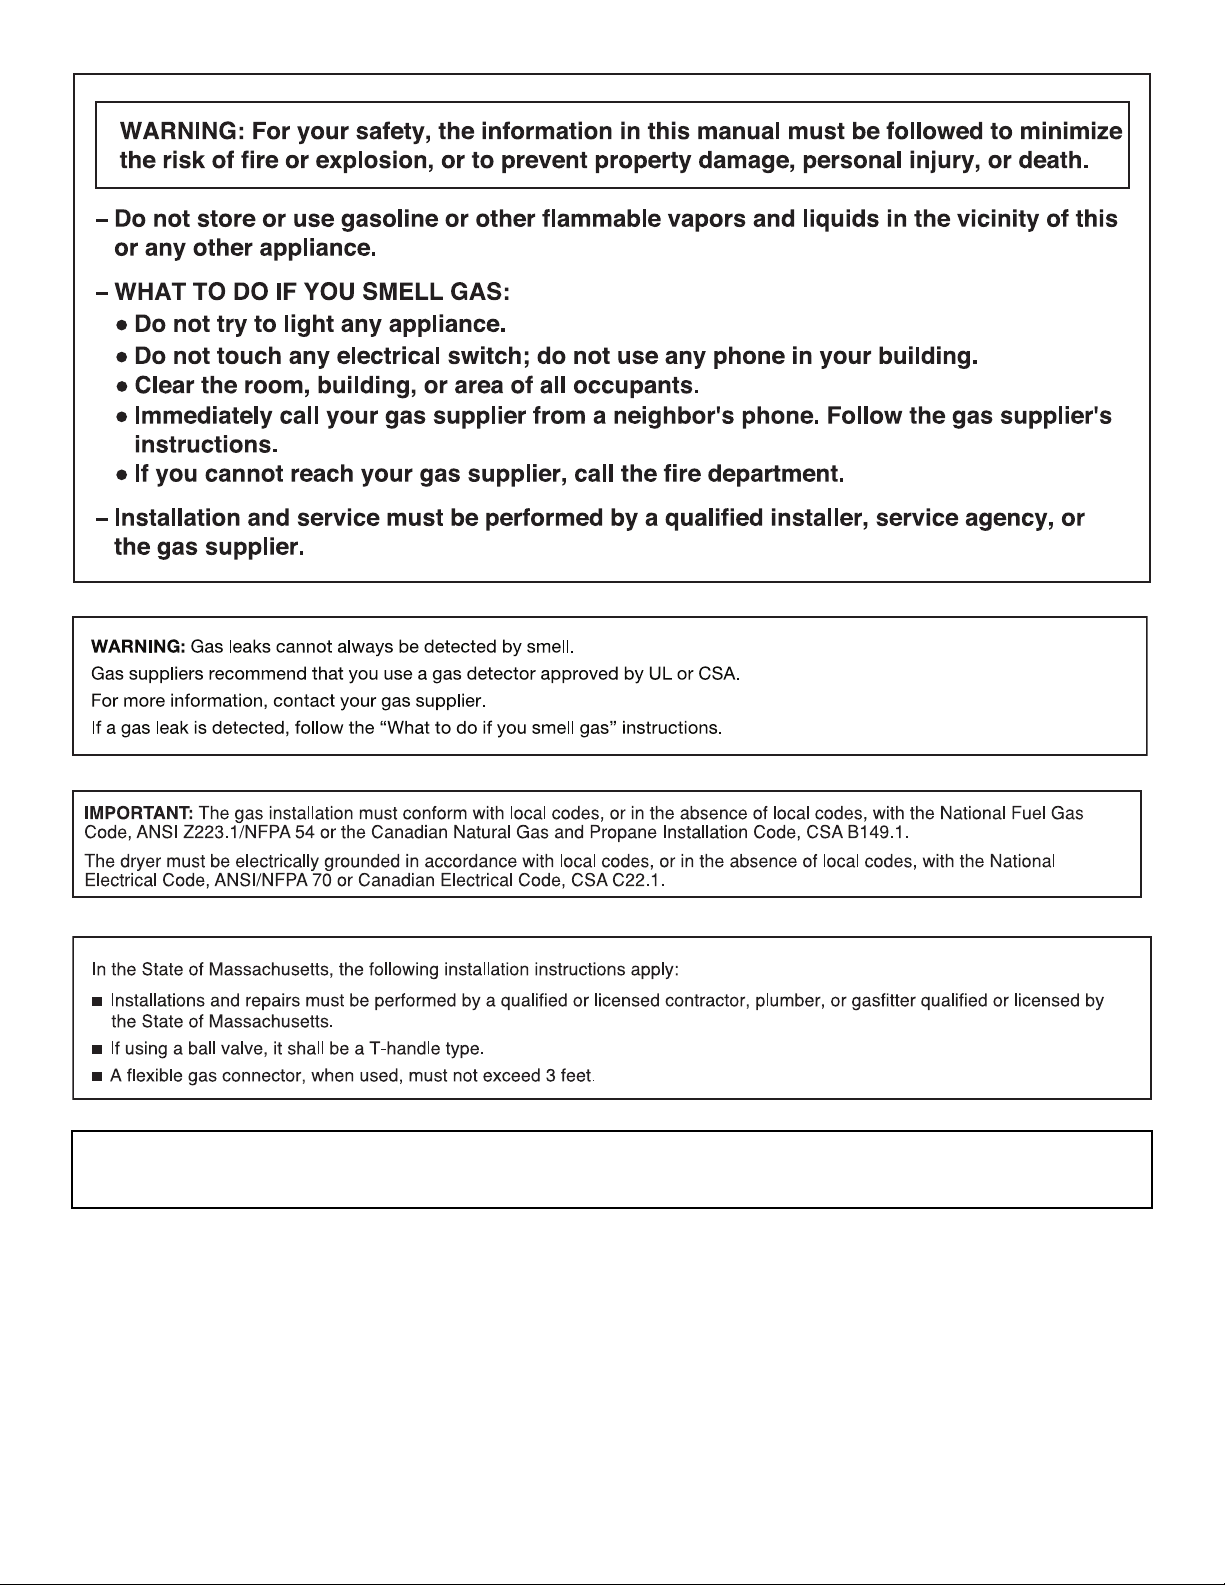
IMPORTANT: The gas installation must conform with local codes, or in the absence of local codes, with the National Fuel Gas
Code, ANSI Z223.1/NFPA 54.
The dryer must be electrically grounded in accordance with local codes, or in the absence of local codes, with the National
Electrical Code, ANSI/NFPA 70.
WARNING: For your safety, the information in this manual must be followed to minimize
the risk of re or explosion, or to prevent property damage, personal injury, or death.
– Do not store or use gasoline or other ammable vapors and liquids in the vicinity of this
or any other appliance.
– WHAT TO DO IF YOU SMELL GAS:
•
Do not try to light any appliance.
•
Do not touch any electrical switch; do not use any phone in your building.
•
Immediately call your gas supplier from a neighbor's phone. Follow the gas supplier's
instructions.
•
If you cannot reach your gas supplier, call the re department.
– Installation and service must be performed by a qualied installer, service agency, or
the gas supplier.
•
Clear the room, building, or area of all occupants.
WARNING: Gas leaks cannot always be detected by smell.
Gas suppliers recommend that you use a gas detector approved by UL or CSA.
For more information, contact your gas supplier.
If a gas leak is detected, follow the “What to do if you smell gas” instructions.
3
4
QUICK START GUIDE /DRYER USE
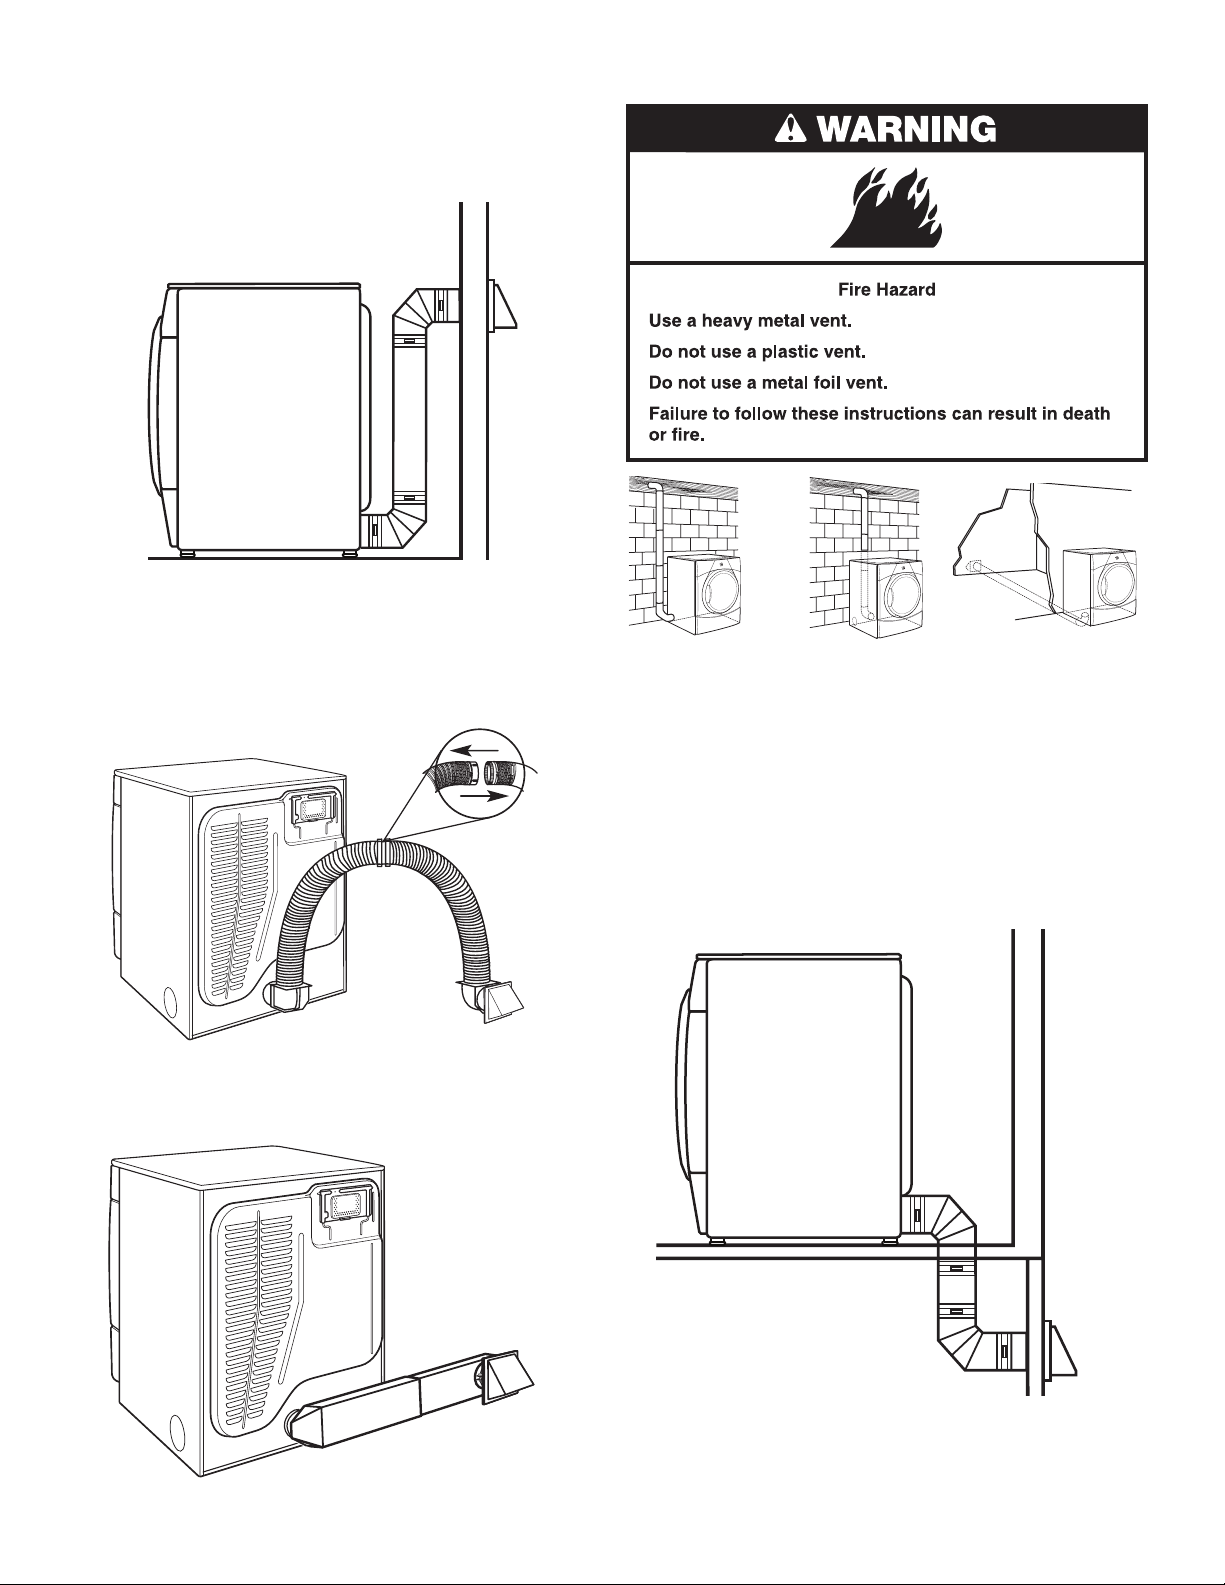
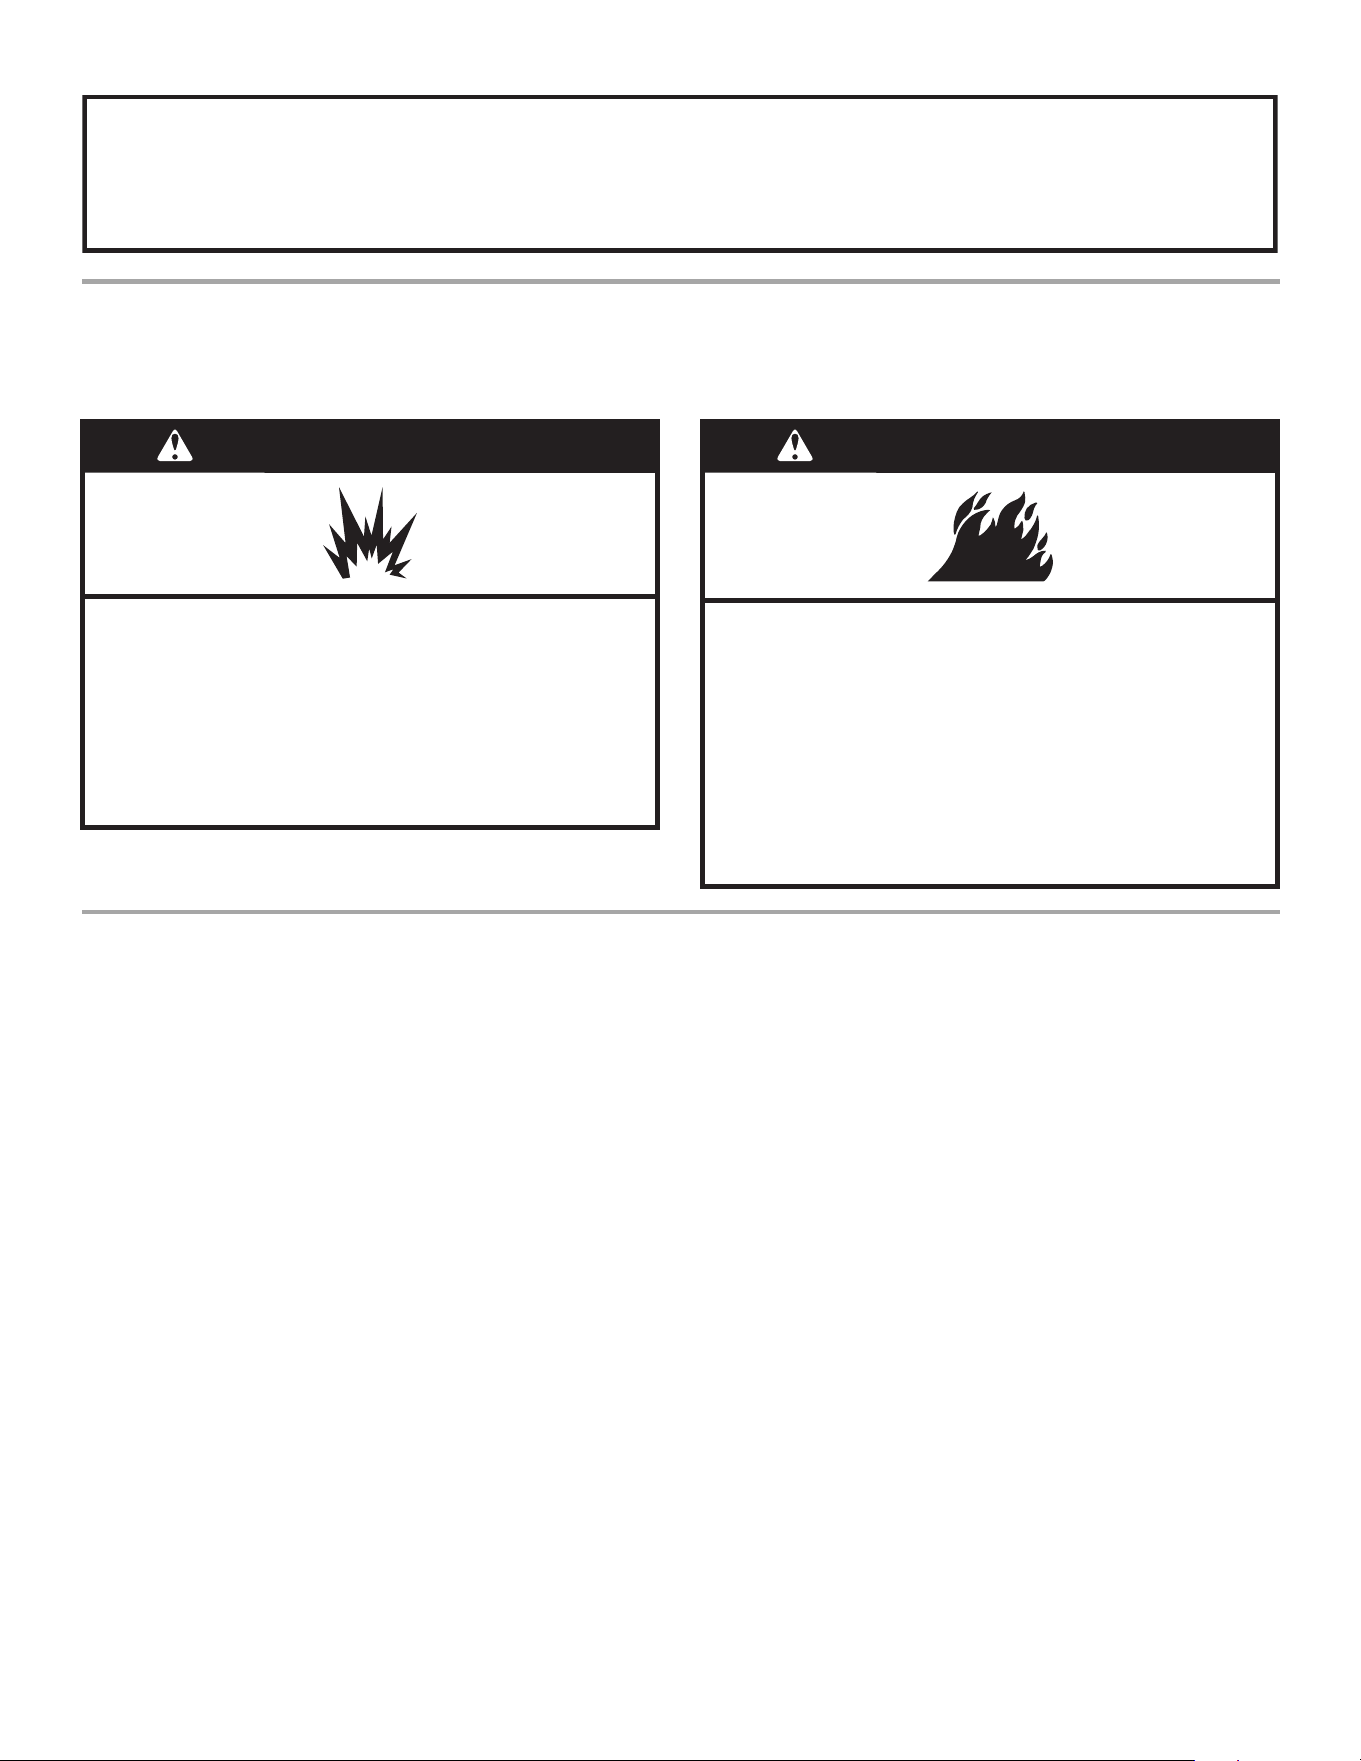
WARNING
Explosion Hazard
Keep ammable materials and vapors, such as
gasoline, away from dryer.
Do not dry anything that has ever had anything
ammable on it (even after washing).
Failure to follow these instructions can result in death,
explosion, or re.
WARNING
Fire Hazard
No washer can completely remove oil.
Do not dry anything that has ever had any type of oil on
it (including cooking oils).
Items containing foam, rubber, or plastic must be dried
on a clothesline or by using an Air Cycle.
Failure to follow these instructions can result in death
or re.
QUICK START GUIDE
AccuDry
WARNING: To reduce the risk of re electric shock, or injury to persons, read the IMPORTANT SAFETY INSTRUCTIONS
before operating this appliance.
This Use and Care Guide covers several different models. Your dryer may not have all the cycles and features described.
USING AUTOMATIC CYCLES
Automatic Cycles automatically match
the cycle setting to the type of load and
adjust drying time for optimal performance.
See the Cycles information on the following
pages for more detail on each cycle.
1.
Clean lint screen.
2. Place laundry in the dryer. Shut the door.
3. Press POWER.
4. Select the desired AUTOMATIC cycle.
5. Press and hold START/PAUSE to begin.
USING TIMED CYCLES
Use Timed Cycles to set a drying time and
temperature. See the Cycles information on the
following pages for more information.
1.
Clean lint screen.
2. Place laundry in the dryer. Shut the door.
3. Press POWER.
4. Select the desired TIMED cycle.
5. Press TEMP until the desired temperature glows.
6. Press and hold START/PAUSE to begin.
Stopping Your Dryer
To stop your dryer at any time
Press POWER.
Pausing or Restarting
To stop the dryer at any time
Open the door or press START/PAUSE once.
To restart the dryer
Close the door and press and hold START/PAUSE
5
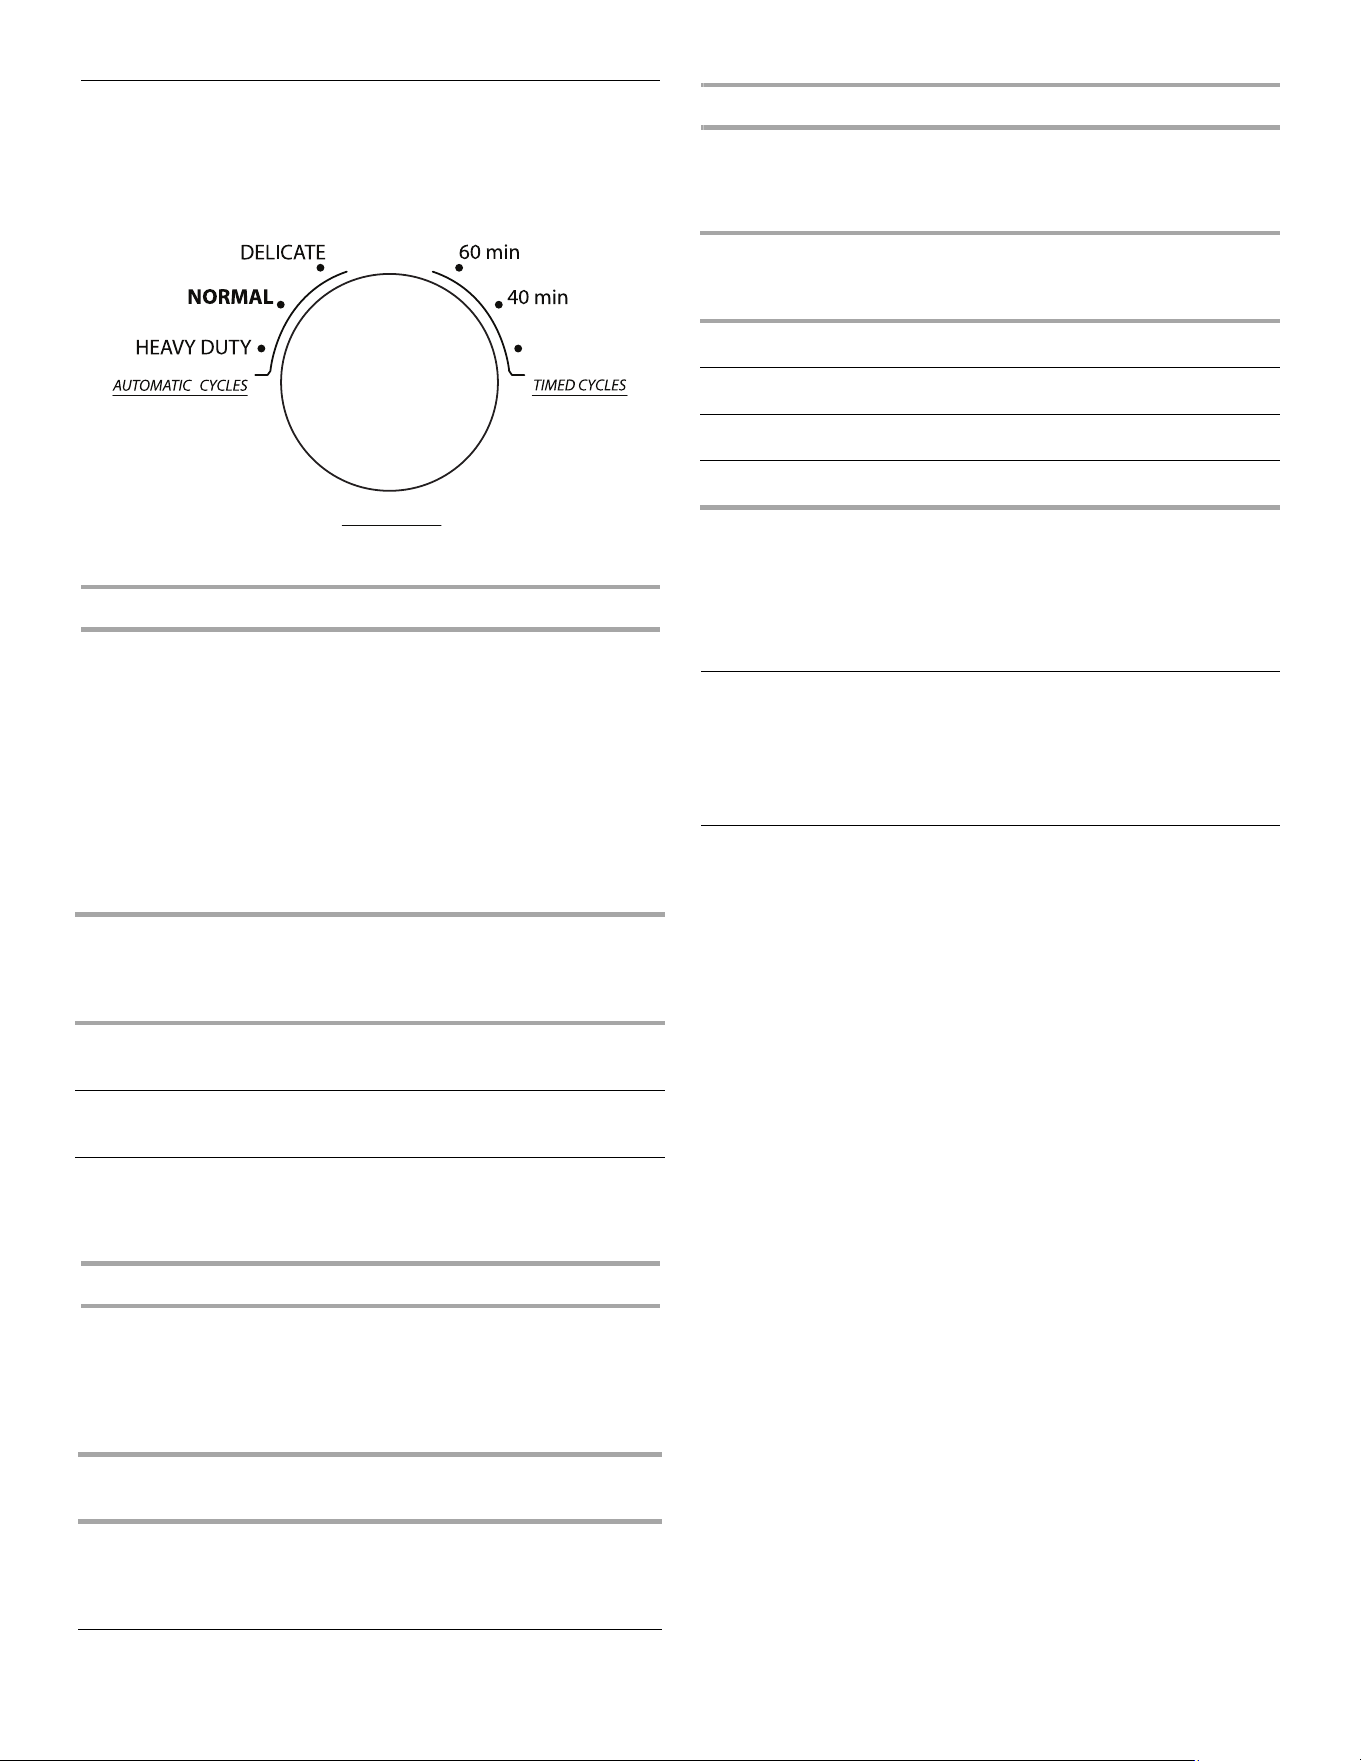
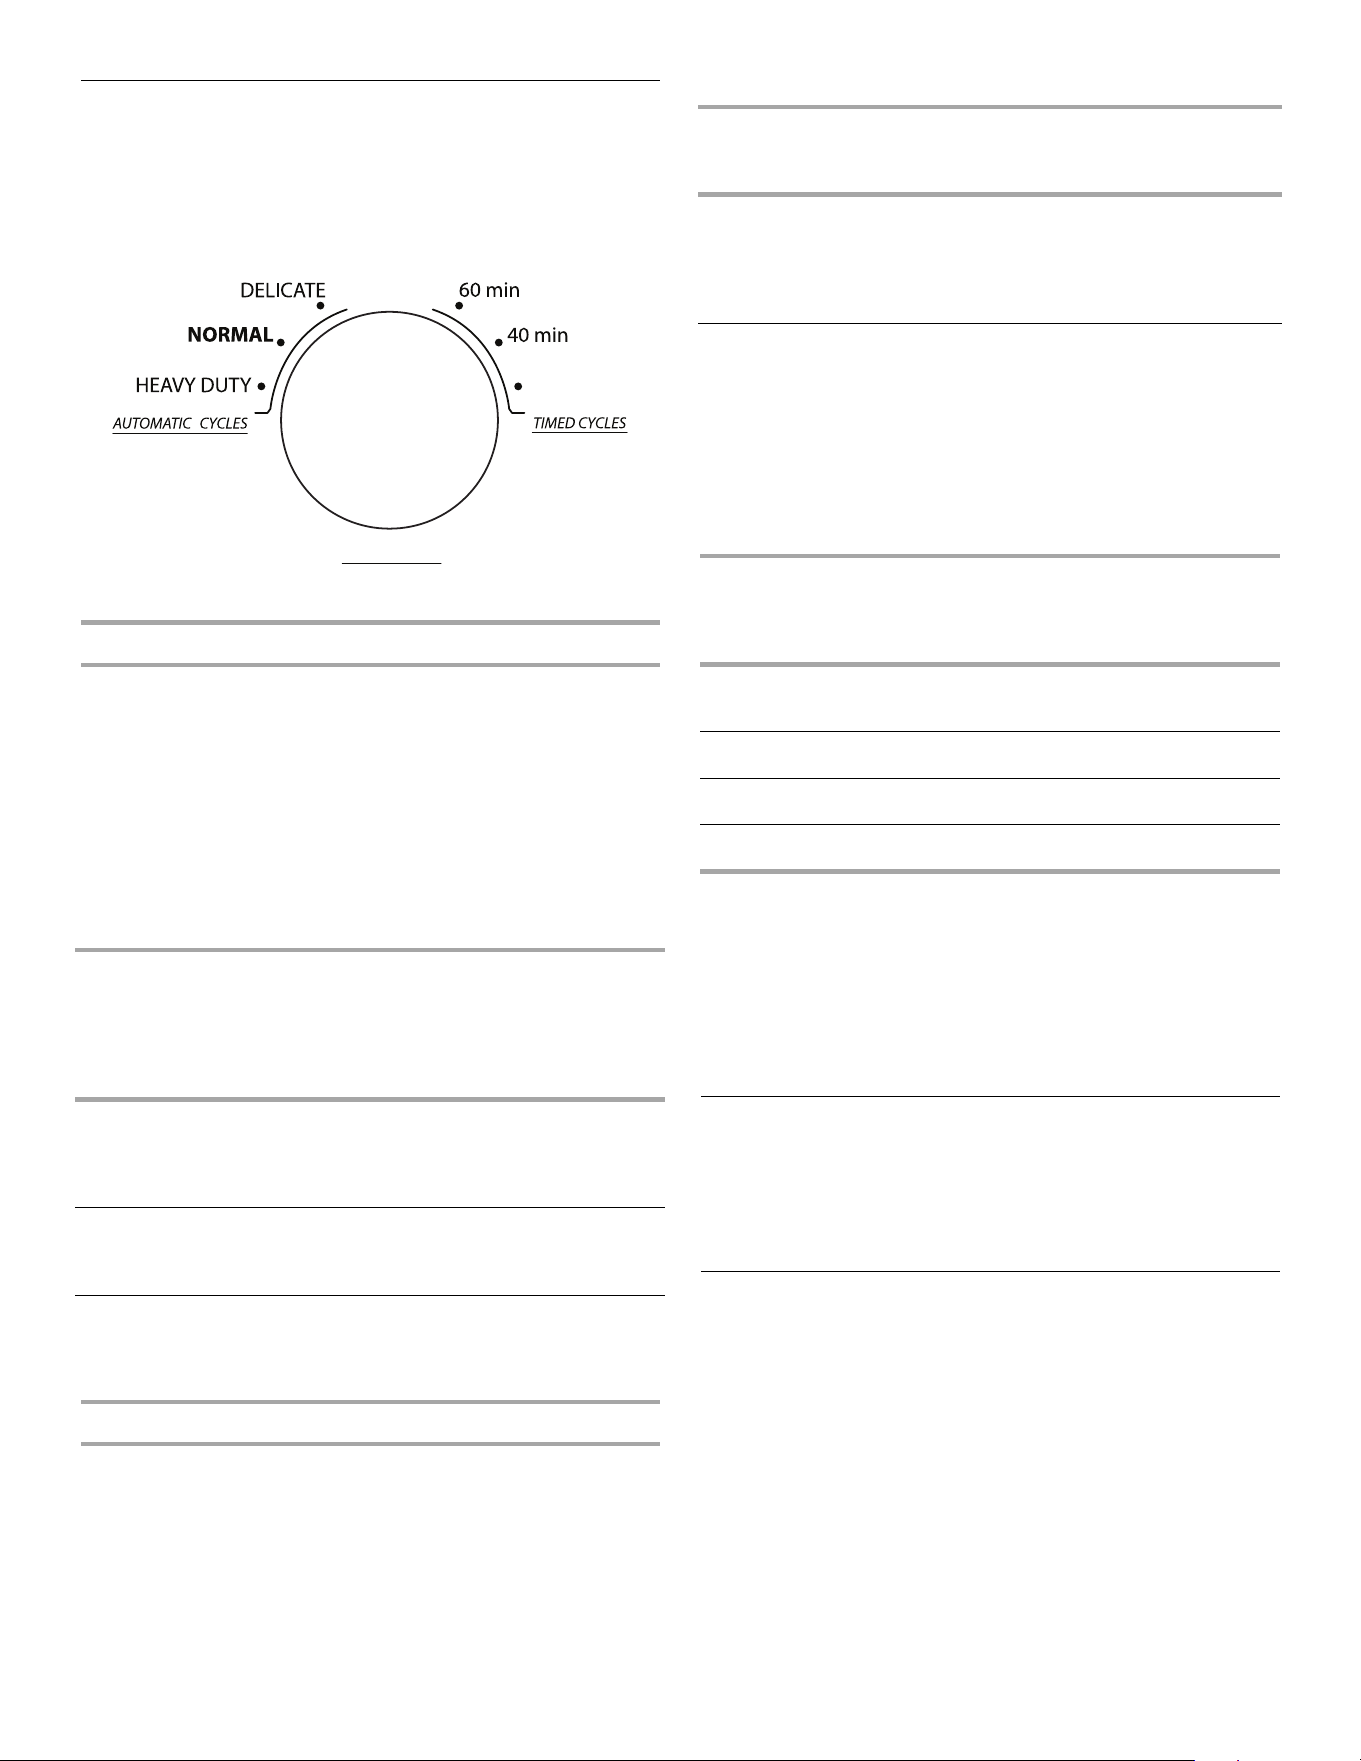
Cycles
NOTE: Not all cycles are available on all models.
Press the cycle selector button to select the drying cycle that
matches the type of load you are drying. See AUTOMATIC or
TIMED Cycle Settings chart.
20 min
Push to Select
Cycle selection button
Automatic Cycles
AUTOMATIC Cycles allow you to match the cycle to the load you
are drying. See the following AUTOMATIC Preset Cycle Settings
chart. Each cycle dries certain fabrics at the recommended
temperature.
A sensor detects the moisture in the load and automatically
ad
justs the drying time for optimal drying. Drying time will vary
depending on load size, fabric type, and the amount of water
removed by the washer.
NOTE: Dr
ying tempratures are set for Automatic Cycles and
cannot be adjusted.
Automatic Cycles
Load Type
Temperature Est.
Cycle
Ti
me
(Minutes)
HEAVY DUTY
Heavyweight items, towels, jeans
Hot 45
NORMAL
Corduroys, work clothes, sheets
Warm 35
DELICATE
Lingerie, blouses, washable
woolens
Low 30
Automatic Cycle Settings
Timed Cycles
Use TIMED Cycles to select a specific amount of drying time and
a drying temperature. Press the TEMP button to change the
drying temperature from the default setting. The default drying
temperature is Hot.
TIMED DRY Cycles
Load Type
Temperature Cycle Time*
(Minutes)
TIMED DRY
Heavyweight items,
bulky items, bedspreads,
work clothes
Hot 60, 40, 20
TIMED DRY Cycle Settings
*Reset time to complete drying, if needed.
Air Dry
Use the Air Dry temperature setting with TIMED DRY cycles for
items that require drying without heat such as rubber, plastic, and
heat-sensitive fabrics. This chart shows examples of items that
can be dried using Air Dry.
Type of Load Est.
Time*
(Minutes)
Foam rubber - pillows, padd
ed bras, stuffed toys 20 - 30
Plastic - shower curtains, tablecloths 20 - 30
Rubber-backed rugs 40 - 50
Olefin, polypropylene, sheer nylon 10 - 20
*Reset time to complete drying, if needed.
When using Air Dry:
■ Check that coverings are securely stitched.
■ Shake and fluff pillows by hand periodically during the cycle.
■ Dry item completely. Foam rubber pillows are slow to dry.
Additional Features
Cycle Signal
The Cycle Signal produces an audible sound when the drying
cycle is finished. Press CYCLE SIGNAL to turn On or Off at any
time before or during a cycle.
Changing Cycles and Settings
You can change AUTOMATIC Cycles, TIMED DRY Cycles, and the
drying temperature on TIMED DRY Cycles at any time before
pressing START/PAUSE.
■ Three short tones sound if an unavailable combination is
selected. The last selection will not be accepted.
Changing Cycles after starting dryer:
1. Press the POWER button. This ends the current cycle and
turns the dryer OFF.
2. Pr
ess the POWER button again or press the cycle selector to
turn on the dryer.
3. Select th
e desired cycle and options.
4. Press and hold START/PAUSE. The dryer starts at the
beginning of the new cycle.
Changing Drying Temperature:
You can change the drying temperature on Timed Dry cycles at
any time by pressing the TEMP button until the desired drying
temperature is lit.
6
DRYER CARE
Cleaning the Dryer Location
Keep dryer area clear and free from items that would obstruct the
flow of combustion and ventilation air.
Cleaning the Lint Screen
Every load cleaning
The lint screen is located in the door opening of the dryer.
A screen blocked by lint can increase drying time.
To clean:
1. Pull the lint screen straight up. Roll lint off the screen with your
fingers. Do not rinse or wash screen to remove lint. Wet lint is
hard to remove.
2. Push the lint screen firmly back into place.
IMPORTANT:
■ Do not run the dryer if the lint screen is loose, damaged,
blocked, or missing. Doing so can cause overheating and
damage to both the dryer and fabrics.
■ If lint falls off the screen into the dryer during removal, check
the exhaust hood and remove the lint. See “Venting
Requirements.”
As needed cleaning:
Laundry detergent and fabric softener residue can build up
on the lint screen. This buildup
can cause longer drying times
for your clothes, or cause the dryer to stop be
fore your load is
completely dry.
Clean the lint screen with a nylon brus
h every 6 months, or more
frequently, if it becomes clogged due to a residue buildup.
To wash:
1. Roll lint off the screen with your fingers.
2. W
et both sides of lint screen with hot water.
3. W
et a nylon brush with hot water and liquid detergent. Scrub
lint screen with the brush to remove residue buildup.
4. Rinse screen with hot water.
5. Thoroughly dry lint screen with a clean towel. Replace screen
in dryer.
Cleaning the Dryer Interior
To clean dryer drum:
1. Make a paste with powdered laundry detergent and very
warm water.
2. Apply paste to
a soft cloth.
OR
Apply a liquid, nonflammable househ
old cleaner to the stained
area and rub with a soft cloth until all excess dye and stains
are removed.
3. Wip
e drum thoroughly with a damp cloth.
4. T
umble a load of clean cloths or towels to dry drum.
NOTE: Garments that contain unstable dyes, such as denim blue
jeans or brightly colored cotton items, may discolor the dryer
interior. These stains are not harmful to your dryer and will not
stain future loads of clothes. Dry unstable dye items inside out to
avoid transfer of dye.
Removing Accumulated Lint
From Inside the Dryer Cabinet:
Lint should be removed every 2 years, or more often, depending
on dryer usage. Cleaning should be done by a qualified person.
From the Exhaust Vent:
Lint should be removed every 2 years, or more often, depending
on dryer usage.
Vacation, Storage, and Moving Care
Non-Use or Storage Care
Operate your dryer only when you are at home. If you will be on
vacation or not using your dryer for an extended period of time,
you should:
1. Unplug dryer or disconnect power.
2. Clean lint screen. See “Cleaning the Lint Screen.”
Moving care
For power supply cord-connected dryers:
1. Unplug the power supply cord.
2. Ma
ke sure leveling legs are secure in dryer base.
3. Us
e masking tape to secure dryer door.
7
For direct-wired dryers:
WARNING
Electrical Shock Hazard
Disconnect power before servicing.
Replace all parts and panels before operating.
Failure to do so can result in death or electrical shock.
1. Disconnect power.
2. Disconnect wiring.
3. Make sure leveling legs are secure in dryer base.
4. Use masking tape to secure dryer door.
Reinstalling the dryer
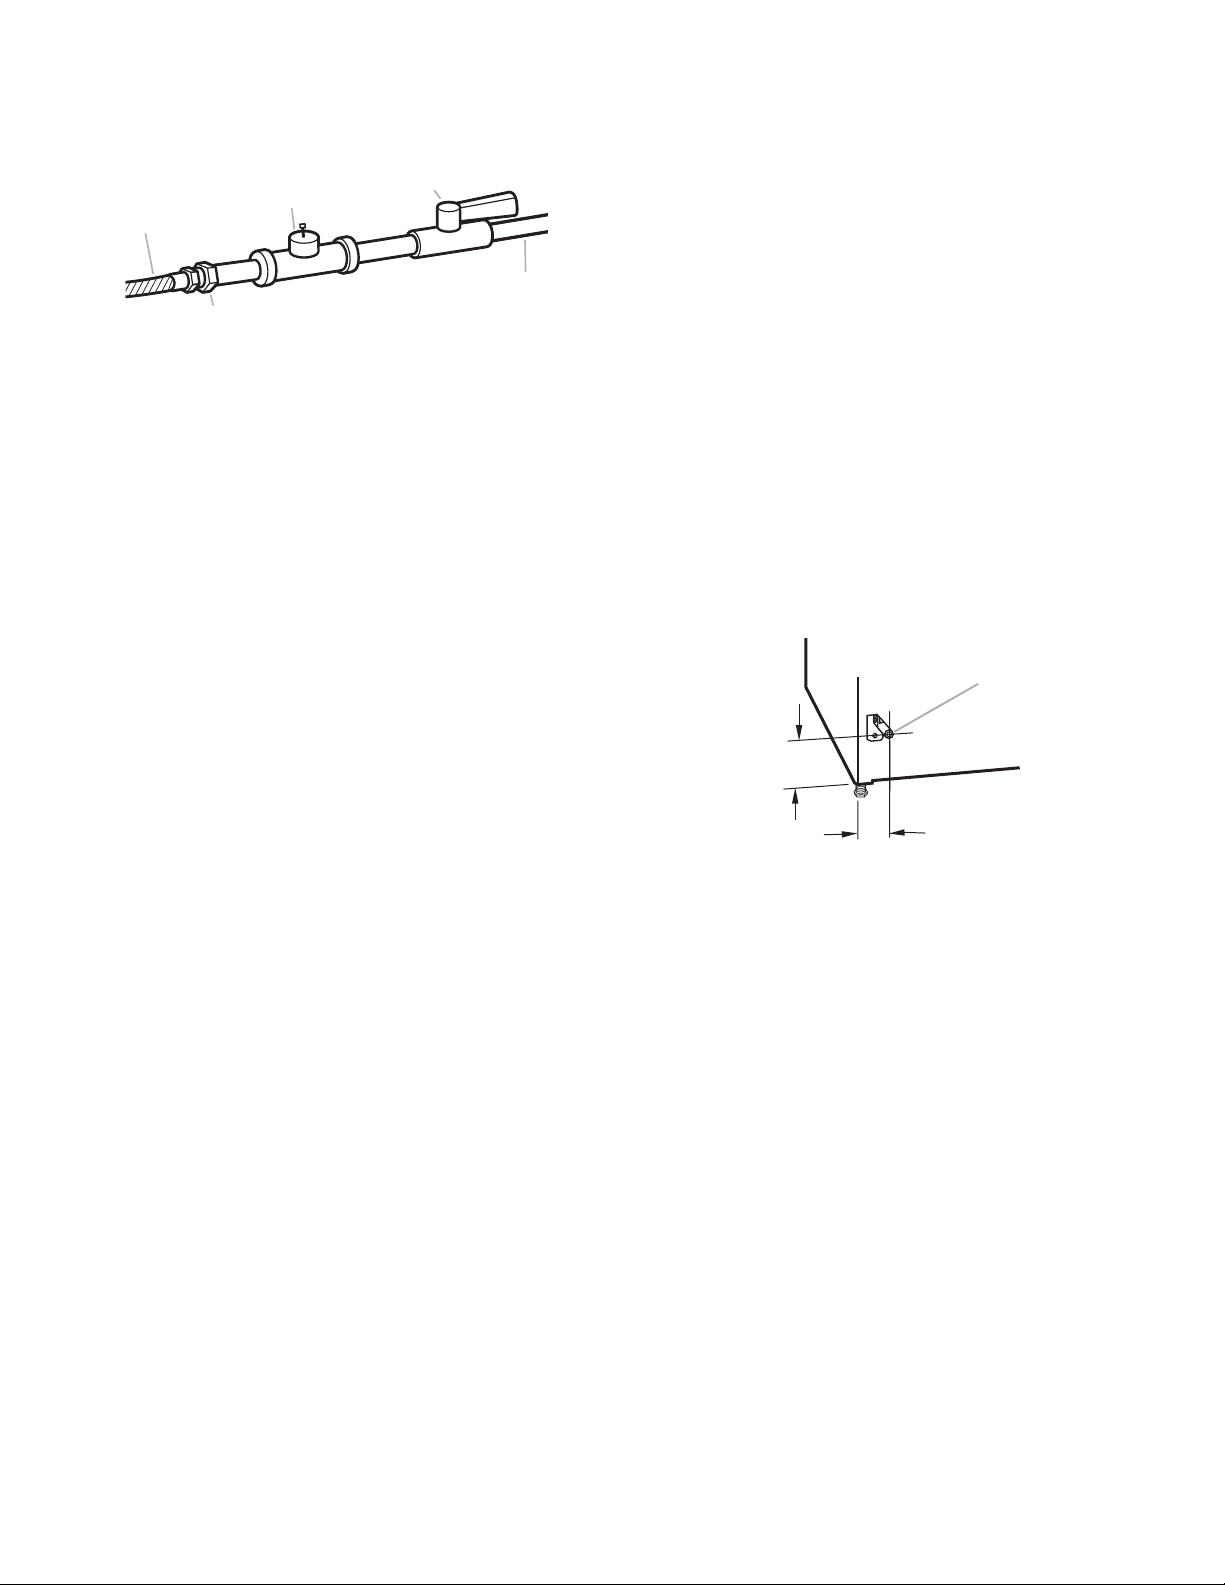
Follow the “Installation Instructions” to locate, level, and connect
the dryer.
Changing the Drum Light
The dryer light automatically turns on inside the dryer drum when
you open the door.
To change the drum light:
1. Unplug dryer or disconnect power.
2. Open the dryer door. Locate the light bulb cover on the back
wall of the dryer. Remove the screw located in the lower right
corner of the cover. Remove the cover.
3. T
urn bulb counterclockwise. Replace the bulb with a 10-watt
appliance bulb only. Replace the cover and secure with the
screw.
4. Plu
g in dryer or reconnect power.
TROUBLESHOOTING
First try the solutions suggested here and possibly avoid the cost of a service call...
For additional recommendations, refer to your Installation Instructions.
Dryer Operation
Dryer will not run
■ Is the dryer door firmly closed?
■ Was the START/PAUSE button firmly pressed?
Large loads may require pressing and holding the Start/Pause
butto
n for 2-5 seconds.
■ Has a household fuse blown, or has a circuit breaker
tripped?
There may be 2 household fuses or circuit breakers for the
dryer. Check that both fuses are intact and tight, or that both
circuit breakers have not tripped. Replace the fuse or reset the
circuit breaker. If the problem continues, call an electrician.
■ Is the correct power supply available?
Electric dryers require 240-volt power supply
. Check with a
qualified electrician.
■ Was a regular fuse used?
Use a time-delay fuse.
Unusual sounds
■ Has the dryer had a period of non-use?
If the dryer hasn’t been used for a while, there may be a
thumping
sound during the first few minutes of operation.
■ Is a coin, button, or paper clip caught between the drum
and front or rear of the dryer?
Check the front and rear edges of the drum for small objects.
Clean out pockets before laundering.
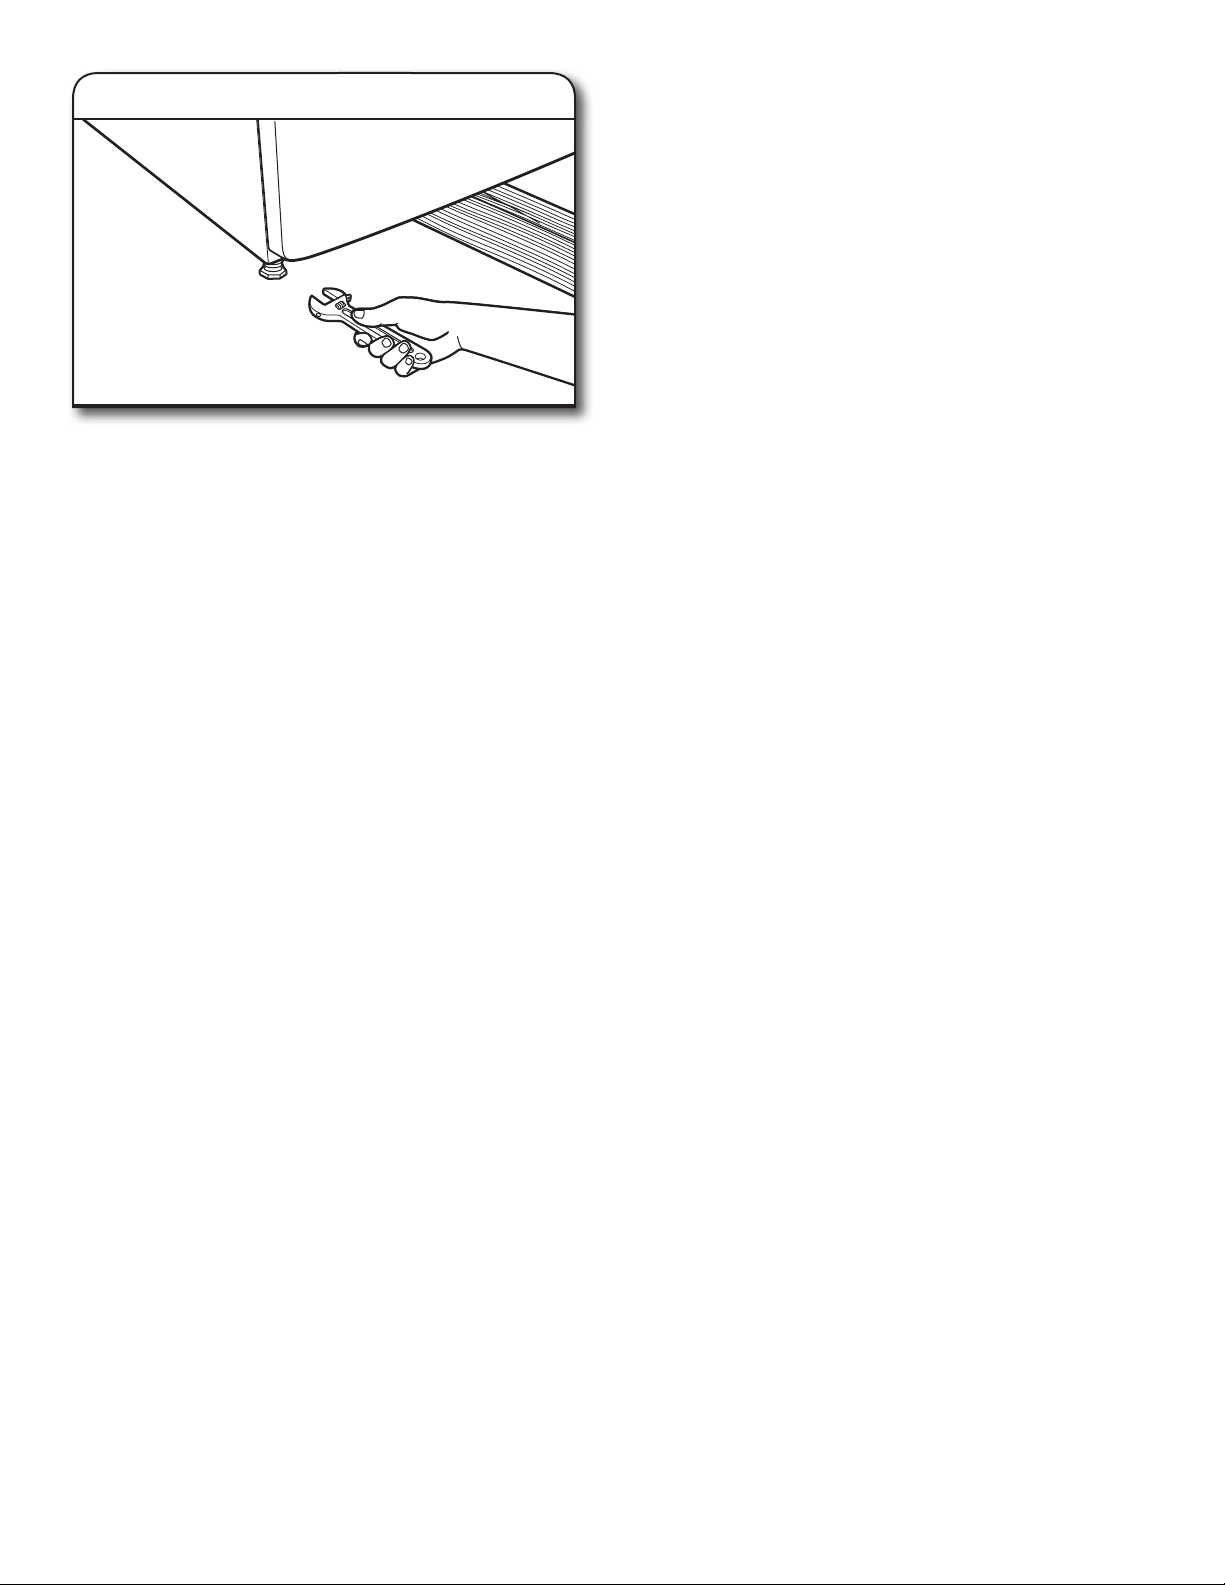
■ Are the four legs installed, and is the dryer level front to
back and side to side?
The dryer may vibrate if not properly installed. See the
Installation Instructions.
■ Is the clothing knotted or balled up?
When balled up, the load will boun
ce, causing the dryer to
vibrate. Separate the load items and restart the dryer.
No heat
■ Has a household fuse blown, or has a circuit breaker
tripped?
The drum may be turning, but you may
not have heat. Electric
dryers use 2 household fuses or circuit breakers. Replace the
fuse or reset the circuit breaker. If the problem continues, call
an electrician.
Dryer displaying error message (WET indicator flashing)
WET indicator is flashing:
If the WET indicator on the dryer c
ontrol panel is flashing, with
a pause between flashes, the dryer control has detected a
problem that requires service. Call for service.
Dryer Results
Clothes are not drying satisfactorily, drying times are too
long, or load is too hot
■ Is the lint screen clogged with lint?
Lint screen should be cleaned before each load.
■ Has the Air Dry temperature setting been selected?
Select the right temperature for the types of garments being
dried. See “Additional Features.”
■ Is the load too large and heavy to dry quickly?
Separate the load to tumble freely.
8
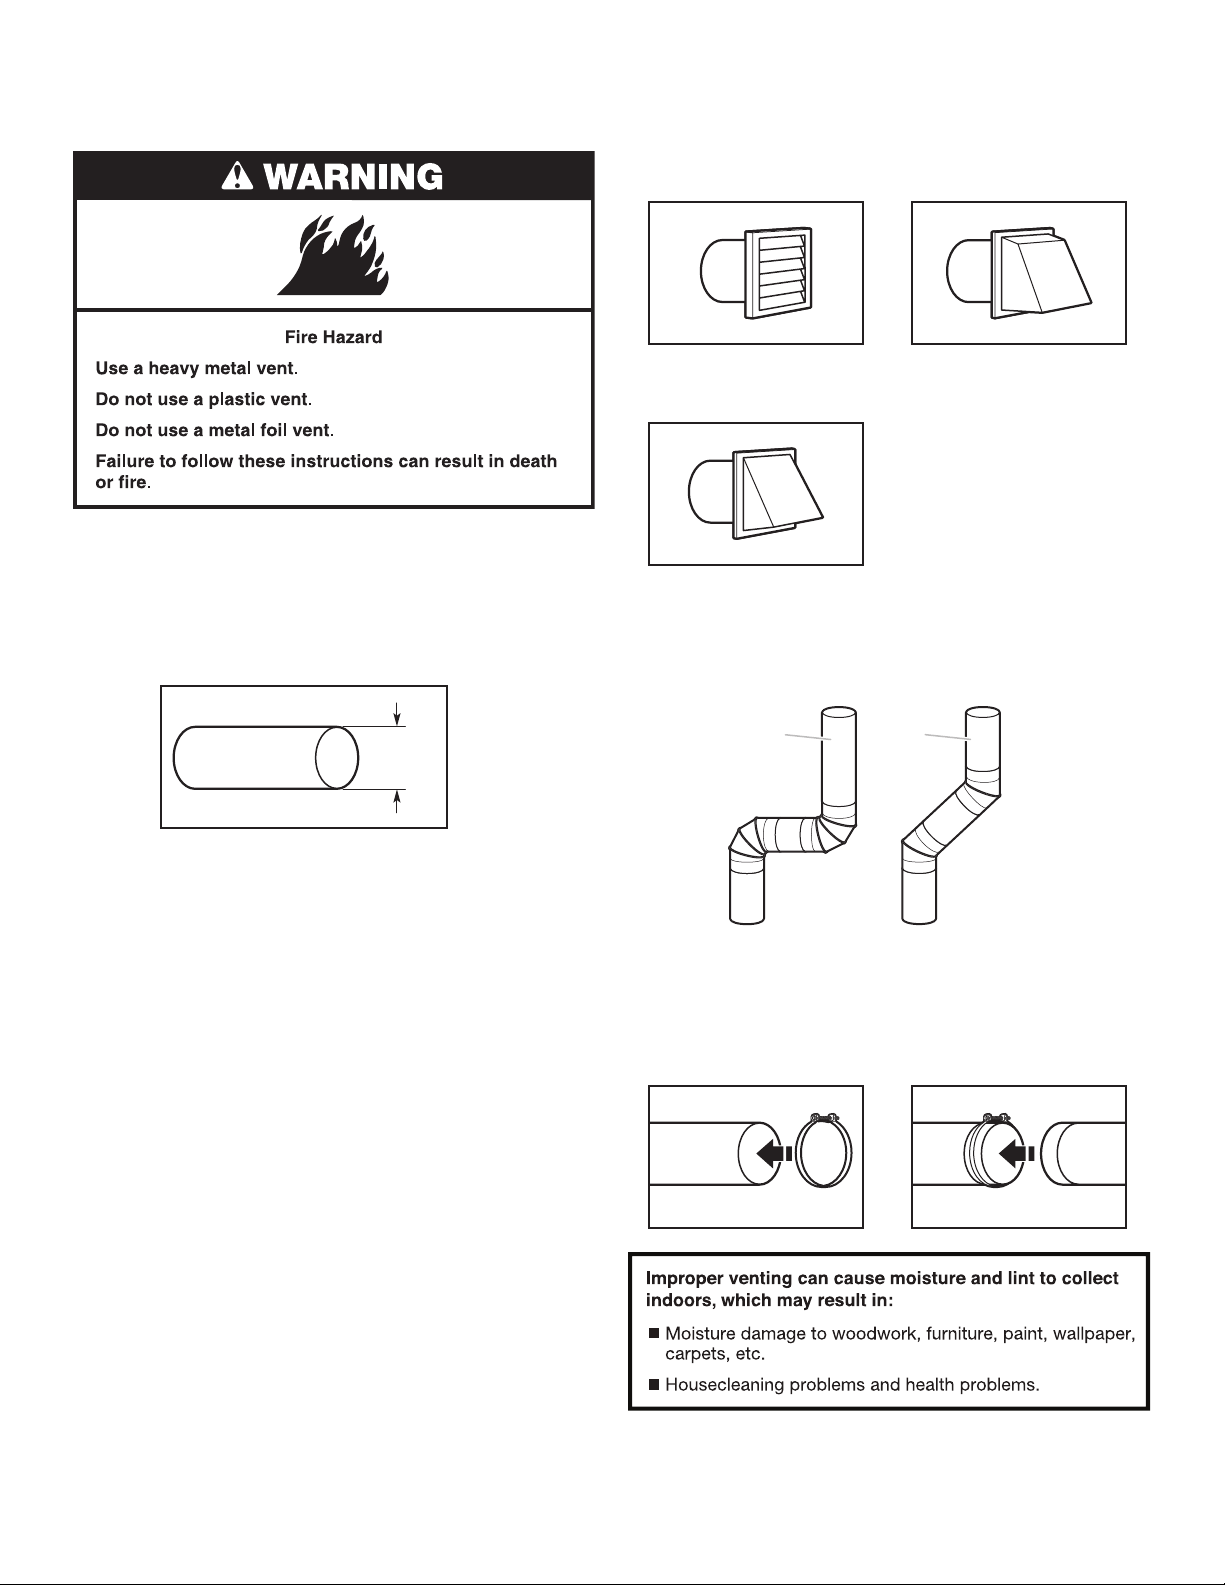
■ Is the exhaust vent or outside exhaust hood clogged with
lint, restricting air movement?
Run the dryer for 5-10 minutes. Hold your hand under the
outside
exhaust hood to check air movement. If you do not
feel air movement, clean exhaust system of lint or replace
exhaust vent with heavy metal or flexible metal vent. See the
Installation Instructions.
■ Are fabric softener sheets blocking the grille?
Use only one fabric softener sheet, and use it only once.
■ Is the exhaust vent the correct length?
Check that the exhaust vent is not too long or has too many
tur
ns. Long venting will increase drying times. See the
Installation Instructions.
■ Is the exhaust vent diameter the correct size?
Use 4" (102 mm) diameter vent material.
■ Is the dryer located in a room with temperature below 45ºF
(7ºC)?
Proper operation of dryer cycles requires temperatures above
4
5ºF (7ºC).
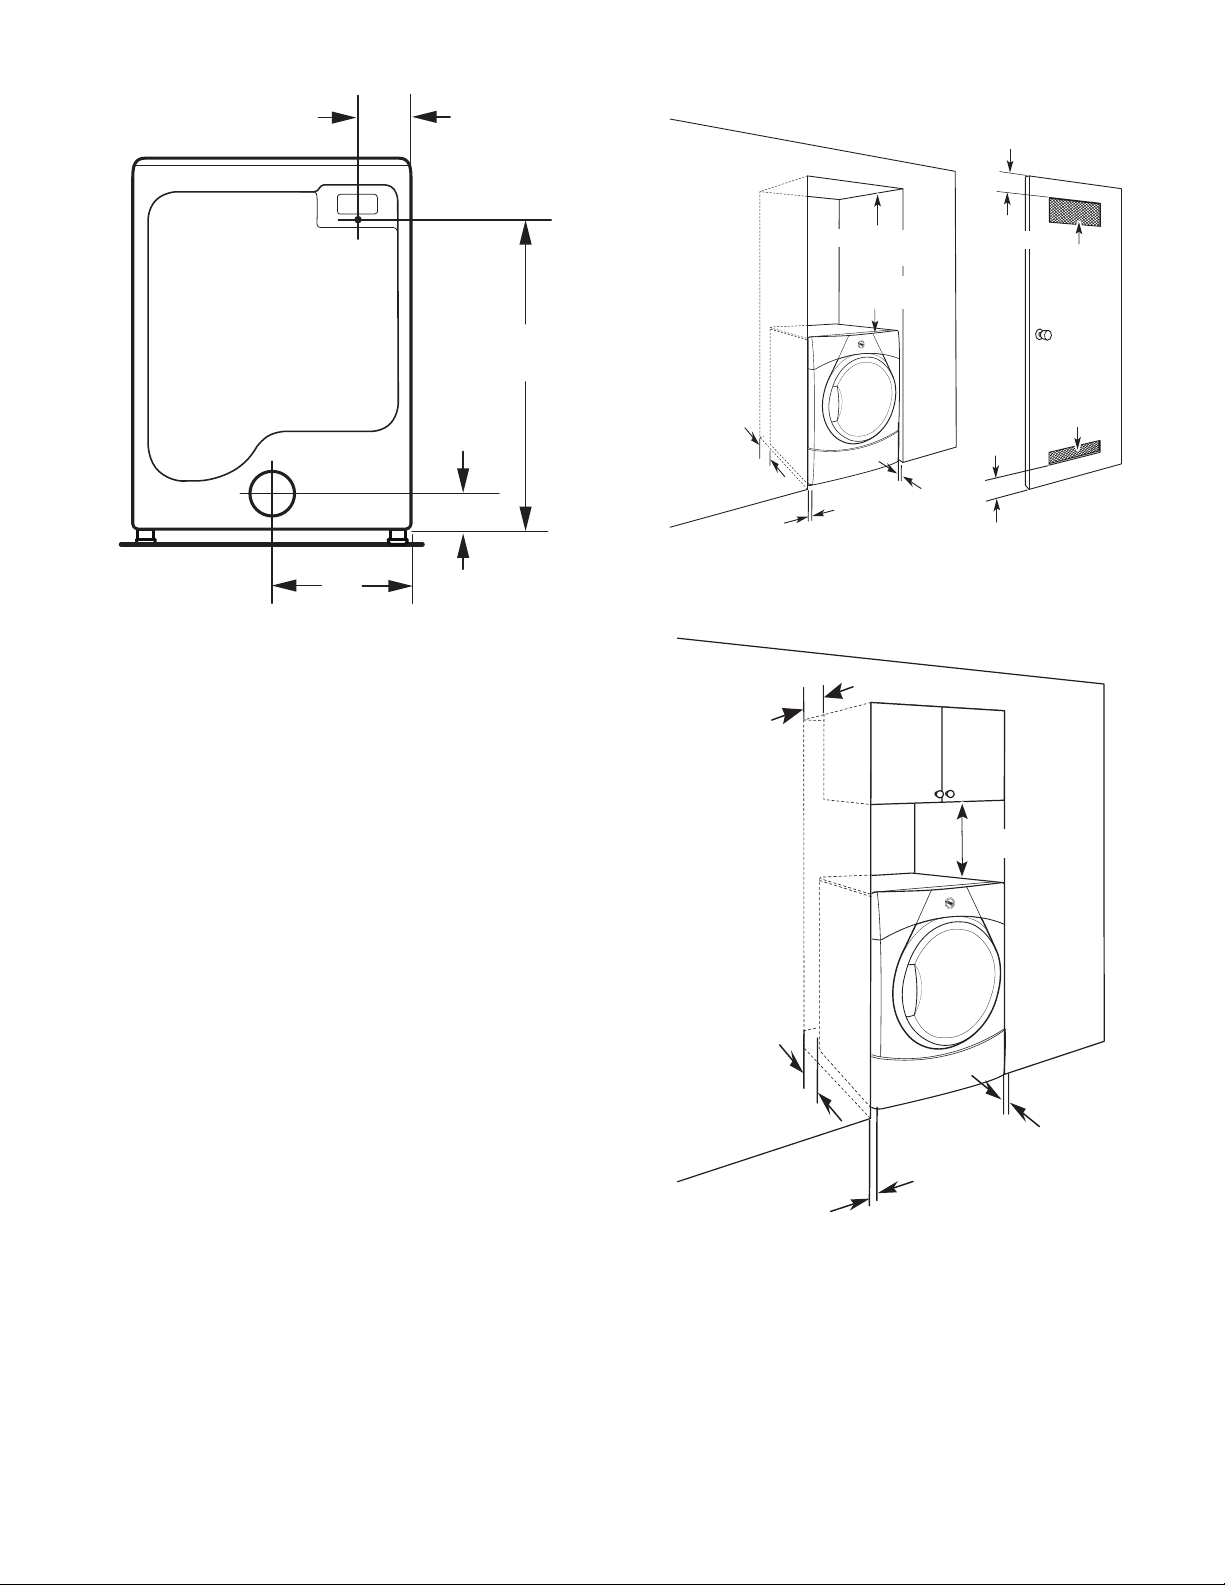
■ Is the dryer located in a closet?
Closet doors must have ventila
tion openings at the top and
bottom of the door. The front of the dryer requires a minimum
of 1" (25 mm) of airspace, and, for mos
t installations, the rear
of the dryer requires 5" (127 mm). See the Installation
I
nstructions.
Cycle time too short
■ Is the automatic cycle ending early?
The load may not be contacting the moistur
e sensor strips.
Level the dryer.
Lint on load
■ Is the lint screen clogged?
Clean lint screen. Check for air movement.
Stains on load or drum
■ Was dryer fabric softener properly used?
Add dryer fabric softener sheets at the begi
nning of the cycle.
Fabric softener sheets added to a partially dried load can
stain your garments.
Drum stains are caused by dyes in clothing (usually blue
jean
s). These will not transfer to other clothing.
Loads are wrinkled
■ Was the load removed from dryer at the end of the cycle?
Remove garments promptly to pr
event wrinkling.
■ Was the dryer overloaded?
Dry smaller loads that can tumble freely.
Odors
■ Have you recently been painting, staining, or varnishing in
the area where your dryer is located?
If so, ventilate the area. When the odors or fumes are gone
fr
om the area, rewash and dry the clothing.
Changing the Automatic Default Settings
IMPORTANT: Your dryness level settings can be adjusted to
adapt to different installations, environmental conditions, or
personal preference. This change is retained and will affect all of
your AUTOMATIC cycles, not just the current cycle/load.
If all your loads on all AUTOMATIC Cycle
s are consistently not as
dry as you would like, you may change the default settings to
increase the default dryness level. This change will affect all of
your Automatic Cycles.
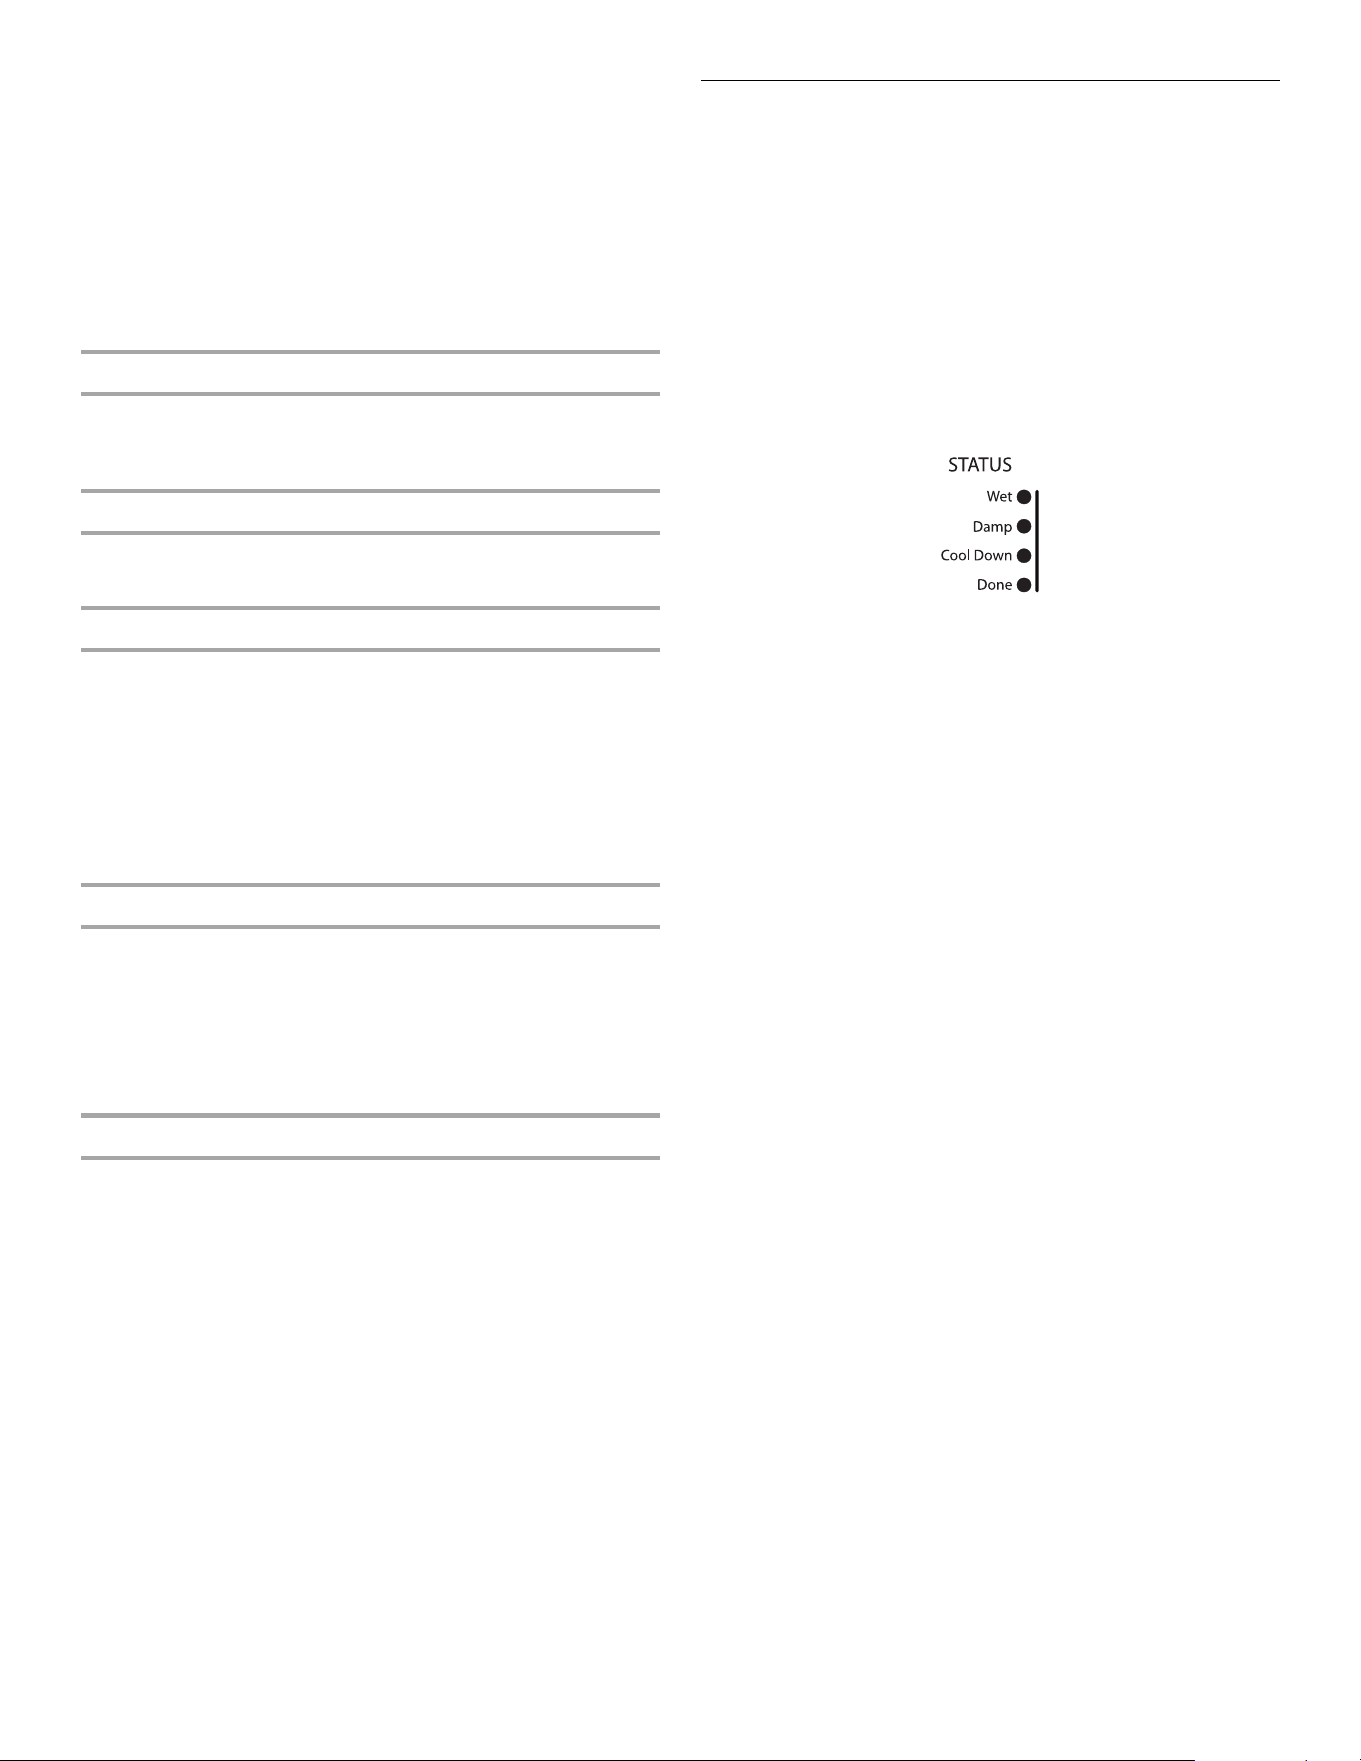
There are 3 drying settings, which are displayed using the WET,
DAMP
, and COOL DOWN indicators:
1. (factory p
reset dryness level) - WET indicator lit.
2. (slight
ly drier clothes, 15% more drying time) - WET and
DAMP indicators lit.
3. (much drier clothes,
30% more drying time) - WET, DAMP,
and COOL DOWN indicators lit.
To change the AUTOMATIC default settings:
NOTE: The AUTOMATIC default settings cannot be changed
while the dryer is running.
1. Pr
ess and hold the TEMP button for at least 6 seconds. The
dryer will beep, and the current drying mode will be displayed.
2. T
o select a new drying setting, press the TEMP button again
until the desired drying setting is shown.
NOTE: Wh
ile cycling through the settings, the current setting
will be lit solid, but the other settings will flash.
3. Pr
ess the START/PAUSE button to save the drying setting and
exit to standby mode.
NOTE: T
o exit without saving, press the POWER button.
4. The drying setting you selected will become your new preset
drying setting for all AUTOMATIC cycles.
9
WHIRLPOOL CORPORATION LAUNDRY WARRANTY
LIMITED WARRANTY
For one year from the date of purchase, when this major appliance is operated and maintained according to instructions attached to or
furnished with the product, Whirlpool Corporation or Whirlpool Canada LP (hereafter “Whirlpool”) will pay for Factory Specified Parts
and repair labor to correct defects in materials or workmanship that existed when this major appliance was purchased. Service must be
provided by a Whirlpool designated service company. YOUR SOLE AND EXCLUSIVE REMEDY UNDER THIS LIMITED WARRANTY
SHALL BE PRODUCT REPAIR AS PROVIDED HEREIN. This limited warranty is valid only in the United States or Canada and applies
only when the major appliance is used in the country in which it was purchased. Proof of original purchase date is required to obtain
service under this limited warranty.
ITEMS EXCLUDED FROM WARRANTY
This limited warranty does not cover:
1. Replacement parts or repair labor if this major appliance is used for other than normal, single-family household use or when it is
used in a manner that is inconsistent to published user or operator instructions and/or installation instructions.
2. Service calls to correct the installation of your major appliance, to instruct you on how to use your major appliance, to replace or
repair house fuses, or to correct house wiring or plumbing.
3. Service calls to repair or replace appliance light bulbs, air filters or water filters. Consumable parts are excluded from warranty
coverage.
4. Damage resulting from accident, alteration, misuse, abuse, fire, flood, acts of God, improper installation, installation not in
accordance with electrical or plumbing codes, or use of products not approved by Whirlpool.
5. Cosmetic damage, including scratches, dents, chips or other damage to the finish of your major appliance, unless such damage
results from defects in materials or workmanship and is reported to Whirlpool within 30 days from the date of purchase.
6. Pick up and delivery. This major appliance is intended to be repaired in your home.
7. Repairs to parts or systems resulting from unauthorized modifications made to the appliance.
8. Expenses for travel and transportation for product service if your major appliance is located in a remote area where service by an
authorized Whirlpool servicer is not available.
9. The removal and reinstallation of your major appliance if it is installed in an inaccessible location or is not installed in accordance
with Whirlpool’s published installation instructions.
10. Replacement parts or repair labor on major appliances with original model/serial numbers that have been removed, altered, or
cannot be easily determined.
DISCLAIMER OF IMPLIED WARRANTIES
IMPLIED WARRANTIES, INCLUDING ANY IMPLIED WARRANTY OF MERCHANTABILITY OR IMPLIED WARRANTY OF FITNESS FOR
A PARTICULAR PURPOSE, ARE LIMITED TO ONE YEAR OR THE SHORTEST PERIOD ALLOWED BY LAW. Some states and provinces
do not allow limitations on the duration of implied warranties of merchantability or fitness, so this limitation may not apply to you. This
warranty gives you specific legal rights, and you also may have other rights that vary from state to state or province to province.
LIMITATION OF REMEDIES; EXCLUSION OF INCIDENTAL AND CONSEQUENTIAL DAMAGES
YOUR SOLE AND EXCLUSIVE REMEDY UNDER THIS LIMITED WARRANTY SHALL BE PRODUCT REPAIR AS PROVIDED HEREIN.
WHIRLPOOL SHALL NOT BE LIABLE FOR INCIDENTAL OR CONSEQUENTIAL DAMAGES. Some states and provinces do not allow
the exclusion or limitation of incidental or consequential damages, so these limitations and exclusions may not apply to you. This
warranty gives you specific legal rights, and you also may have other rights that vary from state to state or province to province.
If outside the 50 United States and Canada, contact your authorized Whirlpool dealer to determine if another warranty applies.
If you think you need repair service, first see the “Troubleshooting” section of the Use & Care Guide. If you are unable to resolve the
problem after checking “Troubleshooting,” additional help can be found by checking the “Assistance or Service” section or by calling
Whirlpool. In the U.S.A., call 1800253-1301. In Canada, call 18008076777.7/08
Keep this book and your sales slip together for future
reference. You must provide proof of purchase or installation
date for in-warranty service.
Write down the following information about your major appliance
to better help you obtain assistance or service if you ever need it.
You will need to know your complete model number and serial
number. You can find this information on the model and serial
number label located on the product.
Dealer name____________________________________________________
Address ________________________________________________________
Phone number__________________________________________________
Model number __________________________________________________
Serial number __________________________________________________
Purchase date __________________________________________________
10
SÉCURITÉ DE LA SÉCHEUSE
Risque possible de décès ou de blessure grave si vous ne
suivez pas immédiatement les instructions.
Risque possible de décès ou de blessure grave si vous
ne suivez pas les instructions.
Tous les messages de sécurité vous diront quel est le danger potentiel et vous disent comment réduire le risque de blessure et
ce qui peut se produire en cas de non-respect des instructions.
Votre sécurité et celle des autres est très importante.
Nous donnons de nombreux messages de sécurité importants dans ce manuel et sur votre appareil ménager. Assurez-vous de
toujours lire tous les messages de sécurité et de vous y conformer.
AVERTISSEMENT
DANGER
Voici le symbole d’alerte de sécurité.
Ce symbole d’alerte de sécurité vous signale les dangers potentiels de décès et de blessures graves à vous
et à d’autres.
Tous les messages de sécurité suivront le symbole d’alerte de sécurité et le mot “DANGER” ou
“AVERTISSEMENT”. Ces mots signient :
Avertissements de la proposition 65 de l'État de Californie :
AVERTISSEMENT : Ce produit contient un produit chimique connu par l’État de Californie pour être à l’origine de cancers.
AVERTISSEMENT : Ce produit contient un produit chimique connu par l’État de Californie pour être à l’origine de malformations
et autres déciences de naissance.
IMPORTANTES INSTRUCTIONS DE SÉCURITÉ
Pour réduire le risque d'incendie, de choc électrique ou de blessure lors de l'utilisation de
la sécheuse, il convient d'observer certaines précautions élémentaires dont les suivantes :
AVERTISSEMENT :
■ Lire toutes les instructions avant d'utiliser la sécheuse.
■ Ne pas placer des articles exposés aux huiles de cuisson
dans votre sécheuse. Les articles contaminés par des
huiles de cuisson peuvent contribuer à une réaction
chimique qui pourrait causer à la charge de s'enammer.
■ Ne pas faire sécher dans la machine des articles q ui ont
déjà été nettoyés, lavés, imbibés, ou tachés d'essence,
de solvants pour nettoyage à sec, d'autres substances
inammables, ou de substances explosives puisqu'elles
dégagent des vapeurs qui peuvent provoquer un
incendie ou une explosion.
■ Ne pas permettre à des enfants de jouer sur ou à
l'intérieur de la sécheuse. Une surveillance étroite est
nécessaire lorsque la sécheuse est utilisée près d'eux.
■ Avant d'enlever la sécheuse du service ou la jeter, enlever
la porte du compartiment de séchage.
■
Ne pas mettre la main dans la sécheuse si le tambour est
en mouvement.
■ Ne pas réparer ni remplacer une pièce de la sécheuse ou
essayer d'en faire l'entretien à moins d'une recommandation
spécique dans le guide d'utlilisation et d'entretien, ou
publiée dans les instructions de réparation par l'utilisateur
que vous comprenez et pouvez exécuter avec compétence.
CONSERVEZ CES INSTRUCTIONS
■
Ne pas installer ni entreposer la sécheuse où elle sera
exposée aux intempéries.
■ Ne pas jouer avec les commandes.
■ Ne pas utiliser un produit assouplissant de tissu ou des
produits pour éliminer la statique à moins qu'ils ne soient
recommandés par le fabricant du produit assouplissant de
tissu ou du produit.
■ Ne pas utiliser la chaleur pour faire sécher des articles
fabriqués avec du caoutchouc mousse ou des matériaux
semblables.
■ Nettoyer le ltre à charpie avant et après chaque charge.
■ Ne pas laisser la charpie, la poussière, ou la saleté
s'accumuler autour du système d'évacuation ou autour de
l'appareil.
■ Un nettoyage périodique de l'intérieur de la sécheuse et du
conduit d'évacuation doit être effectué par une personne
qualiée.
■ Voir les instructions d'installation pour les exigences de
liaison de l'appareil à la terre.
IMPORTANT : L'installation du gaz doit se conformer aux codes locaux, ou en l'absence de codes locaux, au National Fuel Gas
Code, ANSI Z223.1/NFPA 54.
La sécheuse doit être électriquement reliée à la terre conformément aux codes locaux, ou en l'absence de codes locaux, au Code
canadien de l'électricité, ANSI/NFPA 70.
11
AVERTISSEMENT : L’odorat ne permet pas toujours la détection d’une fuite de gaz.
Les distributeurs de gaz recommandent l’emploi d’un détecteur de gaz (homologation UL ou CSA).
Pour d’autre information, contacter le fournisseur de gaz local.
En cas de détection d’une fuite de gaz, exécuter les instructions “Que faire dans le cas d’une odeur de gaz”.
12
GUIDE DE DÉMARRAGE RAPIDE/
UTILISATION DE LA SÉCHEUSE
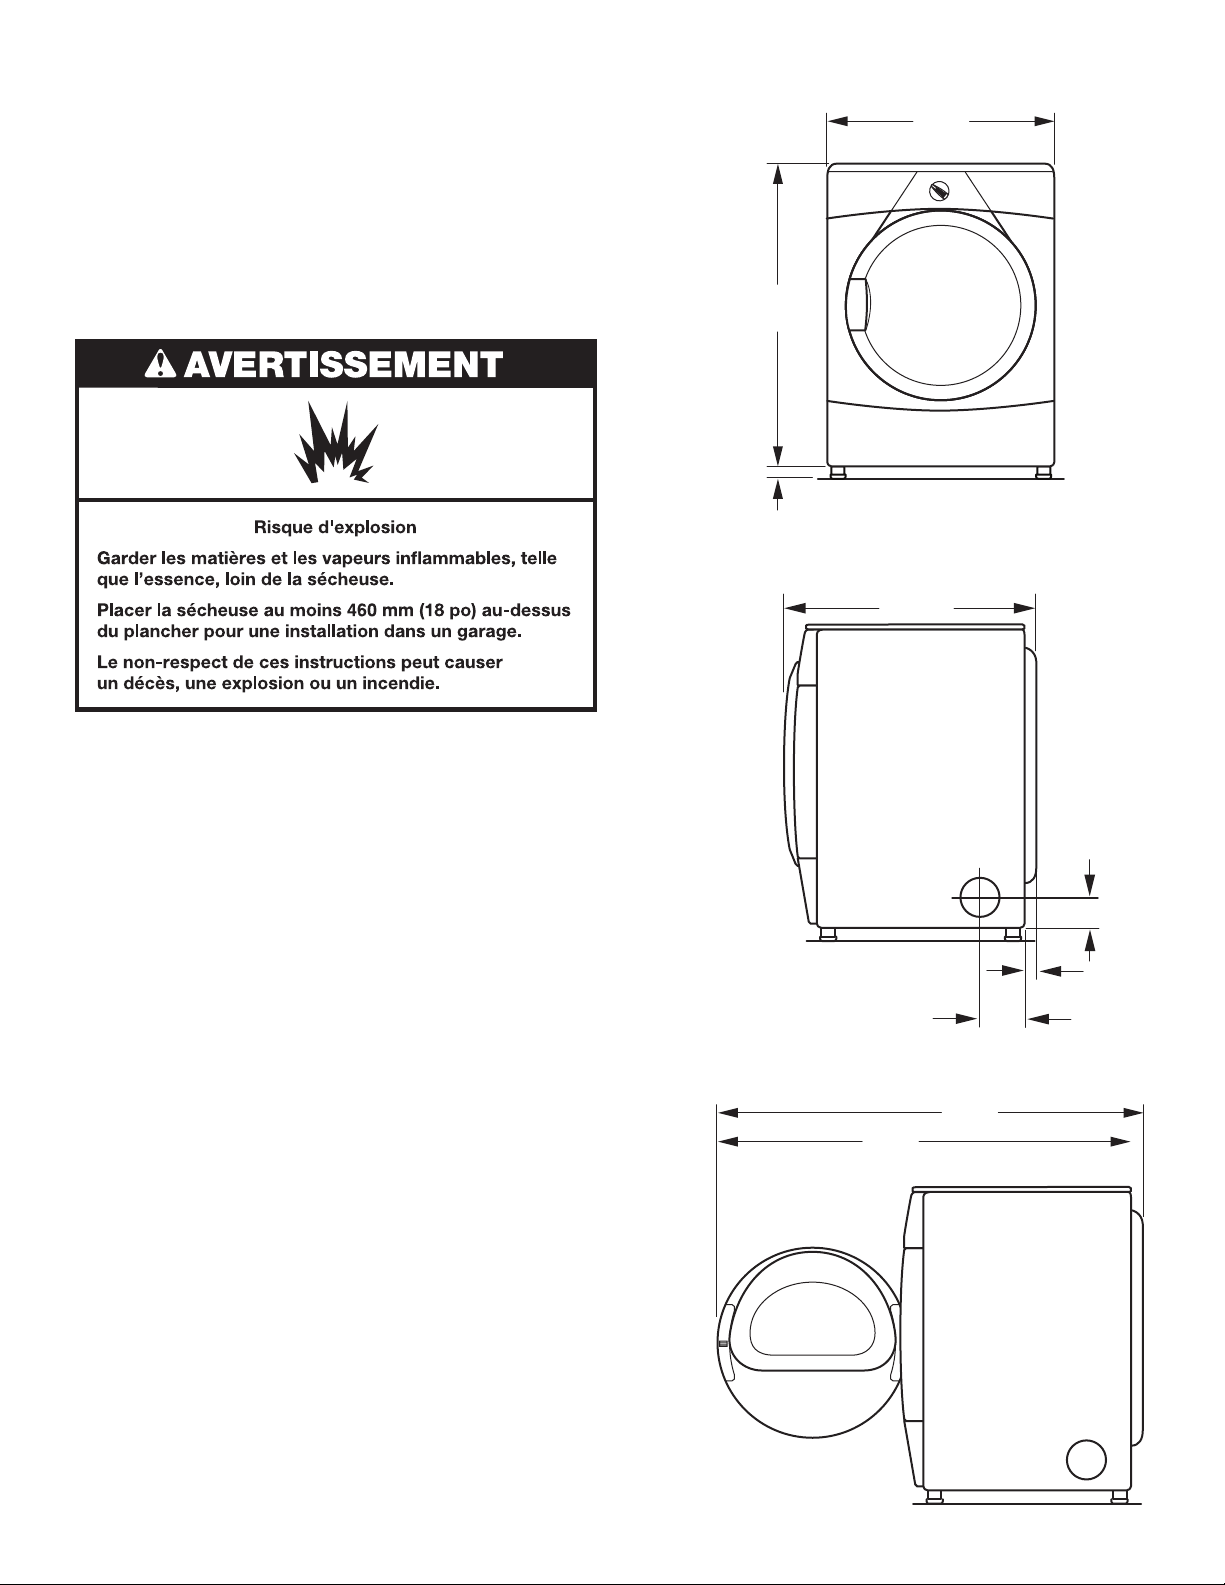
Risque d'explosion
Garder les matières et les vapeurs inammables, telle
que l’essence, loin de la sécheuse.
Ne pas faire sécher un article qui a déjà été touché par
un produit inammable (même après un lavage).
Le non-respect de ces instructions peut causer
un décès, une explosion ou un incendie.
AVERTISSEMENT
Risque d’incendie
Aucune laveuse ne peut complètement enlever l’huile.
Ne pas faire sécher des articles qui ont été salis par
tout genre d’huile (y compris les huiles de cuisson).
Les articles contenant mousse, caoutchouc ou
plastique doivent être séchés sur une corde à linge
ou par le programme de séchage à l’air.
Le non-respect de ces instructions peut causer
un décès ou un incendie.
AVERTISSEMENT
Pour un résumé sur l'utilisation de la sécheuse après installation, voir le GUIDE DE DÉMARRAGE RAPIDE à la page suivante.
GUIDE DE DÉMARRAGE RAPIDE
AccuDry
AVERTISSEMENT : Pour réduire le risque d'incendie, de choc électrique ou de blessures à autrui, lire les IMPORTANTES
INSTRUCTIONS DE SÉCURITÉ avant de faire fonctionner cet appareil.
Ce Guide d'utilisation et d'entretien couvre plusieurs modèles. Votre sécheuse peut ne pas comporter l'ensemble des
programmes et caractéristiques décrits.
UTILISATION DES PROGRAMMES
AUTOMATIQUES
Les programmes automatiques adaptent
automatiquement le réglage de programme
en fonction du type de charge et ajustent le temps
de séchage pour une performance optimale.
Voir les renseignements sur les programmes dans les pages qui
suivent pour plus de détails sur chaque programme.
1. Nettoyer le ltre à charpie.
2. Placer le linge dans la sécheuse. Fermer la porte.
3. Appuyer sur POWER (mise sous tension).
4. Sélectionner le programme automatique désiré.
5. Appuyer sans relâcher sur START/PAUSE (mise en marche/
pause) pour commencer.
UTILISER LES PROGRAMMES
MINUTÉS
Utiliser les programmes minutés pour régler une
durée et une température de séchage. Pour plus
d'informations, voir les renseignements sur les
programmes dans les pages suivantes.
1. Nettoyer le ltre à charpie.
2. Placer le linge dans la sécheuse. Fermer la porte.
3. Appuyer sur POWER (mise sous tension).
4. Sélectionner le programme minuté désiré.
5. Appuyer sur TEMP jusqu’à ce que la température désirée
s'allume.
6. Appuyer sans relâcher sur START/PAUSE (mise en marche/
pause) pour commencer.
Arrêter la sécheuse
Pour arrêter la sécheuse à tout momentOuvrir
Appuyer sur POWER (mise sous tension).
Mettre en pause ou remettre en marche
Pour mettre la sécheuse en pause à n'importe quel moment
Ouvrir la porte ou appuyer une fois sur START/PAUSE (mise en
marche/pause).
Pour remettre la sécheuse en marche
Fermer la porte et appuyer sans relâcher sur START/PAUSE
(mise en marche/pause).
13
14
Programmes
REMARQUE : Certains programmes ne sont pas disponibles sur
certains modèles.
Appuyer sur le bouton de sélection
de programme pour
sélectionner le programme de séchage qui correspond au type
de charge à sécher. Voir le tableau R
églages de programmes
automatiques ou Réglages de programmes minutés.
20 min
Push to Select
Bouton de sélection de programme
Programmes automatiques
Les programmes automatiques permettent d'assortir le
programme à la charge à sécher. Voir le tableau Réglages de
programmes automatiques suivant. Chaque programme sèche
certains tissus à la température recommandée.
Un capteur détecte l'h
umidité de la charge et adapte
automatiquement la durée de séchage pour un séchage optimal.
Le temps de séchage variera selon la taille de la charge, le type de
tissu, et la quantité d'eau évacuée par la laveuse.
Remarque : Le
s températures de séchage sont réglées pour les
programmes automatiques et ne peuvent être ajustées.
Programmes automatiques
Type de charge
Température Durée
estimé
e
du pro-
gramme
(en
minutes)
HEAVY DUTY
(service intense)
Articles lourds,
serviettes, jeans
Élevée (Hot) 45
NORMAL
Tissus velours,
vêtements de travail, draps
Moyenne
(W
arm)
35
DELICATE (articles délicats)
Lingerie, chemisiers, lainages
lavabl
es
Basse (Low) 30
Réglages de programmes automatiques
Programmes minutés
Utiliser un programme minuté pour sélectionner une durée et une
température de séchage spécifiques.
Appuyer sur le bouton TEMP (températur
e) pour modifier la
température de séchage préréglée par défaut. La température par
de séchage par défaut est élevée.
Programmes de
séchage minuté
Type de charge
Température Durée du
p
rogramme*
(en minutes
TIMED DRY
(séchage minuté)
Articles lourds, articles
v
olumineux, couvre-lits,
vêtements de travail
Élevée (Hot) 60, 40, 20
Réglages des programmes de séchage minuté
*Régler de nouveau la durée pour terminer le séchage, si
nécessaire.
Air Dry (séchage à l'air)
Utiliser le réglage de température Air Dry (séchage à l'air) avec les
programmes TIMED DRY (séchage minuté) pour les articles qui
doivent être séchés sans chaleur, tels que le caoutchouc, le
plastique et les tissus sensibles à la chaleur. Ce tableau donne
des exemples d'articles pouvant être séchés au moyen du réglage
Air Dry.
Type de charge Durée
es
timée*
(en
minute
s)
Caoutchouc mousse - oreillers, soutiens-gorges
rembourrés, jouets rembourrés
20 - 30
Plastique - rideaux de douche, nappes 20 - 30
Tapis à endos caoutchouté 40 - 50
Plastique oléfinique, polypropylène, nylon diaphane
10 - 20
*Régler de nouveau la durée pour compléter le séchage, si
nécessair
e.
Lors de l'utilisation du séchage à l'air :
■ Vérifier que les revêtements sont bien cousus.
■ Secouer et faire bouffer les oreillers à la main périodiquement
pendant le programme.
■ Faire sécher l'article complètement. Les oreillers en
caoutchouc mousse mettent du temps à sécher.
Caractéristiques supplémentaires
Cycle Signal (signal de programme
Le signal de programme est un signal sonore qui retentit lorsque
le programme de séchage est terminé. Appuyer sur le bouton
CYCLE SIGNAL pour activer ou désactiver à tout moment avant
ou pendant un programme.
Modification des programmes et réglages
On peut modifier les programmes automatiques, les programmes
de séchage minuté, ou changer le réglage de température de
séchage sur les programmes minutés à tout moment avant
d'appuyer sur START/PAUSE.
■ Trois brefs signaux sonores retentissent si une combinaison
non disponible a été sélectionnée. La dernière sélection ne
sera pas acceptée.
Changer de programme après avoir mis la sécheuse en
marche :
1. Appuyer sur POWER (mise sous tension). Ceci met fin au
programme en cours et arrête la sécheuse.
2. Appuyer à nouv
eau sur le bouton POWER (mise sous tension)
ou appuyer sur le bouton de sélection de programme pour
mettre la sécheuse en marche.
3. Sélectionner le pr
ogramme et les options désirés.

15
4. Appuyer sans relâcher sur START/PAUSE (mise en marche/
pause). La sécheuse recommence au début du nouveau
programme.
Changer la température de séchage :
On peut modifier la température de séchage des programmes
minutés en tout temps, en appuyant sur le bouton TEMP
(température) jusqu'à ce que la température désirée s'illumine.
ENTRETIEN DE LA SÉCHEUSE
Nettoyage de l'emplacement de la sécheuse
Éviter de laisser des éléments qui pourraient obstruer le débit de
combustion et empêcher une bonne ventilation autour de la
sécheuse.
Nettoyage du filtre à charpie
Nettoyage à chaque charge
Le filtre à charpie se trouve dans l'ouverture de la porte de la
sécheuse. Un filtre obstrué de charpie peut augmenter le temps
de séchage.
Nettoyage
1. E
nlever le filtre à charpie en le tirant directement vers le haut.
Enlever la charpie du filtre en la roulant avec les doigts. Ne
pas rincer ni laver le filtre pour enlever la charpie. La charpie
mouillée s'enlève difficilement.
2. Remettre le filtre à charpie fermement en place.
IMPORTANT :
■ Ne pas faire fonctionner la sécheuse avec un filtre à charpie
déplacé, endommagé, bloqué ou manquant. Une telle action
peut causer un échauffement ou des dommages pour la
sécheuse et les tissus.
■ Si de la charpie tombe dans la sécheuse au moment du
retrait du filtre, vérifier le conduit d'évacuation et retirer la
charpie. Voir “Exigences concernant l'évacuation”.
Nettoyage au besoin
Les détergents et les assouplissants de tissu peuvent causer
une accumulation de résidus sur le filtre à charpie. Cette
accumulation peut augmenter
les temps de séchage ou
entraîner un arrêt de la sécheuse avant que la charge
ne soit complètement sèche.
Nettoyer le filtre à charpie avec une brosse en nylon tous les
6 mois ou plus fréquemment s'il dev
ient obstrué par suite d'une
accumulation de résidus.
Lavage
1. En
lever la charpie du filtre en la roulant avec les doigts.
2. Mouiller les deux côtés du filtre à charpie avec de l'eau
chaude.
3. Mou
iller une brosse en nylon avec de l'eau chaude et du
détergent liquide; frotter le filtre avec la brosse pour enlever
l'accumulation de résidus.
4. Rincer le filtre à l'eau chaude.
5. Bien sécher le filtre à charpie avec une serviette propre.
Replacer le filtre dans la sécheuse.
Nettoyage de l'intérieur de la sécheuse
Nettoyage du tambour de la sécheuse :
1. Préparer une pâte avec un détergent à lessive en poudre et
de l'eau très chaude.
2. Applique
r la pâte sur un linge doux.
OU
Verser un nettoyant liquide domestique ininflam
mable sur la
surface tachée et frotter avec un linge doux jusqu'à ce que
toute la teinture et les taches restantes soient enlevées.
3. Essuy
er complètement le tambour avec un linge humide.
4. Fai
re culbuter une charge de linge ou de serviettes propres
pour sécher le tambour.
REMARQUE :
Les vêtements contenant des teintures instables,
tels que jeans en denim ou articles en coton de couleur vive,
peuvent décolorer l'intérieur de la sécheuse. Ces taches ne sont
pas nuisibles à votre sécheuse et ne tacheront pas les vêtements
dans les charges futures. Faire sécher les articles à teinture
instable en les tournant à l'envers pour empêcher le transfert de
la teinture.
16
Retrait de la charpie accumulée
Dans la caisse de la sécheuse :
Il faut retirer la charpie accumulée dans la caisse de la sécheuse
tous les 2 ans ou plus souvent, selon l'utilisation de la sécheuse.
Le nettoyage devrait être fait par une personne qualifiée.
Dans le conduit d'évacuation :
La charpie devrait être enlevée tous les 2 ans ou plus souvent,
selon l'utilisation de la sécheuse.
Précautions à prendre avant les vacances, un
entreposage ou un déménagement
Entretien en cas de non-utilisation ou de remisage
On ne doit faire fonctionner la sécheuse que lorsqu'on est
présent. Si l'utilisateur doit partir en vacances ou n'utilise pas la
sécheuse pendant une période prolongée, il convient d'exécuter
les opérations suivantes :
1. Dé
brancher la sécheuse ou déconnecter la source de courant
électrique.
2. Net
toyer le filtre à charpie. Voir “Nettoyage du filtre à
charpie”.
Précautions à prendre avant un déménagement
Sécheuses alimentées par cordon d'alimentation :
1. Débrancher le cordon d'alimentation électrique.
2. Veiller à ce que les pieds de nivellement soient solidement
fixés à la base de la sécheuse.
3. Utiliser du ruban adhésif de masquage pour fixer la
porte de la
sécheuse.
Pour les sécheuses avec câblage direct :
AVERTISSEMENT
Risque de choc électrique
Déconnecter la source de courant électrique avant
l'entretien.
Replacer pièces et panneaux avant de faire la remise
en marche.
Le non-respect de ces instructions peut causer
un décès ou un choc électrique.
1. Déconnecter la source de courant électrique.
2. Déconnecter le câblage.
3. V
eiller à ce que les pieds de nivellement soient solidement
fixés à la base de la sécheuse.
4. Utiliser du ruban adhésif de masquage pour fixer la
porte de la
sécheuse.
Réinstallation de la sécheuse
Suivre les “Instructions d'installation” pour choisir l'emplacement,
régler l'aplomb de la sécheuse et la raccorder.
Changement de l'ampoule d'éclairage du tambour
La lumière de la sécheuse s'allume automatiquement à l'intérieur
du tambour lorsqu'on ouvre la porte..
Changement de l'ampoule du tambour :
1. Débrancher la sécheuse ou déconnecter la source de courant
électrique.
2. Ouvrir la porte de la sécheuse. Trouver le couvercle de
l'ampoule d'éclairage sur la paroi arrière de la sécheuse.
Enlever la vis située au coin inférieur droit du couvercle.
Enlever le couvercle.
3. Tou r ner l 'ampoule dans le sens antihoraire. Remplacer
l'ampoule seulement par une ampoule de 10 watts pour
appa
reil électroménager. Réinstaller le couvercle et le fixer
avec la vis.
4. B
rancher la sécheuse ou reconnecter la source de courant
électrique.

17
DÉPANNAGE
Essayer d'abord les solutions suggérées ici ce qui vous évitera peut-être le coût d'une visite de service...
Pour plus de recommandations, consulter les Instructions d'installation.
Fonctionnement de la sécheuse
La sécheuse ne fonctionne pas
■ La porte de la sécheuse est-elle bien fermée?
■ A-t-on bien enfoncé le bouton START/PAUSE (mise en
marche/pause)?
Pour les charges importantes, il peut être nécessaire
d'appuyer sur le bouton Start/Pause pendant 2 à 5 secondes.
■ Un fusible est-il grillé ou un disjoncteur s'est-il
déclenché?
Il peut y avoir 2 fusibles ou disjoncteurs pour la sécheuse.
Vérifier que les deux fusibles sont intacts et serrés ou que les
deux disjoncteurs ne sont pas déclenchés. Remplacer le
fusible ou réenclencher le disjoncteur. Si le problème
persiste, appeler un électricien.
■ Une alimentation électrique correcte est-elle disponible?
Les sécheuses électriques nécessitent une alimentation
électrique de 240 V. Vérifier avec un électricien qualifié.
■ A-t-on utilisé un fusible ordinaire?
Utiliser un fusible temporisé.
Bruits inhabituels
■ La sécheuse est-elle restée hors service pendant un
certain temps?
Si la sécheuse n'a pas été utilisée depuis quelque temps, il
est possible qu'elle émette des bruits saccadés au cours des
premières minutes de fonctionnement.
■ Une pièce de monnaie, un bouton ou un trombone sont-
ils coincés entre le tambour et l'avant ou l'arrière de la
sécheuse?
Vérifier les bords avant et arrière du tambour pour voir si de
petits objets y sont coincés. Vider les poches avant de faire la
lessive.
■ Les quatre pieds sont-ils installés et la sécheuse est-elle
d'aplomb de l'avant vers l'arrière et transversalement?
La sécheuse peut vibrer si elle n'est pas correctement
installée. Voir les Instructions d'installation.
■ Les vêtements sont-ils emmêlés ou en boule?
Une charge en boule rebondit, ce qui fait vibrer la sécheuse.
Séparer les articles de la charge et remettre la sécheuse en
marche.
Absence de chaleur
■ Un fusible est-il grillé ou un disjoncteur s'est-il
déclenché?
Le tambour peut tourner, mais sans chaleur. Les sécheuses
électriques utilisent 2 fusibles ou disjoncteurs. Remplacer le
fusible ou réenclencher le disjoncteur. Si le problème
persiste, appeler un électricien.
La sécheuse affiche un message d'erreur (le témoin
WET clignote)
■ Le témoin WET clignote :
Si l'indicateur WET sur le tableau de commande de la
sécheuse clignote, avec une pause entre les clignotements,
cela signifie que le module de commande de la sécheuse a
détecté un problème nécessitant une réparation. Faire un
appel de service.
Résultats de la sécheuse
Le séchage des vêtements n'est pas satisfaisant, les
durées de séchage sont trop longues, la charge est trop
chaude
■ Le filtre à charpie est-il obstrué de charpie?
Le filtre à charpie doit être nettoyé avant chaque charge.
■ Le réglage de température Air Dry (séchage à l'air) a-t-il
été sélectionné?
Choisir la température correcte pour les types de vêtements à
sécher. Voir “Air Dry (séchage à l'air)”.
■ La charge est-elle trop grosse et trop lourde pour sécher
rapidement?
Séparer la charge pour qu'elle culbute librement.
■ Le conduit d'évacuation ou le clapet d'évacuation à
l'extérieur est-il obstrué de charpie, restreignant le
mouvement de l'air?
Faire fonctionner la sécheuse pendant 5 à 10 minutes. Tenir la
main sous le clapet d'évacuation à l'extérieur pour vérifier le
mouvement de l'air. Si vous ne ressentez pas de l'air en
mouvement, nettoyer le système d'évacuation ou remplacer le
conduit d'évacuation par un conduit en métal lourd ou flexible.
Voir les Instructions d'installation.
■ Des feuilles d'assouplissant de tissus bloquent-elles la
grille de sortie?
Utiliser seulement une feuille d'assouplissant par charge et
ne l'utiliser qu'une seule fois.
■ Le conduit d'évacuation a-t-il la longueur appropriée?
Vérifier que le conduit d'évacuation n'est pas trop long ou ne
comporte pas trop de changements de direction. Un long
conduit augmentera les durées de séchage. Voir les
Instructions d'installation.
■ Le diamètre du conduit d'évacuation a-t-il la taille
correcte?
Utiliser un composant de 4" (102 mm) de diamètre.
18
■ La sécheuse se trouve-t-elle dans une pièce où la
température ambiante est inférieure à 45ºF (7ºC)?
Le bon fonctionnement des programmes de la sécheuse
nécessite une température ambiante supérieure à 45°F (7°C).
■ La sécheuse est-elle installée dans un placard?
Les portes du placard doivent comporter des ouvertures
d'aération au
sommet et en bas de la porte. Un espace
minimum de 1" (25 mm) est nécessaire à l'ava
nt de la
sécheuse et, pour la plupart des installations, un espace de
5" (127 mm) est nécessaire à l'arrière de la sécheuse. Voir les
Instructions d'installation.
Temps de programme trop court
■ Le programme automatique se termine-t-il trop tôt?
La charge n'est peut-être pas en contact avec les bandes de
détection. Régler l'aplomb de la sécheuse.
Charpie sur la charge
■ Le filtre à charpie est-il obstrué?
Nettoyer le filtre à charpie.
Vérifier le mouvement de l'air.
Taches sur la charge ou sur le tambour
■ L'assouplissant de tissus pour sécheuse a-t-il été utilisé
correctement?
Ajouter les feuilles d'assoup
lissant de tissus au début du
programme. Les feuilles d'assouplissant de tissus ajoutées à
une charge partiellement sèche peuvent tacher les
vêtements.
Les taches sur le tambour sont dues aux teintures contenues
dans les
vêtements (les jeans en général). Il n'y aura pas de
transfert sur les autres vêtements.
Charges avec faux plis
■ La charge a-t-elle été retirée de la sécheuse à la fin du
programme?
Retirer les vêtements rapidement pour empêcher la formation
de plis.
■ La sécheuse a-t-elle été surchargée?
Faire sécher de plus petites charges qui peuvent culbuter
libr
ement.
Odeurs
■ A-t-on récemment employé de la peinture, de la teinture
ou du vernis dans la pièce où est installée votre
sécheuse?
Si tel est le cas, aérer la pièce. Une fois les odeurs ou
éman
ations disparues, laver et sécher à nouveau les
vêtements.
Changement des réglages par défaut de
programmes automatiques
IMPORTANT : Vos réglages de degré de séchage peuvent
être modifiés pour s'a
dapter à différentes installations, à
l'environnement de l'installation ou selon vos préférences
personnelles. Cette modification est sauvegardée et affectera
tous vos programmes automatiques, pas seulement le
programme/la charge actuel(le).
Si les charges des programmes de séc
hage automatiques sont
systématiquement moins sèches que désiré, vous pouvez
modifier les les réglages par défaut pour augmenter le niveau de
séchage.
Il existe 3 réglages de séchage, affichés par les témoins
lumineux WET (mouillé), DAMP (humide), et COOL DOWN
(r
efroidissement) :
1. (niveau de séchage préréglé à l'usine) - témoin lumineux
WET allumé.
2. (vêtements légèr
ement plus secs, 15 % de temps de
séchage supplémentaire) - témoins lumineux WET et
DAMP allumés.
3. (vêtements beaucoup
plus secs, 30 % de temps de
séchage supplémentaire) - témoins lumineux WET, DAMP
et COOL DOWN allumés.
Pour modifier les réglages automatiques par défaut :
REMARQUE : Les réglages automatiques par défault ne peuvent
pas être modifiés pendant que la sécheuse est en marche.
1. Appuyer sur
le bouton TEMP (température) pendant au moins
6 secondes. La sécheuse émet un signal sonore, et le mode
de séchage en cours s'affiche.
2. Pou
r sélectionner un nouveau réglage de séchage, appuyer
de nouveau sur le bouton TEMP jusqu'à ce que le réglage de
séchage désiré s'affiche.
REMARQUE : Penda
nt une recherche de réglage, le réglage
en cours ne clignote pas mais les autres réglages clignotent.
3. Appuyer sur
le bouton START/PAUSE (mise en marche/pause)
pour sauvegarder le réglage de séchage et sortir du mode de
veille.
REMARQUE :
Pour sortir du mode de veille sans sauvegarder,
appuyer sur le bouton POWER (mise sous tension).
4. Le
réglage de séchage que vous avez sélectionné deviendra
le nouveau réglage par défaut pour tous les programmes
automatiques.

19
GARANTIE DES APPAREILS DE BUANDERIE DE
WHIRLPOOL
CORPORATION
GARANTIE LIMITÉE
Pendant un an à compter de la date d'achat, lorsque ce gros appareil ménager est utilisé et entretenu conformément aux instructions
jointes à ou fournies avec le produit, Whirlpool Corporation ou Whirlpool Canada LP (ci-après désignées “Whirlpool”) paiera pour les
pièces spécifiées par l'usine et la main-d'œuvre pour corriger les vices de matériaux ou de fabrication qui existaient déjà lorsque ce
gros appareil ménager a été acheté. Le service doit être fourni par une compagnie de service désignée par Whirlpool. LE SEUL ET
EXCLUSIF RECOURS DU CLIENT DANS LE CADRE DE LA PRÉSENTE GARANTIE LIMITÉE CONSISTE EN LA RÉPARATION PRÉVUE
CI-DESSUS. Cette garantie limitée est valide uniquement aux États-Unis ou au Canada et s'applique exclusivement lorsque le gros
appareil ménager est utilisé dans le pays où il a été acheté. Une preuve de la date d'achat d'origine est exigée pour obtenir un service
dans le cadre de la présente garantie limitée.
ÉLÉMENTS EXCLUS DE LA GARANTIE
La présente garantie limitée ne couvre pas :
1. Les pièces de rechange ou la main d'œuvre lorsque ce gros appareil ménager est utilisé à des fins autres que l'usage unifamilial
normal ou lorsque les instructions d'installation et/ou les instructions de l'opérateur ou de l'utilisateur fournies ne sont pas
respectées.
2. Les visites de service pour rectifier l'installation du gros appareil ménager, montrer à l'utilisateur comment utiliser l'appareil,
remplacer ou réparer des fusibles ou rectifier le câblage ou la plomberie du domicile.
3. Les visites de service pour réparer ou remplacer les ampoules électriques, les filtres à air ou les filtres à eau de l'appareil. Les pièces
consomptibles ne sont pas couvertes par la garantie.
4. Les dommages imputables à : accident, modification, usage impropre ou abusif, incendie, inondation, actes de Dieu, installation
fautive ou installation non conforme aux codes d'électricité ou de plomberie, ou l'utilisation de produits non approuvés par
Whirlpool.
5. Les défauts apparents, notamment les éraflures, les bosses, fissures ou tout autre dommage au fini du gros appareil ménager, à
moins que ces dommages soient dus à des vices de matériaux ou de fabrication et soient signalés à Whirlpool dans les 30 jours
suivant la date d'achat.
6. L'enlèvement et la livraison. Ce gros appareil ménager est conçu pour être réparé à domicile.
7. Les réparations aux pièces ou systèmes résultant d'une modification non autorisée faite à l'appareil.
8. Les frais de déplacement et de transport pour le service d'un produit si votre gros appareil ménager est situé dans une région
éloignée où un service d'entretien Whirlpool autorisé n'est pas disponible.
9. La dépose et la réinstallation de votre gros appareil ménager si celui-ci est installé dans un endroit inaccessible ou n'est pas installé
conformément aux instructions d'installation fournies par Whirlpool.
10. Les pièces de rechange ou la main-d'oeuvre pour les gros appareils ménagers dont les numéros de série et de modèle originaux
ont été enlevés, modifiés ou qui ne peuvent pas être facilement identifiés.
CLAUSE D'EXONÉRATION DE RESPONSABILITÉ AU TITRE DES GARANTIES IMPLICITES
LES GARANTIES IMPLICITES, Y COMPRIS LES GARANTIES APPLICABLES DE QUALITÉ MARCHANDE OU D'APTITUDE À UN
USAGE PARTICULIER, SONT LIMITÉES À UN AN OU À LA PLUS COURTE PÉRIODE AUTORISÉE PAR LA LOI. Certains États et
certaines provinces ne permettent pas de limitation sur la durée de garanties implicites de qualité marchande ou d'aptitude à un usage
particulier, de sorte que la limitation ci-dessus peut ne pas être applicable dans votre cas. Cette garantie vous confère des droits
juridiques spécifiques, et vous pouvez également jouir d'autres droits qui peuvent varier d'une juridiction à l'autre.
LIMITATION DES RECOURS, EXCLUSION DES DOMMAGES FORTUITS OU INDIRECTS
LE SEUL ET EXCLUSIF RECOURS DU CLIENT DANS LE CADRE DE LA PRÉSENTE GARANTIE LIMITÉE CONSISTE EN LA
RÉPARATION PRÉVUE CI-DESSUS. WHIRLPOOL N'ASSUME AUCUNE RESPONSABILITÉ POUR LES DOMMAGES FORTUITS OU
INDIRECTS. Certains États et certaines provinces ne permettent pas l'exclusion ou la limitation des dommages fortuits ou indirects de
sorte que ces limitations et exclusions peuvent ne pas être applicables dans votre cas. Cette garantie vous confère des droits juridiques
spécifiques, et vous pouvez également jouir d'autres droits qui peuvent varier d'une juridiction à l'autre.
Si vous résidez à l'extérieur du Canada et des 50 États des États-Unis, contactez votre marchand Whirlpool autorisé pour déterminer si
une autre garantie s'applique.
Si vous avez besoin d'un service de réparation, voir d'abord la section “Dépannage” du Guide d'utilisation et d'entretien. Si vous n'êtes
pas en mesure de résoudre le problème après avoir consulté la section “Dépannage”, vous pouvez trouver de l'aide supplémentaire en
consultant la section “Assistance ou Service” ou en appelant Whirlpool. Aux É.U., composer le 1-800-253-1301. Au Canada,
composer le 18008076777.
7/08
Conservez ce manuel et votre reçu de vente ensemble pour
référence ultérieure. Pour le service sous garantie, vous
devez présenter un document prouvant la date d'achat ou
d'installation.
Inscrivez les renseignements suivants au sujet de votre gros ap-
pareil ménager pour mieux vous aider à obtenir assistance ou ser-
vice en cas de besoin. Vous devrez connaître le numéro de modèle
et le numéro de série au complet. Vous trouverez ces renseigne-
ments sur la plaque signalétique située sur le produit.
Nom du marchand ______________________________________________
Adresse ________________________________________________________
Numéro de téléphone ___________________________________________
Numéro de modèle______________________________________________
Numéro de série ________________________________________________
Date d'achat____________________________________________________
ASSISTANCE OR SERVICE
Before calling for assistance or service, please check “Troubleshooting” or visit www.amana.com/help.
It may save you the cost of a service call. If you still need help, follow the instructions below.
When calling, please know the purchase date and the complete model and serial number of your appliance.
This information will help us to better respond to your request.
Maytag Services, LLC
ATTN: CAIR
®
Center
P.O. Box 2370
Cleveland, TN 37320-2370
Customer eXperience Centre
Whirlpool Canada LP
1901 Minnesota Court
Mississauga, Ontario L5N 3A7
You can write with any questions or concerns at:
Maytag Services, LLC Customer Assistance
1-800-253-1301 www.amana.com/help
Whirlpool Canada LP
Customer eXperience Centre
1-800-807-6777
www.amana.com/help
Our consultants provide assistance with
Please include a daytime phone number in your correspondence.
If you need replacement parts or to order accessories
We recommend that you use only FSP
®
Factory Specied Parts.
These parts will t right and work right because they are made with the same precision
used to build every new MAYTAG
®
appliance.
To locate FSP
®
replacement parts, assistance in your area, or accessories:
or call your nearest designated service center or refer to your Yellow Pages telephone directory.
In the U.S.A.
Features and specications on our full line of appliances.
N
Installation information.
N
Specialized customer assistance (Spanish speaking,
N
hearing impaired, limited vision, etc.).
In the U.S.A. and Canada
Use and maintenance procedures.
N
Accessory and repair parts sales.
N
Referrals to local dealers, repair parts distributors,
N
and service companies. Maytag
®
designated service
technicians are trained to fulll the product warranty
and provide after-warranty service, anywhere in the
United States and Canada.
ASSISTANCE OU SERVICE
Avant de faire un appel pour assistance ou service, veuillez vérier la section “Dépannage” ou consulter
www.amana.com/help. Cette vérication peut vous faire économiser le coût d’une visite de réparation.
Si vous avez encore besoin d’aide, suivre les instructions ci-dessous.
Lors d’un appel, veuillez connaître la date d’achat et les numéros au complet de modèle et de série de votre appareil.
Ces renseignements nous aideront à mieux répondre à votre demande.
Si vous avez besoin de pièces de rechange ou pour commander des accessoires
Si vous avez besoin de commander des pièces de rechange, nous vous recommandons d’utiliser seulement des pièces
spéciées par l’usine FSP
®
. Ces pièces conviendront et fonctionneront bien parce qu’elles sont fabriquées selon les mêmes
spécications précises utilisées pour construire chaque nouvel appareil MAYTAG
®
.
Pour trouver des pièces de rechange FSP
®
ou des accessoires dans votre région :
Whirlpool Canada LP Centre pour l’eXpérience de la clientèle
1-800-807-6777 www.amana.com/help
Pour plus d’assistance
Vous pouvez nous soumettre toute question ou problème en
écrivant à l’adresse ci-dessous :
Centre pour l’eXpérience de la clientèle
Whirlpool Canada LP
1901 Minnesota Court
Mississauga, Ontario L5N 3A7
Dans votre correspondance veuillez indiquer un numéro
Nos consultants fournissent
l’assistance pour :
Procédés d’utilisation et d’entretien.
N
Vente d’accessoires et de pièces de rechange.
N
Les références aux concessionnaires, compagnies
N
de service de réparation et distributeurs de pièces de
rechange locaux. Les techniciens de service désignés par
Maytag
®
sont formés pour remplir la garantie des produits
ASSISTANCE OR SERVICE
Before calling for assistance or service, please check “Troubleshooting” or visit www.whirlpool.com/help.
It may save you the cost of a service call. If you still need help, follow the instructions below.
When calling, please know the purchase date and the complete model and serial number of your appliance.
This information will help us to better respond to your request.
Whirlpool Corporation
Customer eXperience Center
553 Benson Road
Benton Harbor, MI 49022-2692
Customer eXperience Centre
Whirlpool Canada LP
1901 Minnesota Court
Mississauga, Ontario L5N 3A7
You can write with any questions or concerns at:
Whirlpool Corporation Customer eXperience Center
1-800-253-1301 www.whirlpool.com
1-800-442-9991 (Accessories)
www.whirlpool.com/accessories
Whirlpool Canada LP
Customer eXperience Centre
1-800-807-6777
www.whirlpool.ca
Our consultants provide assistance with
Please include a daytime phone number in your correspondence.
If you need replacement parts or to order accessories
We recommend that you use only FSP
®
Factory Specied Parts.
These parts will t right and work right because they are made with the same precision
used to build every new WHIRLPOOL
®
appliance.
To locate FSP
®
replacement parts, assistance in your area, or accessories:
or call your nearest designated service center or refer to your Yellow Pages telephone directory.
In the U.S.A.
Features and specications on our full line of appliances.
N
Installation information.
N
Specialized customer assistance (Spanish speaking,
N
hearing impaired, limited vision, etc.).
In the U.S.A. and Canada
Use and maintenance procedures.
N
Accessory and repair parts sales.
N
Referrals to local dealers, repair parts distributors,
N
and service companies. Whirlpool designated service
technicians are trained to fulll the product warranty
and provide after-warranty service, anywhere in the
United States and Canada.
ASSISTANCE OU SERVICE
Avant de faire un appel pour assistance ou service, veuillez vérier la section “Dépannage” ou consulter
www.whirlpool.com/help. Cette vérication peut vous faire économiser le coût d'une visite de réparation.
Si vous avez encore besoin d'aide, suivre les instructions ci-dessous.
Lors d'un appel, veuillez connaître la date d'achat et les numéros au complet de modèle et de série de votre appareil.
Ces renseignements nous aideront à mieux répondre à votre demande.
Si vous avez besoin de pièces de rechange ou pour commander des accessoires
Si vous avez besoin de commander des pièces de rechange, nous vous recommandons d'utiliser seulement des pièces
spéciées par l'usine FSP
®
. Ces pièces conviendront et fonctionneront bien parce qu'elles sont fabriquées selon les mêmes
spécications précises utilisées pour construire chaque nouvel appareil WHIRLPOOL
®
.
Pour trouver des pièces de rechange FSP
®
, de l'aide ou des accessoires dans votre région :
Whirlpool Canada LP Centre pour l'eXpérience de la clientèle
1-800-807-6777 www.whirlpool.ca
ou contacter votre centre de réparation désigné le plus proche, ou encore consulter les Pages Jaunes.
Pour plus d'assistance
Vous pouvez nous soumettre toute question ou problème en
écrivant à l'adresse ci-dessous :
Centre pour l'eXpérience de la clientèle
Whirlpool Canada LP
1901 Minnesota Court
Mississauga, Ontario L5N 3A7
Dans votre correspondance, veuillez indiquer un numéro
de téléphone où on peut vous joindre dans la journée.
Nos consultants fournissent
l'assistance pour :
Procédés d'utilisation et d'entretien.
N
Vente d'accessoires et de pièces de rechange.
N
Les références aux concessionnaires, compagnies
N
de service de réparation et distributeurs de pièces de
rechange locaux. Les techniciens de service désignés
par Whirlpool sont formés pour remplir la garantie des
produits et fournir un service après la garantie, partout
au Canada.
W
10296184B
W
10296186B - SP
©
2010 Whirlpool Corporation.
A
ll rights reserved.
T
ous droits réservés.
® Registered Trademark/TM Trademark of Whirlpool, U.S.A.,
Whirlpool Canada LP Licensee in Canada
® Marque déposée/TM Marque de commerce de Whirlpool, U.S.A.,
emploi sous licence par Whirlpool Canada LP au Canada
2/1
0
Printed in U.S.A.
Imprimé aux É.-U.