Loading ...
Loading ...
Loading ...
ENG-13
This lens can be used with the A II (W II) tripod mount ring, sold separately.
Attaching the Tripod Mount
9.
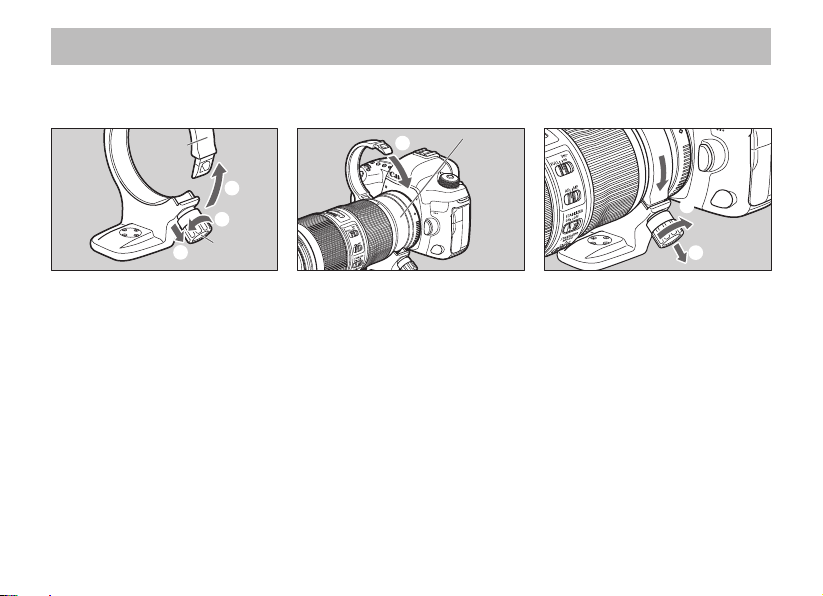
Tripod Mount (Sold Separately)
①
③
②
Collar
Lock
knob
1 Open the collar of the tripod
mount
Turn the lock knob
counterclockwise until it
becomes loose (about 3 turns)
(
).
Pull the knob in the direction
of the arrow (
) to release the
collar (
).
④
Tripod
mounting
location
2 Attach tripod mount to lens
With the collar open, insert
the tripod mount into the
attachment area and close the
collar (
).
⑦
⑤
⑥
3 Fix tripod mount to lens
While pulling the lock knob
(
), insert the end of the
open collar until it reaches its
original position (
).
Turn and tighten the lock
knob, xing it securely to the
lens (
).
When removing the tripod mount, hold the camera and lens and remove the mount following the
above procedure in reverse.
Adjusting the Tripod Mount
By turning and loosening the lock knob of the tripod mount, you can rotate the camera to set the
image for any vertical or horizontal position.
Loading ...
Loading ...
Loading ...