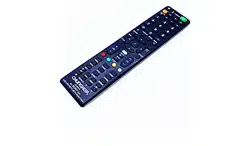
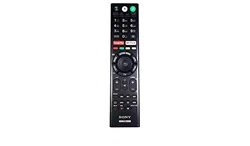
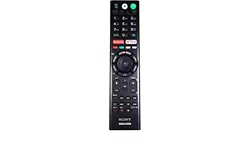
The remote control shape, location, availability and function of remote control button may vary depending on your region/country/TV model.
Guidelines for IR Remote Control
• Point your remote control directly at the IR sensor located on your TV.
• Make sure that no objects are blocking the path between the remote control and the IR sensor on your TV.
• Fluorescent lamps can interfere with your remote control; try turning off the fluorescent lamps.
• If you are having problems with the remote control, reinsert or replace your batteries and make sure that they are correctly inserted.
Connection Diagram
For more information on connections, refer to the Help Guide by pressing HELP on the remote control.
Note
• When connecting the cable to the Cable/Antenna input, finger tighten only, over tightening the connection can damage the TV.
1. USB 1/2, USB 3
• Connecting a large USB device may interfere with other connected devices beside it.
• When connecting a large USB device, connect to the USB 1 port.
2. AUDIO OUT
• Supports 3-pole stereo mini jack only.
• To listen to the TV's sound through the connected equipment, press HOME. Select [Settings] → [Sound] → [Headphone/Audio out] and then select the desired item.
3. HDMI IN 1/2/3/4
• If the device has a DVI jack, connect it to HDMI IN 1 through a DVI - HDMI adaptor interface (not supplied), and connect the device's audio out jack to HDMI 1 AUDIO IN.
• If connecting a digital audio system that is compatible with Audio Return Channel (ARC) technology, use HDMI IN 3. If not, an additional connection with DIGITAL AUDIO OUT (OPTICAL) is necessary.
4. VIDEO IN 1
• For a composite connection, use an Analog Extension Cable (not supplied).
5. IR BLASTER*2
6. REMOTE RS-232C REMOTE IR IN
• These jacks are for receiving the external control signal. Enables extended control of the TV using RS-232C via the RS-232C and IR IN jacks. RS-232C: connect to the RS-232C terminal of the home controller. IR IN: connect to the IR out terminal of the home controller.
• Take care to not connect to headphones or an external audio system.
*1 When connecting mono equipment, connect to the L (MONO) audio jack (socket).
*2 Only on limited region/country/TV model.
Installing the TV to the Wall
This TV’s instruction manual only shows the steps on preparing the installation of the TV before installing to the wall.
Your TV can be mounted on a wall using a Wall-Mount Bracket (not supplied) out of the box as packaged. If the Table-Top Stand is attached to the TV, the TV may require detaching the Table-Top Stand; see page 15 (Detaching the Table-Top Stand from the TV). Prepare the TV for the Wall-Mount Bracket before making cable connections.
For product protection and safety reasons, Sony strongly recommends that installation of your TV on the wall be performed by qualified professionals. Do not attempt to install it yourself.
• Follow the instruction guide provided with the Wall-Mount Bracket for your model. Sufficient expertise is required in installing this TV, especially to determine the strength of the wall for withstanding the TV’s weight.
• The length of the screw for Wall-Mount Bracket differs depending on the Wall-Mount Bracket thickness. Please see below illustration.
• Be sure to store the unused screws and Table-Top Stand in a safe place until you are ready to attach the Table-Top Stand. Keep the screws away from small children.
Note
• Read the supplied Safety Booklet for additional safety information.
1. Remove the screws from the rear of the TV.
2. Attach the Wall-Mount Bracket (not supplied) using the screws (not supplied).
Note
• If using an electric screwdriver, set the torque at approximately 1.5 N·m {15 kgf·cm}.
Detaching the Table-Top Stand from the TV
To detach the Table-Top Stand from the TV, remove the screws
Note
• Do not remove the Table-Top Stand for any reason other than to install corresponding accessories on the TV.
• Be sure the TV is vertical before turning on. To avoid uneven picture uniformity do not power on the TV with the LCD panel facing down.
• When attaching the Table-Top Stand again, be sure to fasten the screws (previously removed) to the original holes on the rear of the TV.
Installing the TV against a wall or enclosed area
Ventilation
• Never cover the ventilation holes or insert anything in the cabinet.
• Leave space around the TV set as shown below
Installed with stand
Installed on the wall
Never install the TV set as follows:
Note
• Inadequate ventilation can lead to overheating of the TV and may cause damage to your TV or cause a fire.
Troubleshooting
General troubleshooting for issues like: black screen, no sound, frozen picture, TV does not respond, or network is lost, do the following steps.
Restart your TV by pressing the power button on the remote control until a message appears. The TV will restart. If the TV does not recover, try unplugging the TV from the AC power cord for two minutes and then plug it in again.
Refer to the Help menu by pressing HELP on the remote control.
Connect your TV to the Internet and perform a software update.
Visit Sony support website (information provided on the front cover).
Perform the factory data reset. Refer to “How to reset the TV to factory settings” (page 17).
When [A new TV system software update is available...] message is displayed.
Sony strongly recommends you to update the TV software by selecting [Update Now]. These software updates improve your TV performance or add new features. The following screen with [Updating…] will appear and the illumination LED flashes white while software is updating.
Do not unplug the AC power cord during the software update. If you do, the software update may not finish completely, and it may cause a software malfunction. Software updates can take up to 15 minutes.
When you plug in TV, the TV may not be able to turn on for a while even if you press the power button on the remote control or the TV.
It takes time to initialize the system. Wait for about one minute, then operate it again.
How to reset the TV to factory settings
WARNING: The reset will clear all of your customized settings including the parental lock setting.
Turn on the TV. You can reset the TV to factory settings by pressing HOME, then select [Settings] →[Storage & reset] →[Factory data reset].
To force factory data reset, unplug the AC power cord. Press and hold both and – buttons on the TV, then plug in the AC power cord. Release both buttons when the illumination LED blinks in green.
For security purposes, be sure to remove all personal and account information before discarding, selling or passing your TV to someone else by: unlinking/unregistering, signing out of and deactivating all network services as well as factory reset the TV
Troubles and Solutions
When the illumination LED is flashing in red.
Count how many times it flashes (interval time is three seconds). Reboot the TV by disconnecting the AC power cord from the TV for two minutes, then turn on the TV. If the problem persists, disconnect the AC power cord, and contact Sony Customer Support (information provided on the front cover) with the number of times the illumination LED flashes.
There is no picture (screen is dark) and no sound.
Check the cable/antenna connection.
Connect the TV to AC power, and press the button on the TV or POWER button on the remote control.
Some programs cannot be tuned.
Check the cable/antenna connection.
The remote control does not function.
Replace the batteries.
The parental lock password has been forgotten.
Enter 4357 for the password and select [Change PIN].
The restricted profile password has been forgotten.
Perform the force factory data reset. Refer to “How to reset the TV to factory settings” (page 17).
The TV and its surroundings become warm.
When the TV is used for an extended period of time, the TV and its surroundings may become warm to the touch. This is not a malfunction of the TV.


 USB 1/2,
  USB 3
USB 3

 VIDEO IN 1


 and – buttons on the TV, then plug in the AC power cord. Release both buttons when the illumination LED blinks in green.