Loading ...
Loading ...
Loading ...
6
The rinsable pre-filter extends the life of your filter
made with HEPA media by trapping larger airborne
particles before they reach the filter made with HEPA
Media.
The pre-filter is black in color and is attached to the filter
made with HEPA media by hook and loop fastener.
We recommend that you inspect the pre-filter once a
month to ensure that it is clean and therefore working
most effectively. Before inspecting the pre-filter, switch
off the unit, and unplug it from the AC outlet.
rinsable Pre-filter
2. MaintenanCe
rePlaCeMent of filter Made
witH HePa Media
Your Air Purifier is equipped with a feature that
automatically advises you when your filter made with
HEPA Media needs replacement.
A red light will illuminate reminding you to change
the filter. Replace the filter with Hoover Part Number:
AH60010 and then use a paper clip to press the “Filter
2.1
FILTER MADE
WITH HEPA MEDIA
FOAM PRE-FILTER
Reset” button next to the red light. Press and hold until
beep occurs and light turns off.
To replace the filter made with HEPA media:
- Switch off the unit, and unplug it from the AC
outlet.
- Remove the rear grille and filter made with HEPA
media.
- Replace the old filter made with HEPA media
ensuring that the pre-filter is aligned correctly.
- Replace the rear grille.
WARNING
! !
HIGH VOLTAGE. To reduce the risk of electric
shock - unplug Air Purifier before servicing.
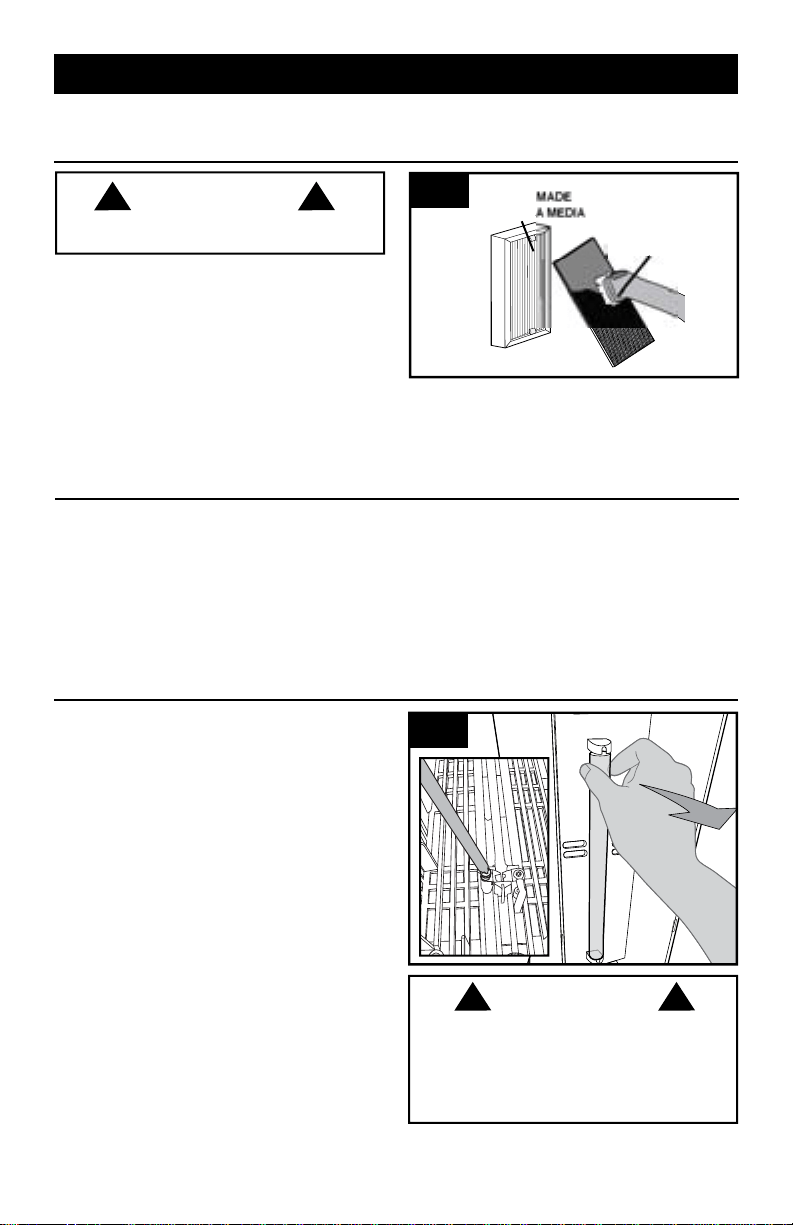
2.1 When you observe that the pre-filter is becoming
clogged and requires cleaning, remove the pre-filter
from the filter assembly and either gently vacuum it
or gently rinse it under a running tap. (NOTE: Do not
use any cleaning solutions, as these may damage
the pre-filter.) Allow filter to dry.
Familiarize yourself with these home maintenance tasks as proper use and care of your cleaner will ensure
continued cleaning effectiveness.
Any other servicing should be done by an authorized service representative.
uV bulb rePlaCeMent
The UV/TiO
2
feature is activated by a fluorescent bulb
inside the Air Purifier. As with all bulbs, this will require
periodic replacement, depending on frequency of use.
To ensure bulb is operational, periodically look at back
of the assembled product for a blue glow through the
grille. Checking in a low light environment or in the
dark will aid in seeing the glow. Replace the UV Bulb
with Hoover part #440001068.
To replace the UV bulb:
- Switch off the unit, and unplug it from the
AC outlet.
- Remove the rear grille and filter made with HEPA
Media.
- Remove the TiO
2
coated screen.
- Loosen the larger screw (2.2 A) on the top clamp
and the larger screw on the bottom clamp. Do not
remove the screws entirely.
- Gently grasp bulb at the top and pull outward until
bulb is free of clamp (2.2 B). Repeat for the bottom
of bulb. Place new bulb in position and apply very
light pressure to top of bulb to seat. Repeat steps
for bottom of bulb.
- Tighten both screws. Reinstall TiO
2
coated screen,
Filter made with HEPA Media and rear cover.
2.2
WARNING
! !
To avoid injury do not touch the glass. Use a
tissue to remove.
The ultra violet bulb in this product contains
mercury. Dispose according to Local, State or
Federal Laws. For information please refer to www.
lamprecycle.com
B
A
NOTE: The TiO
2
coated screen does not require
replacement or cleaning.
Loading ...
Loading ...
Loading ...