Loading ...
Loading ...
Loading ...
5 61-800-798-7398 sharkclean.com
ENGLISH
GETTING TO KNOW YOUR
SHARK® STEAM MOP
WELCOME!
Congratulations on
your purchase. Use this
instruction manual to
learn about your new
Steam Mop’s great
features. From assembly
to use to maintenance,
you will find it all in here.
NOTE: When assembling
your Steam Mop there may be
a little water in or around the
water tank. This is because
we thoroughly test all of our
Steam Mops before you buy
them, so you get a quality
Shark* Steam Mop.
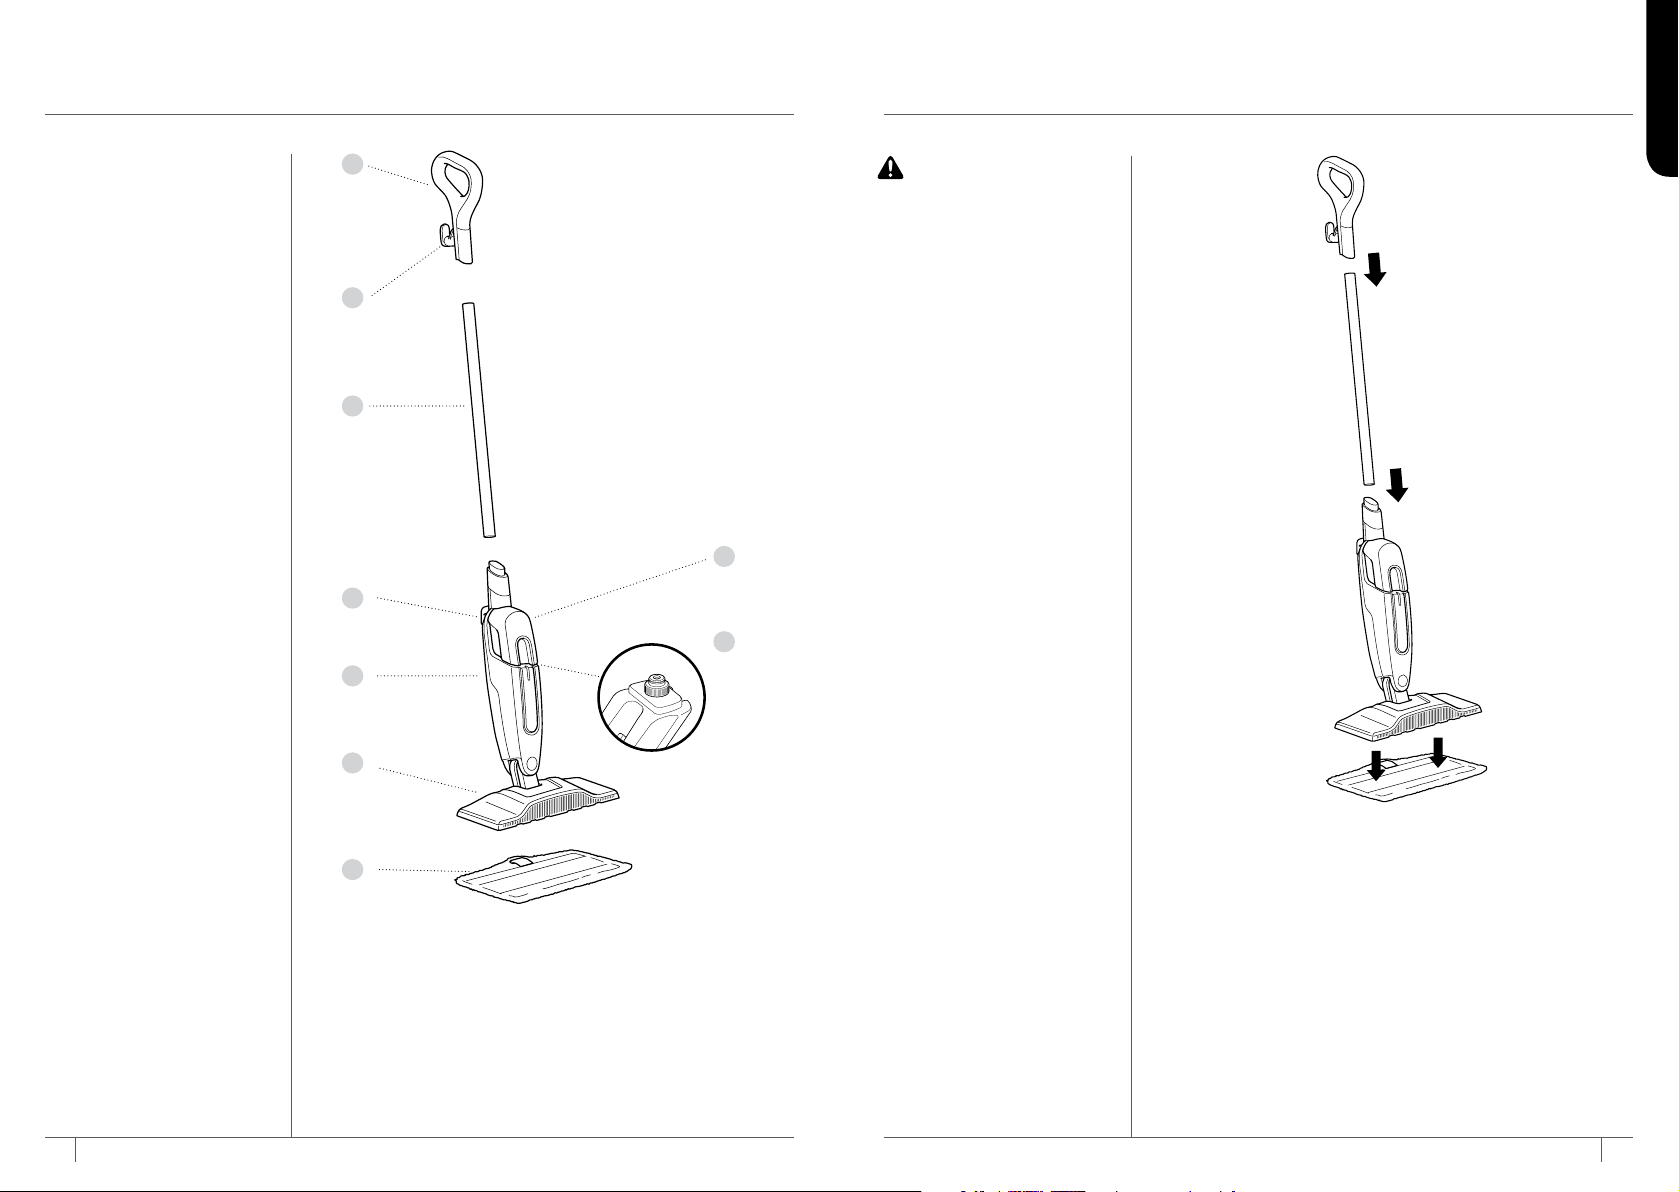
MAIN UNIT
A Steam Mop Handle
B Upper Cord Wrap
C Pole
D Lower Cord Wrap
E Removable Water Tank
F Water Tank Cap
G Steam Mop Body
H Mop Head
I Dirt Grip
™
Pad
H
A
G
B
D
F
I
E
C
ASSEMBLING YOUR
STEAM MOP
WARNING: ALWAYS
make sure the Steam
Mop is UNPLUGGED
when not in use.
NEVER fill the Steam
Mop when the Steam
Mop is plugged into
an electrical outlet.
Unplug from the
electrical outlet and
allow to cool before
you fill the mop, or
attach or remove the
head. Make sure you
add only water to the
tank. Chemicals or
cleaning solutions
(including vinegar) may
damage the Steam Mop
and could be unsafe for
you and your family.
1 Align the mop handle and mop pole so the arrow symbols
inside them face forward. Insert either end of the pole into
the handle until it clicks securely into place.
2 Align the assembled steam mop pole and the steam mop
body, so their arrow symbols both face forward. Insert the
pole into the top of the mop body, sliding it in until it clicks
into place.
3 Place the Dirt Grip
™
cleaning pad on the floor with the
quick fastener strips facing up. Align the mop head directly
over the pad, then press the mop head down onto the pad.
The quick fastener strips will secure the pad to the mop
head.
STEP 1
STEP 2
STEP 3
Loading ...
Loading ...
Loading ...