Loading ...
Loading ...
Loading ...
ENGLISH I 7
ASSEMBLY
WHAT’S IN THE BOX
• Telescope tube
• Altazimuth mount and tripod
• H20mm (20x) – 1.25”
• SR4mm (100x) – 1.25”
• 3x Barlow Lens
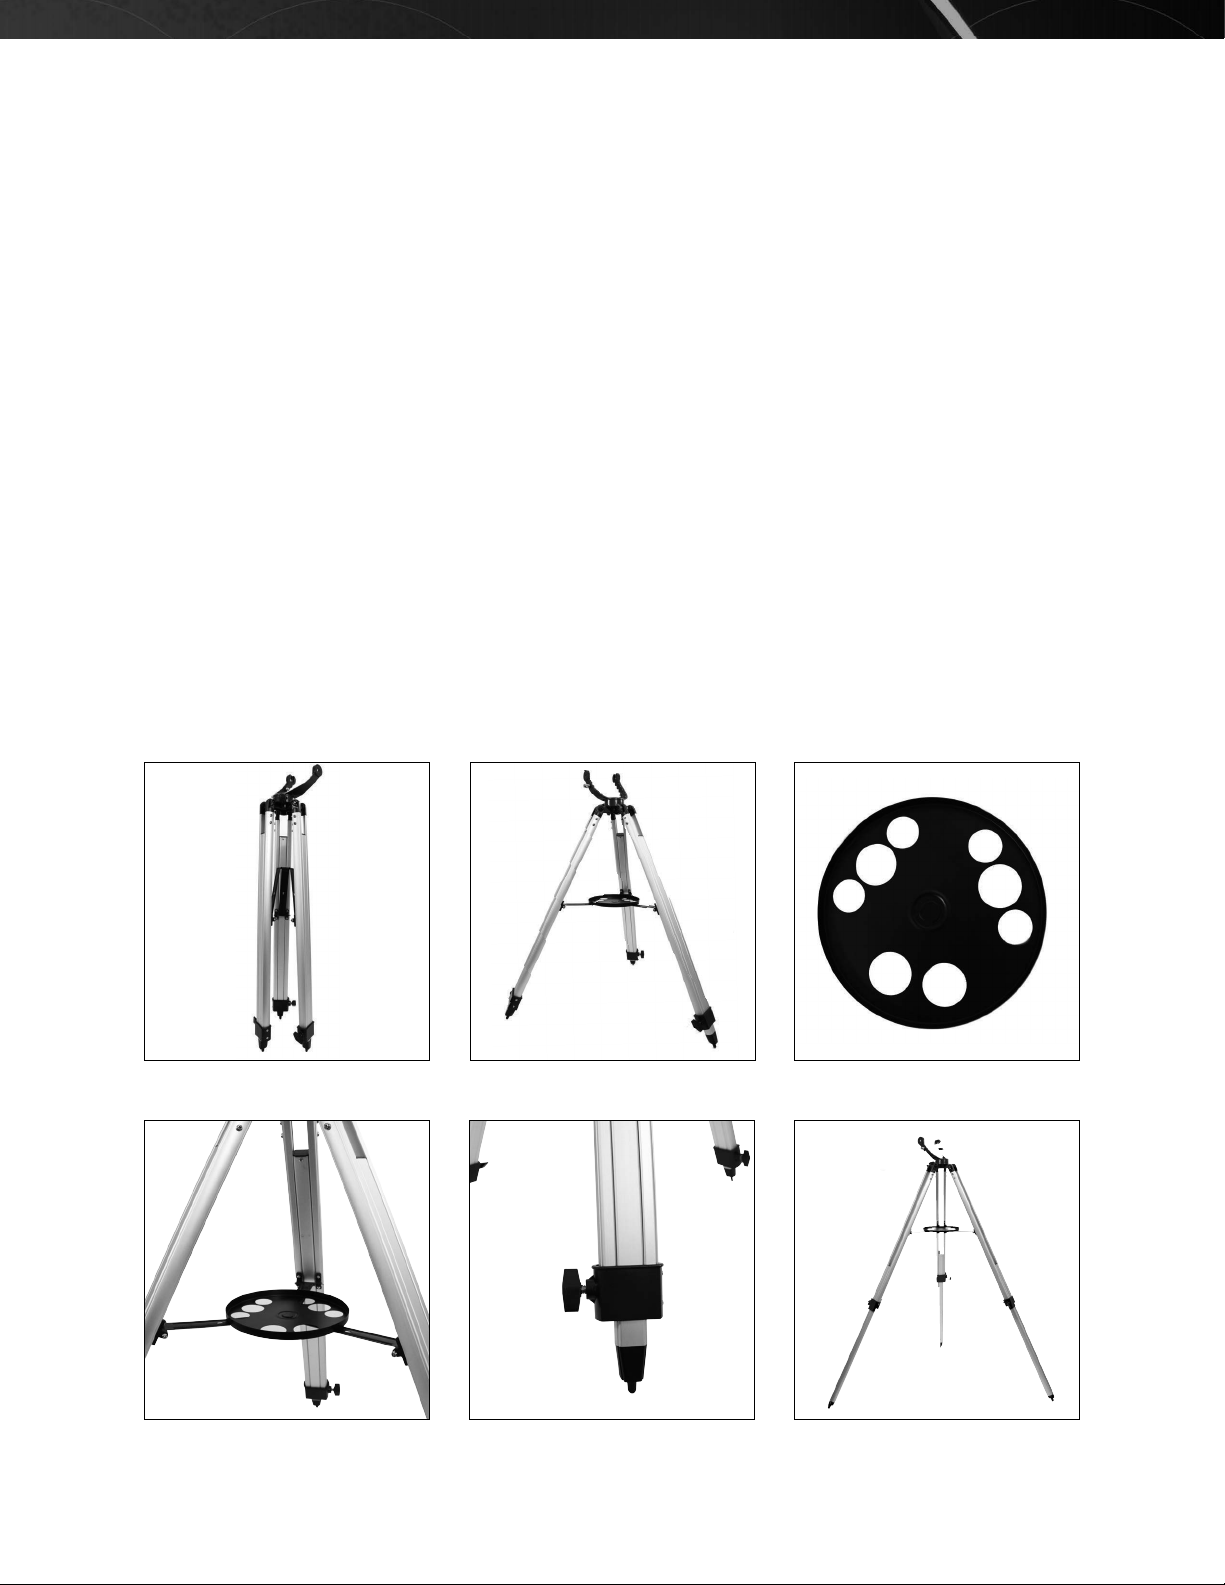
SETTING UP THE TRIPOD
1. Remove the tripod from the box (Figure 2-1). Stand the tripod upright and separate the tripod legs. Then, push down
slightly on the tripod leg brace (Figure 2-2). Note: The very top of the tripod is called the altazimuth mount.
2. Next, install the tripod accessory tray (Figure 2-3) by placing the threaded post on the bottom of the tray over the hole
in the center of the leg support bracket (Figure 2-4). Turn the entire accessory tray clockwise to screw the tray in place.
Be careful not to over tighten.
3. Extend the legs to the desired height. Unlock the tripod leg lock knobs at the bottom of each leg (Figure 2-5) by turning
them counterclockwise and pull the legs out. Then lock the knobs securely. A fully extended tripod looks similar to the
image in Figure 2-6.
Fig. 2-4 Fig. 2-5
Fig. 2-6
Fig. 2-2
Fig. 2-1 Fig. 2-3
NOTE: The tripod will be the most rigid and stable at lower height settings.
• Erect image diagonal – 1.25”
• Finderscope: 5x24
• Accessory tray
• TheSkyX – First Light Edition DVD-ROM
Loading ...
Loading ...
Loading ...