Loading ...
Loading ...
Loading ...
3
INSTALLATION INSTRUCTIONS
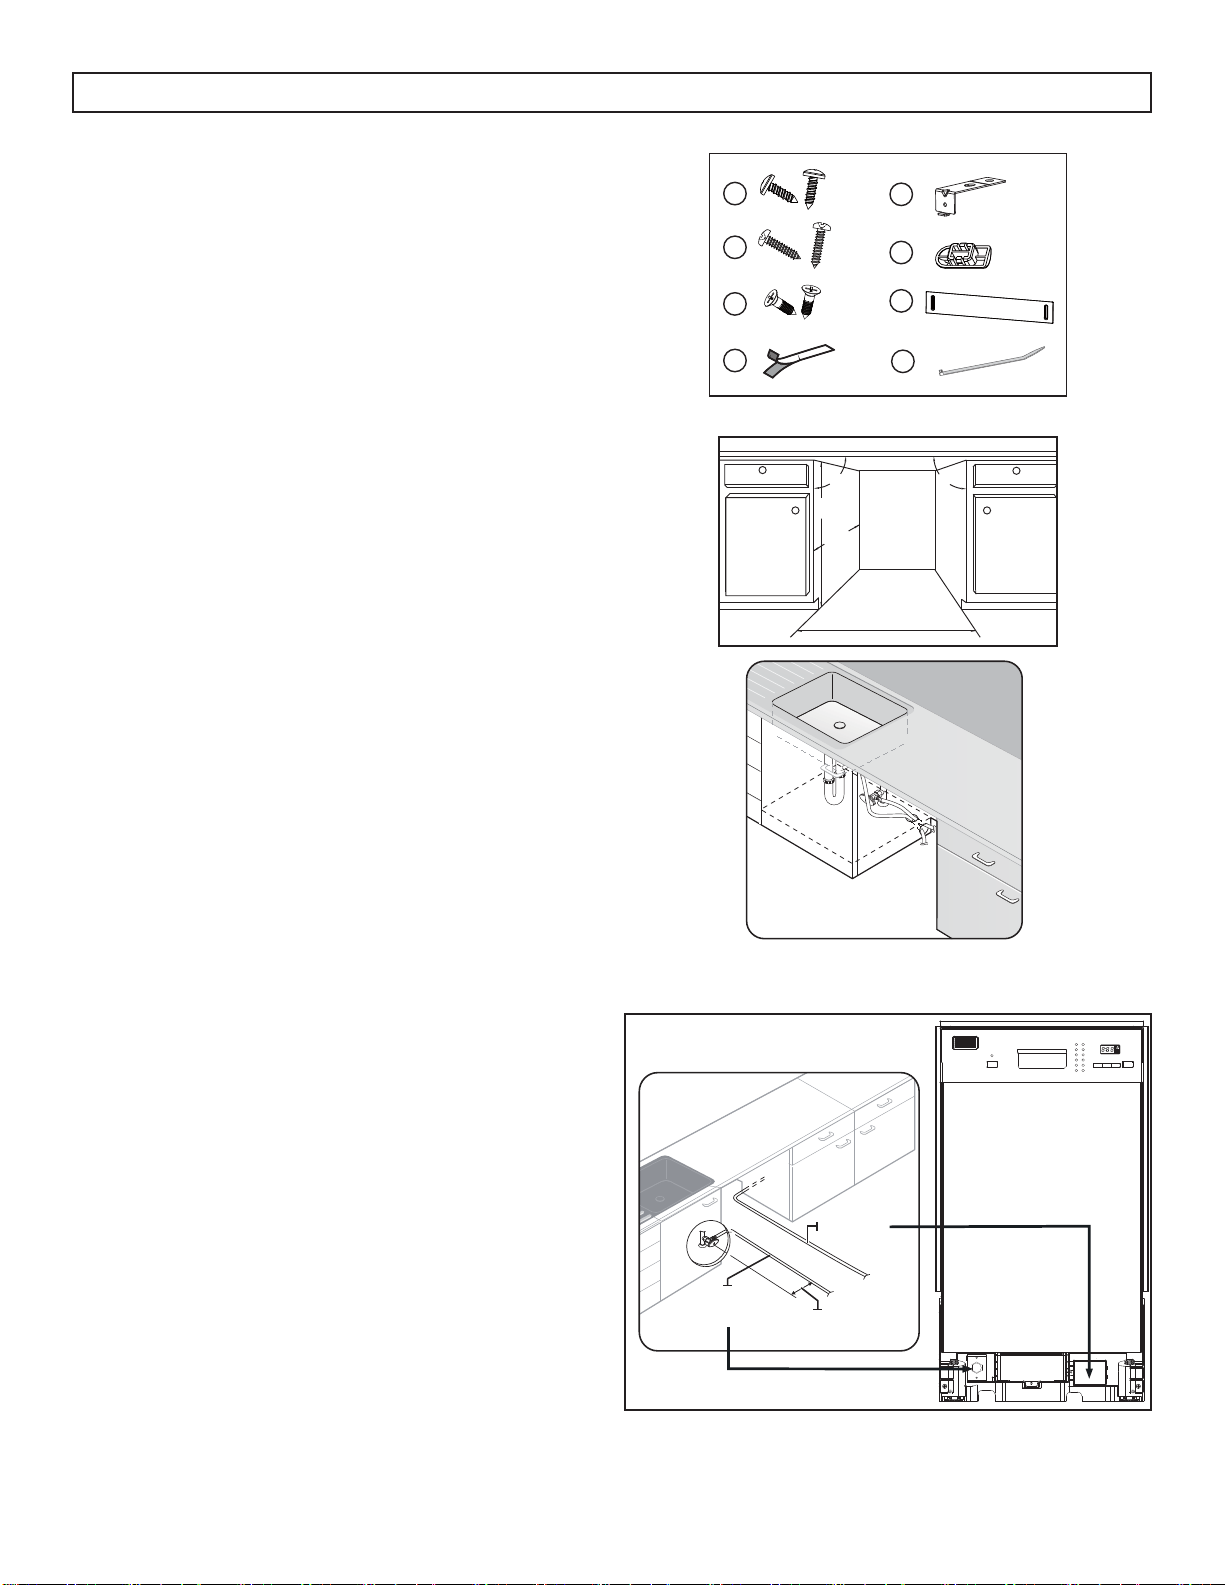
ACCESSORIES
1. ST3.5*9 screws for the installation brace (x2)
2. ST3.9*13 screws for the kick plate (x2)
3. ST4*14 screws for the installation brace (x2)
4. Condensation strip
5. Installation brace (x2)
6. Adjustment caps (x2)
7. Kick plate
8. Cable tie to secure the drain hose
ENCLOSURE
The installation location must have a solid fl oor
that is able to support the appliance when it is fully
loaded and fi lled with water. The location must be
within 3 meters of a sink with easy access to the
water supply, the drain and an electrical outlet. The
location must have enough space in front of it for
the door to open to 90° so that the dishwasher can
be loaded.
The installation enclosure should have the following
dimensions: 23.6 inches (60 cm) wide by 32.5
inches (82.5 cm) tall by 22.8 inches (58 cm) deep.
There should be less than 5 mm between the top of
the dishwasher and the cabinet and the dishwasher
door should align with the cabinet face.
If necessary, cut holes in the surrounding cabinetry
to provide access the water and power connections.
WATER CONNECTION INSTRUCTIONS
The hot water supply line pressure must be between
0.04 - 1 MPa.
The water supply inlet temperature should be
between 48 - 65°C (120 - 149°F). Ensure that the
water temperature does not exceed 65°C (149°F) to
avoid damage to dishes.
Ensure that the circuit breaker and the water supply
valve are turned off before connecting the hot water
supply line to the dishwasher.
The power cable will connect to the junction box on
the front right side of the appliance. The hot water
supply line will connect to the water port on the
front left side of the appliance.
Note: It is recommended to only use soft water in
the appliance to achieve the best washing results.
1
2
3
5
6
7
4
8
90 r
23.6 inches
(60 cm)
90 r
32.5 inches
(82.5 cm)
22.8 inches
(58 cm)
Power cable
Hot water
supply line
135 - 185 mm
(5 1/3 - 7 1/3”)
Loading ...
Loading ...
Loading ...