Manual de
Uso y Cuidado
No. Parte: W10701075
Este manual contiene información útil, léalo detenidamente.
Fabricado por Industrias Acros Whirlpool S.A. de C.V.
Antigua carretera a Roma km 9 Col. El Milagro
Apodaca N.L. México, 66634
Tel. (81) 8329-2100
Características Eléctricas Nominales
Corriente Nominal
Frecuencia
Tensión Nominal
6,0 A
60 Hz
127 V ~
Importantes instrucciones de seguridad
Para reducir el riesgo de incendio, descarga eléctrica o
heridas personales cuando use su refrigerador, siga estas
precauciones básicas:
•Lea todas las instrucciones antes de usar su refrigerador.
•El dejar abandonado un refrigerador puede causar que alguien jugando pueda quedarse atrapado en él y se sofoque.
•Si va a cambiar su refrigerador hágalo de una forma segura para todos.
•Le aconsejamos que quite las puertas del refrigerador fuera de uso o que se asegure con una cuerda resistente.
•Nunca deje que un niño opere, juegue o se meta dentro de un refrigerador.
•Nunca limpie las piezas de un refrigerador con líquidos inflamables; los vapores pueden causar incendios o
explosiones.
• PARA SU SEGURIDAD •
•
No almacene o use gasolina o gases inflamables cerca de este o cualquier electrodoméstico, los vapores pueden
causar incendios o explosiones.
•
Si el cordón tomacorriente se daña, debe ser reemplazado por nuestro departamento de servicio o por un electricista
calificado para evitar algún riesgo.
-GUARDE ESTAS INSTRUCCIONES-
ADVERTENCIA
!
ADVERTENCIA
!
Antes de conectar el refrigerador
• No use el refrigerador en un cuarto donde la temperatura baje a menos de 13 °C (55 °F).
• Mantenga el refrigerador lejos de los efectos del clima.
• Conecte el refrigerador solo en un tomacorriente apropiado con el suministro eléctrico adecuado y con
conexión a tierra.
• No ponga comida en el refrigerador antes de que se haya enfriado en la forma apropiada.
• Use el refrigerador solo como se especifica en este manual.
• Dé el mantenimiento apropiado al refrigerador.
• Asegúrese de que el refrigerador no sea operado por personas no capacitadas para hacerlo en la
forma indicada.
• El refrigerador es sólo para uso doméstico.
Peligro de Choque Eléctrico
Es necesario que éste refrigerador sea puesto a tierra.
NO modifique el cordón eléctrico. Si no calza en el tomacorriente, haga instalar un tomacorriente
apropiado por un electricista calificado.
NO use una extensión eléctrica con este refrigerador.
Consulte con un electricista calificado si tiene dudas respecto a si el refrigerador está
debidamente puesto a tierra.
Si no se cumplen las precauciones indicadas anteriormente se puede ocasionar una lesión grave
o aún la muerte.
Instalar adecuadamente
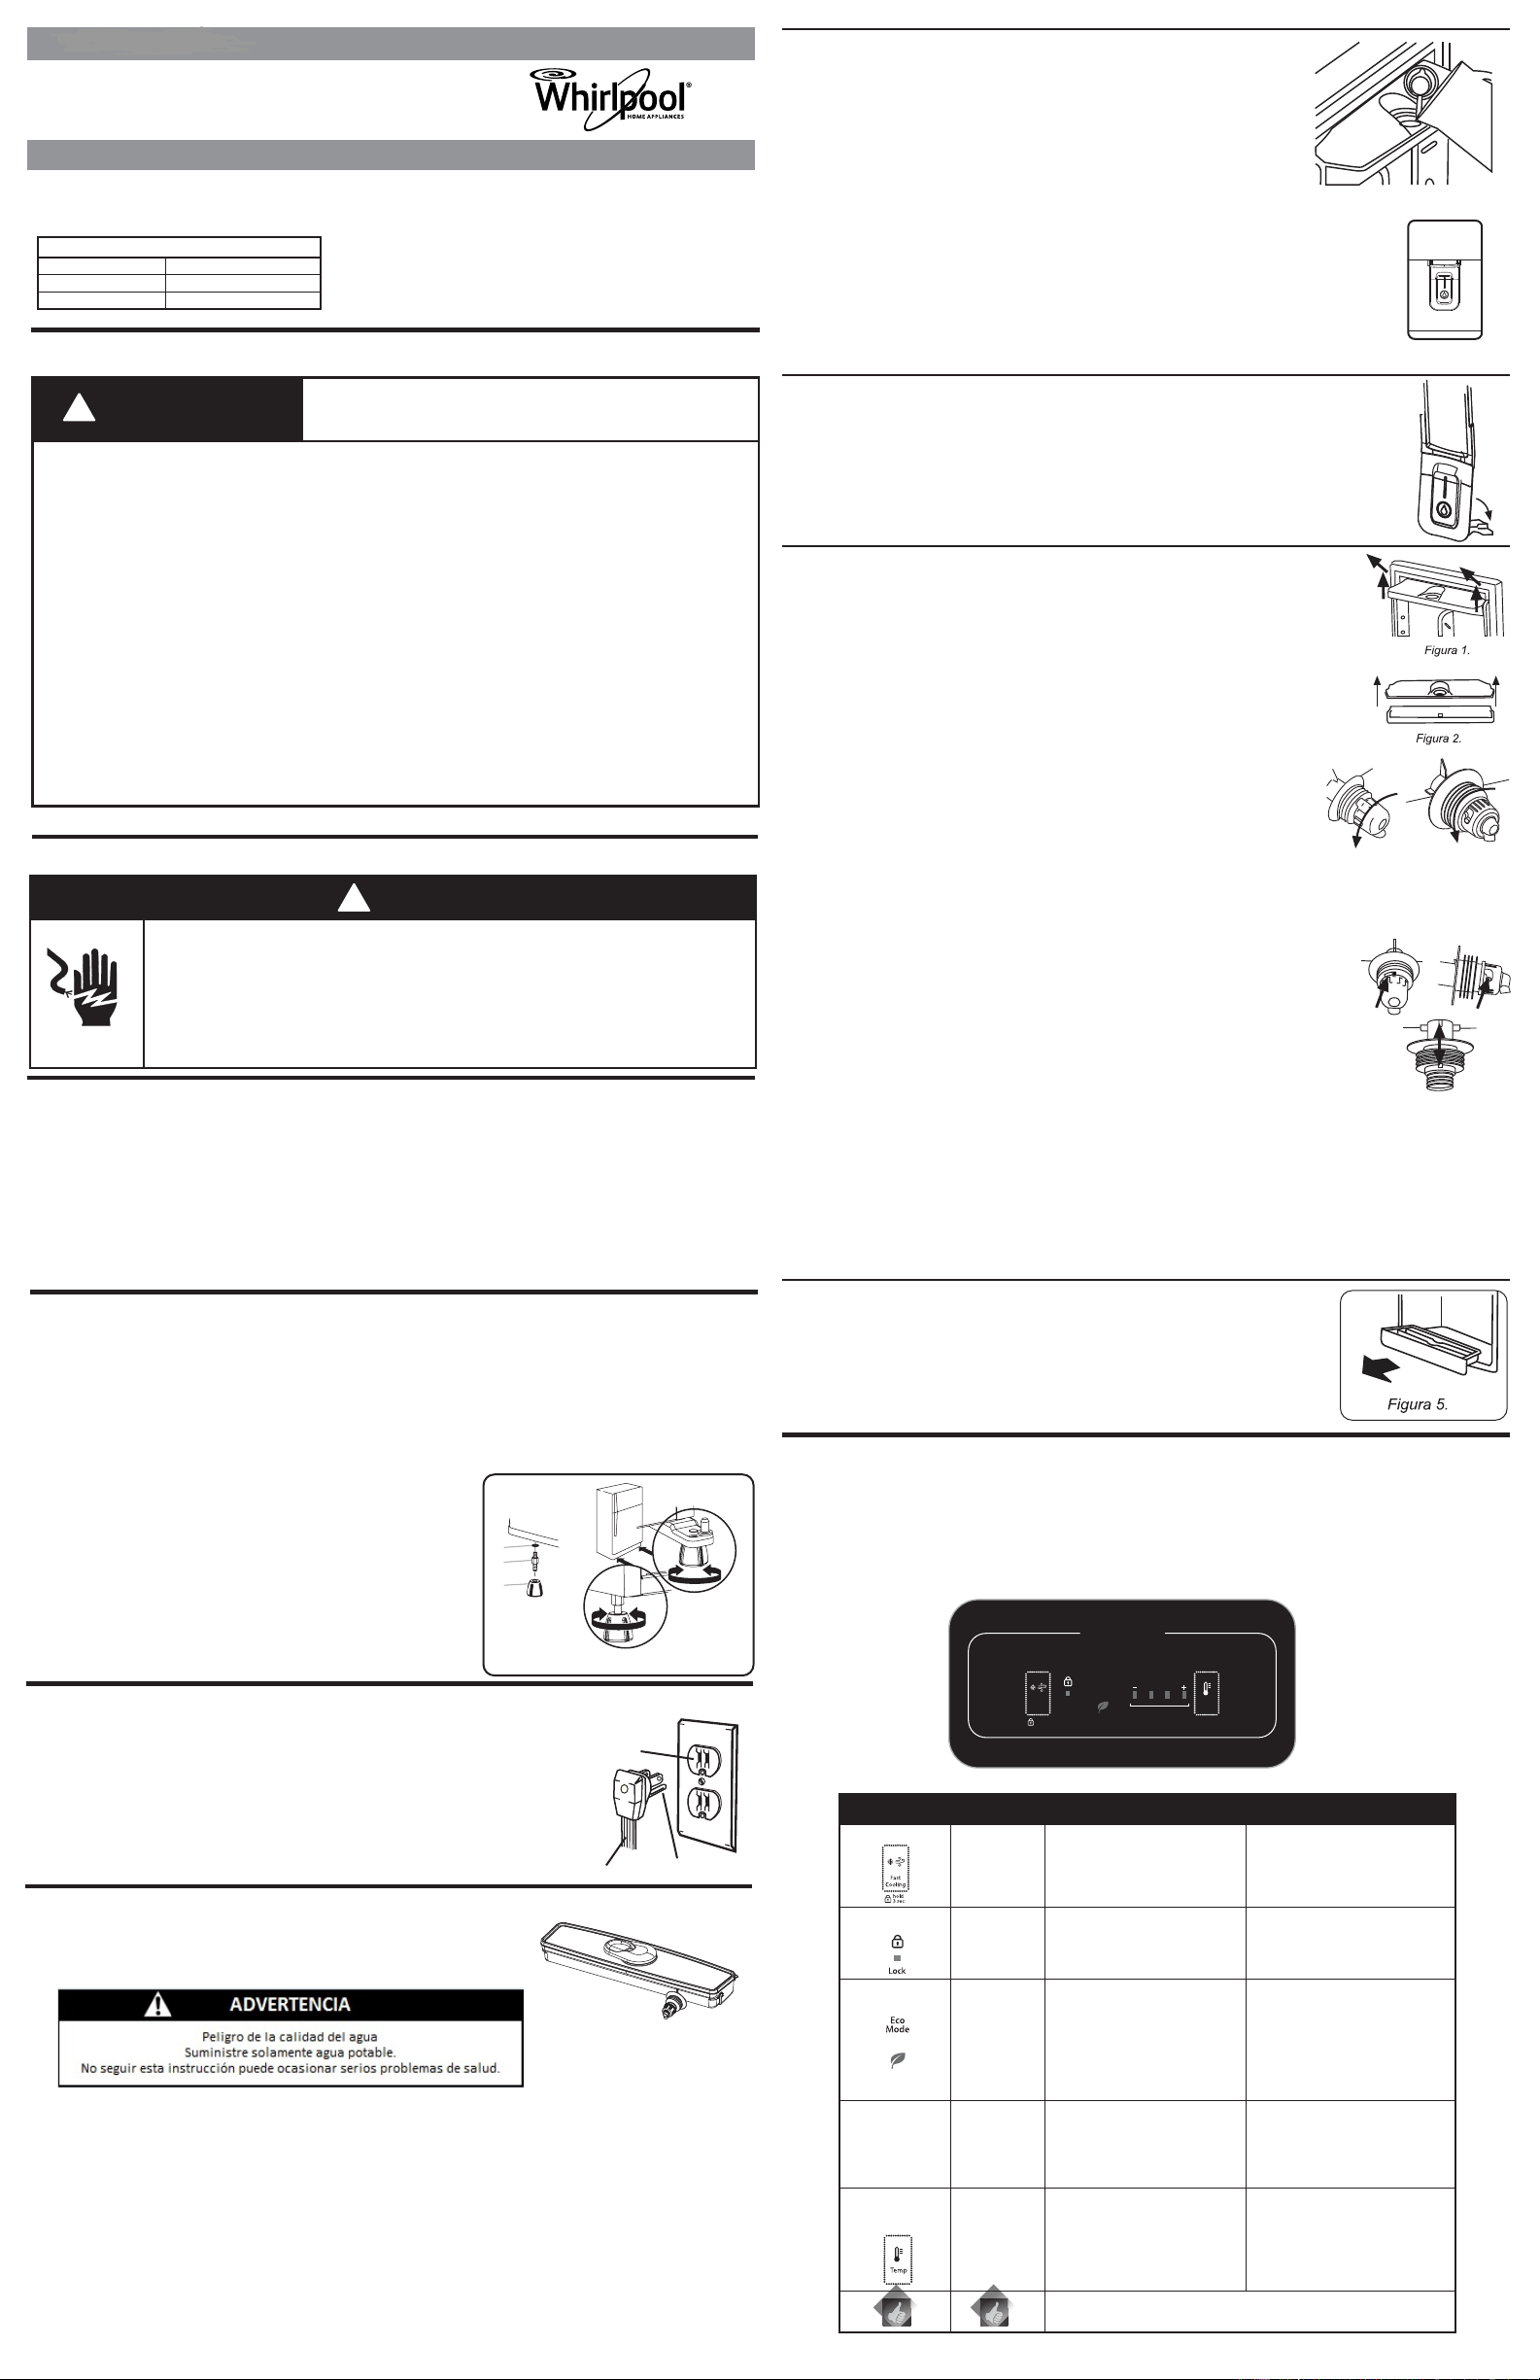
Cómo instalar el refrigerador
• Para mayor precisión verifique con un nivel de carpintero
colocado en la parte superior del refrigerador o verifique
si al abrir y cerrarlo no se mueve, entonces estará
nivelado.
• Se recomienda que quede un poco inclinado hacia atrás,
así la puerta tenderá a cerrarse sola.
Siga estos pasos antes de conectar el nuevo refrigerador:
1. Retire los aditamentos de empaque incluso los interiores.
2. Coloque el refrigerador bajo las siguientes recomendaciones:
• Deje un espacio mínimo de 7,5cm(3") a 15cm(6") entre la parte superior del refrigerador y los
gabinetes.
• Deje cuando menos un espacio de 5cm(2") a 10cm(4")e ntre el condensador del refrigerador en la
parte posterior y la pared.
• Deje un espacio de 1,25cm(1/2") a 10cm(4") a cada lado del aparato para facilitar la instalación.
• Si el refrigerador va a estar contra la pared lateral,
deje un espacio adicional para permitir que se abra
más la puerta.
3. Nivele el refrigerador siguiendo las
instrucciones de la Figura 1
Figura 1
Lado de la bisagra
del refrigerador
Lado opuesto de la
bisagra del refrigerador
A
B
C
A. Rondana metálica
B. Tornillo nivelador
C. Nivelador
Instrucciones para la puesta a tierra
Método de puesta a tierra
Su refrigerador está equipado con un cordón eléctrico provisto de un
enchufe de puesta a tierra de 3 terminales. Para disminuir a un mínimo la
posibilidad de sufrir choque eléctrico, el cordón debe ser conectado en un
tomacorriente mural del tipo con puesta a tierra para enchufes de 3
terminales, puesto a tierra de acuerdo con el Código Nacional de
Electricidad y todos los códigos y reglamentos locales. Si no se dispone de
un tomacorriente de este tipo, es responsabilidad y obligación del cliente
hacer instalar un tomacorriente mural para enchufes de 3 terminales
debidamente puesto a tierra por un electricista calificado.
Tanque de almacenamiento
Tomacorriente mural del tipo puesta
a tierra para enchufes de 3
terminales.
Enchufe de puesta a
tierra de 3 terminales
Cordón eléctrico
Terminal de
puesta a tierra
Despachador de Agua (algunos modelos)
Su nuevo refrigerador posee un innovador despachador de agua en la
puerta, esto le favorece al tener agua fresca disponible y a reducir el
número de veces que abre la puerta de su refrigerador, ayudándole a
reducir el consumo de energía en el producto.
Tanque de almacenamiento de agua
El tanque de almacenamiento de agua es de llenado manual y se localiza en la parte interior de la
puerta del compartimiento del refrigerador. Tiene como capacidad máxima 3 litros de agua.
IMPORTANTE:
· Limpie el sistema antes de utilizarlo por primera vez. Para hacerlo, llene el tanque de
almacenamiento con agua limpia y oprima la palanca del despachador con un vaso grande o una
jarra hasta que saque al menos un litro de agua. Tire esa agua. Este proceso ayuda a limpiar el
sistema y despejar el aire de la válvula dispensadora.
· Una vez limpio el sistema, espere a que se enfríe el agua antes de usar el despachador nuevamente.
· El despachador es para uso exclusivo de líquidos, las bebidas como la leche, los jugos con pulpa y
las semillas pueden obstruir la válvula y causar el mal funcionamiento del dispensador.
· El fabricante no se responsabiliza de los daños causados al despachador y su sistema debidos a la
utilización de otros líquidos que no sean liquidos sin pulpa.
NOTAS:
- Después de 6 horas la bebida carbonatada puede perder su efervecencia
- Lavar el tanque antes de rellenar con otra bebida (ver limpieza del dispensador)
Llenado del tanque de almacenamiento de agua
Para llenar el tanque de almacenamiento de agua, gire la tapa pequeña
de la cubierta y retírela. A continuación vierta el agua con una jarra.
NOTA: Por seguridad, la tapa pequeña no se retirará completamente de
la cubierta del tanque de almacenamiento.
Cómo usar el despachador de agua:
1. Tome y oprima con un vaso resistente o una jarra, la parte central de la
palanca del despachador.
2. Después de obtener el agua necesaria, deje de hacer presión sobre la
palanca, pero no retire el vaso o la jarra hasta que haya dejado de
correr el agua completamente.
IMPORTANTE: Siempre llene el tanque de almacenamiento
de agua cuando esté debidamente colocado sobre la puerta.
IMPORTANTE: Siempre despache agua sujetando el vaso
(o recipiente) con la mano. No intente dejar un vaso sólo en
la cavidad del despachador.
NOTA: Es posible que el agua tenga un sabor extraño si no utiliza el
despachador periódicamente.
Bloqueo del despachador
El despachador se puede bloquear para facilitar la limpieza o para evitar que sea
activado sin intención.
NOTA: El bloqueo impide únicamente el movimiento de la palanca del despachador.
Para bloquear el despachador
Baje el seguro que está localizado en la parte posterior de la palanca hasta que se
asiente sobre la pared del hueco del despachador.
Limpieza del despachador
Para limpiar el tanque de almacenamiento de agua:
1. Tome el tanque de almacenamiento de agua con ambas manos por los
extremos e inclínelo ligeramente hacia arriba, posteriormente jale hacia arriba
hasta que se libere completamente de la puerta del refrigerador (ver figura 1).
2. Coloque el tanque sobre una superficie plana y retire la cubierta del mismo
jalándola hacia arriba. (Ver figura 2).
3. Libere la válvula girándola en el sentido contrario a las manecillas del reloj
(ver figura 3) y límpiela con cuidado.
NOTA: su refrigerador puede tener cualquiera de las 2 tipos de válvula
aquí ilustrados
4. Utilice una esponja o un paño suave humedecido con jabón neutro o
detergente. Enjuague abundantemente y cerciórese de que no queden
residuos jabonosos. Finalmente seque con un paño suave limpio y
seco.
NOTA: No utilice fibras rugosas para limpiar el tanque de almacenamiento
de agua, pues dañará su acabado.
IMPORTANTE: Antes de volver a colocar el tanque de almacenamiento en
la puerta, asegúrese que:
Figura 3
· La válvula haya sido colocada correctamente, revise que el tope de la
válvula esté haciendo contacto con el tope localizado en el tanque de
almacenamiento.
· Que el anillo de aislamiento esté puesto correctamente en el
tanque como se muestra en la siguiente figura.
Para colocar nuevamente el tanque de almacenamiento en la puerta del
refrigerador:
1. Ensamble la válvula al tanque girándola en el sentido de las manecillas del
reloj, inserte la correa del tapón de la cubierta del tanque y posicione la
cubierta en su lugar.
2. Finalmente coloque el tanque en la puerta tomándolo con ambas manos e
inclinándolo ligeramente hacia arriba, engánchelo en las patitas laterales de
la pared interna de la puerta y empújelo hacia abajo hasta que quede
firmemente sujeto.
NOTA: Cerciórese de que el tanque de almacenamiento haya sido colocado
correctamente sobre la puerta y que no existe ninguna posibilidad de que se
caiga.
Rejilla colectora de gotas
La rejilla colectora de gotas sirve para almacenar los goteos o derrames
eventuales durante el uso del despachador de agua.
Para limpiar la rejilla colectora es necesario que la retire del refrigerador. Esto
se hace jalándola directamente hacia fuera (ver figura 5). Para insertarla
colóquela en su posición y deslícela hacia el frente.
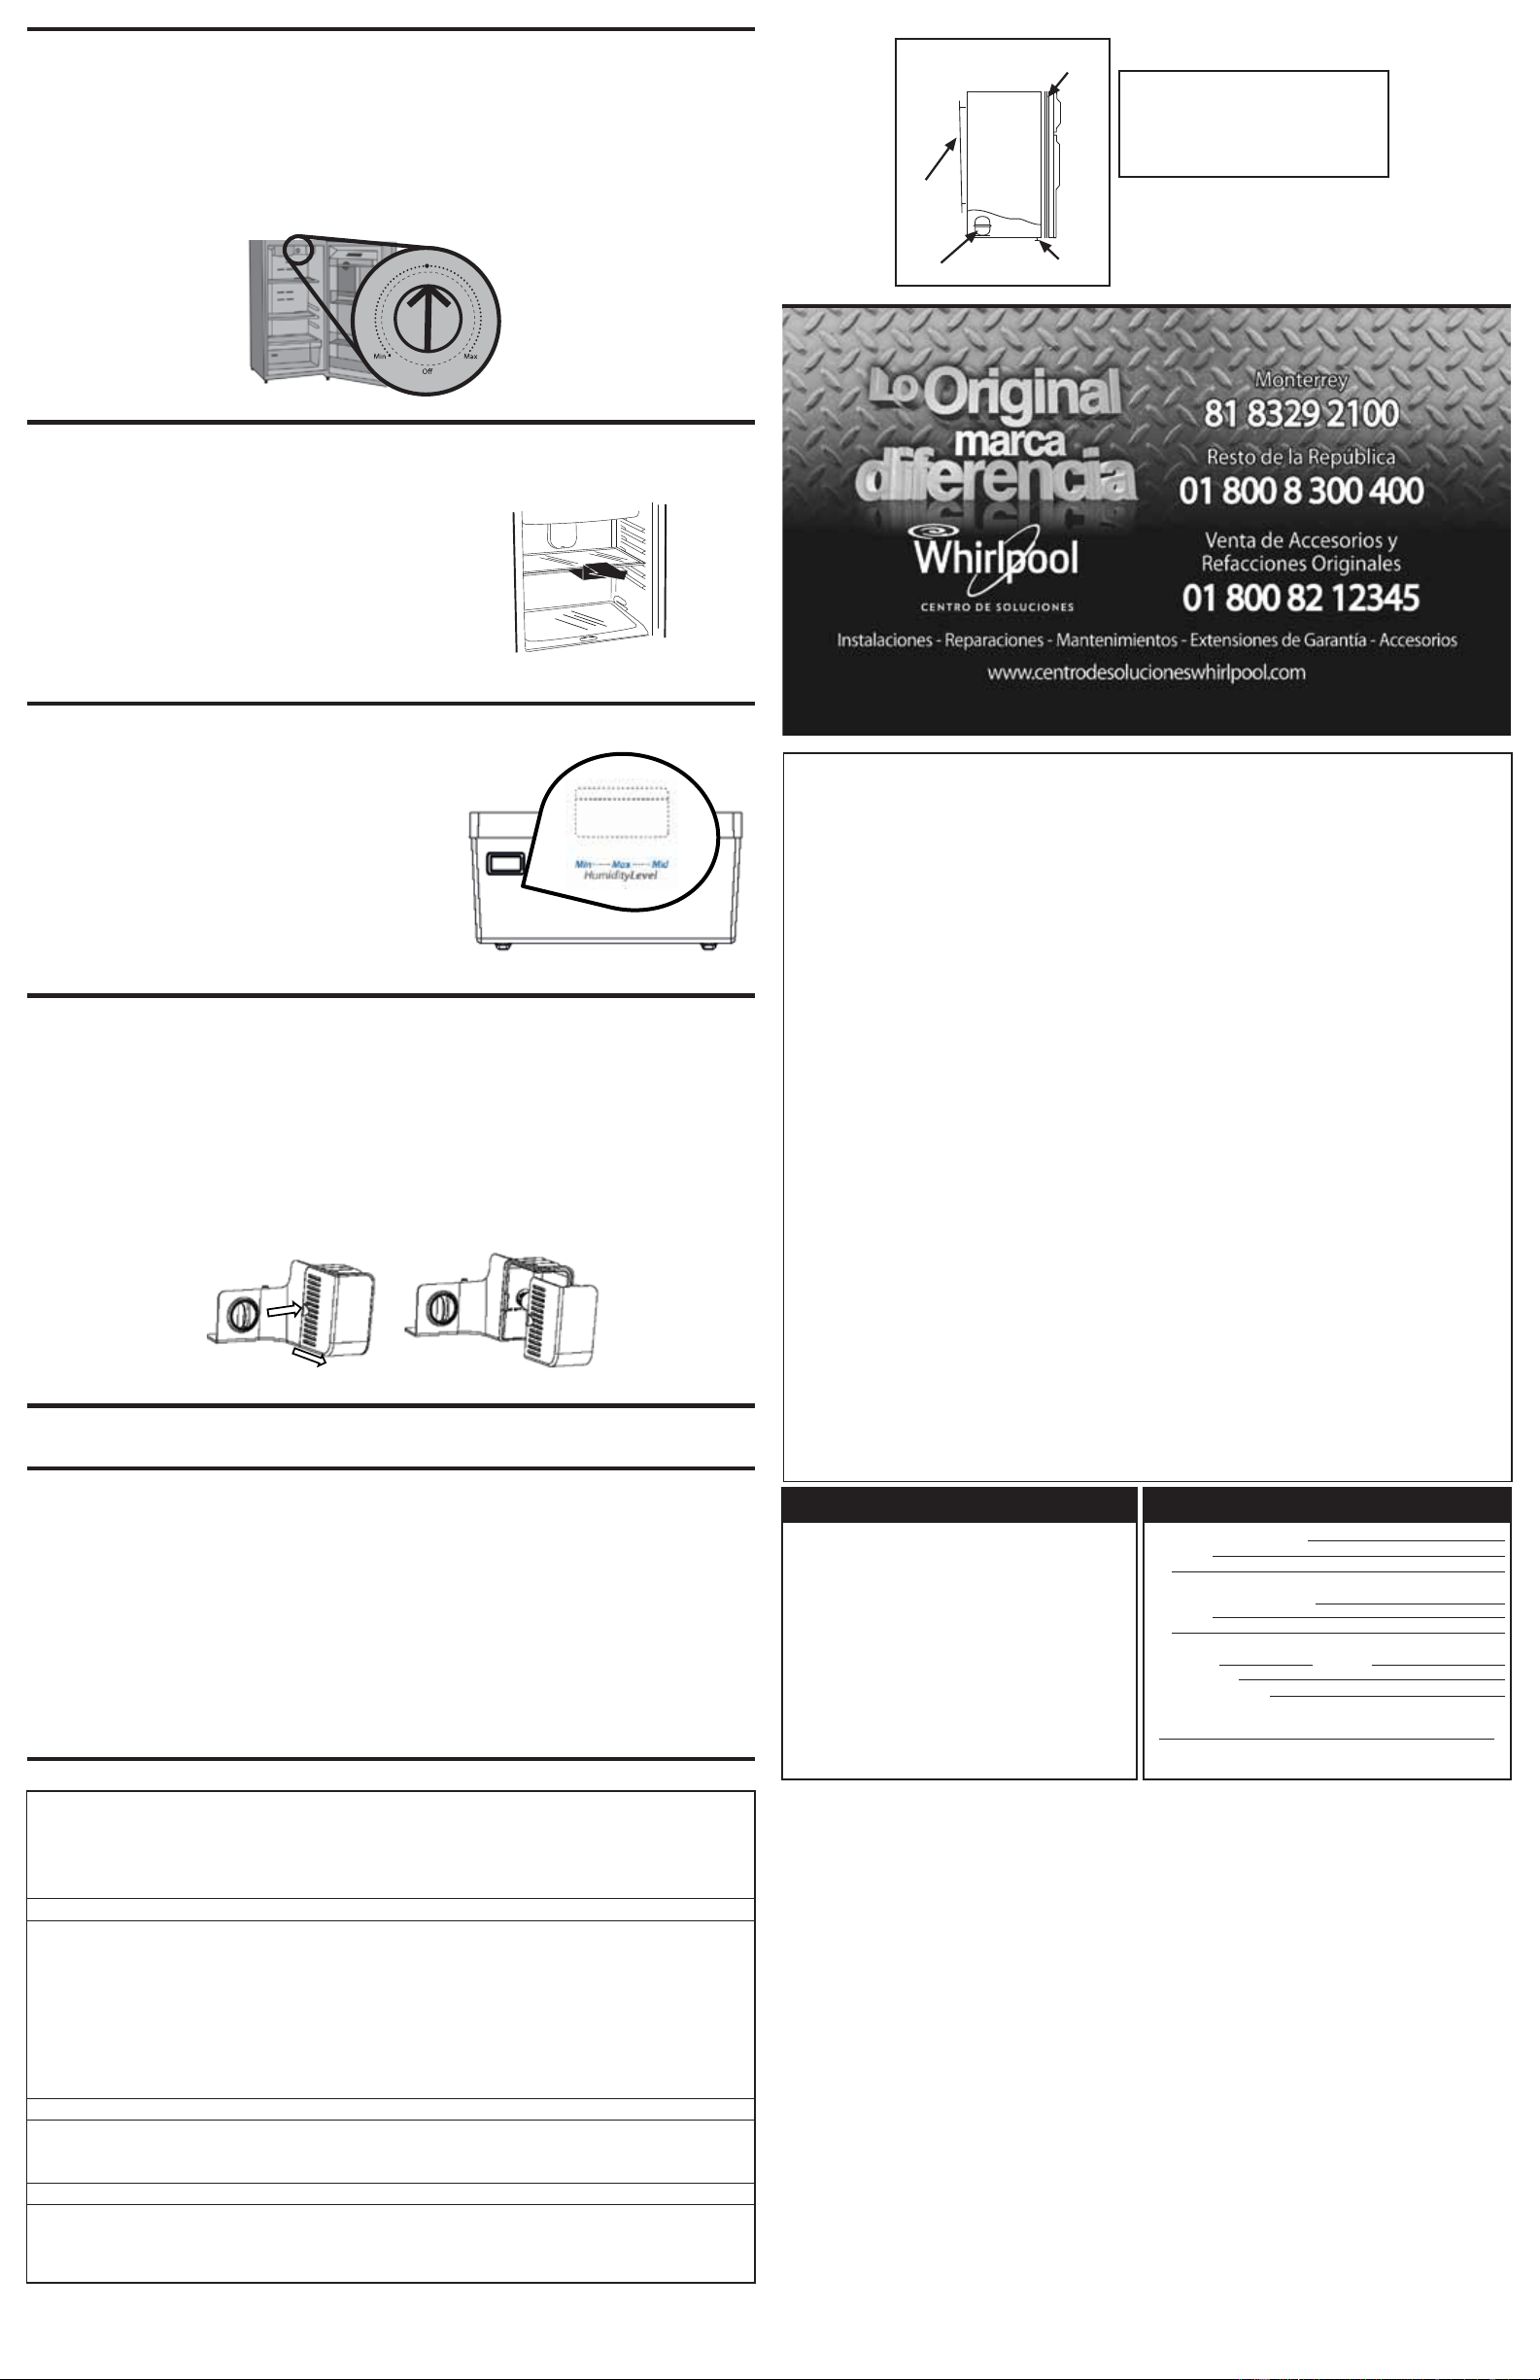
Cómo usar el refrigerador con control electrónico (Algunos
Modelos)
Control Electrónico “6
th
Sense”
Si su refrigerador cuenta con control electrónico “6
th
Sense”
la temperatura se regula desde el
exterior de la pue rta del congelador. Vea la siguiente tabla con la
explicación de todas las funciones:
El nivel de temperatura recomendado es el 3
Función
Fast Co oling
Lock
Eco-Mode
Opening door
announcement
Temperature
control
Función
Enfriamiento
rápido
Candado
Modo
ecológico
Aviso de
puerta
abierta
Control de
temperatura
Descripción
En un lapso de un a hora, la
temperatura disminuirá hasta
2°C en el refrigerador y hasta
-20°C en el congelado r.
Todas las funciones del control
electrónico se bloquearán.
Cuando el refrigerador
presenta un nivel óptimo de
enfriamiento, retrasará los
ciclos de deshielo hasta que
sea necesario.
Si la pue rta del refrigerador
se queda abie rta, el usuario
lo notará por las luces
intermitentes del control.
Se tienen hasta 5 niveles de
temperatura. El nivel 1 es el
menos frío y el 5 es el
más frío.
Modo de activar
Presione una sola vez el botón
de “Fast Cooling”.
Deje presionado el botón de
“Fast Cooling” hasta que la luz
amarilla encienda.
Se activará automáticamente
(hoja verde encendida) cuando
el producto presente un
algoritmo de condiciones
(temperatura, aire, conde n -
sación, etc.).
Al pe rmanecer la pue rta
abierta.
Presione el botón “Temp” para
seleccionar el nivel deseado. El
máximo nivel de frío (5) se
activa cuando las cuatro luces
están encendidas.
Smart Cooling
Fast
Cooling
hold
3 sec
Eco
Mode
Lock Temp
Cold
1 2 3 4
5
Coldest
Este manual de uso y manejo aplica para los siguientes modelos:
WT4043D, WT4343S, WT4543D, WT4543S, WT4943S
In some European factories the letter "W" of the part code mentioned herein will be automatically
replaced by the number "4000" (e.g. "W12345678" becomes "400012345678")
STM W10705693
Este aparato no se destina para utilizarse por personas (incluyendo niños) cuyas capacidades físicas, sensoriales
mentales sean diferentes o estén reducidas, o carezcan de experiencia o conocimiento, a menos que dichas
personas reciban una supervisión o capacitación para el funcionamiento del aparato por una persona responsable
de su seguridad.
•
Los niños deben de supervisarse para asegurar que ellos no empleen los aparatos como juguete.
•
22-Apr-2014 13:13:23 EDT | RELEASED
In some European factories the letter "W" of the part code mentioned herein will be automatically
replaced by the number "4000" (e.g. "W12345678" becomes "400012345678")
1. Desconecte el refrigerador.
2. Remueva la parrilla superior.
3. Remueva la cubierta de plastico (snap in).
4. Remueva el foco.
5. Reemplácelo con un foco de 25 watts para electrodomésticos.
6. Coloque nuevamente la cubierta.
7. Conecte el refrigerador nuevamente.
NOTA: No todos los focos son adecuados, asegúrese de reemplazarlo por otro que tenga la misma
forma, tamaño y características eléctricas.
***Si usted cuenta con un foco LED (o sistema de iluminación por LED) y percive un mal funcionamiento o
no enciende al abrir la puerta del refrigerador, llamé al centro de servicio Whirlpool para asesoramiento. ***
Como usar el refrigerador
Control de humedad del cajón para legumbres
Para la mejor conservación de sus frutas y legumbres
incluimos este control que regula la entrada de aire frío al
cajon para legumbres.
Presione hacia la izquiera o derecha dependiendo el nivel
de humedad que requiera dentro del Cajon
Para cambiar el foco del refrigerador
Sonidos que pueden escucharse
Su nuevo refrigerador puede emitir sonidos, la mayoría de ellos son normales, pero las superficies duras
como el piso, las paredes de la cocina y el refrigerador pueden hacerlos más audibles.
Murmullo Suave, silbido suave
Pueden ser el ventilador y el aire en movimiento.
Golpecitos secos o cascabeleo
El termostato emite un golpecito seco bien definido cuando el refrigerador para; igualmente cuando
empieza a funcionar de nuevo. El reloj del control de descongelador también emite el mismo tipo de
sonido cuando el ciclo de descongelación comienza.
Sonidos de agua
Después de que el refrigerador pare, se puede oir por algunos minutos un goteo en la tubería.
Puede oirse también agua que corre a la bandeja recolectora de agua y un sonido peculiar como agua
cayendo sobre una superficie caliente en los ciclos de descongelación.
MUY IMPORTANTE
ES RESPONSABILIDAD DEL USUARIO VERIFICAR LA SIGUIENTE INFORMACIÓN ANTES DE LLAMAR AL
TÉCNICO:
Si usted siguió correctamente las instrucciones del manual de instalación, uso y cuidado, y tiene preguntas sobre el
funcionamiento del refrigerador, esta guía le ofrece soluciones a problemas que puede detectar y corregir en su
hogar.
SI EL REFRIGERADOR NO FUNCIONA
•Conecte directa y correctamente la clavija, NO USE EXTENSIONES.
•Revise EL CONTACTO ELÉCTRICO, PODRÍA ESTAR DAÑADO, conecte otro aparato y pruebe si funciona.
•Evite poner a funcionar varios aparatos a la vez; LA INSTALACIÓN ELÉCTRICA SE SOBRECARGA.
•Verifique que el CONTROL DE TEMPERATURA ESTÁ EN POSICIÓN DE ENCENDIDO.
•Asegúrese de que NO ESTÉ JUNTO A UNA FUENTE DE CALOR como horno, estufa o luz directa del sol.
•LAS PUERTAS DEBEN CERRAR HERMÉTICAMENTE, revise el empaque magnético de las puertas.
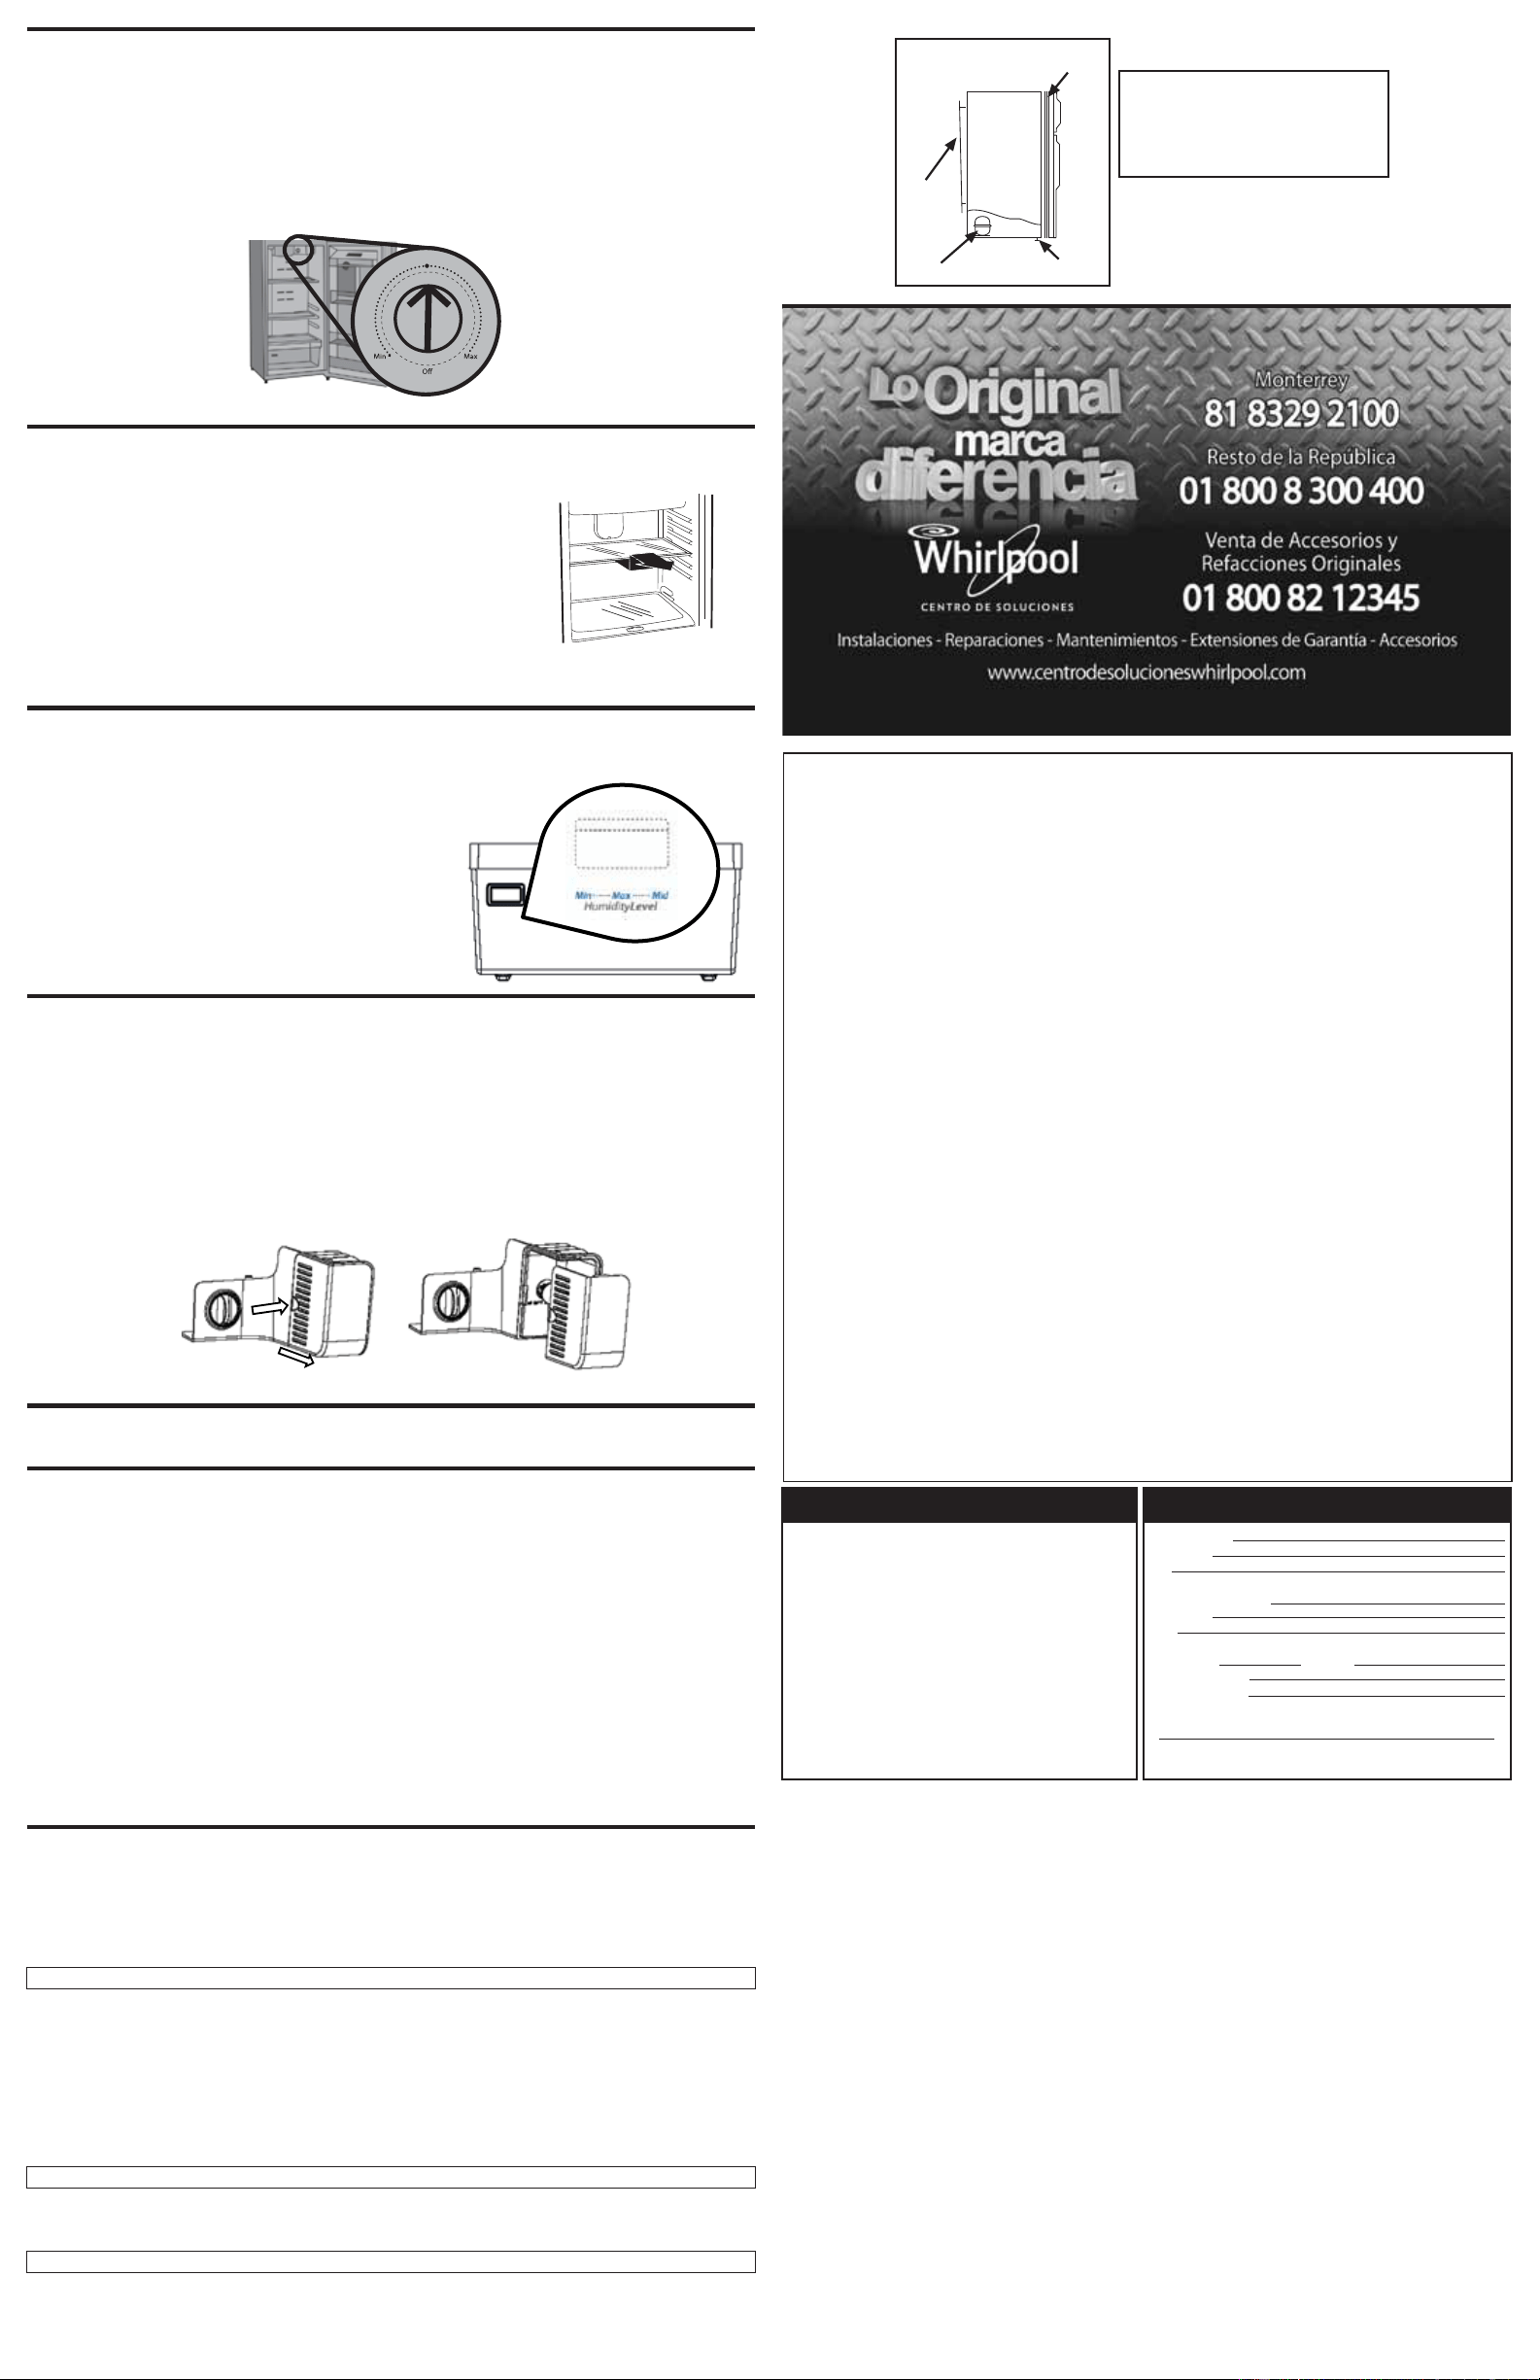
•NIVELE EL REFRIGERADOR, retire las bases de madera y ajuste los tornillos niveladores (FIGURA 1).
•NO SOBRECARGUE EL REFRIGERADOR , la circulación de aire frío será deficiente.
•Coloque la perilla de control de TEMPERATURA EN MED (frío medio) y espere por lo menos 24 horas antes de
hacer un nuevo cambio de temperatura.
NOTA QUE EL REFRIGERADOR TRABAJA POR PERIODOS PROLONGADOS
•Verifique que el CONDENSADOR ESTÉ LIBRE DE POLVO Y PELUSA (FIGURA 1).
•EVITE ABRIR CONTINUAMENTE LA PUERTA o por periodos prolongados.
•NO INTRODUZCA ALIMENTOS CALIENTES y manténgalos tapados.
SI ESCUCHA SONIDOS EXTRAÑOS
•Revise que NO HAYA OBJETOS SOBRE O DETRÁS DEL REFRIGERADOR.
•EL COMPRESOR NO TRABAJA CORRECTAMENTE, puede ser que un bajo voltaje estuviera presente. Verifique
la intensidad de la luz, si es baja esto nos indica que tiene un bajo voltaje, hable a su compañía de luz para que
corrijan el suministro de energía (FIGURA 1).
Antes de llamar al técnico
FIGURA 1
CONDEN
-SADOR
EMPAQUE
MAGNÉTICO
TORNILLOS
NIVELADORES
COMPRESOR
SI DESPUÉS DE SEGUIR LAS
INSTRUCCIONES
DE ESTA GUÍA, EL REFRIGERADOR
NO FUNCIONA LLAME A
LOS CENTROS DE SERVICIO INDICADOS
01 800 8 300 400
Este documento deberá ser presentado para
cualquier trámite relacionado con la garantía.
EL COMPRADOR DEBERÁ MANTENER
ESTE DOCUMENTO EN SU PODER Y EN
UN LUGAR SEGURO.
El consumidor podrá solicitar que se haga
efectiva la garantía que ampara esta póliza
con el distribuidor donde se adquirió el
producto. En caso de extravío de la póliza, el
distribuidor expedirá una nueva póliza de
garantía, previa presentación de la nota de
compra o factura respectiva.
NOTA IMPORTANTE
NOMBRE DEL COMPRADOR:
DOMICILIO:
TEL.
NOMBRE DEL DISTRIBUIDOR:
DOMICILIO:
TEL.
PRODUCTO: MODELO:
NUM. DE SERIE:
FECHA DE ENTREGA:
FORMATO DE IDENTIFICACIÓN
FIRMA DEL DISTRIBUIDOR Y SELLO
(Señalar con precisión calle, número exterior o
interior, colonia, ciudad, estado y C.P.)
PÓLIZA DE GARANTÍA
Para remover las parrillas completas de vidrio o alambre
Ajuste las parrillas del refrigerador de acuerdo a la forma en que se
usa el refrigerador.
Para quitar las parrillas:
1. Retire todos los artículos de las parrillas.
2. Levante la parte posterior.
3. Deslice la parrilla hacia afuera.
Para volver a colocar las parrillas:
1. Ponga la parte trasera de la parrilla en los rieles
situados en las paredes laterales.
2.Guíe la parte delantera de la parrilla en los rieles.
3. Deslícela hacia adentro hasta que tope.
Estante de latas (algunos modelos)
Colocar unicamente latas de 355 ml.
Presionar y jalar.
Si su refrigerador cuenta con control manual
la temperatura se regula a través
de la perilla localizada en la sección del
refrigerador:
WHIRLPOOL MÉXICO S.A. DE C.V.
Antigua carretera a Roma km 9, Col. Milagro, Apodaca, N.L., Mexico, 66634, Tel.(81) 8329-2100,
en los términos de esta póliza, garantiza al comprador y usuario del refrigerador identificado en la
presente póliza, exclusivamente lo siguiente:
AMPARA LOS SIGUIENTES MODELOS MARCA WHIRLPOOL:
CONCEPTOS CUBIERTOS POR LA GARANTÍA:
Defectos de fabricación que impidan total ó parcialmente el correcto funcionamiento del aparato
que se presenten dentro de los términos de vigencia de esta garantía. En este caso, la reparación
se hará sin costo alguno para el comprador o usuario. Si se requiere el reemplazo de alguno de los
componentes, piezas o del aparato, asimismo correrá por cuenta del otorgante. Igualmente los
gastos de transporte dentro de la red de servicio y mano de obra derivados del cumplimiento de la
garantía serán cubiertos por el otorgante.
CONCEPTOS QUE INVALIDAN LA GARANTÍA:
· Cuando el producto se hubiere utilizado en condiciones distintas a las normales (el refrigerador no
es para uso comercial o industrial).
· Cuando el producto no hubiere sido operado de acuerdo con el instructivo de uso y manejo que lo
acompaña.
· Cuando el producto hubiere sido alterado o reparado por personas no autorizadas por el Centro
de Soluciones de Whirlpool México S.A. de C.V.
PROCEDIMIENTO PARA HACER EFECTIVA LA GARANTÍA:
Al considerar el comprador final que ha ocurrido algún evento amparado por esta póliza, deberá
ponerse en contacto con el Centro de Soluciones a nuestro Centro Nacional de Llamadas, desde
Monterrey N.L y su área conurbada al (81) 8329-2100 y desde el interior de la República
Mexicana al 01-800-8-300-400; donde un asesor de servicio especializado lo atenderá. Nuestras
instalaciones están ubicadas en Carretera Miguel Alemán Km. 16 Col. El Milagro C.P 66634.
Apodaca, N.L. En donde también podrá encontrar accesorios y partes originales. Para mayor
información de nuestros servicios, visite www.centrodesolucioneswhirlpool.com
TÉRMINO:
Esta garantía tiene una vigencia de 1 AÑO en todas sus partes y mano de obra y 3 AÑOS en el
sistema sellado de refrigeración a partir de la fecha de compra.
NOTA: El sistema sellado de refrigeración comprende: COMPRESOR, EVAPORADOR, FILTRO
DESHIDRATADOR, CONDENSADOR, TUBO DE CONEXIÓN Y DE SUCCIÓN.
(algunos modelos)
WT4043D, WT4343S, WT4543D, WT4543S, WT4943S
20-Dec-2012 18:55:29 EST | RELEASED
In some European factories the letter "W" of the part code mentioned herein will be automatically
replaced by the number "4000" (e.g. "W12345678" becomes "400012345678")
22-Apr-2014 13:13:23 EDT | RELEASED
In some European factories the letter "W" of the part code mentioned herein will be automatically
replaced by the number "4000" (e.g. "W12345678" becomes "400012345678")

This guide contains important information, please read it carefully
This use and care guide was designed for the following models:
Electrical nominal values
Nominal current
Frequency
Nominal tension
6,0 A
60 Hz
127 V ~
Important Safety Instructions
To reduce the risk of fire, electric shock or personal
injuries, please follow up these basic precautions when
using your refrigerator:
WARNING
!
WARNING
!
Before connecting the refrigerator
Correct Installation
How to install the refrigerator
Follow these steps before connecting your new refrigerator:
Figure 1
Side of the
refrigerator hinge
Opposite side of
the refrigerator hinge
A
B
C
A. Metallic washer
B. Leveling screw
C. Level
Instructions for electrical grounding
Grounded electrical wall outlet
for 3 prongs power cords
Grounded connector
for 3 prongs power cords
Power cord
Ground pround
terminal
Water or liquid dispenser (some models)
Filling the water or liquid tank
Dispenser lock
The dispenser can be locked to ease the cleaning or avoid unintended use.
NOTE: The dispenser lock prevents the dispenser lever to move.
.
Unblock dispenser
Pull down the lock located on the back part of the dispenser lever until it locks on the
cavity wall of the dispenser.
Figura 3
Dripping tray
How to use the electronic control on the refrigerator (some
models)
The suggested temperature level is 3
Function
Fast Cooling
Lock
Eco-Mode
Opening door
announcement
Temperature
control
Function
Fast cooling
Lock
Eco mode
Opening
door
announcement
Temperature
control
Description
In an interval of one hour, the
temperature will decrease up
to 2°C in the refrigerator and
up to -20°C in the freezer.
All electronic control functions
will be locked.
When the refrigerator has
optimal cold temperatures,
the defrost cycles will be
delayed until it’s necessary
to run it.
If the refrigerator door is held
open, the user will notice the
control
temperature levels available.
Level 1 is the less cold, level 5
is the coldest.
To activate
Press the “Fast Cooling” button
once.
Press the “Fast Cooling” button
until the yellow led is on.
Activated automatically (green
leaf led on) when the device
algorithm (parameters like
temperature, air, condensation,
etc.)
Refrigerator door is held open
Press “Temp” button to select
the desired temperature level.
The coldest level (5) is active
when the four lights are on.
Smart Cooling
Fast
Cooling
hold
3 sec
Eco
Mode
Lock Temp
Cold
1 2 3 4
5
Coldest
WT4043D, WT4343S, WT4543D, WT4543S, WT4943S
Use and Care
Guide
Manufactured by Industrias Acros Whirlpool S.A. de C.V.
Antigua carretera a Roma km 9
Col. Milagro
Apodaca N.L. Mexico, 66634
Tel (01-81) 8329-2100
• Read the instructions before operating your refrigerator.
• Don’t leave the refrigerator unattended for long time, a children could be playing around the refrigerator and get
trapped inside.
• If you are going to replace the refrigerator, take adequate preventive measures.
• We suggest removing the refrigerator doors when it’s not in use, or secure the doors by tightening them with a
cord.
• Never allow children to play with the refrigerator or get inside of it.
• Never clean the refrigerator parts with flammable cleaners; the fumes may cause fires or explosions.
- FOR YOUR SAFETY -
• Don’t keep or use gasoline or flammable products close from this or any other device, the fumes may cause fires
or explosions.
• To avoid risks, if the electric cord is damaged, it must be replaced immediately by a certified service technician
or a qualified electrician.
- KEEP THESE INSTRUCTIONS -
Electrical Shock Hazard
This refrigerator needs to be electrically grounded.
Don’t alter the power cord. If the connector does not fit on the wall outlet, have a qualified
technician to install the correct grounded wall outlet.
Don’t use an extension for the power cord for this refrigerator.
If you have doubts about the refrigerator grounding, please consult a qualified electrician.
Failure to follow these instructions can result in death, fire, or electrical shock.
• Don’t use the refrigerator on a room where the temperature is under 13°C (55°F).
• Keep the refrigerator away from the weather conditions.
• Plug the refrigerator to an adequate wall outlet with the correct voltage and grounding.
• Don’t store food in the refrigerator until it is completely cold.
• Use the refrigerator only as specified in this guide.
• Provide adequate periodic maintenance service to the refrigerator.
• Don’t let people who are not familiar with the refrigerator to operate it without supervision.
• The purpose of this refrigerator is solely for domestic use.
1. Remove the packing materials including the materials inside the refrigerator.
2. Place the refrigerator following the next suggestions:
• Leave a 7,5 cm (3”) to 15 cm (6”) gap between the upper part of the refrigerator and the cabinets.
• Leave a minimum space of 5 cm (2”) to 10 cm (4”) between the refrigerator condenser on top of the
refrigerator and the wall.
• Leave a gap of 1,25 cm (1/2”) to 10 cm (4”) on each side of the device for an easy installation.
• If the refrigerator will be placed next to a side wall, leave a
minimum space so the refrigerator door can open wider.
3. Level the refrigerator following the instructions on figure 1.
• For more precision, verify the refrigerator level using a level
on the upper part of the refrigerator or verify if there are no
rocking movements when you open or close the door, if there is
no move, the level its fine.
• It is recommended to slightly tilt the refrigerator to the back,
in this way the door will tend to close by itself.
Grounding method
Your refrigerator is equipped with a power cord with and electric connector
with 3 prongs including grounding. To reduce the risk of electrical shock, the
power cord must be plugged to a grounded 3 prong electrical power outlet
according to the National Electrical Code and all local codes and ordinances.
If the correct electrical power outlet is not available, it is client´s responsibility
to install the correct 3 prong wall outlet, grounded by a qualified electrician.
Your new refrigerator has an innovative water or liquid dispenser on the door, this allows the user to
have cool fresh drinks available, reducing the number of times the refrigerator door is open, reducing
the energy consumption of the product.
Water or liquid tank
The water/liquid tank needs to be filled manually. It is located on the inner part of the refrigerator door.
The maximum capacity is 3 liters.
IMPORTANT:
• Clean the system before using it for the first time. To clean, fill the tank with clean water and
drain the water throw the dispenser using a big glass or jar until you have dispensed at least one liter.
Dispose the water. This process helps to clean the system and evacuates any remaining air from the
dispensing valve.
• Once the system has been cleaned, wait until the water or liquid is cold before using the
dispenser.
• The dispenser is designed to be used only with water or some other liquids. The use of juices
with pulp or milk will affect the performance of the dispenser.
• The manufacturer is not responsible for any damage caused to the dispenser and the
dispensing system when the container is filled with juices with pulp or milk.
NOTE:
- The carbonated drinks might lose its effervescence after 6 hours.
- Wash the tank before filling it with a different drink. (see dispenser cleaning)
To fill the water/liquid tank remove the small cap from the cover. Then
pour the water/liquid with a jar.
NOTE: For safety purposes, the small cap can’t be removed completely
from the tank.
IMPORTANT: Always make sure that the tank it’s positioned correctly on
the door before filling the tank.
How to use the dispenser
1. Grab a solid and firm glass or jar and use it to push the central part
of the dispenser lever.
2. Stop the pressure on the lever to stop the dispenser, don’t remove the glass or jar
until the liquid it’s not running through the dispenser anymore.
IMPORTANTE: Always hold the glass or jar firmly while dispensing the water/liquid.
Don’t let the glass stand on the dispenser cavity.
NOTE: It is possible to detect an awkward taste on the water/liquid if the dispenser is not
used periodically.
Dispenser cleaning
To clean the dispenser tank:
1. Grab the dispenser tank with both hands and tilt up, then pull up until the
tank is removed from the refrigerator door. (see Figure 1).
2. Place the tank on a flat surface and remove the cover by pulling it upwards.
(see figure 2).
3. Turn the valve counter clockwise to release it (see figure 3), wash carefully.
NOTE: your refrigerator model might have any of the two valves shown on the
image
4. Use a sponge or cloth with mild neutral soap or detergent. Rinse deeply
and make sure no soap leftovers are left behind. Finally dry with soft and clean
cloth.
NOTE: Don’t use scouring pads to wash the dispensing tank, this will damage
the finish.
IMPORTANTE: Before placing the dispensing tank, make sure of:
• The valve is placed correctly; the valve is making contact with the dispen-
sing tank.
• The sealing ring is placed correctly in the tank as shown in the figure.
To replace the dispensing tank in the refrigerator door:
1. Mount the valve to the tank by turning the valve clockwise, insert the cap
strap and place it on its place.
2. Finally, grab the tank with both hands and place it in the door. Tilt slightly
upwards, hook it up on the side small feet of the refrigerator door and push it
downwards until the tank is completely placed on the door.
NOTE: Make sure the tank is correctly placed on the door before operating the
dispenser or closing the door.
The dripping tray catches eventual drippings from the dispenser.
To clean the dripping tray you need to remove it from the refrigerator. Just pull
the tray out of the refrigerator. (see figure 5). To replace the tray just place it on
its position and push forward.
Electronic control “6th Sense”
If your refrigerator has the 6th Sense Electronic control
the temperature is controlled from outside of the freezer door.
The following table describes all the features:
In some European factories the letter "W" of the part code mentioned herein will be automatically
replaced by the number "4000" (e.g. "W12345678" becomes "400012345678")
•
This appliance is not intended for use by persons (including children) with reduced physical, sensory or mental
capabilities are different are impaired, or lack of experience or knowledge, unless such persons are supervision
or training to operate the appliance by a person responsible for their safety.
•
Children should be monitored to ensure they do not use the devices as a toy.
Storage tank
STM W10704810
W10704433
22-Apr-2014 13:13:23 EDT | RELEASED
In some European factories the letter "W" of the part code mentioned herein will be automatically
replaced by the number "4000" (e.g. "W12345678" becomes "400012345678")
Refrigerator Use (some models)
Humidity control on crisper drawer
To change the refrigerator light bulb
Noises coming from the refrigerator
IF THE REFRIGERATOR IS NOT OPERATING
THE REFRIGERATOR OPERATES FOR LONG PERIODS
IF YOU HEAR ACKWARD NOISES
Before calling the technician
FIGURE 1
CONDENSER
MAGNETIC
SEALING
LEVELING
SCREWS
COMPRESSOR
IMPORTANT NOTE
BUYER NAME:
ADDRESS:
TEL.
DISTRIBUTOR NAME:
ADDRESS:
TEL.
PRODUCT: MODEL:
SERIAL NUMBER:
DELIVERY DATE:
IDENTIFICATION FORMAT
DISTRIBUTOR SIGNATURE AND STAMP
(Please include detailed information about street,
number, city, state and zip code)
Remove the glass or wire shelf
Can shelf (some models)
This shelf is only for cans of 355 ml.
If your refrigerator is equipped with manual control
The temperature is regulated
through the knob located on the
refrigerator section.
Position the refrigerator shelves according to what you want to store
in the refrigerator.
To remove the shelves:
1. Remove all the items from the shelves.
2. Uplift the back part of the shelf.
3. Slide out the shelf.
To replace the shelf:
1. Place the back part of the shelf over the rails on the sides of the
refrigerator cavity.
2. Guide and the front part of the shelf.
3. Slide the shelf until stop
To preserve the freshness of your fruits and vegetables the
crisper humidity control has been included in your drawer.
This control regulates the intake of cold air into the crisper
drawer.
Set the crisper control to the left or the right depending on
the desired humidity level inside the crisper drawer.
Your new refrigerator could emit different noises, most of them are normal, but the hard solid surfaces
around like the floor, kitchen walls and the refrigerator might increase the noise perception.
Soft Whisper, soft whistle
This can be caused by the fan and the air flowing on the refrigerator
Soft hits, rattle noise
The thermostat doesn’t produce hit noises itself, but when it turns off or on the compressor, which
produces the hits and rattling noises.
Water noises
After the refrigerator has been turned off, you might hear pipe licking noises for some minutes. You might
also hear water falling to the colleting bin and a peculiar sound of water falling into a hot surface during
the defrost cycles.
VERY IMPORTANT
IT’S THE USER RESPONSIBILITY TO CHECK THE FOLLOWING INFORMATION BFORE CALLING THE
TECHNICIAN:
If you have followed the use and care manual instructions correctly and you still have questions about the operation of
the refrigerator, this guide provides solutions to correct problems detected at home.
• Plug the power cord connector correctly, DON’T USE CORD EXTENSIONS.
• Check THE ELECTRIC OUTLET ON THE WALL, IT COULD BE DAMAGED, try a different electric device to make sure the outlet is in
good conditions.
• Avoid operating different devices at the same time; THE ELECTRIC INSTALLATION WILL OVERHEAT.
• Make sure the TEMPERATURE CONTROL IS ON THE ON POSITION.
• Make sure the refrigerator IS NOT LOCATED NEXT TO A HEATING SOURCE like an oven, stove or direct sunlight.
• THE DOORS SHOULD CLOSE HERMETICALLY, check the magnetic seal on the doors.
• LEVEL THE REFRIGERATOR, remove the wooden bases and adjust the leveling screws (FIGURE 1).
• DON’T OVERLOAD THE REFRIGERATOR, the air won’t flow freely inside the refrigerator.
• Set the temperature control knob on MED setting (medium cold) and wait at least 24 hours before changing the temperature again.
• Check that the CONDENSER IS FREE OF DUST AND LINT (FIGURE 1).
• AVOID OPENING THE REFRIGERATOR DOOR FREQUENTLY or for long periods.
• DON’T STORE HOT FOOD and store on closed containers.
• Check that THERE ARE NO OBJECTS OVER OR BEHIND THE REFRIGERATOR.
• THE COMPRESOR IS NOT WORKING CORRECTLY, there might be low voltage on the power supply. Check the intensity of the light
on a bulb at home, if the light is dimmed this means there is low voltage, please contact the Electricity Company to fix this problem. (FIGURE
1).
IF AFTER FOLLOWING THESE
INSTRUCTIONS THE REFRIGERATOR
STILL DOESN’T WORK,
CALL THE SERVICE CENTER
01 800 8 300 400
WARRANTY POLICY
WHIRLPOOL MEXICO S.A. DE C.V.
Address: Antigua carretera a Roma km 9, Col. Milagro, Apodaca, N.L., Mexico 66634, Tel. (01 81)
83-29-21-00, the terms of this policy applies for the buyer and the user of the refrigerator identified on
this warranty and covers only the following:
THE FOLLOWING MODELS ARE COVERED UNDER THIS WARRANTY:
CONCEPTS COVERED BY THIS WARRANTY:
Manufacturing defects that totally or partially prevents the correct performance of the product discovered
during the validity terms of this warranty. In this case, the repair will not be billable for the buyer or the
user. If the replacement of a part, component, piece or the whole product, this will be covered by the
granter. The shipping expenses under the service area and labor for the repair covered under the warran-
ty will be payed by the granter.
TERMS THAT NULL THIS WARRANTY:
• When the product has been used different than the regular household use. (The refrigerator
is not designed for commercial or industrial use).
• When the product has not been operated as instructed in the manual or use and care guide
included with the unit.
• When the product has been altered or modified by personnel different than Whirlpool service
technicians.
PROCEDURE TO CLAIM THIS WARRANTY:
When the buyer or end user considers that an event covered under this warranty has occurred, the user
will need to contact Whirlpool Service to the national Call Center, from Monterrey, N.L. and the cities
around call the number (81) 83-29-21-00 and from the rest of the country call 01-800-8-300-400; a
specialized service agent will help you. Our office address is Carretera Miguel Aleman Km. 16 Col. El
Milagro C.P. 66600. Apodaca, N.L. In our offices you can also find accessories and original parts. For
more information about our services please visit www.centrodesolucioneswhirlpool.com
VALIDITY:
This warranty has a validity of 1 YEAR on parts and labor and 3 YEARS on the sealing system of the
refrigerator starting on the purchase date.
NOTE: The sealing
system of the refrigerator includes: COMPRESSOR, EVAPORATOR, DEHYDRA-
TOR FILTER, CONDENSER and CONNECTION AND SUCTION PIPE.
This document must be shown for any paperwork
related to this warranty.
THE BUYER MUST KEEP THIS DOCUMENT
ON A SAFE PLACE.
The buyer could claim this warranty described on
this policy at the distributor where the product was
purchased. In case of misplacement of the policy,
the distributor will dispatch a new warranty policy
after the purchase ticket or invoice has been
delivered to the distributor.
1. Unplug the refrigerator.
2. Remove the upper rack.
3. Remove the plastic cover (snap in).
4. Remove the bulb.
5. Replace with 25 watt bulb for household appliances.
6. Replace the cover.
7. Plug the refrigerator back.
NOTE: Not all bulbs will fit, be sure to replace one that has the same shape, size and electrical
characteristics.
*** If you have an LED (or LED lighting system) and perceives a malfunction or not light when you open the
Push and pull.
(on some models)
refrigerator door, contact Whirlpool service center for support. ***
WT4043D, WT4343S, WT4543D, WT4543S, WT4943S
20-Dec-2012 18:55:29 EST | RELEASED
In some European factories the letter "W" of the part code mentioned herein will be automatically
replaced by the number "4000" (e.g. "W12345678" becomes "400012345678")
22-Apr-2014 13:13:23 EDT | RELEASED
In some European factories the letter "W" of the part code mentioned herein will be automatically
replaced by the number "4000" (e.g. "W12345678" becomes "400012345678")