Loading ...
Loading ...
Loading ...
7
Adjusting Controls
Temperature Separator (Temperature Display)
For your convenience, your beverage center control is preset at
the factory. When you rst install your beverage center, make
sure that the control is still preset to the mid-setting as shown.
The mid-setting indicated in the previous section should be
correct for normal usage. The control is set correctly when
beverages are as cold as you like.
If you need to adjust the temperature, wait at least 24 hours
between adjustments and then recheck the temperature.
To make the beverage center colder, adjust the control to the
next higher setting. To make the beverage center less cold,
adjust the control to the next lower setting.
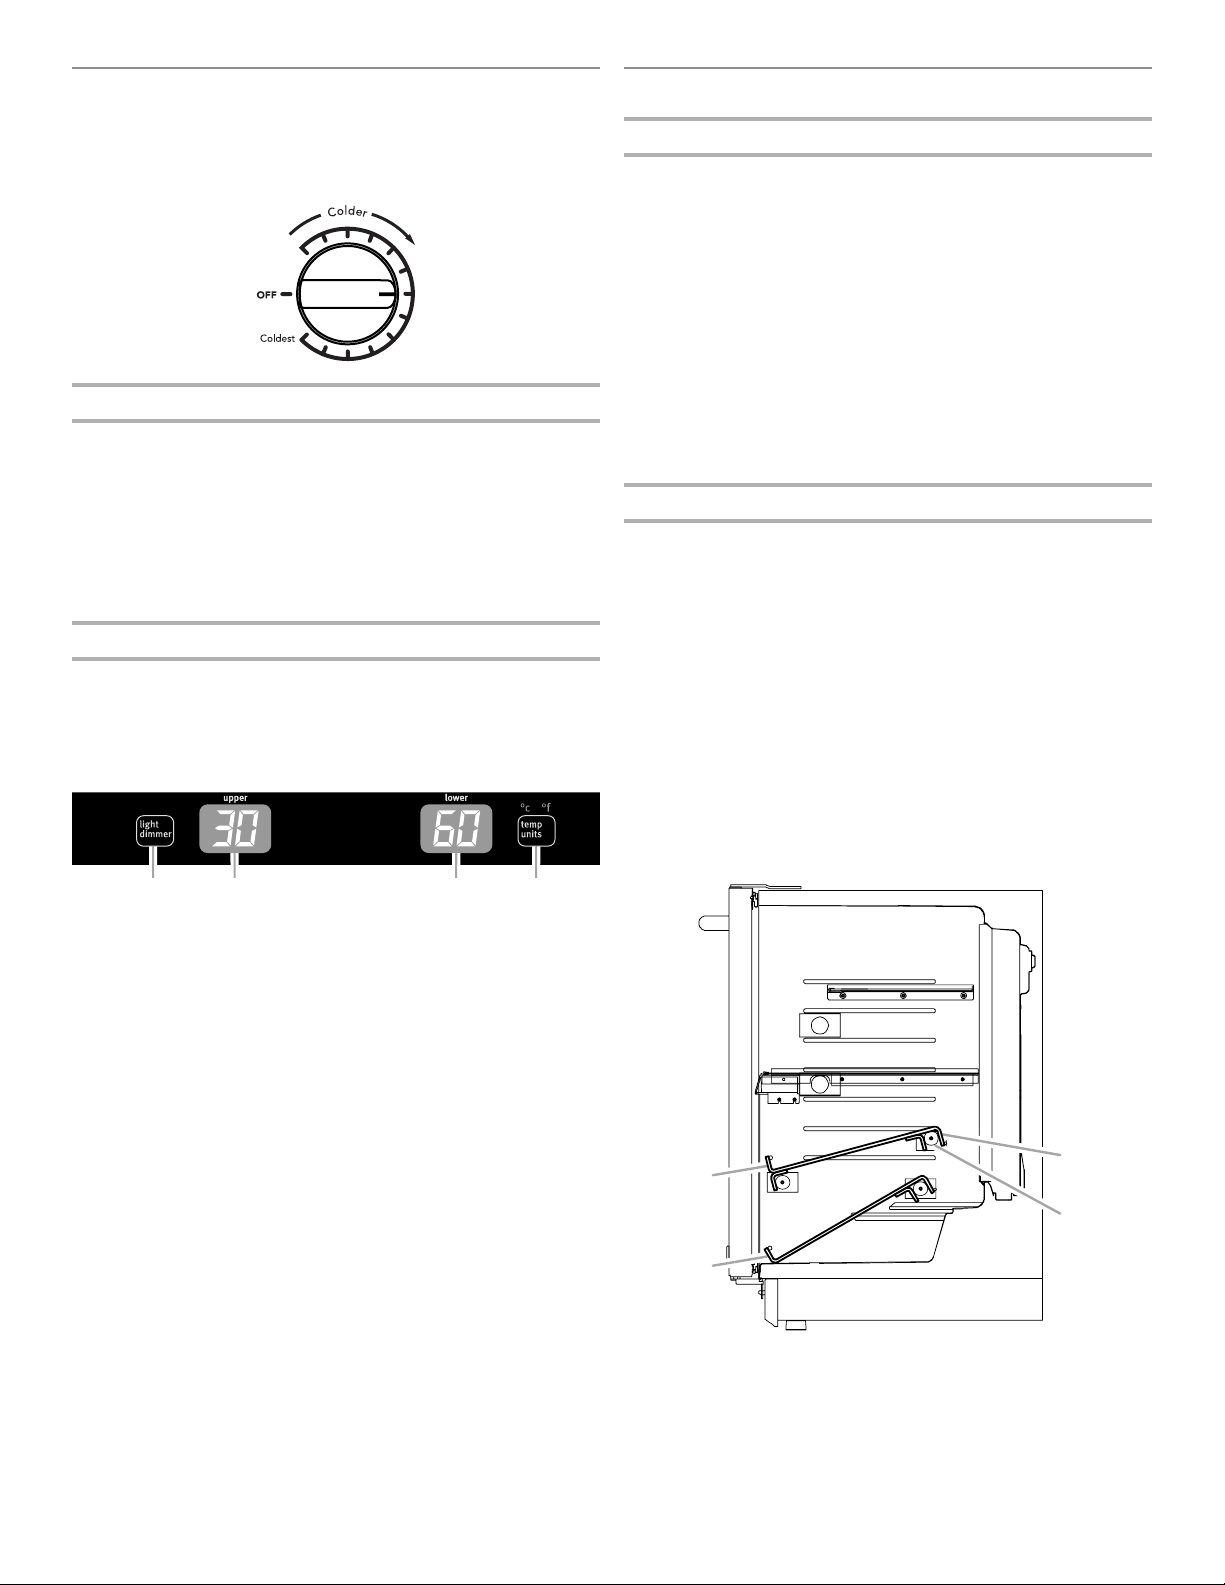
The temperature separator displays the current temperatures
(Fahrenheit or Celsius) for the upper and lower zones
(compartments) of the beverage center. To adjust the
temperature settings, see “Adjusting Controls” earlier
in this section.
Using the Control Beverage/Wine Racks
Upper Wine Rack
To remove the wine rack:
1. Remove all bottles from the wine rack.
2. Lift the wine rack straight up slowly until it clears all four
resting posts. Pull the rack out of the compartment.
To replace the wine rack:
IMPORTANT: The wine rack hooks should be facing down when
the wine rack is installed.
1. Place the wine rack into the compartment above the four
resting posts and slide the rack back until it is aligned with
all four resting posts.
2. Push down gently on the rack until the wine rack hooks snap
rmly onto the two rear posts and the front of the rack is
resting on the two front posts.
Lower Wine Rack
To remove the wine rack:
1. Remove all bottles from the wine rack.
2. Slowly, lift the wine rack straight up slowly until it clears all
four resting posts. Pull the rack out of the compartment.
To replace the wine rack:
IMPORTANT: The wine rack hooks should be facing down when
the wine rack is installed.
1. Slide the wine rack into the compartment until the two hooks
on the back of the rack are aligned with the two rear resting
posts.
2. Push down gently on the rack until the hooks on the back of
the rack snap rmly onto the two rear posts. Rest the front of
the rack on the compartment oor.
A. Dimmer
B. Upper zone display
C. Lower zone display
D. Fahrenheit/Celsius
A B C D
A. Upper wine rack
B. Lower wine rack
C. Rack hook
D. Resting post
Side View
A
B
C
D
Loading ...
Loading ...
Loading ...