
Loading ...
Loading ...
Loading ...
7
EN
CLEANING AND MAINTENANCE
Make sure that the oven has
cooled down before carrying out
any maintenance or cleaning.
Do not use steam cleaners.
Do not use wire wool, abrasive
scourers or abrasive/corrosive
cleaning agents, as these could
damage the surfaces of the
appliance.
Wear protective gloves.
The oven must be disconnected
from the mains before carrying
out any kind of maintenance
work.
EXTERIOR SURFACES
Clean the surfaces with a damp microfibre cloth. If
they are very dirty, add a few drops of pH-neutral
detergent. Finish off with a dry cloth.
Do not use corrosive or abrasive detergents. If any of
these products inadvertently comes into contact with
the surfaces of the appliance, clean immediately with
a damp microfibre cloth.
INTERIOR SURFACES
• After every use, leave the oven to cool and then
clean it, preferably while it is still warm, to remove
any deposits or stains caused by food residues. To
dry any condensation that has formed as a result
of cooking foods with a high water content, leave
the oven to cool completely and then wipe it with
a cloth or sponge.
• To remove the remaining limestone from the
bottom of the cavity after the
cooking,
we recommend to clean the cavity with the
products provided by After Sales Service (please
follow instructions attached to the product).
Cleaning is recommended at least for every 5 to 10
cooking cycles.
• The door can be easily removed and refitted to
facilitate cleaning of the glass.
• Clean the glass in the door with a suitable liquid
detergent.
• The top heating element of the grill can be
lowered to clean the upper panel of the oven:
Extract the heating element from its seating,
then lower it. To return the heating element to its
position, lift it up, pull it slightly towards you and
make sure that the tab support is in its proper
seating.
ACCESSORIES
Soak the accessories in a washing-up liquid solution
after use, handling them with oven gloves if they
are still hot. Food residues can be removed using a
washing-up brush or a sponge.
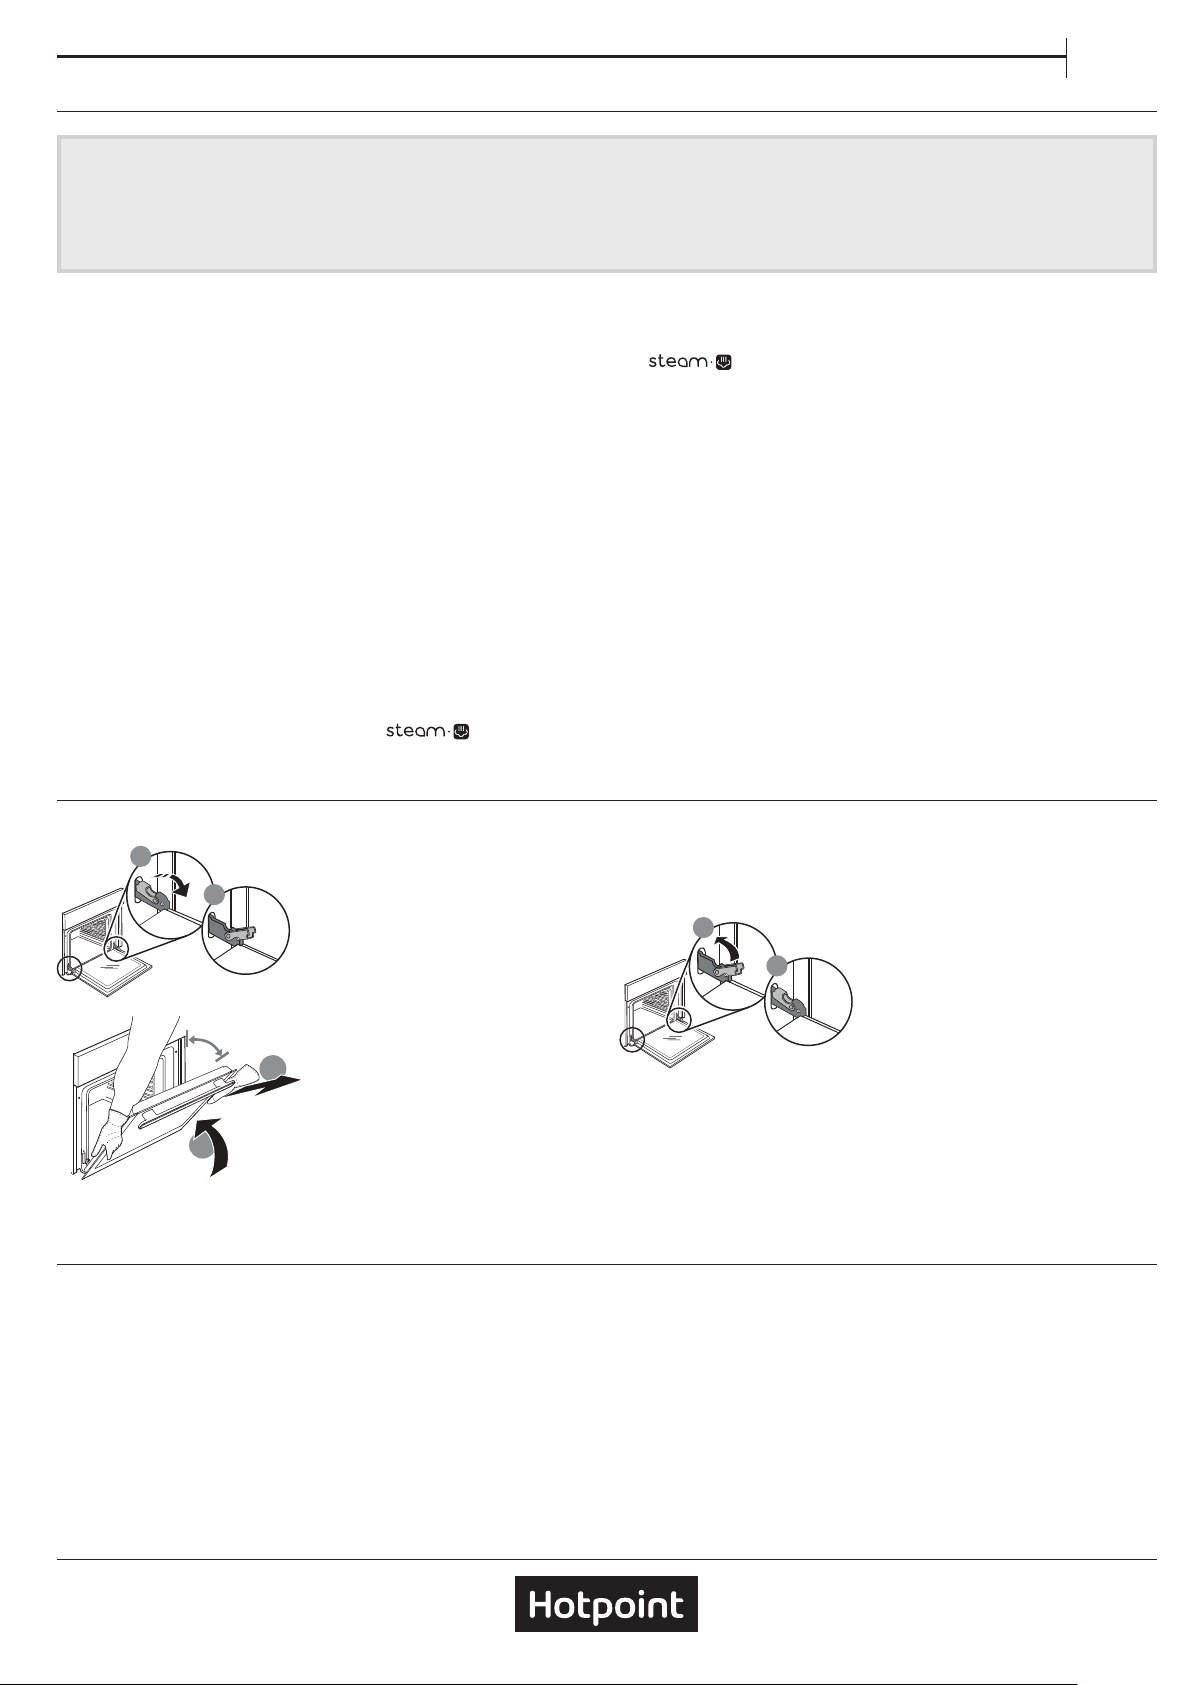
REMOVING AND REFITTING THE DOOR
b
a
. To remove the door, open
it fully and lower the
catches until they are in the
unlock position.
a
b
~15°
2. Close the door as much
as you can. Take a firm hold
of the door with both
hands– do not hold it by
the handle. Simply remove
the door by continuing to
close it while pulling it
upwards at the same time
until it is released from its seating. Put the door to
one side, resting it on a soft surface.
3. Refit the door by moving it towards the oven,
aligning the hooks of the hinges with their seating
and securing the upper part onto its seating.
b
a
4. Lower the door and then
open it fully. Lower the
catches into their original
position: Make sure that
you lower them down
completely.
Apply gentle pressure to check that the catches are in
the correct position.
5. Try closing the door and check to make sure that it
lines up with the control panel. If it does not, repeat
the steps above: The door could become damaged if
it does not work properly.
REPLACING THE LAMP
1. Disconnect the oven from the power supply.
2. Unscrew the cover from the light, replace the bulb
and screw the cover back on the light.
3. Reconnect the oven to the power supply.
Please note: Use 25 W/230 V type G9, T300 °C halogen
lamps.
The bulb used in the product is specically designed for
domestic appliances and is not suitable for general room
lighting within the home (EC Regulation 244/2009).
Light bulbs are available from our After-sales Service. - Do not
handle bulbs with your bare hands as your ngerprints could
damage them. Do not use the oven until the light cover has
been retted.
Loading ...