Loading ...
Loading ...
Loading ...
12 Chapter 1
Connections & Setup
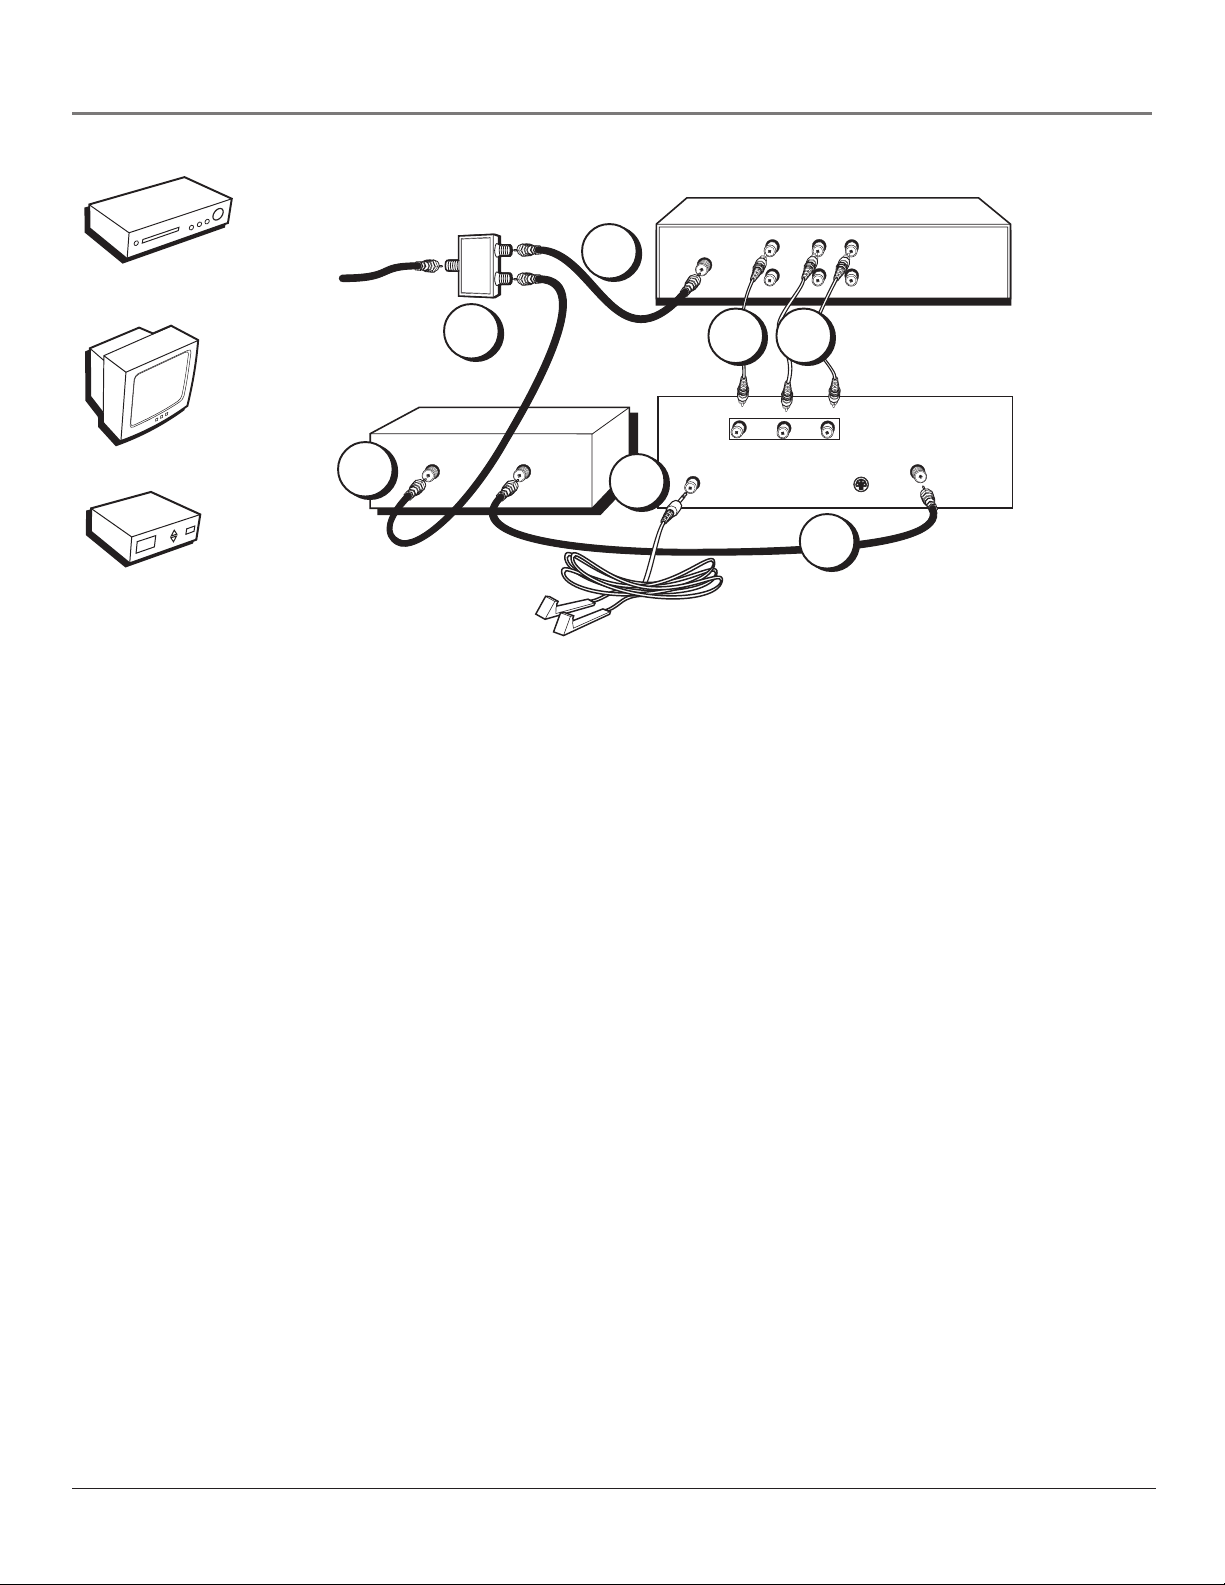
ANTENNA IN
VCR
CABLE BOX
SIGNAL SPLITTER
VIDEO
OUT
LR
AUDIO
IN
LR
TV
G-LINK
CABLE/
ANTENNA
VIDEO
R
L / MONO
S-VIDEO
AUDIO
IN
From Cable Line
CABLE IN TV OUT
1A
1B
1C
2
4
3B
3A
TV
Cable
Box
VCR
Note: The GUIDE Plus+ system’s One-Touch VCR Recording feature is not available with this
connection. If you want to use the One-Touch VCR Recording feature with your cable box, you
must use the TV and VCR connection on page 8. You can do so by routing the signal from your
cable box into the antenna input on your VCR. Note that PIP won’t work if you use this
connection. This connection may not be compatible with all cable services, especially if some or
all cable channels are scrambled.
Connection: TV + VCR + Cable Box
1. Connect Signal Splitter to your VCR and TV
A. Use a Signal Splitter (not provided) to split the signal coming into the room. You can purchase
a Signal Splitter at your local electronics store or through the Accessory Order Form on
page 59.
B. Connect a coaxial cable to Signal Splitter and to the Input Jack on the VCR (sometimes labeled
ANTENNA IN).
C. Connect a coaxial cable to the Signal Splitter and to the CABLE IN Jack on the cable box.
2. Connect Cable Box to TV
Connect a coaxial cable to the TV OUT Jack on the cable box and to the CABLE/ANTENNA jack
on the TV.
3. Connect the TV to your VCR
A. Connect the audio cables (white and red) to the AUDIO IN jacks on the TV and to the Audio
Output Jacks on the VCR (sometimes labeled AUDIO OUT R and L).
B. Connect the video cable (yellow) to the VIDEO IN jack on the TV and to Video Output Jack on
the VCR (sometimes labeled VIDEO).
4. Connect G-LINK cable
A. If you haven’t already done so, remove the Demo Pin from the G-LINK jack on the TV.
B. Connect the G-LINK cable to the G-LINK jack on the TV. Next step, place the wands of the
G-LINK cable to work with the VCR and cable box (instructions are on p. 13).
Go to page 13
Loading ...
Loading ...
Loading ...